Sooner or later, any owner of this device will have to replace a burnt-out heating element in a storage electric boiler.
Don’t think that it will serve you for decades, no matter how high-quality and expensive the model is. Heating elements fail for two reasons:
- scale formation and burnout of the working element (heating coil)
- corrosion and mechanical failure
Scale and cleaning of heating elements
Scale forms primarily in the presence of hard water. Just 1mm of scale gives 75% additional thermal insulation. Thus, the heating element under such a large layer of salts simply begins to overheat.
The first sign of scale formation is a distinct hissing or whistling noise.
When the noises become louder, but the boiler continues to work properly, do not delay cleaning, otherwise it may be too late.
Disassemble the boiler, as shown below, and begin cleaning. This can be done in two ways:
- a regular knife or wire brush
- if the scale is very hard, then use citric acid or special products
Cut off the neck of a 1.5 liter plastic bottle and dilute the solution in it:
- warm water 60 degrees
- 7 teaspoons citric acid
Soak the heating element in it overnight. After which, in the morning you clean off all excess. The result is sometimes simply amazing.
Using TENs
Recently, more and more people are thinking about the possibility of autonomous heating of their home. Every year the cost of traditional heating increases, so quite often with the help of an autonomous system there is a chance to save money.
Also, sometimes there is simply no possibility of connecting to a central heating system - this is especially true for holiday villages. The only option to heat the house in this case is to install a heating boiler. Solid fuel and gas boilers continue to be the most popular, but their use is also not always possible - access to the main gas pipeline is not always available.
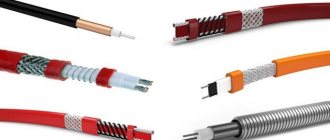
The best way out of such situations is to install electric heating equipment, since electrical networks are available almost everywhere. The main element of any such heating device is TEN. The efficiency of the heating system largely depends on its type. Typically, household heating equipment uses tubular heating elements, as well as elements with a thermostat. The latter make it possible to regulate the operation of the heating system.
Electric heating systems are very convenient to use: they do not emit harmful substances, since they do not form combustion products, do not require installation in a separate room, are safe to use, and are easy to install and adjust. But still, when installing electric heating equipment, you should first check whether the electrical network can withstand the high load. You also need to prepare in advance for the fact that you will have to pay a lot of money for electricity.
Corrosion of the water heating element
Why does the heating element body corrode and collapse? The fact is that the heating element in the boiler is equipped with a magnesium anode.
Without it, a galvanic couple is formed inside the titanium:
- tank - heating element
And with a magnesium anode:
- heating element - anode
Through this anode, all stray currents flow to the ground, gradually taking with them some part of the anode body. When it is completely destroyed, these currents begin to flow down the body of the heating element.
The growths on the heating element do not form evenly. Because of this, different parts of its copper shell acquire different expansion coefficients. As a result, surface tension is created, which breaks the shell of the heating element.
In many service centers, if the boiler breaks down completely, you may even be denied a warranty if you do not have a receipt for timely replacement of the anode.
Ultimately, corrosion becomes through and the working element burns out.
By the way, with the anode intact, the water from the tank may have a slight odor. When the smell disappears, this may be some kind of sign of corrosion of the electrode.
Modern models have special sensors that monitor the condition of the anode.
With timely replacement of the anode and mandatory cleaning, your heating element will actually last several times longer. Grounding the housing also increases the service life of the heating element by at least two times.
However, for some reason many people lose sight of this point. Meanwhile, during intensive work, it is recommended to clean the boiler at least once a year.
It cannot be said with certainty that some models, for example Electrolux, Ariston or Gorenje, have a longer service life than Thermex or Indesit. It all depends on many factors:
- amount of water consumed
- the average heating temperature of this water, its chemical composition
- how the plug is inserted into the socket (where the phase comes and where the zero)
- is there grounding or not?
Parallel connection
The number of heating elements can be 2, 3 or any other number (x). Then the total resistance is equal to: R = r / 2 or R = r / 3 or R = r / x, where r is the resistance of one heater
We calculate the total power using the formula:
P = 2*p or P = 3*.p or P = x*p, where p is the power of one heating element
For example: 2 parallel connected 1000 W 230 V heating elements operating on 230 V generate 2000 W at 230 V with R = 26.45 ohms 3 parallel connected 1000 W 230 V heating elements operating on 230 V generate 3000 W at 230 V with R = 17.63 Ohm, etc.
Checking the serviceability of the heating element
How can you understand that the heating element has burned out and it’s time to change it? If the indicator lights light up and show that the boiler is on, but it does not heat, this is only an indirect reason.
The issue may be wiring, poor contact, or a thick layer of scale. The main check should be carried out with a multimeter by measuring the resistance. How to do this is described in detail in the article “Connecting the boiler to the electrical network - errors and rules.”
You can also check the presence of potential between zero and the body of the device. When the heating element is destroyed, its current-carrying spiral comes into contact with water, and through it the voltage reaches the boiler body.
It is better to take measurements with a multimeter in AC voltage measurement mode. The dial can show either a couple of tens of volts or all 220V. This already indicates a 100% malfunction and the need to change the heating element.
If you have an RCD, as it should be in a normal circuit, then it starts to knock out when you try to turn on and supply power.
A correct RCD (not 30mA, but max 10mA) is a mandatory element of the circuit when connecting any boiler, otherwise the voltage can easily appear on the faucet, tap water in the kitchen and in other unexpected places.
Three-phase connection of heaters
Delta connection
The rated voltage of each heating element is identical to the voltage between phases in a delta connection.
Star connection
The rated voltage of heating elements is equal to the phase-to-phase voltage of three-phase wiring divided by the root of 3 or 1.732
Connection example: 3 1000 W 230 V heating elements connected to a 400 V three-phase network generate 3000 W. 3 1000W 400V heating elements connected to a 400V three phase power supply generate 1000W.
Read more about three-phase connection of heating elements in our article - triangle or star for connecting heaters
Draining water and disassembling the water heater
And so, when you decide that you still need to open it, the first thing you do is turn off the power by unplugging the plug from the socket. Then drain the water from the titanium. To do this, turn off the hot and cold water supply taps.
Unscrew the cold water hose, placing a suitable container for drainage.
If water does not flow from the removed hose, this indicates an air lock. We need to remove it. To do this, just slightly loosen the nut at the point where the hot water pipe connects to the pipe.
Next, open the safety valve and release water through it. If the valve suddenly becomes clogged, you will have to twist the entire valve. Water will flow out of the boiler in a continuous stream.
After draining, completely unscrew both valves from the titanium (hot + cold) to open the bottom cover and gain access to the heating elements.
There are modern models where the bottom cover is collapsible and to remove it, it is not necessary to touch the valve. It comes in the form of a plastic insert secured with several screws.
Disconnect the power wires, first remembering or marking with a marker which one is connected where. Better yet, draw a diagram. As a rule, all wires are colored and this will be easy to do. Otherwise, you can get confused in such a pile of wiring.
If you don’t want to draw anything, then just take a couple of photos on your cell phone. You will know exactly the location of all elements and wires.
After this, unscrew the nuts or screws securing the heating element itself around the perimeter.
You can unscrew them in any order, but you need to screw them in the same way as the engine head or the wheels on a car, that is, crosswise.
If you immediately tighten a nut all the way, this will cause the flange to bend and there will not be the required tightness. Consequently, the gasket will not hold and will leak.
Carefully pull the heating element out. It will be all covered in rust, and from the magnesium anode, except for a thin burnt piece of iron, there may be nothing left at all.
Power calculation formula
One of the important issues when choosing a heater for heating is power calculation. The energy efficiency of the heating system largely depends on this parameter. Excessive power leads to increased energy costs, as well as overload of the electrical network, which can cause a fire. If it is insufficient, the device will be ineffective in maintaining the required temperature regime.
The calculation of the heating element is carried out according to the formula Pm = 0.0011*m(T2-T1)/t, where Pm is the value of the design power, T1 is the starting temperature level, T2 is the final temperature of the coolant in the system, and t is the time for heating to the optimal level.
Let us give an example of calculating the required power for heating a 6-section aluminum heating radiator using heating elements. The calculation will be carried out as follows:
- In the passport of the radiator model you need to look at the volume of coolant. Let's say it is 3 liters.
- It is assumed that the coolant needs to be heated from 20 to 80 degrees. Estimated warm-up time is 10 minutes.
- Let's carry out the calculation using the formula with substitution of values Рм=0.0066*3(80-20)/10 = 1.118.
That is, to fulfill the set conditions, you will need to install a heating element, the power of which will be approximately 1.2 kW. If the initial conditions change, the required power value will also change.
Flushing
After the heating elements are removed, the boiler itself must be rinsed with clean water to remove all the rust and dirt that has accumulated inside. Therefore, for a quality replacement, the water heater still has to be removed from the wall.
Rinse the insides with an ordinary tap hose. Pour only a little water, since the boiler with a volume of 50-80 liters will still have to be lifted manually to drain all the scraps. Some people add citric acid when washing, others don’t.
Washing tip: It is best to rinse the tank in the bathroom, placing it vertically on a linen board. Twist the watering can from the mixer shower and insert the hose into the hole where the heating element was.
Types of electric heaters for heating
TENs were invented at the end of the nineteenth century in America. A patent for this was received in 1896. The very first products were a spiral insulated with ceramic material and inserted into a metal tube. Such electric heaters for heating were practical products, but unsafe to use. Mass production of these devices began 50 years after their invention. Since that time, TENs began to be widely used and became one of the most popular heating devices operating from the electrical network. Since then they have changed a lot, they have become more perfect - you can see what they look like now in the photo. Modern devices differ markedly from the very first models, but the principle of their operation remains unchanged.
Replacing heating element and anode
After all cleaning procedures, proceed to reassembly. Keep in mind that the anode may not be included with the new heating element. Be sure to buy it separately and screw it into your seat.
It is especially worth noting that if two heating elements are installed in the boiler, then it is not always necessary to install two anodes.
One is enough for one electric titanium, even if you have at least five heating elements inside. An anode is not an accessory or component of a heating element. This is an element of protection for the boiler.
Please note that in the factory version, during the first disassembly, there is no place at all on the second heating element for attaching this same anode.
Some claim that on tanks with stainless steel you can do without an anode, the main thing is to have them in specimens with walls made of glass porcelain.
However, the pattern of failure of boilers is usually the same: first the anode, then the heating element and then the housing.
You can install heating elements not only from the direct manufacturer of the boiler. For example, there is a company called Thermowatt, which produces some of the best heating elements on the market. The main thing is that the power, overall dimensions and seating fit.
It is also recommended to install stainless steel heating elements on stainless steel tanks. If you cannot find any, then use copper ones.
Practice has shown that there is not much difference. The main thing here is the quality of the product (China or Italy).
When repairing, be sure to change the flange gasket. Here are some of their varieties for boilers Thermex, Ariston, Indesit, Gorenje, Electrolux:
ThermexAristonIndesitGorenjeElectrolux
Some people are trying to save money here. Remove the old one and replace it with the new element.
However, a leak that will inevitably form in a month or two will make you regret such savings.
The flange nuts, as mentioned above, are tightened in a cross pattern. In this case, there is no need to use excessive force; you can inadvertently break the thread or tear the pin out of the body.
According to the marks sketched in the diagram, connect the power wires and replace the protective casing-cover. Before closing the cover, be sure to check all terminal blocks again, they should fit tightly and not loosen.
Solid fuel heating boilers with heating elements
Currently, boilers operating only on solid fuel are rarely used. Instead, the domestic market offers a wide selection of combined and universal heating units that operate not only on solid fuel, but also on other types of energy carriers. A wide range of electric solid fuel heating boilers is offered to consumers.
This type of units is intended for heating residential, domestic, agricultural and other premises. A number of models can be used as both the main and backup sources of heat supply. They are also installed for use with other types of heating systems.
A heating element solid fuel boiler has the following advantages:
Some models have additional elements:
- A heating element for a 2 kW heating boiler, equipped with a thermostat and a temperature limiter;
- a draft regulator that allows you to automatically regulate the flow of air into the combustion chamber of the device.
In the event of a breakdown, heating elements for heating boilers can be replaced with new products.
At the stage of designing a heating system for a house or apartment, you should carefully consider options for its creation that will save the family budget and ensure coziness and comfort.
Filling with water and checking functionality
Hang the electric titanium in place. Connect the hoses and open the cold water and begin to fill the tank. The hot water tap must also be open to allow air to escape.
At the same time, make sure that there are no leaks anywhere. As soon as water comes out of the “hot” tap, the boiler is full. There is no need to close the tap immediately; let all the “slurry” spill out and finally flush the tank and pipes.
Only when clean water comes out do you turn off the mixer.
After this, the water heater must stand for at least half an hour or an hour so that condensation leaves all surfaces and there is confidence that there are no leaks.
You can then apply voltage by plugging the titanium into an outlet. To check the operation of the thermostat, use the control knob to force the adjustment to maximum and minimum.
In this case, the boiler on/off light should light up.
If the boiler operates quietly, without making any sounds, and it is not clear to you whether it is heating or not, you can check the energy consumption using the meter.
At maximum heating power of the heater, the counter will spin or blink much faster. This means that the heating elements work as they should.
The entire repair with the purchase of spare parts will cost you around 1500-2000 rubles. In any workshop that calls a plumber to your home, they will ask for at least 3,000-5,000 rubles for such work, and this does not include materials.
So self-repair can save you a significant amount of money, the main thing is not to make some mistakes.
Installation
Sometimes situations occur in which the heating element of the water heater is functioning properly, but the thermostat for some reason has already failed - it does not turn off or does not work correctly. In this case, you can postpone the purchase of a new water heater and limit yourself to replacing the thermostat yourself. To do this, you should take the technical passport of the boiler and, based on its operational properties and technical characteristics, select the appropriate model.
For a more accurate choice, you should rewrite all the data from the markings of the old device, and based on the data sheet and these data, you can purchase a new thermostat.
Installing a thermostat with your own hands requires certain skills and knowledge in the field of electrical installation work. It is very important to comply with safety regulations, without knowledge of which work cannot begin. The thermostat should only be replaced with a model similar in its technical characteristics; the use of a home-made device for installation in a factory-made boiler is not allowed.
At the first stage, you should turn off the power to the water heater and stop supplying water to it from the water supply system. Then you need to drain the existing liquid and remove the bottom panel of the device, thereby opening access to the heating element. After opening the cover, you need to remove the pressure ring and remove the old thermostat along with the control unit.
Next, you should install and connect the new thermostat, put the pressure ring in place and fix the bottom panel. After installation is complete, you need to fill the water heater tank with water, turn on the heating element and check the operation of the new device by setting it to the minimum temperature value.
If the thermostat turned off the heating element after the water had reached the desired temperature, then the installation was carried out correctly and the thermostat is functioning in operating mode. At the last stage, you should adjust the thermostat, giving it the necessary operating parameters.
Criterias of choice
When choosing heating equipment, any consumer is guided by its ability to heat the home and utility or technical rooms as efficiently as possible. The main indicator of any heat generator is its power. As a rule, the required power is calculated through complex calculations, taking into account the heated area of the premises, the characteristics of wall and roof materials, the number of door and window openings and dozens of other parameters.
A simplified calculation is made based on the area and volume of the premises. In the most simplified form, it is generally accepted that 1 kW of the declared boiler power is enough to effectively heat 10 m² of room area. In practice, for a house with an area of 150 m², a 15 kW boiler will be sufficient. Ideally, a heat generator with parameters higher than the calculated ones by 10-15% is selected.
When choosing, you should also consider:
- materials for manufacturing the housing and heat exchangers;
- linear dimensions of the boiler;
- possibility of connecting electrical equipment and characteristics of the electrical network;
- location of connection points for pipes and shut-off valves;
- features and shape of the gas outlet;
- the need for arrangement and power of supply ventilation;
- price and brand authority.
Finned tubular type electric heaters
Finned heaters also belong to the tubular type of elements, but they also have ribs that are located in planes perpendicular to the axis of the heater tube. Such ribs are made from metal tape, and they are attached to the tube using washers and clamping nuts. The device itself is made from stainless steel or structural steel.
This type of heating elements are used in heating devices that heat air or gas. They are often found in devices such as thermal curtains or convectors (read: “Electric heating convectors: how to choose - little tricks”). They are used to heat rooms using thermal air mass.
Do-it-yourself Termex boiler repair
Before you begin the repair, first gather the necessary tools: a set of wrenches, an adjustable wrench, electrical tape, various screwdrivers, pliers. After this, turn off the water by closing the inlet and outlet valves to the water heater. Then drain the water from the boiler tank and disconnect it from the power supply.
The next step is to remove the protective cover. If you have a vertically located boiler, then the lid is located at the bottom, and in the case of a horizontally located one, it is on the left or in front.
When removing the cover, pay attention to the stickers. Often the screws for fastening it are located under these stickers
If you have unscrewed all the screws and the cover still does not come off easily, check the stickers again.
Replacing the heating element
First, perform all of the above steps and remove the tank cap.
To make it more convenient to work, you can even remove the tank from the wall.
It is worth noting that most Thermex models have not one, but two heating elements. Therefore, it is imperative to remember how and in what sequence the parts need to be connected. It’s better to photograph the whole process.
To remove the heating elements from the Thermex water heater, remove the top cover by unscrewing the bolt; disconnect all plugs and unscrew the bolts securing the heating elements.
The heating element itself is turned off as follows:
- After removing the cover, find the protective thermostat, remove the tips from it;
- also remove the tips (3 pieces) from the heating element;
- cut the plastic clamp;
- Unscrew the screws, removing the sensor;
- now disconnect the cable and unscrew the four screws;
- then you need to dismantle the nut on the clamping bar and pull out the heating element.
After dismantling the heating element, it is necessary to clean the surface of the tank from dirt and scale. Only after this can you install a new heating element and put everything back together.
Do not forget that the heating element does not always need to be changed. If the water in the tank still heats up, but it happens slowly, then, most likely, scale has formed on the heating element. Then dismantle it and descale it. Then install. The problem should go away. Also, do not forget that it is advisable to clean the heating element with chemicals rather than scrape off the dirt. In the latter case, there is a possibility of damage to the part.
To clean the heating element, you can use a solution of citric acid or vinegar (its percentage in the solution should be about 5%). The part must be immersed in liquid and wait until the scale falls off. Then you need to wash the heating element.
Faulty thermostat
The thermostat in Termex water heaters is located under the cover, next to one of the heating elements, and its sensor is located inside the tank.
Sometimes the thermostat fails. This element cannot be repaired; it must be replaced. To perform the replacement, you need to do all the preparatory steps, remove the cover, then remove the thermostat. But before dismantling, we recommend checking this part. To do this, use a lighter to heat the tip of the sensor (copper). If the thermostat is working properly, you will hear a characteristic click, which means that the protection mechanism has activated and the circuit has opened. Otherwise, you will have to replace the part.
Tank leak
No matter how trivial it may sound, but first you need to find where the water is coming from. A lot depends on this, since if the tank is rotten, you will have to buy a new water heater. So:
- if water oozes from the side seam, then the container is rusty and repairs will not be possible;
- If water comes out from under the lid at the bottom, then you need to disassemble the tank.
If traces of leakage are found in the places where the heating elements are attached, then your water heater is not hopeless and can be saved by replacing the gasket.
In the case of the second option, complete all preparatory steps, then remove the plastic cover. Next, take a close look at where the water is leaking. If it comes out near the flange, then the rubber gasket has deteriorated (less often this is a problem with the heating element). Otherwise, the tank is rusty and the boiler can be thrown away. To replace the gaskets, you need to remove the heating element. But it is necessary to carefully examine the heating element itself. If it is cracked, it is also better to replace it.
Power measurement. Power measurement in direct and single-phase current circuits
The power in DC circuits consumed by this section of the electrical circuit is equal to:
and can be measured with an ammeter and voltmeter.
In addition to the inconvenience of simultaneous reading of two instruments, power measurement by this method is carried out with inevitable error. It is more convenient to measure power in DC circuits with a wattmeter.
It is impossible to measure active power in an alternating current circuit with an ammeter and voltmeter, because the power of such a circuit also depends on cosφ:
Therefore, in AC circuits, active power is measured only with a wattmeter.
Figure 8
Fixed winding 1-1 (current) is connected in series, and movable winding 2-2 (voltage winding) is connected in parallel with the load.
To correctly turn on the wattmeter, one of the current winding terminals and one of the voltage winding terminals are marked with an asterisk (*). These terminals, called generator terminals, must be turned on from the power supply side by combining them together. In this case, the wattmeter will show the power coming from the network (generator) to the electrical energy receiver.
Site headings
- DC-DC (4)
- Automatic pumping of water from a drainage well (5)
- Automatic (34)
- Car (3)
- Antennas (2)
- Assembler for PIC16 (3)
- Power supplies (28)
- Well drilling (6)
- Life (11)
- Generators (1)
- Signal generators (6)
- Sensors (4)
- Engines (6)
- For the garden (11)
- Chargers (14)
- Radio protection (6)
- Winter water supply for a bath (2)
- Measurements (29)
- Indicators (5)
- Indication (10)
- As my grandfather used to say... (1)
- Switches (5)
- Logic circuits (1)
- Feedback (1)
- Lighting (3)
- Programming for Beginners (12)
- Programs (1)
- Works by visitors (7)
- Radio transmitters (2)
- Radio stations (1)
- Regulators (5)
- Repair (1)
- Homemade products (12)
- Homemade mobile sawmill (3)
- Homemade water supply (7)
- Self-calculations (36)
- Welding (1)
- Alarms (5)
- Directory (12)
- Stabilizers (15)
- Construction (2)
- Timers (4)
- Thermometers, thermostats (24)
- Technologies (21)
- ULF (2)
- Signal conditioners (1)
- Electricity (4)
- (12)
Conclusion
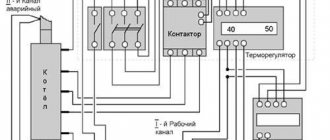
The connection diagram for an electric boiler with heating elements is considered. With basic knowledge of electrical engineering, you can assemble such a boiler yourself.
©elesant.ru
More articles
- Types of electrical circuits of distribution networks
- Electric boiler connection diagram TEN
- Switch connection diagrams
- Connection diagrams for sockets and control buttons
- Connection diagrams for television antennas and sockets for a computer
- Types of electrical circuits
Additional functions of electric heaters
Above we discussed the simplest designs of devices that do not have any built-in adjustment mechanisms.
But electric water heaters can be equipped with simple automation that provides the device with additional functions.
These include:
- Thermoregulation. Heating elements with a built-in thermostat for heating have a temperature sensor that is triggered when the working environment is heated to a certain level. The electric heater is adjusted from the outside of the flange.
- Antifreeze. This function is provided by a simplified thermostat, which operates only when the temperature drops to 0-2°C. It prevents water from freezing in heating pipes, consuming a minimum of electricity.
- Turbo heating, which provides forced heating of the working environment during the initial start-up of equipment. It must be remembered that the electrical wiring of the room must withstand a short-term increase in power.
There are not many devices that support additional functions, because the operation of heating devices as a whole is often regulated using a separate automation unit.
