Floor-integrated space heating systems have appeared relatively recently. Initially they were used as additional comfort systems. Agree, it’s nice to walk barefoot on a heated surface. When the technology became mature and production costs decreased, heated floors began to be used as the main heating system.
Based on the type of heating elements, they can be divided into two main types:
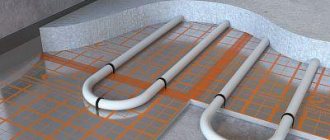
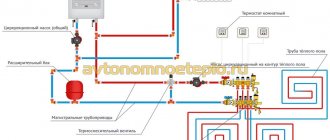
- Using coolant (heating using pipes laid in a screed). Installation is quite complicated; it requires connecting an electric boiler (or other water heating system) to a heated floor. Laying pipes is a major undertaking and the installation cost is quite high. Subsequently, this pays off in low cost of use. Serious disadvantages include the difficulty of repair (in case of leakage), as well as the inertia of thermoregulation. You can’t just turn the knob and immediately change the temperature. Therefore, most residential property owners prefer electrical systems.
- Electric heated floors have many installation options (in a screed, on a wooden subfloor, linoleum floor, laminate, carpet). You can organize temporary placement and transfer the system from one home to another. Installation of an electric heated floor is carried out in the shortest possible time, and practically does not require the involvement of qualified specialists. It is these technologies that will be discussed in our material.
Types of electric floors
To understand how to install an electric heated floor with your own hands, let’s take a brief overview of the technologies:
- A heating cable is a conductor with a certain resistance. When voltage is applied, the cable heats up. It can be single-core or have two conductors in one sheath.
A two-wire heater is easier to install, but when installed over large areas, an electric field may occur. Single-core wire is cheaper, so it is used outdoors and in industrial premises. A mono conductor has no problems with a magnetic field over a large area. An electric heated floor with two conductors is connected on one side of the cable. This is more convenient, and it is also easier to organize control. - Heating mats: this is the same cable, only attached to a backing (a mesh made of synthetic materials).
It can also be one or two wires. The only difference is in the connection and control method. Rolls of electrical mats are slightly more expensive than cable coils (per unit area). There is no need to buy mounting hardware - you simply roll out the roll onto the floor. Calculations of the area and length of the cable are also not required: the wavy laying of the cable on the mounting grid is carried out strictly according to the technical operating conditions. - Infrared heating film. This is an innovative technology, so the cost of materials is slightly higher.
A fundamental difference from other technologies: heating occurs not due to convection of warm air from bottom to top, but due to the transfer of thermal radiation in the infrared range. Objects are heated directly, by analogy with UFO heaters. Advantages: efficiency, small thickness (several millimeters), ease of installation, absolute fire safety and harmlessness.
Resistive cables
Such heating elements are produced in single- and double-core versions. They are connected to the network using special couplings. The principle of operation of these cables, regardless of the number of cores, is similar: heat begins to be released when current passes through them.
However, there is a difference - this is the connection method. In single-core elements, the current passes through one conductor and in order to make the circuit closed, both ends of the coil must be connected to the power supply.
The installation process is as follows:
- The adapter coupling is attached at the connection point (this is prohibited from doing near the thermostat).
- The cable is unwound and laid so that its other end, located near the coupling, is placed in the installation box.
When both couplings are connected, a closed loop is obtained and the wiring is completely ready for use. In this case, the couplings are on the floor and are filled with screed.
Connecting a resistive two-core cable is simpler, since one end is connected and a plug is placed on the other. To make the circuit closed, there is a second current-carrying core.
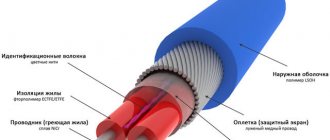
The design of both types of cables has much in common: one or two insulated cores, to give greater rigidity, a metal protective braiding against damage, and on top everything is covered with an outer insulating layer. In some products, the cores may be drainage, which serve to reduce the efficiency of electromagnetic radiation.
The price of two-core products is higher, but it is still in great demand for two reasons:
- It is easier to lay the cable, since the second end is not connected to the thermostat;
- electromagnetic fields of lower intensity are formed.
But both types of resistive conductors have a big drawback, which is the constant amount of thermal energy released. If heat is not removed for any reason, overheating occurs. This ends with a breakdown of the floor heating system.
Therefore, the resistive cable is not laid under furniture and make sure that there are no voids in the screed. The fact is that air has low thermal conductivity and in the area where the bubble appears, heat begins to be removed at a low speed, and this leads to an increase in the temperature of the cores, which fail.
What else is needed for installation
We will tell you about various elements of fixation, connections, etc. in the “installation” section. No matter how well the thermoelements are laid, there will be no heat without a control controller.
Main types of thermostats:
- Pure mechanics. Using a calibrated handle, the user sets the floor (or room air) temperature.
There is a temperature sensor in the flooring (or in the room) that transmits information to the controller. If there is a deviation from the set value, the electronics turns the heating on or off. There is no additional service. - Simple electronic regulator. In addition to maintaining the set temperature (button control, information on the display), you can set an operation timer. The controller “organizes” the heating for your arrival and turns it off at the set time.
- An intelligent controller allows you to set climate control programs, or even integrate heating into the smart home system. You can connect the GSM module and control the heating using your smartphone. Or use the Internet.
Such a controller controls heated floors in all rooms at once.
Having selected the type of heating elements and purchased the necessary equipment, we proceed to independent installation. What do you need to know before going to the store?
Correct selection of underfloor heating system
The only means of heating, or additional? If you have just built a house, or bought an apartment with the right to choose the type of heating, the right decision would be to choose “underground” heating without additions. True, there are both advantages and disadvantages.
You get a more flexible climate control system than traditional heating radiators. In addition, installing an electric heated floor does not affect the interior in any way. It's simply not visible. The warmth coming from below provides a unique feeling of beach comfort. It's like you're walking on sun-heated pebbles or sand. Equipment and installation on a turnkey basis, at a cost no higher than traditional pipe laying and installation of a water heating boiler.
The disadvantages include more expensive energy. In any case, electricity is inferior to wood, coal and gas. There are EMF concerns, but all kits are certified for unrestricted residential use.
- An additional electrical system is installed as a backup (or alternative). Or simply to improve comfort. In the cold winter, no matter how warm the radiators provide, children can hardly play freely on the floor. And by turning on the heating from below, you can enjoy the warmth anywhere.
Calculation of power and laying pitch
Of course, the heating temperature depends on the climate zone and the material from which your house is built. However, the calculation of an electric heated floor is made not by temperature, but by power consumption. For central Russia, the following parameters are accepted:
- Living room, kitchen, dining room, hallway, corridors: 150 W per m²;
- Bedroom, children's room, office (subject to lockable entrance doors): 120–150 W per m²;
- Glazed loggia: 200 W per m²;
- Bathroom: 180 W per m².
Having determined the energy costs for each room (according to the room design), we “cut out” from the area the area occupied by permanent furniture: cabinets, chests of drawers, sofas, beds. The technology for laying electric heated floors involves calculating only the area over which there are no objects.
In this case, there is no need to differentiate the power by the new area: you calculate the actual clean floor surface.
Important: The area of the room is taken to be the area of the heated surface (minus the furniture), and not the dimensions determined by the BTI.
The cable laying pitch is calculated as follows. Initial data:
- power per linear meter of heating wire;
- heated surface area;
- coefficient (W per m²) for a specific room.
For example, a living room is 25 m². There is a total of 5 m² under the furniture, so the heated area is 20 m². The power parameters for this type of room are 150 W per m², therefore the cable power will be 3 kW.
Information: connecting an electric heated floor as an additional measure does not require calculation of the total power. The resulting figure is reduced by 1/3.
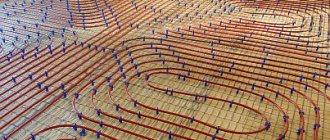
Cables are regulated according to the so-called linear power. As a rule, this ranges from 12 to 24 W per linear meter. Based on this, you can buy either 125 or 250 m of cable for a power of 3 kW. The installation step depends on this. You simply determine the distance between the lines (more dense or less frequent) by choosing a more or less powerful cable. Of course, the price per linear meter will vary.
The illustration shows a typical table for calculating a cable of a certain brand. This is not absolute information for all options. You can just understand how you can vary the laying step with the same thermal parameters.
Many experts believe that a fine step provides more uniform heating: stripes with different degrees of intensity do not appear. The other side of the coin is that the longer the cable, the more difficult and time-consuming its installation.
A pitch of no closer than 70 mm is considered normal.
If you buy heating mats, the step has already been formed in production. The unit of account in this case is W per m². You have the opportunity to choose denser (or less frequent) cable laying for different rooms.
We have already considered the advantages and disadvantages of linear heating cables and thermal mats. However, if your premises have a complex configuration, stacking the rolls may be difficult. In this case, a linear cable will help. Although, with some ingenuity, you can beat the configuration using mats.
Installation of thermostats
First of all, you should determine the location of the thermostat. It must be mounted on one of the walls of the room at a distance of at least 30 centimeters from the floor surface. Typically, thermostats are located close to switches. A recess is made in the wall the size of a standard socket box.
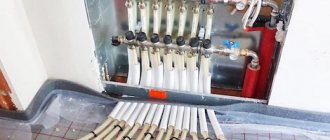
After installing the installation box, the power supply is supplied without connection - zero, phase and ground. Then lay the groove in the direction from the thermostat to the floor. Several sections of pipe or corrugated hose are placed in it. 1 – 2 segments are taken out of the wall near the floor surface and connecting wires from the cables are placed in them.
The section of pipe located between them must be laid along the floor to a mark located 50–100 centimeters from the wall. Now, if the sensor breaks down, it can be replaced without any problems; to do this, remove the thermostat panel and remove the damaged element by the wires from the pipe. Then the new product is inserted and connected.
Laying thermal elements
There are a great variety of floor coverings. For each of them there is a method for laying heated floors. We will not divide the electrical part into a separate cable, mats, or infrared film. The principle of construction installation is not fundamentally different.
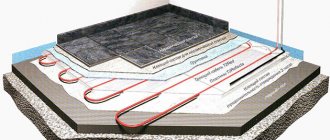
- Laying in screed. Not only a hydrobarrier is placed on the subfloor, but also thermal insulation. Otherwise, you will be the sponsor of good weather for the neighbors below. Then the mounting grid (when working with a linear cable), on which the heater “snake” is laid. Infrared sheets or heating mats are mounted in the same way. A screed with a thickness of at least 30 mm is poured on top.
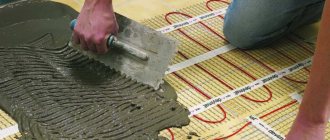
- How to properly lay an electric heated floor on a screed? The technology is similar, only instead of the second screed, the adhesive composition of the building mixture is applied. The thickness can be 10 mm over the heating elements, this is not a power coating.
- Installation under tiles is the same as on screed. Don't forget to ensure a minimum thickness above the wires.
Important: Before embedding a heated floor in concrete (glue), be sure to check the resistance (indicated in the passport data) and performance. Once the solution has set, repairs will be difficult to carry out.
- Laying under laminate or carpet. If you are laying the finishing coating on a screed, see the options above in the text. And for cases when there is already a screed, and you need to mount a warm breakwater, a variety of substrates are provided for installation.
- The cable is mounted in standard grooves, and sound insulation and laminate are placed on top. For linoleum and carpet you will need a thin, rigid base.
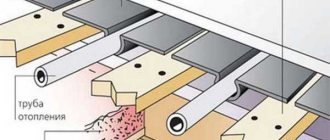
- Wooden house, floors on logs. Do you think it is impossible to install a heated floor? On the contrary, this is easier to do than in a concrete panel house. Thermal insulation is laid between the joists (reflector up), and a heating cable is attached to it.
The only limitation is more stringent fire safety requirements. When purchasing a cable, you should pay attention to this.
Separately, we can note the infrared plates. Their installation requires virtually no preparation. Just a flat floor, thermal insulation, and laying directly under the finishing coating.
Surface preparation
First step. We dismantle the old floor covering and screed. When laying a film heated floor, the old screed, if it is in good condition, does not need to be dismantled. If you install a cable system, you will have to get rid of the tie. Thoroughly clean the surface from dust and dirt.
Second step. We lay a layer of waterproofing material. Traditionally, polyethylene film is used, but you can choose other insulation if you wish. It is important that the moisture-proof material extends approximately 100-120 mm onto the walls.
Third step. We attach a damper tape to the wall along the perimeter of the base. Thanks to it, it will be possible to compensate for the thermal expansion of the system during heating. We carefully trim off the excess waterproofing and damper tape.
Fourth step. We lay a thermal insulation layer. Thanks to it, loss of thermal energy through the base will be eliminated. Choose insulation taking into account the location of the room, the type of base and the intended purpose of the heating system.
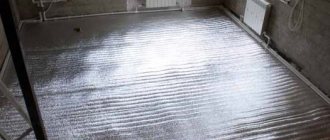
If you plan to use the system as an addition to the main heating, thermal insulation can be done using polyethylene foam equipped with a reflective foil layer. Additionally, the material will take on the function of a substrate for a heated floor.
If there is a heated room on the lower floor, it is best to install thermal insulation using expanded polystyrene sheets. The thickness of the material is 2-5 cm. Another insulator with a similar thickness will do.
When installing a heating system in a previously unheated room, for example, on a veranda or balcony, the thermal insulation layer must be more thorough. For example, 10 cm insulation with polystyrene foam or mineral wool of similar thickness is suitable.
Fifth step. We lay a reinforcing mesh on the insulation. If desired, you can add microfiber and plasticizer to the screed solution. This improvement in the composition will make it possible to do without additional reinforcement.
Power (control) connection
The installation is complete, the wires are put into boxes. How to connect an electric heated floor without cluttering the walls with control panels and sockets?
Of course, this is not a chandelier or a fan. We have already reviewed the controllers (see text above), all that remains is to choose one of them based on price and needs.
Important: Each room at maximum load consumes 3–5 kW. Accordingly, the wiring must match the cross-section. Minimum 2.5 squares, and preferably 4. This is not the case where they save on matches.
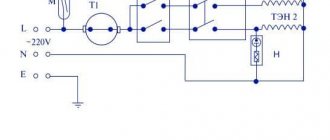
There is no uniform order of layout of controls. Each manufacturer offers its own options. The illustration shows a typical connection diagram for an electric heated floor with a two-core cable and a mechanical temperature controller. Of course, if you are designing a room for an electric floor, installing individual power lines is done immediately. How to connect in a finished house? We'll have to knock down the walls and do some cosmetic repairs. A heated floor system cannot simply be plugged into the nearest outlet.
The nuances of choosing high-quality sand concrete and cement in bags and the features of pouring screed
To the stage of pouring the screed so-called. Some developers do not treat the “wet type” responsibly enough, making mistakes when choosing a ready-made sand concrete mixture M300 or violating the proportions when preparing the solution themselves. For example, they use a lot of water to give the mixture greater mobility and increase its life time during the laying process, which leads to a decrease in the strength of the screed and an increase in the likelihood of cracks.
Maria A
I want to make my own mixture for pouring sand concrete screed. Questions: how to choose the components of the mixture and what additives are best to use?
Another common question from portal users is: what is better - using ready-made sand concrete or preparing your own mixture from high-quality cement in bags.
Anna Ruzhitskaya
In terms of convenience, reliability and stability of the result, it is better to use ready-made dry mixtures (sand concrete). For these mixtures, the maximum sand grain size is regulated, i.e. In production, seeded sand is used, the cement-sand proportions are strictly maintained, and the crack resistance parameters of the hardened mortar are checked.
Please note that mixtures from trusted manufacturers undergo thorough quality control at all stages of production and meet all GOST requirements. The mixture, precisely measured by weight, is delivered to the site in reliable packaging - 40 kg bags.
To install a screed on a warm floor, it is better to use a “wet” screed.
A semi-dry screed differs from a wet screed in that it uses a small amount of water necessary to mix the cement-sand mixture.
Therefore, it is difficult to distribute and compact the semi-dry screed efficiently, taking into account the installed underfloor heating system - mounting tape and thermal cable. When the density of the cement stone decreases, due to the formation of air cavities, the heating efficiency decreases, because The thermal conductivity of the screed decreases.
When preparing sand concrete for screed yourself, special attention should be paid to the quality of the ingredients. The sand should be coarse, sifted, without clay and other harmful impurities (shells, plant remains, contamination with petroleum products, etc.). When choosing the proportions of the mixture, you should remember that sand can have different humidity levels, which affects the required amount of mixing water.
When working with ready-made dry mixtures, pay attention to the availability of information with recommendations on basic recipes and exact proportions for preparing the main types of solutions. This simplifies the work of builders.
The quality characteristics of sand concrete and screed can be improved by using plasticizers and fiberglass.
Typical installation errors
- Do not turn on the heating until the screed or adhesive coating of the floor has completely dried.
- Before pouring the electric floor with screed, treatment with a primer is required. Otherwise, voids may form around the wire.
- Service equipment (for example, a temperature sensor) must be placed in a tube (or corrugated). Then it can be removed for prevention or replacement.
- Do not cut a cable that is industrially secured to a heat mat. You can cut the backing and rotate the halves at the required angle.
- Be sure to record a “map of the area,” that is, a diagram of the location of the heating elements. This will come in handy when rearranging furniture.
