April 6, 2020
The history of using heated floors goes back quite deep. Even Roman baths were heated in a similar way. Why does the system remain popular after so many years? All thanks to the fact that heated floors bring great benefits to their owner. In particular, with the installation of heated floors, the following appear:
- Cosiness. Walking on the heated surface of some materials is extremely pleasant.
- Saving. Heated floors can optimize the heating system. The result of installing heated floors is a reduction in heating costs. For standard rooms - 30%, but for rooms with non-standard high ceilings - by 50.
- Free space. Warm floors will help get rid of bulky heating devices.
I'm glad that there are several options for heated floors. This makes the system virtually universal - the owner of any type of home can afford to install a heated floor. There are two main types of coverage:
- water;
- electric.
Water heated floor
It represents the oldest modification. It has been used for quite a long time, and has managed to establish itself as a reliable system. And most importantly, if you have the tools, the installation can be done by a master without any preparation yourself.
A water heated floor is a system consisting of pipes that are placed under the main floor covering. In this case, there are two options for placing communications:
- "Wet". It got its name due to the fact that during its installation liquid materials are used, in particular – cement screed.
- "Dry". The pipes are mounted on polystyrene mats or wood-slat support. Most often, this type of floor can be seen in wooden houses or apartments where it is not possible to use a screed.
It is impossible to say which type of flooring is better; each type is used in different situations. We'll talk about them in more detail below. In the meantime, here are the features of a water floor in comparison with an electric one.
Connection and crimping
At the very beginning of the installation of warm water floors, the initial end of the pipe is connected to the distribution manifold. Here, when the installation of the heated floor is completed, the second end of the pipe is connected - the return flow.
This distribution unit performs various functions. With the help of adjustments, you can increase the pressure in the system, set the desired temperature, ensure a uniform supply of coolant to different circuits, and combine the joint operation of a warm water floor with traditional heating radiators.
Direct connection of pipes to the manifold is carried out with special clamp fittings of the Eurocone design. After installing and connecting all circuits, the entire system is checked for leaks by conducting pneumatic tests. This operation is called crimping, performed using a compressor. The pressure inside the system rises to approximately 4 bar, and it remains in this state until the heated floors are started. The dimensions of air molecules are much smaller than those of water, so even minor depressurization is detected very quickly.
Hydraulic tests can also be carried out, but in a cold room the water may freeze during testing, and the air is not subject to any influence.
Peculiarities
A water floor is not installed in all rooms due to the specific features of the installation and operation process. Among them, the most significant are:
- Installation is not possible in every apartment, since it is extremely difficult to regulate the temperature of such a floor. When connecting to central heating, the owner relies entirely on utility services. But if you install your own boiler, you will need additional space. But not everyone can afford it.
- Installation using the “wet” method must be on a reliable surface. The reason for this requirement is the large weight of the screed.
- Raising the floor level by an average of ten centimeters after completion of the work. Therefore, this must be taken into account when renovating, since furniture “under the ceiling” may not fit into the room.
- Much attention should be paid to the flooring. The temperature of a water floor is more difficult to regulate. And given that some coatings cannot be heated to high temperatures, certain problems may arise. It is advisable to choose flooring with special markings indicating the possibility of working with heated floors.
Correct installation of the intermediate screed
This method can significantly reduce heat loss. Below is a table of heat loss.
Based on the table above, it can be stated that the maximum thickness of the screed may not exceed 20.0 mm. If the base is located above an unheated area (for example, a balcony, loggia, etc.), it is advisable to increase the heat-insulating layer to 40.0-50.0 mm.
The best solution is to reinforce the intermediate screed with polypropylene fiber. The further procedure is the same as for point 1 (installation on the old base).
Installation
The installation principle is different and depends on what type of water floor is chosen.
Installation of a “wet” water floor
When working with this type, it is meant to create a multi-layer system consisting of several elements.
Prepared surface.
This element can be ordinary soil or a concrete platform. An important condition for this stage is a flat surface. The strong relief of the site subsequently, with a certain risk, leads to the formation of air cavities that negatively affect the heating system. The load on the pump increases.
Waterproofing layer.
Thickness not less than 2mm.
Thermal insulation.
It is advisable to use insulation with a low thermal conductivity coefficient. For example, polystyrene foam with a density of 35 kg/m3.
Pipes.
They are one of the most important elements, because it is through them that hot water circulates. It is best to use pipes made of flexible material and homogeneous in composition. For example, PE-RT.
Steel grate.
Placed on top to hold the solution. The cell size is about five centimeters.
Screed.
A solution of standard proportions is mixed. For greater convenience in
During operation, it is possible to use special additives that improve plasticity or purchase ready-made compounds. The thickness of the layer is about five centimeters.
Finish coating.
You can install any one that is compatible with heated floors. But it is best to use natural materials. Porcelain tiles work well.
Wet heated floors can be installed both in a finished building and at the initial stages of construction. After installing the heated floor, all that remains is to connect it to the heating system. It is recommended to use your own boiler rather than connect to a common heating system.
“Dry” method of installing heated floors
Installing a heated floor with your own hands can also take place in a less extensive form. For example, due to the size of the building, or due to the desire not to delay repairs, a water-heated floor can be installed in another way. This method has a number of advantages:
- Light weight. The load from such a floor is only thirty kilograms. While the tie on such chips puts a load of about 300 kilograms on the horse.
- Installation speed. Unlike the “wet” option, the coating can be installed immediately after installing the coolants. The screed will dry for about a month.
- Low layer height. Usually does not exceed six centimeters.
There are several different installation options without screed. However, the most popular of them is the use of polystyrene plates with a groove. Such mats allow you to install heating elements in recesses. Without resorting to the help of experts.
Let's look at the installation process:
- Leveling the area.
It is understood that per square meter of floor the slope should not exceed two millimeters. If it does not meet this requirement, it must be leveled. In the case of a concrete floor, a thin screed is suitable. If the floor is wooden, you will have to fix it in other ways. Ignoring this step is a typical mistake when installing yourself. Meanwhile, the slope of the heated floor leads to the formation of air cavities in the system, which negatively affect its operation. - Installation of waterproofing.
A film with a thickness of at least two hundred microns is suitable for this stage. It must be overlapped, leaving about ten centimeters of margin. The joints must be secured with tape. - Damper tape.
Its necessity is justified by the fact that when heated, the concrete slab expands. Sometimes this leads to its destruction. Research shows that when a meter of concrete is heated by forty degrees, it increases in size by 0.1 mm. The tape absorbs this expansion. - Installation of polystyrene mats.
The mats have special grooves in which the pipes are attached; in order for the structure to be more reliable, its joints must be treated with glue. - Pipe laying.
An extremely important stage that you should not approach without knowing some details. Firstly, the pipes can be laid out in different ways. The most popular is the snake. However, you can lay out the pipes using a snail. The advantage of the second option is more uniform heating, but the “snake” is easier to install. Secondly, in large rooms several circuits should be made. Approximately one circuit is needed for 40 square meters. - Installation of metal heat distribution plates.
It is made into the grooves of the slab and a pipe is laid on top of them. - Rough floor.
It is constructed from gypsum fiber boards with grooves for fastening together. Next, the plates are fastened with special 19 mm self-tapping screws with double threads.
The same ceramics, laminate, or synthetic coverings are suitable as floor coverings. However, it is necessary to remember this. That they must have specialized markings confirming that the material can work at elevated temperatures.
The main positive feature of a water floor is the low cost of maintenance. All costs associated with it. It pays for itself in a few years.
Warm floor with electric heater
Can be used as the main source of heating, or as an additional one. In comparison with the water one, it has its own characteristics.
Minuses:
- Price. We are talking about both the initial purchase of the material and the subsequent cost of maintenance.
- If installed incorrectly, there may be an electric shock.
- An electric floor is not as durable as a water floor.
In turn, the advantages of electric heated floors are:
- Great possibilities for temperature regulation.
- Easy to install.
- Heating occurs evenly.
Kinds
Floors are divided into several types. There are two main ones:
- cable;
- infrared film.
Cable floors involve the use of cable as a heating element. Its installation takes place using a concrete screed. In general, the installation process is very similar to the same process for water floors.
But infrared film is a qualitatively new material. It consists of an alloy of copper and aluminum. Thin and easy to install, it fits directly under the covering.
Installation of heating cable floors
Installation of cable electric heated floors occurs in the following sequence:
- Heater fastenings.
- Creating a screed.
It should be noted that the cable may or may not be fixed. In the second case, you will have to install it yourself. But in the first, the cable is fixed to special mats made of metal or special fiber. Such mats are much easier to install.
It is worth noting the mistakes that are often made:
- Poor quality screed materials. At this stage, you should be especially careful in choosing the material. Otherwise, the screed may crack. Attempts to correct the situation may damage the heating elements.
- Installing a temperature sensor. It is installed during pouring of the screed. It should be located closer to the center of the slab, in a corrugated pipe. In the next steps it is connected to the control panel.
- Examination. Before filling, it is necessary to check whether the installed system is working.
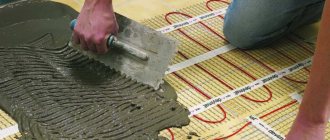
Application of mounting grid
The most correct way to install a wired floor heating element is in this way. In this case, you need to secure the cable to the mesh with plastic clamps, as shown below.
After the term installation is completed, the assembled structure is slightly raised above the base (you need to place it on some support of the appropriate size), after which the pouring is done. As a result, we get a thin layer of reinforced concrete, inside of which there is heating wiring.
This method of termo installation allows you to create an economical and reliable heated floor with minimal inertia of heating temperature.
Installing a film floor
This process is much simpler than the previous one, since it does not imply the need to create a screed. It consists of the following steps:
- A temperature controller is mounted on the wall, to which a cable is routed.
- The floor is thermally insulated.
- The film is installed on the resulting surface. In this case, the heating element should be located at the bottom.
- Both the thermal insulation layer and the film itself are secured with tape to make it immobile.
- Installing a temperature sensor.
- Connecting and testing the system.
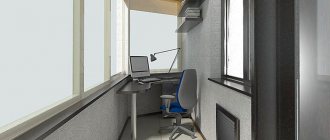
The choice of heating control unit should also be approached wisely. It is selected based on the room in which the underfloor heating system will be placed. If we are talking about a balcony or other cold room, you will need a heater that produces from one hundred eighty to two hundred and fifty watts per square meter. If we are talking about residential premises, 120W is quite enough.
The most important advantage of this type of flooring is that they do not carry any additional load on the supporting structures.
We install heating sections
Do-it-yourself cable installation is carried out according to a plan in which the cable pitch and the order of its placement have already been determined.
Cable installation
Before laying, check the wire for resistance.
Check the wire for resistance
The results obtained must correspond to the figure indicated in the warranty card.
Deviations of 10% in both directions are possible.
The correspondence of the numbers means that the cable heats well, and the system will please you with warmth.
The heating element can be single- or double-core. In the first case, both ends must be connected to the thermostat.
Connect to thermostat
In the second there is only one. The cold end is inserted into the groove made. You can see the connection of both types of wires in the video.
The beginning of the cable and the coupling are placed on the mounting tape. Afterwards they are fixed. The coupling is placed so that it does not stick out from the future concrete screed. Its presence on the concrete surface is unacceptable.
The heating element is laid out according to plan. In this case, the required step is observed, as well as a certain sequence. It is important that the cable does not have very sharp bends. If they are, the system will not work well. According to experts, the minimum bending radius should be 5 centimeters.
Next, install the temperature sensor yourself. To do this, install a corrugation from the thermostat to the floor. This corrugation should also be placed on the floor between the turns of the cable. It is placed in the middle of the step and inserted between the wires by more than 40 centimeters. The end of the corrugation is plugged. Next, a temperature sensor is inserted into it and pulled out. According to some videos, the procedure must be repeated to make sure it is easy to replace.
To achieve the most accurate correspondence between the temperature of the floor surface and the set operating mode of the thermostat, the plugged end is placed on the substrate, raised as close as possible to the surface of the screed.
Next, insert the temperature sensor into the corrugation with your own hands, check the resistance of the laid cable again, and connect the thermostat.
Mount the temperature sensor
This process depends on the features of the device. They also connect the power cable to it and check how the system works, as well as how it heats. If all is well, turn off the thermostat. Then it is removed. This step will allow the final repair to be carried out without any chance of damaging the device. In addition, photograph or draw the placement of cables. Some people make videos.