Despite the development of new technologies in the field of heating, a conventional wood-burning brick stove remains the main source of heat in many private and country houses, garages and various outbuildings. But building even a simple heating stove costs money - the homeowner needs to buy materials and pay for the services of a stove master. To save on construction costs, we suggest building a brick oven with your own hands. Below we will tell you how to build it correctly, provide drawings and masonry order diagrams.
Why are brick ovens popular?
Brick stoves are found in private homes and country cottages. Despite the fact that there are more modern and technologically advanced ways to heat rooms of any size, it is possible to achieve comfort and a stylish interior only with such a design. Do-it-yourself brick veneer looks good in cottages.
The popularity of such heating elements lies in several factors.
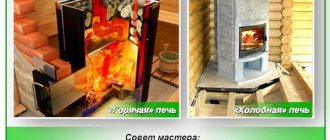
- Thoughtful design. This helps retain heat much longer than with cast iron or steel varieties. One stack of firewood is enough for a full day of heating. Solid fuel is added to metal stoves every 5-6 hours.
- Economical. Combustion of fuel produces high heat transfer. Excess heat warms up the masonry, which in turn warms the rooms.
- Environmental friendliness. During the combustion of wood, carbon dioxide and a water base are released. These substances do not harm the environment.
- Soft thermal radiation. External parts do not heat up to maximum limits.
- Optimal humidity level. When bricks are heated, moisture evaporates from the pores, and when cooled, it is absorbed again. Thanks to this, the humidity levels in the room are 40-60%.
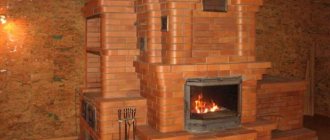
A hob is often installed on the surface of the stove. This allows you to prepare dishes with a special flavor.
Heating stove with bottom heating, size 1020×890 mm
The heating stove has dimensions, mm: 1020x890x2240.
Material consumption (excluding foundation and pipes) is as follows:
- red brick - 570 pcs.,
- fire-resistant brick - 100 pcs.,
- red clay - 20 buckets,
- fireproof clay - 3 buckets,
- sand - 12 buckets,
- fire door - 250×210 mm,
- blower door - 250×140 mm,
- smoke valve - 130×250 mm,
- grate - 380×252 mm,
- cleaning doors measuring 130×140 mm - 7 pcs.,
- pre-furnace sheet - 500×700 mm.
The stove can be folded by one stove within 24 hours; in addition, it will take about 6 hours to carry the material and prepare the solution.
The stove is designed to heat a room up to 35-40 m². The heat output of the furnace with a one-time firebox is 4 kW (3400 kcal/h), and with a two-time firebox it is about 5 kW (4300 kcal/h).
In this furnace, the grate is designed to use firewood and coal briquettes as fuel. When burning anthracite and hard coal, the grate is laid flat at the back with refractory bricks in three rows.
Drawings of sections and the order of the furnace masonry are shown in Fig. 4. The furnace is laid according to the procedures, observing the rules for bandaging the seams.
Rice. 4. Heating stove size 890×1020 mm a - facade and sections A-A, B-B; b - masonry 1-6 rows
Rice. 4. Continuation in - sections B-C, D-G, D-D; g - masonry 7-14, 16 rows
Rice. 4. Continuation d - laying 15, 17-34 rows and cutting pipes
Rice. 4. Continuation e - laying 35-44 rows
From the thirty-sixth to the forty-third row, the masonry of pipe cutting with an internal pipe section of 130 × 250 mm is shown. The forty-second and forty-third rows must be laid out in the same way as the forty-first row, making sure to follow the rules for dressing the seams (the order of rows 42 and 43 is not given). The masonry of the forty-third row is similar to the masonry of the forty-first row.
Calculation of basic parameters
Before starting construction work, it is necessary to calculate what power stove is needed for installation in a particular house. Dimensions are determined based on the heat transfer capabilities of the furnace. For well-insulated buildings, the calculation algorithm of I.V. Kuznetsov is suitable. It involves the use of average thermal power, which can be obtained from 1 m2 of oven surface.
For most fireboxes, the typical indicator is 0.5 kW/m2, and for intensive operation during a significant cold snap - 0.76 kW/m2.
When determining the thermal power of a brick kiln, only those surfaces that participate in the heat exchange process are taken into account.
It is not recommended to choose massive rough bars for small rooms. This is due to the fact that they will take too long to warm up, and half of the heat will escape through the chimney. It is recommended to place it at the intersection of living rooms so that they warm up evenly.
Drawings and diagrams of brick kilns
Based on the proposed drawings, you can design and make a brick stove with your own hands.
- Russian stove
- "Swede"
- "Dutch"
- Bath stove
The given diagrams are some of the most popular design solutions. You can construct such rough bricks with your own hands in a private home without outside help.
Firebox
The optimal dimensions of the firebox can be determined based on the maximum volume of the fuel fill. The amount of combustible materials is calculated taking into account the calorific value and their specific gravity. In order for the stove to operate at the required power, the volume of the firebox must be 2-3 times greater than the obtained value.
With the correct volume of the combustion chamber, you can fire the stove at extremely low temperatures outside the window. The size of the combustion chamber must correspond to the parameters of the bricks from which the stove will be built.
The maximum volume of solid fuel should not exceed 2/3 of the furnace.
Ash pan
The height of the ash pan is calculated taking into account the type of fuel that will be used to heat the room.
Low-ash varieties - coal, peat briquette. For this type of fuel, the height of the ash pan should be about 1/3 of the height of the firebox. Solid wood fuel – pallets, firewood. In this case, the height of the ash pan is reduced to 1/5.
Arrangement of an ash pit in the furnace is mandatory. Combustion products will enter this chamber and will not spread over the entire internal surface. Cleaning your oven before the cold season will be easy.
Chimney
The chimney is an essential part of the heating system, since fuel combustion products exit through it. Gas boilers require good draft, so the pipe is installed in a round shape. For a stove operating with solid fuel, a rectangular version will be sufficient.
When calculating the dimensions of the chimney, it is taken into account that the cross-section of the blower should be smaller than the area of the flue. The parameters of standard brick used as the main building material are also taken into account.
It is not recommended to significantly increase the cross-sectional indicators: cold air will penetrate through the wide pipe. This will degrade performance and lead to dangerous situations.
Chimneys that are too narrow can produce a lot of smoke. This leads to carbon monoxide poisoning and the possibility of fire. The problem can be prevented by building up an asbestos cement pipe or laying another row of bricks.
The chimney should not touch the wooden parts of the ceiling. During construction, you need to ensure that the distance from the chimney cut to the nearby ceiling beams is the same. The chimney should be 1.5 m from the roof ridge and rise above it by 0.5 m.
Heating stove with bottom heating size 770×770 mm
The heating stove has dimensions, mm: 770x770x2310 (see Fig. 2).
Rice. 2. Heating stove with bottom heating, size 770×770 mm a - facade; b - sections A-A, B-B; c - masonry 1-13 rows; d - sections B-C, D-G; d - masonry 14-35 rows; 1 - smoke valve; 2 — holes for cleaning; 3 - combustion door; 4 — blower door; 5 - firebox; 6 — grate; 7 - ash chamber
Rice. 2. Heating stove with bottom heating, size 770×770 mm g - sections B-C, D-G; d - masonry 14-35 rows; 1 - smoke valve; 2 — holes for cleaning; 3 - combustion door; 4 — blower door; 5 - firebox; 6 — grate; 7 - ash chamber
Material consumption (excluding foundation and pipes) is as follows:
- red brick – 230 pcs.,
- fire-resistant brick - 210 pcs.,
- red clay - 12 buckets,
- fireproof clay - 6 buckets,
- sand - 7 buckets,
- fire door - 250×210 mm,
- blower door - 250×140 mm,
- smoke valve - 130×250 mm,
- grate - 300×252 mm,
- cleaning doors size 130×140 mm - 6 pcs.,
- pre-furnace sheet - 500×700 mm.
The stove can be built by one stove within 18-20 hours; in addition, it takes about 5 hours to carry the material and prepare the clay-sand solution.
The stove is designed to heat a room up to 20 m². The heat output of the furnace with a one-time firebox (with anthracite consumption of up to 12.2 kg) is about 3 kW (2600 kcal/h). The heat output of the lower part of the furnace is 2.3 kW (2000 kcal/h). The heat output of the stove with double firing increases to 3.7 kW (3200 kcal/h).
It is advisable to use anthracite and coal as fuel, but in their absence, you can use firewood, coal briquettes and peat briquettes.
The laying of the furnace in rows does not differ from the previous heating furnace with dimensions of 770x640 mm.
Preparatory activities
Before starting construction, it is necessary to go through the preparatory stage. It is worth taking it seriously - the more scrupulous the approach, the better the result. Making a brick stove with your own hands from scratch is a very real task.
Preparation for construction occurs in several stages.
- Buy building materials.
- Determine the location of the building in a residential building.
- Pouring the foundation.
- Prepare a solution for working with bricks.
These are the basic preparation steps before building a brick kiln.
Required materials and tools
To make a brick stove with your own hands, you need to select high-quality materials. To build the structure you need to take:
brick. Individual quantity calculations are carried out for each project; doors: for the blower and firebox; clay for mortar; lattice; soot cleaner; flap; grates; valve; cast iron hob.
It is forbidden to use sand-lime bricks to build a furnace - even the double variety is not suitable.
Refractory bricks are optimal for furnaces; ceramic bricks are rarely used.
The basis for the solution will be clay. Red is suitable for red brick, fireclay - for fireclay. There are also special mixtures for sale for the construction of stoves; to work with the solution, it is enough to prepare it as written in the instructions.
To build a furnace, take the following tools:
- putty knife;
- Master OK;
- tape measure;
- plumb line;
- mop broom;
- level for construction;
- knitting wire;
- containers for preparing cement and clay mortar;
- grinder;
- metal strips and corners;
- bushhammer.
The foundation under the structure must be strong and reliable. To do this, you need to prepare a stable foundation. The following materials and tools will be useful:
- sand;
- crushed stone;
- reinforcing mesh;
- cement;
- boards and nails;
- waterproofing material.
If external wall finishing work is planned, then you need to buy material for this.
Features of choosing a place to install a heating device
Usually the location of the furnace is designated even before the construction of the house in the project. This is necessary in order to install heating equipment in a place from where warm air currents will be evenly distributed throughout the rooms. The foundation for the stove must be separate from the general foundation of the house. The distance between their walls must be at least 150 mm.
Failure to comply with the rules regarding foundation construction will lead to deformation of nearby walls.
A properly installed stove should heat several rooms located across the wall at once. If there are several rooms in the house, it is worth installing the grub at the crossroads of the walls. Since the foundations must be separate, it is better to make the internal walls light.
There are cases when the stove is installed next to the front door. This is how a thermal curtain is made to protect rooms from the penetration of cold air masses.
It is better not to place the edges of the stove close to the walls of the house. This is due to the fact that it is necessary to ensure full access to the rough. Owners are advised to regularly inspect heating equipment to comply with safety regulations. If the stove is part of the wall of a residential building, then a layer of heat insulation is laid between it and the end part of the partition.
If the stove is installed in a built room, then it is necessary to ensure that the chimney is not located too close to the beams. The distance is more than 15 cm, taking into account the thermal insulation gasket.
The area in front of the firebox is covered with fireproof material. Typically, metal sheets or ceramic tiles are chosen.
Construction of the foundation
In order for the stove to operate safely and efficiently, the foundation must be properly equipped. It must be separate from the common house.
Before starting to construct and lay the foundation, you should pay attention to the fact that the distance of the chimney from the roof slab should be more than 15 cm. Markings are applied where the grout will be located.
If the house has wooden floors, they are cut out at the location of the stove. 15 cm retreat from the outer edge. A pit is dug in the resulting hole. Its depth depends on the climatic conditions of the region and the degree of soil freezing, usually 0.7 - 0.8 m is sufficient.
15 cm of sand is gradually poured into the bottom of the hole. It needs to be watered to compact it. Crushed stone is poured on top in a layer of up to 15 cm. It is compacted tightly and evenly. Wooden pegs are driven into the corners of the resulting pit, and cladding boards are attached to them. The walls are covered with a polyethylene wall to prevent cement mortar from seeping into it.
A reinforcing mesh is installed 5-10 cm from the floor. It is placed on metal rods or broken bricks nailed to the bottom.
Concrete is prepared to pour the foundation. To do this, mix cement (M-400), sand and crushed stone in a ratio of 1:3:4. Pour in a small amount of water: the consistency should be medium fluid. If you overdo it, the base will turn out to be fragile and will begin to quickly collapse under the load of rough material.
The prepared mixture is filled into the formwork and leveled using the rule. After a few hours, when the composition “sets”, it needs to be covered with film. The prepared site for the structure is left for several weeks until the solution dries.
The upper base of the stove should be located 15-20 cm below floor level.
Preparation of the solution
For laying stoves in a private home, clay and sand mortars are used. Kaolin and fireclay marl are suitable for fireclay. For ceramic bricks, use ground gray and blue Cambrian clay with fire-resistant characteristics.
For 100 bricks you will need about 40 kg of clay.
Before preparing the solution, the clay is checked for fat content. This is necessary in order to determine in what proportion it should be mixed with sand.
To test, 1 kg of clay powder is filled with water to the top edge and left for 24 hours. If marl is used in construction, it only needs to stand for 2 hours. After souring, the clay is diluted with water; the consistency should resemble thick dough.
The resulting wet clay is divided into 5 equal parts. Sand is added to each in different percentages: 10%, 30%, 50%, 70%, 100%. After this, the resulting composition is dried for 4 hours. From each mass, roll small sausages (diameter - 1.5 cm, length - 30 cm), roll them into a circle.
- If there are no cracks in the mortar, it is suitable for any construction.
- There is a dry crust and minimal damage - it can be used.
- The cracks are about 1 mm deep - suitable only for low-power heating equipment.
- If there are kinks or deep damage, the solution must not be used.
The solution can be prepared using an identical algorithm.
- Pour the required amount of clay with water for a day.
- Knead it to the consistency of dough, sift through a 3x3 mm sieve - this will remove lumps.
- Add sand in the proportion that testing has shown to be optimal.
- Pour in water and stir until the consistency resembles thick sour cream.
If the fat content is not enough, you need to add sand or clay. It is checked with a trowel - the trowel is soaked in the solution and the result is assessed. With a normal ratio of components, 1-2 mm of the composition will stick, no more and no less.
Design selection
Before you finally settle on any design, you need to clearly localize the range of tasks facing the future furnace system. What is expected from it, how often they plan to use it and for what purpose. And then make a choice.
Traditionally, all stoves are divided into two main classes based on functionality. The design can be:
- heating;
- heating and cooking.
The difference is clear from the name of each class. Heating stoves are highly specialized and can only heat. True, everything in their design is subordinated to the fact that they perform their task as efficiently as possible.
The heating and cooking design is already considered universal. You can still cook food on it. It doesn’t matter what exactly is added to the ability to heat the home: oven, bread chamber, stove, smokehouse. The important thing is that the stove has become dual-purpose.
In the dacha sector, heating and cooking stoves are the most popular because they are simple and practical - as a rule, this is the only stove in the house, and therefore versatility does not interfere with it.
Also, the increased popularity of suburban areas, if not created, then revived a class of stoves, rare to this day, intended only for cooking. They are now united under the very vague and widely interpreted name “barbecue”.
Although it would be more correct to classify them as a group of stove complexes, since they can include not only a primitive barbecue, but also an additional set of services, limited only by the desires and capabilities of the owner. And they cannot be classified as any single furnace organism - this is really a complex created from a unique set of furnace modules.
Accordingly, a country stove can equally well be placed on the street (a garden grill stove) or designed exclusively for the home, so there is simply no universal step-by-step instruction - the indoor and outdoor varieties of stoves are only partly related, but structurally they are completely different types. Therefore, their masonry technology is slightly different - one of them requires increased moisture resistance, for which cement is added to the masonry mortar, which slightly reduces the fire resistance of the massif.
How to properly build a brick oven. Instructions for the progress of work
Before starting work, you should familiarize yourself with the procedure for the selected type of oven. Visual diagrams will tell you in what order to lay the bricks.
After choosing the type of rough stone and its arrangement, you can proceed to instructions on how to build a brick stove in your house. This step-by-step guide is suitable for those who would like to get oven equipment with a hob.
- Rows of bricks are laid in a continuous row on cement-sand mortar up to floor level. The masonry must be adjusted precisely by level and plumb so that it is level and strong. The stability of the structure depends on this.
- After the first row has been laid, they begin to install the blower chamber.
- Before laying the second row of bricks, install the door for the blower. There are special loops in its corners; steel wire is threaded through them and laid into the seams of the masonry. To prevent it from moving or turning over, it is supported with bricks (but not treated with mortar; this is a temporary measure).
- The second row is laid as shown in the order. A ash pit is formed.
- Next, fireclay is used, indicated in the diagrams in yellow. After laying, a grate is installed above the ash pit.
- On the fourth row of bricks, they begin to lay out two channels to clean the rough from accumulated soot. Each chamber is equipped with a separate door.
- A grate is placed in the fifth row. It can be correctly laid in the special recesses that are in the bricks of the bottom row. All subsequent rows must be laid with fireproof bricks.
- The grate will fit correctly only if it is laid accurately. Each row must be checked with a level.
- Before laying the sixth row, the combustion door is installed. It is temporarily fixed with a column of bricks, which is laid on the grate. To prevent it from falling out, you can support the part with a metal or wooden strip.
- From the seventh row, the creation of gas ducts begins. To do this, the vertical walls are laid with bricks installed on the edge.
- Before laying the ninth row, a quarter is knocked out of the brick. It is laid in such a way that it fixes the firebox door. The wire from it is laid in the same row of masonry, which helps to finally secure it.
- If a hob is being made for working with cauldrons or other utensils, it is laid in the 11th row. Bricks are laid on the upper opening, the front part is decorated with a steel corner. The sealant is basalt cardboard or asbestos cord.
- Rows 12-16 are a chamber above a cast iron stove. Before you begin to cover the cooking niche, you need to lay steel strips. They will be the basis for laying the 17th row.
- The front part of the 17th row needs to be additionally decorated with a metal corner.
- The 18th and 19th rows are laid out completely, three vertical heat exchangers are installed.
- 20th row of masonry - placement of horizontal channels and doors for regular cleaning of the stove from carbon deposits and soot. From this moment the construction of the drying chamber begins, if provided.
- 22nd row – door overlap.
- From the 23rd row they begin to work with a horizontal flue. At this stage, it is ensured that only the holes in the vertical channels are open. Metal strips are laid over the drying chamber.
- The 24th row of bricks is laid.
- In row 25-28, another door for the cleaning channel is installed. At this point, you can block the stove niche.
- Valves are installed on the two remaining vertical gas ducts. First the frames are installed, then the partitions.
- Rows 31-35 become a transition area to the chimney.
- In the area of the 36-38th row, fluff is made.
This completes the installation of the brick stove with your own hands. Next you need to move on to constructing the chimney. It is laid out from the first row of the rough and finished where indicated in the order. In the example given, this is the 26th row. If necessary, the chimney is made higher.
In the third row of the chimney you need to install a special door. It is necessary in order to clean it from combustion products. On the 27th they install a central damper. Starting from the 31st row, the cross-section begins to gradually decrease so that the pipe can be taken outside.
In the place where the pipe from the furnace will pass through the ceiling, you need to lay a layer of non-combustible material. Expanded clay and mineral insulation are usually used.
Furnace arrangement options
These are the main popular options. It is worth carefully reviewing the diagrams before starting construction work - they show step by step how and in what sequence materials should be placed.
- The order of the Swedish oven.
- Dutch order.
- Order of the Russian stove.
- Ordering a sauna stove.
- Ordering of the Kuznetsov furnace.
Briefly about the installation of the oven and heat exchange register
Some designs provide for the installation of an oven. It needs to be mounted in a place where it would be washed by the maximum amount of heat flow. The optimal zone is the transition from the firebox to the heat exchanger. Metal corners are placed on the side walls of the horizontal flue. At the points where the oven touches the wall, asbestos cord or basalt cardboard is laid as a seal.
The heat exchange register is placed in the hottest zone of the stove. It can be located at the beginning of the flue, in the rear part of the firebox or under the hood (for non-revolving options).
Assembling a brick stove for a private home is not a difficult task. If you have the necessary tools, diagrams and quality materials, you can make a productive and durable roughener for regular use.
Materials and tools for work
In order to build a stove with your own hands, you should first stock up on the necessary tools and what it will be made of. To do this, take one of three types of bricks:
- ceramic;
- silicate;
- refractory.
In general, the last option is the most ideal material from which stoves are made, but as practice shows, they are most often used when laying a fireplace or firebox on the outside of a building.
Among the refractory bricks are:
- fireclay;
- refractory.
After everything has been decided with the materials for laying the stove and the choice has been made, you can begin to prepare the necessary equipment. During work you will need:
- rule;
- hammer-pick;
- fun;
- furnace hammer;
- sweeper for cleaning the canal;
- level;
- marking rod;
- plumb line;
- pliers;
- chisel;
- sieve;
- construction corner;
- container;
- rasp.
Once all the necessary tools are ready, it is time to begin preparing the solution.
Where is it more efficient and safe to place a small-sized stove?
In order for the heating stove to efficiently release heat, it is placed in the middle of a one-room dwelling or built into interior partitions. Small heating and cooking stoves are placed in the center of the kitchen or against the wall.
The heating structure will be safe if the ceiling is properly cut. A spark arrestor is placed on the chimney.
The combustion chamber is a source of increased danger. The stove is placed so that coals and sparks do not fall on walls, doorways, or furniture. If necessary, walls are protected with non-combustible materials (flat slate, ceramic tiles).
Heating stove with bottom heating size 1160×890 mm
The heating stove has dimensions, mm: 1160x890x2240.
Material consumption is as follows:
- red brick - 580 pcs.,
- fire-resistant brick - 140 pcs.,
- red clay - 22 buckets,
- fireproof clay - 5 buckets,
- sand - 13 buckets,
- fire door - 250×210 mm,
- blower door - 250×140 mm,
- smoke valve - 130×250 mm,
- grate - 380×252 mm,
- cleaning doors measuring 130×140 mm - 9 pcs.,
- pre-furnace sheet - 500×700 mm.
The stove can be built by one stove within 26 hours; in addition, it will take about 6 hours to prepare the clay-sand mortar and carry the material.
The stove is designed to heat a room up to 45 m2. The heat output of the furnace with a one-time firebox is 4.3 kW (3700 kcal/h), and with a two-time firebox - 5.4 kW (4600 kcal/h).
In this furnace, the grate is designed to use firewood, coal briquettes and peat briquettes as fuel. When using anthracite and hard coal, the grate is laid at the back with refractory bricks on the edge.
Drawings of sections and order of masonry are shown in Fig. 5.
Rice. 5. Heating stove with bottom heating, size 1160×890 mm a - facade; b - masonry 1-12 rows
Rice. 5. Continuation in - sections A-A, B-B, D-G; g - masonry 13-18 rows
Rice. 5. Continuation d - sections B-C, D-D, E-E; e - masonry 19-28 rows; 1 - firebox; 2 - ash chamber; 3 - grate; 4 - combustion door; 5 — blower door; 6 — cleaning holes; 7 - smoke valve
Rice. 5. Continuation - masonry 29-32 rows
When laying the second row, it is necessary to strictly adhere to the order, since this row forms a system of chimneys for the lower heating chamber. The bottom of the ash chamber is laid with masonry of the fourth and fifth rows. When laying the sixth row, a blower door is attached to the masonry.
Otherwise, the laying of the stove is not difficult and is similar to the laying of previous stoves, but you must strictly adhere to the procedures: you should not make unjustified narrowing of the chimneys. The pipe is placed in five bricks with an internal size of 130x250 mm.
Brick kitchen slabs
Based on their design, kitchen stoves can be divided into simple, medium and complex.
A simple kitchen stove has a combustion and blower doors, a grate and a smoke valve. It is the simplest of all household stoves.
Kitchen stoves of average complexity have, in addition to the above-mentioned stove appliances, an oven, and complex ones also have a hot water box. Ovens are made of black steel with a thickness of at least 1 mm, and hot water boxes are made of galvanized steel. The casing of the water heating box is made of black steel with a thickness of at least 1 mm. The thicker the steel, the more durable the devices.
Stove with two-burner stove and oven
In a simple cookstove, hot flue gases from the firebox are directed under the cast iron stove and then discharged through an opening under the chimney into the chimney.
In other kitchen stoves, hot flue gases are directed under the cast-iron stove and then, descending, heat the walls of the oven or one wall of the water-heating box, and then are discharged into the pipe, while heating the bottom wall of the oven, the bottom and the other wall of the water-heating box.
The above-mentioned kitchen stoves do not have a cooking chamber, therefore, during cooking, steam and odor are released into the room, which negatively affects the microclimate of the room. This article provides drawings of sections and ordering of a kitchen stove of an improved design, which has a cooking chamber connected to a pipe using a ventilation duct closed by a ventilation valve.
Heating stove with bottom heating size 2250×510 mm
The heating stove has dimensions, mm: 2250x510x2480.
Material consumption (excluding foundation and chimney) is as follows:
- red brick - 740 pcs.,
- fire-resistant brick - 40 pcs.,
- red clay - 25 buckets,
- fireproof clay - 1 bucket,
- sand - 15 buckets,
- fire door - 250×210 mm,
- blower door - 250×140 mm,
- smoke valve - 130×250 mm,
- grate - 380×252 mm,
- cleaning doors measuring 130×140 mm - 7 pcs.,
- pre-furnace sheet - 500×700 mm.
The stove can be built by one stove within 30 hours; in addition, it will take about 8 hours to prepare the clay-sand mortar and carry the materials.
The heat output of the furnace with a one-time firebox per day is 6 kW (5100 kcal/h), with a two-time firebox - about 7.1 kW (6100 kcal/h). The stove is designed for heating a room up to 60 m². Drawings of sections and ordering are shown in Fig. 8.
Rice. 8. Heating stove with bottom heating, size 2250×510 mm a - facade; b - sections A-A, B-B, B-C; c - masonry 1-6, 8 rows
Rice. 8. Heating stove with bottom heating, size 2250×510 mm g - section G-G; d - masonry 7 - 18 rows
Rice. 8. Heating stove with bottom heating size 2250×510 mm e - masonry 19-36 rows
When laying the fifth row, it is necessary to strictly adhere to the order, since this row determines the main dimensions of the chimneys of the lower heating chamber. The twenty-third row also determines the main dimensions of the chimneys of the upper heating chamber. It is not recommended to reduce or increase the size of chimneys when laying subsequent rows.
Heating stove with bottom heating size 1290×510 mm
The heating stove has dimensions, mm: 1290x510x2310 (see Fig. 6).
Rice. 6. Heating stove size 510×1290 mm a - facade; b - sections A-A; c - masonry 1-5 rows; 1 - foundation in the ground; 2 - soil; 3 - smoke valve; 4 - cutting; 5 - ceiling; 6 - combustion door; 7 — blower door; 8 - waterproofing; 9 - external foundation; 10 - firebox; 11 - ash chamber; 12 — grate; 13 - holes for cleaning
Rice. 6. Continuation of d - masonry 6-30, 33 rows
Rice. 6. Continuation d - masonry 31,32, 34-40 rows
Material consumption (without foundation and pipe) is as follows:
- red brick - 400 pcs.
- fire-resistant brick - 220 pcs.,
- red clay - 16 buckets,
- fireproof clay - 10 buckets,
- sand - 11 buckets,
- fire door - 250×210 mm.,
- blower door - 250×140 mm,
- smoke valve 130×250 mm,
- grate - 300×250 mm,
- cleaning doors measuring 130×140 mm - 4 pcs.,
- pre-furnace sheet - 550×700 mm.
The stove can be folded by one stove within 24 hours; in addition, it will take about 6 hours to prepare the solution and carry the material.
The heat output of the stove with a one-time firebox is about 3.8 kW (3300 kcal/h), with a two-time firebox - 5.1 kW 14,400 kcal/h)^ The stove is designed for heating a room up to 35 m2. It is advisable to lay the furnace from the fourth to the eighteenth row using refractory bricks. With proper operation, the efficiency of this furnace can be up to 80%, and when using hermetic (furnace and blower) doors it reaches 85%.
The laying of the stove is simple, it is carried out according to the procedures, while observing the correct alternation of seams.