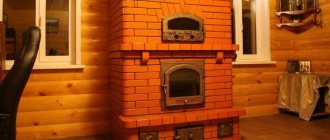
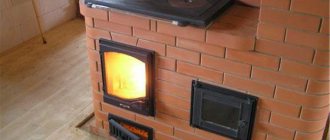
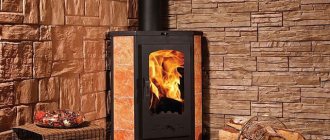
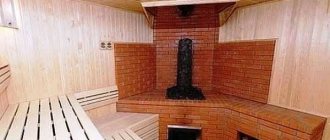
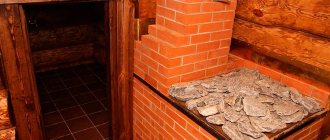
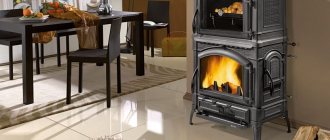
Most owners of country houses have already appreciated the convenience and ease of operation of the Shvedka stove. In addition to the function of heating the premises, such a device provides for cooking food, turning this process into a pleasant activity. A built-in fireplace allows the home owner to:
- create comfort in the room;
- decorate the interior of the home;
- enjoy the sight of a living flame.
The design of this stove, heated with wood, was developed by master A.I. Ryazankin. It was he who managed to effectively combine a fireplace and a Shvedka heating and cooking stove.
Design features
For the first time this unit came to Russia from Scandinavia, when the Swedish troops were defeated near Poltava. Even then it was popular due to the following characteristics:
- economical in operation;
- ability to retain heat for a long time.
These parameters were achieved by creating a unique system of several channels for gas removal.
Thanks to this, the stove simultaneously made it possible to heat the room, cook food, including baking bread, and dry things. The design of the Shvedka stove involves various designs with arches and other unusual shapes. In this case, simultaneous use is allowed:
- fireplace;
- beds;
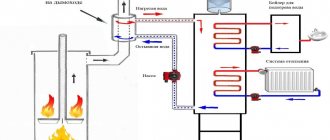
- heating tank with water;
- drying chamber.
The Shvedka brick stove is equipped with the following elements:
- hob;
- hood;
- oven;
- heat shield.
When constructing a similar stove in a house, the rear surface of the structure should be placed in the living room. The front side of the unit with the firebox is usually installed in the kitchen. The device involves installing a chimney capable of functioning in the following two modes:
- winter: gases move through specially equipped channels, warming up the home;
- summer : combustion products are sent directly into the pipe.
An important advantage of the Shvedka is its small dimensions: 2.17x1.03x0.88 m (HxLxW). By design, the furnace can be combined or bell-type, with three or five channels.
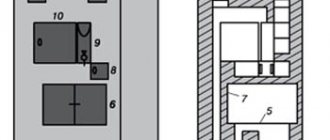
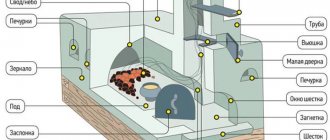
1 – fireplace hearth; 2 – two L-shaped pins; 3 – grid; 4 – fireplace walls; 5 – vent with a window; 6 – blower door; 7 – gas duct; 8 – cleaning window; 9 – transition window; 10 – cleaning window; 11 – grate; 12 – oven; 13 – combustion door; 14 – gas duct; 15 – jumper; 16 – ceiling above the fireplace portal; 17 – iron corner; 18 – plate; 19 – door for cleaning; 20 – overlap; 21 – overlap above the space of the stove and the side wall of the furnace; 22 – cooking chamber; 23 – fireplace shelf; 24 – displacement of the septum; 25 – gas collector; 26 – window for cleaning the gas collector; 27, 28, 29 – partitions; 30 – cleaning window; 31, 32 – valves; 33 – cleaning window; 34 – valve.
Small stove for a summer residence
Buslaev’s Swedish stove is ideal for use in a dacha, where people live throughout the field work season
The design has a niche where you can quickly dry shoes and clothes, which is very important if you have to do this often
The stove fittings correspond to the fittings of the previous version. The building's oven is capable of producing a heat wave. Due to the small size of the materials, little is spent, but the small size of the furnace also influenced the thermal output in the direction of its reduction. The Swedish stove is designed to heat a house with an area of no more than 20-25 square meters. m. at an outside temperature of more than 15 degrees. The design is light, the order is quite clear.
The small stove is a channel structure and includes a hob, the dimensions of which are slightly larger than the dimensions of a Dutch column. If the oven is installed, then it is located at a considerable distance from the firebox. The first heat does not affect the oven in any way; when the oven is lit, there is no heat wave from the oven.
There is no chamber near the combustion part in which afterburning occurs, which is what distinguishes a small stove from ordinary structures. In its operation, the stove is more reminiscent of a Dutch stove than a Swedish stove; only the name is taken from the Swedish stove.
Small stoves are decorative devices, are based on special alloys and are installed ready-made. These are modern products, the dimensions of which are calculated by refractory computers. Outwardly, they may look different than the old version of the Swede, but the calculation is carried out taking into account the same principles.
Operating principle of the Shvedka stove
Describing the operating features of the device, it is necessary to dwell on the operation of its various sections:
- Fireplace area. During the combustion process, warm air and smoke are released, which rise, bypassing the open valve, and exit through the installed pipe.
- Kitchen area. The operating principle assumes the following:
- combustion of wood in an equipped fuel compartment located under a two-burner stove;
- the warm air released passes between the hob and the oven;
- bypassing the oven on the right side, it falls into the chimney;
- the heated gases, rising to the top of the furnace, rush into the horizontal channel;
- Warm air moves through installed flue ducts into the smoke channel, where it enters directly into the pipe through open valves.
Advantages
The Swedish stove has a very “flexible” design - it can be adjusted to the conditions and desires of the owner, modified and improvised with functions. The stove not only heats rooms, it can be folded so that:
- cook food on it,
- dry herbs;
- bake in the oven;
- dry outerwear and shoes;
- equip a warm sun lounger;
- additional shelves;
- admire the open flame.
But that's not all. Swedish oven:
- Has a high level of efficiency.
- With good efficiency, it is small in size.
- It heats up quite quickly.
- The combustion process is regulated (by dampers).
- Can be done with “winter” and “summer” running.
A Swedish stove will produce 20% more heat than a Dutch oven built from the same amount of materials. And it’s more convenient to cook on it than on the Russian one - you don’t need to bend over and use a grip.
9632bce10363354e248c1329617a273c.jpe 0f9144b4c66791468fef78ad9393f49f.jpe b906bdd2e27548d30c2db6edec3f39da.jpe
You can place food prepared the night before in the cooking niche above the stove and close it with a damper. Then in the morning you can save time on heating up breakfast - it will still be warm.
Characteristics
The design of the stove assumes its convenient location in the wall separating the kitchen from the living space, with the installation of a hob and fireplace in the corresponding rooms. The Shvedka is considered a very compact piece of equipment, with dimensions of 2.17 x 1.03 x 0.88 m excluding the pipe. In addition to these dimensions, the fireplace portal extends by 0.13 m.
When installing the furnace, a solid foundation (1.02x1.02 m) is built. The power produced by the Shvedka is 3 thousand kcal/hour or more.
About history and design
The right to invent the Swedish stove is disputed by the Germans and Swedes. It is assumed that the first versions of this design appeared on the territory of modern Germany. From there, the Swede spread throughout the countries of Northern Europe, capturing the Scandinavian Peninsula. In Russia, they became acquainted with it during the time of Peter I, and since then it has firmly entered into the life of the northern territories with their frequent cold and dampness.
According to another version, the stove appeared when the Swedish king Adolf Frederik Holstein-Gottorp ordered the development of a design for the harsh climate of his country. At that time, there were Dutch women in Swedes' houses, but they were gluttonous, and the people of Sweden were already thinking about the environment and saving fuel resources.
In Russia, the growth of interest in the stove began a couple of decades ago; it began to spread even in regions where Russian stoves were traditionally used. The reason for its popularity was a successful combination of qualities - the Swede is a heating and cooking type design, and copes with both responsibilities equally well.
Swede with a hob for two places Source pechiexpert.ru
The tall rectangular structure has a recognizable appearance. It is difficult to confuse it with other stoves, although several varieties have appeared in recent years. As in a traditional Russian stove, the Swede has a combustion chamber, and the air passes through the ash pan and grate, and then enters the firebox. However, the combustion products are then directed into long smoke channels, linger there and do not allow the furnace walls to cool for a long time.
The stove on which food is cooked is located above the fire. Therefore, the dish is fried as on a gas stove, and not baked as in a Russian oven; During cooking, the smell spreads throughout the house. Unlike the grate design, in the Russian stove the fire was lit in the depths, and air entered through the crucible. Food was prepared in two ways: either they placed pots in front of the fire, or they waited until it burned out, closed the stove with a damper, and baked the food. There was no smell.
Structurally, the Swede is designed so that it can be installed in a wall. In Scandinavian housing, this was traditionally the space between the kitchen and living space. In modern country houses it is placed between the kitchen and living room.
Stove with fireplace in the kitchen-living room Source aviarydecor.com
During cooking, the kitchen room warms up well and quickly, but the accumulated heat, thanks to the rather long smoke channels, is redistributed and gradually goes into the adjacent room.
Necessary materials
For the longevity of the stove, it is recommended to use only high-quality bricks, which must be purchased with a reserve. To build a unit with a fireplace, the following elements will be required:
- red brick – 717 pcs. (excluding pipe);
- white sand-lime brick – 154 pcs.;
- grate 20x30 cm;
- cleaning chamber doors 14x14 cm – 8 pcs.;
- firebox (21x25 cm) and blower (14x14 cm) doors;
- cabinet-oven 45x36x30 cm;
- hob 41x71 cm;
- valves 13x25 cm – 3 pcs.;
- 2 steel corners 50x50x5x102;
- 2 metal sheets 50x70 cm;
- steel strips 50x5x92 cm - 3 pcs.; 50x5x53 cm – 2 pcs.; 50x5x48 cm – 2 pcs.;
- reinforcement for laying the foundation;
- cement, crushed stone, sand, clay;
- boards for formwork construction;
- fireplace grate (you can make it yourself from fittings);
- sheet of roofing material for waterproofing the base in 2-3 layers;
- baked steel wire for securing the doors;
- pieces of asbestos or asbestos rope.
As mentioned above, the structure has dimensions of 102 × 89 × 217 cm. The fireplace protrudes from the general plane by 13 cm. Therefore, the foundation should be larger than the building itself by 10-12 cm on each side.
Trial fire
It is normal to light the stove for the first time, it is possible when the masonry is dry. It is necessary to perform the following sequence of actions:
- For 2 weeks, the stove is heated with small amounts of fuel, made from thin logs and wood chips. It is not advisable to completely cool the oven. The quality of heating is checked by placing crumpled newspapers in the cleaning channels. A small fire will not set the paper on fire, but how damp it becomes will indicate the quality of drying;
- The final one is also done gradually, you need to heat it several times a day, gradually increase the power of the flame, increasing the amount of firewood.
The frequency of cleaning the channels depends on the fuel used, generally this should be done 1-2 times a year. To clean smoke ducts, experienced stove makers recommend heating a Swedish stove with a fireplace with dry aspen wood once every 2 weeks. It is best to clean the pipe from soot manually, or using a homemade electric soot brush.
Preparing the base
Since the design of the furnace is quite massive, it is necessary to create a reliable foundation for its construction. Its depth must be determined from the regional characteristics of the area in terms of soil composition, the presence of moisture and its freezing. It is recommended to use deep foundation pits - at least 0.6-0.8 m.
When constructing the foundation, the following work algorithm must be observed:
- Dig a pit.
- Carefully compact its bottom.
- Place a 0.1-0.12 m layer of sand in the recess.
- Fill with crushed stone at 0.15-0.17 m.
- Install the formwork in that part of the foundation that will rise above the ground level.
- Build a monolithic foundation.
- Reinforce the entire thickness of the monolith being created using a mesh of reinforcement, which imparts rigidity to the foundation and reliability of its operation.
- Pour concrete solution into the pit. It is recommended to carry out this procedure in several stages, allowing the mixture to set. In this case, a cement-gravel composition should be used in the lower layers, and a sand-cement composition closer to the top.
- The elevation of the finished foundation above the floor level should be approximately 0.05-0.1 m.
- Roofing felt is laid on the base, providing the necessary waterproofing.
Manufacturing instructions
Building a cooking and heating stove out of brick should be done by people who have at least minimal skills in laying brick structures. The contractor is required not only to perform competent installation using the diagram, but also to follow safety standards. Like any stove, the Swede is a source of heating, and therefore is built taking into account the rules of SNiP: with safe indentations and the use of thermal insulating materials.
Site selection and preparation
The Swede is usually installed between two adjacent rooms; in this case, the firebox goes into the kitchen, and the wall opposite it goes into the adjacent room. The location for the stove is chosen taking into account its size and the following factors:
- Area of premises, location of doors.
- How the chimney will be installed, what are the features of the roof.
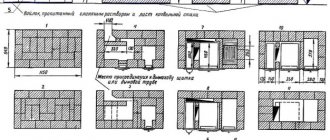
Example of ordering (layer-by-layer masonry scheme) Source pinimg.com
Furnace order
Following the instructions, such a unit can be built without much effort. The algorithm for making brickwork and arranging a chimney in the Shvedka stove assumes a certain sequence.
Row 1. The brick is laid on roofing felt used as foundation waterproofing. It is important that the first layer is laid evenly, since the harmony of the entire structure depends on it. To do this, experts recommend making markings on the roofing material using a corner, a long ruler and chalk. According to the outline of the installation it will be easy to complete the work.
Row 2. We construct the hearth of the fireplace using metal elements. After the construction of the “Swede” is completed, a grille is welded onto them. It is possible to mount a ready-made decorative product, which is attached according to the attached instructions.
Row 3. During installation of the third level, two metal doors are installed in the blower chamber and the cleaning compartment. To ensure the necessary fire safety conditions, they need to be covered with asbestos pieces or wrapped with asbestos rope. To secure the metal elements in the required place in the masonry, you need to thread steel wire through the hinges of the doors, which is fixed using bricks and cement composition temporarily placed around it.
Row 4. The bars are laid out according to the pattern. It is required to install perfectly even bricks on the sides of the doors, despite the protrusions of the metal elements.
Row 5. Fire-resistant silicate material is used to lay the combustion chamber. The grate bracket is placed on the solution. The oven box wrapped with asbestos rope is attached to it.
Row 6. The bars framing the fuel chamber are installed on the rib at the rear on the right side. They should not exceed 75 mm in height. The bricks of the back wall of the fireplace protrude 35 mm, and their lower parts are cut at an angle.
Row 7. The bars framing the fuel chamber on the right and back are installed on the edge. The bricks on the back wall of the firebox of the fireplace are extended another 35 mm and cut at an angle from below. To cover the combustion chamber, two steel strips measuring 50x5x530 mm are used.
Row 8. The firebox of the fireplace is closed. The bricks on the back wall of the chamber extend another 35 mm and are cut diagonally from below.
Row 9. Access to the firebox door is limited. The brick at the back wall of the chamber is cut diagonally from above. The bars extend inward another 20 mm and are cut diagonally from below. To cover the oven door, two steel strips measuring 50x5x480 mm are used.
Row 10. Access to the oven door is limited. The oven and firebox chambers are combined. The brick wall separating them is not placed in this row. A cutout is made to install the slab. A cleaning door is installed at the top of the firebox. A cast iron two-burner stove (410x710 mm), a cleaning flap (140x140 mm) and a corner at the entrance to the cooking chamber with parameters 50x50x5x1020 mm are mounted.
Row 11. We begin to form the cooking chamber. The bricks installed on the right side have a size of 210 mm. They cover the resulting gap between the stove and the right wall of the oven. The bricks above the fuel hole of the fireplace are protruded into the chamber by 40 mm and cut from below at an angle.
Row 12. The cleaning door is closed. The bricks of the front wall of the firebox of the fireplace extend inward another 40 mm and are cut diagonally from below.
Row 13. The bricks of the front wall of the firebox extend another 40 mm into the open hearth and are pressed together.
Row 14. On the front side of the structure we begin to make a mantelpiece. We move the bricks in this place to each of the three sides by 30 mm.
Row 15. We continue to make the shelf. We extend the bricks another 30 mm in each direction.
Row 16. Laying is done according to the diagram. The size of the oven at this level is 1020x890 mm. A corner (50x50x5x1020 mm) and three steel plates (50x5x920 mm) are also installed here.
Row 17. Cover the cooking chamber.
Row 18. Laying is carried out according to the diagram.
Row 19. We begin to form the upper flue ducts of the furnace. To clean them, two doors will be installed. We shift the jumper between the fireplace and vertical channels to the left by 30 mm. At the same time, we cut off the lower left and upper right edges of the brick diagonally. We install cleaning doors (140x140 mm).
Row 20. The jumper between the fireplace and vertical channels is shifted another 30 mm and cut obliquely as in level 19.
Row 21. We lay the cleaning doors. The fireplace chimney narrows by another 30 mm. In this case, the main vertical channel is blocked to the size of 3/4 of a brick, forming a shelf inside the space. A place is prepared for installing a cleaning door in the fireplace channel, then a 140x140 mm sash is mounted.
Row 22. In the area where the shelf is formed in the main chimney, a place is prepared for installing a cleaning door. The jumper between the channels continues to move to the left. A sash measuring 140x140 mm is mounted.
Row 23. The displacement of the structural element continues. The cleaning door installed at level 21 is closed.
Row 24. Cutouts are made in the bricks to install the fireplace damper. The cleaning flap installed at level 22 is closed. Two bars in the furnace channels are cut obliquely from above. A fireplace damper measuring 130x250 mm is installed.
Briefly about the main thing
The Swedish stove is a popular heating and cooking design that provides enough heat to heat your home and cook. There are various models of Swedes, not only with a stove, but also with a fireplace, oven or stove bench.
Regardless of functionality, they all require the use of high-quality, especially durable materials. You should not skimp even on clay for masonry mortar; reliability and durability of operation depend on it.
The oven is manufactured strictly according to a plan, including an order - a separate detailed diagram for each row. It is recommended to lay out the rows dry first, this will help to avoid mistakes. After the masonry is completed, the oven is left to dry, which includes a natural and forced stage.
Required Tools
To work you will need the following tools:
- Furnace hammer and pick hammer. They are used to process bricks. Splitting and hewing are impossible without a hammer. The pick, due to its shape, is suitable for punching holes. Also, sloppy seams between bricks are processed with a hammer if the mortar has already hardened.
- Trowel. The trowel mixes the masonry mortar, scoops up the mortar with it and distributes it over the surface.
- Joinings. This tool helps to process the seams between bricks, giving them a neat appearance. The joints have different cross-sectional profiles; they must be selected according to the size of the seam.
- Mortar shovel. Just like a trowel, it is suitable for mixing the mortar and distributing it over the bricks.
- Building level. For masonry, steel or wood is suitable. The level is designed to check the correctness of the horizontal row of masonry, and also allows you to determine whether the frames of the stove appliances are evenly placed.
- Square. Thanks to it, it is checked how correctly the corners of the masonry and the corners of the foundation are folded.
- Mooring cord. This thin cord is designed to check the symmetry of the masonry rows and the uniformity of the seams. It is used to determine the position of bricks.
- Rule. This wooden tool also determines how evenly the brick is laid.
- Plumb. Determines the uniformity of vertical brick laying.
- Wash brush. Grouting of surfaces occurs with it.
- Cycle and squealer. A steel scraper is necessary if the stove will be lined with tiles. With its help, tiles are cut. While grinding the cycles, it is struck with a hammer.
- Rasp. It is used to saw down tiles, and also removes sagging on the edges.
We recommend that you acquire all of the above tools before starting work.
Rating of purchased metal hearths
A corner fireplace stove made of brick is distinguished by a rather complex assembly and installation; the simplest are ready-made purchased metal hearths. In this table you can learn more about the most inexpensive and popular models today:
| Descriptions and characteristics | |
| Bayern corner | Installing such a fireplace is quite possible with your own hands. The fireplace body is made of steel, the thickness of which is six millimeters. The interior of the installation is lined with fireclay bricks. The sides are made of ceramics, and the power of the heating unit is 6 kilowatts, which allows you to heat a house with a total area of up to 50 square meters. |
| The model is based on small fireproof panoramic glass. The design itself is equipped with a small hob for cooking food on two burners. A power of nine kilowatts allows heating a house with a surface area of about 170 cubic meters. The sides of the model are also lined with panels made of refractory ceramics, which significantly increases the efficiency and heat transfer of the fireplace. | |
| The instructions for this model indicate the possibility of simple use. This firebox has a power of 6 kilowatts, which allows you to evenly heat a space with a total area of up to 50 square meters. Additionally, the fireplace is covered with heat-resistant paint, which significantly extends its service life and prevents the formation of rust and corrosion. | |
| Teplodar | One of the most powerful combustion chambers is 12 kilowatts. This heating unit is suitable for buildings with area up to 70-80 square meters. Fire-resistant glass ceramics are used to decorate the door. The main part of the structure is made of stainless steel. |
In order to become more familiar with the models presented in the table, we also recommend watching the video in this article.
Calculation of basic parameters
The construction of a furnace begins with drawing up a project and performing some calculations. To avoid troubles during the installation process, it is necessary to prepare project documentation. It will cost 100-200 rubles. If you need to create a complex project with a non-standard stove configuration, you may need to pay about 1 thousand rubles. However, you cannot save on this, since if you make mistakes you will have to spend a lot more.
When creating calculations, special attention should be paid to the parameters of the chimney duct. They are determined by the performance and heat transfer intensity of the equipment
To independently select the pipe diameter area, it is important to consider 2 parameters:
- Firebox size.
- Specific calorific value of fuel.
To calculate the first, you need to multiply the linear dimensions of the firebox; the second is indicated in the tables.
Table specific calorific value of firewood kW m 3
| Type of wood fuel | Humidity 12% | Humidity 25% | Humidity 25% |
| Poplar | 1856 | 1448 | 636 |
| Fir | 1902 | 1484 | 652 |
| Spruce | 2088 | 1629 | 715 |
| Birch | 3016 | 2352 | 1033 |
| Oak | 3758 | 2932 | 1287 |
| Aspen | 2181 | 1701 | 747 |
Table for choosing the size of the chimney according to the furnace power
| power, kWt | Pipe dimensions, mm |
| up to 3.5 | 140x140 |
| 3,5-5,2 | 140x200 |
| 5,2-7,2 | 140x270 |
| 7,2-10,5 | 200x200 |
| 10,5-14 | 200x270 |
| over 14 | 270x270 |
Required materials and tools
On thematic forums you can find many statements claiming that the construction of a Swedish stove is a simple process that does not require special skills or tools. However, for a novice master, the implementation of such a project may seem quite complicated. The construction of such a structure requires a scrupulous and responsible approach.
The builder must understand how to read blueprints and pay attention to procedures
It is also important to make the mortar correctly and have minimal mason skills. Next, you should lay the bricks evenly and adhere to technological rules
For the upcoming work you need to prepare the following materials and tools:
- Master OK.
- Hammer and rubber mallet.
- Plumb line or string.
- Rule and order.
- Tape measure, level, pencil or marker.
- Containers for mixing mortar and shovels.
To simplify the process, it is better to use electric tools.
Preparation of mortar for brickwork begins with carefully sifting sand and clay through a metal sieve with small cells
It is important to pay special attention to the choice of proportions and raw materials
Since simple clay is not able to cope with high temperatures, it must be replaced with a fireclay variety. Professionals use white, blue or dark blue clay for their work, which is located at a depth of 5-8 m. If you are going to prepare the component yourself, look for it on river banks or in deep washouts. The best option is a rock with medium fat content that does not contain sand.
The future solution must be soaked in a special container for several days until the lumps disappear and excess liquid seeps onto the surface of the sludge. When the water is removed, the consistency will resemble sour cream. If you apply it to the wall, it will harden as quickly as possible.
To determine the quality of the clay composition at the selection stage, it is necessary to carefully smell the rock. The presence of third-party odors indicates the content of organic components, which will begin to burn out when exposed to heat and reduce the strength properties of the masonry.
Foundation - monolithic concrete
Materials
Cement must be taken at least M400. The coarse aggregate can be crushed stone or gravel, the particle size of which does not exceed 30 mm. Sand with impurities of no more than 10% is suitable for concrete work. These include clay, mica, organic origin and dust particles. Impurities in coarse aggregate should be less than 2%.
The required materials for the foundation can be calculated based on the consumption per 1 m3 of finished concrete:
- Cement M400 - 325 kg/m3.
- Sand - 1300 kg/m3.
- Gravel (crushed stone) - 1300 kg/m3.
- Water - 205 l/m3.
Tools
To carry out concrete work, you must have a tool with which:
- lay the concrete mixture (shovel, trowel);
- compact (tampers, probe);
- smooth (ironing board, trowel, grout, iron, corner).
1 - dipstick; 2 — narrow tamper; 3 - round tamper; 4 — square tamper; 5 - ironing board; 6 - scraper; 7 - half-grater; 8 — ironing board
Sequence of concreting
It is very important to determine the depth to which you need to lay the foundation for the stove. It depends on the ability of the soil to resist loads on it (bearing capacity)
There are quite a lot of soils with weak bearing capacity. Under the influence of loads, they can change their original structure (subsiding loess and containing soluble salts, swelling clay, of biological origin, as well as water-saturated, increasing in volume in winter).
So, for example, for fine (silty) sands, sandy loams, loams and clays, in which groundwater is located above the depth of soil freezing, the bottom of the foundation is assigned below this level. The depth of freezing is determined based on the results of long-term observations.
1 - sand cushion; 2 - gravel; 3 — freezing depth; 4 - monolithic foundation; 5 - waterproofing; 6 — floor level; 7 - brickwork
This is the case if the house may not be heated in winter. If the house is heated throughout the winter, then the base of the foundation should be at a depth of more than 50 cm from the layout of the land plot.
In dense soils with good bearing capacity, the foundation can be concreted without formwork. Then a hole is dug exactly according to the size of the foundation. If the soil crumbles, formwork is necessary. It is made from coniferous or deciduous wood, which is not subject to warping. The boards are taken with a thickness of at least 19 mm and a moisture content of no more than 25%.
At the bottom of the hole under the foundation, a cushion at least 15–20 cm thick is made of sand and gravel, which is compacted.
Caring for freshly laid concrete consists of maintaining the required temperature and humidity. This is protection from rapid drying of the concrete surface in windy, hot weather using some kind of wet covering (burlap, tarpaulin, wet sawdust or sand).
Protection of fresh concrete from excessive moisture, drying, and cooling is carried out for one to two weeks in accordance with the outside air temperature. The most important thing is that the concrete gains at least half of its full strength.
The formwork can be removed only when sufficient concrete strength (50%) has been achieved. Most often, this occurs no earlier than 7–14 days at temperatures from +5 to +20 °C. The higher the temperature, the faster the strength gains.
Waterproofing is placed on top of the hardened concrete (2 layers of roofing material). The size of the foundation must be taken 100 mm larger at each edge of the furnace.
About the heat exchanger
When building a brick stove with a water heating boiler with your own hands, you should take into account many factors and calculate the project as a whole. Any type of materials and structures have their advantages and disadvantages.
There are several ways to install a water register in a furnace:
- Inside the hearth;
- In the chimney;
- In the body of the stove, next to the hearth.
Depending on the location, choose the material for the heat exchanger and its shape:
- Copper - effective due to the high thermal conductivity of the metal, but due to the low melting point of copper, constant circulation of water in the system is necessary;
- Steel - heat-resistant steel with a wall thickness of 4-5 mm is used for boilers. For long service life of steel structures, it is not recommended to drain water from them.
- Stainless steel is expensive, but the most suitable material for a boiler. The only disadvantages include the complexity of manufacturing.
When choosing the type of material and installation location of the heat exchanger, it is worth remembering that by placing the water circuit in the fireplace, in the summer the entire system will heat up; to avoid this, you will have to remove separate batteries to remove excess heat.
When installing a heat exchanger in the chimney, additional dampers are added to the stove design, which do not heat the boiler during summer operation of the stove. It should be taken into account that the heat exchanger must be larger in volume than when built into the fireplace. In addition, the boiler should not reduce the throughput of the smoke channels.
Calculation of power and dimensions
For normal heating of the room, it is necessary to correctly calculate the register area and its power. For a brick kiln, an approximate calculation is sufficient; it is impossible to make an exact one, due to many factors and variables.
It is known from practice that heating 10 m2 of space requires 1-1.5 kW of energy. From one square meter of heat exchanger you can get 5-10 kW. To determine the register power more accurately, you need to consider:
- Location of the coil in the furnace;
- Type of fuel - wood, coal. When burned, wood produces less thermal energy.
- Approximate temperature in the hearth and location of the heat exchanger;
- Average water temperature throughout the entire circuit;
- The heat transfer coefficient of the material from which the coil is made.
As the fuel burns, the power of the heat exchanger will decrease, so it is better to increase the calculated coil area by 10-15%.
