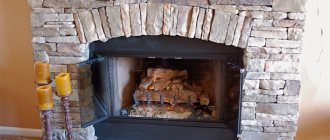
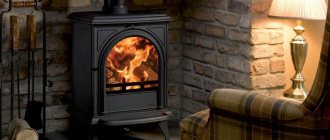
In recent years, the fireplace has ceased to be an exclusively classic element of the interior. Modern biomodels are made of metal and glass, and they run on environmentally friendly fuel that does not produce smoke or soot. Fireplaces are becoming a central element in the design of living rooms, libraries, bedrooms and kitchens. They replaced the bulky stoves on which food was previously cooked. Depending on their location, fireplaces are classified into four types: island, corner, built-in and wall-mounted. The most material is spent on the first type, since the unit is installed in the middle of the room and has four walls. The most economical option in terms of cladding and decoration is considered to be a built-in model. In the classic configuration, the fireplace consists of a firebox, a smoke collector, a chimney and a portal. We are interested in the last component, since it is this that is decorated with stone decor, wood, inlay, and plaster. More modern models of electric fireplaces are a box without any communications. Thanks to this quality, they are used in the design of not only country houses, but also city apartments.
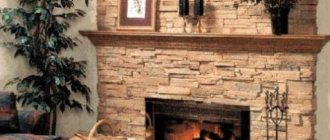
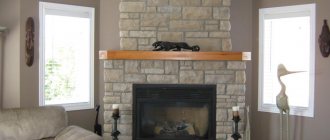
Decorating the fireplace with decorative stone returns the interior to its roots, that is, to the times when it was faced exclusively with natural, roughly processed materials. Such solutions are suitable not only for classic or ethnic styles. Modern loft, modern, Provence, Gothic go perfectly with stonework. It, in turn, is suitable for retro-style wallpaper and textured Venetian plaster. Natural stone has an impressive weight, and finishing is fraught with difficulties. There are now a number of high-quality imitations on the building materials market. Decorative stone for a fireplace is not inferior in characteristics to the original, and in some ways even surpasses it. In the article we will talk about how to choose a material from a variety of options and how to lay it correctly.
Artificial or natural stone?
Natural rock is a natural composite that is formed over many years from stone chips, marble powder and quartz, bonded into a single whole using polymer resins. This material was used in ancient times and it did not lose its relevance until the time when brick was invented. Artificial stone has some advantages over natural rock:
- The composite contains light fillers, thanks to which each block has a small weight. This feature of the material allows it to be used to decorate not only the fireplace itself, but also the accent wall on which it is located. Due to its heavy weight, natural stone is not recommended for use in decorating surfaces more than 1 m high.
- Stone for fireplace decor is easy to install, and its pliability and relative softness make it possible to sheathe structures of complex configurations.
- To cut the material, you only need a grinder, while cutting real cobblestone is not so easy.
- The affordable price for artificial stone has perhaps become its main advantage. For a very reasonable fee, you can decorate not only a fireplace, but also part of a wall or a doorway. Natural cobblestones require painstaking processing using special equipment, which results in a high cost of the material.
- Artificial stone is produced in various color variations. The ordinary breed has a meager range of shades. Stones of rare colors will be very expensive.
- The material allows the use of seamless technology when finishing, which is impossible when working with natural wood.
Although purchasing artificial stone for cladding seems like a great idea, it also has disadvantages:
- The natural rock has a unique pattern. No imitation can replicate the natural texture of the material.
- Real stone, due to its hardness, is not afraid of mechanical damage, and its service life varies from several tens to a couple of hundred years.
Although both materials, with the proper approach, allow you to embody the most original design ideas, artificial stone is more “flexible” in this regard.
How to veneer a fireplace with stone
Finishing a fireplace with stone is technologically not much different from laying tiles. The difference is in working with the material itself, but there are almost no technical features. The only thing is that when using natural flagstone, be sure to cover the fireplace with mesh. Without it it will fall off.
Finishing the fireplace with stone is one of the options
Features of working with artificial gypsum stone
This type of decorative stone is inexpensive and lightweight; it can be used to decorate fireplaces, especially without overloading the ceilings. There are only some nuances, without which you will not achieve a good result.
The technology for producing gypsum stone is such that each element has some irregularities, sagging, and protrusions. We grind them off with a knife, fortunately the plaster is cut without problems. We grind each cladding element so that at the back, around the perimeter, a frame is formed with an angle of 45° (or so).
Moreover, often the corner elements of the gypsum decorative stone are several millimeters higher than the ordinary ones from the same collection. In order for the cladding to look monolithic, this difference also has to be removed - grinded down. When all the cladding elements are adjusted, they can be glued into place. Heat-resistant glue is used for cladding fireplaces, although with the correct design it almost does not heat up.
Working with natural stone
Most often, fireplaces are faced with natural stone, sawn into plates. It is also called flagstone or stone tiles. The shape of all the fragments is different, you have to adjust it to make everything look beautiful. In this case, it is definitely better to first lay out the entire picture on some plane, select and process the elements. Only after the mosaic is complete can it be glued. The entire technology for installing a fireplace on the walls is described above and is practically no different. The whole process can be seen in the video.
Criteria for choosing decorative stone for finishing
When choosing the optimal artificial material, you need to pay attention to a number of nuances:
- The product must be well packaged.
- The surface of the material must be smooth. If the stone has a porous structure on the front side, then its production technology has been violated. Such material will not last long.
- Experts believe that the imitation must have “endurance.” In their opinion, the strength of the stone reaches its maximum values only after a month has passed from the date of its manufacture.
- The product comes with several certificates. Since the material is synthetic, it is important that these documents are available, because we are talking about finishing a surface that will periodically heat up. Production flaws will certainly affect the quality of artificial stone, as a result of which it can become harmful to human health.
- The packaging of a high-quality imitation must contain the name of the manufacturer and the date of manufacture.
Also, you shouldn’t buy artificial stone secondhand, since you don’t know where and by whom it was produced, how well it meets quality standards and how many years it will last.
How to properly unstitch seams?
To give the masonry a more natural and aesthetic appearance, the joints are completely filled with mortar. To perform jointing, it is better to use only branded jointing materials.
Do not use mixtures that are intended for laying tiles.
- To completely fill the seam, you can use a seam filling bag. You can do it quickly yourself, you just need to cut off 1 corner of a regular plastic bag, only the hole should be slightly smaller than the seam to be filled.
- Fill the bag with mortar (do not pour too much, the volume should fit in the palm of your hand), apply pressure and force the mortar into the seam. Try to avoid getting liquid on the front surface.
- We wait until the mortar in the seams begins to set, after which we need to remove its excess using a trowel and at the same time press it into the seam. Do not try to remove the sagging immediately after filling, you will only stain the front part.
- After removing the excess, you should finally clean the seams using a broom, which should be made of plant materials. Do not use solvents for cleaning.
- Jointing is an extremely important work process that completely prevents moisture from entering the surface. If moisture penetrates under the cladding, the surface may crack.
Tiles suitable for finishing
Not every type of tile is suitable for finishing a fireplace. Depending on the manufacturing technology and structure, the material is classified into several types. Each of them differs not only in cost, but also in characteristics, installation features and service life. The tiles are selected based on the characteristics of the room that is decorated with a fireplace.
For example, for a bathhouse they buy heavy-duty material that will not be afraid of high temperatures and high humidity. For the kitchen, an imitation with similar characteristics is selected. Living rooms, bedrooms, and offices are less demanding on tiles. Their microclimate is stable.
Terracotta
The main component of the tile is clay. The material attaches perfectly to any surface using ordinary liquid nails. Terracotta has high vapor and air permeability. This helps the decor absorb excess moisture in the room and participate in the formation of a favorable microclimate. Terracotta is used to cover not only fireplace portals, but also the facades of houses. The material is frost-resistant, so it is ideal for decorating rooms with unstable temperatures (for example, baths). The special texture of the surface allows terracotta to release heat for a long time, so fireplaces decorated with such tiles cool down more slowly. In terms of strength, the material does not lag behind stove bricks.
Majolica
Majolica is glazed terracotta. The additional glossy layer allows the surface to be cleaned with abrasive compounds, contact with which will not damage the tile. In terms of characteristics, majolica does not lag behind terracotta. It is also easily fixed to the surface, gives off heat for a long time, and can be used in any type of room. During production, the top layer of majolica is decorated with patterns. A wide range of designs allows you to choose the material to suit your interior design.
Heat-resistant clinker tiles
Clinker is made from several types of clay and fireclay powder. Natural dyes are added to the composition. The material is environmentally friendly. Since its structure is low-porous, it releases heat slowly. Frost resistance allows you to decorate fireplaces in houses and temporarily used baths. The thickness of the clinker varies from 0.9 to 1.2 cm. The tiles are strong, durable and insensitive to mechanical damage. The clinker is secured to the surface with liquid nails. Unfortunately, the material does not have the adhesion of terracotta, so during finishing they additionally use a reinforcing mesh.
Porcelain tiles
We owe the appearance of porcelain stoneware to the Italians. The technology for producing new facing material was first tested at the end of the last century. The monolith is non-porous, which significantly increases its service life. Porcelain tiles are made from marble chips, metal oxides, quartz sand with the addition of pigments by pressing under high pressure. The artificial material performed well during tests at low and high temperatures. This quality of porcelain stoneware allows it to be used when decorating fireplaces in steam rooms, in the kitchen and for finishing the facades of houses. The material can decorate a room with almost any style, as it is available in a wide range of color and texture options. The surface of porcelain stoneware does not fade under sunlight.
Tiles
Tiles are piece finishing parts made from special types of clay. Their surface is treated with glaze, which gives it a glossy shine. Due to the high cost, tiles never managed to become market leaders. Their manufacturing technology involves firing at high temperatures, which makes the material heat-resistant and durable. Tiles are characterized by high heat transfer, which is useful for those rooms where the fireplace is not just an interior element, but also an alternative source of heat.
Since tiles are very expensive, they can only be used to decorate a mantelpiece. For the rest of the portal, a cheaper material is selected, which will be combined in color and texture.
Let's start work
The beginning of fastening is a crucial moment.
As you start, so will you finish.
- At the beginning of facing the fireplace with stone, finishing is carried out from the corner. Laying should be done alternately, alternating long and short elements.
- First of all, attach the thickest tiles and use the minimum amount of mortar for this. This will help you in further work.
- To make the structure look more natural and aesthetically pleasing, the installation elements should be adjusted to size. To adjust the size, use wide nippers or a hacksaw. Try to mount the treated sides so that they are either below or above the viewing angle.
- Apply a layer of mortar about 1.5 cm onto the installation element. Use a trowel for this. Control the distribution of the solution on the surface; it should be completely and evenly covered.
After laying the mesh, apply a layer of mortar
- When laying the element, it should be lightly pressed and slightly moved to different positions by pressing. This will help to completely fill the seam and secure the element most correctly.
Seams are being adjusted
- When installing, the solution should protrude slightly from the seams.
- When carrying out seamless masonry, attention should be paid to the end seams. They must be completed. To do this, you need to apply the solution to the entire surface of the element (excess is removed during shrinkage). After squeezing out, excess mortar should be removed using a trowel.
- When attaching fasteners to a surface that is too dry or carrying out installation work in dry weather, the surface of the elements and the laying plane should be moistened using a sprayer or a paint brush. The styling elements can simply be placed in a container of water, and after 2 minutes in the water they are ready for installation.
- When installing elements seamlessly, they must be wetted, regardless of weather conditions.
- After the solution gets on the surface of the cladding, do not remove it immediately, let it dry a little.
Master class on laying tiles
Tiling a fireplace with your own hands is not that difficult. The entire finishing process will take 5-8 hours. The builder's high level of skill will significantly speed up the procedure. The grouting is done the next day, so you can get a beautiful, stylish interior element in just two days.
The finishing process is divided into three stages:
- Surface preparation;
- Cladding works;
- Finishing.
The process is completed by decorating the mantelpiece and part of the chimney if you plan to use wall decorations.
Preparatory work
Before tiling the fireplace, its surface must first be prepared. If the old layer of finishing has been removed from it, then the portal is cleaned of any remaining adhesive and leveled. Then the surface is degreased and small particles of dust are removed, which can subsequently affect the quality of fixation of the finishing material. The treatment is completed by applying a layer of mastic, which seals microcracks.
Tools and materials
For work you will need the following materials:
- Tile;
- Corner elements;
- Heat-resistant grout for joints and glue;
- Identical pieces of drywall to create even seams between elements.
The standard set of tools includes:
- Level and plumb;
- Latex gloves;
- Construction pistol;
- Grinder with a disc for cutting tiles;
- Comb spatula;
- Rubber hammer;
- Unnecessary container (bucket, bowl);
- Drill and attachment for mixing dry mixtures.
The list of materials is sometimes supplemented with special means for surface treatment after laying the tiles. For example, some use dirt-repellent agents.
Technology for laying tiles on the walls of the fireplace and exhaust pipe
The fireplace should be covered only after surface preparation has been completed. Start from the corners. They are fixed after measurements are taken. They will serve as a guide that will ensure that even rows of tiles are laid without distortions. Heat-resistant glue is mixed in a container. Then it is applied with a comb spatula to the back side of the tile. For better adhesion, the surface of the fireplace is also covered with glue in a similar way. Then a tile is applied to it and, after correcting the position, pressed with force. Finish fastening by tapping with a rubber hammer. To maintain a gap of the same width between the seams, pre-prepared pieces of drywall are inserted into them. It can be removed only after 12 hours from the moment the decor is fixed. If necessary, the tiles are cut with a grinder into fragments of the required size. A day after installation, you can start grouting the joints. The composition has a base white color, which is adjusted using special dyes. The grout is mixed with pigment according to the instructions, and then filled into a construction gun. Its nozzle is inserted into the groove of the seam and the mixture is carefully squeezed out, moving along the gap. The grout should be level with the tile, but not protruding above it. If some of the composition gets on a clean surface, there is no need to immediately try to wipe it off. The grout is removed after it has hardened using a screwdriver or knife. After 1.5-2 hours, the composition will begin to thicken and acquire the consistency of a dense paste. Now we begin to unstitch the seams, which is carried out using a regular flat-head screwdriver.
If the elements are secured using glue without mastic, then the “wrong” side of the finishing material is slightly moistened with water.
Fireplace plaster
Plaster is one of the simple and practical options for decorating a brick fireplace. A few years ago, plastered surfaces were whitewashed or painted. Today it is possible to apply a decorative layer with different textures on top of ordinary plaster.
Finishing a fireplace with plaster can be fragmentary
Types of plaster for fireplaces
Finishing a fireplace with plaster is popular for the reason that any design can be developed. The second plus is that if everything is done correctly, you can achieve a smooth surface, the finish is beautiful and durable. For plastering fireplaces, the same compositions are used as for brick stoves. Although the heating temperatures of the surfaces differ, the plaster mixtures are made the same. There are two options: make the plaster composition yourself or buy a ready-made one. If you don’t have experience working with clay and determining its fat content, it’s better to buy one. Store-bought plasters for fireplaces and stoves contain additives and additives that make the surface more durable and cracks are less likely to appear in it.
Mixtures for fireplace plaster
As a rule, each manufacturer has two formulations with different properties. The first is basic, for rough finishing. It can be applied in a fairly thick layer - up to 10 mm. After drying, the second layer is laid - the finishing layer. It contains more finely ground substances, is applied in a thin layer - usually up to 3 mm, and the surface is smooth. Such a surface can already be painted if it has been plastered smoothly) or decorative plaster can be applied.
If you want to finish the fireplace at a minimal cost, you can make plaster compositions from clay, sand and lime yourself. But, let us repeat once again, without experience working with clay, it is difficult to ensure that homemade plaster does not crack. Compositions for plastering a fireplace for making them yourself are different, here are a few proven ones:
- Clay-lime: 1 part clay and slaked lime + 2 parts sand;
- based on slaked lime - 2 parts lime, one part gypsum and sand.
To make the fireplace plaster solution more durable, reinforcing fibers are added to it. Previously, it was finely chopped straw, later - asbestos fibers, and today glass or fiber fiber is mainly added. The fractional part of this additive is small - 0.1-0.2 parts. It is added to the dry components (cement and sand), and everything is mixed. The dry mixture is added to the clay and/or lime dough, mixed thoroughly again, and water is added if necessary.
It is better to take lime already slaked, in the form of lime paste. If you extinguish it at home, unreacted particles always remain, which are then extinguished during the operation of the fireplace, destroying the plastered surface. Regarding sand, its quantity is precisely selected depending on the fat content of the clay. The solution must be sufficiently plastic. The fat content of the solution is checked using a piece of wood. Dip it into the solution and remove it. If an even layer 2-3 mm thick remains on the surface, the solution is normal. If the layer is thick and lumpy, you need to add sand; if the stick is almost clean, add clay.
Normal fat solution
The clay is pre-soaked (2 days or until all the lumps are limp), then rubbed through a metal sieve with a mesh of 2 cm. The ground clay dough is once again pressed through the mesh, but with a fine mesh of 0.5-0.7 mm.
You need quarry sand, it must be clean and dry. It is also sifted before use.
For those who don’t want to deal with homemade compounds, here are several companies that produce plaster for fireplaces and stoves. The following compositions performed normally:
- Plitonite super fireplace refractory;
- Petromix KU;
- heat-resistant Terracotta plaster;
- Bossnab;
- RS Parade;
- rtner;
- Kiln plaster HEFNERPUTZ.
The list includes both domestic and European manufacturers. This is not to say that Russian compounds are worse, but working with imported ones is easier.
Features of plastering stoves and fireplaces
The technique of applying the solution itself is no different: a certain layer is applied (sprayed) with a spatula or a special ladle, then leveled (possibly using beacons). The main points are to prepare the fireplace surface for plastering:
- First, all old finishing, if any, is removed from the walls - paint, lime, remains of plaster, mortar, etc. Only clean brick should remain.
- For better adhesion of the plaster mortar to the surface, the seams are deepened by about 1-1.5 cm. Take jointing, a chisel or a screwdriver and scrape out the mortar in the seams.
- All existing cracks are sealed with a repair compound or heat-resistant sealant (which can withstand heating up to 800°C).
- When everything is prepared, take a brush with long bristles and clean the surface well. It must be clean.
- The following are the options: If the surface of the fireplace is relatively flat (the difference is less than 5 mm), you can wet the walls and begin to apply plaster.
- If, due to the curvature of the surface, the layer will have to be made more than 5 mm, reinforcement is necessary. A metal mesh with a fine mesh is stuffed onto the walls of the fireplace. It is secured with nails, which are driven into the seams (the seams can be left unstitched, or stitched, but not so deeply). To ensure that the caps hold the mesh, metal washers larger than the mesh size are put on. Plaster is applied over this stack. In this case, you can be sure that the plaster will not fall off.
Fireplace after plastering
Before you start plastering the fireplace, carefully read the instructions on the package. It usually describes under what conditions and how the plaster should be applied. But experts advise lighting the fireplace, heating the walls to 60°C, then moistening the surface and starting to plaster. The walls are heated so that the brick takes on its “working” dimensions. In this case, there is less chance that the plaster will tear when heated. Wetting with water is necessary to ensure that the solution is not too dry: brick is hygroscopic. If it is dry, it quickly draws water out of the plaster mortar and it becomes too dry and does not harden to its normal state. The result is cracks on the surface.
A few more points regarding drying. When plastering a fireplace, at least two layers are applied. The second can be applied only after the first has dried completely. To speed up drying, you can create a draft, but you cannot light the fireplace. The same applies to the second - finishing - layer.
For the technology of plastering stoves and fireplaces, see the following video.
Preparing the fireplace for finishing
You can lay artificial stone on almost any surface, but each of them imposes certain requirements on the finishing process, and you need to understand them before finishing the fireplace with decorative stone.
The most important rules for cladding different surfaces are as follows:
- When finishing wooden surfaces, you need to take into account their exposure to moisture. To neutralize its impact, the surface must be treated with a suitable waterproofing material before finishing.
- It is necessary to install a plaster mesh on the surface. The mesh is fixed with self-tapping screws, which are screwed into holes prepared in advance in the fireplace. It is recommended to cover the caps of the screws with washers - they ensure reliable fixation of the mesh. The attachment points should be positioned so that the distance between them vertically is about 15 cm, and horizontally - about 5 cm.
- Plaster is applied over the mesh. The minimum permissible thickness of the plaster layer is 1 cm. After application, the plaster must be left until it hardens completely, and only then can finishing be continued.
- On concrete and metal surfaces, preparation is carried out in exactly the same way, but there is one difference - there is no need for waterproofing, since these materials are not afraid of moisture.
- Before covering the fireplace with decorative stone, surfaces made of brick or concrete should be marked with notches.
- Regardless of what material was used to decorate the surface of the fireplace, the lining can only be laid using a solution that can withstand high temperatures. The best option for rough finishing is clay, the characteristics of which fit perfectly into high temperature conditions. You can also use a combination of cement and fireclay.
Artificial cladding details
If you want not to overload the brickwork, you can choose inexpensive faux finishes for fireplaces. Gypsum stone is produced by casting, which leaves sagging and irregularities on it.
Each element must be processed with a simple construction knife. The corner parts must be turned especially carefully to make them look beautiful; they are made at an angle of 45 degrees at the joints. When all the pieces are prepared and laid out on the floor, they can be taken in order and glued to the bricks using special heat-resistant glue.
Numerous photos of fireplace decoration show original examples of combinations of different types of materials. The stonework is perfectly complemented by a shelf made of carved wood, and decorative plaster creates unique compositions with ceramics or artificial stone.
Tiles and porcelain tiles in the fireplace surround
Selecting heat-resistant ceramic tiles for a fireplace is not entirely easy. There are cases when the glazed surface very quickly becomes covered with small cracks, which spoils the aesthetic appearance and complicates the cleaning process.
In order not to take risks, it is better to spend time, and sometimes a little more money, but find materials specifically designed for decorative finishing of fireplaces. These include the following types of finishing ceramics:
- terracotta - is a thick ceramic tile without glaze, its technical characteristics are close to brick;
- majolica is a type of terracotta tile, with a complex production process in which the front surface is covered with reliefs and painted with multi-colored glazes;
- clinker heat-resistant tiles, made from a complex recipe of a mixture of different clays and fireclay, have a noble color of fired ceramics from burgundy to light gray;
- porcelain stoneware - is a product produced using ceramic technologies, but with the addition of fine stone chips, quartz dust and coloring pigments;
- tiles are thicker ceramic parts that are embedded in the walls of the portal during construction work and fixed by securing wire.
How to treat the main surface before finishing
This work is performed in several stages, which we will consider in more detail:
- First, we completely clean the base surface, regardless of what material it is made of.
- If the base surface is made of brick, then it should be cleaned of dust and primed. It should be dry and even.
- If there are significant irregularities, then it is worth plastering the surface first.
- Before starting work, you should lay out the drawing and arrange all the elements in the desired sequence.
- Do not glue decorative stone without first trying it on dry.
- Always lay out a row and check the configuration before you start gluing. Don't neglect this. All parts should be adjusted before gluing.