Some stoves require decorative finishing. If funds allow, you can decorate them with natural materials. Since this solution is not for everyone, many choose to line the stove with artificial stone. This option has many advantages.
The article discusses the types of suitable materials, issues of base preparation and installation. Using the instructions, you can finish the oven yourself. But even if do-it-yourself cladding is not included in the plans, the information will help you not make a mistake in choosing a stone and monitor the work of a specialist.
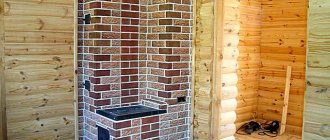
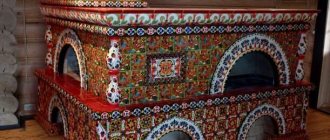
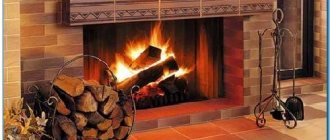
Figure 1. Stove lined with artificial stone in the interior
Advantages of artificial stone
Natural stone is expensive. In this, the “fake” has an undoubted advantage. But cost is not the only advantage of artificial stone. Among the advantages of the latter:
- relative ease of installation; finishing with tiles or stone slabs requires high qualifications; strict dimensions of materials make the slightest miscalculation fatal - a clumsy result is guaranteed;
- artificial stone can be different, and a clear geometry may be present in this case as well; but nothing prevents you from purchasing a stone with shapes close to natural - hence there is no need to maintain “mathematically” even seams;
- inclusion of light fillers in the composition, which are responsible for significantly lightening the finishing structure; this is important because the stone is characterized by considerable thickness, and excess weight would reduce the adhesion (adhesion) of the coating to the base;
- the opportunity to not limit the flight of imagination in any way - the market is replete with offers for every taste;
- no need for expensive professional tools; natural stone and ceramic tiles may require professional equipment; artificial variations can also dictate similar requirements, but a stone with a ragged silhouette is a completely different matter.
Characteristics
If we compare natural stone and gypsum, we can note a number of advantageous characteristics. Externally, it is almost impossible to distinguish a natural version from an artificial one; the latter looks very decent. But for interior decoration of an apartment, decorative material is also convenient because it is much lighter than its natural counterpart. This means that installation is much easier. The load on the wall is small, and accordingly, the material will hold better.
You can make the facing stone yourself. To reduce the cost of processing the material, you can initially produce a stone with a smooth surface.
Gypsum stone is more resistant to negative influences than its natural counterpart. The artificial material is easy to clean and is resistant to stains. A varied color palette allows you to choose the best option for finishing.
In order to create such a finishing material with your own hands, you need to use anhydride, gypsum, water and the necessary form. It is best to use a silicone base for these purposes; it is more pliable and plastic, and therefore the finished stone looks more natural. But along with silicone molds, metal, wooden, and plastic containers are used. However, this process is labor-intensive and time-consuming. Therefore, it is more familiar and convenient to use a ready-made stone.
Types of stone suitable for stove finishing
Figure 2. Artificial stone options
*
There are many types of artificial stone. Not all of them are suitable for cladding bases that are subject to temperature changes. Let's consider the suitable ones.
Porcelain tiles
Artificial stone is another common name for ceramic granite. Visually, the material does not have to resemble at all what it is associated with. Rather, it is an analogue of ceramics or glass. However, in terms of strength, porcelain stoneware is superior to both and natural prototypes. Being fired in a kiln at high temperatures, the material does not react in any way to the thermal effects of the fireplace. He doesn’t care about mechanical load either – within reasonable limits.
There are several types of ceramic granite. If you wish, you can find hundreds of collections that imitate stone not only at the level of physical and chemical characteristics, but also externally. There are materials with both strict geometry and a “natural” silhouette. You can use any slabs, but the latter type is preferable for those who decide to finish the stove themselves.
Porcelain stoneware contains various types of clay, feldspar, mineral additives and pigments. The multi-component mixture is pressed under enormous pressure and then fired at temperatures above 1200 degrees. This provides excellent strength characteristics.
concrete stone
One of the most popular types of artificial stone, which is most often used when decorating stoves. The composition includes sand, cement, dyes, plasticizers, fillers and water repellents. Materials of this type are distinguished by good contextual indicators and accessibility - lining the stove with concrete artificial stone will not strain the budget.
Gypsum-based stone
It has excellent strength characteristics. Any imitations are possible. Due to the properties of gypsum, it is well suited for lining heated surfaces.
Traditional methods
The first 3 points and positions in Fig. and in the list above - traditional methods of facing fireplaces and stoves. The best of them, but the most expensive and complex, is finishing with tiles; it increases the efficiency of the stove by 15-17 percentage points. For example, if the initial efficiency of the stove is 60%, then after tiling it will reach 70%; For this reason, we will return to tiling later.
Finishing the furnace with dry-molded facing bricks gives an increase in efficiency of 7-9 percentage points. provided that it is carried out at the same time as the construction of the furnace, i.e. decorative brick cladding was included in its layout at the design stage. Otherwise, when lining an already standing fire (running) stove, an increase in efficiency is possible, as when lining with terracotta, up to 5 percentage points. The facing brick is then mounted on the fireplace/stove structure in the same way as stone (see below), but the labor-intensive procedure of its preliminary laying is much simplified.
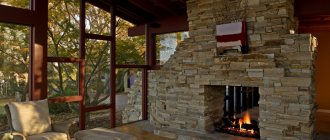
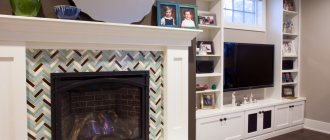
Brick cladding of heating devices
When using a modern insulated fireplace insert with glass and a standard chimney for it, a small fireplace can be made entirely of face brick, pos. 1 in Fig. on right. Just not silicate, in Fig. just light! And a stove or stove-fireplace with a lining of red facing brick under a simple worker fits well aesthetically with majolica, pos. 2. However, these and other types of “brick” decor can be achieved more easily and cheaper by facing with terracotta and clinker. But before moving on to them, let's linger a little on the plaster.
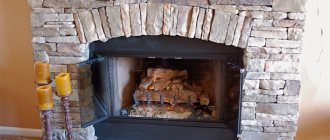
Stove/fireplace plaster
Plastering a fireplace or stove allows you to achieve good aesthetics of the device in various types of interiors, see figure, but it is very labor-intensive even for simple white plaster. Decorative plasters, e.g. Venetian or polished stucco, you will have to leave it here altogether, this is a separate complex topic. In any case, the main obstacle when plastering a stove/fireplace is cutting the seams. If the appliance and masonry mortar in the joints are sintered into stone, preparing its surface for plaster becomes not only long, but exhausting, requiring extreme attention and experience so that a crack does not appear in the joint.
Cladding stoves and fireplaces with plaster
Next, the plaster mass needs lime. Even in the conditions of a fireplace shopping center, gypsum soon begins to lose water of crystallization, causing the plaster to dry out. The addition of vermiculite does not help, it only worsens heat transfer. In general, the procedure for plastering a fireplace or stove is as follows:
- The parts of the furnace structure to be lined are cleaned of the previous finish until there are no traces of it; the last residues are removed with a steel brush.
- The surface under the plaster is moistened by applying lightly moistened burlap or technical cloth for 1-1.5 hours.
- Masonry joints are cut to a depth of 9-10 mm with a narrow chisel for cutting out grooves - a cross-cutting tool - and light blows of a hammer.
- If the device was previously in use (heated), it will not be possible to cut the seams to the required depth right away: picking at dry clay mortar is unacceptable! In this case, wetting and cutting are repeated several times.
- The surface with cut seams is carefully brushed to remove dust and crumbs, then moistened with a plaster brush.
- Prepare a primary (starting) plaster solution with the consistency of medium-thick sour cream.
- The starting solution is used to fill the cut seams and the base surface to a thickness of 4-5 mm.
- After the primary plaster has dried, the same finishing solution or decorative plaster with the consistency of very thick sour cream or soft plasticine is prepared.
- The finishing plaster is applied in a layer of the same thickness.
- After the plaster has completely dried, a full cycle of putting the furnace into operation (starting up) is carried out: drying, a series of accelerating fireboxes, a test firebox.
Material selection criteria
Figure 3. And a few more variations of the stone
*
When choosing stove stones, you need to pay attention to the following aspects:
- price; very often the price of imported materials is higher than domestic ones - despite the fact that the quality is no better; This is far from an axiom, but it is recommended to take a closer look at the market;
- compliance of the slabs with the necessary requirements; first of all, the stone must be heat-resistant - otherwise the coating will not last long; the material must be strong and wear-resistant, preferably chemically inert; the packaging contains markings declaring the most important characteristics;
- date of manufacture; no, we are not talking about “delay”, but quite the opposite - too “fresh” concrete materials are not yet ready to become finishing materials, especially in the context of lining furnaces.
Remember! The lower your qualifications, the more desirable the blurry shape of the slabs. This will hide the flaws that will inevitably occur when installing it yourself.
Preparing the base
The choice is made, the stone is in place. But this is not enough for finishing - first you need to prepare the base. It should be smooth and durable. If the stove is not new, you will have to first remove the old coating. It is necessary that the base remains clean after dismantling. Grease stains, pieces of mortar, tile or paint residues must be removed. In the case of surfaces subject to heating, this aspect is very important - it is necessary to ensure maximum adhesion of the plaster mixture to the base and glue to the plaster.
The adhesion will be better if the brick seams are deepened. This can be done simply and quickly using a grinder and a diamond blade. A 5mm recess is sufficient. After the basic preparatory work, you need to check whether the base is loose. To do this, go over the surface and seams with a metal brush - nothing should crumble.
Left:
- saturate the walls with a primer - this will strengthen the base and enhance the adhesion of the materials;
- reinforce the base - this is also necessary to strengthen the ligament; as a reinforcing layer - plaster mesh;
- moisten the prepared surface generously with water; ignoring this point will lead to the fact that the base will absorb most of the liquid from the plaster - this will have a very negative impact on the strength of the latter.
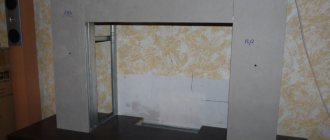
Installation subtleties
This stone can be laid on any surface, even wood and drywall. Only in this case additional surface preparation is required. For a wooden wall, it would be appropriate to install sheathing and waterproof it. With concrete and brick surfaces everything is simpler, but careful leveling of the surface cannot be avoided. It should be clean and smooth.
Walls are different everywhere, it is necessary to take into account all the nuances.
- The walls are cleaned of dirt and dust.
- Cracks, irregularities, and holes are repaired using putty.
- If the walls have pronounced unevenness, you need to use drywall.
- Carefully seal all joints and cover the surface with putty.
- Then coat with primer, if necessary, do this twice, waiting for the first layer to dry.
- Treat the wall additionally if there is fungus on it. It is not enough to simply remove it; you need to dry the wall well, then treat it with a primer.
- If there is old coating on the walls, it must be completely removed. This applies to paint, wallpaper, decorative plaster.
The prepared surface is treated with a primer. Rooms with high humidity are treated with a special composition that prevents the appearance of fungus and mold. You can glue the gypsum stone using a cement-adhesive mortar, which is applied to the wall with a notched trowel. The glue dries very quickly, so there is no need to dilute a lot at once. You should try and get used to how much you can use in a certain amount of time.
This is a very important point, because the quality of the glue determines how the decorative elements will stick. It can be of several types.
- A dry mixture based on cement. Provides good adhesion of the material to the surface, but shrinks.
- Dry mixture with a gypsum base. Most suitable for gypsum tiles due to its composition.
- You can use glue that is available for tiles, as well as liquid nails and mastic. Each composition contains instructions for the preparation and use of the material.
To lay out the panels efficiently, you must first make markings. To do this, you need to use a level and draw a line along which the first row will be laid out.
Laying begins from the bottom corner to the central part. The stone can be laid in even or uneven rows, leaving seams, which are then sealed with grout having a gypsum, alabaster, or cement base. When working, use a narrow spatula, act carefully, trying not to cover the tiles. If the surface gets dirty, you should immediately remove the solution with a wet sponge.
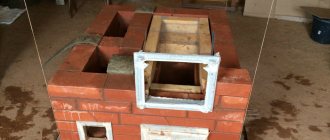
Leveling the oven base
Figure 4. Preparing the stove base for finishing
*
Theoretically, you can do without plastering. It is quite possible to line the stove with stone and mortar. But this is the last century - today there are many special heat-resistant mixtures on sale that increase the service life of the coating. And the consumption of such compounds is regulated by technical and financial considerations. Accordingly, the base should be as smooth as possible.
For those who want to work the old fashioned way, here is a recipe for mixing a heat-resistant plaster mixture:
- sand;
- cement;
- clay;
- water.
The ratio of sand, cement and clay is 0.2/1/3. Water is added according to the situation - the consistency depends on the layer of mortar and the size of the slabs.
However, it is more advisable to purchase a ready-made mixture. It is distinguished by a more precise composition and strict mixing. There are many options on sale.
Important! Carefully study the packaging - the composition of the mixture and instructions. Both dry plaster and tile adhesive must be heat-resistant
We recommend reading about how to properly plaster in articles devoted to this process. It is important to heat the stove before work, and then let the finished plaster sit for several days. This will increase the service life of the coating and avoid the appearance of cracks.
It will also be useful: barbecue oven - types and characteristics.
Choosing tile adhesive
Figure 5. Options for “stove” adhesive
The stone is laid on tile adhesive. We will not repeat the importance of resistance to high temperatures. But this is not the only criterion for choosing a composition.
Artificial stone is usually not large in size. But if the oven is lined with dimensional materials, you need to take care of adhesion. In such cases, you need to purchase glue designed to work with heavy slabs. And in general, it’s better not to skimp and buy a mixture with excellent grip.
If the base is properly prepared, the glue calculation is carried out according to the diagram specified in the instructions. Otherwise, the quantity must be adjusted taking into account deviations of the furnace surface from the plane and vertical.
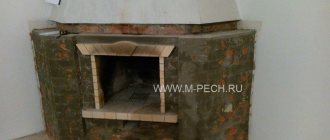
Brick cladding
Here are several options for facing a fireplace with brick.
Our user with the nickname Chairman carefully decorated the fireplace with red brick and placed emphasis on the decor of the casing.
Here is an interesting option for decorating a fireplace from our participant with the nickname petr038, with wooden shelves (this is 100x100 timber).
The top beam did not change from the heat of the fireplace, the varnish on the bottom became more matte. For a year and a half of using the fireplace, nothing cracked, fell off or caught fire.
Here is another example of a successful fireplace fireplace lining with brick.
SpodmvFORUMHOUSE Member
Here is an example of such a design: “Promo-700” firebox, VKSM brick, dome - according to the usual pattern, lined with porcelain stoneware and Kamrok stone.
This fireplace has been heating the house in the off-season for seven years, the finish is like new.
The customer uses the fireplace to heat the house in the off-season (the house is connected to the city heating system), it has been in use for 7 years, there are no complaints.
Tools needed for oven adhesive finishing
*
Figure 6. Tools for laying artificial stone
For stone cladding you will need:
- level (laser, water or bubble);
- grinder for cutting stone;
- spatula for applying the mixture;
- notched spatula (comb) for forming an adhesive layer;
- rubber spatula;
- rod or rule;
- tile wedges;
- foam sponge.
If the stove needs to be tiled with porcelain stoneware, a tile cutter will not hurt. It makes it much easier to cut tiles evenly and without chipping. A tile cutter cannot cut torn stone, and the effects of working with a grinder on it are almost invisible.
It is better to mix the glue with a mixer or a drill with a mixing attachment. But if you don’t have a drill, you can knead by hand. It is not recommended to do this - it takes a long time and is of lower quality, but not critical. It is only important to bring the mixture to the maximum possible homogeneity.
We do not mention small tools. Surely there is a tape measure and other little things in every home.
Marking the base
Where to start? And how to ensure even seams? Marking the walls helps with this. It is necessary to determine the starting points of installation. To do this, use a laser or water level. The latter option is preferable if you have a limited budget. It is in no way inferior to the technological version. Plus, in a small area, using a laser does not have any pronounced advantages.
The following recommendations will help you understand where to start and how to work:
- in most cases you need to start from the corners (at least there should be whole elements in the corners);
- with seamless cladding, it is better to lay the stone from the bottom up, and when laying with subsequent jointing (especially when laying porous slabs), it will be more convenient to go from top to bottom - this way the slabs will not become dirty;
- whole slabs - the most visible places; usually these are the top and corners, but you need to look at the situation;
- Usually the bottom row is left for last - it is more convenient to cover the floor with trimming, rather than adjusting the floor covering to the stove stone.
Based on this, the starting points are determined. After this, either lay the first row along the laser mark, or pull the beacon cord (according to the marks).
Recommendation! When laying from top to bottom, it is advisable to use an adhesive with low fluidity. In this regard, the compositions differ from each other - there are also those that do not allow the tiles to “float”, while maintaining plasticity for half an hour
Laying process
Figure 7. Laying stone on the stove
The cladding process is easier to demonstrate in the format of a list with recommended points:
- It is better to apply glue both to the stone and to the base; in one case, the glue is immediately removed, leaving a minimal layer; in the other, the mixture is leveled with a notched trowel, forming a layer of a given thickness on all slabs;
- the stone must be gently, but with force, pressed to the base;
- corner areas must be completely filled with glue - voids are fraught with destruction of the coating;
- when working with elements of different sizes, it is necessary to alternate slabs - this will give a natural-looking cladding;
- special attention to the first row; the result depends on how well the start is set;
- when laying from bottom to top, a rail is used to fix the first row; when working with slow-flowing glue, you don’t need to use a support, but you will have to let the mixture set a little in order to continue lining;
- to form seams, use tile wedges, crosses or any other auxiliary elements;
- when using stones of different thicknesses on the same plane, you need to start from the thickest slabs;
- the more porous the stone, the more carefully you need to work - glue that gets into the pores is very difficult to remove;
- cladding with flat slabs must be periodically controlled with a batten or rule; tiles with complex terrain (for example, cobblestones) do not need this.
*
Preparing a place for the fireplace mantel
A 4 cm thick wooden mantelpiece should be hidden in a groove. Draw a line at a height of 4 cm from the surface along which the stone will be laid.
Marking the mantelpiece
Trim the corner along the line
The groove for the mantelpiece is ready
Work in progress
cutting
Figure 8. Options for cutting stone and tiles
Stone on a concrete base is cut with a grinder with a diamond wheel. When laying ceramic granite, use a specialized tool - a tile cutter.
When decorating the corners of stone cladding, do not use tiled corners. Instead, they make a bevel - they cut the sidewalls at an angle of 45 degrees. On an industrial scale, electric tile cutters are used for this purpose, but in our case, a grinder is sufficient. If the stone is soft, the process does not require much effort and high qualifications. Cut corners can be effectively joined to each other.
How to care for tiles
Any finishing tile is moisture-resistant, heat-resistant, and does not require special care. Periodic wet cleaning using detergents is sufficient. It is not recommended to use a hard sponge, scraper or other devices that can damage the surface of the elements.
Some types of facing tiles are washed with alcohol or solvents. The manufacturer indicates proportions and recommendations for the preparation of cleaning mixtures on the packaging of the material. To care for seams filled with epoxy mixture, you can use any cleaning compounds. If the seam is treated with cement, use only gentle solutions that do not contain abrasives or acids.
Grouting and jointing
Figure 9. Grouting seams using a ball
For aesthetic and hygienic purposes, the seams are jointed - filled with a durable heat-resistant grout mixture. There are two main options for jointing - using a rubber spatula and using a syringe (or its replacement - a regular bag with a hole).
The trowel is suitable in situations with smooth stone and thin joints. Wide joints and porous tiles are the reason to turn to another option.
The process of jointing with a spatula:
- the grout is applied with a spatula using diagonal (relative to the joints) movements;
- the fugue should fill at least 2/3 of the seam thickness;
- without allowing the grout to set, its excess is removed from the surface of the stone, and a fugue at the joints is formed using a finger or, for example, a piece of wire;
- The coating is polished using a foam sponge.
The process of jointing using a bag:
- You should fill a strong cellophane bag with the mixture and cut off one corner; it turned out to be an analogue of a syringe, with which the grout can be squeezed into the seam;
- avoiding the fugue getting on the surface of the stone, fill the joints with it;
- after filling a certain area, the joints are embroidered in the same way - using a round object of suitable diameter.
Painted brick
Another option is not to plaster the stove or varnish the bricks, but to paint them. This is what our user with the nickname adi-vrn did, and many, having seen such a successful example, wanted to try painting the bricks of their stoves.
adi-vrn
I removed all the plaster, opened the seams, grouted it with terracotta grout and painted it with lime with the addition of black tint and salt. It turned out to be a great gray color.