The implementation of modern interior styles, with the exception of the loft, does not allow the display of engineering communications. Therefore, when carrying out repairs, you often have to decide how to cover the heating pipes in the room, where to hide the risers going upstairs to the neighboring apartment. The article describes the simplest ways to solve this problem and provides valuable advice on how to choose a camouflage method.
Masking heating pipes Source pilorama-chita.ru
How can you decorate batteries?
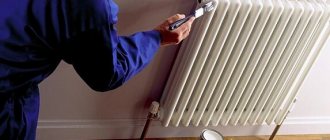
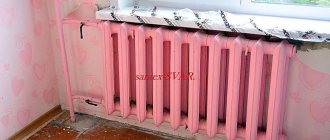
The easiest way to decorate a radiator is to paint it. It is not at all necessary to choose white color - the paint can be any color. Before this, you need to dismantle the radiator, remove rust, degrease with acetone or burn with a torch or blowtorch.
Interesting materials:
How to get an EDS key for your phone? How to get digital signature online 2022? How to get digital signature online via phone? How to obtain Jewish citizenship? How to get a European passport? How can a Ukrainian obtain European citizenship? How to obtain Finnish citizenship? How to get a Finnish visa in St. Petersburg? How to obtain French citizenship? How to obtain German citizenship?
Six different ways to hide pipes
Heating communications spoil the appearance of the room, they do not fit well into the decor of the room, therefore, if possible, many try to hide or disguise them. This can be done in different ways.
The loft style allows for display of utilities Source pinterest.com
Hidden broach
If you ask a builder or a craftsman specializing in apartment renovations how to cover a pipe in a room beautifully, he will definitely advise you to make a hidden broach. Its implementation becomes justified when a major overhaul is carried out and communications are assembled from scratch using new modern materials.
The groove is cut with a grinder Source sevparitet.ru
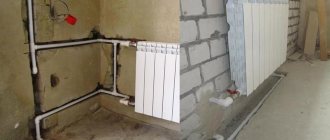
To do this, first, horizontal and vertical channels (grooves) are cut out in the wall with a grinder, then the plumber lays pipes directly into them, brings them to the heating devices and completely connects the entire system. The entire wiring remains deep in the wall; it is covered with plaster on top, so the technical filling becomes completely invisible.
When pipes are laid hidden, they are hidden in the wall Source uyut-remont.ru
Note! Before hiding communications in the wall, the pipes must be covered with insulation. If this is not done in the presence of coolant, condensation will accumulate on the surface of the wiring. It will cause wet spots to appear on an already repaired wall.
Thermal insulation of utilities in front of a hidden screed Source trubservice.ru
This option for masking heating pipes has its pros and cons. When the pipes are completely hidden, the appearance of the room is transformed and becomes more beautiful. Nothing prevents you from placing furniture close to the walls and building an even line with the furniture. But the practice of operating such premises shows that in the event of an accident it will be impossible to eliminate the leak. It will be difficult to discover where it formed. If this happens in an apartment building, there is a risk of flooding the neighbors. This threatens a scandal and large expenses for compensation for damage to other people's property.
The absence of heating pipes streamlines the interior Source www.stroykat.com
The risks of accidents are high even when polypropylene pipes are used to assemble the pipeline. In this case, fittings are used to connect two joints. Over time, they lose their tightness. Therefore, leaks form, which can only be detected using a water sensor. There are cases when plastic pipe joints leak due to poor soldering. In order to eliminate damage, you will have to re-open the grooves and replace the damaged area. And this is, at the very least, another major overhaul.
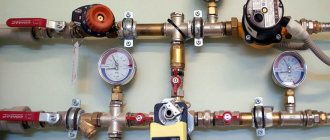
Water pressure sensor for heating system Source luvateknoloji.com
Floor screed
Sometimes the lower distribution of heating pipes is completely hidden in the floor screed. This technology is no different from the technology of hidden broaching in the wall. Only one thing: to save money, all pipes are laid in one large wide groove. Separate branches then run off from it in the required directions.
Laying the piping system in the floor Source logo-term.ru
This method of disguise is good if the apartment or house has not yet been screeded. Then it will be easier to create a plan indicating the location of the pipes on the floor, lay the pipes according to it, and then pour the screed. After the concrete has dried, the floor will be perfectly level. Experts advise maintaining the communication plan. It will later be useful for repairing the heating system.
The screed completely hides the wiring Source rousset-yves.fr
When the floor in a house or apartment is made of planks, it will be much easier to lay pipes along the bottom and then maintain them. After laying the finishing coating, it is important to leave one or two boards loose where you can quickly gain access to the main technical components of the pipe distribution.
Installation of heating pipes under a plank floor Source teplomir-nsk.ru
See also: Catalog of companies that specialize in insulating country houses.
False wall
Any decoration of heating pipes should not impede access to areas of possible accidents. Therefore, it is worth giving preference to those designs that meet these requirements. One of them is a false wall, erected using metal profiles. You can then cover them with anything: plasterboard, plastic, plywood. The main thing is to leave access in the form of opening hatches to the places where pipes connect with the heating device, to the locations of couplings and tees. Before assembling the box, it is important to inspect the pipeline and perform the following steps.
To disguise risers, it is better to erect a false wall Source otoplenie-gid.ru
- If the heating risers are assembled using metal-plastic pipes connected by dismountable fittings, the latter should be removed and replaced with press fittings.
- If the wiring is old, you will have to completely change it.
- It is advisable to first cover pipes made of copper or steel with any plastic heat insulator.
After covering, the frame will completely cover all technical components Source www.remontnik.ru
Please note! Experts, when talking about how to decorate a heating pipe in a room, do not recommend using the box where polypropylene pipes are used for laying utilities. When heated, they expand; the high temperature of the coolant makes them plastic. In such a situation, before choosing pipe decor, it is necessary to make a preliminary calculation of the thermal expansion of the pipeline. Only an experienced engineer can do this.
The box is closed with plasterboard Source cosmo.actorz.ru
The finished false wall can then be decorated with anything: you can paste wallpaper on it or lay ceramic tiles. It is important to remember that its construction will take away useful space from the room. For small rooms, this decor of heating pipes is not suitable. Here you can use another method.
The box can become part of the overall decor of the apartment Source master-st.pro
How to sheathe pipes with plasterboard - do-it-yourself finishing options
Many apartment owners, after completing the installation of pipes or heating systems in the house, are wondering how to cover them with an outer box and what kind of cladding to use for this. Everyone has their own preferences in this matter, but the material that is most often used for this purpose is drywall. True, it is necessary to provide for possible breakdowns: for example, buy reliable fittings on the website https://alfastars.msk.ru/.
Advantages of plasterboard boxes
In general, the construction of an outer box can serve various purposes, for example:
- Give structures an aesthetic appearance.
- Provide protection from accidental mechanical and other damage.
- Achieve a soundproofing effect (especially in the case of sewer pipes).
Plasterboard sheets meet all these requirements well, and although other materials can be used to construct the box, they are preferable for a number of reasons:
- Low price.
- Easy to assemble structure.
- Excellent environmental performance.
- High sound absorption rates.
Working with this material is not difficult, and therefore the involvement of professionals is optional, and if you have some skills, you can cover the pipes with plasterboard yourself.
Materials and tools
Drill for frame assembly
Before you start making a box, you should consider a set of tools and materials.
Materials and tools:
- sheet plasterboard;
- metal profile (guide and rack);
- dowel-nails, self-tapping screws for fastening parts of the box;
- special knife for cutting drywall.
You will need materials such as polyurethane foam, shock-absorbing tape, putty to level the surface of the box. Tools that will be useful are a drill, a hammer, a screwdriver, a tape measure, a level, a plumb line, and a pencil.
Wood or metal
Metal profile base
First of all, you need to assemble the frame. To make the box, either a metal profile or a wooden beam can be used. The advantages of a metal profile made of galvanized steel are that, unlike wooden beams, it has increased resistance to moisture and is not exposed to rust for a long time.
The advantages of a wooden frame include the environmental friendliness of wood and a higher degree of sound insulation.
How to cover walls with plasterboard if heating pipes are in the way
A good alternative to corrugated stainless steel would be copper on soldered joints, but the problem is that it forms a galvanic couple with aluminum, which leads to electrochemical reaction of one of the metals, and aluminum radiators are often used in heating systems. The structure of rack profiles is fastened with transverse inserts for strength. Sometimes a shock-absorbing tape is laid. It is believed that it absorbs vibration, due to which the frame will last longer. First you need to install rack profiles. Their number and length will depend on the room where the renovation is being carried out. For example, to insulate pipes in a toilet (where the riser is usually located in the corner), three profiles are required; if the pipes are located vertically or horizontally in the middle of the wall, then four rack strips need to be fixed. That is, the pipes are placed either in a square or in a triangle - it depends on the wishes of the owners and the characteristics of the room.
If necessary, then upon completion of the installation of the metal structure, we attach soundproofing materials. It is best if you carry out these actions simultaneously with covering the walls with plasterboard. Once the installation of the frame is complete, you can begin to cover it with plasterboard. Sheathing
happens as follows: To obtain clear and even corners, use a metal corner. A putty solution is placed inside it and, pressing the corner tightly to the edge of the box, stretch it over the entire surface. Then the wall is leveled with a thick spatula, cleaned and primed.
The resulting surface becomes suitable for subsequent finishing with paint, wallpaper, tiles, and tiles.
Who is responsible for the riser (central sewerage) or what is common property?
The riser itself is community property. This conclusion can be made on the basis of Decree of the Government of the Russian Federation dated 08/13/2006 N 491 (as amended on 07/09/2016) “On approval of the Rules for the maintenance of common property in an apartment building and the rules for changing the amount of fees for the maintenance and repair of residential premises in the case of the provision of services, etc. , namely part 2, paragraph 2
... other equipment serving more than one residential and (or) non-residential premises in an apartment building (including boiler rooms, boiler rooms, elevator units and other engineering equipment);
also part 5 of the same document
The common property includes an in-house engineering drainage system, consisting of sewer outlets, fittings (including bends, transitions, pipes, revisions, crosses, tees), risers, plugs, exhaust pipes, drainage funnels, clearings, branches from risers to first butt connections, as well as other equipment located in this system
That is, the riser (central communication) belongs to the common property of the house. As a result, the management company, residential complex, homeowners association, etc. should be responsible for its maintenance. She is the one who raises funds for the renovation of common property.
Preliminary work
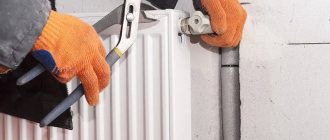
Preparatory work includes processing steel heating pipes and radiators (heating radiators), from which old paint is removed and, if necessary, new paint is applied. Paint as an insulating material will protect metal pipes from premature damage by rust. These works must be completed before installing the box, which will subsequently block access to the pipes.
The above work will not be required if the box being manufactured will be used for sheathing plastic water pipes.
Note!
You can continue installing the box only after the paint on the pipes or batteries has completely dried.
Photos in the interior of the rooms
Kitchen
The kitchen is the ideal room in which all ways to hide batteries will become practical and convenient. If the room is small, then you can hide the radiator with the help of a beautiful tabletop or make a folding table, which will fold out when convenient.
Factories of metal-plastic structures offer a large selection of beautiful large-sized window sills that imitate stone, wood and other materials. A modern window sill does not break under weight, is not afraid of external factors, is easy to care for, wipe clean, is not afraid of scratches, and so on. You can hide any type of battery in this way, including cast iron.
In the photo, wooden boxes are used to disguise the radiators.
Living room
If the radiator is in a niche, then a wide window sill will help create a work area.
You can place souvenirs, vases or potted flowers on the constructed wooden box. You can also cover unsightly radiators in the living room with thick curtains.
The photo shows a modern living room. In order to hide the radiators, a wooden structure was installed, which also serves as a place for rest, storage and decoration.
Bedroom and children's room
In the interior of a bedroom and children's room, batteries can be used as another place to relax, a tabletop for decorative elements or a workplace.
Bathroom
You can hide the pipes in the bathroom using a louvered door, plastic grilles or a cabinet with opening doors.
We hide heating radiators using wooden, glass or plastic screens.
In the photo, the radiators in the bathroom are hidden using a wooden box.
Hallway
For radiators in hallways, glass screens or wooden boxes are suitable. In a small room, covering the battery is only necessary from a practicality point of view. This could be a locker for storing shoes, or the battery will become a small coffee table where keys and other necessary items will be stored.
Installation of plasterboard box
- Sheets of plasterboard are prepared for assembling the sheathing, after which they are cut into fragments of the required size.
- The blanks are inserted between the profiles and placed for subsequent fixation.
- The plasterboard blanks are attached to the frame using self-tapping screws. The heads of the screws should sink into the drywall no more than 1 millimeter. Drywall sheets are screwed to the frame on both sides.
- Using a hacksaw, the ends and edges of the used sheets protruding beyond the structure are sawed off. The edges in the places of cuts are leveled using a diamond mesh No. 100.
At this point, the assembly of the box itself can also be considered complete, and the next stage is the transition to its lining and additional work.
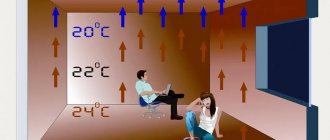
Which is better: heated floors or radiators?
Warm floorBatteries
Preparation for covering pipes with plasterboard box
Before sheathing the pipes with plasterboard, you should do some preliminary work, which is as follows:
- Preparation of the necessary materials, including metal profiles (guides, racks), screws, dowels and the plasterboard sheets themselves.
- Preparation of the necessary tools (knife, screwdriver, hacksaw, plumb line, level, pencil).
- In the case of metal pipe products, it is advisable, before covering the pipes with plasterboard, to clean their surfaces of old paint and repaint. After covering the pipes with plasterboard, access to them becomes very difficult or impossible.
Upon completion of the above work, before covering the pipes in the room or bathroom with plasterboard, you must first prepare a reliable frame for its fastening.
DIY frame installation
The material for constructing the frame structure to which the plasterboard sheathing will be attached is usually metal profiles (racks and guides) made of galvanized sheet.
These products are resistant to corrosion and rust, and therefore their use ensures a long service life and the absence of serious problems during operation.
Work on the manufacture of a frame structure consists of the following stages:
- Marking the lines and contours of the frame on the floor, walls and ceilings, made with a simple pencil using a level and plumb line.
- Installation of guide profiles in accordance with the marks and their fastening to the wall using dowels.
- Installing three vertical rack profiles and measuring the distance between them.
- Inserting rack profiles into the guides and attaching them to each other using small special screws called “bugs”.
After the specified work is completed, the frame for the planned cladding can be considered ready, and it is possible to begin the construction of the box itself from plasterboard sheets.
Video description
The video shows how to hide heating pipes in the wall:
Open methods
There is also open decoration of heating pipes. When using it, the pipes are simply painted to match the walls, then they become less noticeable. When choosing such a disguise, it is important to apply the paint to a cold contour. This means that pipes can only be painted in the warm season. Paint applied to a hot circuit will dry quickly and then crack. Correcting such a defect will be very problematic.
Heating pipes painted to match the walls Source www.indog.ru