Comfortable living conditions in a country cottage cannot be created without a high-quality heating system. It must be efficient and economical enough to keep living rooms warm during the heating season, and energy costs are not too high. To achieve this, you need to choose the right type of heating system, and then select the most suitable option for connecting heating radiators in a private home. In order to understand all the existing models, we turned to the specialists of the Miralex store, which offers a wide range of radiators.
Connection diagram for heating radiators Source domsdelat.ru
Types of heating systems
The heating system in a private house can be:
- air;
- electrical;
- water.
Air system
This option operates without coolant. The air in the house is heated directly from heating devices - stoves or convectors. With this system, heating radiators are not used. Air heating is convenient for heating compact country houses. For large cottages it is used extremely rarely.
Electrical system
In such a system, heat is transferred through current conductors. Electric underfloor heating works on this principle. Heating using an electric system can be quite convenient. But its arrangement requires increased attention to safety rules, and during operation it is expensive for home owners.
Water system
A type of heating system in which heat is transferred through water (sometimes steam) as a coolant. The coolant flows from the heating device through pipes to the heating radiators. This option is considered the most convenient and practical. Most often, in country houses, heating is installed in this way.
Water heating of a private house Source heatsun.net
Where and how to place
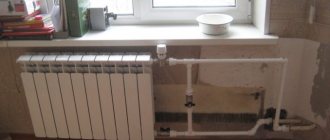
Traditionally, heating radiators are installed under the window. This is necessary so that the rising warm air cuts off the cold from the window. To prevent the glass from sweating, the width of the heating device must be at least 70-75% of the width of the window. It must be installed:
- in the middle of the window opening, permissible deviation - 2 cm;
- distance from the radiator to the floor - 8-12 cm;
- to the window sill - 10-12 cm;
- from the back wall to the wall - 2-5 cm.
Distances from radiator to window
These are all recommendations, the observance of which ensures normal circulation of warm air in the room and its effective heating.
Read how to choose polypropylene pipes here.
Types of heating boilers
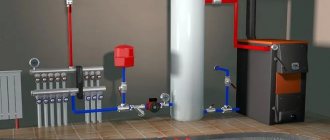
The central element of the heating system is the boiler - a heating device in which the coolant reaches the desired temperature. The heating connection diagram in a private house largely depends on what kind of boiler is used in it.
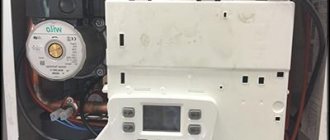
According to their purpose, boilers are divided into double-circuit and single-circuit. The first option is equipment designed for both heating and water heating. A single-circuit boiler heats only the heating medium. According to the installation method, they are divided into floor and wall.
Boilers also differ in the type of fuel with which the coolant is heated. There are boilers of the following types:
- gas;
- electrical;
- solid fuel;
- liquid fuel;
- combined.
To operate solid fuel boilers, coal, firewood, and less often peat and other types of solid combustible materials are used. Diesel or waste oils are used as liquid fuel for boilers of the corresponding type.
Solid fuel water boiler in a private house Source otoplenie-gid.ru
Most country cottages are heated by gas boilers. In non-gasified areas, heating with electricity is often used. Solid fuel and liquid fuel boilers are completely independent of communication networks. The first option is more attractive because it requires traditional firewood and coal, rather than dangerous flammable liquids.
The most prudent homeowners install combination boilers in their homes, designed to operate on different types of fuel. For example, you can install an electric boiler, supplemented with a combustion chamber for solid fuel, so that in case of damage to the electrical network, switch to wood heating.
Double-circuit boilers that provide homes with heat and warm water are predominantly gas devices. They are universal, as they eliminate the need for homeowners to purchase and install a separate water heating boiler.
Scheme of double-circuit heating in a house Source pikucha.ru
See also: Catalog of companies that specialize in insulating country houses.
Incorrect calculation of the number of sections
Using a tap, you can lower the heating temperature if it suddenly turns out to be too high for the room, but you cannot raise it above that achieved with the tap fully open. In apartment buildings with centralized heating, the coolant temperature varies. If for some reason it turns out to be low (this often happens), it will be impossible to raise the air temperature inside the apartment. Now, if only there were a little more sections in the radiator...
Calculation of radiator sections when replacing is made based on the basic coefficient, which is equal to 1.4 per sq. m. It can be done with the help of store consultants when purchasing a radiator. But here the following error awaits buyers: the calculation is carried out based on the average heating temperature of the coolant, and there are situations, as already mentioned, when the temperature of the water inside the batteries drops below. In order not to experience discomfort, the number of sections should be slightly larger than calculated by the average coefficient.
Heating radiator design
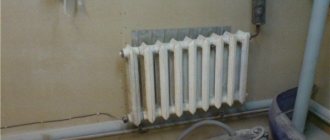
The heating radiator consists of several heat exchange sections. The more sections, the correspondingly higher the battery power. There are models of radiators that can be “expanded” with new sections, if necessary, already during operation.
One collector passes through all sections at the top and one at the bottom. Each section has a vertical channel connecting the upper and lower manifold. This applies to all sections, including the outer ones. Therefore, the radiator has 4 outputs, but only two of them are used. One is connected to the coolant supply pipe, and the second is used to drain cooled water back into the boiler. Unused outputs are closed with plugs. This is how most radiators are designed.
Heating radiator diagram Source mr-build.ru
Installation stages
The installation of the radiator is specified by the requirements of SNiP and corresponds to the following algorithm:
- The installation location, type and number of fastening elements are determined, depending on the type, weight and dimensions of the device.
- Fastening brackets and hooks.
- The necessary adapters, fittings, and plugs are mounted on the radiator.
- The radiator is installed on fastening elements.
- The supply and discharge lines are connected to the device.
- An air venting mechanism is connected, for example, a Mayevsky tap.
- The system is being tested.
Some types of modern aluminum and bimetallic radiators have a protective film on the body - it is better to remove it after installation is completed. This will avoid accidental damage to their surface and deterioration of aesthetic parameters.
Types of pipe system
In the heating system diagram, the relative position of the coolant supply inlet and the return outlet is of fundamental importance. This depends on the direction of the coolant and the type of pipe system.
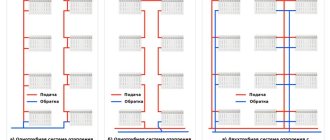
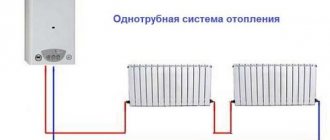
Single pipe system
This is a simplified option for arranging heating in a cottage. This option is quite economical, since it requires fewer pipes for wiring and is carried out with less labor for installation work. The system is a chain of radiators connected by one pipe. The coolant heated in the boiler enters each radiator in turn, flowing from one to another. That is, the “return” from one battery becomes the feed for the next, etc.
For single-pipe systems, you can now install special modules Radiplekt and Radiplekt Therm from Gibax, thanks to which you can maintain the temperature in the house using automatic or manual modes. Their installation is quite simple, and the minimum number of connections will provide an additional guarantee for the reliability of the connections.
The single-pipe scheme for connecting heating radiators in a private house has one significant drawback - with it, the radiators heat up unevenly. The first radiator will always be the hottest, and further from battery to battery the temperature will gradually decrease. Therefore, it is impossible to maintain the same temperature in all rooms with single-pipe heating.
Scheme of single-pipe heating of a two-story cottage Source utepleniedoma.com
For certain layout features, a single-pipe system may be quite suitable. So, if in a small house the chain of radiators starts from living rooms and ends with technical rooms, this option may be optimal. But in spacious cottages it is better to install two-pipe heating.
Two-pipe system
A more expensive option to install, but simple and easy to use. In this system, two pipe lines operate simultaneously. The first supplies hot water to each battery. That is, there is one pipe going into each radiator. The coolant, before entering the radiator, regardless of its location in the circuit, does not enter neighboring radiators, but goes directly. The second pipe collects the return from all radiators and delivers it to the heating manifold.
The advantages of the bottom type of wiring are that almost the same temperature is achieved at all heat exchange points. Such a system is better adjustable and ensures uniform heating of the entire building.
Scheme of two-pipe heating of a cottage Source ro.decorexpro.com
Beam (collector) system
The collector circuit is a variant of a two-pipe connection, but with more complex wiring. It is used in cases where it is necessary to hide pipes, for example under a floor covering. In this case, two collectors are installed - for the supply and for the return, and from each radiator one pipe extends into the first collector, and another one into the second.
Some connection schemes use two types of system. The entire house can be heated using the two-pipe principle, but for a separate area, such as a veranda or large living room, a combination of several radiators using the single-pipe principle is used. When developing a two-pipe scheme for connecting heating radiators in a private house, the main thing is not to get confused in the supply and return manifolds.
Radial (collector) heating circuit Source firmacz.ru
Wall marking
The installation of batteries in a wooden house (as in any other house) begins with marking the walls, according to which heating devices will be installed in the next stages of work. If a system with natural circulation of coolant is installed in the house, then the pipeline must have a constant slope of at least 6 degrees along the flow of water. Failure to comply with this rule will certainly lead to the appearance of air jams, and in the worst case, will not allow the system to function. For systems with forced circulation, this rule does not matter.
You need to mark the wall along which the brackets for the radiators will be installed. Radiators cannot be installed close to the wall - the distance between them should be about 5-10 cm. The radiator must be removed from the floor by at least 10 cm, and from the window sill by 8 cm. The markings are done level with a pencil. When marking, you need to take into account the width of the radiator sections so that the installed holders are strictly between the sections.
It is advisable to install foil material behind the radiators, which will act as a heat reflector. If there is a gap of at least 3 cm between this material and the radiator, it is possible to significantly increase the efficiency of the radiator and reduce heat losses.
When the marking is completed, holes of the required sizes are drilled in accordance with it. The dowels are driven in with a hammer, after which the brackets are secured using self-tapping screws. To make your work easier, you can purchase special battery holders equipped with threads that allow you to screw them directly into the dowel.
When selecting brackets, you need to take into account the type and characteristics of the radiators being installed so that the elements match each other. You also need to pay attention to the number of brackets used for one radiator (in most cases, three holders are enough, two of which are located at the top and one at the bottom).
Diagonal top connection
Diagonal connection of radiators with top supply allows for the most efficient heating of rooms. Hot water is supplied to the upper entrance, inside it is distributed into sections, and, cooling, falls down, after which it is forced out into the lower entrance into the return manifold, located on the other side of the radiator.
Diagonal connection of radiators Source radiator-prado.ru
Installing mounting strips
Hammering dowels into the holes
We install the mounting strips and check the horizon level.
If necessary, we adjust.
Two-way bottom connection
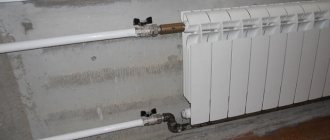
The supply is carried out into the lower inlet on one side, and the return comes out of the lower inlet on the other side of the battery. The efficiency in this case is lower than in the previous version. But this connection allows you to hide the pipes as much as possible.
Double-sided bottom connection of radiators Source hi.decorexpro.com
Selecting the necessary components
For the upcoming work, you need to prepare tools. We purchase taps, valves, valves, and thermostats from shut-off and connecting valves. For installation, you need adapters that allow you to connect parts of different diameters: couplings, bends. Brackets and corners are purchased to secure devices to the wall. Bypasses (jumpers in the form of pipe sections) are also required, which are installed between two pipeline lines. It is necessary to check in advance the presence of all elements in the composition so that during installation you do not have to search for missing parts.
Polypropylene pipes for heating
When installing batteries, the possibility of hiding the heating system pipes under wall coverings is also taken into account. If there is cladding with decorative plastic or plasterboard, then packaging the load-bearing parts of the heating system in them will increase the aesthetic appearance of the room. The ends of the pipes with the existing threads are brought out. This is done so that during subsequent installations of radiators there is no need to damage the wall covering. The necessary parts for installation are selected taking into account the thread diameter.
Hiding heating system pipes under wall coverings
Modern methods of connecting pipes include both welding and threaded assembly. Both options do not affect the battery life or the level of their warming up, but they differ in several respects. For example, welding seams are more reliable, while threads are susceptible to mechanical stress and vibration. In addition, in older houses it is often impossible to thread pipes. The way out is welding.
Welding pipes for heating
But in new houses they install pipes made of modern materials, such as polypropylene and metal-plastic. Welding is no longer used to connect them.
One way bottom top connection
Mainly used in multi-storey buildings. In cottages with 2 or 3 floors with single-pipe heating, it is also sometimes used. The difference between the lower and upper connections is that in the first case, hot water is supplied to the lower inlet and discharged under pressure through the upper inlet, and in the second case, the opposite happens. In both cases, the plant and coolant outlet are located on one side. It is worth noting that of all the existing options, the one-way bottom connection is the most ineffective.
Requirements for devices
First, bimetallic heating batteries must be efficient and practical to use.
Secondly, the appearance of bimetallic radiators should attract the buyer and not spoil the living space itself. They should fit into the room and become a pleasant addition to it.
The third requirement for this heating device is strength. This technical requirement is considered the main one when choosing a bimetallic battery. If the strength of such a device is good, it means that it will withstand high pressure in heating during operation.
According to the passport data of the heating radiator, it is able to withstand pressure of twenty to forty atmospheres. In apartment buildings, heating pressure does not exceed the level of ten atmospheres. However, an extra margin of safety will not hurt. Bimetallic heating radiators are made of two types of metal, therefore, they have the best qualities of one and the other.
If you look at this device in section, then under the outer aluminum layer you can see the internal steel collector, and the vertical channels that conduct heat are steel.
Bimetallic battery in section
Radiator location
For high-quality heating of a cottage, you need not only to choose the right heating scheme, but also to correctly position the radiators in the rooms. Installation of heating batteries in a private house is carried out on the basis of calculations made by specialists. The number of radiators and sections for each radiator is determined taking into account various factors:
- volume of premises;
- level of heat loss of the building;
- radiator insert diagram;
- at what height the batteries will be installed, and much more.
Sequence of work
Installation of batteries begins with complete shutdown of the circuit. When replacing old radiators with new ones, the water is drained and the heating elements are dismantled. It would be correct to use a pump to eliminate the presence of coolant residues in the system.
After all the water has been removed, the mounting location of the batteries is aligned in both planes. Brackets are installed.
Package
The next step is to pack the radiators using sealing flax, packaging paste or special shut-off valves. Using a torque wrench, tighten the connection, creating the force specified in the documentation.
Installation work
Installation of radiators on the wall is carried out by welding or polypropylene pipes. In the first case, it is enough to use two fasteners; in the second, at least three are required. Two should be at the top, one at the bottom.
With ten or more sections, the number of fastenings should be increased to five. There should be three at the top, two at the bottom.
Spatial location control
The position of the batteries is monitored in both planes. It is advisable to provide a slight slope towards the wall. This will avoid airing the system during its operation.
The final stage
Threads are cut on the risers and all elements of the heating system are connected. The tightness of all connections is carefully monitored.
Test tests can then be carried out to detect possible leaks.
