Ecology of consumption. Estate: The facing materials used to decorate the ancient temples of our cities and the architecture of the Babylonians and Egyptians have too obvious advantages to send the technology of our ancestors into oblivion.
For many centuries, tiles have been a part of our culture. Gradually, this type of ceramics lost its former popularity. But over the last 20-30 years we have seen a renewed interest in decorating stoves with tiled elements.
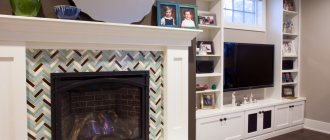
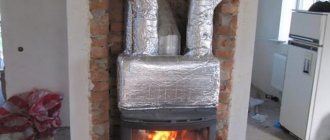
Stove lined with tiles
For some time, the ceramic-finishing culture succumbed to the pressure of Western technology and the huge variety of tiles. But the facing materials that decorate the ancient temples of our cities and the architecture of the Babylonians and Egyptians have too obvious advantages to send the technology of our ancestors into oblivion.
What is a stove tile?
A tile is a ceramic tile of a special box-shaped design. Its surface can be rough if it is terracotta, or glossy if it is majolica. The tiles can also be smooth or with a relief pattern. The main difference of the product is the box-shaped protrusion with holes, the so-called rumpa. The holes are intended for wire, the ends of which are embedded in the seams between the bricks during the laying process.
How is the tile constructed?
Traditional tiling does not involve the use of glue or mastic. With this finishing, special “air cushions” are formed between the tiles and the stove surface. They support long-term heat transfer, accumulate heat and distribute it evenly over the entire area. That is why experts say that a stove lined with tiles provides gentle warmth. It is impossible to get burned by it.
Types of tiles
Based on their shape and purpose, tiled ceramics are divided into several main types. Among them:
- flat slabs - elements that cover the main area of the fireplace;
- corner – designed for decorating corners;
- basement and cornice - designed for finishing the lower and upper zones of the stove, respectively;
- shaped – corner tiles, which are necessary for decorating corners of complex shapes.
Tile options
Preparing clay
We start by preparing the clay. If you plan to independently prepare material, it is better to do it in the summer or at the very beginning of autumn. The clay, broken into small lumps, must be thoroughly dried in the sun. Then, using a special tamper, we break up the lumps and sift the clay to remove all impurities. Pour the resulting material with water and stir well. We drain the small debris that floats to the surface. We repeat this several times. It is very convenient to use a specially prepared container.
Holes are made in it at different heights from the bottom, initially closed with plugs. As you wash, the holes open, the water drains out, and only liquid clay remains. The liquid material is scooped out and poured into a wide container. Then we put the clay in the sun so that the excess water gradually evaporates. Stir the mixture constantly. Later, when the clay becomes like a thick dough, knead it thoroughly with your hands to give the mass plasticity. The material is ready for use.
Preparation of clay mass
Tips for choosing material
When purchasing, you should pay special attention to the quality of the material. The tiles should not be damaged, fragile, or have any defects. Carefully inspect the end of the product.
If it has a large number of pores, refrain from purchasing. After all, such tiles will absorb a large amount of moisture, and when exposed to temperature, they can become deformed. A high-quality stove tile will serve you for a long time, but with poor material, difficulties will arise already at the installation stage.
The size of the parts is important. Each manufacturer has different sizes, but they must be within the framework of GOST:
- 45-50 – in thickness;
- 200 by 200, 220 by 220, 205 by 130 – by area.
Additional tips:
- It is necessary to compare tiles from the same batch with each other. If they differ by more than 10 mm, then you are unlikely to be able to lay out a beautiful canvas.
- Before purchasing or making material, it is recommended to calculate how many tiles of each type (facade, plinth, corner) are needed for your stove.
- You should add several samples to the amount received for unforeseen expenses: damage, scratches, chips and other damage. Even if you do not use all the material, you can leave it in case some decorative elements are damaged during use.
- You should also decide on the style of the future tiled stove. There is a wide selection of tiles in Dutch, Spanish, Russian, and Yaroslavl styles.
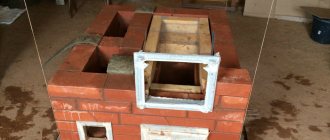
Making a plaster mold
Do-it-yourself stove tiles can come in a variety of sizes and shapes. Having chosen the one you need, we sculpt a clay blank, with the help of which we will subsequently make a plaster mold. We take a piece of clay and form it into a flat cake. Using a sharp knife, cut out the desired shape. Take a straightener and carefully align the edges of the model. We begin to sculpt a relief pattern. We take a stack and apply a sketch of the pattern to the workpiece. We mold rollers from clay and place them along the outlined contours and along the perimeter of the part.
The relief pattern on the tile can be convex or concave
Gradually fill out the form, using a stack to form all the necessary recesses of the pattern. Lightly level the finished form with a damp cloth. We prepare a frame from wooden blocks. We place the finished model in it. Now it is ready for pouring. We spread the plaster. To do this, take 10 parts of water and gradually add 7 parts of gypsum. Stir the resulting solution well. It must be used immediately after production, otherwise within a few minutes it will begin to lose its plasticity.
Modeling from clay
We moisten the clay form in the formwork with water from a spray bottle and fill it with gypsum mixture. First, pour a thin layer so that the details of the pattern are covered. Then pour the mixture to the top of the formwork. After 15 minutes, after the plaster has hardened, remove the wooden frame and leave the mold until completely dry. After drying, carefully separate the clay part; it should come off easily. Wash and dry the resulting plaster mold well. Now it can be used for the production of tiles.
Making a mold from plaster and embossing a tile in it
Glazing stage
The tiles have a smooth, shiny surface. This smoothness is achieved by glazing. The glaze is applied to the surface in a layer of 1-1.5 mm by pouring or dipping in one step, otherwise streaks will remain on the surface. You can glaze both an already painted tile and a tile.
The glaze can be made from starch paste with crushed flux (glass). Under the influence of high temperature, starch will penetrate into the pores of the tile and, when baked, forms a thin glazing film on its surface.
We shape and fire the parts
Fill the finished mold with soft clay. Gently press it into the relief, making sure that all the recesses are filled. Take a straightener and level the surface. Now we make the part three-dimensional. We fashion four blocks from clay and place them on the workpiece. This will be a rumpa. Don't forget to make holes for the wire. We wait until the molded sample hardens slightly. Carefully remove it from the mold.
We take an object with a smooth surface, it can be a round pebble, a glass vial or a metal spoon, and carefully polish the surface of the workpiece until a soft shine appears. Now the tile must be left until completely dry. We place the dried blanks in a muffle furnace, placing them in small pieces of brick, otherwise they will stick together. We fire the products for 3-4 hours at a temperature of about 900C. After firing, we do not remove the parts from the oven, but leave them inside until they cool.
A flat tile can be decorated with a multi-color pattern. The easiest way to do it is using the cold painting technique.
Glazing stage
The tiles have a smooth, shiny surface. This smoothness is achieved by glazing. The glaze is applied to the surface in a layer of 1-1.5 mm by pouring or dipping in one step, otherwise streaks will remain on the surface. You can glaze both an already painted tile and a tile.
The glaze can be made from starch paste with crushed flux (glass). Under the influence of high temperature, starch will penetrate into the pores of the tile and, when baked, forms a thin glazing film on its surface.
Glazing the details
To prepare the glaze, you need to dilute the liquid custard starch paste. Mix it with finely ground glass. The consistency of the finished glaze should resemble liquid sour cream. We dip tiles painted with engobes or products without painting into this solution. We leave the parts to dry and then fire them again. The paste will be absorbed into the clay pores and dry, leaving a thin layer of glaze on the surface of the product.
Preparation of crushed glass, painting and glazing of tiles
Tiled stoves and fireplaces are very beautiful and practical heating devices. They create a special “gentle” warmth that makes any room comfortable and cozy. If you wish, you can try to make tiles with your own hands; this is quite possible, but it is quite troublesome and requires certain skills in working with ceramics. It is much easier to buy ready-made products. In any case, a stove lined with tiles will delight you with its colorful appearance for many years.
How much are?
You can purchase tiles for interior decoration in specialized stores. Experienced consultants will be able to quickly calculate the required quantity of goods. They will help you decide on the style and design, and also give you an idea of the cost.
It is worth considering that finishing the stove with tiles will cost you much more than with other materials. On average, the price of one piece of such finishing is 300 rubles.
For one square meter you will have to pay from 11,000 rubles. For lining an average stove you need to pay approximately 50,000 rubles. A smaller fireplace will cost from 30,000 rubles.
It is worth paying attention to the fact that all prices are conditional. By providing the seller with a sketch of the stove and its parameters, you can find out the exact amount.
Tile
0 votes
+
Vote for!
—
Vote against!
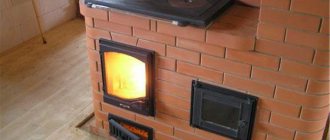
Brick is considered the most standard surface finish for a fireplace or stove. But such design does not always combine well with the design of the room. Tiles or tiles will help create an elegant and unique look for the finished heating device. This article will talk about finishing the stove with tiles.
What are stove tiles
Tiles are a type of tile with a special box-shaped shape. This type of cladding has been used for centuries and is a unique material for decoration.
Tiles for stoves photo
A significant difference between tiles and standard tiles is their special shape: the reverse side is presented in the form of a box and is attached to the surface of the heating device using built-in pins. The base for the fasteners is prepared in advance during the installation of the furnace - this is the most practical option. Without a preparatory stage, fixing the tiles requires additional surface preparation.
There is a certain classification of tiles according to the type and shape of the product:
- flat – can only be installed on a flat surface;
- cornice – designed to decorate the portal above the cornice;
- basement - installed above the floor surface, up to a row of flat tiles;
- corner - decorate the corner;
- shaped – designed for convex parts.
The main material for making tiles is clay. As the temperature rises, its expansion coefficient completely coincides with that of the brickwork. It follows from this that the material has a high level of heat transfer.
Distinctive properties of tile cladding
The material not only has a decorative function, but also has a number of advantages compared to brickwork.
- Hygiene . Tiles do not require additional care. Thanks to the glossy surface, it is easy to remove dust and soot from them. In addition, the material does not absorb fumes, which has a positive effect on the air in the room where the stove is located.
- Heat capacity . The thickness of the tile and the material of manufacture increases the efficiency of heat transfer significantly.
- Heat dissipation. The design of the material and the layer between the pump and the surface of the furnace allow not only to accumulate heat, but also to retain it for a long period after the heating element has finished operating. The heat generated is enough to heat the room for 12 hours.
DIY stove tiles
Preparing clay for tiles
To make tiles, the clay must have a certain consistency and structure. To do this, she must go through all stages of preparation:
- prepared pieces of material are evenly distributed over the wooden surface of the flooring;
- the clay is thoroughly dried;
- the resulting dry lumps are brought to a powdery state using a tamper;
- clay powder is sifted to remove fine debris;
- The final stage in preparing clay is elutriation. To do this, the resulting powder is placed in a special sifting device with holes that are tightly closed before the procedure. The container is filled with water, which descends as the mass clears. As a result of the procedure, the solution is divided into a dense and liquid layer of clay. It is the liquid mass that will be subsequently used in the process of making tiles;
- The liquid clay is dried to a thick sour cream state, after which it is mixed several times to give the material plasticity.
Forming a tile model
The finished product can have a smooth or structured surface. In the first option, only a flat tile base is made. Relief design requires a more labor-intensive process.
The workpiece in the form of a lump of clay is rolled out into a flat cake. Excess edges are cut off with a special tool - a stack. The size of the finished product is determined based on the size of the furnace in which the firing procedure will be carried out. The front side is aligned with the rule.
Relief formation:
- a drawing is applied using sculptural stacks;
- rolled clay rollers are laid out along the marked lines;
- the space between them is filled with clay mass;
- The edges of the picture are equal to the stacks.
Making a tile form . The mold material is gypsum. Working with it should be quick because it hardens quickly. Making the mold should take no more than 20 minutes. Progress:
- installation of formwork according to the size of the tile;
- a solution of gypsum and water is prepared in a ratio of 7:10;
- the model is wetted with water and immersed in the frame;
- the formwork is filled with gypsum;
- After some time the frame is removed.
The finished form is thoroughly washed and dried. The service life of the workpiece allows it to be used up to 200 times.
Molding tiles for stoves and fireplaces
In the process of making tiles, the following steps are carried out:
- the bottom of the mold is covered with a thin layer of clay and carefully compacted to draw the relief;
- the rest of the material is laid out;
- the last layer is aligned by the rule;
- Clay sides - rumps - are installed along the edges;
- holes for installation are formed in the corners of the tiller;
- the tile blank must dry thoroughly (the drying period takes from 3 to 5 days);
- The final stage is the firing of the product in a muffle furnace at a temperature of 950 C0 for 4 hours.
After complete cooling, the tile can be removed from the oven and covered with drying oil in several layers. The design is applied to the material using oil paint. The finished tile is varnished to protect the design from erasing and changing color.
Preparing the stove and mortar for lining the stove with tiles
Facing work on installing tiles is a labor-intensive process. Inadequate craftsmanship can affect the quality of the finished stove finish. In this case, it is better to turn to professionals. It is worth remembering that the price of the product and work will be quite high.
But the price is quite justified, since a stove lined with tiles will serve and have a beautiful appearance for a very long period of time. In addition, the material has a high heat transfer coefficient. This means that even after the oven cools down, the coating will continue to generate heat for some time. Tiles are not afraid of sudden temperature changes - they are a fairly high-strength material. And their environmental friendliness leaves no doubt.
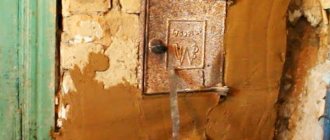
Surface preparation:
- The surface of the oven is carefully prepared. If the oven is of fresh masonry, then it is necessary to remove excess mortar. To reconstruct an old heating system, you need to completely get rid of the old finish. For this purpose, it is advisable to use a wide spatula or a stiff brush.
- Existing seams are buried to a level of 1 cm to improve adhesion to the mortar.
- The surface of the furnace is covered with a construction mesh. It will increase the level of rigidity and accordingly increase the service life of the surface.
Making the solution
- There are only two options for using mortar for installing tiles: clay and cement. A more labor-intensive process is to apply a clay mixture, but this method is durable and heat-resistant.
- To prepare a solution from clay, you need to pass the material through a sieve to get rid of debris. Then the mass is mixed with sand in the proportion: 2 to 1. It is worth considering the fact that the larger the proportion of sand, the less elastic the solution will be. Therefore, the proportions should be observed as accurately as possible.
- Regarding the quality of sand, it is advisable to give preference to sea or mountain sand rather than river sand. They have less shrinkage effect and therefore guarantee a smooth surface after drying.
- The clay mass is filled with water and kept in a cool place for a day. This will allow it to absorb water as much as possible and acquire the elasticity necessary for work. Then you need to add sand to the solution and mix thoroughly until it reaches the consistency of thick sour cream.
Tip: to enhance the fireproof properties of the facing surface, you can add fireclay powder to the solution. It will not only improve the quality of the coating, but will also avoid the appearance of cracks in the joint area at the highest possible temperatures.
The peculiarity of the cement mortar suggests its use only in the case of heating with wood. Coal and higher temperature fuel options will cause the coating to deteriorate. In addition, despite being easier to manufacture, compared to clay, this solution has a shorter service life.
A cement mortar for installing tiles is prepared as follows:
- cement is mixed with sand at a ratio of 1:3;
- Water is gradually added to the resulting mixture;
- for kneading, it is best to use a special attachment on a drill - a “mixer”;
- the finished solution must be plastic and homogeneous.
Tip: The shrinkage process of cement and sand mortar occurs very quickly. To thicken the composition, you can add a small portion of any washing powder to it.
Tiles
When carrying out facing work on installing tiles, it is necessary to adhere to technical standards as closely as possible. This will allow you to avoid further unwanted violations of the integrity of the surface.
Stages of work:
- Initially, the surface to be decorated is measured and the amount of material is calculated, taking into account the corners and portals of the oven;
- All tiles must be soaked in water before installation, which will significantly increase the material’s resistance to high temperatures;
- The material is fastened from the corner of the furnace, observing the laying line; if necessary, guide beacons can be used in the work;
- the solution is applied over the entire surface of the pump, at this moment it is worth carefully monitoring the density of the material, since the resulting air pockets can subsequently lead to peeling of the lining;
- when fastening heavy tiles, it is necessary to increase the amount of mortar and add broken bricks to it to improve adhesion;
- It is necessary to insert special metal pins into the holes of the tiller, while bending the edges to improve the adhesion of the surfaces;
- a wire is attached to the edges of the pins, which is connected to self-tapping screws that are pre-installed into the furnace masonry;
- the tiles are connected to each other and to the surface of the stove using wire;
- the hollow space between the pump and the surface of the furnace is filled with crushed stone or broken brick.
After laying the first row, the rest are installed in a similar way, maintaining a gap at the seam. At the end of the work, all seams are thoroughly rubbed with a gypsum-based solution. To make the pattern monolithic, it is necessary to add a color to the grout that is similar to the color of the main material.
- While working, you should pay attention to the different sizes of tiles and the difference in shades. It is not difficult to cope with discrepancies in the size of facing materials. It is enough to use a grinder and process the edges with a rasp. Before the grinding procedure, a small bevel must be made on the surface of the tile.
Advice: if you need to cut a tile, before the procedure, first make a cut on the front surface. Otherwise, you may end up with splits along the edges of the seam.
- As for the color scheme, the formation of a pattern with the smallest transitions between tiles of different shades is considered harmonious. Experts in the field of stove cladding recommend using the most classic method of distributing the color scheme from dark to lighter colors. Dark colors should be used in the lower part of the stove. This decision is due to the fact that soot from the fire will gradually settle on the surface of the tiles and on darker versions it will be less noticeable.
- You should not throw away tiles with defects (chips, loss of pattern integrity, cracks). All of them can be useful in the area adjacent to the wall surface, or other inaccessible places.
A stove lined with tiles is not only a tribute to fashion, but also a solution to the issue of the quality of room heating. Possessing high heat transfer rates, durability and environmental friendliness, they can be an excellent option for decorating a heating device.
Price issue
The cost of an original cladding kit cannot be low (prices start from 200 thousand rubles), but you need to understand that you are not purchasing a utilitarian cladding, but a work of art. And, by the way, you can participate in its creation yourself by suggesting the plot of the composition or expressing an idea regarding the design style of the stove.
German ceramics are traditionally valued and can be ordered at Russian representative offices of leading companies or online. Photo: Gutbrod Keramik
Varieties
Tiles are divided into several types, depending on their design, shape, and surface finish. The finishing kit for each fireplace usually includes many different elements.
But complex designs can additionally be equipped with unique products made specifically for a specific device.
By shape
It is impossible to cut tiles like tiles when laying them, otherwise their heat-accumulating qualities will disappear. There are 3 main types of products:
- Frontal (flat). Used for finishing smooth surfaces;
- Angular. For facing corners and turns;
- Shaped. They make it possible to highlight zones and trim protruding parts (for example, cornices).
By surface type
- Glossy (glazed);
- Terracotta and matte (not glazed). This material is much cheaper than glazed products.
By ornament style
The color scheme and theme of the tile designs are able to convey the atmosphere of the country where they were made.
- Dutch tiles. They are mainly made on a white background with a blue color scheme. Among the drawings, images of shepherdesses, mills, steppe and sea landscapes predominate.
- Spanish tiles. Products with oriental flavor.
- German tiles. Ceramics with a sparse pattern and clear lines, have standard sizes, and do not require additional processing.
- Russian tiles. They are stunning with a variety of patterns and colors, each region giving its own relief styles.
- Yaroslavl tiles. They differ from other Russian ceramics by their muted color and complex pattern.
Tiled stoves
A tiled stove needs to be planned before its construction. The work begins with a sketch:
- A pattern is drawn.
- Dimensions are taken.
- The number of tiles and all the necessary elements are calculated.
When ordering tiles, additionally purchase 1 piece of each type of tile. Even if no tiles are damaged during the laying process, it will be safer if spare parts are stored in case of damage in the future.
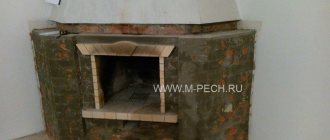
Stove decorated with tiles
- The finished set of tiles is laid out on the floor. Each element is numbered on the reverse side.
- The simultaneous installation of the first row of ceramics (basement) and brickwork begins. The base elements are filled with mortar in the same way as all tiles, but a metal rod is not inserted. If the base is not too level, the first row can be installed on the mortar (just make sure that the mortar does not get between the tiles). The second row and above - dry only.
- A triple bundle of wire is screwed onto the crutch and (its ends will be embedded in the masonry).
- The crutches are also connected to each other with wire.
- After the first row of tiles has been laid out, the brickwork begins. Each brick is pressed tightly against the tile. The wire is embedded in the right places and bent.
- Often the tiles are additionally secured with staples.
Tiled masonry is sometimes made with seams up to 10 mm. But the canvas with horizontal seams of 1 mm or less looks much better, as they did in the old days.
Russian Ethnics
Go to collection
Russian tile with stucco reliefGo to collection
Russian round tile with embossed Bird and berryGo to collection
Russian round tile with a relief Russian lionGo to collection
Russian tile with stucco relief HorseGo to collection
Russian round tile with a relief Bird
Interesting solutions in the interior
Despite the fact that for a long time decorative tiles were considered an attribute of an exclusively traditional style, modern tiles in all their diversity are suitable for a wide variety of interior types and styles.
The following possible options exist:
Bright decorative tiles can fit perfectly into a country style - such ceramic elements will look great with dark and light wood. At the same time, you can create the atmosphere of a real Russian hut if you choose carved furniture and complement the interior with stylish ceramic accessories - vases, teapots or dishes.
- Even in a classic interior, tiles can look stylish, but you should preferably choose light and plain options. Tiles with complex images can also be suitable, but there should be only a few of them so that they stand out against the general background and do not look too colorful.
- Tiles with oriental painting may be suitable for a colonial style. Dark tiles always look quite restrained and elegant, and a sophisticated pattern will become the highlight of the interior. Graceful tiles with ornate patterns and images of mythical creatures will perfectly fit into the romantic atmosphere of a colonial-style space.
In the eclectic style, you can combine modern decorative elements with traditional tiles. At the same time, for a design to really look fresh and interesting, not only the contrasts between different elements are important, but also the features that unite them. For example, the color scheme of the tiles and the decoration of the room may match, or you can repeat the patterns of the tiles on the floor tiles.
Most often, fireplaces are installed in country houses - that’s where they look most appropriate. With decorative tiles in a private home, you can create a unique atmosphere of warmth and comfort, as well as visually highlight the hearth in the interior. Since private houses are usually much more spacious than the average city apartment, their interiors are by definition more eclectic. In addition, it is in a private home that you want to feel close to nature, use natural materials in decoration and borrow traditional motifs in design.
Sometimes in a country house, tiles are not only used to completely cover the fireplace, but are also used to decorate countertops, window sills, and also to decorate floor tiles. If all the tiles are made in the same style, such a design will not look overloaded in a spacious room. At the same time, minimalist options using several tiles can also look stylish.
Tiles are also suitable for an electric fireplace in an apartment, even if it has a modern high-tech design. The main thing is to choose the right color scheme and not overload the design with details. Tiles with a laconic design often look interesting even in combination with metal, glass and brickwork, characteristic of modern electric fireplaces.
To learn how to choose tiles for a fireplace, watch the following video.
Read with this