In recent years, the symbol of the family hearth - the fireplace - is again at the peak of popularity. It’s so nice to sit with him in the evening and watch the dancing flames. The fireplace creates a cozy and comfortable atmosphere in the room. No wonder it is called the soul of the living room.
Unfortunately, for a number of reasons, residents of apartment buildings do not have access to a real fireplace, but this does not mean that they should give up the dream of decorating their home with this spectacular interior element. In this material we will tell you how to make a corner fireplace from plasterboard. A master class from experienced specialists will help you understand all the intricacies of creating such a design.
Fireplace in the interior of the apartment
To begin with, we invite you to consider what properties such a design has, and what types such devices can be divided into. All fireplaces can be classified according to the type of fuel used.
- Gas. When burning, no soot is released, the room warms up quickly. But to build such a structure you need permission, and besides, it’s not easy to connect it.
- Electrical are the most popular devices. No special permission is required to install them. They can be purchased without any problems at construction supermarkets.
- Biofireplaces are original and environmentally friendly devices that fit into any interior. Their disadvantages include only the rather high cost of fuel.
- And, of course, the classic version, heated with wood, which cannot be installed in an apartment building.
Corner fireplace made of plasterboard
The most sought-after and popular finishing material on the modern construction market, from which almost any structure can be made, is rightfully considered plasterboard. Ceilings, partitions, and decorative elements are made from it. Any person who has an idea of how to use construction tools can make a corner false fireplace out of plasterboard with their own hands. Of course, such a design does not compete with a real fireplace, which warms the house by burning wood, but it can become a wonderful decoration for a modern apartment. In addition, if you install an electric heater with imitation fire, the fireplace will look just like a real one.
Decoration equipment
But what about the flame? Without it, a fireplace is not a fireplace. The beneficial effects of contemplating dancing tongues of fire have been genetically ingrained in us since prehistoric times. A fire in a cave meant the well-being and safety of the tribe.
But you can’t light a fire in a city apartment. Modern firefighters do not understand primitive psychology. Should you make a tacky dummy or buy a ready-made one made of plastic? Put candles in the firebox? This is all wrong.
There are such things on sale - electronic photo frames. This is an LCD display designed to display pictures. The control electronics of such a frame are much simpler than those in a computer or tablet, which is why frames cost much less than computer displays. Many models of electronic photo frames allow you to display moving images in the form of animated GIF files, etc.
With the help of an electronic photo frame, the appearance of your apartment “hearth” can be changed every day, depending on your mood. And with some simple manipulations, a fireplace can even become an aquarium.
The price of an electronic photo frame is largely determined by its memory capacity and set of service functions. But we don’t really need them for the fireplace! We need to show just one animated picture: dancing flames.
Under this condition, a frame with a diagonal of 17” (40 cm) made in China will not put a burden on the family budget, and 40 cm diagonally is the size of the firebox of a quite decent-looking fireplace. If more is even better. And keep in mind - the frame with the flame will be in the depths of the artistically decorated niche for the fireplace. Such an imitation of a fireplace can mislead anyone, but will give you the complete illusion of a real flame.
Manufacturing technology
To make a corner fireplace from plasterboard with your own hands, all work must be divided into several stages. They begin with the preparation of the project. At this stage, you need to decide on some important factors:
- location of the future structure;
- the dimensions of the corner fireplace made of plasterboard;
- construction and design of the portal.
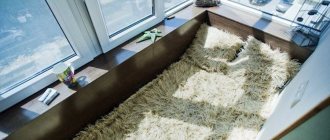
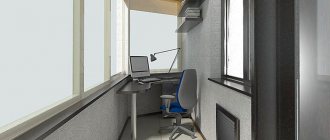
Let's start with choosing a location. A fireplace is usually installed in the living room. In a spacious room it can be placed in the center of one of the walls. If the room is small (which is more often the case in modern apartments), it is more advisable to make a decorative corner fireplace from plasterboard with your own hands.
As a rule, designers combine a fireplace with a TV area. In other words, these items are placed nearby, for example, the panel can be installed above the fireplace. It is not at all necessary to strictly adhere to this rule. If you wish, you can place the fireplace and TV on opposite walls.
A do-it-yourself corner fireplace made of plasterboard, a photo of which you can see in the article, can become not only a decorative, but also a functional element if an electric heater is installed in it. You can also equip it with drawers or shelves for storing various small items.
Design dimensions
When a location has been chosen, you should decide on the dimensions of the corner fireplace made of plasterboard and make a drawing of the future structure. It is not necessary to make a decorative fireplace in dimensions corresponding to the present one. You can use the drawing that we offer in this article or make changes to it according to the size of your room. For example, if you plan to install an electric fireplace in the portal, then, most likely, the dimensions of the niche will have to be adjusted to the parameters of the device. It is important that the fireplace turns out beautiful and harmonizes with the interior.
Materials
To create a corner fireplace from plasterboard you will need the following materials:
- drywall;
- PUP profiles;
- dowel-nails and self-tapping screws for assembling the frame;
- primer;
- starting putty;
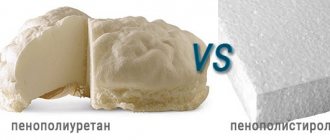
- materials for decoration (wallpaper, clinker tiles, decorative stone, polyurethane stucco, etc.).
It should be noted that for the fireplace portal, which involves the installation of an electrical device, you should use only fireproof, heat-resistant plasterboard, for example, Knauf-Fireboard. You will have to calculate the amount of materials yourself: it depends on the size of your structure.
Frame assembly
You can begin assembling the frame for the corner fireplace from plasterboard, which will become the basis of the structure. Step-by-step instructions for its installation can be presented in the following steps:
- In accordance with the project, apply markings to the floor and wall. These are the outlines of your future design.
- Mark the outline of the combustion chamber on the wall. When carrying out this work, make sure that all lines are strictly vertical and horizontal. The lines should intersect at a 90° angle on the floor, unless your design requires other angles. This markup will take some time, but it will greatly simplify the work later, so don’t ignore it.
- According to the markings using dowel-nails, it is necessary to attach PNP profiles to the wall. This way you will assemble the base of the back wall, which consists of two posts (vertical) and two crossbars connecting them. Please note that the distance from the bottom cross member to the floor will ultimately become the height of the parapet.
- Attach profiles to the wall that follow the contour of the combustion chamber. Install a profile on the floor along the contour of the parapet. Then we install the front struts. The depth of the fireplace is determined by the distance from them to the rear pillars. Horizontal cross members are used to connect the front and rear elements. We should not forget about the connection between the crossbars of the front pillars. They should be located at the same level as the crossbars on the back wall.
- Next, you should install the parapet posts and tie them with crossbars on top. Please note: they must be located at the same level with the lower crossbars of the portal.
- We install combustion chamber racks in the front part of the frame, which we connect to the main supports using several crossbars.
- At the final stage of installing the corner fireplace structure from plasterboard, it is necessary to make the vaults of the combustion chamber.
- To bend the profiles into an arch, it is necessary to make cuts in their sides in increments of about two centimeters.
So, the frame assembly is completed. If it seems to you that it is not as strong and rigid as you planned, install additional stiffeners. And one more piece of advice from experts: when installing a corner fireplace made of plasterboard yourself, use plumb lines and a building level. It is worth noting that instead of a profile, you can use a wooden beam to build the frame. The stages of work in this case will not differ.
The final touch: fireplace decor
A decorative portal on the wall or in the corner of the room can be supplemented with candle flames by installing a bio-fireplace with real flames in the firebox or by placing a heater there, stylized as burning logs. In any case, an artificial hearth will look no worse than a real one, and can perform the functions of a decorative element in the interior even better. After all, to light a fire you will not need either wood or coal, which can stain the carpet or floor.
It is not enough to just build a fireplace with your own hands from plasterboard. It is also necessary to decorate the finished structure. A few photos will help you choose the desired design style and make a reliable frame suitable for a specific interior.
The sufficient strength of gypsum board allows you to decorate the hearth even with materials such as imitation wild stone and tiles. Tip: the easiest way is to buy ready-made stucco molding from polystyrene foam.
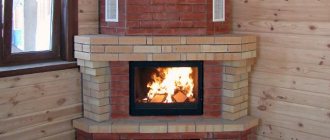
Fireplaces for a rustic-style interior (photo in Fig. 3) can be covered with light tiles that reproduce the surface of rocks. Before finishing, cover the surface of the gypsum board with putty for better adhesion of the tile adhesive. Installation of tiles is carried out according to general rules:
- stick the elements;
- dry;
- perform grouting and jointing (if necessary).
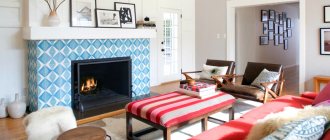
The tiles are fixed in the same way. For interiors in bourgeois style, you can find tiles that imitate tiles in trade organizations. Such fireplaces can be complemented with stucco molding painted in shades of paint on the tiles.
Interior products: polyurethane molding
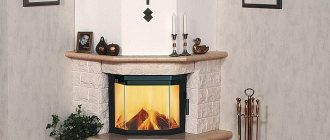
The greatest scope for imagination is provided by the classic style. Polyurethane foam and plastic moldings, baseboards, and stucco moldings allow you to create masterpieces in the Rococo and Baroque styles, as in the photo (Fig. 4), turning your apartment into palace apartments. This design of fireplaces should be approached very responsibly, trying to combine the appearance of the hearth and other furnishings.
Depending on whether you plan to use the fireplace as a decorative element, or whether you want to receive some heat from it on winter evenings, it’s up to you to decide, but you can choose to imitate different types of flames. The portal looks elegant, in the firebox where the bio-fireplace is installed. Such design will 100% comply with fire safety rules.
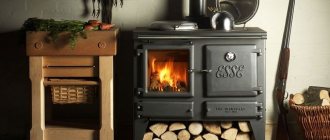
How to light a fire in a fireplace?
You will probably think that lighting a fireplace is the easiest task - throw in a couple of branches, papers, bring a match and here it is - beauty. In reality, everything turns out differently. The first fire can tell you a lot.
After manual construction, if you suddenly doubt the effectiveness of your miracle fireplace, call a specialist to the site for an assessment and initial heating
Otherwise, there may be a strong risk of ignition if installed incorrectly, as in the 2016 American film “Manchester by the Sea,” where the main character inadvertently burned down the entire house by throwing in a couple of extra firewood. There are other pitfalls that may emerge after a short time
Still from the film Manchester by the Sea (Manchester by the Sea) burning house
There is no need to rush things when it comes to the finish line. Your efforts may be ineffective, so read one of our articles in advance on how to properly light a fireplace.
In conclusion, check out this funny video of a Dalmatian and a horse having fun against the backdrop of enchanting flames - relaxation is guaranteed.
https://youtube.com/watch?v=UTxsZn7ZVkg
Frame covering
Before you begin covering the fireplace, you must cut out the drywall strictly in accordance with your project. To cut a sheet of material along a straight line, you must do the following:
- press a rule or a long ruler to the cut line of the sheet;
- using a sharp mounting knife, cut the material along the ruler;
- break the sheet with your hands and fold it;
- cut the drywall along the fold line on the back of the sheet.
To obtain more complex shaped parts, for example, the arch of the combustion chamber, it is necessary to apply markings on the material. You can use graph paper for this purpose and then use a jigsaw. When all the parts are cut out, all that remains is to secure them to the frame using ordinary drywall screws at intervals of 10-15 cm.
If you are making a portal for an electric fireplace, install it inside the combustion chamber to make sure that no mistake was made during installation.
Drawing up a drawing
The first step in creating a decorative design is drawing up a drawing. This stage requires accurate calculations. Regardless of the size of the future product, it is recommended to draw the drawing on a scale of 1:1, which will greatly facilitate further work.
To draw up a drawing you need to prepare:
- whatman;
- ruler;
- pencil.
A sheet of paper needs to be attached to the place where the fireplace will be located, and then outline the main lines. The drawing must indicate all the details of the fireplace, including dimensions, relief and shape.
Drywall installation
At the joints of sheets that are located in the same plane, a small chamfer no more than 5 mm wide should be removed. Be sure to stick a sickle mesh onto the joints, which helps reinforce them. Using a paint brush, coat the structure with two layers of primer. Please note that the second layer should be applied after the first has completely dried.
Then the joints of the sheets and the heads of the screws are treated with starting putty. After this, it is necessary to putty the entire portal. After the putty has hardened, the surface is treated with a jointer using a P80-P120 mesh. This will eliminate minor flaws.
When completing the work, remove dust from the surface of the structure and treat it with primer one more time.
Decoration
This is perhaps one of the most interesting stages in creating a corner fireplace from plasterboard with your own hands, since it is this that gives you the opportunity to show your imagination, and the huge selection of finishing materials presented on the construction market today guarantees that it will not be limited.
The simplest and most affordable finishing option is wallpaper that imitates brick or stone. The design of corner fireplaces made of plasterboard looks especially impressive if clinker tiles are used for cladding. This material is resistant to high temperatures, so it can be safely used with an electric fireplace. Clinker tiles resemble bricks in appearance, and their color range is varied, which allows them to be used to implement a wide variety of design solutions.
Another classic finishing option looks no less attractive - lining the surface of the portal with decorative stone. Like clinker tiles, the stone is mounted using regular tile adhesive.
Tools for work
If you decide to start building a fireplace, get a hand-held circular saw.
It is the size of a hair clipper and is equipped with a dust removal system that works in conjunction with a household vacuum cleaner. Cutting drywall with it is much more convenient, and the work is much more accurate than with a jigsaw, not to mention a hand saw. Just make sure when purchasing that the cutting depth is at least 16 mm, and better yet, more than 24. Power, brand, etc. don’t really matter; plasterboard is a malleable material. Then, get an abrasive mesh and several bars for it of various configurations. What it is? An abrasive mesh works like sandpaper, but when processing loose and crumbling materials it does not become clogged with dust. And a mesh is placed on a special block for precise processing. A simple block in the form of a parallelepiped allows you to process planes; curved (shaped) bars – surfaces of complex shape.
With the above tools at your disposal, you can build a fireplace that, to an outsider’s eye, is indistinguishable from the real thing. Subject to some additional conditions, but more on that later.
White fireplace
In the interior of an apartment decorated in a classic style, a false fireplace painted white and complemented with stucco will look great. Experts recommend paying special attention to the tabletop, on which the overall perception of the portal largely depends. It is often made to look like marble or precious wood. You can order it separately from any company that produces furniture. If you plan to make your fireplace as authentic as possible, order a beautiful wrought iron grate for it. This way the work will be completed, and you will be able to enjoy not only the stylish element of the interior, but also use it for its intended purpose (if you have an electric fireplace).
Installation and facing works
A decorative fireplace portal requires not only competent design, but also compliance with the standards of the installation and cladding process.
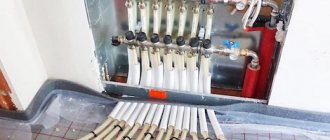
First of all, make sure that there is an outlet near the planned installation location, and if there is none, install one. Next, we begin to screw in the racks of metal profiles. If the shape of the structure is straight, assembling it will not be difficult. If you provided for the presence of rounded elements, to obtain the required shape, you will need to cut the metal profile and thereby perform the rounding. The optimal distance between cuts is 40-60 millimeters.
Now we move on to the lining of the fireplace portal. If this is the simplest and most primitive false fireplace, you can use cardboard or foam. However, for portals in which the heater will be installed, it is best to use drywall. It is cut out according to the diagram and secured with self-tapping screws. The inner surface of the frame, in order to avoid melting and overheating, is also lined with fireproof materials such as asbestos or magnesite.
An important stage in any finishing process is the preparation and insulation of the surface. It is necessary to properly seal all the seams and knocks between the sheets of drywall and the frame itself. To do this we use putty. If you are planning further cladding of the portal, you need to prime and sand the surface well.