Every home should be warm and cozy. Agree, without the first point it is impossible to comply with the second. Considering the complexity of modern architectural solutions and the uniqueness of the interior, radiator batteries may not be suitable for heating a room everywhere. Therefore, modern technologies offer heating using elements installed in the floor. The topic of this article is installing a heated floor with your own hands.
Where can it be mounted?
Warm floors can be used almost everywhere. The electric version is installed in private houses, apartments, loggias, bathhouses and even garages. The water type takes up a lot of space, so it is not applicable in small apartments with low ceilings, but in large houses it is superior in ease of use to its electric counterpart.
A floor with heating elements can be used as the only or additional source of maintaining room temperature. However, it should be remembered that such a heating system is not a cheap pleasure. Be prepared for your electricity bills to skyrocket.
Classification
Water
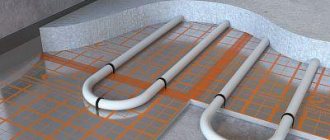
Floor heating using hot water pipes was known to mankind even before the beginning of our era. The main condition for the use of such a design: the ability to connect to a central heating system or install a separate boiler room. In standard apartment buildings, the installation of such heating devices is prohibited, because the water pressure in the pipes is designed only for radiators.
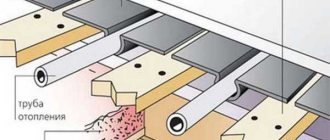
For installation, metal-plastic or polymer heat-resistant pipes are used. They are highly reliable, their minimum service life is forty years. However, due to the thick layer of insulation, it will not be possible to significantly increase the air temperature, so the system is used for additional heating. The pipes themselves, layers of insulation and overlying material take up a lot of space. Please note that the floor level will be increased by at least ten centimeters.
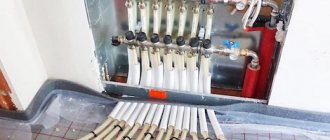
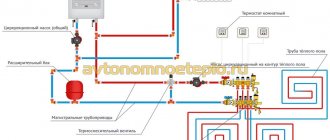
The design consists of a heating circuit and a distribution unit, including a manifold, pump and mixing unit. The standard heating area when installing one circuit is 10-15 square meters. For spacious rooms, several circuits are installed with the possibility of individual connection and control of each of them.
Advantages of this type:
- long service life;
- low power consumption;
- safety;
- There are no restrictions on furniture installation.
However, there are also disadvantages that significantly limit the scope of application of the system.
The main ones:
- design complexity;
- complexity of installation;
- high load on the floor due to the thickness of the structure;
- in case of breakdown, a major repair is required with a complete opening of the entire floor.
A water floor is less common than the next subtype - electric. It will be discussed in more detail in the article.
Electric
In this case, the system produces heat through a variety of electrical heating elements. Below are the main subtypes depending on the components. In this case, the installation process and the type of decorative finish change slightly.
Cable
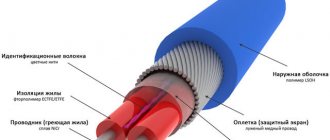
The most common and accessible type. The device is simple. Mounted on a screed or in a layer of tile adhesive. Very convenient for installation in small spaces. The cable is supplied completely ready-made: it is convenient to install, but cannot be shortened. To avoid overheating, massive furniture should not be installed above floor elements.
Film
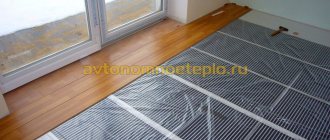
Special heating films are produced on an industrial scale. They are strips of heat-resistant polyester with sealed thread-like heating elements. Heating occurs in the form of infrared radiation, it is very fast, uniform and of high quality. Installation is incredibly simple and quick: the film is laid directly under the floor covering. There is also a minus: film sections cannot be placed in screed and tile adhesive, because an alkaline environment will damage the polyester.
Thermomat
They are considered an improved variation of the cable system. The product has the form of fiberglass rolls with attached cables. During installation, part of the coating can be cut off to adjust the area of the heating coating. The use of mats simplifies the installation of heating cables.
Fastening with a tucker
The pipe is secured using a special device - a tucker, which holds about 120 clamps. Using this device, the pipe is fixed according to the markings. The process takes a small amount of time, but despite the speed of fixing the pipe, the fastening is very reliable. The only disadvantage of this method is the cost of the equipment - 230 euros. It is very difficult to find it in a domestic specialty store. This method of fastening is suitable for installers and qualified specialists in this field.
Principle of operation
The operation of electric underfloor heating varies slightly depending on the type of heating element. When using mats and cables, the temperature rises due to heating of the conductor as a result of the passage of electric current through it. The wire heats the screed, which then transfers heat to the floor covering. Heating of the room occurs due to convection processes.
The film with infrared elements heats up due to the radiation of heat from the carbon layer, which occurs under the influence of current. This radiation, as in the previous version, transfers to the finishing coating and to objects located close to the floor surface.
In both cases, the temperature can be adjusted by installing temperature sensors and controllers that are attached to the floor.
Advantages and disadvantages of the electric option
The design is very simple, so it has earned wide popularity in all countries.
Advantages:
- ease of installation (can be carried out even by a non-professional);
- high autonomy (no connection to water supply or even electrical network required - can be powered by an electric generator);
- versatility - can be installed in any room, even with extremely high humidity (for example, in a bathroom or bathhouse).
There are also disadvantages, but they are insignificant when compared with the water version of the floor.
Main disadvantages:
- relatively high price of materials;
- high inertia - the air heats up very slowly;
- heating elements must not be installed under massive furniture.
A lot depends on the features of use and purpose of the elements. Let's look at this in detail in the next subsection.
Main or additional heating
If you are installing the floor in an apartment where there is central heating, you can use cable heaters of the lowest power. If such a heat source will be the main one, you need to increase the number of elements and make a very thick screed - at least five centimeters. Also, the frequency of the cable will affect the power of the entire system.
The principle of operation in such cases does not change. However, with high power, it is necessary to additionally install systems that protect against overheating, short circuits and other problems with the general electrical wiring.
Construction of polyethylene pipe
Reinforcement.
Almost all cross-linked polyethylene pipes have a complex multilayer structure. It could be:
- polypropylene;
- fiberglass;
- aluminium foil;
- perforated aluminum;
- solid aluminum sheet.
The reinforced layer is able to neutralize sudden pressure changes inside the PE-S pipe when used in a hot water or heating system.
The design of cross-linked polyethylene products provides for the presence of a reinforced layer both on the surface of the product and at various depths. If it is necessary to solder two or more pipes, the reinforcing layer is stripped to 1 cm.
Pipes made of cross-linked polyethylene for underfloor heating are practically not reinforced. This material is also called “pure”.
Oxygen barrier. The manufacturer also calls it a “diffusion barrier” or “anti-diffusion protection.” This layer is mandatory for all types of cross-linked polyethylene products.
The reason for its appearance in HDPE pipes is the ability of oxygen molecules to penetrate into the material through a three-dimensional lattice, as a result of which cross-linked polyethylene is slowly but surely destroyed.
The diffusion barrier can also be either inside or outside the pipe.
Methods for installing heated electric floors
Laying methods depend on the type of elements and purpose of the room.
Main options:
- Mounting into a screed layer. Suitable for living rooms, bathrooms, kitchens and loggias. Cable elements, waterproofing, and insulation are used. The final touch is decorative flooring.
- On top of the screed under the tile. A very economical method, but suitable only for residential apartments, when the room on the floor below is fully heated.
- Directly under the floor covering. Film options are used; they are placed directly on the screed. In some cases, waterproofing is done.
It must be borne in mind that floor screed is required in any case if you want beautiful, smooth and durable floors.
What you need
It is very important to plan your budget correctly so as not to save not only on the heating elements themselves, but also on all building materials. High-quality waterproofing is especially important; in some cases it is a decisive factor.
To lay the floor you will need the following materials:
- the flooring system itself (heating elements and reinforcing mesh included);
- connecting wires;
- fastenings;
- temperature controller;
- temperature sensor;
- RCD protection system (residual current device);
- cement with sand;
- copper cable for grounding.
It is also necessary to purchase the flooring in advance in order to determine its thickness, texture and other aesthetic characteristics.
Material selection
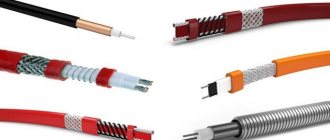
The heating cable can have various designs.
Main types of cables:
- Self-regulating. The element is a polymer matrix. When overheating occurs in the fault zone, the current flow is reduced to prevent breakdown. The remaining areas are operating normally. Thanks to this property, a cable of this type has durability and high reliability, but is characterized by high cost.
- Resistant. Consists of one or two wires that have very high resistance. Passing through them, the current is converted into thermal energy. The heating core is protected by a layer of insulation and a metal braid responsible for grounding. However, if one section of the core fails, the entire system breaks down irreversibly.
Installation of the heating branch cable is carried out in a layer of cement fill, which will additionally redistribute heat and perform the function of insulation from cold from external sources.
Power calculation
To determine the power, you need to know the characteristics of all wiring and heating devices. Key indicators: length and power factor.
There is a special formula: P1 = P2 * S * K.
K – safety factor equal to 1.3...1.6. P1 is the power of the purchased cable, and P2 is the required heating power of one square meter of room.
However, classical norms are most often used. So, in a living room the power does not exceed 150-180 Watts, and on balconies and loggias - 180-230 Watts per square meter. It is not recommended to increase the power without a good reason, so as not to overload the system and not lead to wasted heat, which will be generated in excess.
Also, the power varies depending on the purpose: is it primary heating or additional heating. For example, if such a structure is the main source, the element should cover 70% of the floor surface. If the heating is additional, fill only the center of the room or areas not occupied by heavy furniture and household appliances.
For non-standard premises and in other cases requiring accurate calculations, special calculators were created. Let's take a closer look at them.
Calculator
A calculator for calculating the length and cable laying diagram can be found freely available on the Internet. The most important indicator is the cable pitch (the width of the stripes between adjacent wires in a loop). To calculate all parameters, you need to indicate the basic initial data.
We will need:
- total area of wire laying areas;
- specific power of the cable indicated in the passport;
- functional purpose of the floor (main or additional source, whether there are other heated rooms nearby).
The calculated value will help you make the right choice when purchasing a cable and calculating the insulation thickness. Knowing the length, you can calculate the step, which is on average ten centimeters.
Brief description step by step
Let's look at the step-by-step process of laying the floor.
Main stages:
- preparation of the base;
- laying out elements;
- sensor installation;
- system connection;
- filling with screed.
Let's look at each step in detail to know all the details of such an important but simple process.
Kinds
Floors are divided into several types. There are two main ones:
- cable;
- infrared film.
Cable floors involve the use of cable as a heating element. Its installation takes place using a concrete screed. In general, the installation process is very similar to the same process for water floors.
But infrared film is a qualitatively new material. It consists of an alloy of copper and aluminum. Thin and easy to install, it fits directly under the covering.
Surface preparation and features of base insulation
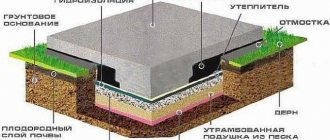
It is best to remove the entire old floor along with the screed down to the base to increase overall reliability. All material is completely cleaned, any elements are dismantled.
Then a layer of waterproofing is laid with a margin so that it extends onto the wall by about 10-12 centimeters. The perimeter is marked with a special tape; this damper tape helps regulate the processes of thermal expansion of the floor surface. Excess tape and waterproofing can always be trimmed.
The floors are also thermally insulated to prevent heat from escaping down the floors or into the ground. To do this, choose insulation depending on the desired result, budget, purpose of the room and the characteristics of the heating system itself.
Basic recommendations:
- If the floor serves as an additional source of heat, you can get by with foamed polyethylene with a foil coating - penofol.
- If the floors below are heated, use polystyrene foam with a thickness of 20-55 millimeters, or similar insulation.
- If there is a lot of unheated space around, and the risks of energy loss are high, it makes sense to insulate the floor with a layer of 10 centimeters of polystyrene foam or mineral wool.
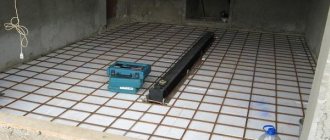
A reinforced mesh is placed on top of the insulation, most often sold as a complex with heating parts of the floors.
Distance between fasteners
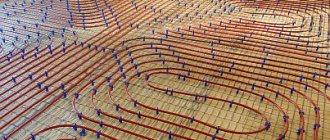
In order for the floor heating system to work efficiently and without unnecessary costs, you need to calculate the optimal pitch between the pipes in the floor. The standard distance is from 10 to 20 cm. The step can be either constant or variable:
- a constant contour step of 20 cm wide is used for systems with a heating load of up to 50 W per 1 sq. m;
- a distance of 15 cm is made with a heating system load of 80 W per 1 sq.m.
Variable pitch is used in other cases. If the installation of a water circuit near external walls is done with a distance of 10 cm, then, moving towards the center, this distance is gradually increased to 20 cm. For economical floor heating, it is recommended to make a distance of 15 cm.
Installation process
Before laying an electric heated floor, a thermostat is first installed. It is placed at a height of at least thirty centimeters from the floor, at the same distance between the heating cable lines. It is recommended to first make a recess in the wall for the device and place a groove for its wire. The sensor should be located in a well-heated area of the room. Therefore, the corrugated pipe with the sensor must be located above the floor level and be equipped with a plug.
This stage of direct installation of heaters varies slightly depending on the type of element used. Let's consider all the nuances.
With heating cable
In order not to confuse the order, we will analyze the process into steps.
Stages of work:
- Supplying phase, neutral and ground from the distribution box to the installation site.
- Formation of a groove in the wall in which two pipes will pass. The water one will contain the power wires of the heating cable, the other will contain the floor sensor wiring. The second one should be one meter longer than the first one.
- Leveling the floor surface, then installing thermal insulation. We place mounting tape on top in half-meter increments and lay the cable. You can do this using any type, but most often the “snake” is used.
- Pulling power wires to the thermostat box, the coupling should be located in the tie. The correct step in laying the cable is the distance between the tape fastenings. The cables are laid parallel.
- Installation of a temperature sensor, which must be wrapped with electrical tape to protect it from mortar.
- Checking the quality of work. It is necessary to measure the resistance of the heating cable with a tester, the permissible error is 10%.
- Screed. This stage will be discussed in detail in a separate section.
As you can see, everything is very simple. Even a beginner can cope with this task.
Application of thermal mats
Technologically, the mat is the same cable connected to an insulating underlying material that facilitates the laying of rolls. Installation in this case is very simplified. The process is similar to laying conventional cables, however there are a number of features that must be taken into account.
The most significant of them:
- The groove for placing the sensor must be made in the wall and on the surface. A protective plastic pipe will lie below the mat itself.
- After the basic preparation, you should immediately proceed to laying the mats. The roll width reaches half a meter. You can cut some parts of the mat to change the direction of the cables. You cannot cut by wire - only the mesh itself, which has a special reserve for changing the width.
- Having measured the desired area, you need to tear off the protective tape on the underside of the mat and unwind the roll, laying it on a clean floor surface.
- The laid mat must be covered with a layer of tile adhesive. The heating cable must not rise above the floor. The glue takes a long time to dry - 3-5 days.
- Once the glue has dried, you can immediately install masonry or other flooring. However, most often the mats are placed under ceramic tiles.
In this case, the cost of heated floors is sharply reduced, because when installing mats, no additional thermal insulation materials are required. Installation is very simple and takes only 7-8 days from start to finish. However, mats have the only drawback - such an element cannot be the only source of heat in the room.
With heating film
The film is incredibly thin - 0.2-0.5 millimeters. Heating occurs due to the presence of copper conductors and carbon inserts, which generate heat when current passes through them.
Film floors are laid according to the same principles as mats, only the power of the system depends on the finishing coating: 150 Watt is enough for laminate, 200-220 Watt is enough for tiles.
Sequence of work:
- The temperature sensor can be placed in a plastic pipe or directly on the surface of the film - this is not important.
- Laying thermal insulation. It is advisable to use foil that will reflect the IR radiation emitted by this type of heater.
- Film decomposition. It can be cut anywhere - it is very convenient.
- Insulation of copper wires at the cut site and at the edges of the film. They are insulated at one end, and power wires will be connected to the other.
- Laying decorative covering.
This material is considered the best option, but is distinguished by the considerable cost of the film itself.
Reinforcement mesh
The most inexpensive element for attaching a floor water line is reinforcing mesh. Select a material with a cell of a certain size. It depends on the step length with which the pipeline is laid: 10*10 cm, 15*15 cm.
Among the advantages of this fastener, the reliability of the fittings is noted. It serves as additional reinforcement for the concrete screed, which is formed for the water-heated floor.
- The pipes are secured using staples or tape. The brackets are made of heat-resistant plastic. They have spines pointing downward; securely hold the pipe in place.
- The staples are installed in a certain order on the entire surface of the reinforcing mesh. They have hooks on the underside. With their help, fastening to the fittings is made. The step between staples is 30-40 cm.
- In places where the pipe bends, it is necessary to place 3 staples. One is designed to hold the pipe in the center, the others provide a certain bending radius.
- The outline is drawn with a snake; push the pipe into the fastener with your foot. Use soft shoes.
Instead of staples, the line is reinforced with plastic tape. It has teeth on the inside. There is a loop at the end. The tape is wrapped around the pipe and inserted into a loop. In this case, the teeth are held by the edges of the loop, securely fixing the contour.
The work is more labor intensive. In this case, the plastic comes into contact with the reinforcing mesh. When using staples, the product is placed on a slight elevation. The grid remains at the bottom.
Connection
The heating element with a wire and sensors are connected to the thermostat according to the diagram specified in the instructions. Then it is necessary to connect the entire system to a residual current circuit breaker, the leakage current value is maximum 30 mA.
The check is carried out in various ways depending on the element:
- Cable and mats - the resistance of wires and elements is measured and compared with the passport characteristics (usually about 10%).
- You can simply touch the IR film. If it is warm, it means everything was connected correctly.
When installing a heated floor in a bathroom or bathhouse, you should connect the braid of the heating wire and the grounding wire. The use of grounding minimizes the risk of electric shock in the event of a malfunction.
Observe safety precautions: it is strictly forbidden to apply tension to the floor structure with screed or glue that is not completely dry!
Laying in grooves
If conditions do not allow raising the floor to the required level, it is possible to wall up the thermal cable in grooves. It should be noted that this technology is unacceptable for shell rock, foam concrete or other material with low thermal conductivity.
This method is not acceptable for insulating load-bearing floors, since it violates their strength. As a rule, it is used to warm up open areas.
The technical characteristics of the thermal cable in such cases are selected based on the depth of the groove. If they are no more than 10.0 mm, then you can use a low-power heating element for a warm floor. When the depth exceeds 20.0 mm, the power consumption can be increased to 17.0-18.0 watts per meter.
Filling with screed
Decorative floor screed is the final stage. The screed is poured from a mixture of sand and cement, the height of this layer is from five to nine centimeters. The entire mass should be distributed evenly, without the slightest irregularities or voids. To do this, initially the screed is made more liquid and pliable by adding a plasticizer, and then, when the level is established, the resulting mass is thoroughly dried. Only after complete drying can you begin to apply the decorative finish.
Finish coating
The best coating option for installation over heated floors is absolutely non-combustible materials. For example, ceramic tiles, granite, brickwork. Also, such rigid materials interact perfectly with the screed, which ensures reliability and high strength of the entire coating. Once warmed up, such layers will be able to maintain the required temperature regime longer.
All finishes must be installed using standard technology for the specific material. You can install laminate, parquet and even linoleum or carpet. It is possible to choose any option depending on the budget and interior design solution. Before purchasing, make sure that the parquet material and linoleum are intended for installation on heated floors. To do this, consult with an experienced sales consultant.
What are the consequences of incorrect installation?
Installation errors or improper operation can lead to multiple problems. However, there is no need to worry - they do not pose a danger to human health and life. But it’s still a pity to spend money, so it’s better to start installing heated floors with your own hands when you have the proper level of skill and experience.
The most common negative consequences:
- incorrect thermal conditions (for example, overheating under massive furniture);
- failure of the entire system due to breakdown of the sensor, wires or other elements,
- insulation failure leading to overheating of wires;
- “leakage” of heat due to improper thermal insulation;
- curvature of laminate and other finishing coating.
To avoid such troubles, you should follow all the rules when installing a heated floor.
Laying infrared thermal film.
Concluding the section on laying electric floors, it makes sense to describe in detail this process for film coating due to its popularity. The materials we will need are:
When everything is ready, we proceed to installation, provided that the horizontal floor is level, the algorithm of actions will be as follows:
At this point the process is considered complete. Please note that this version of an electric heated floor makes it possible to repair it (replace heating elements). To do this, simply remove the coating.
Common Mistakes
Beginners with little experience in laying floors can make many mistakes. However, some common flaws can be common even for a professional if low-quality components and elements are used. Therefore, you always need to take into account two factors: not only the qualifications of the worker, but also the quality of the purchased building materials.
Possible misfires:
- It is strictly forbidden to cut the cable. It must be purchased at a strictly suitable length. Any attempt to shorten it will lead to inevitable damage to the element.
- Do not lay cable or film on a contaminated surface. To remove dust, you must use a special vacuum cleaner.
- It is best not to step on the heating cable during installation, especially when wearing hard-soled shoes.
- If any liquid, glue or cement gets into the corrugated tube containing the sensor, it will be damaged and will not be able to measure the media.
- Air pockets should not be left in the tie, especially if they are located close to the cable or even in contact with it.
If you are not confident in your abilities, you can turn to a professional. However, we recommend that you study in detail all the materials given in the article and try to make at least one section of the floor in a small room yourself.
