Advantages and disadvantages
The Butakov stove has the following advantages:
- Cost-effective: one full deposit is enough to burn wood quietly all night – up to 10-12 hours.
- The condensate formed after combustion settles on the walls of the vertical pipe, after which it is again sent for combustion. This allows you to get rid of the unpleasant odor.
- Due to the unique design, heating occurs quite quickly, and heat distribution is uniform.
- Strong and thick walls with well-treated seams will prevent fire from breaking into the room.
- The oven can be used as a stove for heating food.
- The presence of a variety of models allows you to choose the optimally profitable option.
- Removing ash is quite simple.
- The stove is easy to install yourself, and its price is not very high: up to 30-35 thousand rubles.
- Stylish design allows the stove to fit into any interior.
The disadvantages include some design features of the devices:
- When the fuel burns out, the stove cools down quickly.
- It is necessary to carefully check the correct installation of the chimney so that smoke does not enter the room. It is also worth remembering that the pipes will have to be cleaned regularly.
- The outer walls become very hot, which can lead to a fire or burn to a person leaning against it.
History of creation
The stove runs on wood, pellets and other solid fuels
The first example of such a stove was made in 2002 in the north of the country, in the Novosibirsk region. Just two months after this, the necessary certificates were received, and by 2004 a patent for the invention was issued. Its developer is a specialist in the field of heating engineering E. Yu. Zubkevich, who named the stove in honor of his relative Professor S.E. Butakova.
A year later, the inventor entered into an agreement with the Termofor company, which mastered the production and production of products. For a number of reasons, cooperation with her was suspended in 2008 and the patent owner remained out of business. To date, the production of these furnaces has been established on an industrial scale.
Technical features of furnaces
In the Gymnasium Student and Associate Professor series, there are several design differences. But there are also general characteristics and operating parameters inherent in each model:
- The heating principle - the oven belongs to the class of convection equipment. Heating is carried out through convection channels, tubes through which cold air is taken in and hot air is exhausted. The special design of convection channels ensures rapid heat transfer. Heat enters the room immediately after kindling, after 3-5 minutes.
Possibility of cooking - convection ovens do not have a special cooking surface. For cooking or heating food, the upper horizontal surface is used.
Operating principle: Termofor stoves are long-burning equipment. During operation, the principle of pyrolysis or gas generation is used.
In addition to the general characteristics and design features that each model has, there are significant differences. In order not to make a mistake when choosing, you should study the description of furnaces from the Termofor company.
Furnaces Gymnasium student
Long-burning heating stove by Professor Butakov Gymnasium student, designed for heating rooms with a maximum area of up to 100 m³. The main type of fuel is firewood, but the use of pressed briquettes is allowed.
The Gymnasium Student series has several differences:
- Combustion chamber volume 78 l. The gas generation mode and the large capacity of the firebox make it possible to extend the operation of the furnace from one load to 6-8 hours.
Inside the structure there are convective pipes, with the possibility of connecting additional air ducts, for heat removal and heating of adjacent rooms. Heating of the room is carried out using a combined method. In addition to convection, a very hot metal stove body is used to heat the room.
Metal convection heating stove Termofor Gymnasist, weighs only 55 kg. For ease of installation, a special stand is provided.
The hob of the Termofor Gymnasist heating and cooking stove is designed as the upper horizontal surface of the body. Convection channels come out so as not to interfere with the installation of dishes, if necessary, cook or heat food.
| Model | "Gymnasium student" |
| Maximum volume of heated room, cubic meters. m | 100 |
| power, kWt | 6 |
| Overall dimensions (WxDxH), mm, pipe up | 370x530x780 |
| Weight, kg | 55 |
| Fire door opening, mm | 250 |
| Combustion chamber volume, l | 78 |
| Maximum fuel loading volume, l | 34 |
| Maximum log length, mm | 440 |
| Chimney diameter, mm | 120 |
| Recommended chimney height, m | 5 |
| Convection pipes: diameter, mm / quantity, pcs. | 40/8 |
The Gymnasist stove is suitable for small rooms up to 60 m², simultaneous cooking and for heating the main and adjacent rooms.
Furnaces Associate Professor
The Termofor Docent wood heating stove, unlike the Gymnasist series, is designed for heating large areas with a total area of up to 250 m². The main differences of the modification:
- Possibility of choosing a complete set - the series includes models with doors that have a glass insert and are completely blind.
The weight of the structure is the mass of the body is about 160 kg, the volume of the combustion chamber is 275 liters.
The main type of fuel is wood with a moisture content of no more than 20%.
Operating principle - the design includes special jets for afterburning exhaust gases, which increases heat transfer by 10-15%.
Construction material – the main body is made of steel. Air heating stove Professor Butakov Associate Professor, comes complete with a cast iron door with glass. The advantage of the solution is the absence of door deformation, even after several years of operation. It is possible to choose a blind door that does not have glass.
| Model | "Assistant professor" |
| Maximum volume of heated room, cubic meters. m | 500 |
| power, kWt | 25 |
| Overall dimensions (WxDxH), mm | 570x820x1000 |
| Weight, kg | 164 |
| Fire door opening, mm | 290x340 |
| Combustion chamber volume, l | 275 |
| Maximum fuel loading volume, l | 100 |
| Maximum log length, mm | 600 |
| Chimney diameter, mm | 150 |
| Recommended chimney height, m | 6 |
| Convection pipes: diameter, mm / quantity, pcs. | 70/14 |
Furnaces from the Butakov company, Docent series, are used for full heating of large rooms. To do this, air ducts are connected to the convective channels. The upper horizontal surface of the stove, as in the Gimnasist modification, is intended for cooking or heating food.
Device
Design of the "Engineer" furnace. (Click to enlarge)
In terms of design and principle of operation, the “Engineer” is practically no different from other models of heating stoves “PROFESSOR BUTAKOV”.
The body of the furnace-boiler is an all-welded structure of an original shape (truncated parallelepiped), made of steel and coated with black anthracite-colored silicone paint.
Inside the housing, in the front and rear parts, there are built-in convection pipes, through the lower part of which cold air is drawn in, passing along the housing, heated, rises, exits through the upper part of the pipe and is distributed throughout the room through special openings-air ducts.
The presence of a large replaceable grate ensures uniformity and duration of combustion of the firebox over its entire area. The bottom of the firebox is protected from burnout by a heat-resistant grate. As a result, all surfaces of the stove participate in heating the room.
The door rotates on hinges 120 degrees, has a special seal and a reliable locking mechanism.
These stoves use solid fuel as fuel - pressed cardboard, firewood, wood waste, peat, brown coal. At the bottom of the furnace there is a capacious box for ash, which is poured into it through the slits of the grate, and which can be emptied of ash without interrupting the operation of the furnace.
The base of the boiler has mounting holes for fixing the stove to the floor.
At the same time, the Engineer stove has a number of distinctive (besides the above) features and characteristics:
- she weighs 100 kg;
- its dimensions are 440×645×800 mm;
- firebox volume -120 liters;
- chimney pipe diameter is 120 mm;
- efficiency factor (efficiency) - about 85% (increased heat transfer is achieved through the use, like the Student furnace, of pipes with a large diameter and thinner walls.)
In addition, the Engineer series has 2 modifications:
- with steel door;
- with a cast iron door with heat-resistant glass.
Accordingly, prices for each model also differ: in different stores they vary between 14,000-16,000 rubles. and 18,000-20,000 rubles.
Characteristics
There are several models of the “Engineer” stove; in this case, we will look at a model of a wood-burning stove from the Termofor company. Its price is approximately 14,250 rubles. (without chimney).
This is what the oven looks like in the photo:
| Heating area, m³ | 250 |
| power, kWt | 15 |
| chimney, Ø mm | 120 |
| chimney outlet | Top/back |
| Height of the chimney, m (minimum) | 5 |
| Firebox volume, l | 120 |
| Door | With glass/without glass |
| Dimensions (depth, width, height), mm | 765*440*895 |
| Maximum load of firewood or coal, l | 40 |
| Maximum length of logs, cm | 45 |
| Boiler material | Metal/steel |
| Firebox material | Metal/steel |
| Unit weight, kg | 113 |
| Manufacturer country | Russia |
The lineup
Today there are many models of the Butakov stove on the market. Below we will consider the main ones.
- The Gymnasist device, with a power of only 7 kW, is capable of heating up to 100 m² of area. The height of the chimney is 5 m.
- The Student stove (9 kW) can heat a room up to 150 m². The maximum fuel volume is up to 20 kg. The height of the chimney is 5 m.
- Professor Butakov’s “Engineer” unit (15 kW) will heat a room up to 250 m². The maximum fuel volume is 40 kg. The height of the chimney is 5 m.
- The Docent stove (25 kW) will heat a home up to 500 m². The design can hold up to 100 kg of flammable substances. The height of the chimney is 6 m.
- The “Professor” device (40 kW) is capable of heating up to 1000 m² of housing. The maximum fuel volume is 200 kg. The height of the chimney is 8 m.
- The Akademik unit (55 kW) can warm up a house with an area of up to 1200 m². The stove can hold up to 240 kg of flammable material.
Each model has its own dimensions. The larger the fuel space and firebox, the larger the dimensions of the stove.
The optimal choice of device depends on its purpose and the area of the premises requiring heating.
The compact stove “Gimnasist” can heat up to 100 square meters. meters. Its chimney goes up, so this unit is suitable for country houses and garage buildings. For other models, the chimney exits to the top or is located at the rear of the structure. They are mainly installed in large rooms.
The history of the origin of the stove.
Butakov's stove A popular professor at the Polytechnic University and heating engineer from the Urals, Sergei Efimovich Butakov, has created a number of economical boilers that run on solid fuel.
Depending on the model, they are capable of heating rooms with a volume of 100-1200 cubic meters. These devices have been successfully tested in many regions of Russia, including cold Siberia. The professor’s inventions received general approval and were able to pass state certification. Now many companies offer Butakov furnaces, but it is very important to choose among them those that can provide quality products from experienced manufacturers
The professor's path to creating these heating devices was not easy. He constantly improved his devices. Thanks to this, the scientist was able to achieve excellent operation of the furnaces, the absence of an unpleasant odor in the rooms when heating them, minimal fuel consumption and a variety of its types. Through trial and error, Butakov was able to create the ideal device for heating buildings, which is becoming more and more popular day by day.
Buying tips
In order for an ignorant user not to make a mistake when buying a stove, it is necessary to know how the original Novosibirsk Termofor product differs from a fake. Considering that the product is designed for long-term combustion, high-quality material is used for its manufacture: thick steel for the body and durable cast iron for the grates and doors. It is the design of the firebox door that is the main difference between the original and the fake.
Depending on the modification, the cost of the structure starts from 15,000 depending on the model. Considering the high functionality and efficiency of the devices, the price of Professor Butakov’s “Student” stove is quite adequate, which allows everyone to economically heat their country houses.
Installation of the unit
The Butakov stove for a bath is installed in the center of the steam room or between the steam room and the dressing room (washing compartment). For a fairly powerful installation, the second option looks preferable. In this case, the combustion door is removed from the steam room, which makes it possible to load fuel without entering it.
When installing the stove, the following recommendations should be followed. It is best to install the stove on a specially equipped concrete platform. If it is not possible to arrange it, then reliable fire-resistant protection must be provided on the floor. To do this, a steel sheet with a thickness of at least 4 mm and sheets of asbestos cardboard with a thickness of at least 10 mm are laid.
The stove may be installed at a distance of at least 40 cm from combustible elements of the bath structure. The adjacent section of the wall of the structure is also insulated with fireproof material. Such a screen must exceed the height of the device by at least 30 cm.
A steel sheet measuring at least 50x60 cm must be placed in front of the combustion chamber door. It is installed close to the stove and must completely prevent accidental contact of smoldering fuel on an unprotected floor. The chimney must have a total length of at least 5 m. The areas where the pipe passes through the ceiling and roof are subject to additional insulation. All pipe joints are sealed with a special, heat-resistant silicone-type sealant.
When operating the stove, the following nuances must be taken into account:
- The stove can only be heated with solid fuel (wood, coal, peat, etc.). It is strictly forbidden to use flammable liquids for kindling (gasoline, kerosene).
- The furnace body heats up to a high temperature, and therefore it is necessary to install guards to prevent accidental touches.
- Loading fuel into a homemade installation is carried out as follows. The lid is removed along with the pipe, and firewood is laid, and small chips are poured on top of it and paper is laid. For lighting, you can use a wick on a long rod. After combustion begins, the lid returns to its place, and the metal profile welded to the pipe begins to compact the loaded fuel. While combustion is in progress, the air duct damper is completely closed.
- The chimney outlet from the housing must be free.
In general, with proper installation and operation, the Butakov stove is considered an absolutely safe device in terms of fire safety. This device is characterized by high efficiency and small dimensions, which ensures efficient heating in rooms of various types. If depressurization of the housing or other defects are detected, operation of the device must be stopped until they are eliminated.
Self-production
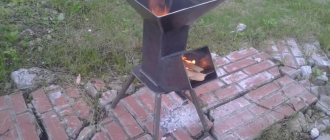
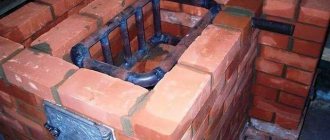
Before you start building a device with your own hands, you need to study its diagram:
The assembly sequence of this unit is no different from the installation of gas generator furnaces. The basis of the device is a metal barrel.
To get a high-quality unit with safe, economical and efficient heating, follow the instructions below:
- Using a grinder, you need to cut off the top of the barrel, smooth out the sharp edges with a hammer and bend them down.
- It is necessary to cut a circle with a diameter of 1.5-2 cm in a steel sheet. This is much smaller than the corresponding size of the barrel itself.
- In the cut out element you need to make a hole with a diameter of 10 cm and weld a steel pipe of the same size to it.
- You will need to attach channel sections to the bottom of the product using a welding machine and install them so that they can move freely inside the barrel. During operation of the unit, metal beams will put pressure on the fuel.
- A damper is mounted on top of the pipe, and the pin is installed strictly vertically.
- This element must be fixed by welding. A hole needs to be drilled at the edge of the valve, cut from steel with a diameter similar to the corresponding pipe size. After installation, the pin should cover the product.
- The damper is screwed on with a nut. Installing this element allows you to further monitor the volume of incoming air, as well as the intensity of the device’s operation.
- The side of the lid must be leveled with a hammer. The edges need to be bent outward to ensure a tight fit and adherence to the base.
- You need to make a hole in the lid with a diameter of 10.5 cm. To do this, you need to stock up on a chisel.
- The pipe needs to be welded to the pancake and brought out through a hole made in the lid, which then needs to be welded.
- For the base of the furnace, you can prepare a not too deep brick platform.
- In the upper part of the device body, you need to cut a hole with a diameter of 15 cm. A smoke channel will pass through it, which is 1.5 times longer than the body itself. A previously measured section of pipe is welded to the hole on top of the structure.
- You need to make a small square hole at the bottom of the device, then weld the door to it. This will be an ash pan - a hatch for collecting ash, where a box is installed for convenience and ease of cleaning.
- The lower part of the chimney pipe is carefully welded. It is desirable that the product stands on legs.
- An elbow is welded to the channel and the furnace is connected. The structure is fixed with a clamp. A fiberglass base is preliminarily placed under this device to ensure the tightness of all connections.
Principle of operation
Operation
oven is carried out simultaneously by pyrolysis and convection:
- The pyrolysis process occurs directly in the firebox. In this case, the fuel does not burn, but simply smolders. If you close or open the door vent, you can regulate the flow of fresh air inside. During this process, a large amount of gas is released, which is sent to the second chamber, where, when mixed with oxygen, it is completely burned. At the same time, the air in the room always remains fresh.
- The convection process occurs in special pipes installed in the structure. Through channels mounted in the firebox with protruding ends at the outlet, hot air is directed directly into the room. Heating is carried out naturally. Cold air is taken in from the lower openings of the pipes. It passes through the entire structure and is sent upward while still hot. However, this leads to sudden changes in temperature in the chimney, which is why condensation is possible, which is a significant disadvantage of this design. But the problem can be solved if you install a pipe. Through it, the condensate will not escape outside, but will settle directly in the firebox, in which it will simply evaporate under the influence of heat.
Potbelly stoves and many pyrolysis units operate in approximately the same way, but there are still some differences. Among them the following are noted:
Pipes in the furnace are not installed arbitrarily, but at an angle
It is important to set the exact angle when arranging the structure yourself. The doors are not just hung on hinges, they contain a convection chamber, which contributes to faster and more uniform heating of the room. The oven, unlike some pyrolysis models, is quite easy to maintain. The ash pan is easy to remove and quick to clean
Among similar designs, it is the Butakov unit that is considered the most efficient, simple, and has high heat transfer.
A little more about pyrolysis...
The essence of pyrolysis lies in the process of technological gas-generator combustion. When solid fuels such as coal, pellets, peat briquettes or firewood are burned, the room warms up. The operating principle is similar to that of a dry distillation boiler. The pyrolysis system is due to its exothermic properties, and can heat the incoming air due to the heat generated. The fuel is ignited and the fan turns on when the door is closed. The high temperature regime (200–800 °C) and low oxygen capacity in the pyrolysis combustion furnace lead to a chemical process - the wood decomposes into coke and pyrolysis gas. Also, when wood burns, it can form methyl alcohol, acetone, vinegar and resin.
The released gas combines with oxygen and goes into the combustion process. The smoke generated during combustion does not contain bad carcinogens and other dangerous components. Burnt fuel produces thermal energy, which heats the room. The water contained in the boiler enters the heating structure in a hot state with a simultaneous return supply. The coolant is also used as a coolant. This is how a boiler with a bottom-mounted chamber functions.
Furnace installation
The unit can be placed in the center of the room or built into the wall, simulating a fireplace. In this case, two adjacent rooms will be heated at once.
When installing a stove, the main condition is the unhindered flow of air. The material must be fireproof, and for the base it is better to use a concrete screed
The chimney heats up quickly during operation and startup of the stove, therefore it is important to lay a thermal insulation layer between it and the roof
At the dacha, you can heat it with wood scraps, but the best fuel for such a design is pellets with high efficiency. The operating principle of the stove is as follows: smoldering occurs slowly, so the moisture content of the wood is not particularly important. Dry wood will burn the same way.
The combustion chamber must be extremely sealed. Carbon monoxide does not enter the room, so the stove can be placed next to the sleeping place. One bookmark should be enough for 18-20 hours. The Butakov unit will be the optimal solution when installed in a country cottage with a decent area, or in a country house.
Today, more powerful stoves are produced. For example, a new model “Akademik” with a power of 55 kW has appeared. This is a real record among heating devices of this type. Thanks to the modern design, installation is possible anywhere. A large range of models allows us to satisfy everyone's needs.
If you follow all the recommendations described above, you will be able to make an excellent device with a long-burning system without much expense.
Range
The most interesting thing about Butakov’s stoves is the names that he used when creating the model range of heating equipment - Student, High School Student, Engineer, Professor, Associate Professor, etc. We will get to know each of them separately.
- High school student. Power parameters - 6-7 kW. Nowadays it is not in great demand; it is purchased mainly to order. A high school student is able to heat an area of up to 20 square meters, using 20 liters of fuel.
- Student. The power of the Student stove is 9 kW, and its weight is only 70 kilograms. The Student model is quite old, but the most common. The heated area does not exceed 100 square meters. At the same time, the Student has a cast-iron grate and a retractable convenient ash pan. The student allows you to heat the house and cook food.
- Engineer. The Engineer weighs 113 kg, but the power is 15 kW. The Engineer model is designed for heating rooms up to 250 square meters. The maximum load of the firebox is 40 liters. The Engineer stove is distinguished by the presence of a glass screen on the door. The door itself can be made of steel or cast iron. The engineer is in great demand for private homes.
- Assistant professor. An impressive 164 kilograms of weight gives 25 kW of power. The firebox of this stove model holds 100 liters of fuel. But the Associate Professor is also capable of heating an impressive area - 500 square meters.
- Professor. The highly efficient Professor stove weighs 235 kilograms, but also produces 40 kW of power. The Professor model copes with heating rooms up to 1200 square meters. To heat such an area, the Professor will require 240 liters of solid fuel to be loaded into the firebox.
- Academician. The most powerful representative of the Butakov stove series. Weighing 300 kilograms, the power of the equipment is 55 kW. Unlike the Professor model, the Academician heats up to 1000 square meters, using 200 liters of fuel.
Advantages and disadvantages
Diagram of the Butakov furnace
What unites the models Student, Professor, Gymnasium Student and other stoves made by Butakov? Their advantages and disadvantages.
The strengths of the furnaces of the Soviet developer include:
- High level of fire safety. In Student stoves and other models, combustion does not occur, but the process of smoldering occurs. Therefore, there is no open fire;
- Functionality. Despite its small dimensions, the same Student model has heating and cooking capabilities. Due to the high efficiency, there is enough power to efficiently perform each function;
- Environmental friendliness. The fuel burns almost completely, so there is no waste hazardous to humans;
- Long service life. At its attractive price, Butakov’s equipment guarantees long-term operation.
But Butakov stoves have certain disadvantages.
- The stove body actively heats up, so touching the surface of the stove can lead to burns. You just need to be careful when using the stove.
- When the combustion process is completed, the chamber cools down quite quickly. Because of this, the indoor temperature drops. But since the furnace is capable of operating for 8-12 hours, it is difficult to call this a serious drawback of Butakov’s equipment.
- When the furnace operates, the air inside the room becomes very dry. To avoid this, you need a humidification system or effective ventilation.
The stoves made by Butakov cannot be called ideal in all respects. But these stoves have their undeniable advantages, allowing them to compete on an equal footing with gas boilers that are objectively more attractive to many.
Furnace design
Butakov's heating device is very simple. The unit consists of the following elements:
- ash pan for collecting combustion products;
- air outlet pipe;
- two-chamber firebox: one compartment is provided for connecting to gas, the second is for afterburning fuel;
- grate in the form of a damper;
- smoke channel.
The pipes run along the edge of both sides of the furnace, are arranged in two rows, close and cross in the upper part. Thanks to this design, the floor warms up well when cold air moves through pipes located in the combustion zone. Due to them, the heating area increases and the furnace walls do not burn out. Thanks to special jets with hot air inside, located at the top of the firebox, the secondary gas is burned in full. This once again confirms the efficiency of the device: the fuel burns out entirely, and the heat is retained indoors for a long time.
Division of Termofor Professor furnaces by type
The solid fuel air-heating boiler Professor Butakov Professor is available in two modifications, differing in the type of fuel used. The stoves can operate on wood and coal.
Prices for Professor stoves depend on the model:
Coal will cost a little more due to the peculiarities of the internal structure. The stove can be bought for 40 thousand rubles.
Regardless of the chosen model: wood/coal, Professor stove, it will last 8-10 years. For the first year of operation, a factory warranty is provided. In the event of a malfunction: burnout or deformation of the housing, the manufacturer is ready to replace the defective product with a new one.
Wood-burning stoves Professor
Metal heating stove Professor Butakov Professor on wood, characterized by an increased volume of the combustion chamber (400 l) and a productivity of 40 kW. Inside the body there are grate bars that ensure maximum burning of firewood and the complete absence of unburned residue.
In the internal structure of Professor Butakov’s heating and cooking stove for home, wood-burning, long-term burning, the gas generation process is used with maximum efficiency. The internal firebox is made in the form of a parallelepiped to improve the afterburning produced during combustion of carbon dioxide.
Wood-burning metal stoves for long burning, Professor Butakov, are distinguished by another design feature. Convection pipes pass inside the side walls of the combustion chamber and form a vault at the top, bending at an angle. It is believed that this particular arrangement of the channels ensures better intake of cold air and release of heated air into the room.
Furnaces Professor coal
The long-burning solid fuel coal air-heating boiler Termofor Professor has several differences from its wood-burning counterpart:
Heat-resistant glass on cast iron door. The decision to use cast iron helped solve the most common problems. Deformation of the firebox door was prevented, and it became possible to observe the flame. To prevent the glass from becoming covered with soot when burning, an anti-smoke system is provided.
The hermetically sealed firebox and internal design features are designed taking into account the possibility of using Professor Butakov’s long-burning stove in residential premises. When used correctly, smoke is prevented from entering the room. The power of the stove is enough to fully heat a building of 400 m².
To heat adjacent rooms, the Termofor company has developed a heat removal panel, through which several air ducts are connected to the Professor stove.
Safe installation of the stove and chimney
For installation you will need an asbestos board or sheet of iron
To install a chimney on an engineer Butakov stove, you will need to read the installation instructions, which describe in detail all installation operations. There is also a diagram for connecting pipes to the output manifolds of the unit.
When installing them, special attention is paid to the issue of fire safety, which is primarily manifested in the selection of a suitable location
The Butakov boiler, as a rule, is installed directly on the floor of a residential or industrial premises. It is placed on a flat surface covered with a sheet of iron on top of a ten-millimeter asbestos flooring. There are mounting holes on its base that allow the housing to be fixed to the floor if necessary.
During installation, it is important to ensure that the stove firebox and body are at least 380 mm away from the walls and floor. If it is impossible to provide the required gap, it is recommended to insulate the wall surfaces at a level of 25 cm above the top of the boiler
To do this, you can use one of the following methods:
- cover with a layer of reinforced heat-insulating plaster 25 mm thick;
- place a 10 mm piece of asbestos with a steel sheet on top on the protected surfaces.
To insulate the floor in front of the firebox door, you will need to lay a metal sheet of the required size.
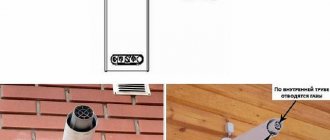
It is also important to determine the exact location of the chimney pipe installation in the ceiling area on the ceiling surface. After marking it, a square hole is made in the selected area, insulated with basalt wool over metal sheets
According to the drawings, the Butakov stove is connected to the finished chimney using a special tee, which ensures that combustion residues of wood (soot) and condensate settle in it
Particular attention is paid to the quality of pipe joints, for which all joints of the gas exhaust system are sealed with heat-resistant sealant.
Preparing pipes and parts
The oven has an outlet of 14 convection pipes. The diameter of the chimney outlet is 200 mm; we purchase it ready-made from a corrugated ventilation pipe.
For manufacturing we will need to prepare several parts. From 4 mm sheet steel we cut out:
- 2 side parts measuring 800/950 mm. The second dimension is the height of the structure;
- For the front and rear walls, we use a grinder to cut out parts 1110/670 mm. After final assembly, the protruding metal will be cut off and can be used as reinforcement for the base;
- for the top we cut out a piece measuring 350/950 mm. It is necessary to mark 6 holes of three pieces on the narrow sides and drill or cut them by welding. Pipes with a diameter of 40 mm will come out of them;
- for 2 side jibs, cut the workpiece to a size of 200/950 mm;
- for the base you can use a corner with a 100 mm shelf or a channel. 2 pieces 950 mm and 2 lintels 470 mm each. It is necessary to make holes in the base for the pipes, which must be coaxial with the top ones;
- For convection pipes we use steel parts with a cross section of 40 mm. 6 of them are straight, they run along the front and back walls. There are 4 holes on the jibs. 8 pipes will need to be bent to a certain angle. It is better to do this on a pipe bender.
You will also need to leave a sheet for making a door and an ash drawer. To make a grate, you can use a sheet 10 mm thick, making longitudinal grooves in it with a grinder. You can weld a grid from reinforcement or a rod with a diameter of 8-10 mm.
To install the grate, we will prepare several pieces of corner. It is better not to secure the grate tightly; this will make it easier to replace and maintain the stove. A hole is marked on the top part and made for connection to the outlet pipe. You will need to prepare a section with a cross-section of 180-190 mm and a length of 170 mm.
Furnace installation
Before installation, you should prepare a place for the heating stove. This does not require the installation of an additional foundation.
The stove is installed on the floor, on a flat, insulated surface (metal sheets on asbestos cardboard can serve as such a surface).
The base of the Butakov stove design is equipped with holes for fixing, so it can be fixed to the floor.
Adjacent walls also need to be insulated to a level 25 cm above the top edge of the stove. Plaster on a metal mesh or asbestos cardboard with a metal sheet serves as thermal insulation.
The distance from the wall to the stove must be at least 38 cm.
A metal sheet must be laid in front of the oven door.
The hole for the chimney should be thermally insulated.
The Butakov heating stove is installed in a prepared place made of non-combustible materials (for example, on a brick stand).
The last step in the installation is connecting the chimney to the tee and the stove.
Important! All pipe joints should be treated with heat-resistant sealant. Important! The chimney pipe should protrude 50 cm above the roof ridge
In this case, the part of the chimney located in open space must be insulated with material that can withstand temperatures up to +400 °C
Important! The chimney pipe must protrude 50 cm above the roof ridge. In this case, the part of the chimney located in the open space must be insulated with material that can withstand temperatures up to +400 °C
Be sure to insulate the hole in the roof with special material.
The space around the structure can be equipped with any heat-resistant and non-flammable material.
Furnace installation
For installation you will need an asbestos board or sheet of iron
To install a chimney on an engineer Butakov stove, you will need to read the installation instructions, which describe in detail all installation operations. There is also a diagram for connecting pipes to the output manifolds of the unit.
When installing them, special attention is paid to the issue of fire safety, which is primarily manifested in the selection of a suitable location
The Butakov boiler, as a rule, is installed directly on the floor of a residential or industrial premises. It is placed on a flat surface covered with a sheet of iron on top of a ten-millimeter asbestos flooring. On its base there are mounting holes that allow, if necessary, to fix the body to the flooring.
During installation, it is important to ensure that the stove firebox and body are at least 380 mm away from the walls and floor. If it is not possible to provide the required gap, it is recommended to insulate the wall surfaces at a level of 25 cm above the top of the boiler. To do this, you can use one of the following methods:
To do this, you can use one of the following methods:
- cover with a layer of reinforced heat-insulating plaster 25 mm thick;
- place a 10 mm piece of asbestos with a steel sheet on top on the protected surfaces.
It is also important to determine the exact location of the chimney pipe installation in the ceiling area on the ceiling surface. After marking it, a square hole is made in the selected area, insulated with basalt wool over metal sheets. According to the drawings, the Butakov stove is connected to the finished chimney using a special tee, which ensures that combustion residues of wood (soot) and condensate settle in it
According to the drawings, the Butakov stove is connected to the finished chimney using a special tee, which ensures that combustion residues of wood (soot) and condensate settle in it
Particular attention is paid to the quality of pipe joints, for which all joints of the gas exhaust system are sealed with heat-resistant sealant
Before starting installation, it is necessary to prepare the place where the unit will stand. To complete the task, it is not necessary to install an additional foundation. The stove can be placed on a brick stand.
Note! It is recommended to pre-insulate the installation site. Metal sheets are used for this purpose. The surface must also be flat, without drops
The surface must also be flat, without any drops.
The walls adjacent to the device must be insulated. Plaster mixture on a metal mesh is an excellent option for thermal insulation.
Important! The device must not be installed close to a wall. In this case, it is recommended to maintain a distance of at least 40 cm. Also, the pipe joints must be treated with a special sealant
Moreover, the space near the unit should not contain flammable materials
Also, pipe joints must be treated with a special sealant. Moreover, the space near the unit should not contain flammable materials.
By observing the above requirements, it is possible to avoid a fire.
Installation of the stove “Professor Butakov” model “Student”
The stove, as you know, is the heart of the house.
I started looking closely at stoves back at the construction seminar in the Ark (January 2007). At that time I was more interested in iron ones, because... I was going to build myself a change house, and naturally I didn’t even think about a brick one. So, I’ve already seen how an ordinary potbelly stove works using Zhenya’s example. It heats up well and... cools down very quickly. And so, in the Ark I see and touch with my hands the stoves of slow (long) burning (or smoldering). First of all, these are Bulleryans (now they are sold under the Brenneran brand).
A miracle of Canadian industry with protruding pipes, these stoves looked truly wonderful.' Many people had such stoves, including those in the common house. Stoves of this type operate in two modes - in the “potbelly stove” mode and in the gas generation mode. In the first mode, all dampers (the damper on the pipe and on the firebox lid) are open. The stove heats up quickly and strongly, and the first layer of coals forms. After this, more firewood is added, and the front flap closes (or rather, a small crack remains). Thus, the flow of cold air, and therefore the draft, is practically reduced to zero. And the stove goes into the second mode - the wood smoldering mode. In this mode, fuel combustion is extremely slow with minimal oxygen supply. This mode allows you to maintain a comfortable indoor temperature for a long time. A design feature of such furnaces is the presence of convective heat exchange pipes. These pipes start at the bottom of the stove, pass through the firebox, and exit at the top. Cold air (from the floor) from outside the stove enters this pipe from below, passes through the firebox (where it heats up) and goes outside (where it rises to the ceiling). Well, warm air from the ceiling gradually falls down.
In general, I really liked these stoves; the guys (and they live there all year round) in the Ark told a lot about their operation. The main thing is that the stove can actually work all night, gradually releasing heat. Firewood or boots are dried on the upper chimneys. The main trouble with all slow-burning stoves is that condensation forms inside the pipe during operation. This is a black, stinking slurry that is difficult to wash off. To reduce its formation to a minimum, and to ensure that it does not flow out of all the cracks in the pipe joints, it is necessary to install the pipes “through water”, i.e. insert the top one into the bottom one. And of course, use sandwich pipes - i.e. insulated pipes.
Why am I singing the defamations of this stove? Simply because these stoves were the first in their class, and the first that I became acquainted with. By the way, these stoves began to be produced in Canada in the 60s.
But in one house in the Ark I saw another stove, and immediately fell in love with it. It was "Professor Butakov". Neat, without protruding pipes, with gilded pipe necks - it was simply beautiful. It turned out that it was made in Novosibirsk and works on the same principle as Bulleryan... only better. On the Termofor website you can find a comparison of their stove with the Canadian one. Of course, this is primarily an advertisement, but... there really are more pipes, they pass their entire length through the firebox, the stove has the shape of a flame, pipes of a larger cross-section (when comparing models with identical characteristics), there is an ash drawer and a grate (Bulleryan does not have them). The stove takes up less space. Butakov’s total heating area is 90% (!) larger. Well, and a small trifle in the form of a flat surface on which you can heat, for example, water. In addition, this is a stove of modern design.
Furnaces "Professor Butakov"
After that, in general, I was no longer tormented by the choice of which stove I would install in my future change house. I’ll say right away that all these stoves, of course, are in no way comparable to a brick one, but they have the right to live in our small houses.
The “Professor Butakov” stove line now has 5 standard sizes, differing in the volume of the room they are designed for: Gymnasium student-100, Student-150, Engineer-250, Associate Professor-500, Professor-1000. Currently, the “Gymnasium Student” model is no longer produced by the plant, but it can still be bought on the markets. This stove is a little different from other models, so a few words about it (in the picture above it is on the far left). In terms of size and weight, it is fully consistent with the “Student”, but it only has 8 convective pipes. The combustion door is round and without an additional casing (since there are no pipes on the front wall). There is no grate or ash drawer. The incoming air regulator is the same as on the Bulleryan - a round gate on the combustion door. The bottom of the firebox is flat - this, of course, makes it easier to remove ash. My opinion is that the presence of a grate and an ash bin is good, and their absence is bad - but I cannot prove it.
I know two more manufacturers of slow burning stoves - Teplodar and Chenel. “Chenel” is very similar in appearance to Bulleryan, but there is a hob on the stove. There are no convection pipes; the air passes under the outer casing over the entire surface. I didn’t look inside, but it looks like there is no grate or ash pan. The disadvantage of these stoves seemed to me to be the small power and volume of the heated room. Plus, I haven’t found these stoves cheaper.
Heating and cooking stoves "Chenel"
I won’t say almost anything about Teplodar, but apparently, instead of convective pipes, it uses an external casing, just like in Chenel. This doesn't seem very powerful to me. There are only two modifications (standard sizes), and the first of them is only 50-100 cubic meters. Plus, the manufacturer’s website was not impressed by the operating time on one stack of firewood - 3-3.5 hours... Pros - low price (compared to Butakov), there is a hob, there is an ash pan (and therefore a grate), the water tank is easy to install ( i.e. there are tanks that are immediately “tailored” for this stove). And I couldn’t find any information on how to use them. Although Volodya bought such a stove from us from field I6.
Teplodar stoves
So,
the advantages
of such stoves: • quick heating of the room; • give off heat for a long time; • lightweight, can be installed without a foundation, although installation requires careful attention (see below).
Minuses
such stoves: • there is always smoke coming out of the chimney when you heat the stove; • quite high cost (especially of “older” models) of the stove and pipes; • such ovens promote active mixing of air that passes through hot convection pipes. The dust present in the air burns in these pipes => combustion products appear that we breathe. Those. these stoves are far from being called “ecological”; • caustic condensate forms on the inner walls of the pipe. The pipe must be cleaned regularly.
An alternative to such stoves that covers all their disadvantages is a brick stove. But, as I already said, in my opinion, it makes no sense to install it in a small house that doesn’t even have a foundation. Because such ovens require at least their own foundation, and take up more space than the above. Well, they cost more.
Not everything is probably enough for entry. I built my house last year, but I couldn’t buy a stove - there was no money, then there was no road... And only recently all these things appeared at the same time. I didn’t think for long, and quickly went to the market to buy a stove.
PURCHASE
I chose the “Student” model - it is small and designed for 150 cubic meters (and my house (2 floors) is 80 cubic meters), i.e. - Enough for the eyes. Here are its characteristics: Conventional models have a double firebox door made of iron. The inner one is round (i.e. the entrance to the firebox is round), the outer one is rectangular, it serves as a protective casing. Starting with the “Student”, these stoves can be equipped with a cast-iron door with fireproof viewing glass. In this case, the entrance to the firebox is rectangular. Knowing full well that this glass would become smoked in no time, I nevertheless decided to pay an additional 1,500 rubles for such a door. Still a “cast iron”!! And it looks more beautiful.
I bought it at the Abramtsevo market in Moscow here. I liked the salesman there (a young guy) who picked out all the other components for me. Later I found another place - this is the market on Yaroslavka, when you drive from Moscow, you pass the traffic police post (the bridge crossing with the concrete street, Sofrino), and immediately to the right of the road. There are two points where these stoves are sold, and in one of them there is a salesman, Anatoly. This stove is 500 rubles cheaper. Good water tanks. But he believes that the chimney should be assembled according to the “smoke”... And besides, he was a little under the gun.
So, below is the estimate for the stove:
Price:
• Stove “Professor Butakov - student” with glass: 11800 rub. • Tank 55 l on a pipe: 3500 rub. • Sandwich pipe 1 m stainless/galvanized. d115: 4pcs x 1000 = 4000r • Plug: 350r • Cutting (40×40 cm) + basalt insulation: 1450r • Corner “Skirt” + “Gusset”: 1120r • Head: 650r • Thermo-sealant: 150r • Galvanized iron sheets ( 1×2 m): 3pcs x 445 RUR = 1335RUR • Asbestos cardboard (0.8×1 m): 3pcs x 105 = 315RUR • Curb stone: 2pcs x 80 = 160RUR • Ceramic tubes in a set of 4 pcs: 3pcs x 105RUR = 315r • 1/2 inch faucet + coupling: 226r
TOTAL: 25371 rub.
Marked in blue is everything that I took in “Abramtsevo” in “Pechka-Kamenka”. In green - in other places, namely: Sheets of iron, faucet and asbestos cardboard - at the Khozyain and Gorodok markets in Khotkovo, and curb stones - in Zhuchki (on the road). He took everything away in one go in his car.
INSTALLATION
Of course, I was going to edit it myself - otherwise I wouldn’t have written this article. I found out about the installation and the peculiarities of these stoves in advance on the Internet (see links at the end) on forums, and our neighbors helped with advice.
So... mid-afternoon, November 2, 2008. My car was only able to drive as far as the entrance to our field. It’s good that Ivan drove by with his truck - otherwise I don’t even know how I would have stomped 70 kg through the mud...
Before installation, I drew a small plan for the upcoming work. The installation steps were as follows:
1) Preparing the place where the stove will stand: protecting the walls and floor with fireproof materials. 2) Determining the location of the pipe passage. Cut a square hole in the ceiling. Protection of the ceiling with fireproof materials (basalt cardboard, metal sheets, cutting box, basalt wool). 3) Installing the stove on the stand. Installation of damper and water tank using sealant. 4) Sequential installation of pipe segments (using sealant). Ceiling passage, exit to the ceiling of the 2nd floor. Determining the location of the passage through the roof. 5) Make a hole in the roof large enough for the pipe to pass through. 6) Deliver the remaining pipe segments. 7) On the outside of the roof, put a “skirt” on the pipe and place it under the ridge. Place a “kerchief” and a cap on the pipe. Make a hole in the roof slab using basalt wool.
So, now in more detail, point by point.
The walls and floor are protected with asbestos cardboard and stainless steel sheets. Additional stainless steel sheets are hung on the walls at some distance from the wall (air gap). The base under the stove is two paving slabs
Since my stove would be very close to combustible wooden structures (walls), even without instructions it was clear that they needed to be protected with something fireproof. Now there is such a pleasant and environmentally friendly material “minrite”, but it is quite expensive (600 rubles/m2), so I decided to make do with sheets of galvanized iron + asbestos cardboard. I nailed sheets of asbestos cardboard onto the walls and floor, and then covered them with a galvanized sheet (with screws). In principle (this can already be seen now, after operation), this would be enough. But I decided to “aggravate” the protection and added another galvanized sheet to the walls, placing it at some distance from the wall so as to create an air gap. I attached this sheet to ceramic tubes. I simply placed two curb stones under the stove. The place for the stove is ready.
A hole is cut in the ceiling (in my case 40x40). The perimeter is lined with basalt fiber (cardboard?). I also hit with iron
The hardest part was cutting a square hole in the ceiling without electricity, but I managed to do the job. The dimensions of the hole were two to three centimeters larger than the dimensions of the cutting box. All means were used to protect the ceiling (this hole), because... they say that this is the most fire-hazardous place. I first laid it around the perimeter (along the walls of the ceiling) with basalt cardboard - with a bend on the ceiling of the 1st floor and on the floor of the 2nd (secured with a stapler). After that, I covered the perimeter with galvanized strips. The result was a neat metal box.
The box is simply inserted into the cut opening. There is an air gap between the cutting and the walls of the ceiling
I inserted a cutting box into this box from below, and since the hole was cut 2-3 centimeters larger, the cutting easily fit into the hole and there was still an air gap of 1.5 cm between its walls and the walls of my box. The passage through the ceiling was ready.
Somehow I installed the stove on the curb stone and achieved balance. I installed a standard damper (damper) in the smoke hole, and soulfully coated everything with thermal sealant (this is a special sealant for chimneys, it holds 1500 degrees). After that, I installed a water tank on the gate.
Actually, by design, there is no water tank. But it immediately seemed to me that free hot water (when the stove is on) would never hurt, so I decided to install a tank in my place.
There will always be hot water in this tank (when the stove is fired). Tank 50l. Faucet sold separately
The main difficulty here is to correctly connect the gate, tank and pipes so that all joints are made “on the water”, i.e. so that the upper pipe is inserted into the lower one. Then the condensate will flow down the pipe and burn in the firebox. To prevent smoke from the chimney from entering the room, you need to:
a) Seal the joints well;
b) Use sandwich pipes.
Sandwich pipes are naturally more expensive than regular pipes, but it is their presence (i.e. insulation of the pipe) that reduces the formation of condensate in the pipe. The only thing is that the first meter of pipe from the stove is made from an ordinary, single pipe, because... the sandwich will interfere with the damper, and it’s difficult to put it on the gate.
So about the tank. It turned out that choosing one that meets all the conditions for joining pipes is not an easy task. The fact is that this particular stove model has a recommended pipe diameter of 120 mm (12 cm), and water tanks are mounted on a pipe of 110, 115... Which is exactly what I did. I took a water tank with a pipe with a diameter of 115 mm. We also tried it on in the store - the lower end of the tank pipe fits perfectly onto the standard stove valve (the only “wrong” place). And the inner pipe of the sandwich is inserted into the upper end - also 115mm. Those. I reduced the diameter of the work by 5mm, but everything assembles perfectly - just as I need it. The only thing that had to be slightly altered by hand (and even then by the hands of the seller) was the relative position of the inner and outer pipes in the sandwich. The sandwich is an inner pipe (stainless steel), an outer one (galvanized) and between them is filled with non-flammable basalt insulation. So, usually both the inner and outer pipes have a narrowing on one side, but for me the seller turned them over, i.e. the inner one tapers on one side, and the outer one on the other. The pipe head just fits over the narrowing. So I tried to show it in this diagram.
So, then I put the tank on the valve (everything is coated with sealant). A sandwich pipe has already gone into the tank pipe above. To prevent insulation from spilling into my tank, it is closed at the bottom with a plug. The pipe has already passed through the ceiling (by the way, it is recommended to calculate the length of the pipes so that the joints are NOT in the ceilings). When cutting, I laid basalt wool around the pipe and closed it with a hatch on top.
All pipes are a “sandwich”, i.e. insulated, double. The entire pipe system, starting from the water tank, is assembled along “water” so that condensate flows into the pipe (and ultimately into the stove). The first pipe segment is plugged with a plug from below.
I won’t describe the agony of cutting a round hole in my metal tiles... I’ll say right away that there’s nothing to do here without the help of electricity. Fortunately, at that time a neighbor brought an inverter - I was sawing out the roof with a jigsaw. After this, we sawed off the interfering laths and quickly assembled the entire pipe. Then everything is simple. A “skirt” is put on the pipe, and the short one is attached to the roof. The skirt should fit under the ridge to prevent streams of rain from flowing into the hole. I solved this problem using a piece of galvanized steel. A ring called a “scarf” is put on the pipe, which closes the gap between the pipe and the “skirt”. Well, the crown of the pipe is the head. He's just getting dressed.
Since the “skirt” is not very wide, I had to foam its side edges - otherwise the side rain would penetrate into the hole under it.
That's all. Installation is ready.
EXPLOITATION
A few words about operation, I think when I have more experience, I will publish it separately. The first firing of the stove is a terrible smoke. All factory oils/paints burn out. Even the instructions say this - it is recommended to carry out the first kindling outside... In general, I opened all the doors and windows, and heated the stove in intensive mode for about an hour. Already after the second kindling there was almost no smell, although it was still noticeable.
What can I say. So far everything is working. The sealant does not leak. The stove heats up, in gas generator mode it works for about 6 hours, it just all depends on the quality of the firewood, and my firewood is crap. I wasn’t prepared... We celebrated the New Year in a warm home, which is what I wish for you too!
see also Photo album of this event.
Oven “Student”
This heating device is the best option for residential premises, as it has small dimensions and attractive appearance
, and is capable of heating a large area. The weight of the structure is 70 kilograms
, the fuel compartment
is 60 liters
.
Traditional units have a double combustion door, the outer door acts as protection. The “Student” design is provided with a special door made of cast iron with a viewing window made of fire-resistant glass. It should be noted that over time the window will turn black, so it may not be installed.
The unit can be purchased ready-made with the necessary components
. Depending on the store, this stove can cost approximately 20,000 rubles
.
Installation of the “Student” stove
The structure can be assembled with your own hands, in several stages
- First of all, it is recommended to prepare an assembly drawing or download a ready-made version on the Internet. This will make the job easier.
- Then you should prepare a place for the structure. The surface of the floor and walls must be finished with fire-resistant materials.
- Decide on the pipe exit area
. Then make a hole in the ceiling, which is covered with non-combustible materials. - Then the unit is installed on the prepared stand
. - All pipes
are installed sequentially using sealant . It is recommended to purchase sandwich pipes that prevent the formation of condensation and the penetration of smoke into the room. - A special “skirt” needs to be made on the outside of the pipe.
If the Student structure is installed at a short distance from wooden parts and surfaces
, then the walls must be covered with asbestos cardboard. It is recommended to fix galvanized sheets on top.
You need to carefully make a hole for the pipe in the ceiling. It should be several centimeters larger than the diameter of the chimney. The hole made must also be covered with fireproof materials, since this area is dangerous. The “Student” stove does not contain a water tank, but if hot water is needed in the house, you can additionally purchase the necessary container. To do this, you need to carefully connect the pipes, container and gate. All joints must be carefully sealed.
After all the components of the “ Student”
will be collected, you need to check the stove and light it. It should be noted that the first ignition implies a lot of smoke in the room
, as paints and various oils will fade.
Therefore, it is recommended to carry out the first start-up of the heating device outdoors
. If no defects are found, then the “Student” structure can be installed in the room.
Advantages and disadvantages
Today, the modern “Engineer” boiler has been improved. Specialists have increased the diameter of convective pipes, and the pipe walls have become thinner. This change contributes to an increase in the open section, and heat flows improve heat transfer. Therefore, the main advantage of the stove is the cost-effectiveness of the model.
Main advantages:
- Increased efficiency. Each structural element is aimed at fulfilling its functional load. It helps heat the room and food.
- Eco-friendly. The firebox is designed in such a way that almost all the fuel burns. Therefore, ash does not emit harmful substances.
- Reliable and fireproof. The design is equipped with a sealed firebox that protects the room from open fire.
- Affordable and durable. The low price goes well with the quality.
- Design. The stove is not bulky, has an aesthetic appearance and fits into any interior.
Main disadvantages:
- Oxygen can enter the furnace through the ash pan.
- For cleaning, the pipe is disassembled into sections.
- The front part of the structure deforms over time.
How to install a Student stove
Detailed installation recommendations are provided in the operating instructions. Despite this, as practice and consumer reviews show, during installation work, the same mistakes are made.
Violation of the advice in the operating instructions leads to a decrease in the thermal efficiency of the stove, refusal of warranty service and rapid failure
It is important to pay attention to the correct location of the stove and ensure fire safety
Where is the best place to put the oven?
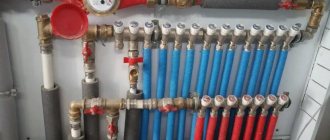
The Hydraulic stove is installed in the same way as a conventional solid fuel boiler. For placement, a boiler room with a ceiling height of at least 2.2 m and a non-combustible base is selected. The batteries are connected using special taps on the side of the case.
For air heating furnaces, due to the principle of operation and design features, a place is chosen for installation that provides unhindered air convection. Optimal location, in the center of a heated room.
If you plan to distribute heated air to adjacent rooms through air ducts, when choosing a location, take into account the need for connection using a heat extractor and air ducts. The stove is installed so that it is easy to route the corrugated pipe to other rooms.
The Termofor company additionally supplies heat removers from air ducts, designed for quick connection of a steel corrugated pipe for hot air distribution. When installing the stove, it is better to use branded components.
How to ensure fire safety
During operation, the walls of the oven become very hot, so thermal protection of walls and floors made of wood and other flammable materials will be required. The work is performed as follows:
Protection of walls from heat will also be required in places where the chimney is laid. When passing through floor slabs and roofing, a special fireproof cutting is installed. A spark arrestor is mounted on the chimney head.
What and how to heat the stove Student
Furnaces of the Student series belong to gas-generating or pyrolysis equipment that is demanding on the quality of fuel.
The heat generator must be heated with wood with a humidity of no more than 20-25%. When using raw fuel, the stove cannot be switched to gas generation mode; the wood will burn as usual, which will lead to an increase in fuel consumption and a decrease in efficiency.
The operating instructions indicate the possibility of using the following types of fuel:
Wood and peat briquettes are optimally suited for operating Termofor stoves. The use of briquettes increases the operating time from one stack. During the combustion of compressed fuel, 20-30% more heat is released than when burning wood.
It is prohibited to burn wood stoves with coal. The design and internal structure of wood-burning models is not designed for the characteristics of coal combustion.
All about stove installation Engineer
To facilitate installation, each Termofor oven comes with detailed installation instructions.
The company has thought out a convenient and simple design that facilitates installation work. To begin installing the Engineer furnace with your own hands, you should begin by determining the location. It will not be unimportant to decide which chimney to use when connecting.
To heat adjacent rooms, a heat sink is installed on air heating furnaces for routing air ducts, and a heating system pipeline is connected to water heating models. After installation, the stove will be able to effectively heat the entire building, and not just the room in which it is installed.
Requirements for placement
The efficiency and uniformity of heating largely depend on the correct location of the stove. For normal operation, the Engineer stove needs a large volume of air and no obstacles in the way of convection currents.
An essential condition is compliance with fire safety rules. Some points that must be followed are contained in the instruction manual. In particular, it states:
- The stove is installed on a non-combustible base.
Protection is provided for walls and ceilings (where the chimney passes) when installed in a wooden house. The section of the wall adjacent to the stove is insulated with non-flammable insulation, and then covered with steel sheet or brick.
The surface of the chimney is heated to a temperature of over 200°C, which, according to the rules of PPB, requires the use of a special passage unit filled with mineral insulation when passing through floor slabs and roofing.
The special design and the use of a special base simplifies the installation of the Engineer furnace and makes it possible to do the connection yourself.
Which chimney is better
Solid fuel heating equipment belongs to the class of furnaces with high flue gas temperatures. During combustion, inside the combustion chamber, the heating intensity reaches 450-550°C. Although due to the use of gas generation, the smoke at the outlet cools significantly, the temperature still remains sufficient to lead to burnout and deformation of a conventional steel chimney.
Additional requirements apply to traction characteristics. Insufficient pressure leads to backdraft, air locks and other operational difficulties.
Reviews from owners and practice have shown that the optimal choice for convection and water heating stoves is a sandwich pipe and a ceramic chimney. An additional advantage of the systems is the simple installation of the chimney yourself. Sandwich pipes and ceramics are assembled like a construction kit and do not require special skills for installation.
On the Internet you can find negative reviews about the stoves of Professor Butakov Engineer, but they are rather the exception to the rule. Basically, owners point out the advantages of Termofor products:
- Affordable price.
Long service life.
A simple design that allows for independent installation of the stove in the house.
Thermal efficiency due to the ability to connect to a water heating system and air ducts.
All of the above factors ensure uninterrupted and comfortable operation of the Butakov stoves of the Engineer series and explain the popularity of the models among Russian consumers.
Installation conditions for an air-heating boiler
So that, having bought an air-heating boiler, you are not disappointed in the choice, and you do not have any difficulties with installing the structure, it is worth knowing some of the nuances. They should definitely be taken into account:
- Installation of an air heating system and specifically a boiler is carried out only in the house during the construction process. A plan and necessary drawings must be drawn up in advance.
- This system will require a backup source of electricity.
- To increase efficiency, the boiler must be installed in a home, and the walls must have reliable thermal insulation.
- Ventilation of the room is necessary, since ventilation does not completely clear the air of gas.
- Air ducts may not be needed if partitions are not installed on the second floor or the area of the house is small.
If you want to heat your house using an air-heating boiler, you can save relatively well on installation and do everything yourself, taking note of a couple of basic recommendations.
It will not be possible to carry out all the work manually, or rather, not everyone. There are some things that are better to entrust to specialists, for example, calculations. To make the right choice of a long-burning air-heating boiler, you need to know the following characteristics:
- required power of the unit taking into account heat loss;
- the rate of warm air entering the rooms;
- all kinds of heat loss;
- air duct system parameters.
You can calculate the boiler power yourself depending on the available information.
It is necessary to decide on the installation location of the unit
There are no special requirements for the location, so in this case it is important to remember the main principles of installing gas or other equipment
How to choose the right solid fuel boiler for you
Types of wood stoves
A wood stove is a universal device that can heat a small house and be connected to the heating system and water supply. Before purchasing, you need to study the features of the classification of heaters.
According to case material
Metal wood-burning stove for heating a house
Depending on the material of manufacture, a wood-burning stove can be:
- Cast iron. The thermal capacity of the housing and its ability to accumulate thermal energy ensure the operation of the device as auxiliary heating. A corrugated chimney or sleeve is designed to remove combustion products. The cast iron unit is equipped with a blower system to maintain temperature for a long time.
- Metal. Stainless metal reduces the time it takes to heat the air in the room. When purchasing, you should focus on the thickness of the walls - thin ones cool down very quickly. Structures with thick seams are less susceptible to cracking.
- Brick. It is built as the main source of heat and is equipped with a serpentine-shaped smoke pipe. Despite the long heating time, the brick can retain thermal energy for several hours.
Depending on the chimney design
External chimney for stove
The chimney pipe removes combustion products and, depending on the installation method, can be internal or external. In the first case, it is located outdoors and has good traction. External systems are not routed through the roof and are used for aesthetic purposes.
Based on the type of construction, several types of chimneys can be distinguished:
- Wall. The lower part is combined with the foundation of the wall. The chimney is made of brick.
- Root. It is installed on a separate base near the outer wall, equipped with a brick or ceramic liner.
- Sandwich. The single-layer pipe has the form of a nozzle and is quickly mounted on a fireplace or stove.
- Coaxial system Schindel. A two-pipe design that injects air in a counter-current manner and removes combustion products.
By type of design
Brick stove with stove bench
Reliable hearth stoves operate on wood and are designed to heat a home of any size. There are several types of devices based on their design.
A stove with a closed heater is suitable for installation in saunas or baths if it has a special compartment for laying stones. The heater is heated by convection or with an open flame. The water circuit is represented by a tank with pipes.
Russian stoves are made of brick and equipped with a sleeping place - a stove bench. The combustion chamber is located under the stove bench, the stove is next to the firebox. The heating intensity is adjusted through the blower. The Russian stove runs on a large amount of fuel and efficiently heats a room of more than 40 m2.
Depending on the location area in the room, you can select fireplaces:
- Angular. Models with a built-in or attached chimney are placed in the outer corner. Rectangular or square are distinguished by a wide fireplace podium with a niche for fuel.
- Wall-mounted. The back of the structure is located near the wall. The average size of the base is 75x125 cm, which is suitable for living rooms in a small house.
- Island. They are built on a separate foundation in large rooms. Perform zoning and heating functions.
Depending on the functional purpose, you can choose a fireplace stove for a wood-burning sauna or a design with a hob.
Swedish stove for home heating and cooking
Swedish stoves are distinguished by a rear chimney outlet and are classified according to the type of section into several types:
- Vertical. Smoke exhaust duct with 2-3 elbows and a cleaning door.
- Horizontal. It is laid out horizontally, has at least 2 bends and heats up evenly.
- Kolpakovy. Warm air masses are retained in 2-3 chambers, the shield heats up evenly.
Fuel combustion duration
A stove or fireplace with a long-burning system operates by burning pyrolysis gases, but wood-burning models are also divided into several types:
- With water circuit. They warm up large rooms efficiently, since the water type circuit is connected to heating radiators.
- No outline. Equipped with an afterburner chamber and a plate deflector. Primary air masses ignite the fuel, secondary air is supplied to the afterburner.
The long-burning system allows you to operate the stove with one load for 3-8 hours.
How does the oven work?
The operation of the Butakov furnace is based on pyrolysis and convection processes:
- Pyrolysis takes place in the combustion chamber - it is there that the fuel slowly smolders, unlike a conventional stove where wood burns. The oxygen supply is controlled by the door vent. The process is accompanied by the release of a large volume of gas, which enters the second chamber and burns when mixed with oxygen. Since carbon dioxide is efficiently removed from the room, the air in it remains fresh.
- The convection process takes place in special pipes, which are a structural element of the furnace. Warm air from the firebox enters the room through a pipe system and, due to natural processes, rises to the ceiling, moving around the room. In this case, cold air from the room enters the firebox through the intake pipes located at the bottom of the structure. The continuous, economical process allows the cubic capacity to be heated evenly.
What to make it from?
Several variants of furnace designs have been developed. This can be a simple barrel in which firewood is placed on top and the air flow is blocked by a gate valve. It will take more time to produce an analogue of industrial samples with a system of convection pipes and a separate gas combustion chamber.
The simplest and most uncomplicated scheme is a Butakov stove made from a gas cylinder. In this option, you can do without convection pipes or use 2-3 convection inserts.
We will examine in more detail the production of an analogue of an industrial design with a rectangular shape and a complete circuit of convection tubes and a system for long-term pyrolysis burning of wood. This design is the most productive and economical.
But during the manufacturing process it will be necessary to perform turning and drilling work. You can take the dimensions and bend angle from industrial sample pipes. The amount of material required for work depends on the chosen option and the dimensions of the furnace.
User manual
It is worth considering that the “Student” dacha stove is a gas-generating equipment that imposes special requirements on the quality of the fuel used.
- It is recommended to use firewood whose humidity does not exceed 25%, since rawer fuel will not allow the unit to switch to gas generation mode. This can provoke a decrease in efficiency with increased fuel consumption.
- For coal modifications, firewood is used as needed. To do this, you will need to completely pull out the grates. When using wood or peat briquettes, the gap between fillings increases significantly. It also generates 28% more heat than wood.
Attention! It should be taken into account that the design of wood-burning modifications does not involve the use of coal