A check valve is a type of pipeline fitting, the purpose of which is to prevent a change in the direction of fluid movement in the pipeline. The device automatically allows flow in one direction and stops flowing in the opposite direction. Refers to direct-acting protective pipeline fittings.
Before purchasing a 110 or 50 mm sewer check valve, it is important to understand the features of different types of locking mechanisms and their operating principles. It is also recommended to find out all the information about the existing sewer system.
Installation is quite simple; additional equipment is usually not required. It is important to purchase the device from trusted sales outlets, and also make sure that there is a warranty from the manufacturer.
What is it and what is it for?
A sewer check valve is a special shut-off device that ensures reliable closure of the passage hole in the cavity of the sewer system.
The main purpose of the gate is to obstruct the movement of wastewater when the network is clogged or overflowing.
Throttle installation is required:
- In a sewer in an apartment building, on the ground floor, in the basement.
- In a private house located on a site with a high groundwater level.
- When installing the system, if all the rules for laying the pipeline were not followed.
- As a safety option in any drains.
Shutoff valves are also involved in resisting cockroaches and rodents that can enter the house by moving through the pipes. The valve is always in the closed position and opens only when water from the plumbing fixture enters the drainage system.
When introducing the device into an existing sewer system, some difficulties arise with disconnecting the system and connecting pipes in series, so the installation of the valve must be provided during the initial laying of the pipeline.
Check valve with electric motor
This modern analogue of a check valve runs on electricity; in case of frequent power outages, there are models with batteries. In this device, the locking membrane is always completely open, which prevents the formation of dirt build-ups on it, which prevent it from closing completely if necessary.
The device operates as follows:
- the liquid begins to move in the opposite direction and fills the pipes;
- when the pipe is filled to 70% of its volume, the probe installed inside sends a signal to the electrical unit;
- sound and light alarms are triggered, notifying you of trouble;
- the damper closes automatically.
Types of how devices work
There are several types of sewer check valve. Depending on the installation location and the nature of the network.
1. Rotary , they are also called petal (clackers).
The body is square or oblong with a bell joint on one side and a blank end on the other. Inside, a round washer with a diameter larger than the through hole of the pipe by 2-4 mm is attached to the upper part of the wall.
A loose spring is installed at the fastening point, allowing the passage to be more tightly covered.
In a quiet state with horizontal installation, the firecracker is closed and opens when wastewater from plumbing fixtures enters the system. If there is a blockage, overflow and water rushes up, the throttle closes and blocks access.
Some models additionally have a manual hydraulic lock of the same operating principle. It is located on the same line, immediately after the first plug. Its task is to mechanically block the drainage passage if the first sewer valve does not work.
2. Lifting.
The main element blocking the passage is also a round disk. It is attached to the ceiling of the housing with a bolt, and a metal spring is wrapped around it. It creates tension to hold the membrane closed. The water pressure entering the system is enough to lift the washer with the spring and move on.
The throttle device allows you to stop the reverse flow, which presses on the disk from top to bottom. The design is used in any sewerage system. A distinctive feature of the housing structure is the flange connection of the top cover. By unscrewing it, you can easily clean and repair the device.
3. Ball.
Installed only on internal networks. There are special recesses inside the body: water passes into one, and a ball is placed in the other. As the waste moves from the device to the receiver, the ball rolls into the cavity.
Expert advice
Experienced plumbers recommend:
- choose a valve based not on its lower price, but on its quality, since the costs of purchasing a device are not comparable to the costs of repairing a home if it is flooded with sewage;
- Before installation, be sure to check the device for leaks. If it is not sealed enough, noise and vibration will be heard during operation. To fix the problem, you need to remove the cover and replace the edging or the shutter itself;
- position the valve correctly so that the arrow on its body is directed towards the sewer outlet;
- install the device in a place where it will always be accessible for cleaning and maintenance;
- if the system is made of cast iron pipes and the valve is plastic, then you must first install an adapter from metal to plastic.
How to install it yourself
At the time of design, the risk of flooding should already be included in the system, so during this period it is necessary to work out the installation of the valve. Installation takes place in several stages.
Installation of a check valve can be done both on an external system and on an internal one.
The first stage is choosing an installation location
The location for installing the throttle must be easily accessible. The equipment must not be installed in the wall or floor, covered or cluttered.
Each device has a cover for cleaning and repair, so access to it is required at all times. If the sewerage system runs in the floor or concrete base, the locking mechanism is mounted in the pipe, and its upper part remains on the surface.
If the depth of the gasket is large and the headband is out of sight, we make a removable cover in the floor for inspection.
The second stage is choosing a device
Locks are classified differently, some are installed outdoors, in a well, others can only be installed indoors. It is necessary to choose the most suitable one for the installation conditions. If there is an error at this point, the shutter may subsequently collapse or crack.
Tools:
- Grinder with cutting disc.
- A sharp, hard knife for chamfering.
- Oil, lubrication paste.
- Hammer and flat board.
- At the installation site, we clear the work area.
- We measure the length of the device so that it fits into the prepared space.
- Lubricate the end of the pipe generously with motor oil or plumbing paste.
- The O-ring should also be treated.
- Before inserting the firecracker into the pipe, having made the socket, we will turn the device several times (if possible).
- With a little effort, but sharply we stick the pipe into the throttle.
- Then we check to see if the rubber band in the device has pulled up.
- On the reverse side we continue assembling the sewerage system.
Step-by-step installation instructions
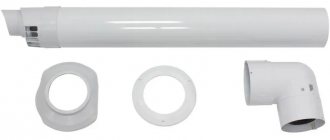
Most air valves are produced by manufacturers to connect to DN110 pipes. If the connecting size of the device does not correspond to the size of the pipe, a special adapter is used. For pipes DN50 or DN75, aerators with the corresponding diameter of the connecting outlet or equipped with a reducing insert are used.
It must be remembered that a valve designed for pipes with a diameter less than 110 mm can be installed for a maximum of two plumbing points.
In areas of transition from a pipe of a larger diameter to a valve with a smaller diameter, reducer inserts and various adapters are used. To install the aerator on a cast iron pipe, there are also special adapters that ensure a reliable joint between the plastic and the metal.
At the beginning of the work, the installation location of the valve is determined, taking into account the installation rules and its accessibility for further maintenance.
Next, perform the following steps:
- The water supply in the house is turned off.
- If the installation is carried out on a previously installed pipeline, then a tie-in is made and a special adapter is installed.
Most aerator models have a bell-type connection.
The assembly of such connections is carried out in the following sequence:
- The outer surface of the smooth part and the surface inside the socket are cleaned of dust.
- Wipe the sealing ring from possible contamination and place it in the socket groove.
- The surfaces that come into contact during connection are lubricated to reduce friction. To do this, use a silicone-based sealant or soap solution, glycerin.
- Place the smooth end of the valve into the socket up to the mark. The quality of the connection is checked by rotating the parts relative to each other, followed by returning to their original position.
If necessary, the area with the connected vacuum valve is secured with a clamp. Upon completion of work, it is necessary to check the joints for leaks.
The surfaces that come into contact during connection are lubricated to reduce friction. To do this, use a silicone-based sealant or soap solution, glycerin
For hidden installation, special models of vacuum valves are used. If the riser is hidden in a fine or protective box, then measures must be taken to ensure the flow of air into the sewer valve. To do this, a ventilation hole is made according to the size of the aerator mesh.
The aerator body is buried in the wall, the fastening element is adjusted so that its outer edge is flush with the wall surface. The only visible element remains the decorative grille, which can be attached using self-tapping screws or inserted manually. For aesthetic reasons, it is available in the most popular color options - white, gray, black and chrome.
Some valve models can be used as drain cleaning holes. To do this, remove the decorative cover, take out the internal mechanism of the fan valve and insert the cable inside.
Correct and incorrect placement
Each device, open or closed, has the direction of movement of the drains drawn on the body. Indicated by an arrow or triangle. It is in the direction of the water that the water seal is installed.
The shutter only works in one direction and in different positions: whether the device is vertical or horizontal. If all installation conditions are met, in the first minutes it will be clear that the device is functioning and water is passing through the membrane.
The correct position of the device is also determined by the installation method. From the socket to the empty end (that is, into the socket), only the empty end of the pipeline can be inserted. On the other side there is only a connecting extension of the pipe with a rubber seal.
Incorrect placement can lead to permanent problems with the device. A device installed incorrectly or in the wrong place will immediately show its failure. Any work begins with reading the instructions, installation of the codpiece is no exception.
Difficulties that may arise if installed incorrectly:
- Hard to reach place. The device requires constant monitoring after installation, therefore, if the shut-off valves are located in a corner or under a layer of concrete in another inaccessible place, it is not possible to maintain it.
- The device was installed in violation of the technological process. Leaky joints, constantly leaking lids - seals are an unpleasant sight. If the rubber bands in the socket are not lubricated with oil during installation, they will ride up or fall inward. Even when all the joints are attached to each other tightly and tightly, they can leak due to the rotation of the O-rings.
- The throttle cannot be installed immediately after the rotating part of the system. During movement, the drains gain decent speed, which means they create pressure. The pipe became clogged or could not cope with the backflow, and the valve closed. The problem was not immediately detected and water continued to flow from the plumbing fixture. The flow of water approaching the membrane will receive resistance and can knock the outlet out of the connecting joint. Therefore, the device is installed strictly on a straight section.
- The valve installation direction is incorrect. Any device has a water movement indicator; installation must be carried out according to this figure. If the device is turned over or placed with the lid down for inspection, the unit will stop working.
Briefly about the operation of the sewer system
Before considering the design of the valve itself, it is necessary to understand how the sewer system itself works.
In all of them, wastewater pipes (from the sink, bathtub, shower, toilet, washing machine and dishwasher) are led to a sewer riser (the liquid enters by gravity). This is a vertically located pipe that runs through the entire house. At the bottom, the riser enters the central sewer, through which wastewater flows into a treatment plant or cesspool.
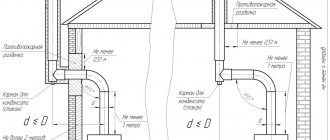
In the upper part of the pipe - it exits through the roof, ending above the roof level (or exits into the attic). It is not closed with plugs on top, but remains open. The purpose of this hole is to equalize the atmospheric pressure with the pressure inside the pipe. This design is called a fan pipe. It is relevant for any buildings with a height of 2 floors or more.
In some cases, the location of the ventilation pipe opening on the roof is not suitable. If there are windows or balconies close to the outlet (at a distance of less than 4 meters), the smell of sewage will be heard in these rooms.
Malfunction and purpose of the valve
For a number of reasons, the operation of the system described above may be disrupted:
if an error was made during calculations or installation (rules and standards are standardized in accordance with SP 30.13330.2012, “Internal pipeline and sewerage”);
if the riser itself is damaged;
if the pipe at the top is clogged with foreign objects (leaves, construction debris, insects or even birds can get there);
if the pipe on top is frozen.
Ventilated and non-ventilated (with valve) riser
When water is drained, a vacuum is created inside the sewer: the liquid sucks in air. Moreover, its quantity can be quite large: for example, water from a washing machine (entered under pump pressure) requires 25 l/s of air per 1 l/s of liquid.
If this amount of air is not enough (this is exactly what the hole in the riser at the top is for), the flow going through the pipe sucks water from the “weakest” water seal (almost always this is the sink).
As a result, noise is heard in the room, and in addition, the smell easily penetrates inside (since the water from the water seal has gone into the pipe). This is not only unpleasant, but also harmful: sewer gas is toxic, and in high concentrations it is explosive (due to the methane it contains). Of course, an explosion due to an odor entering the room is unlikely - too much gas must be present in the air.
If you ignore the unpleasant odor for a long time, in addition to the health hazard (possibly due to the presence of hydrogen sulfide in the gas), the room itself may suffer. The fumes also contain bacteria that contribute to the formation of mold. If there is also high humidity in the bathroom, this will very quickly lead to its development.
The solution to the problems described above is to install an air valve on the sewer pipe. This solution was invented in the Scandinavian countries: due to snowfalls and cold weather, the sewer risers leading to the roof froze.
The air valve itself allows fresh air to enter the pipeline, quickly normalizing the pressure (equalizing internal and atmospheric pressure). It can be used instead of a pipe going out onto the roof (that is, onto an unventilated riser). and together with it, in addition.
How to clean, conduct an audit
The sewer system itself prevents the passage of clean water through it. Sometimes debris does not pass through the valve, getting stuck at the base of the plug cheeks. This problem often occurs if you do not monitor what goes into the drains.
Manufacturers of water seals have provided an inspection window in the device. It is located at the top of the shutter. Fastened with several bolts: three or four. Cleaning or inspection of unit components occurs through it.
We unscrew the bolts, first loosening each one. Remove the water seal cover. A round membrane and a chamber through which all the water passes will become visible. We remove all debris and large elements stuck in the chamber with a glove. We slam the plug several times, shaking it off. Now you need to rinse the device.
Clean water is poured inside the window. First, wash the chamber after the membrane, then the inlet compartment. After the inspection, we check the normal operation of the throttle by flushing the toilet or turning on the water in the sink. All this without closing the viewing window lid. You can see how everything works. Only after this close the lid and tighten the bolts. The rubber band also needs to be washed and returned to its place.
Important: you cannot immediately pull out all the pins and remove the cover. Residues of waste water can suddenly rush through the window.
Necessary information about the sewer drain pipe
The importance of using a vacuum valve will be difficult for an ignorant person to immediately understand if he does not have an idea of the general structure of the sewerage system. And in particular - about the need for ventilation and pressure equalization in pipes
Generally speaking, about the role of the vent pipe.
Let's take it step by step.
The sewer must be ventilated. In the sewerage system, all the main parameters are closely interconnected.
This refers to the diameters of laid pipes in various areas, from plumbing fixtures to a collector or septic tank (cesspool), the angle of inclination to the horizontal at which they are installed, the speed of movement of wastewater and the degree of filling of pipe channels.
There are special methods for calculating these characteristics, and with proper selection and installation, the system should operate without failures.
The optimal slope is designed to ensure that the speed of movement of the wastewater at which the water almost completely transfers all contaminants. And at the same time, the pipe is not filled completely, but only to 0.5÷0.7 of the height of its cavity. In the upper part of the channel, air and gases that always accompany any sewer move freely, of course, a very unpleasant “aroma”.
We will not dwell on these aspects in more detail - they are already covered on the pages of our portal.
Moreover, in sewer pipes and chambers, due to the saturation of wastewater with organic waste, the processes of fermentation and decay do not stop. And this is always accompanied by the release of a considerable amount of gases, many of which, by the way, are very unsafe both from the point of view of toxicity and from the point of view of fire safety. That is, their timely withdrawal must be provided for.
This is precisely why ventilation outlets of pipes are provided to the outside. It is these ventilation risers that are called fan pipes.
For example, very often they are equipped with septic tank chambers or cesspools (position 4 in the figure). But if these local treatment facilities are located near the house, then sewer odors can greatly spoil the cozy atmosphere in the yard.
Therefore, they usually try to place the head of such a pipe higher so that the “aromas” are immediately picked up and carried away by the wind. This could simply be some kind of vertical ventilation outlet, raised to a certain height, if the specifics of the site allow (item 3)
Above the highest high point of connection of the branch section, this riser itself turns into a drain pipe, passes through the roof covering and ends at the cap on the roof.
This option can be considered the most reliable, since it fully copes with all absolutely the tasks of a fan pipe (one such important function will be discussed below). Some owners, not wanting to organize the passage of a vent riser through the attic floor and roof, act as shown in the diagram - pos.
2. That is, the ventilation pipe is inserted into the area where it is laid horizontally outside the house, and then it rises vertically along the wall and ends above the eaves of the roof.
Some owners, not wanting to organize the passage of a vent riser through the attic floor and roof, act as shown in the diagram - pos. 2. That is, the ventilation pipe is inserted into the area where it is laid horizontally outside the house, and then it rises vertically along the wall and ends above the eaves of the roof.
Of course, when bringing the vent pipe outside, certain rules must be observed based on its location relative to other objects:
- Wherever the pipe is located, its head should not be closer than four meters from opening windows or balconies.
- The cut of the vent pipe cannot be closer than 200 mm to the roof surface on pitched roofs or on flat unused ones.
- It cannot be closer than 100 from the edge of the prefabricated ventilation shaft.
- If the flat roof is in use, then the height of the drain pipe above it must be at least three meters. And this necessarily presupposes the presence of stretch marks.
- Deflectors or wind vanes are never placed on the fan pipe.
Popular brands and specifications
"Tatpolymer" is a commercial and industrial company, whose price list includes a non-return valve for sewerage TP-85.100. The shut-off valves are made of polypropylene. Diameter 110 mm, there is a handle for manual control of the damper. Operating temperature up to + 60 degrees. Withstands water column pressure up to three meters. Purpose – household sewerage. Minimum service life 40 years.
Peshtan is a Serbian manufacturer of fittings for engineering systems made of polypropylene and PVC. The product of this company is made of polyvinyl chloride. Painted light brown. Suitable for both external sewage systems and inside buildings. Has a manual damper control function. Suitable for pressure systems. The diameter of the passage hole is 110 mm, the material of manufacture is polymer. The service life of polymer products is over 50 years.
Ostendorf - Germany. Reliable and durable polypropylene valve. Tube diameter 50-160 mm. Depending on the purpose, it can be gray or brown. Gray 50mm diameter, for indoor systems only. Operating temperature up to +95 degrees. Manual control - membrane using a rotary flag on the lid. The screws on the cover are made of stainless metal and can be easily unscrewed in aggressive environments. The rubber seal in the socket of the product has a special conical shape, this allows it to sit firmly in the groove and not rotate.
Selection rules
When choosing the appropriate option, you need to know what materials valves are usually made from, as well as what sizes they come in.
Manufacturing materials:
- cast iron;
- polypropylene;
- polyvinyl chloride
Typically, the check valve is purchased from the same material as the pipeline. It is not recommended to buy a plastic product for a cast iron system, and vice versa.
The dimensions of the valve directly depend on the amount of free space. You also need to pay attention to such a thing as the horizontal or vertical connection system. Valves are usually purchased for a horizontal line. But if there is no free space behind the toilet or sink, you can install a vertical product. If there is a critical lack of space, wafer models are installed.
Before purchasing a product, you should evaluate the condition of the sewage system and focus on the following indicators:
- pipe section;
- the material from which the pipeline is made;
- valve sizes: 50, 110, 32, 40, 90, 160 mm, etc.;
- connection method;
- availability of a warranty on the device;
- ease and simplicity of installation.
Valera
The voice of the construction guru
Ask a Question
Cost is an equally important criterion, but it does not guarantee the effectiveness, functionality and reliability of the valve. The most important characteristic when purchasing is the diameter of the sockets and pipeline. These parameters must match.
