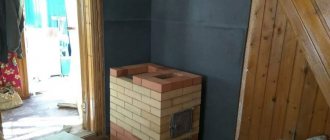
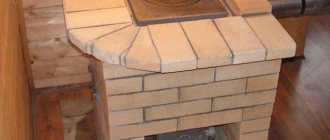
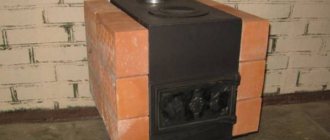
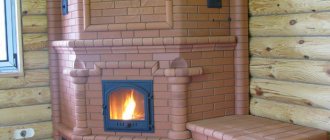
A potbelly stove is a common heating unit that allows you to inexpensively but effectively heat a country house, a residential building, or any separate room. In addition to numerous advantages, such a device has disadvantages: it cools quickly and accumulates heat poorly. This problem can be solved by a simple, long-proven method: covering a steel or cast-iron stove with decorative refractory bricks. It retains thermal energy better and gives the heating structure an attractive appearance.
A potbelly stove is considered the simplest, most reliable heating device used to heat rooms for various purposes Source zen.yandex.ru
Brick stove for a garage or workshop
You can buy a potbelly stove ready-made or build it yourself. It is designed for heating premises of various functional purposes using solid fuel. This design occupies a small area, approximately 2 x 2.5 bricks. The latter must certainly be heat-resistant. The masonry is carried out using a solution of fireclay powder, sand, and refractory clay.
Main elements of the furnace device:
- Heat-resistant foundation. Serves as the base of the stove, evenly distributes the load over the entire area, and ensures fire safety.
- Firebox. A device for burning fuel to produce thermal energy.
- Grate. With its help, air is supplied from below to the combustion area and the intensity of the process is regulated.
- Chimney. Creates conditions for the movement of flue gases inside the firebox and their release into the external environment.
- Ash chamber. Used to collect accumulated ash and clean the heating structure.
A brick potbelly stove is a small universal-purpose boiler, which in terms of operating parameters and design features is not much different from traditional stoves and huge heating units.
Calculation of basic parameters (with drawings and dimensions)
High efficiency of a potbelly stove can only be achieved if all the main design parameters are correctly calculated.
Pipe
In this case, the diameter of this element is very important. The throughput of the chimney should be less than the productivity of the furnace firebox, which is the main distinguishing feature of a potbelly stove. This will allow warm air not to immediately leave the stove, but to linger in it and heat the surrounding air.
It is very important to make an accurate calculation for it. The diameter should be 2.7 times the volume of the firebox. In this case, the diameter is determined in millimeters, and the volume of the firebox in liters
For example, the volume of the combustion chamber is 40 liters, which means the chimney diameter should be about 106 mm
In this case, the diameter is determined in millimeters, and the volume of the firebox in liters. For example, the volume of the combustion chamber is 40 liters, which means that the chimney diameter should be about 106 mm.
If the potbelly stove provides for the installation of grates, then the height of the firebox is calculated without taking into account the volume of this part, that is, from the top of the grate.
Screen
It is very important to force the hot gases not to cool, but to burn out completely. In addition, the fuel must burn through partial pyrolysis, which requires extremely high temperatures. A metal screen located on three sides of the stove will help to achieve a similar effect.
It should be placed at a distance of 50–70 mm from the stove walls, due to which most of the heat will return to the stove. This air movement will give the necessary high temperature and protect against fire.
A metal screen located on three sides of the stove will help to achieve a similar effect. It should be placed at a distance of 50–70 mm from the stove walls, due to which most of the heat will return to the stove. This air movement will give the necessary high temperature and protect against fire.
The screen of a potbelly stove made of red brick is capable of accumulating heat
Litter
It definitely has to be there. There are two reasons for this:
- some of the heat is radiated downwards;
- the floor on which the stove stands gets hot, which means there is a risk of fire.
The litter solves these two problems at once. As such, you can use a metal sheet with a projection of 350 mm (ideally 600 mm) beyond the contour of the furnace itself. There are also more modern materials that do an excellent job of this task, for example, a sheet of asbestos or kaolin cardboard, at least 6 mm thick.
You can use an asbestos sheet for bedding under a potbelly stove.
Chimney
Despite all the calculations, gases sometimes escape into the chimney not completely burned out. Therefore, it must be done in a special way. The chimney consists of:
- the vertical part (1–1.2 m), which is recommended to be wrapped in thermal insulation material;
- hog (slightly inclined part or completely horizontal), 2.5–4.5 m long, which should be 1.2 m from the ceiling, which is not protected with heat-resistant materials (1.5 m from the wooden surface), from the floor - by 2.2 m.
The chimney must be vented to the street
Photo gallery: diagrams of a potbelly stove for a garage
The diagram must indicate all the exact measurements. The chimney must be led out onto the street. The potbelly stove can be round or square. The volume of the firebox depends on the presence of grates. The layout of the potbelly stove depends on the material used.
Advantages of a potbelly stove made of bricks
Despite the primitive design, a heating device of this type is considered quite effective. The additional use of refractory material can improve its performance.
The main advantages of a brick potbelly stove:
- safe to use (it is impossible to get burned if you touch brick walls);
- retains heat for a long time;
- All solid fuels are suitable for heating;
- transportability;
- high heat transfer;
- construction does not require expensive materials;
- simple design, you can make it yourself.
Attention! If a brick potbelly stove is used incorrectly, there is a risk of poisoning with fumes. Therefore, it is necessary to strictly follow the recommendations for the operation of such a heating unit.
If desired, during the process of laying bricks you can make a cooking area Source termopaneli59.ru
Problems when building a mini-oven with your own hands
Amateur stove makers, due to inexperience, make mistakes, which then lead to problems. Let's look at the most common cases:
- Laying stoves with deviations from the design. As a result, there is no normal draft in the smoke ducts, and the walls heat up unevenly. The solution to the problem will be to disassemble the stove and lay it according to proven schemes.
- Laying stoves “by eye”, without using a level, frame, plumb lines, or rules. The device warps, the center of gravity shifts, and during operation the device collapses faster.
- Incorrect preparation of the solution. The masonry is cracking and crumbling. A temporary solution to the problem is to purchase a factory-made mixture and seal the cracks with a new solution. If the masonry cracks constantly and deeply, the stove will have to be moved.
- Firebox of a freshly built and wet device. This will lead to cracking of the masonry, which will need to be covered with mortar.
Which brick is better to choose for masonry?
For each section of a brick potbelly stove, a certain type of brick is used. The highest temperature is in the firebox, so to create it you need fireclay fire-resistant material.
The smoke exhaust ducts and combustion area are exposed to lower temperatures. For them, it will be enough to use fire-resistant ceramic bricks. It is slightly cheaper than fireclay and can withstand moderate loads.
The base must be erected from frost-resistant brick products that can withstand considerable pressure from the main part of the furnace structure.
The brick used for construction must be of high quality, solid, with sufficient heat capacity and heat transfer. Since such products are produced in different sizes, on the eve of purchase it is important to find out what size the order is designed for.
Advice! To give a brick potbelly stove an attractive look, it is recommended to use decorative brick products as a finishing material.
When building a potbelly stove with your own hands, you cannot do without fireclay refractory bricks Source sdelaipech.ru
An even simpler version of the stove
If the previous option seemed complicated to someone (although it is not), we can offer an extremely simplified heating design. You can lay out this oven with your own hands in literally an hour, even if your hands are far from being called golden.
Figure 4. The simplest version of a brick oven
The operating principle of the structure is simple. Solid fuel burns below, and settles here under the influence of its own mass. Temperature changes create a draft that carries hot air currents upward. In this case, the firewood burns almost without a residue - the smoke is minimal.
For masonry you will need only two dozen whole bricks and two halves. The stove consists of five rows. The design is so simple that there is no point in describing the order. The procedure is clearly shown in the illustration.
For those who want an intermediate option, we can recommend a slightly more complicated option.
Figure 9. L-shaped stove
To create this structure you will also need 20-30 bricks. This option can be completed by yourself in a couple of hours, if the skills of a mason are completely absent. A specialist will complete the construction in a matter of minutes.
Advantages of the simplest furnace designs
- very high installation speed – from a day to several minutes;
- does not require a foundation; the stove can be folded anywhere; and if you do not use a binder mixture, the stove comes out collapsible and can be easily moved;
- as fuel - everything that burns: logs, branches, cones, corn stalks, leaves, chipboard, furniture remains, etc.;
- fuel consumption is several times less than, for example, in the case of a potbelly stove;
- the simplest option - without using clay - allows you to get greater heat transfer than from a fire; therefore, such structures are a godsend for those who do not want to constantly maintain a fire while camping;
- almost complete absence of smoke - fuel burns with a minimum of waste;
- the temperature of the bricks reaches 1000 degrees – good heating and fast cooking are guaranteed.
Brick potbelly stove: installation technology
Before you start building a heating structure, you should select a suitable scheme for a particular case. It must meet the required dimensions and technical capabilities. After reading the recommendations for building the unit, it is important to carry out preparatory work: purchase the necessary equipment, high-quality building materials, and select a site for construction.
Tools and building materials
To independently build a brick potbelly stove (regardless of shape, size) you will need:
- brick (ordinary red, fireclay, finishing);
- mounting mixture;
- ash pan, ash cleaning hatches, firebox door, hob;
- wire;
- grate;
- seal;
- steel elements: corners, strips;
- pick;
- panicle;
- mopping;
- construction mixer;
- level;
- pliers;
- rubber mallet;
- trowel;
- tamping;
- shovel;
- sieve;
- several containers;
- Sander.
To install a potbelly stove made of brick, you should also prepare a welding machine with consumables, the usual equipment for a welder.
For comfortable work on the construction of a brick potbelly stove, it is important to prepare the required construction tools in advance Source iz-kirpicha.su
Creating a foundation
A potbelly stove made of brick is usually mounted on a specially created solid base. Wooden flooring cannot be used as such. The size of the foundation should exceed the dimensions of the stove by 12 centimeters around the entire perimeter. Before pouring it, you need to disassemble part of the flooring.
To install the foundation, you should prepare:
- crushed stone;
- sifted sand;
- cement;
- container for preparing the solution;
- water;
- building material for waterproofing;
- shovel;
- level;
- roulette
Sequencing:
- Dig a rectangular hole for the foundation (0.5 m deep).
- Cover the bottom completely with a mixture of sand and gravel, moisten it with water, and compact it thoroughly.
- Lay a crushed stone layer (about 15 cm), compact it again.
- Mix a solution of cement, sand, water (proportion –1:3:1).
- Pour the prepared mixture into the crushed stone and level it.
- Wait a couple of days.
- Cover the frozen surface with waterproofing material (for example, roofing felt). It will prevent moisture from penetrating from the ground.
Attention! The brick base for a potbelly stove cannot be connected to the main foundation of the building. If they are located very close, a sand cushion 50 cm wide must be placed between them.
To ensure safety, all heating units are installed on a pre-created base Source pechnoy.guru
Preparation of the solution
Some craftsmen claim that an ordinary cement-sand mortar is suitable for constructing or lining a furnace. Others insist on adding clay to the composition, which increases the strength of the seams. Therefore, the master himself has to make decisions about the components. Ready-made mixtures can be used as simple and fireproof ones.
Heat-resistant masonry mixture "Terracotta" ensures high-quality and reliable bricklaying in the combustion area of the potbelly stove Source el-brus.pro
If you plan to prepare the solution yourself, it is recommended to conduct several experiments. They will help you determine the right amount of clay. To do this, you need to make several batches of the main components, using different proportions. Then pour the samples into molds and check for strength after a while. Testing is carried out using a hammer, which is used to break the frozen pieces one by one. In this way, the strongest sample is determined.
Another option is to use a large amount of cement, without adding clay. If the master prefers store-bought products, it is best to choose a clay-fireclay masonry mixture.
For high-quality preparation of the solution, it is recommended to use a construction mixer Source beton-gomel.by
Preparation of the solution
Let's start by preparing the solution. For masonry work we use a special ready-made mixture. Sold in construction stores. It is a yellow-gray powder in 25 kg bags. All that remains is to dilute it with water in the correct ratio and mix. Detailed instructions are always indicated on the packaging; you need to follow them step by step. This solution is the best choice. It has only one drawback - its high price.
You can prepare the mortar for masonry yourself. For this we need clay and sand. First, let's determine the quality of the available clay and the content of impurities in it. We follow the following instructions:
- Roll the clay into a rope. Thickness - 10-15 mm, length - 150-200 cm.
- Take a rolling pin with a diameter of 50 mm and wrap a rope around it.
- The tourniquet should stretch smoothly and break, stretching by about 15-20%.
Expert opinion
Pavel Kruglov
Stove maker with 25 years of experience
If the rope stretches more, the clay is “fat”; if it breaks earlier, the clay is “skinny.” In the first option, the solution will shrink greatly under the influence of temperature, in the second it will crumble.
The next step is to prepare the sand. First, sift it through a fine sieve. The cell should not exceed 1.5x1.5 mm. Next we follow the instructions:
- using a handle and burlap, we arrange some kind of net;
- pour sand into it and begin to rinse it under running water;
- Rinse until the draining water runs clear.
Thus, we have rid the sand of impurities.
We do the same with clay. Now it should be soaked. To do this, pour the clay into a previously prepared container. Pour water so that the entire surface of the clay is covered. After 24 hours, mix thoroughly. We repeat the process until the clay has a consistency similar to toothpaste.
There is no universal proportion for a solution. Everything is installed by trial and error, depending on the characteristics of the materials used. The main thing is that the solution is convenient to work with.
To increase strength, experts recommend adding a little cement or salt.
Expert opinion
Pavel Kruglov
Stove maker with 25 years of experience
Here is a basic recipe for masonry mortar:
Take 2 parts of clay. Add one piece of sand to it. Using a construction mixer, mix until smooth and thick. We will need approximately 40 liters of solution.
Secrets of a potbelly stove
The size of the diameter of the stove chimney allows the gases formed inside to be released outside in a minimum volume. Thanks to this, the combustion products make several revolutions inside the chamber before going into the smoke exhaust channel. As a result, favorable conditions are created for air intake, which improves the quality of fuel combustion.
After carefully reading the design drawings of the potbelly stove, you can make such a unit with your own hands Source vmasshtabe.ru
The design of the potbelly stove provides a partial pyrolysis combustion mode, in which volatile substances are completely burned in the firebox. The presence of a screen encircling the combustion space on three sides makes it possible to regulate temperature maintenance and guarantees the safe operation of the heating structure. The screen is usually placed at a distance of 7-10 cm from the stove. In addition, most of the infrared radiation is reflected, and the gap increases the efficiency of the heating unit.
Thoughtful installation of a potbelly stove allows you to create a cozy and warm atmosphere in the room Source indclimat.ru
The grate is in place
- On the fourth row, the combustion chamber and smoke exhaust channels begin to form. The bricks are installed at the end. Stands are installed inside the channels on which the next rows will be laid, since there must be a hole for the smoke to escape. The back wall is laid without mortar.
- Having laid out the fourth row, the combustion chamber door is installed above it. installation is carried out according to the blower type, and the door is also temporarily secured using wire, which is fixed with bricks installed on the sides.
- The fifth row is laid out according to the diagram. All bricks are laid flat, except for those that form smoke exhaust channels with the inner walls.
- On the sixth row, the brick is installed on its end, and this row is the last when the brick is placed in this way. The back wall is laid with bricks installed at the end in two rows.
- The seventh row is placed according to the diagram.
- On the eighth row, the fire door is covered with a masonry of two bricks on top. In this row, a hewn brick is installed on the back wall, which will guide the flame towards the burner.
- On the ninth row, asbestos strips are placed in the place where the hob will be laid, which will ensure a tight seal between the bricks and the metal part. The masonry proceeds according to the diagram.
- On the tenth row, the hob is laid and the formation of the chimney begins.
- On the eleventh row, a valve is installed on the smoke exhaust duct. It is laid on asbestos strips and coated with clay mortar.
Features of operation
A potbelly stove made of brick must certainly be safe for the people around you. To do this, it is important to follow these rules of use:
- Use only coal and dry wood as fuel material.
- On the eve of igniting the installation, you should slightly open the chamber damper, put some firewood inside, and then set it on fire.
- When the fuel burns sufficiently, the furnace performance can be adjusted by opening (closing) the ash pan.
- To remove ash deposits from the structure, you need to wait until the device cools down, carefully remove the ash drawer, and take it out of the room.
- Remove highly flammable objects and materials from the stove at a distance of at least one meter.
- You cannot immediately place more than 3 kg of solid fuel into the firebox.
- The firebox door must not be left open.
- An operating stove should always be supervised by an adult.
Attention! If a brick stove is in a faulty condition (for example, the smoke exhaust system is malfunctioning), it cannot be lit.
Compliance with the rules for operating a potbelly stove will protect users from burns, carbon monoxide poisoning, and other undesirable consequences Source stroymart.com.ua
Required Tools
To organize your work you need the simplest tools. If there is no electricity on the site, you can do without mixing with a drill and do everything by hand. To work you will need:
- Trowel for laying bricks and cleaning off excess mortar.
- Pickaxe for dividing bricks (if necessary).
- Plumb to maintain even vertical masonry.
- Water level for horizontal leveling.
- Container for solution.
- A shovel or drill with an attachment for mixing the solution.
- Joining, if desired, make neat seams.
- Sieve for sifting sand 1.5*1.5mm. Burlap is used for washing.
- An abrasive attachment for a drill for cleaning finished masonry from excess mortar.
Potbelly stove modifications
The design disadvantages of a metal heating unit can be easily eliminated by covering it with high-quality brick. This will allow the thermal energy produced by the device to be stored. In addition, the likelihood of a fire is significantly reduced and the risk of injury is eliminated. This increases the warm-up time of the unit, but the heat is ultimately retained much longer.
A metal potbelly stove is often used for heating country houses Source idearemont.ru
If a metal structure is covered with brick, the result will be a brick potbelly stove with the following characteristics:
- the weight and dimensions of the technical device are significantly smaller than those of the laid out analogues;
- heat exchange and accumulation of thermal energy are improved;
- efficiency increases.
To eliminate the disadvantages of a metal stove, it is important to perform brick cladding properly, while strictly observing safety rules.
To quickly heat the premises, the front and top of the stove are left open Source prostroymat.ru
Plating sequence
Diagram of an iron stove lined with bricks.
Before covering the stove with bricks. you need to make sure that the floor can withstand such a load. Without a foundation, stoves weighing up to 800 kg can be installed on a wooden floor. Of course, this is provided that the beams and joists are in good condition. A sheet of steel is placed on the floor, a layer of brick is placed on it, and then a stove is installed. If the floor is wooden, then a sheet of asbestos must also be placed under the metal. The steel sheet lining should protrude 30-40 cm in front of the front wall of the stove to prevent hot coals from falling onto the unprotected floor. Metal sheets with an asbestos cement backing also need to be attached to the walls of the room located next to the stove. It is necessary to take into account that a gap must be left between the stove lining and the wall of the room.
There must be a gap of 30-50 mm between the metal wall of the stove and the masonry. This must be done because metal and brick have different temperature coefficients of linear expansion. When heated, metal expands much more than brick, so if you place a potbelly stove closely, without a gap, the stove may collapse. Free space between the metal wall and the brick is also necessary for air convection.
As a rule, they line the stove with 1/2 brick. It makes no sense to make the wall thicker, since it will take too much time and fuel to warm up thick brickwork. Before you start covering the potbelly stove, you need to make markings, taking into account the gap. Mark the outer contour of the furnace. The first row is made continuous. You should try to make the thickness of the mortar between the bricks no more than 0.5 cm. In the second row, 1-2 holes are made on each side of the stove, depending on the size of the stove. The length of the holes is 1/2 of a brick. All subsequent rows are continuous, like the first row.
The front wall of the stove on the firebox side must be lined with ease of use in mind - the door must open and close freely. Here you can show your imagination and perform figured masonry. At the top of the opening above the door you need to lay a metal corner on which the top rows of bricks are laid. The upper part of the stove can be covered at your discretion, since technically it does not play a significant role, performing mainly a decorative function. The top of the oven can be made in the form of a vault or made flat.
After the lining is completed, the mortar in the joints should dry. This will take 1-2 days. After this, the surface of the masonry must be cleaned from excess mortar using a drill with a brush attachment. Then the masonry is washed with a soapy solution and a brush with stiff bristles.
Nowadays there is a large selection of metal stoves of various designs and price categories on sale. Metal stoves are used for heating private houses, temporary structures, at construction sites for heating workers, security guards and other purposes. The use of metal stoves in home baths and saunas is also increasingly gaining popularity, although in this case a brick stove is considered more traditional, but it cannot always be used for a number of reasons. The main advantages of metal stoves are their compactness (since not every room can install a brick oven), ease of installation, fast heating. The main disadvantage is that after stopping the fire, it cools down quite quickly. This drawback can be eliminated by lining a metal stove with bricks. This will greatly extend the heat transfer without increasing the size of the stove too much. If you made a metal stove yourself, then by lining such a stove with brick, you will give your stove a decorative look.
Having basic construction skills, you will be able to line an iron stove with bricks yourself; for this you will need the following materials and tools.
Potbelly stove lined with brick
In practice, many options for finishing a heating unit are used. Before covering the heating device with bricks, you should study all the intricacies of the process and adhere to the general requirements for performing such work:
- The bricks are laid at a distance of 7-10 cm from the walls of the metal stove.
- The bottom and top of the masonry should contain small holes to provide ventilation.
When the air is heated in the space between the structures, it constantly circulates. Warm currents of air masses spread throughout the room, quickly heating it. At the same time, cold air, gradually moving along the walls of the metal device, cools it. This increases the service life of the unit.
Finishing a potbelly stove with bricks is a simple process, even beginners can do it Source iz-kirpicha.su
Drawing of the metal component of a complex stove
Based on the drawing, all the details of the future stove are drawn on metal sheets, and then they are cut out using a grinder, gas or plasma cutting machine, or welding machine. To transfer the drawing to metal, use a ruler, square, compass and tailor's chalk.
On the sheets you need to place two side walls, a bottom plane, an upper hob, as well as the front and back walls.
The combustion and vent holes are marked and cut out on the front panel. You can also immediately cut out the shape of the legs on all walls.
A round hole is cut in the top panel for installing a chimney pipe.
Secrets of long-term operation of solid fuel units
The whole secret of long-term burning of a potbelly stove is hidden in the way of putting fuel into it. The firewood in such a stove is ignited from above, so there is no danger of all the logs placed in the fuel chamber catching fire at the same time.
Despite its unassuming appearance, a homemade long-burning potbelly stove successfully competes with many factory-made wood stoves
Additionally, this is facilitated by the method of air supply. The oxygen required for combustion is supplied only to the top layer of fuel. Such solutions make it possible to increase the size of the filling as much as the dimensions of the furnace allow. Of course, the continuous operation time of such units increases tens of times.
The secret of long-burning stoves is an efficient way of burning fuel
The duration of one heating cycle can be further increased by the pyrolytic decomposition of solid fuel, which occurs at high temperatures and lack of oxygen. In this case, firewood does not burn, but smolders, simultaneously forming a large amount of volatile hydrocarbon compounds. Pyrolysis gases burn under the roof of the furnace, releasing a large amount of heat. Thus, smoldering helps to lengthen the continuous combustion period, and pyrolysis makes it possible to increase the efficiency of the heat generator many times over.
Simple designs
A potbelly stove for a summer residence is usually a type of basic fireplace stove. The simplest stove, a potbelly stove, made by yourself, is made from a metal barrel. This requires the use of some plumbing skills.
- On the side surface of the barrel, just below the middle, we cut out a rectangular hole with a grinder or a chisel. This will be the firebox. We weld the cut-out sheet of metal onto the canopies and add a simple locking mechanism - the firebox door is not at all difficult to manufacture.
- Below the combustion hole we cut out a smaller window. This opening is the ash pit. We perform the same operations as for the fire door to obtain a closing structure. Subsequently, by opening or closing the blower door, it will be possible to adjust the draft.
- Inside the barrel, above the upper opening of the blower, we build grates. For this you can use metal fittings. To make a grate out of it, drill the barrel from opposite sides and thread a reinforcement bar into the hole so as to leave about 1 cm outside on each side. The rod is scalded by welding. Repeat this process to form a lattice inside the barrel. The grate bars can be made removable by welding stops inside the barrel for their installation. The best are factory-made cast iron grates.
- A hole is cut out on the top edge of the container and a chimney is welded in (you will need a 4-5 inch pipe), and pipe scraps are installed on the bottom edge as legs.
The efficiency of such a potbelly stove can be increased by installing an obstacle in the path of hot gases in the form of sheet metal sections welded onto the walls. The sections are installed in such a way that the heated gases pass through a serpentine path, more fully transferring heat to the walls of the device.
A good stove for a wood-burning cottage is made from an old gas cylinder. The thickness of the wall allows such a stove to work for a long time. When positioned vertically, the design is similar to that of a barrel. However, by placing the cylinder horizontally, you can slightly increase the efficiency, creating a more difficult path for combustion products to escape and increasing heat transfer.
Potbelly stove from an old gas cylinder - Photo 05
Potbelly stove from an old gas cylinder - Photo 06
When positioned horizontally, several rows of holes with a diameter of 10-12 mm are drilled at the bottom of the cylinder. They will act as a grate. These holes are covered with a metal box with a blower door. The box will serve as an ash pit. The end of the cylinder is carefully cut off with a grinder, resulting in an original round door. On the other edge of the container, a hole is cut perpendicular to the surface and a chimney is welded. You can build a potbelly stove from a cylinder with your own hands in a few hours, and it will serve for many years.
Ceiling passage
To allow the sandwich to pass through the ceiling, a rectangular hole was cut to the size of the stainless ceiling cutout. An SML slab 8 mm thick and 60x60 cm in size was laid for cutting. This entire structure was screwed with self-tapping screws to the bars in the ceiling between the floors. In the ceiling around the pipe, insulation with foil two layers thick was laid, the foil was laid towards the sandwich. I taped all the seams with aluminum self-adhesive tape and covered the top with the same LSU sheet measuring 60x60 cm. The roof passage has not yet been laid in any way, because it is planned to redo the roof next year. Masterflash was placed on top and sealed with sealant.
source
How to organize air heating
This heating method involves direct heating of the air in the garage from a selected heat source. This can be any of the following units:
- solid fuel stove;
- furnace - dripper in production;
- electric heater - convector, oil radiator or heat gun;
- gas convector.
Such heaters emit diesel combustion products directly into the room
Installation of a wood-burning and exhaust stove
Direct heating of the air in the garage by burning cheap fuel - firewood and various waste - is the most economical heating method. But you need to organize it wisely, otherwise the heater will heat one corner of the room, while the opposite one will remain cold. It is clear that you cannot install a stove in the middle of the room, which means that the issue of heat distribution must be solved differently.
To make effective air heating of a garage or box with your own hands using a wood stove, use our recommendations:
- Order, buy or make an economical potbelly stove yourself, not just an iron box with a pipe. You will find examples of furnaces with drawings, diagrams and assembly instructions in the corresponding publication.
- The heat exchange surface area of the heater walls must correspond to the dimensions of the room. The calculation is as follows: in order to add logs at intervals of 3-4 hours and evenly warm up a 20 m² garage, the heating surface area should be 1 m².
- The part of the housing around the ash pan is not taken into account (it heats up slightly). But the area of convective fins welded to the walls from the outside is taken into account.
- Install the potbelly stove in the chosen location and be sure to organize airflow around the case with any fan - household, for hoods or a computer cooler. Thanks to the forced air movement, heat is more efficiently removed from the walls of the firebox and distributed more evenly throughout the box.
- Before venting to the street, lay the chimney horizontally along the wall, so it will release more heat into the room.
- Raise the chimney pipe to a height of 5 m, counting from the grate, and equip it with a damper to adjust the draft. Provide a condensate collector at the bottom; adjust the cap at your discretion.
There are designs of homemade stoves designed for air heating of workshops, garages and other outbuildings. Below is a diagram of a potbelly stove made from a gas cylinder and equipped with a separate heating chamber through which air is blown by a fan. If necessary, water can also be driven through the heat exchanger.
All of the above applies equally to potbelly stoves using waste oil. The only difference is the placement of the fuel tank that feeds the dropper. Keep the tank away from the stove to prevent fire. Do not use a regular two-chamber miracle heater - it is a fire hazard and consumes up to 2 liters of waste per hour. Use models with a drip burner.
Placement of electric heaters
The first thing you need to do is to choose the right electrical heating appliances based on power. If you want to heat the entire garage, then measure its area and multiply the resulting quadrature by 0.1-0.15 kW. That is, a box of 20 m² will require 20 x 0.15 = 3 kW of thermal power (and it is equal to electrical power), sufficient to maintain positive air temperatures.
Now let's move on to the recommendations:
- If your work in the garage is periodic and short-term, it is better to save money and buy a portable fan heater or infrared panel. It is located in the right place and heats only part of the room. The thermal (also known as electrical) power of the device is 50% of the calculated one.
- Try to use heaters equipped with a turbine or fan to distribute heat better and faster.
- A rational solution for convectors and other wall-mounted appliances is to install several small heaters at different points instead of one large one. Then the garage will warm up evenly, and if necessary, half of the heaters are turned off.
- Do not follow the lead of sellers who are trying to sell a more expensive device under the guise of an innovative and high-tech product. The efficiency of all electric heaters is the same and equal to 98-99%, the difference is in the method of heat transfer.
Different heating methods can be combined. For example, it makes sense to hang an infrared panel above a workbench to provide local heating. Heat the rest of the garage with a stove or a heat gun - whichever is more profitable. Don't forget about garage ventilation - it is necessary when burning any type of fuel.
Western European experience
If you type the phrase “garage heating” in the search and look at pictures on English-language sites, you will not find any wood-burning or oil-fired stoves in Western European garages. How do local motorists warm themselves:
- electric portable heaters;
- infrared hanging heaters;
- air heating units (heaters).
We have already discussed the first 2 options above. The third method is also far from new: water heated in the boiler passes through a radiator, blown by a powerful axial fan. Ideally, the unit is suspended from the ceiling and distributes hot air throughout the room.
The advantages of this option are compactness, heating speed and the possibility of air conditioning in the summer (cooled water is sent to the radiator instead of heated water).
Heater made from a car radiator
There is one downside - increased costs for equipment, because the coolant must be heated in the boiler and supplied through pipes to the heater. But if the garage is attached to a private house, then the problem is easily solved by connecting the radiator to the building’s water heating system.
Conclusion
A potbelly stove lined with brick retains heat longer and allows you to consume less fuel. Masonry significantly increases the aesthetic qualities of a simple stove. If desired, the efficiency of the potbelly stove can be increased by installing a sandwich mesh. It protects the chimney from burning out and accumulates heat. Often the front side and top are left open. This way the stove warms up the room faster, but due to the reduction in brick area, it releases the heat faster. Clay mortar is ideal for stoves, but is demanding on room humidity. If the logs are old, it is better to remove some of them and pour a cement foundation.
People have been wondering how to line a potbelly stove to preserve heat since the time of the revolution. The brick absorbs some of the heat, which is safer to use and reduces the risk of getting burned. You can dry things, fruits and berries on the masonry. A potbelly stove has been helping out in the cold for more than one generation; it never ceases to be in demand and loved by all summer residents. Covering a stove with brick is an affordable and quick way to improve it and keep the house warm. A budget method that does not require special skills.
