The article was prepared with the participation of specialists from LafargeHolcim
The “warm floor” heating system is popular both among city residents and owners of country houses. This is due to the fact that, thanks to the optimal vertical temperature distribution (from floor to ceiling), it helps to create comfortable conditions in the house. One of the options for a heated floor can be an electric one, with a heating cable laid in a sand concrete screed. Many users have questions about how to properly make such a system, avoid installation errors and pour a reliable and durable sand-concrete screed. In this article, with the help of a specialist from LafargeHolcim, we will tell you:
- How to choose the right “pie” of an electric heated floor with a heating cable.
- What should be the thickness of the sand concrete screed when using a heating cable.
- How to choose high-quality sand concrete and cement.
- How to make your own mortar from sand and cement.
- Why is fiber added to sand concrete?
- The main stages of work on pouring sand concrete onto a heated floor screed with a heating cable.
Resistive cables
Such heating elements are produced in single- and double-core versions. They are connected to the network using special couplings. The principle of operation of these cables, regardless of the number of cores, is similar: heat begins to be released when current passes through them.
However, there is a difference - this is the connection method. In single-core elements, the current passes through one conductor and in order to make the circuit closed, both ends of the coil must be connected to the power supply.
The installation process is as follows:
- The adapter coupling is attached at the connection point (this is prohibited from doing near the thermostat).
- The cable is unwound and laid so that its other end, located near the coupling, is placed in the installation box.
When both couplings are connected, a closed loop is obtained and the wiring is completely ready for use. In this case, the couplings are on the floor and are filled with screed.
Connecting a resistive two-core cable is simpler, since one end is connected and a plug is placed on the other. To make the circuit closed, there is a second current-carrying core.
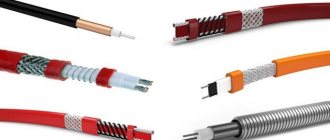
The design of both types of cables has much in common: one or two insulated cores, to give greater rigidity, a metal protective braiding against damage, and on top everything is covered with an outer insulating layer. In some products, the cores may be drainage, which serve to reduce the efficiency of electromagnetic radiation.
The price of two-core products is higher, but it is still in great demand for two reasons:
- It is easier to lay the cable, since the second end is not connected to the thermostat;
- electromagnetic fields of lower intensity are formed.
But both types of resistive conductors have a big drawback, which is the constant amount of thermal energy released. If heat is not removed for any reason, overheating occurs. This ends with a breakdown of the floor heating system.
Therefore, the resistive cable is not laid under furniture and make sure that there are no voids in the screed. The fact is that air has low thermal conductivity and in the area where the bubble appears, heat begins to be removed at a low speed, and this leads to an increase in the temperature of the cores, which fail.
Self-regulating cables
Thanks to their special structure, heating wires of this type do not overheat. A self-regulating cable for underfloor heating consists of small segments connected in series. Each of them has two conductive cores, between which there is a polymer that generates heat.
Self-regulation of this type of electric floor is based on the properties of the polymer, whose electrical resistance largely depends on the temperature regime. The higher it is, the greater the resistance.
For this reason, as the polymer heats up and the degree of resistance increases, the current flowing through the element decreases, which means the amount of thermal energy released decreases. This is how the heat transfer of each segment is regulated. In this case, the temperature of neighboring elements does not depend on each other. The cost of such wiring under heated floors is much more expensive than resistive cables.
Prevention
Complication of mycotic eczema
Mycotic eczema is a chronic disease and tends to recur regularly. How long the remission will last depends on the patient himself, on how well he follows preventive measures. Eczema can be complicated by a long course and rashes all over the body, and wounds on the skin often become infected, suppuration appears, and in advanced cases, sepsis develops.
Prevention of relapses of mycotic eczema lies in the correct lifestyle. The patient needs to eat a balanced diet, excluding the consumption of allergenic foods, exercise regularly, harden and strengthen the body’s immunity in every possible way.
It is also very important to monitor the condition of the skin, immediately treat wounds and treat any rashes on the integument. Avoid exposure to household chemicals; all manipulations must be carried out with gloves.
It is necessary to maintain personal hygiene, regularly wash your hands and the whole body.
Nuances of arranging cable floor heating
If any heating wire is damaged, the system loses its functionality. For this reason, heated floors constructed using cables are laid in a screed. At the same time, its thickness is selected so that the high load from the cement layer does not damage the wiring located under it.
In addition, a screed that is too thick in this case will greatly reduce the efficiency of the heating system, making it inertial. A thicker layer can cause a lot of trouble, since the floor will not heat up even when the power is set to maximum.
In the electrical cable laying diagram for heated floors, it is always necessary to provide for the placement of a thermostat and a floor surface temperature sensor. You can do without these devices by directly connecting the cables to the power source. But then the heat supply system will not work for long.
This is especially true for resistive cables. Therefore, when installing a wired underfloor heating system, you first need to install a thermostat.
First of all, it is necessary to measure the resistance and insulation of the wire. Since each bay is accompanied by a passport, which indicates the technical characteristics of the cable for heated floors, it is necessary to compare the indicators obtained during the measurements with the data in the document. If the deviations do not exceed 10%, then installation work can continue.
Cost of work
The exact cost of the work is difficult to calculate; a lot depends on the materials and the cost of installation work . So, we can only talk about the approximate cost - 2000-9000 per square meter, this is for the material.
For laying the cable you will pay 300-500 rubles per square meter, for installing a thermostat and other related devices, you will need to pay separately.
If we add up the prices for everything, then on average it will be 700-1300 rubles per square meter of area.
Installation of thermostats
First of all, you should determine the location of the thermostat. It must be mounted on one of the walls of the room at a distance of at least 30 centimeters from the floor surface. Typically, thermostats are located close to switches. A recess is made in the wall the size of a standard socket box.
After installing the installation box, the power supply is supplied without connection - zero, phase and ground. Then lay the groove in the direction from the thermostat to the floor. Several sections of pipe or corrugated hose are placed in it. 1 – 2 segments are taken out of the wall near the floor surface and connecting wires from the cables are placed in them.
The section of pipe located between them must be laid along the floor to a mark located 50–100 centimeters from the wall. Now, if the sensor breaks down, it can be replaced without any problems; to do this, remove the thermostat panel and remove the damaged element by the wires from the pipe. Then the new product is inserted and connected.
Connection from an outlet or directly
If the boiler is connected from an outlet, then the outlet must have a degree of protection IP44. These are sockets for rooms with high humidity levels.
Remember that the socket in the bathroom can only be placed in certain places. And there are areas where doing this is strictly prohibited. You can read more about this in the article “Socket in the bathroom - 5 placement rules.”
Although many are opposed to connecting electric heaters through a socket, this is the only way to ensure a visible break in the conductors (phase and neutral) when disconnected, as required by safety regulations.
If it says that this boiler can be connected in two ways
directly
and via the standard power cord
then you will not lose the guarantee here.
In addition, if you need to dismantle the device from the wall, if there is a plug, you will not need to call an electrician to disconnect it from the power supply. Pull out the plug, take it off, rearrange it, do whatever you want.
Powerful boilers over 3.5 kW should only be connected directly through a circuit breaker; a socket connection is not allowed here.
The cable must be routed so that there are no intersections with water pipes and places where the heater will be mounted.
Installation of heated cable floors
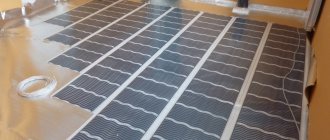
When installing cable floor heating, proceed as follows. First, the base is cleaned and leveled. If necessary, a screed with a thickness of 3–7 centimeters is poured for this purpose. A level base is important.
If this requirement is neglected, then heating will not be uniform. When an air bubble appears under the resistive cable due to unevenness of the base, it will soon burn out.
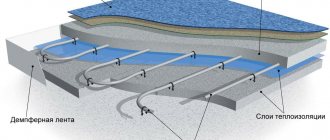
On a prepared, clean base, in order to reduce heat loss, install thermal insulation, consisting of two parts: a tape laid around the perimeter of the room, and insulation. When choosing an insulating material, pay attention to its heat resistance - it should easily withstand temperatures up to 100 degrees.
If there is a cold basement below the room, a thicker layer should be created, and if there is another apartment, then 2 centimeters will be enough. If the heat insulator is not used, a third of the system’s power will go down.
When choosing insulation when laying a cable in a heated floor screed, it is better to give preference to a material that has a metallized surface. As a result, the heat going down will begin to be reflected and heat not the ceiling between the floors, but the screed located above the wiring.
You can save money by purchasing regular insulation and laying a film with a reflective effect on top of it. At the same time, experts do not recommend using foil, since it will collapse in a few months. You can buy heat insulation in both rolls and slabs.
It is unacceptable to leave gaps between the sheets and strips of insulation: they are laid closely, since any gap creates a cold bridge through which heat leaks out.
Depending on the base, the following can be used to attach heat-insulating materials: double-sided tape, staples plus a construction stapler, and adhesive. For joining points, tape is used - it can be mounting tape, but the best choice would be metallized tape.
When there is often high humidity in the room, waterproofing is placed on top of the thermal insulation layer. To do this, use polyethylene film or other modern material.
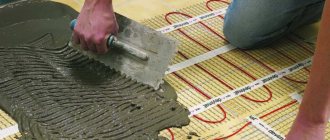
Then you can proceed in one of two ways. In the first case, a small height preliminary screed is laid from a mixture of sand, cement and water. Thanks to its presence, heat is distributed more evenly and overheating of the floor heating cable is prevented.
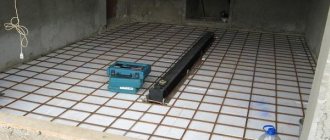
The second method involves installing a mesh with cells of 10–15 millimeters or a special mounting tape on top of a polyethylene film. The tape must be placed with a laying step of 40–50 centimeters. The grids are mounted close to one another.
Perform power calculations for heating cables
When calculating thermal power for a cable system, the purpose of this heat supply method is taken into account. If the heating cable for a heated floor is planned to be used to provide auxiliary heating for a property, then 110-140 W will be required for each “square” of area. When the system is the main one, in this case 150 W or more is needed.
In addition, you should know the size of the area where the cable will be laid out. It should not pass under furniture, plumbing fixtures or objects located low above the floor surface. This is especially true for resistive cables, which are at risk of overheating, but for self-regulating wires there is no danger.
By subtracting the area of these zones, you can find out the actual heat supply area and the power of the entire underfloor heating system, for which the heating area is multiplied by the norm for one square meter.
Next, you should calculate the length of the floor heating cable: in the passport for this product, manufacturers indicate the power of one meter. The required footage is determined by dividing the total power by the cable capacity. For example, the result of calculations was 93 meters.
You need to purchase several bays, the total length of which is close to the calculated value. It should be remembered: if there are extra meters of cable left, they cannot be cut off, since there are couplings at their ends, secured using special equipment.
You can make something similar yourself, but the service life instead of 10 - 20 years will be several years, and sometimes months. Therefore, the cable is laid along its entire length.
Thermal sensors
In order for warm cable electric floors to fully function, the thermostat must constantly receive information not only about the air temperature, but also about the degree of heating of the floors themselves. For this purpose, temperature sensors are used: internal and external. Internal sensors are placed between the turns of the heating cable and serve to monitor the floor. External ones are usually located inside the thermostat; they monitor the air temperature in the room.
Heated floor temperature sensor
When cable underfloor heating is installed as an additional heating system, it is usually limited to installing internal sensors. And if it is the main or even the only equipment for heating the room, then the ambient temperature becomes an equally important indicator. Then there is a need for an external sensor.
If you are installing a cable heated floor under laminate, wooden parquet or other material that is sensitive to overheating, then a double control system is required. In this case, you cannot do without both types of temperature sensors.
Laying heating cables
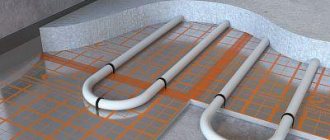
The power ends must be led to the wall to the thermostatic device. In this case, the couplings must be in the screed. Lay the floor heating cable according to the diagram in the shape of a “snail” or “snake”. The first method is more difficult to implement and has no advantages, so the second installation option is almost always used. Sometimes a double or triple “snake” is laid.
The size of the installation step is selected taking into account the required power: the closer the wires are located, the greater it will be. The maximum distance between adjacent conductors is 30 centimeters, and the minimum is 5 centimeters. A more precise step is determined based on the purpose of the room: in bedrooms and children's rooms it is usually larger, and in common rooms it is smaller.
In addition, if desired, the distance is reduced in areas near window and door openings, as well as in the center of the room. The main thing you should pay attention to when developing a wire layout is that they cannot intersect or touch, and the gap between the walls and cables must be at least 15 centimeters.
After completing the installation of the heating elements, you need to install a floor temperature sensor, the wires from which are connected to the thermostat via a corrugated hose. It is advisable to place it centrally between two wires. If the screed height is sufficient, the tube with the sensor can be placed on top and fixed. When the thickness is not enough, the subfloor has to be tapped.
One line (one circuit) per room when wiring in an apartment
When renovating, it is very important to properly plan and implement the wiring in the apartment. We consider this decision to be categorically inconvenient and incorrect. In our opinion, the classic version looks like this:
For each room you need to put 2 groups:
- Line of sockets
- Line of light
- Power devices (Cookers, hobs)
- “Vacation” line on which you can “hang” a refrigerator and an alarm system. This scheme may be convenient for those who often leave their apartment. In this case, you can turn off the power to the entire apartment, leaving only the alarm and refrigerator in working condition.
Final pouring of the screed
Before final pouring of the solution, you need to make sure that the cables are working properly. To do this, take a tester and measure the resistance. This parameter must match the data in the passport. Permissible deviation is maximum 10%.
When everything is in order with the heating elements, you can start pouring the screed. If thermal insulation was not installed, and the installation was carried out directly on the subfloor, then the height of the solution can be 3 centimeters.
If there is insulation, the concrete layer must be at least 6 centimeters. Only with such a thickness of the screed is it possible to ensure the required rigidity of the floor covering. The height can be made smaller provided that hard finishing materials are laid - parquet boards, laminate, etc.
After leveling the concrete layer, it is left for at least 4 weeks. Only then do they begin to connect the cables to the thermostat. It has clamps to which the heating conductors are first connected, and then the power wires. The electric heated floor is ready and all that remains is to install the floor covering.
To lay a cable for a heated floor with your own hands, you need to have the appropriate knowledge and skills, otherwise the best solution would be to contact specialists who provide this type of service.
Peculiarities
Electric underfloor heating is a modern type of residential heating system.
This design consists of heating mats and special regulators laid under the floor or between layers of concrete screed. The advantages of the scheme include:
- uniform heat distribution along the height of the building;
- absence of circulation disturbances in the form of convection currents - movement of heat in the air;
- simplicity and clarity of self-installation of the system;
- cost-effectiveness of professional installation;
- saving useful area of heated space;
- no need for additional equipment;
- Possibility of installation under any floor covering;
- increased comfort and convenience;
- environmental friendliness;
- Possibility of use by people suffering from various types of allergies and bronchial asthma.
The disadvantages of electric heating are:
- high cost of 1 kW of electricity;
- creation of an electromagnetic field within a heated room;
- mandatory skills in handling temperature regulators;
- difficulty in diagnosing and repairing the system;
- existence of height restrictions for heated buildings;
- the need to improve electrical safety through grounding.
However, with rational design and proper installation, all these shortcomings are eliminated by themselves, which is why this system is becoming increasingly popular among consumers.
Cable underfloor heating and flooring
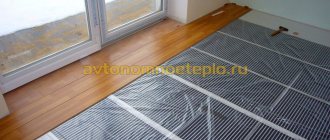
Warm electric floors may not be used with all types of floor coverings. When resistive cables are installed, the finish can be made from any tile, wood plank, laminate or linoleum. As for the last two types of flooring, they should not have a heat-insulating layer.
When purchasing laminate or linoleum, it is advisable to pay attention to the presence of such characteristics of the materials as suitability for heated floors. When the heating system is installed using a resistive cord for underfloor heating, the floor surface should not be covered with carpets or heating elements should not be placed under furniture.
But a self-regulating cable can be installed anywhere. If you are going to use glue, grout and adhesive composition, you need to purchase special ones. They are intended specifically for floor heating systems, since they have greater elasticity and better thermal conductivity.
Example prices for some components
Thermostats:
- digital thermostat Nexans MILLITEMP CDFR-003 – 2500-2800 rubles;
- thermostat OCD-3 – 4000-4500 rubles;
- thermostat TR 510 (mechanical) – 1500-1800 rubles;
- thermostats for heated floors RTC 70.26 – 500-800 rubles;
- thermostat UTH-150 (invoice) - 1200-1500 rubles.
Warm floor:
- Teplolux floors 20TLOE2-170 (3.40 kW) – 10,000-12,000 rubles;
- Teplolux floors 20TLOE2-75 (1.40 kW) – 4000-6000 rubles;
- Teplolux floors 18TLOE2-38 (0.70 kW) – 2000-3000 rubles;
- floors Heating mat Thermo Thermomat TVK-130 – 4000-4500 rubles;
- Arnold Rak floors Heating mat FH-2107 120W 0.5×1.5m (0.75 sq.m.) – 1700-2200 rubles;
- floors Gulfstream heated floor set MGS2-75-0.5 – 2000-2400 rubles;
- floors Twin-core heating cable Nexans TXLP/2 – 4000-5000 rubles.
Other options for arranging a warm electric floor
It will take a lot of time to make a warm electric floor; this work cannot be done in a short time. Most of the time is spent ensuring that the screed solution completely hardens. The mixture must be laid in a layer at least 6–7 centimeters thick.
A linear meter of cable is inexpensive, but to the costs of installing a heated floor, you should add the costs of installing a screed, thermal insulation, purchasing fastening tape and other materials.
Taking into account the above information, before making a final decision, it would not hurt to familiarize yourself with other options for arranging a warm electric floor, for example, using film and rod heaters. They emit heat in the infrared range, which is well perceived by the human body, which is their huge advantage.
When heating with infrared heated floors, the temperature seems comfortable, although it is several degrees lower than with thermal radiation. As a result, energy costs are reduced. Among the advantages of the infrared rod floor is its ability to self-regulate.
Safety regulations
Before installing a heated floor yourself, you must carefully read the installation instructions and user manual supplied with the kit by the manufacturer. The documentation describes the safety requirements for installation and operation of heated floors:
- which heating elements can be cut and which are not designed to be adjusted
- what type of screed mortar or tile adhesive should be used?
- Recommendations for opening heat shrink splices
- how to lay wires and make wiring
- wiring diagram for heating elements and control unit.
We remind you that large pieces of furniture should not be placed on sections of heated floors - wardrobes, beds, dressing tables, etc., and especially those without legs. The floor above the heating elements should not be covered with carpet or large rugs to avoid frequent overloads of the system.
