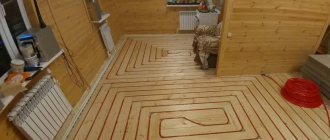
Warm floors are an opportunity to increase comfort and coziness in any room. Indeed, it is much more pleasant to step on a heated floor covering, no matter what type it is, than on a cold one, which is especially important during periods of seasonal cooling - for example, in autumn. Yes, both in winter and summer, such a floor will bring a lot of benefits. Film heated flooring is especially popular - it is easy to install and convenient to use, and most importantly, when installing it, you do not need to bother with the screed.
Film heated floor
Features of this heating system
A film-type warm floor is a rather complex electrical system that you certainly cannot make yourself, but it is possible to purchase this film and install it yourself. You just need to have a general understanding of how to work with electrical devices, as well as follow all the rules for laying this product.
IR film for heated floors
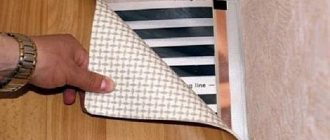
A film floor can be called a universal heating system, since in some cases it can replace heating in a small room and also help create comfort in it. The film itself has special heating nanoelements, which are made of carbon-containing materials. Under the influence of electric current, they can create infrared radiation, due to which the surface is heated. The radiation is not noticeable to the human eye, but the body will immediately feel it.
Types of IR film floors
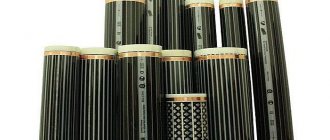
The nanoelements themselves are closed on both sides with a special polymer material, as if sealed inside it. The width of one strip of carbon substances is only 15 mm, and there are a lot of them on one piece of film. They are parallel to each other, and the film looks striped. The strips of heating elements are connected to each other by special silver-plated copper busbars. Thanks to the polymer film covering the heating strips on both sides, the system is protected from a number of influences, including moisture.
SNiP 2.04.05-91. Heating, ventilation, air conditioning. Downloadable file (click the link to open the PDF in a new window).
SNiP 2.04.05-91
Table. Some characteristics of the heating element.
| Parameter | Meaning |
| Film roll width | 50-100 cm |
| Length of material in 1 roll | 50 m |
| Material thickness | 0.2-0.4 mm |
| Power (consumption) | 25-80 W/h per 1 sq. m. |
| Possible heating level of the carbon element | 30-50 degrees |
Specifications
Types of infrared film heated floors
Despite the relative novelty of infrared heating systems, manufacturers offer several varieties.
- Film infrared heated floor. The essence of this system is that the heating element is a fiber laid between two layers of polymer film. The heating film is flexible, durable, wear-resistant, and is also a good dielectric.
- Rod infrared heated floor. The peculiarity of the system is that the function of the heating element is performed by carbon rods connected by wire.
This is the most innovative of the systems, allowing to reduce heating costs by 60% (compared to other systems). The only thing that hinders the widespread use of carbon rod floors is their high price.
This is interesting: A device for sharpening drills - we describe all the nuances
Film usage options
Interestingly, such systems are used not only for underfloor heating in bathrooms (for example), but also as the main heating system in the house. True, for this you will have to cover most of the surface of the walls and floor (up to 70%) with just such a film, and this is quite expensive. Also, in areas characterized by harsh winters, this option for heating rooms cannot be used - the power of the film is simply not enough to warm the room. But in this case, the floor can be used as an additional heating option.
On a note! In some conditions, the film can be used as an emergency heating option. For example, in the event of a rupture of water pipes, such a floor can save the situation of the residents living in the house. The main thing is that there is electricity in the house.
Application of IR film heated floor
Sometimes IR film is even placed on the ceiling. This is a good option for additional heating of attic floors. The floor can also be used to heat a number of utility rooms, turning on the system only when necessary.
On a note! Most often, in apartments and houses, an IR heated floor system is installed in bathrooms and kitchens - where cold tile floors are often laid.
Installation sequence
Increased reliability
As a result of the use of infrared floors, it turned out that their service life can reach 30 years. Standard systems do not have this property. Film melting point 120℃, operational maximum 60℃.
The laminated surface of the heated floor, consisting of several layers, reliably resists mechanical stress and moisture. Ensures safe operation of the system even in the event of defects (puncture, cut).
The equipment continues to function even if one carbon element fails. Manufacturers guarantee the operation of the product for up to 10 years.
Comfort
The use of an infrared system for heating premises eliminates direct heating of the air. The human body, having received enough heat, is in a room with fresh air, optimally cool and humid.
When the system operates, no oxygen is burned, there is no noise or vibration. There is no circulation of air flows, which eliminates the presence of dust in the atmosphere. There is no need to install complex ventilation systems, since there are no combustion products or unpleasant odors.
Impact on humans
IR radiation has long been used by medicine for the prevention and treatment of diseases. The rays have special properties and help cure certain diseases. Infrared flooring has a positive effect on the human body during operation.
First of all, the rays create heat around the human body, providing him with comfortable conditions. Long-term exposure to infrared radiation slows down inflammatory processes. Has a calming effect on the nervous system. In order for a warm floor to be comfortable for residents, it must be selected and installed correctly.
A few words about safety
Film floors are considered safe for human health. They do not have a negative effect on the body during operation. But on the other hand, it is important to install them correctly, insulating all contacts to avoid electric shock. Otherwise they are completely safe. There is no need to be afraid of electromagnetic radiation - its level is negligible to cause harm.
Infrared heated floor
There is an opinion that the presence of such floors in the house improves the microclimate. And also some note a decrease in the recurrence of allergic reactions to anything.
Where can I get a qualified review about film warm field?
Yes, everything is as usual! Only ask good friends who have experienced this themselves, or compose it yourself, and for this you need information from several sources. Sources may include information posted on the websites of manufacturers and their official dealers. Articles on this topic, where there are no positive reviews about only one brand and negative reviews about all others. In conversations with company representatives and sellers in order to find out individual characteristics. Don’t hesitate to ask sales managers about the difference between their film flooring and a competing one.
Look at the characteristics, the materials from which it is made, touch, finally, because even by touch you can identify differences, when one thermal film, even in appearance, is made soundly, has inscriptions about the brand, manufacturer, certificates, markings by meter, while the other is all transparent and flimsy and it is clear that during its manufacture they clearly saved on materials.
Power and energy consumption
Installing a film floor is not as complicated as it seems at first glance. The main thing is to understand the instructions, take your time and follow all the recommendations, then everything will definitely work out. To begin with, it is important to determine what capacity the material itself needs to be purchased. Depending on the indicators, the floor will heat up differently.
Selecting the power of film heated floors
Let's look at power indicators using Caleo floors as an example. So, the line of these films is represented by 4 variations.
- Line is the simplest option. The film is 50 cm wide and has a power of 130 W/m2. Ideal for additional floor heating.
- Grid is a more powerful film, but at the same time reliable and durable. There are two types depending on power - 150 and 220 W/m2.
- Gold - this option can be adjusted in power depending on the temperature level in the room. There are also two types - 170 and 230 W/m2.
- Platinum is a self-regulating high-tech floor that is not afraid of even being blocked by interior elements, and is not afraid of overheating. The most reliable and economical option with a power of 230 W/m2.
Warm floor CALEO PLATINUM
You need to choose a film based on power depending on its operating conditions. To heat the floor only in the toilet (additional), you can take the simplest and lowest-power option, but if you plan to install a full-fledged heating system for a large room, then you should take a more powerful film.
It is also important to pre-calculate energy consumption. The maximum consumption can be found by looking at the material labeling. For example : if the film power is 220 W/m2, then in 60 minutes a square meter will spend approximately 0.22 kWh. Most energy is spent on heating the system. By switching your floors on and off regularly, you can save quite a lot of money, provided they are well insulated.
On a note! You can regulate the floor temperature automatically using a temperature sensor and thermostat. That is, for example, when the floor reaches the set temperature of 26 degrees, the temperature sensor will react to this indicator and transmit a signal to the thermostat, which will turn off the heating. The floor will automatically turn on when the film cools down again. So the consumption will seriously depend not only on the power of the floors, but also on the frequency of their activation.
You can calculate the required film power as follows.
Step 1. If the system will be used as an additional system for underfloor heating (central heating will also be installed), then you should remember that it is enough to cover only 50% of the entire floor surface to achieve the desired effect.
Not the entire floor can be covered with film
Step 2. Next you need to find out the usable floor area. This includes only those areas where nothing stands - the open floor. For example, the usable area was 8.6 m2. To obtain the values, it is enough to remember the mathematics, take measurements from the free space and carry out simple calculations.
Determination of usable floor area
Step 3. Then you need to calculate the amount of film, but it is also important to take into account its parameters (width, length, etc.). It is recommended to cover the entire usable area. So, for example, the choice fell on a film with a power of 150 W/m2, which has a canvas width of 50 cm. Thus, you can find out that the master will need to have 4 pieces of film 4 m long - that will be 8 m2. The total power will be 1.2 kW, load 5.5 A.
Calculate the required amount of film
Attention! It is important to know the power of a film floor in order to prevent overvoltage of the system and its failure.
Electricity consumption of infrared film heated floors
It will be a shame when, in the event of a warranty claim, you cannot find someone to turn to. If the website only has a contact phone number and a minimum of information about the trading organization, and there are no bank details or pickup points, then you should think about it at least a little.
The price of the product
In modern Russia, the Age of market conditions and fierce competition has arrived, in which everyone from the manufacturer to the consumer participates. The price of a film heated floor directly depends on its quality and brand.
Today, the price of film heated floors ranges from 550 rubles. up to 1000 rub. for striped and from 1200 to 1750 thousand per square meter for continuous thermal film.
With a large presence of all kinds of brands and fierce competition between manufacturers, everyone strives to make their goods more accessible, but everyone has their own limits, beyond which economic feasibility is lost.
It is possible to make a product cheaper only through the use of lower quality materials in production, but even that is not infinite. For example, if, in the production of a protective layer of thermal film, instead of components produced in Korea, we take materials produced in India, then the price difference will be about 100 rubles, but will accordingly entail a decrease in the quality of the product.
You can, of course, get a discount from a trading company, but to do this you need to buy in bulk.
Installation of film heated floors
This is a very significant topic of conversation. Buying thermal film is half the battle, you need to correctly calculate what related products you will need, the thermal insulation must have a special reflective layer, how to properly connect the grounding layer without which electric heated floors cannot be used, what is the best way to connect heating strips and what material to use when installing under soft coverings. By receiving answers to these questions on the website or in a conversation with a representative of a trading organization, you will form the correct opinion about the seller and the degree of trust in the brand.
conclusions
The conclusions are simple. Search by obtaining information and drawing conclusions yourself, or relying on the opinion of experts, but remember the rules:
- By buying a cheap product you save on quality.
- When buying an expensive product, you overpay for the brand, but you get confidence.
- If a seller only praises his own product and criticizes others, then this is the opinion of an interested person, whose opinion should be treated with a grain of salt.
- When purchasing a product, talk about installing film heated floors, be sure to take detailed instructions and a phone number where you can get advice.
When using article materials, an active link to the article is required!
Return to list
Installation and connection
Before starting installation, it is advisable to sketch out the laying scheme, that is, approximately position the film pieces as they will lie on the floor. It is important to maintain all the necessary distances, distances from walls, etc. You need to retreat from walls and other heating systems by 10-20 cm. The free space between the strips themselves should be no more than 5 cm.
Connection diagram
Let's consider what is needed to install a heated floor on an area of 8.6 m2.
Table. What will you need?
| What do you need? | Characteristics |
| Substrate | It is best to take isolon with a thickness of no more than 0.5 mm, area - 10 m2. The material is needed for additional thermal insulation and in order to soften the mechanical impact on the film during operation. |
| Polyethylene film | It is advisable to lay it for additional waterproofing in case of accidental water leakage. The size is exactly the same as that of the isolon in terms of area. Thickness – about 50 microns. |
| Modular box | Enough for 4 modules. |
| Switch | It is better to take automatic ones for 10 amps. |
| Clip-on clips | These are connecting elements that will help make individual pieces of film into a single system. Take 2 pcs. for one heating mat. Total - 10 pcs., 2 clips are taken in reserve. |
| PuGV wires | Two segments of red and blue colors. 10 m long is enough. |
| Scotch | You need a regular one - for fastening individual elements of the substrate, and a bituminous one - for insulating electrical elements. |
Clamps for film heated floors
So, let's look at how the installation of IR film will take place.
Step 1. First, you should thoroughly clean the surface of the subfloor from debris and level it. If the floor is level after cleaning, there is no need to level it further. But in some cases it will be necessary to make a cement screed or pour a self-leveling mixture.
The floor needs to be leveled and cleaned
Step 2. Next, you should determine where the film will be laid on the floor surface. For convenience, you can apply markings directly to the surface of the subfloor. It is worth remembering that the film is installed only on spaces free from furniture and other interior items.
Markings can be applied directly to the subfloor
Step 3. You also need to select in advance a place to install the thermostat. It must be located in an accessible place. In the wall from it to the floor you need to make a shallow groove into which the wires located inside the protective corrugation will be laid. A thermostat sensor will be connected to this system. You can also use cable ducts to hide wires.
The location for the thermostat must be chosen in advance
Step 4. Then you need to lay a substrate or thermal insulation material over the entire floor area. Individual strips cannot be laid overlapping, only parallel to each other. They can be connected to each other using ordinary household tape. You can secure this material to a wooden surface using a stapler. You can glue the underlay onto a concrete floor using double-sided tape.
Strips of material are laid parallel
Fastening with a stapler
The joints are taped
Step 5. Next, you can begin laying the film itself. It needs to be rolled out to the required area, having previously been cut into separate pieces. It is important to remember that the film can only be cut along specially marked lines, which are located at a distance of 17.4 cm from each other along the entire length of the material. The film cannot be cut anywhere else. The material is laid out on the base with the copper strip down. You should also ensure that the film strips are located at a distance of 10 cm from the walls.
Laying IR film
The film can only be cut along specially marked lines.
Step 6. The film strips need to be secured with tape. It is enough to glue them together so that they do not move separately from each other.
The strips are fixed with tape
Step 7. Next, you need to insulate the cut areas in the area where the copper strip is located with bitumen tape. The insulating material should cover the entire cut in this area.
The cut area in the area where the copper strip is located is insulated with bitumen tape
Another photo of the process
Step 8. Then, in the places where the wires will be connected, you need to install clamps in the area of the copper bus. One side of the clamp should go inside the thermal film, and the other side should go outside on top of the copper strip.
One part of the clamp is installed
Clamp side installed
The second part of the clamp is attached over the copper strip
Step 9. Next, you need to tighten the clamps with pliers.
The clamp is clamped with pliers
Step 10. Then you need to insert the pre-stripped ends of the wire sections inside the clamps for connection. You should also fix the wires inside the clamp using pliers, clamping the elements.
The ends of the wires are inserted into the clamp
Fixing wires with pliers
Step 11. Next, you need to seal the clamps with two pieces of bitumen tape, closing the clamps at the top and bottom.
Each clamp must be sealed with two pieces of bitumen tape
The second piece is glued
Step 12. Now you can connect the thermostat. A temperature sensor is included in its package. This sensor must be installed on the black stripe on the film underneath, fixing the sensor itself with bitumen insulation.
Installed temperature sensor
Another photo of the temperature sensor
The sensor is fixed with bitumen tape
Step 13. In the isolon, at the location of the sensor, you need to make a small cutout so that the floors in this place remain level after installation is completed. The same cuts are made in the area of the clamps.
Cutout at sensor location
The same cuts are made in the area of the clamps
Step 14. The wires themselves, coming from the heated floor, can also be laid in small recesses in the isolon and secured with ordinary tape.
The wires are fixed with ordinary tape
Step 15. Now you can connect the wires to the thermostat. It is important to follow the instructions in the instructions for use of the device. Next, the thermostat needs to be mounted on the wall.
Connecting wires to the thermostat
Connection process
Step 16. Then the system needs to be tested for functionality. To do this, you need to turn it on and check whether all the elements heat up. Before turning it on for the first time, it is important to make sure that all contacts are insulated and everything is done correctly.
Turning on the system for the first time
Checking the system for functionality
Attention! Before laying the final floor covering, you need to walk on the film carefully so as not to damage it.
Prices for infrared heated floor "Kaleo"
infrared heated floor Kaleo
What consequences can result from errors during the installation of ETP?
The most common mistakes in self-installation of ETP include:
Purchasing extra materials. This happens when a person takes into account the total area of the room. It is necessary to take into account only the one that serves as the basis for the heated floor. The floor, which is occupied by furniture and heavy household appliances, is not taken into account. Do not cut the cable in the heating mat
It is important to plan the installation so that the entire mat is used. It is better to leave a small part of the floor uncovered. It is forbidden to turn on the floor with a screed until it is completely dry.
This will cause uneven drying, the formation of voids and cracks. The cable must not be laid without first leveling and cleaning the subfloor. It is recommended to treat the base with a primer to prevent dust from settling and the formation of air pockets around the perimeter of the chamber. This contributes to its severe overheating. The temperature sensor is installed in the corrugation in order to have access to it for repair and replacement. An important step before starting operation is measuring the resistance. If any abnormalities are found, it is recommended to contact a professional to correct the problem. To carry out rearrangement of furniture or repairs in the future, you should save the ETP masonry diagram. To do this, just take a photo of the floor before pouring cement.
Possible installation errors


