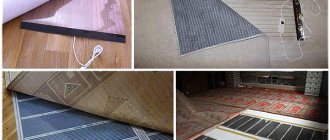
In the heating systems market, film heated floors have already transformed from exotic types of heating into a popular, effective and fairly economical alternative to classical systems. The reason is simple - the emergence of modern film materials, which are relatively inexpensive and accessible, do not require serious capital expenditures when equipping the premises and are quickly installed, even independently with minimal work skills.
This article will be a detailed analysis of the features of infrared film heated floors made in Russia and South Korea.
Please note that here we are considering infrared heated floors as an additional source of heat in residential areas. If you are interested in installing a film heated floor as the main type of heating system, we recommend using a heated ceiling based on appropriate film materials. This is an order of magnitude more effective.
Types, design and principle of operation of infrared film floors
Most of the film materials used on the Russian market for organizing heated floors are of South Korean or domestic origin. This is due to several factors:
- uniform heating of the material over almost the entire area;
- convenient standard sizes: mainly roll deliveries 100 m long of various widths (500–1000 mm) with a cutting pitch of 200–250 mm;
- several types of power ranging from 110–400 W/sq.m;
- record quality guarantees (10–20 years of operation);
- optimal price accessible to most consumers.
The most famous manufacturers of infrared film materials are Q-Term , Heat Plus , RexVA , STEM Energy , Hit-Lite and several other companies. These are carbon-based electric heaters, supplied in coils, the operating features of which we will analyze.
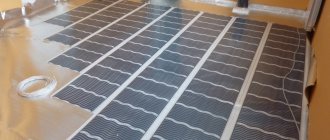
Installation of a film heated floor includes laying a special film across which carbon heaters are located (see figure) having a linear shape.
These heaters have a strictly calculated resistivity. When an electric current passes here, electrical energy is converted into thermal energy, that is, the film heats up. The resulting heat is evenly distributed over the entire surface, quickly warming up the coating of your finished floor.
Current-carrying copper strips (busbars) are located on both edges of the roll. A variety of standard sizes and marking of cutting lines allows you to cut the film material directly on site with virtually no losses. In addition, thanks to its great flexibility, elasticity and minimal thickness (only 0.338 mm ), the material adheres perfectly to any surface, without requiring special preparation when installing a heated film floor. The weight of one “square” electric heater is 0.4 kg .
The main types of power of South Korean films: 150, 220, 300, 400 W/sq.m (less common options are also available). The width of the material most often has the following steps: 0.5, 0.8 and 1.0 m . All South Korean heaters have proven themselves to be excellent. The main thing is an accurate connection diagram for the film heated floor, high-quality installation in accordance with the instructions provided and proper operation. Many of these heaters are suitable not only for equipping heated floors, but also for heated ceilings (including as the main heat sources).
Among Russian manufacturers of infrared electric heaters, ZEBRA EVO-300 WF occupies a special place. This is an excellent development, which gained fame after the release of popular heaters for heated ceilings (ZEBRA EVO-300 series SOFT, ST, PRO, EX). EVO-300 WF was created specifically for heated floors. "Zebra" is a modular device, equipped with a grounding loop and a housing made of aluminum foil .
The main advantage of the Zebra WF is one-way thermal radiation , in which up to 95% of the energy goes directly to heating, providing record system efficiency.
An approximate connection diagram for the ZEBRA EVO-300 WF film heated floor is presented below. .
Types of thermostats
Thermostats, also called thermostats or thermostats, come in several types. They differ in the following ways:
- Method of measurement.
- Location of the sensitive element.
- Control method.
Measuring method
It can be electromechanical and electronic. In the first case, two properties of metals are used:
- Elasticity, when under the influence of an external force they change their shape and return to their original position after the cessation of its action. It is used, for example, in capillary temperature sensors of air conditioners - when heated, the liquid expands, presses on the membrane, which bends and opens the electrical contacts;
- Shape memory. If two plates of dissimilar metals (copper and aluminum) are mechanically connected, then when heated they deform, and when cooled they return to their previous position. These are so-called bimetallic contacts.
In the second case, the property of metals to change electrical resistance when heated and cooled is used. Or the so-called thermoelectric effect (thermocouple), when current begins to flow through two conductors connected in a ring with different conductivities if their ends are heated to different temperatures.
Location of the sensing element
It can be located either directly on the heat source or outside it. In the first case, the entire control unit is attached, for example, to the body of an electric convector. It reacts to the amount of heat emitted by the device. This is the simplest solution, but it is ineffective because it is not related to the actual temperature in the room.
In the second case, the sensor is installed on any of the structures. For example, on the wall, at a distance of 1-1.5 meters from the floor. Moreover, it can be either combined with the control unit or installed separately, but maintaining a galvanic connection with it.
For example, if you are installing a control system for an electric heated floor, you can install a thermostat with a sensor in its housing somewhere on the wall. But if water heating is used, then the sensitive element is mounted next to the pipes, in the floor mass.
This is done for the reason that the coolant cannot cool below a certain limit - the entire system may freeze and fail. A sensor on the wall will probably miss such a moment. The connection diagram for a heated floor thermostat with a steam heating system is shown in the figure below.
It is also worth taking out the meter if the atmosphere in the room is too humid (steam room in a bathhouse). In this case, it is necessary to exclude any possibility of electrical breakdown through the human body. And this will happen if you touch the control unit with wet hands.
Control method
It can be of two types:
- Mechanical, when the physical characteristics of the opening contacts change. For example, their length.
- Electronic. In this case, the magnitude of the control signal to which the opening relay reacts is adjusted. It is precisely this element that is a sign of electronic control, and not the presence of a mechanical vernier on the block body. This wheel can be used to rotate the potentiometer shaft.
The advantage of the first is simplicity. However, it has a huge error. Therefore, if you use a heater for special purposes - creating a favorable microclimate for animals and plants, use exclusively electronic models. This method allows you to include many additional elements in the circuit that increase the comfort of use.
For example, a liquid crystal display that displays the temperature. Or a remote switching device: you go to the dacha, connect via GPRS to the heating system and upon arrival enter a warm house.
Advantages of film heated floors
There are many advantages of heated floors, here are just the most basic advantages that stand out to everyone who has installed film heated floors:
- Quick heating of the room. Direct impact on the floor material significantly increases the heating rate compared to the vast majority of alternative systems.
- Ease and simplicity of installation.
- There is no need to make a screed: the material fits perfectly under most types of finishing coating: laminate, linoleum or carpet.
- The room loses almost nothing in height (we remind you that the thickness of the electric heaters is only 0.388 mm).
- You can be completely calm, no water leaks will threaten you.
- The infrared system works completely unnoticeably and absolutely silently, everything happens automatically according to your settings.
- Control is carried out using a thermostat, which is equipped with a remote temperature sensor that responds to changes in parameters within 0.5 degrees.
The manufacturer guarantees the flawless functioning of the infrared heated floor for 10 to 20 years (depending on the specific company). The actual service life of electric heaters exceeds 25 years.
Advantages and disadvantages
Laying underfloor heating loops with a single coil
The main advantages of a water floor include its reliability and durability. In addition, low energy consumption. But at the same time, such a floor is difficult to install, and the need to connect to a water supply reduces, or even completely eliminates, the possibility of installing it on the top floors of buildings. The fact is that the floor level is lower than the level of the water supply system. Therefore, in order for the water in the floor to be at a constant temperature, it must be discharged into the water supply system and a new portion received.
Laying underfloor heating loops with a single coil
Laying heated floor loops in a spiral
To do this, a pump is installed, which will return water from the floor pipes to the system. For the floor to function properly, it is necessary that stable pressure is maintained in the general house system, and that the interface between the floor and the system is accurate. That is, the power of the injection pump must be selected correctly and it must work uninterruptedly.
Water heated floor kit
Disadvantages of film heated floors
We do not idealize underfloor heating at all and objectively admit that it also has disadvantages. The disadvantages of such heating include:
- High heating costs for rooms with a very large area and high ceilings.
- Temperature restrictions. According to SanPiN (SNiP RF 41-01-2003 “Heating, ventilation and air conditioning”) the floor surface in rooms where people are constantly present should not heat up above 26 °C. And the floor temperature where people are temporarily located can be raised to 31 °C. Attempts to excessively raise the floor temperature (when the temperature outside is 30 °C or lower) will lead to discomfort: it will become too hot to walk on.
- Installation of film heated floors is possible only in open areas, free from furniture without legs. Otherwise, there is a risk of critical overheating of the film and its premature failure.
- The system dries the air. This occurs due to natural convection of air when heated. This is especially evident when using infrared heated floors as the main source of heating. In this case, we recommend installing humidifiers.
Possible installation errors
For the proper functioning of the film heating system, perfect accuracy of installation and connection of the entire device is required. In the process of performing independent installation work, mistakes are often made. Therefore, you should know what not to do when installing such equipment:
- lay the film overlapping;
- install one thermostat on two separate circuits;
- attach the film to the base using nails or other sharp fasteners;
- install equipment near other heating devices;
- connect the device without isolating the contacts to the electrical network;
- use a material containing foil as a substrate;
- cover the system with cement mortar;
- install large pieces of furniture in places where the film passes;
- bend the material with the carbon mixture at a right angle.
To avoid damage to the film during renovation work indoors, it is recommended to maintain precise laying diagrams.
Compared to many other floor heating systems, installation of film heating equipment is much simpler. Following the diagrams and instructions provided by the manufacturer, you can install the device yourself. But connecting the system to the network requires certain professional skills. Therefore, the process of connecting all devices must be carried out by a qualified electrician.
Energy consumption of film heated floors
To find out the maximum power consumption of the system, just pay attention to the labeling. For example, with a heater power of 220 W/sq.m for 1 hour of operation, 1 “square” of electric heated floor consumes 220 Wh (0.22 kWh) . Please note that the main energy consumption occurs when heating the room, and maintaining the set temperature requires periodic switching on, the frequency of which depends on the heat loss of the building envelope, as well as the parameters you set on the thermostat. Of course, the thermal insulation of the facility must be at least at the level of the SNiP recommendations of the relevant region.
The temperature sensor is located directly on the surface of the film material, under the finishing floor. Let's imagine that you set the thermostat to 26 °C, which is most comfortable for you. When this temperature value is reached, the sensor will record it, give a signal to the control device, and the thermostat will turn off the power. Then the floor will gradually cool down, and the speed of the process directly depends on the level of heat loss - and the thermostat will again supply power to the electric heaters.
Thus, the actual energy consumption at a particular facility directly depends on the frequency of system on/off . The greater the heat loss, the higher the consumption . We recommend that the floor be insulated (a layer of conventional building insulation 100 mm thick is sufficient). In this case, the specific average electricity consumption will be about 20–30 W per 1 sq.m of heated area.
The most common mistake made by buyers of electric heated floors is that they want to use them to insulate their floor. But the film material does not retain heat: its task is to generate thermal energy . And the resulting heat must be retained by special insulation materials , which must be included in the floor design. The modern market offers a lot of available options for insulation from various companies from different materials (Knauff, Isoverr, expanded polystyrene, etc.) with a thickness of 30 to 100 mm (the thickness is selected depending on the climatic characteristics of the region and the design of the insulation object).
What happens if the installation of a film heated floor is carried out without insulation? In some cases, the system can cope with heating your room, but in most cases it cannot. Without insulation, thermal energy will simply be lost, escaping into the atmosphere, into the ground, or absorbed by ceilings. But in any case, excessive consumption of electricity is inevitable, because the system will have to work almost constantly to compensate for heat loss.
Is it possible to use special substrates up to 5 mm thick, since they also reduce thermal conductivity? Yes, such a substrate is better than nothing at all. However, the effectiveness of insulation is manifested with a minimum thickness of insulation material in the floor structure of 100 mm.
Types of systems
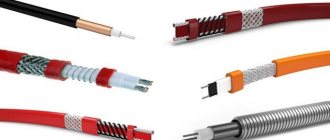
When studying the question of how to connect a warm floor to electricity, it is necessary to consider the existing types of systems. Most often, wires are used for the purposes presented. This product consists of a nichrome core, around which various insulating shells are created.
The cable comes in different sections. If the cross-sectional diameter of the product reaches approximately 7 mm, it is mounted in a screed. According to building codes, this layer is from 3 to 5 cm. If the screed is smaller, the heat is distributed unevenly. Warmer and cooler zones will be felt.
If it is not possible to make a screed in the room (raise the floor level by 5-7 cm), a thin wire is used. Its diameter is 3.5 mm. This system is installed directly into the tile adhesive. The solution layer is only 5-8 mm. This system heats up faster, but also cools down literally 30 minutes after turning off.
Calculation of film heated floors
For the efficiency of an infrared heated floor, a correct preliminary calculation of its power is important. Let's give an example in which a heated floor is planned to be used as an additional heat source (that is, a boiler or central heating operates in parallel). In this case, it is enough to cover up to 50% of the floor with film.
To begin with, we determine the useful heating area. The usable area is only its open areas, not occupied by furniture, etc. The picture of the room below shows that the usable heating area is 8.6 sq.m (S = 4.1 x 2.1 m).
Based on the size of the usable area, we select the standard sizes and number of film electric heaters, while it is desirable to cover the entire usable area to the maximum. Here we will use South Korean film with a power of 150 W/sq.m with a width of 500 mm . You will get 4 sections of 4 meters each, that is, 8 sq.m of electric heaters with a total power of 1.2 kW (8 sq.m x 150 W/sq.m = 1200 W). We get a load current of 5.5 A (1200 W / 220 V = 5.5 A).
We recommend drawing up a laying diagram before installation. On it you will need to mark the location of laying the film sections, the distance between the strips, the connection diagram for the film heated floor, including the location of the power wires and the temperature sensor coming from the thermostat.
Note! It is strictly forbidden to lay electric heaters overlapping! There should be 10–20 cm . 50 mm is allowed between the heater strips .
Another very important point. At the site where it is planned to install film heated floors , there must be additional electrical power . Quite often, in its absence and high energy consumption (the system operates in several rooms simultaneously, including as the main one), the problem of network overload . This leads to constant operation of the input machine and other troubles.
In order to avoid such problems in the future, it is necessary to design the power supply parameters of the facility in connection with the additional electrical power of the heated floor.
Below we present the recommended maximum length of South Korean carbon-based film materials depending on the width of the roll and the specific power of the heater.
| Table No. 1. Recommended maximum length of South Korean carbon-based film materials depending on the width of the roll and the specific power of the heater. | |||
| Roll width (m) | Specific power (W/sq.m) | Recommended max film length (m) | |
| 0,5 | 150 | 10 | |
| 0,5 | 220 | 8 | |
| 0,8 | 220 | 6 | |
| 1,0 | 150 | 7 | |
| 1,0 | 220 | 5 | |
Scope of application
Film equipment is widely used for heating various types of premises. The system can act as:
- additional heating device;
- main source of heat.
Also, heated floors can be installed to maintain the temperature of individual areas of the room. Film flooring is most often used for heating;
- living rooms;
- bathrooms;
- utility rooms;
- loggias;
- bathrooms;
- winter gardens;
- public buildings;
- gyms.
Often, film heating systems are used in kindergartens or playrooms. The device has gained such popularity due to numerous positive characteristics, which include safety of use.
Selecting the cross-section of the electrical cable for film heated floors
The choice of electrical cable cross-section for film heated floors is made depending on the area of the materials used and, accordingly, the power of individual groups of film heaters . These recommendations are compiled taking into account the electrical installation rules (ELI), as well as taking into account the underestimated wire cross-section data of some manufacturers. So, a wire marked 2.5 sq.mm actually turns out to have a cross-section of 2–2.1 sq.mm. Below is a table with the recommended cross-section of copper wire, depending on the maximum area of the heaters and the power of one group.
| Table No. 2. Selection of electrical cable cross-section for film heated floors | |||
| Film heater power (W/sq.m) | Cross-section of copper wire (sq.mm) | Recommended maximum area of film heaters of one group (sq.m) | |
| 150 | 1,5 | up to 12 | |
| 150 | 2,5 | from 12 to 20 | |
| 150 | 4,0 | from 20 to 30 | |
| 220 | 1,5 | up to 8 | |
| 220 | 2,5 | from 8 to 14 | |
| 220 | 4,0 | from 14 to 24 | |
If the area of the group heaters exceeds the values indicated in the table, then when connecting they must be divided into subgroups of permissible area in accordance with the recommendations. Example: 28 sq.m of infrared heated floor with a power of 150 W/sq.m can be easily divided into 2 subgroups of 14 “squares”. In this case, each subgroup is connected to the power line with a separate wire with a cross-section of 2.5 sq. mm.
Note! The choice of power wire cross-section for connecting an electric heated floor is very important. If you install wires with a reduced cross-section (relative to the recommended one), this risks overheating the wire, melting the insulating layer, which can lead to a fire!
Laying infrared film and connecting heating elements
The film is carefully cut along the lines intended for this purpose to obtain pieces of the desired size. Place the thermal film towards the thermostat. You need to make sure that the copper strip is at the bottom. The film is fixed together with construction tape.
To connect the heating elements together, proceed as follows:
- the stripped tip of the wire is installed inside the contact clamps;
- a clamp with wires is attached to the heating element of the film (one end is located on the copper busbar, the other - inside the structure);
- fix with pliers;
- insulate the places where the tires are cut and where the electrical cable is connected with bitumen tape.
Advice. You need to plan the sections of infrared film so that there are a minimum of connections. The length of one strip should not be longer than 8 meters.
To prevent the joints of the heating elements from sticking out, recesses are cut out for them in the heat-insulating layer.
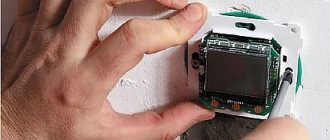
Thermostats for film heated floors
The thermostat is the control device, or simply the brain of the film heating system. It is this that allows you to automatically control and manage the heating process, maintaining a preset temperature. The main difference between thermostats for heated floors is the presence of a remote temperature sensor , which is located on the surface of the film, immediately under the final finishing of the floor.
We constantly monitor the equipment market, selecting thermostats for our clients that can definitely be trusted to control film heated floors. Such devices include 70.26, E 31.116, E 51.716, E 91.716, Wi-Fi SIU WF-1 and some others. You can freely find a description of the advantages and connection diagram for each device on our website.
How to prepare a place for a thermostat
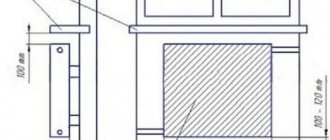
It is convenient to install this device in the wall, raising it approximately 20-30 cm from the floor. A 2 cm recess is made in the wall. The size corresponds to the dimensions of the thermostat.
From the resulting hole down to the floor, cut a groove. Cables will subsequently be laid there to connect the film floor to the thermostat and the electrical network.
Advice. It is best to hide the cables in a corrugation. This will greatly simplify the task of repairing them.
Accessories and tools for film heated floors
This includes almost everything that can be included in the system, from the substrate to the machines, tape and connecting contacts to the tools that will be needed during installation. Let's look at the required components using the same example used above. So, the useful heating area is 8.6 sq.m, there are 4 pieces of film, the total power of the heaters is 1.2 kW. Based on this data, we will select additional materials and equipment:
- Substrate for heaters. Isolon with a thickness of up to 5 mm and an area of 10 sq.m. is ideal here. This provides additional thermal insulation and protects the film from accidental damage on the base of the floor. Attention! The substrate must be without metal coating (aluminum foil).
- Polyethylene. Performs a protective function against accidental water leaks. 10 m² of polyethylene with a thickness of 50 microns is sufficient.
- 10 A circuit breaker – 1 pc.
- Modular box (for 4 modules).
- PuGV wire 1 x 1.5 sq. mm – 2 pieces of red and blue, 10 linear meters each.
- Connecting clamps (clips) – 2 pcs. for each heater + spare pair, 10 pcs. in total.
- Bituminous tape for insulating the ends of films (at the rate of 30 pieces of 50 x 50 mm: 6 for each electric heater plus a small reserve).
- Household (ordinary) tape for fixing materials.
Installation tools: screwdriver, wire cutters, pliers, assembly knife, scissors, electrical tester.
Materials and installation procedure
The most common is heated floors using “wet” technology. Let's consider its structure and required material in more detail.
Work begins with leveling, since the insulation can only be laid on a flat surface. Ignoring this layer will lead to high heating costs. First of all, a rough screed is required.
Installation procedure:
- The layout around the entire perimeter of the damper tape is a heat-insulating material up to 1 cm thick. It is required to prevent heat loss and compensate for thermal expansion. Use a special tape or other insulation of similar thickness.
- Laying heat-insulating material on a rough screed. The thickness of the layer depends on the region, type of insulation, foundation material, and organization of the subfloor. The calculation is carried out individually for each case.
- Reinforcing mesh, step 5 cm. Pipes should be tied to it with plastic clamps or wire. When using polystyrene foam, reinforcement can be eliminated. Fastening occurs directly to the sheets with special brackets.
- Installation of beacons and pouring screed. The layer thickness is from 3 cm above the outer surface of the pipe.
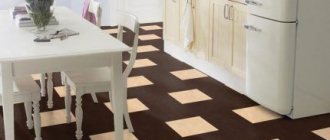
- Laying the final coating. Any type of coating compatible with heated floors can be used.
Pipes and laying schemes
The main element of the system are pipes. They can be polymer or metal-plastic. Their important features are long service life and good flexibility. The main disadvantage is high thermal conductivity. This indicator has a lower value for new corrugated pipes made of stainless steel. They bend just as well and cost no more than their predecessors, but due to their lack of popularity, many ignore them.
The diameter of the pipes is determined by the characteristics of the floor; it ranges from 16-20 mm. There are various installation patterns (spiral, snake), which take into account the characteristics of the room.
The snake is the simplest installation method, but by the end of the circuit the coolant has time to cool down and slightly heats the surface. Since the warmest place will be the zone where the coolant enters, installation begins with a cold zone near the door or window.
The double snake and spiral do not have the described disadvantage, but their installation is more complicated. Before work, you should draw everything on paper so as not to get confused in the diagram.
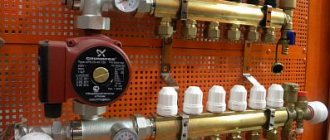
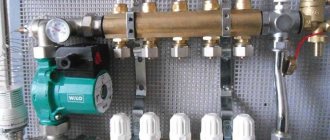
Collector
The collector is necessary to regulate operation. You should choose a model with the required number of outputs to connect all the elements. The cheapest option is a manifold with a shut-off valve. However, lack of adjustment often reduces the efficiency of floor heating robots. More expensive models have additional valves to control the operating parameters of the floor. Some manifolds have a pre-mixer and servos. The first is required to adjust the coolant parameter, and the second is required to automate the heating process.
The collector is mounted in a special box made of galvanized steel. Installation takes place at a certain height, ensuring further supply of the necessary pipelines.
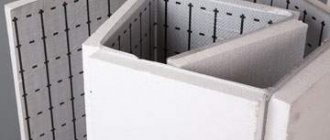
Thermal insulation substrate
The base for laying pipes should be prepared. Use a thermal insulation substrate:
- with foil coating (penofol) to provide additional insulation of the ceiling;
- polystyrene foam boards, which will increase the durability of the polymer.
mineral insulation is used on top of the ground and if the lower room is not heated.
The thermal insulation layer must be of a certain thickness and have the required resistance to heat transfer.
Screed
For the screed, a regular mortar of Portland cement and sand is suitable. Cement grade - from M-350.
As a rule, a “wet” screed takes a long time to gain strength – about a month. It is prohibited to use heated floors, as cracks form and pipes burst. Semi-dry screeds based on special additives to increase the plasticity of the solution and reduce the amount of moisture used will help reduce the drying time. Additives are purchased additionally or special mixtures are used. The cost of the latter is higher, but it is easier to work with them: according to the instructions, add water and stir until smooth.
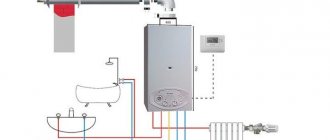
Warm floors allow you to heat rooms evenly and save on coolant. Its connection to the heating system does not require any special costs and can be done independently.
Connection diagram for film heated floor
The film heated floor operates from a standard network of 220 V , 50 Hz . Connecting films to the network is parallel . A schematic diagram of connecting a film heated floor (again, we focus on our example) is presented below.
- Design group load data.
- 10 A circuit breaker.
- Thermostat RTC 70.26.
- Group wires PuGV 1 x 1.5 sq. mm.
- Insulation of the connection point of the group wire to the film.
- Insulation of current-carrying copper bars at the ends of the strip.
- Remote temperature sensor.
Laying laminate
Before laying the laminate, it is necessary to protect the device from water. To do this, it is covered with polyethylene, which is overlapped and overlaps the walls. The seams are taped.
The slabs of the first row have the tenons cut off on one side. This side of the lamellas is placed against the wall, with a 10 mm indentation - a technological gap into which the gasket is placed. The gap is necessary for free contraction or expansion of the material as the temperature changes.
The boards of the second and subsequent rows are applied to adjacent panels at an angle of 45 degrees and snapped into place using locks. The last plank should be mounted using a clamp,
When all the finishing material has been laid, skirting boards are installed around the perimeter of the room; they will cover the technological gaps.
Flooring technology at home
To work you will need:
Roll of infrared film; When choosing a film floor, you should pay attention to the power consumption of the structure, temperature conditions and environmental parameters. High-quality infrared coating emits negative ions that fill the room and prevent the appearance of mold, dust and various types of fungi
The ideal option would be a film with two operating modes: heating the room and retaining heat. An approximate calculation of electricity consumption should not exceed 40 Watt/m². Mechanical models will be the most economical option
They are easy to use and perfect for small spaces
Contact terminals; Clamps are small metal fasteners that are useful for connecting the film floor to the network cable.
Thermostat; The thermostat is not included in the heated floor kit, so you will have to purchase it separately.
The most economical option would be mechanical models. They are easy to use and perfect for small spaces.
For large areas it is better to use programmable controllers. This way you can control the temperature by setting the operating modes of the system yourself, thereby reducing energy costs.
The electronic thermostat will always show you the exact floor temperature thanks to the display. Its sensory counterpart will also provide you with information about air heating.
Electrical wiring and insulation; Usually included in the kit along with infrared film.
Thermal reflective material; The presence of such a layer between the floor and the infrared plates will minimize heat loss. When choosing, consider the planned floor covering. For linoleum and carpet, choose materials with a soft layer, and for laminate and tiles, choose materials with a hard layer.
Please note that the composition does not include aluminum foil. It is better to give preference to lavsan film. Scotch;
Scotch;
Noise-reducing underlay. Polyethylene film is also suitable for laminate, and hardboard for carpet.
Step-by-step instructions on how to install an infrared floor with your own hands
- Measure the areas you want to heat. Please note that in the future they should not contain any household appliances or furniture without legs. In addition, all heat sources such as fireplaces, ovens and heating pipes must be at least 20 centimeters from the film;
Select a suitable location on the wall to install the thermostat;
Clean the floor surface from foreign objects and construction debris;
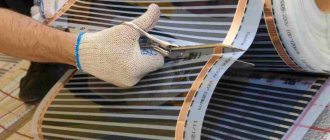
Unroll the roll of infrared film and cut it along the heating strips along specially marked lines. At the same time, try to maintain the maximum length (within 8 linear meters). This will significantly reduce the number of connected wires;
Lay the heat-reflecting material on the cleaned base and secure the sheets together with tape;
Lay the prepared strips of film on top of the reflective layer so that the copper strip is on the bottom. Direct all contacts towards the intended location of the thermostat. Make sure that the film does not intersect anywhere with baseboards and other decorative elements;
Fasten the contact clamps using pliers, a hammer or a special riveter to the metal current-carrying strips. The terminal must be placed in such a way that the rivet is attached to the current-carrying side, and the clamp itself is between the layers of film (copper inserts have a two-layer film). Make sure the fastening is secure;
Use the included bitumen insulation on the cut lines of the copper strip and on the cut of the silver contacts inside the infrared film;
Attach the film with tape to the heat-reflective material.