assets/from_origin/upload/resize_cache/iblock/3a0/600_450_2/3a0881555e9f5a216e3963eb2fe9a66b.jpg From this article you will learn:
- How to calculate the power of an electric heated floor for connection
- How to connect an electric floor heating thermostat
- How to connect an electric heated floor
The most difficult task when installing an electric heated floor is connecting to the power supply. The installation of the floor itself is not difficult; even an inexperienced person can handle it. But it is important to correctly connect the electric heated floor - rod, cable or infrared. This is necessary for the electric floor to function properly and not break. From this article you will learn how to properly connect the equipment, then the electric floor will work properly.
Types of heated floors
Electric floors are heating systems that run on electricity. These devices include a thermostat and a temperature sensor.
Such heating evenly warms the surface, does not take up useful space in the house and does not spoil the interior.
The disadvantage of all electric heating models is the risk of electric shock, but only if installed incorrectly.
Cable floors
Cable-type devices include heating cable and heating mats. The wire in such floors is resistive or self-regulating.
The first one can be single or two-core:
- single-core - has one current-carrying core, is cheap, but has high ELM radiation, so it is not suitable for residential premises;
- two-core - two wires united by one insulating shell, the radiation of electromagnetic waves is lower, which is why it is used in living rooms.
The device of the self-regulating cable consists of two current-carrying conductors closed in parallel with a semiconductor matrix. It is able to regulate the heating level itself, depending on the air temperature.
Types of cable heating:
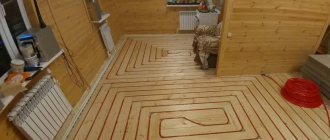
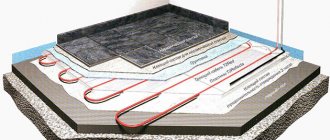
- Heating cable - this type of warm electric floor was one of the first to appear. It has 100% heat transfer, that is, all electricity is converted into heat. The device is a double-insulated wire that heats the surface. It unfolds on the base with a certain step. Installation is the most labor-intensive, because most often this electric floor is laid under a concrete screed, although a laying method is possible. The “pie” consists of: a base, thermal insulation, a substrate, a heating element, a screed and a finishing coating.
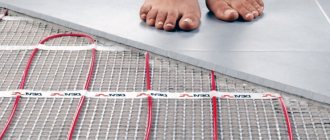
- Heating mats differ from cable mats in that the wire is already fixed to the fiberglass film. This makes DIY installation much easier; you just need to roll out the mat, no need to calculate the installation step and fix the heating element. The layers of this electric heated floor are the same as when using heating mats, only instead of a concrete screed, the device can be filled with tile adhesive.
Infrared systems
In this design, heating is carried out by infrared waves, there is no electromagnetic radiation. Objects in the room are heated, not the air in it.
Infrared systems include film floors and rod mats:
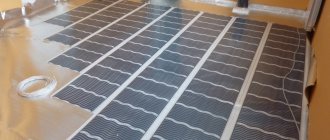
- Film flooring is a thermal film with a carbon base. The heating elements consist of an alloy of copper and aluminum, they are located parallel and sealed inside the film, along the edges of which there are conductive busbars. The advantage of such heating is the lightness of the structure, the absence of the need to fill the screed, and the floor covering can be of any kind and can be laid directly on the film. It itself is only 0.3 cm thick, so it does not take up the height of the ceiling. In cross-section, such a floor looks like this: a rough base, foil thermal insulation, heating film, polyethylene and floor covering.
- Rod - mats made of carbon rods placed parallel. Carbon is a nanostructure made from a carbon base with binding components. The standard width of such mats is 0.8 m and the length is 25 meters. Such a device has a self-regulation function. The disadvantages include the possibility of installation only in a screed.
“Pie” of this gender:
- base;
- heat reflecting material;
- carbon mats;
- concrete screed or tile adhesive,
- coating.
And finally
- Thermoregulators are either electronic or mechanical. The second option is more accessible and easier to use. The first is modern products with many more options that allow you not only to save on heating, but also to make it fully automatic. What do we recommend choosing? Of course, modern electronic products, with the help of which system management becomes a much more enjoyable and efficient process.
- Infrared heaters have different design variations. This is convenient and aesthetically pleasing, because the buyer will always be able to choose a device that best matches the design of his own home. So you can purchase both a classic white version of the unit (say, for a bathroom), and a device with a “wood” design (for rooms where the walls are decorated with wooden lining).
From the author:
Hello, dear readers! When the cold weather sets in and the centralized heating system is not yet working, many begin to miss the sun. Nobody likes to be cold. Usually at such moments, home owners begin to think about buying a heater, but often this question is put off, and then the heating system starts to work, making the problem irrelevant.
This time we suggest not to wait for autumn and stock up on woolen socks, but to select and install an infrared heater in advance. Why him? Firstly, unlike conventional equipment - for example, oil-fired - such a heater can be mounted on a ceiling or wall. Therefore, it does not interfere at all even when its work is not necessary. Secondly, this is a unique device of its kind, which can easily be called a personal home sun.
However, the advantages, of which there are truly many, will be discussed in detail below. In the meantime, let's figure out how this device generally works.
Do-it-yourself cable heated floor installation technology
Installation of cable heated floors.
It is easier to install an electric heated floor than a water one, but there are some nuances here too. Let's look at step-by-step instructions for installing a cable floor.
Laying scheme
Before installing a warm electric floor, you need to read the installation instructions and draw a diagram on paper. It should be remembered that it does not creep under furniture and appliances. In addition to the fact that this is not rational, it can also lead to overheating of the system and its failure.
There are two main ways to lay floor wires - “snail” and “snake”. When installing the heating element correctly, the distance from the walls should be at least 10 cm.
Calculation of materials
At the next stage, it is necessary to calculate the amount of material that will be needed to install a warm electric floor in the room. To do this, it is better to use ready-made tables that are developed by system manufacturers or special calculators.
The main task is to correctly calculate heat loss. After this, the optimal laying step is determined and the required cable length is calculated. When calculating the length, you must not forget about the section that runs along the wall to the thermostat.
The wire length is calculated using the formula
h=S x100/L , where:
- h - cable length;
- S—area;
- L is the total length of the wire.
In addition, you will need fastenings, a copper grounding cable, connecting wires, an RCD protection system, a regulator and a sensor.
Calculation of power and laying pitch
The required power of the device is influenced by climatic conditions and the material from which the house is made. It is different for different regions, for central Russia it is:
- In the kitchen, hall, hallway - 150 W per m2;
- In the bedroom and children's room - 120 - 150 W;
- In a glazed loggia - 200;
- In the bathroom - 180 W per m2.
In addition, the choice of power depends on the purpose of the system:
- main heating - 140 - 180 W per m2, while covering at least 70% of the area;
- additional - 140 W is enough.
The energy consumption per room is calculated, with the removal of zones where furniture will be placed. That is, only the heated area is taken into account, and not the one indicated in the BTI documents.
Power is calculated by the formula: P1= P2*S*1.3
- P1 - power;
- P2 - heating power m2;
- 1.3 is the coefficient.
The laying step is calculated based on indicators such as:
- Number of linear meters of heating element;
- Heated surface area;
- The coefficient for a given room is W per m2.
Let's consider an example of calculation for a room of 25 m2 - a hall. 5 m2 is filled with furniture, 20 m2 remains for heating. The power indicator for such rooms is 150 W. As a result, a heating element with a power of 3 kW is required.
Cables are regulated by linear power, the range ranges from 12 - 24 W per linear meter. It follows that you can buy 125 or 250 m. This depends on the laying step - the distance between the loops. It is believed that the smaller the step, the more uniform the heating. But at the same time, the more frequently the branches are located, the more difficult and time-consuming the installation will be. The average standard laying step is 7 cm.
Control block
A thermostat is required to control and control the temperature level. He is responsible for turning the floor on and off, as well as for its operating mode.
Thermostats are either electronic or mechanical. According to the recommendation of professionals, the regulator should be installed on the wall, at a distance of one meter from the floor, preferably closer to the electrical wiring. To place it, you need to make a recess in the wall, from which you make grooves for wiring to the floor.
Preparing the base
Laying any electric heated floor, including cable, is possible on a flat, clean surface.
If there is old finishing material, it is dismantled. The floor is cleaned of dirt with a broom or construction vacuum cleaner. Then, the base should be inspected for irregularities and cracks.
If there are minor irregularities, they can simply be rubbed off. If the differences in the base are large, then you will need to pour a thin layer of leveling screed, 3 - 7 cm. Before pouring the self-leveling compound, the surface is primed. Only after the solution has dried can you proceed to the construction of the next layer.
It is possible to install a warm electric floor directly on the floor slabs; they also need to be cleared of debris.
Thermal insulation
Hydro and thermal materials are laid on the subfloor; they are necessary for the efficient operation of the system.
First, a polyethylene film is laid - it will serve as waterproofing. Insulation is spread over it - it can be foam foam with a foil layer. The slabs are placed butted against the walls, the seams are connected with tape. Expanded polystyrene or polypropylene foam is also suitable as thermal insulation.
After this, the perimeter of the entire room is glued with damper tape, this compensates for the expansion of the screed when heated.
To simplify the fixation of the heating element, it is recommended to lay reinforcing mesh on top of the thermal insulation. It will make the structure stronger, and the cable will be attached to it.
Cable laying and fastening
The wire must be laid according to the prepared diagram, with a planned step. Start from the place where the cable will be connected to the thermostat. If a single-core wire is used, then it must also return to the thermostat; when using a two-core wire, this is not required.
If there is fittings, the heating element will be attached to it with plastic clamps. If it is not available, a steel mounting tape is mounted on the thermal insulation, to which the wire will be fixed with dowels or self-tapping screws. Perhaps fastening with mounting tape directly to the insulation boards.
Installing a Temperature Sensor
The temperature sensor is placed on the floor, the distance from it to the wall with the regulator is 1.5 meters. To do this, recesses are made in the thermal insulation for it and the wiring going to the device.
This is necessary so that the sensor does not rise above the surface. It is placed in this recess, placed in a corrugated pipe, which has a plug at one end, and is tightly fixed.
Connection - diagrams
This is the most critical stage on which the performance of the floor depends. The sequence of actions is as follows:
- Checking the wiring - after all, installing an electric floor significantly increases the load on the electrical wiring of the entire house. Using a multimeter, the cross-section of the cable in the network is determined, then it is analyzed whether the wire of the warm electric floor matches it. If the diameter of the cores does not match, it is necessary to change the wiring. An RCD with a circuit breaker is selected for the new load.
- Connecting the device involves connecting the heating cable and the wire from the temperature sensor to the thermostat. After which, the thermostat is connected to power.
- Additional grounding of the cable and power cord.
Before pouring the screed, the device is turned on for a few minutes to check its functionality.
Installation of screed layer
After checking the system, you can install the next layer of the structure. There are several options:
- Pouring wet screed. For this, both ready-made mixtures and it is possible to make the solution yourself. The mixture is made from sand, cement, water, with the obligatory addition of plasticizers. The layer thickness is 3 - 5 cm. The solution is applied from the central corner of the room towards the door. The surface is leveled according to the rule and left for 28 days until completely dry.
- Pouring tile adhesive. The cable is covered with a layer of 5 - 8 cm and left to dry for a while.
- Laying dry screed. For this, fine quartz sand or slag is used. The method is simpler and faster than with concrete mortar. The mixture is distributed over the floor surface; it should cover the structure completely. After 12 o'clock you can begin further work.
Arrangement of the finishing coating
Only after the solution has hardened, according to the instructions, can you proceed to laying the selected topcoat. This could be laminate, linoleum, tile, the main thing is that the product is allowed to be adjacent to heating systems.
Installation of heating cable in grooves
The heating cable can be installed in grooves, but this is a complex process. It is recommended only if there is a clean cement-sand screed, and when it is not possible to raise the floor level yet.
After hollowing out the grooves in the concrete for the wires, the recesses are filled with tile adhesive. Then the cable is pressed into the composition so that there are no air voids.
For uniform heating, with grooves measuring 1 cm, a wire of 10 - 12 W/m is used, with 2 cm - 20 W/m.
Installing a cable on an old base
When installing a heating cable on an old concrete base or tile, the heat loss is 30%.
First, insulation is laid on the floor, then a mounting tape is placed to which the heating element will be attached. Only then, the wire is covered in an even layer with tile adhesive.
Connection from central heating
According to the legislation of the Russian Federation, the Republic of Belarus, Ukraine and other countries of the former USSR, unauthorized intervention in the centralized heat supply system is prohibited. Simply put, for connecting additional heating devices and heated floors, you face a large fine and an order to dismantle the extra heaters.
Note. Similar measures and responsibility are provided for connecting the transformer substations to the centralized hot water supply (DHW) network.
How is an unauthorized connection from centralized heating detected:
- neighboring apartments receive less heat, residents begin to write complaints, a commission from the management company identifies your modernization;
- due to pressure surges or poor-quality installation, a breakthrough and flooding of the lower apartment occurs;
Leaking connection inside a concrete monolith - responsible persons note a large difference in the readings of the common house meter and apartment heat energy meters;
- if you connect the heated floor circuits in series with the batteries, the hydraulic resistance of the entire branch increases, the flow decreases, and the apartments along this riser become colder.
Some “cunning people” advise connecting the TP loops through a plate heat exchanger in order to isolate the circuits from the central heating. The catch: the hydraulic resistance of the network will not increase and a pipe break will not cause serious flooding, but the amount of heat removed will still increase.
How to do underfloor heating legally:
- Contact the heating supply organization with an application and obtain permission.
- Together with the permit, obtain technical specifications for installation and connection of floor circuits.
- Develop and approve the project.
- Install the system yourself and put it into operation.
It must be admitted that the vast majority of applicants are rejected at the application stage. An exception is made for residents of new buildings with individual connection of apartment heating to distribution risers. But if you decide, at your own peril and risk, to embed heating circuits into the heating network, proceed to study the next section.
Installation of thermomat
Installation of Thermo Thermomat
The process of installing heating mats with your own hands is much simpler than cables, since the wire is fixed to the sheet:
- Draw a diagram of the location of the mat on paper; we must remember that they are not placed under heavy furniture.
- The power of the heating device and the amount of material required are calculated - this is done by analogy with cable floors, taking into account the usable area.
- A place on the wall for the temperature sensor is determined, a recess is made for it, as well as grooves from this area to the sensor.
- The base is prepared - it is leveled and cleared of debris. Then it is covered with a primer - this will improve the adhesion of the floor to the solution.
- The sensor is installed - placed in a corrugated pipe and placed at a distance of at least 50 cm from the wall. It should be placed between the floor turns.
- Mats are laid - they are laid directly on the subfloor to avoid overheating; additional insulation is not necessary. The product is equipped with adhesive tape, so no fasteners are required. Mats should not overlap each other. If you need to trim the fabric, you need to be careful not to damage the electrical wire.
- The connection is made and the system is checked - the resistance of the cable in the mats is checked with a multimeter. The thermostat is installed, the floor and sensor wires are connected to it, after which it is connected to the power supply. A test run of the system is performed.
- The mats are poured with tile adhesive - a layer of 8 - 10 mm, and time is given for it to dry. The grooves are also sealed with this composition.
It is possible to lay mats in concrete or dry screed; this process is the same as when installing a heating cable (described above).
- The finishing coating is laid - when filling the mat with glue, it is often tiles.
Turn on the electrical system only after the glue has completely dried.
Thermal mats can be laid on an old base, similar to a heating cable.
First start
Upon completion of the installation of the heated floor, we carry out the first start-up; for this, the pipeline should be thoroughly rinsed with water, and the pressure in the system should be at maximum. After which, this water must be drained and the system must be purged with a compressor.
Then the circuit is filled with working coolant; if there are several loops, they are filled in turn. In this case, the air from the pipeline must be completely squeezed out through the air vent.
To create pressure in the system, the pump is turned on for a short time, this promotes the movement of the coolant, which displaces the remaining air pockets. The process should be repeated (add water and turn on the pump) until the system is completely filled.
You need to start a heated floor starting from a minimum temperature of 20 degrees. Every day add 5 degrees until you reach the working level - +40. After which, the thermostat should be set in design mode.
Film floor installation
Infrared heated floor - Installation, laying and connection of film flooring.
As mentioned above, installing a warm electric film floor is simple. But you need to start, as when installing any heated floor, with the film location diagram (do not lay it under furniture). The film is placed at a distance of at least 10 cm from the furniture.
Then the power of the floor is determined. When laying laminate as a finishing coating, the power should not exceed 150 W, if there are tiles - up to 200 W. Afterwards, the quantity of the product is calculated - with film this is easy, it should cover the entire required surface, a maximum length of 8 meters.
The process of constructing an electric heated film floor is similar to cable systems, the only difference is in the arrangement of the heating element.
Preparatory work
You should start by preparing the area for the thermostat. It is installed in an accessible place on the wall. A recess is made for it, in which the junction box is placed.
Then the subfloor is prepared - leveled and cleaned.
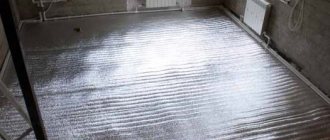
A polyethylene film is laid down - it is necessary for protection from moisture. Foil insulation (no more than 5 cm thick) is laid on top of it, with the metallized side up, this will help avoid heat loss. The sheets are glued together with tape.
The location of the film is marked on the insulation, and a recess is made for the sensor. The temperature sensor should be placed under the second section of the infrared floor - this will allow more accurate reception of information about surface heating.
Film editing
Floor strips are laid according to the prepared diagram. To reduce the length of the wire, the film is placed with its end sides to the wall where the thermostat will be, the distance from the wall is 15 cm, the copper contacts should be located down.
Laying the sheets overlapping is not allowed; they must be positioned end to end. If necessary, the film can be cut, but only along specially designed lines; the maximum length is 8 meters. The product is fixed with tape to the heat-insulating material.
Connecting the system
The film is connected to the power supply using terminals. To do this, the insulation is removed from the edge of the wire, it is inserted into a clamp, one contact of which is inserted inside the film, and the second is installed on a copper busbar. All contacts are fixed with pliers and insulated with bitumen tape; the places where the film is cut must also be insulated.
After this, a temperature sensor is installed, it is attached to the bitumen insulation to the black silicon strip at the bottom of the film, and the wire is pulled to the thermostat along a recess in the substrate.
The thermostat is installed. The sex cables from the sensor are connected to it. Then the power supply wire is connected. To check the functionality of the system, you need to turn it on at full power for a few minutes.
Laying the finishing coating
Before laying the finishing product, the structure is covered with thick polyethylene - this will protect it from moisture.
Laminate flooring can be laid directly on plastic film. If you are going to lay carpet or linoleum, then sheets of plywood are placed on top of the waterproofing.
How to properly install tiles on a warm film floor - this can be done in two ways:
- A painting mesh is placed on the polyethylene to improve adhesion. A thin layer (1 cm) of self-leveling compound or screed is poured.
- The waterproofing is sheathed with GVL, the sheets are fixed with self-tapping screws. It is important not to damage the film. The tiles are mounted using underfloor heating adhesive.
Electric film floors can be installed on old flooring.
To do this, it is cleaned, a heat-reflecting product is placed on top, on which the film is laid.
Connection diagram
The thermostat is mounted in the wall near an outlet or switch. A mounting box for the thermostat is installed in the prepared funnel in the wall, to which the electrical wires (zero and phase) of the power supply and temperature sensor are connected. Next, the thermostat is connected.
The thermostat mechanism has side sockets to which the electrical wiring (220 V), a temperature sensor and a heating element are connected.
It is important to know wire colors:
- White – L-phase.
- Blue – N zero.
- The yellow-green wire is grounding.
Connection diagram:
- Electrical wires (voltage 220V) are connected to connectors 1 and 2. A blue wire is connected to 1, and a white wire to 2.
- The heating electric cable wires are routed to sockets 3 and 4: No. 3 – wire N, No. 4 – wire L.
- The temperature sensor wires are connected to pins 6 and 7, regardless of polarity.
- Functional check. To do this, connect the power supply, set the temperature on the device to a minimum and connect the system of heating elements (usually using a special handle or button). Next, set the maximum temperature. The correct operation of the thermostat will be indicated by a click, which warns of an electrical short circuit.
Instructions for connecting a warm water floor:
- First, install the temperature sensor. It is recommended to install the temperature sensor close to the thermostat.
- Assemble the servo drive in the heating floor design. This electromechanism is designed to automatically regulate the water pressure passing into the circuits.
- Connect the existing electrical wires into a single circuit.
- Adjust the heating elements of the mechanism.
- Upon completion of installation, you must connect to the network and check the functionality of the entire system. For 90-120 minutes, measure temperature conditions with an ordinary thermometer in the area where the sensor is located. An indicator of correct operation is the complete elimination of deviations in readings.
In this case, the thermostat controls the temperature of the air, and not the heating of the coating.
Connecting the thermostat to a two-wire cable. The two-core cable system under the protective layer consists of two current-carrying wires. It is easy to install because the connection is made using a single wire, as opposed to a single-core electrical cable.
The connection diagram shows that in a two-core electrical cable 3 electrical wires are in contact: brown and blue are current-carrying, yellow-green is grounding. The phase is connected to connector 3, electrical contact 4 is connected to zero (blue), and contact 5 is grounded (green).
Connecting a single-core cable. The design of a single-core cable consists of one current-carrying electrical wire (white). The second green wire is intended for grounding the PE shield. White wires are connected to thermostat electrical contacts No. 3 and No. 4, and green wires are connected to No. 5.
Connecting warm mats is almost no different from the process for cable heating.
Let's just look at the differences:
- To install the temperature sensor, a recess is made on the surface of the mat. The structure is connected to the network using copper conductors located along the edges of the heating mats.
- It is possible to cut the film coating along the contours. On the reverse side of the film, the electrical wires are insulated, and on the front side they are left open for connection to electrical wires. Film strips are laid parallel to each other and connected to each other.
Installation of a core floor
How to make a warm floor under tiles? It's simple. DIY installation!
Technology of laying rod-based heated floors with laying of cable mats. First, a layout is made for the placement of the canvas, and the amount of material required is calculated.
Rod floors are sold as a kit, but sometimes it is necessary to purchase additional components. The required power is calculated by analogy with the cable mats that we discussed above.
Laying a core floor consists of several stages:
- Preparatory work - determining the location for the temperature sensor, cleaning and leveling the base, placing the foil backing - these works are carried out in the same way as when installing any electric floor. If the floor is planned to be screeded, then the perimeter is covered with damper tape.
- Installation of rods - the rod roll unwinds on the surface, the distance between adjacent strips should be 50 - 70 mm. The length of one strip should not exceed 25 m. The strips are fixed to the substrate with tape.
- Connection - a thermostat is installed in the prepared area, to which the floor wires are connected. The sensor, placed in the corrugation, is placed in the groove of the substrate and connected to the regulator, which in turn is connected to the power source. A prerequisite is to conduct a test test of the system before the next stage of work.
- Pouring the screed - this can be concrete mortar, dry adhesive mixtures, or dry screed, layer thickness 20 - 30 cm.
- Installation of the finishing coating - only after the screed has completely dried is the finishing material applied. When laying tiles, no screed is required; the mats are filled with tile adhesive.
It is permissible to lay a core heated floor on an old coating. The installation principle is the same as when installing a thermomat.
Connection options
To ensure normal operation of the TP circuits and get the long-awaited feeling of comfort, it is necessary to resolve 2 issues:
- Supply coolant with a temperature of no higher than 50 °C (maximum 55 °C) into the heating circuit pipes. Overheated floors cause discomfort for most people; the optimal temperature for finishing is 26 °C.
- Ensure the required coolant flow in radiators and underfloor heating loops. If the diameter of the supply line is too small or the circulation pump does not develop the required performance, the radiators and heated floors will heat equally poorly.
Let's look at several schemes that allow you to connect a water-heated floor to an existing heating system. Let's see how well the issues of temperature and coolant flow are resolved in each option:
- direct connection to a two-pipe radiator network;
- the same, using regulating thermostatic heads;
- insertion into the main line of a single-pipe system with an additional pump;
- full connection with a separate pipe from the boiler.
Direct connection to the radiator network
The insertion of the TP circuit into the supply and return of a two-pipe distribution will function tolerably under the following conditions:
- the total heated area is relatively small - up to 100 square meters;
- heat source – gas boiler capable of maintaining the coolant temperature within 40-50 °C;
- the circulation pump installed in the boiler room has sufficient performance;
- heated floors are designed for heating small rooms - bathroom, kitchen, children's room.
The direct connection scheme is suitable only for small heating areas.
The direct connection scheme has a right to life, but in general it is very imperfect. Judge for yourself: it is much easier for water to move along a path of low resistance further along the main line than to flow into a long pipe of the heating circuit.
Point two: when severe cold weather sets in, you yourself will raise the temperature in the boiler, the floor surface will heat up, and the room will become stuffy. The tiled bathroom will turn into a bathhouse. Please note: intensive heating of the bathroom is absolutely useless; people are not there all the time.
Option for direct insertion of the circuit instead of a dead-end radiator with two-pipe wiring
For reference. As some home craftsmen also do: they connect the TP circuit to a break in the return line running from the batteries to the heat source. And then they wonder why the heated floors and radiators don’t work. The reason is an increase in the hydraulic resistance of the entire branch and a decrease in coolant flow.
Using RTL valves
Special thermal heads of the RTL type will directly help to correctly solve the issue of regulating the water temperature when connecting a heated floor. An automatic valve is installed on the return pipeline and can be easily adjusted to a certain temperature. The work algorithm looks like this:
- Until the heating of the coolant reaches the value set on the thermal head, it quietly circulates through the pipe of the floor circuit.
- When the water temperature rises to the set value, the head actuator closes the thermostatic valve. The circulation stops and the coolant cools down.
- After the temperature decreases as a result of cooling, the thermostat opens the passage and the movement of water resumes.
Heating is regulated based on the temperature of the return flow limited by the thermal head
Reference Information. The European company Oventrop has long been offering solutions for such cases - UniBox blocks built into the wall. There is an RTL type thermal head inside, the adjustment handle is brought out. There are versions with two valves - one controls the coolant flow based on the return flow temperature, the second controls the heating of the surrounding air.
The disadvantage of the solution is the limitation of the pipeline length. If the length of the loop exceeds 50 m, the transformer transformer will begin to operate unevenly due to increased resistance. To heat medium and large rooms, you will have to divide the heated floors into 2-3 circuits and the same number of monoliths separated by expansion joints, as shown in the drawing.
Now about the pros:
- heating with heated floors can be organized in any room, without being tied to the boiler and furnace;
- the price of the product is incomparable with the cost of mixing units and additional pumps;
- if the batteries are equipped with air thermal heads, the TP system will be able to operate in the summer - the radiators will turn off themselves.
The described scheme is also suitable for connecting underfloor heating to a two-pipe centralized heating network. But keep in mind one nuance: dirty coolant can quickly clog the thermostatic valve or damage it. The master will tell you about the intricacies of the operation of RTL heads in the next video:
Is it possible to connect to a single-pipe distribution?
In order to power the heated floors from heating - the single-pipe "Leningrad" favorite of many craftsmen - you will have to assemble the mixing unit with your own hands and install a second pump, as shown in the diagram. For the normal functioning of the system, the following conditions must be met:
- the internal diameter of the distribution line is at least DN25, the maximum number of radiators on the ring is 5 pieces;
- the connection of the TP loop is made into the return pipeline after all batteries;
- the minimum distance between the supply and return taps of the heated floor is 30 cm;
- To maintain the temperature in the circuit, a three-way mixing valve is installed.
Note. A similar scheme is used by apartment owners to unauthorizedly connect TPs to the old type of central heating - single-pipe vertical risers.
In this and other diagrams, shut-off valves and automatic air vents are not shown, but it is necessary to install these fittings.
Three-way valve - a simplified design, capable of preparing water at a fixed temperature of 45-50 ° C. The pump “drives” the coolant through the loop, and the valve mixes in portions of hot water from the main line.
In practice, the scheme is used quite rarely. The reason is instability of operation and imbalance of radiators connected to a single pipe of the Leningradka. When the three-way valve opens slightly and recharges the heating circuit, the pump pressure is transferred to the main line, and the water flow in the batteries changes.
Advice. If you want to assemble a reliable underfloor heating system with your own hands, it is better to install separate supply and return pipelines from the boiler. The consequences of perversions with a single-pipe radiator network are unpredictable.
Traditional scheme with mixing unit
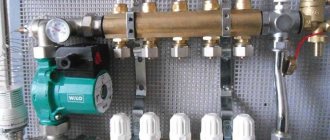
When it is necessary to install underfloor heating in each room of a two-story house, you cannot connect to the existing radiator heating. It is necessary to lay separate pipelines and install a distribution comb. What connection options are used:
- if the length of the circuits does not exceed 50 m (including connections to the collector), thermal heads are installed on the comb that respond to the return flow temperature;
- mixing unit with manifold and two-way valve;
- the same, with a three-way thermostatic valve.
In the first case, the principle of operation is similar to inserting one loop through the RTL head, only the regulators are located on the comb and control each circuit separately, as is implemented in the photo. Circulation is provided by the main pump located in the combustion chamber or inside a wall-mounted gas boiler.
In the second option, hot water is mixed by a two-way valve installed on the supply and controlled by a thermal head with an external temperature sensor. The latter is hidden in the collector pipe or screwed to it from the outside.
When the temperature of the supplied coolant increases, the liquid from the sensor flask presses on the valve stem and it closes. The scheme provides for the installation of an additional pump that pumps water through all loops of the TP.
The scheme with a three-way valve, whose operating principle is described above, is more advanced and is designed for a significant flow of coolant in heated floors. The disadvantage of both options is the high price of the equipment and the complexity of installation. All details about assembling the comb and how to connect the heating circuits are set out in the corresponding manual.
Common Mistakes
How to install electric floors correctly with your own hands - this question often arises for beginners who want to do this heating at home.
The main mistake is installing floors under large furniture. Underneath, the surface is not cooled, which leads to overheating and then failure of the system.
You cannot bend the cable either, as this will disrupt the functioning of the device. When laying cable mats, cutting the wire is unacceptable, so you should correctly calculate the size of the heated area.
A common mistake when constructing electric floors is inappropriate control of the insulation resistance during installation. The indicator should not exceed that specified by the manufacturer by more than 10%.
When using a film heated floor, it may stop heating if the film is damaged. Its current-carrying parts must be properly insulated, otherwise electric current will leak and the system will eventually shut down.
If we talk about the temperature sensor, then you should not pour it into the screed. In case of breakdown, replacement will be difficult. It is placed in a corrugated pipe.
Phasing on the thermostat
A common question is: is there a difference where to connect the phase on the thermostat and where to connect the zero?
Yes, I have. This does not affect the operating logic of the device, but it does not affect the safety.
If you confuse the phase and zero, then when the thermostat is turned off, it will not be the phase conductor that will break, but the neutral one. Thus, the phase will be constantly present on the underfloor heating cable, which is naturally not safe.
In those devices that have a separate switch on the case, when it is pressed, two conductors are broken at once, both phase and zero. But this is in manual shutdown mode, and not in all models.
Often the zero is fed directly through its track. I went into the terminal and immediately went to the heated floor.
In this case, the switch itself is only responsible for interrupting the power supply to the control board. When automatically triggered by a sensor, only one wire is always broken.
Safety requirements for operation
Before using electric floors, read the manufacturer's instructions included in the kit.
Basic safety requirements that apply to all types of electric floors:
- Do not shorten the heating element;
- It is necessary to take only a screed solution or tile adhesive intended for warm polos;
- Opening heat-shrinkable sleeves at the junction of the heating and installation parts of the floor is prohibited;
- Do not lay carpet on heating sections or place furniture without legs.

