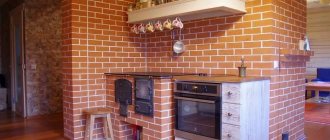
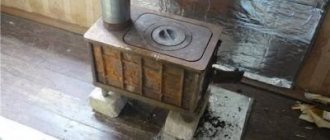
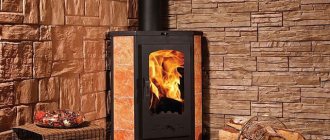
Arrangement of the territory in the garden requires effort in organizing a fireplace for cooking.
Laying stoves is a complex operation that requires a lot of experience and a sufficient amount of knowledge. We invite you to learn about the basics of laying stoves in order to have an idea of how it is done. The simplest is considered to be the laying of brick stoves. In fact, laying brick stoves requires a lot of special knowledge on the construction of fireboxes and vaults, chimney systems and other technological elements. This page describes how to lay simple stoves in a garden plot. A similar principle can be used to create heating and sauna stoves. Look at the photo of the furnace masonry, which illustrates the basics of all operations and the materials used. The video of furnace laying offers more clarity, where the work of a real professional and his advice are presented.
Furnace placement
The stove is placed opposite the window to illuminate the working chamber. Brickwork of a Russian stove can be started on a log frame from the 5th row. According to the order from the 1st and 2nd rows, two air chambers are visible under the stove. Under the hearth, the height of window-1 depends on the height of the hearth. There is no need to make a window. Chamber niche-2 can be finished with glazed tiles. This is a good place to keep kitchen utensils. If you make a window in wall-3, then you can put a grip and a poker under the stove. The cast iron is placed and removed with a grabber, and the coals and ash are raked from the hearth with a poker. The ceilings made of boards under the hearth (see row 4) and under the hearth can be located at different levels. Usually the pole is made at a level convenient for the housewife. Before making the ceiling, you need to estimate its height by laying dry bricks at a height convenient for the housewife. To do this, she must take the grip and see whether it is comfortable for her or not. The height of the pole should be such that the hostess does not have to stand on tiptoe.
Preparation of materials and tools
To build a Russian stove with a flood chamber with your own hands, you need to prepare in advance the full amount of building materials, tools, auxiliary equipment, as well as shaped parts made of cast iron and steel.
Materials
To design a Russian stove of traditional shape and dimensions: 1.9 - 2.0 m high, 1.6 m wide and 2.38 m long, you will need:
| Name of material or shaped part | Unit | Quantity |
| Tempered red brick M - 200 | Thousand PC. | 1,75 |
| Fireclay fire-resistant brick | Thousand PC. | 0,23 |
| Oily clay | kg | 250 |
| river sand | kg | 300 |
| Hob with two burners 40x70 cm | PC. | 1 |
| Grate 20x28 cm | PC. | 2 |
| Grate 25x38 cm | PC. | 1 |
| Fire door 25x21 cm | PC. | 1 |
| Fire door 25x18 cm | PC. | 1 |
| Cleaning door 13x13 cm | PC. | 2 |
| Blower door 25x15 cm | PC. | 1 |
| Smoke damper 18x26 cm | PC. | 1 |
| Damper 38x45 cm | PC. | 1 |
| Water heating tank 28x12x50 cm | PC. | 1 |
| Steel corner 5x60x60 mm | m | 1,5 |
| Steel strip 5x50 mm | m | 20-25 |
| Steel sheet 5x50x50 mm thick | PC. | 1 |
A Russian stove with a flood chamber is a rather massive structure and requires reliable support. When calculating its dimensions, not only the weight and dimensions of the furnace are taken into account, but also the soil composition and groundwater level in the area of the future pit. The support in the form of a rectangular slab should be wider than the main structure by 10-15 cm in each direction, and the depth, depending on the characteristics of the soil, should be 50-80 cm.
Concrete can be purchased ready-made, but it will be cheaper to mix it yourself. To build a monolithic foundation slab 1.7x2.5 m and 0.6 m thick, you need to purchase:
- crushed stone - 4.2 m3 (0.7 m3 - for the underlying layer and 3.5 m3 for concrete);
- sand - 3.5 m3 (0.43 m3 - underlying layer and 3 m3 - in concrete mortar);
- cement M400 - 0.66t (13 bags);
- reinforcement with a diameter of 8÷10 mm - 85 m (53 kg);
- board for formwork 40 mm thick - 0.2 m3;
- roofing felt - 9 m2;
- polyethylene film - 5-6 m2.
Tools
A standard stove maker's kit should consist of:
- Trowels (trowel) - used to take the masonry mixture from the container and distribute it over the surfaces of the brick. During the process of laying a Russian stove, a trowel is also used to clean off excess mortar that has protruded beyond the seam.
- Hammers - picks - split and trim brick blocks to fit individual masonry segments or give them a certain configuration.
- Joints are a special tool for designing seam lines.
- Cords - moorings - control the straightness of the rows and the perpendicularity of the walls, but more often craftsmen perform this work with a plumb line and a building level.
- Ordering - necessary to align the thickness of horizontal seams.
- Plumb line - a device for checking the verticality of walls.
- A building level is a tool for controlling the evenness of each row.
- Rules - used to create a smooth plane on top of the foundation structure.
- Shovels and two containers for making concrete and mortar.
- Measuring bar - for measuring the thickness of the seam.
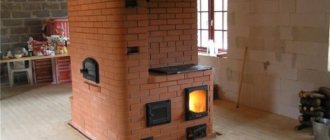
Furnace design
Under the hearth, on top of the boards, sheet asbestos is placed, which protects the boards from burning and does not allow heat to pass down. From the 8th row, the thickening of the side walls up to 19 cm begins due to the application of bricks to the main wall on the edge. From the 8th to the 11th row, it is more convenient to place these bricks while standing. Bricks with broken corners will go here, since they still need to be trimmed. In the 11th and 17th rows, different masonry systems are bandaged. Bandaging is necessary for the strength of the oven. The 8th and 9th rows under the hearth are covered with river pebbles mixed with coarse sand or broken glass, broken cast iron that is already unusable. A hearth is placed on the backfill with 3-5 mm gaps between the bricks. From above, the gaps are filled with dry granular sand, which is compacted by tapping on a laid plank. Then the entire plane of the brick is ground into the hearth so that there are no tubercles on it.
Shield schemes
A rough stove can have several purposes and, depending on the purpose of its use, different types of shields are built. Let's consider the possible options for shields:
- Sequential stroke with vertical channels. To build this type of shield, the least amount of materials is required. The scheme is easier to implement for those who do not have sufficient experience, due to the simplicity of the design. If the shield circuit is constructed correctly, the resistance to gases will be the greatest, and the thermal efficiency will be average.
- Sequential stroke with horizontal channels. It is much more difficult to build a circuit than the previous one, but they do not differ in parameters. Thermal efficiency increases by reducing gas resistance.
- Sequential stroke with long vertical channels. The main advantages of the scheme are that the ease of construction corresponds to the first type, and the thermal efficiency corresponds to the second. The disadvantages will be the need for additional construction of the foundation and high costs of building materials.
- Parallel move. A furnace with a shield with a parallel stroke is not compact, it takes up a lot of space, but it has the highest thermal efficiency. It is possible to reduce the furnace power.
(no votes yet)
Description of the masonry
The hearth is often worn out and pits form on it, so if the seams are sandy, then it will be easy for you to remove the unusable bricks and replace them with new ones. But it is best to make the hearth from fireclay bricks. Sand seams allow heat to pass through better from under the hearth, which means that pies and bread will bake better. Under the hearth a floor is made of boards. Over time, the boards become deformed and the hearth collapses. The ceiling shown in the order is rigid and cannot be deformed. It consists of brick overlaps-4, on which a brick floor-5 is placed. For greater strength, the core bricks are placed on rib-6. The ceiling over pole-7 is made from any available material - spring steel, two metal corners and a channel (i.e. a wider corner with sides). In order to better illuminate the hearth and working chamber, you can omit covering one of the side walls (shown by the dotted line). At the corner, place a brick column or install a metal stand. On the 20th row a round pipe for samovar-8 is installed. Stoves-9 are laid out, from which heat comes in and small things can be dried in them. On the 22nd row, a cleaning chamber is made, where a box for soot-10 is installed. The arch is placed against the back wall slightly higher than the front of the pole. This is so that there is more hot air underneath. For this purpose, a protrusion is made in arch-11 above the mouth. It also serves as a spark arrestor. Fans of simple masonry may not make both a recess for the damper and a protrusion in the arch.
Recommendations for use by stove makers
The efficiency of fuel combustion and the overall condition of the stove depend on compliance with operating rules, which should be followed not from time to time, but regularly.
Brick, like mortar, is a “living” material that can become deformed over time due to temperature changes. Therefore, you will have to not only clean it, but also cover up the cracks so that condensation does not form and the heat capacity of the structure does not drop.
This happens very simply, here is an example: over time, a gap of only 2 mm wide has formed around the valve. It turns out that in an hour it passes as much as 15 m³ of air heated to a temperature of 90-100 ° C, that is, approximately 10% of the total heat emanating from the stove.
Heat loss increases up to 40% if you simply open the door, and by 20-25% if air is supplied through the vent
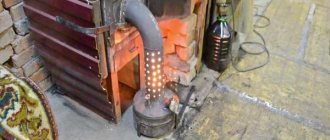
Furnace repairs and cleaning are carried out once a year, before the heating season. But chimneys need cleaning much more often - about 2-3 times per season. Before starting the fire, remove ash from the grate to ensure free access of air for efficient combustion.
Fuel is prepared in advance, since the logs must dry. To do this, they are put in woodpiles under a canopy and left for at least a year. It is not recommended to use wet firewood, since evaporating moisture settles on the walls and mixes with soot.
It is better if the firewood is the same length and thickness no more than 10 cm. This way they will burn equally quickly and evenly, which is important for heating bricks
Typically the combustion process takes from 1.5 to 2 hours.
Firewood is stacked in the combustion chamber in rows or in a cage, with a small distance between logs. It is important that they burn at the same time, as the heat will be greater.
It is not recommended to heat the stove for a long time for increased heating. This can provoke the appearance of cracks, as a result of which first cosmetic and then major repairs will be required - laying the masonry again.
For kindling, quickly flammable materials are usually used: wood chips, paper, shavings. Before lighting, open all the dampers, the view, the door
As soon as the wood ignites, the firebox is closed and the vent is opened. The draft is regulated by the position of the valve or view.
Some more useful tips:
- A bright red flame and black smoke indicate a lack of air - the flow needs to be increased.
- A white flame and a hum in the chimney is an excess of air; it is better to cover the vent a little.
- You can move the logs only after they have thoroughly burned out and formed wastelands that allow air to pass through.
- The firebrands are pushed into the center of the hot coals so that they burn out faster.
- As soon as the coals stop burning with a blue flame, they are distributed over the hearth, moving closer to the mouth.
- To protect against carbon smoke, the pipe is not closed for another 10 minutes to prevent carbon monoxide from entering the room.
If the stove is heated with coal, it is still recommended to heat it with wood.
When finishing external walls, remember that beautiful cladding can partially reduce the flow of heat into the room.
Russian stove vault
Sometimes the vault is made very low, almost level with the top of the mouth. In such an oven, the pies are burning on top, but damp on the bottom, because the hot roof is close. It is not necessary to cut wedge bricks in the masonry of the vault. The seams at the bottom of the vault should be reduced to nothing, and at the top they should be up to 1 cm. For the strength of the vault, it is good to occasionally insert brick plates - wedges - into the seams of each row before driving the castle bricks. Key bricks (the last row in the vault is best done from the front of the vault. After finishing laying the vault, it may turn out to be uneven at the top, which means it is not even at the bottom. This happens due to uneven boards in the formwork. To straighten the vault from below, you need to put it on take a board and, where the tubercles are visible, hit it with a hammer, then the vault is leveled. Afterwards, moisten the seams well with water. I usually lay vaults without formwork, slowly, with dry bricks.
First laying rows
The first fitting row of bricks is marked and laid out on the foundation, without mortar for now. They check with a level whether the row is horizontal, and then check it with the drawing. Without a pre-drawn plan, a smooth stove will not work.
Several of the bricks being tried on are dipped into water for a couple of minutes for better subsequent setting with the mortar, and at the same time the mortar is placed on the vacant spaces, leveled and a wet brick is slapped on top.
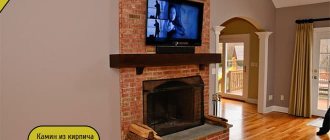
In the photo: masonry of the stove.
All bricks are connected to each other with mortar during the laying process, and the remaining mortar is immediately removed. Having laid out this row, cover it with roofing felt, preferably in three layers - this will be the waterproofing, and the first row of the stove will be considered not the one that has already been laid, but the other one, which will be on top of the insulating layer.
Masonry of a Russian stove
The laying of the arch of a Russian brick stove is carried out like this: one row on one side, a row on the other, etc. The brick is supported with one hand, the brick is nailed with a hammer with the other and the protruding clay is removed, but so that it lubricates both adjacent bricks along the seam. Thanks to this, the first row of bricks is securely fastened and does not settle after a few seconds. It is better to lay bricks near the front wall of the vault with a 12-stroke; after hammering in the castle brick, the masonry goes easier, and for ease of work, you can already place a bucket of mortar on the castle. When driving key bricks under the last two rows, standing bricks can be placed to support them using wooden wedges. The vault is placed so that its rows rest against the walls. It is laid from whole bricks and on wooden formwork-13. Supported by heel bricks-14. The last castle row is clogged with wedge bricks. The back part of the arch is higher, due to this it goes like a wedge. In this case, it is better to lay the castle row from fours and halves of bricks across the vault-15. It is better to hammer them in several at a time, capturing more than half of the whole brick in the side rows. With a smaller grip area, the side bricks will come out of the masonry. One row of masonry is placed on top here. If there is a large amount of fuel burned - two rows.
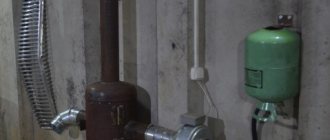
About the heat exchanger
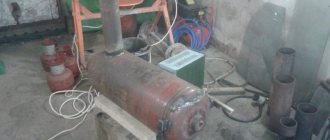
When building a brick stove with a water heating boiler with your own hands, you should take into account many factors and calculate the project as a whole. Any type of materials and structures have their advantages and disadvantages.
There are several ways to install a water register in a furnace:
- Inside the hearth;
- In the chimney;
- In the body of the stove, next to the hearth.
Depending on the location, choose the material for the heat exchanger and its shape:
- Copper - effective due to the high thermal conductivity of the metal, but due to the low melting point of copper, constant circulation of water in the system is necessary;
- Steel - heat-resistant steel with a wall thickness of 4-5 mm is used for boilers. For long service life of steel structures, it is not recommended to drain water from them.
- Stainless steel is expensive, but the most suitable material for a boiler. The only disadvantages include the complexity of manufacturing.
When choosing the type of material and installation location of the heat exchanger, it is worth remembering that by placing the water circuit in the fireplace, in the summer the entire system will heat up; to avoid this, you will have to remove separate batteries to remove excess heat.
When installing a heat exchanger in the chimney, additional dampers are added to the stove design, which do not heat the boiler during summer operation of the stove. It should be taken into account that the heat exchanger must be larger in volume than when built into the fireplace. In addition, the boiler should not reduce the throughput of the smoke channels.
Calculation of power and dimensions
For normal heating of the room, it is necessary to correctly calculate the register area and its power. For a brick kiln, an approximate calculation is sufficient; it is impossible to make an exact one, due to many factors and variables.
It is known from practice that heating 10 m2 of space requires 1-1.5 kW of energy. From one square meter of heat exchanger you can get 5-10 kW. To determine the register power more accurately, you need to consider:
- Location of the coil in the furnace;
- Type of fuel - wood, coal. When burned, wood produces less thermal energy.
- Approximate temperature in the hearth and location of the heat exchanger;
- Average water temperature throughout the entire circuit;
- The heat transfer coefficient of the material from which the coil is made.
As the fuel burns, the power of the heat exchanger will decrease, so it is better to increase the calculated coil area by 10-15%.
Furnace mouth
The arch of the mouth-16 is laid out in one or two circles, fixed to the racks. To secure them well, the mouth window is first laid. At the same time, a groove-17 is made for the damper. The mouth of the furnace-18 is closed with a tin damper, which is inserted into a recess or simply leans against the wall-19. The order shows a more complex option, where the damper fits into the recess and closes the cooking chamber more tightly. In order to make a recess for the damper, you must first make a template for the future damper-20 from thick plywood. Install it in the center and flush with the wall-19, temporarily strengthening it dry with bricks-21 attached to it.
The mouth is the narrowest hole in the masonry of a Russian stove, which is closed only by arched masonry. Through it, fuel is placed into the heating chamber, and dishes with food are placed. A person needs to make his way through the mouth into the heat chamber to steam.
Gases exit the furnace through the mouth for the first time. It is narrow so that gases and heat remain in the oven for as long as possible. Usually the housewife shows the stove maker the largest baking sheet or cast iron in order to make a mouth according to their size.
Covering the portal
In order to block the portal above the hearth of a Russian stove, it is not necessary to have metal. It can be covered with an arch.
If you do not want to install a samovar, then it is better to narrow the gas collector from the 19th row, and install the view on the 24th row. Wall-22 is not needed. If the height of the room allows, then for better draft and heat transfer in Russian stoves it is good to finish the last row, not reaching 35 cm from the ceiling, then you need to increase the gas collector under the view or valve (depending on what kind of stove appliance you were able to purchase).
Peculiarities
The Russian stove simultaneously performs many functions to ensure comfortable living in the house:
- heating the house in cold weather;
- cooking food;
- drying the crop for subsequent storage;
- providing the home with hot water.
An old Russian stove
Of course, a Russian stove is not an absolutely ideal device, and it has disadvantages. Cooking food in an oven is not so easy - not every housewife knows how to use a grip and pots. Maintaining a fire is also not the easiest thing. How many men are accustomed to lighting the stove and chopping wood with their own hands? Also, the stove as a heating device has a design flaw - heat is released at a height of more than a meter, above the floor. In modern ovens they have tried to eliminate this shortcoming. To do this, smoke circulation channels are located below, heating the stove over its entire height. To make cooking easier, the design includes a cast iron stove.