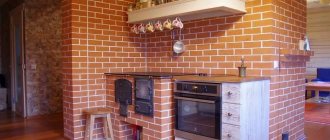
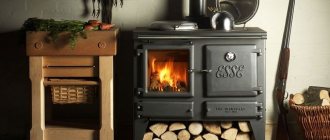
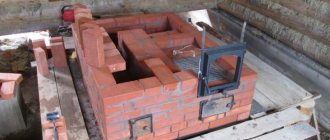
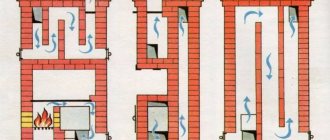
Brick stoves equipped with a hob are universal - they allow you to heat the house, as well as heat water and cook food. The designs of stoves vary, from the simplest and most compact, which you can assemble with your own hands, to complex multifunctional ones, the laying of which is best left to an experienced stove maker. For those who are interested in how to fold a stove with a stove for the home, how to properly fold a stove with your own hands, an article will help, which contains a diagram of the stove and drawings with orders.
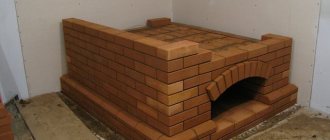
Do-it-yourself heating and cooking stove: masonry
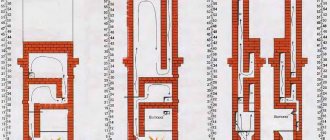
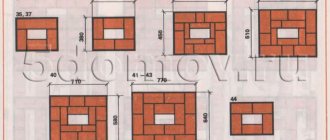
To ensure the correctness of the masonry, drawings of heating and cooking furnaces with orders are used.
From the very first row in this model of stove, a ash pan is provided.
When laying out the second row, a blower door is installed, pre-wrapped with asbestos cord.
In the fourth row, holes for the circulation of heated air are indicated, and in the fifth row, a grate is laid. Sand-lime brick is used for the walls of the firebox and the threshold.
In the sixth row, a combustion door is installed, wrapped with asbestos cord.
From rows 6 to 10, laying is done according to the diagram. It is advisable to fasten the tenth row with a frame welded from a corner.
In the eleventh row, a hob is laid on an asbestos pad.
From rows 12 to 16, bricklaying is done according to the diagram.
A corner is placed above the hob in the 17th row to accommodate the 18th row, on which the frame of the chamber above the stove is closed.
Rows 19 to 23 form the drying chamber. A drying door is installed on the nineteenth row.
On the twenty-fourth row for laying out the ceiling of the dryer, a metal corner is placed, and the next row is placed on it. On the 25th row there is a door for cleaning.
From rows 26 to 29, masonry is done according to the diagram.
On row 30, 2 valves are installed.
Along the 38th row, the masonry continues according to the pattern.
The subsequent rows refer to the part of the heating stove facing the second floor of the house. The order for it has its own numbering (rows 1-32).
In the 2-3rd row a door is placed on the cleaning hole, and in the twenty-seventh row a chimney valve is placed.
Part of the stove, located on the second floor, is laid out in the shape of a wide chimney. And it takes on the appearance of a narrow pipe just under the ceiling of the second floor. Next, the pipe goes through the attic to the roof. Its head is covered with a special umbrella, which protects it from precipitation, debris and dust.
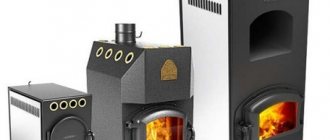
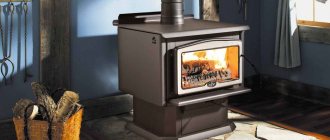
Rating of long-burning stoves
When compiling the review, models of Russian and foreign production were studied. Technical parameters, efficiency, functionality and complexity of maintenance were studied. User reviews and the opinions of heating engineers were taken into account. The main attention was paid to the following parameters:
- Power – affects the maximum heated area;
- Design – closed models and fireplaces are produced;
- Material – must withstand high temperatures;
- Doors – translucent, transparent and opaque;
- Functionality - can be equipped with automation, hob, heat exchanger.
Low level of safety, thin body material, poor efficiency - equipment with such defects were excluded from our rating.
Dutch oven
Dutch oven
This stove unit is perfect for small private houses, country houses and even apartments. The stove will be very useful in the absence of a centralized heating system. In addition, such a stove can be equipped with a hob and used for cooking.
It is recommended to choose a location for the stove at the stage of planning the house. But even if your house has already been built, there will be no problems with the construction of the “Dutch”.
Dutch - home decoration
The stove can be built either on a foundation or without it, but in the first case the stove will last a little longer.
The Dutch oven has a very spacious firebox. At the same time, the design is not equipped with a blower, which further distinguishes the stove in question from its analogues.
Among the important advantages of the “Dutch stove” it is necessary to include the efficiency and rationality of fuel use - in such a stove, firewood burns out much more slowly than in most other existing units.
Video - Oven with glass door
Rows 1-9
Rows 10-18
Rows 18-26
Chimney
First step. Prepare a solution of clay, water and sand. First soak the clay in water and sift the sand. Mix the ingredients in such a ratio to obtain a homogeneous mass with the consistency of sour cream. Typically, sand and clay are mixed in different quantities, and about 25% of the total volume of dry components is added to water. For the rest, focus on the characteristics of your clay.
The brick also requires preliminary preparation - it needs to be dipped in water for about a day.
Proceed with laying the stove. Every 2-3 rows, check the evenness of the masonry with a building level.
Second step. Lay roofing felt or polyethylene on the floor. For the stove in question, you will need insulation measuring 530x780 mm. Apply a 1-centimeter layer of sifted sand onto the waterproofing and carefully level the backfill.
Third step. Place the first row on top of the sand bed. Check the evenness of the brick laying and carefully fill the entire resulting surface with mortar.
Install the ash door. Use steel wire for fastening.
Fourth step. Lay out the second row of Dutch stitches according to the order. In general, this row will not differ from the initial row.
Fifth step. Lay out the third row. Starting with it, fire-resistant bricks must be used for masonry. Place a grate on the third row.
Sixth step. Lay out the fourth row. At this stage, the bricks should be laid on edge.
At the same stage, you need to mount the door for the combustion chamber. Use steel wire to secure the doors.
Seventh step. Lay out the fifth row in the same way as the fourth, only lay the brick in the usual way, i.e. flat.
Eighth step. Lay out the sixth row. Place the brick on its edge again. Check the corners and overall evenness of the masonry.
Ninth step. Lay out the seventh row. Place the bricks flat. Place only the back wall on edge. Lay all subsequent rows of bricks flat.
Tenth step. Proceed to laying the eighth row. At this stage, the combustion door is completely closed. The inner brick (it must be fireproof) above the combustion chamber should be beveled.
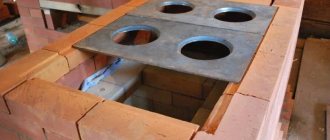
Eleventh step. Lay out the ninth row offset back. Lay a moistened asbestos cord on top of this row, and then a hob. Carefully seal the joints between the brick and the slab. You can make the cooking surface square or round - whichever you prefer.
Twelfth step. Proceed to laying the tenth row. At this stage you need to lay out the base of the chimney. The “Dutch” has compact dimensions, so you should abandon the installation of a major brick chimney, opting for a metal structure.
Thirteenth step. Lay out the eleventh row and install the smoke damper. Pre-wrap the valve with asbestos cord.
Fourteenth step. Lay out the twelfth row. At this stage, form a joint between the chimney and the metal pipe.
The furnace installation is complete.
Detailed diagram of the furnace device
Finally, you just have to do the following:
- bring the smoke exhaust pipe to the required height;
- seal the joints between the floor and the stove unit using a plinth;
- plaster the "Dutch". You can also use whitewash, paint and even ceramic tiles for finishing.
Thus, independent laying of a heating and cooking stove is not such a difficult undertaking. All you have to do is follow the instructions in everything.
Heating and cooking room with fireplace
Good luck!
Read the article on our website about making a Dutch oven with your own hands.
Video description
About the Swede project with three firing modes in the following video:
The principle of order
It is most convenient to organize waterproofing for the bottom row using roofing felt. In this case, you can mark the first row on it (for example, with chalk or a construction marker). The markings should be approached responsibly: it determines the evenness of the future furnace body. Before starting work, you need to know the following nuances:
- Determine the places where the brick will be laid using the mortarless method.
- Know how to properly trim bricks.
- Know how the joints between brick and metal are sealed (filled with asbestos cord), plan and be able to make temperature gaps.
Order scheme of 16 rows Source terman-s.ru
Small, but simple cooking stove
Exclusively for culinary purposes, also in the country house or in the summer kitchen, the following design is intended, see fig. Below, a simple cooking oven:
- firebox door;
- blower door;
- oven door;
- hot water tank;
- cleaning
Simple cooking oven
In appearance, it is nothing more than a well-known kitchen stove, but it is made according to the Swedish principle, only without the labyrinth of channels; in the summer they are still inactive. Constructing “rough” in Swedish, we get:
- Although this is a brick kiln, it will take less than 250 bricks themselves, taking into account amateur fire, and the load on the floor will not reach the permissible 250 kg/sq.m. according to SNiP. m. That is, this stove can be built directly in an existing living space. Only the fireproof mat will have to be turned over: put felt on the floor, steel on it, and then build on the steel sheet. Asbestos or basalt cardboard are not suitable, they will not have adhesion to the floor and steel, and the stove may “move”!
- The oven heats up no worse than in a Swedish oven and you can bake bread in it.
- Instead of a hot water tank, you can install the same U- or W- heat exchange register, and in the attic - a hot water storage tank with thermal insulation. Then there will be enough hot water not only to wash dishes and hands, but also for a shower.
- From the Swede I got the side exit to the chimney, i.e. no need to hit the ceiling under the pipe.
- The fire part of the stove is completely Swedish and can withstand a fairly intense fire. In a small house or dacha for household and commercial purposes, inhabited from spring to autumn, a heating panel can be attached to the stove.
How to choose a stove for your home
Before purchasing such a device, you need to consider some points. Igor Izotov told Komsomolskaya Pravda how to choose a stove for your home . He advises paying attention to the following factors:
Oven type
It largely depends on what you need the oven for. For a home bath, simple heating in a room, or maybe for a storage garage. Wood-burning stoves are the most common type on the market . They have a simple design and give a pleasant smell when fired. Just remember - you need to install a chimney for it, which will have to be cleaned periodically. Find a place for it. Don't forget that you will need a lot of good firewood.
Gas ovens are smaller. They do not need firewood, but if the stove runs, for example, on natural gas, then they will have to lay a gas pipe and buy gas cylinders. Some of these stoves have gas burners, but for some you will have to buy them in addition.
There are also electric ovens . They are suitable for home saunas - “Finnish”. This stove operates on stones, which are heated by electric heating elements. The room warms up quickly, but the downside is that there is a lot of electricity consumption.
Heat retention time
An important point is the speed of warming up. Especially if you are making a steam room. Brick stoves retain heat for a long time, but these require longer heating and installation may require extra care. Most home stoves are metal. They heat up quickly, but also lose heat if the fire is not maintained. A cast iron stove also retains heat for a long time, but it will also cost more.
Compactness
Again, it all depends on where you place the stove. If you need heat in a workshop or warehouse, you can take a heavier and larger device. If it’s for a house or a small bathhouse, then choose a compact option. Make sure there is somewhere to connect the chimney.
Power
This point also depends on the volume of the house. On average, for a private house of 100 sq. m requires a furnace with a power of approximately 10 kW. In this case, the efficiency should be 100%. If you have a smaller room, then the power may be less. It is logical that more heat will be in the place where the stove is installed.
Step-by-step instructions: design with a bed
The model of this design is very bulky due to the sun lounger attached to the back. But this is a great idea for replacing a bed in a country house. A house of 30 square meters will be perfectly heated by a stove measuring 1781x1280 millimeters, where the length of the sunbed itself will be 1781 millimeters, and its width will be 630 millimeters.
Required materials (table)
| Material/element | Amount) | Size (mm) |
| Red brick M-200 | 900–920 | |
| Fireclay brick Ш-8 | 200–215 | |
| Firebox door | 1 | 210x250 |
| Cleaning channel doors | 3 | 70x130 |
| Blower door | 1 | 140x250 |
| Chimney dampers | 2 | 130x260 |
| grate | 1 | 250x400 |
| Hob | 1 | 310x610 |
| Steel strip | 5m | 50x5 |
| Steel corner | 80 cm | 60x60x5 |
| Clay, sand | ||
| Fireclay mortar | 160 kg | |
| Oven | 1 | 450x360x300 |
Foundation
It is recommended to do it at the stage of laying the foundation of the house itself, where the stove will be located. But the stove is not always planned at the stage of building a house, so you often have to make holes in the finished floor. But in any case, the foundation of the stove and the base of the concrete building must be separated from each other. Otherwise, if the shrinkage of one side is unsuccessful, the other side may also warp, thereby deforming the entire masonry.
To build such a powerful unit, you need an appropriate foundation, which will go almost a meter deep into the soil, or more precisely 70 centimeters. If the soil freezes deeper, then the hole, accordingly, should be dug deeper. This information should be taken care of in advance.
If the construction of the stove takes place in an already finished house, and not at the construction stage, then marking the future Swede should be done directly on the floor with the condition that the hole in it should be 10–15 centimeters larger than the size of the foundation in all directions.
After the marking and hole in the floor are made, you need to mark the soil and dig a pit. Cover the bottom with sand moistened with water. Compact it too. The thickness of the compacted sand layer should be 10–20 centimeters. Specific data depend on the depth of the excavated pit. Then there is a layer of crushed stone of 15–15 centimeters, also well compacted. Next, install the formwork and attach roofing material to its walls for waterproofing. The formwork should rise above the soil layer to the entire height of the foundation, which is either 1 layer of brick short of reaching the floor, or rises 8–10 centimeters above it.
Coarse crushed stone + cement + sand = concrete for pouring a pit. This layer should be approximately 15 centimeters thick. Install the reinforcing mesh and press it into the concrete solution.
The next layer is a thinner cement mortar. It is poured to the height of the soil, leveled and left to harden. The reinforcement structure is again laid on the slightly hardened surface and concrete is poured to the height of the entire formwork. Level this layer and leave until completely hardened, for about a month.
When everything is ready, it is necessary to remove the upper part of the formwork and lay waterproofing on the foundation (2-3 layers of roofing felt, which must first be glued together in thickness).
Another option for a foundation for a stove
The foundation is finished. Now you can proceed directly to laying the furnace itself.
Furnace laying
The laying is carried out according to the order scheme.
Scheme of the order of the stove with a stove bench
If you follow this scheme, the work will proceed as follows:
- The first two rows set the direction of laying the entire structure. They are laid flat.
- On the third row, gas outlet channels and a blower chamber begin to form and the door is installed.
- The fourth row provides for the installation of doors for the cleaning chamber and preparation of space for the grate.
- 5th row - installation of firebox doors and laying of the grate.
- 6th row - the oven is installed.
- The 7th row finishes laying the deck chair and begins laying the stove hob.
- The 8th, 9th and 10th rows are laid according to the pattern. The walls of the firebox are erected in them, and a chamber is also built around the oven.
- The 11th row provides for the installation of a hob. It is necessary to lay pieces of asbestos under its edges, and fix its front part with a steel angle.
- Rows 12–16 - a wall surrounding the hob is built.
- On the seventeenth row, the niche needs to be covered with strips of metal and reinforced with a corner. At the same stage, the first chimney valve is installed. First, the valve frame is mounted on the mortar, then the moving part is mounted on it.
- Rows 18–26 are laid out strictly according to the pattern.
- The second chimney damper should be installed on the 27th row.
- The last stage is the construction of the chimney pipe.
Similar designs or what the Swedish stove is compared to
A Swedish stove is a fairly effective and practical device for heating a room and operating a hob.
Among similar devices, it is worth noting several of the most popular varieties:
- Dutch oven.
A special feature of this type of stove is that the stove operates exclusively to heat the room. It is compact and does not take up too much space, so only a small amount of materials are needed to build it, making it a more economical option.
Of course, the absence of a hob cannot always satisfy the client’s needs, but knowing the basic rules and technology of how to build a Dutch oven, you will provide yourself with heating for the entire cold period. Please note that the efficiency level is several times lower in contrast to the Swedish one (by about a third);
- Muscovite.
This model is a type of Swedish stove with oven and stove, only it is more advanced. Having the same dimensions, it is much more practical, since all elements of the structure are located more thoughtfully (taking into account further operating conditions).
As a rule, this stove has the following functional parts: ash pan, cleaning hatches, grate, firebox, cooking surface, ventilation system, water heating tank, oven, valves (winter, summer and central).
It is worth noting that for a small-sized house (up to 50 square meters) it is ideal; the only difficulty may be its independent construction, which is almost impossible to create without experience;
- Stove with stove and stove.
In a sense, this type of stove can be classified as a more simplified version of the standard Russian stove. This is due to the fact that the bench is not an ordinary brick extension, but a real place that has full, gentle heating.
As for operation, this stove does not have any significant shortcomings, which cannot be said about the mass of the structure.
In addition, due to the presence of a stove bench, it is necessary to allocate a significant area of the room for installing this stove.
If a novice builder intends to build, I will say frankly that the order is quite complicated, and for a beginner it is difficult to understand how to assemble a stove with a stove;
- Swedish stove with fireplace.
Most often, this design is preferred to be installed between rooms. The oven is easy to use and has high efficiency. The difficulty for a beginner still lies in laying and connecting all the functional parts.
Advantages and disadvantages
Before deciding how to properly lay a brick wall, you need to evaluate all its advantages and problem areas.
Experts highlight the following advantages:
- compactness – base area up to 1 sq. m and height no more than 2 m;
- possibility of use both for heating and for cooking, relaxing, and drying things;
- excellent performance indicators - high efficiency and heat transfer;
- simplicity of design;
- decorative function of room decoration;
- the ability to regulate heating modes;
- efficiency of heating;
- ease of maintenance and infrequent fuel stowage.
Effective use of the Swedish stove is only possible with regular combustion processes. If the room is not heated too often, then it is necessary to dry it.
The optimal area for a heated room is considered to be 40 square meters. m. When laying a stove, you must use high-quality raw materials, and the door of the combustion chamber must be cast.
The best long-burning stoves with a water circuit
The easiest way to ensure uniform heat distribution in the house is to install a water heating system. Radiators are connected using pipes through which coolant circulates to a source of thermal energy. Its role can be played by a long-burning furnace with a water circuit, which can easily replace a solid fuel boiler. The difference between these models and conventional stoves is the presence of a heat exchanger.
Stoker 120 Aqua-C
A universal model that can be used as a backup heating device for a home with an area of 60 sq.m. A special feature of the design is the presence of a water jacket for connecting the battery and the possibility of additional installation of a heating element. The firebox ensures complete combustion of fuel due to the combustion of gases. Working time on one bookmark is up to 6 hours.
A door with heat-resistant glass will allow you to control the combustion process. Fine-tuning the power helps create a comfortable atmosphere in the home. The design of the housing makes it possible to increase efficiency due to the convection effect. The fins increase heat transfer and improve air circulation. The model is characterized by a high rate of heating of the room.
Advantages:
- Increased volume ash pan;
- Hob;
- Precise adjustment with microslides;
- Economical.
Flaws:
- Not detected.
Guca Lava Thermo
The Serbian company offers an inexpensive option for the heating system of a house with an area of up to 90 sq.m. The model is made of gray cast iron and boiler steel and has good heat transfer. The flue gas afterburning system has increased efficiency to 78%, thanks to which fuel is consumed economically and heating occurs quickly. Two air flow regulators help you fine-tune the room temperature. You can change the power for both primary and secondary afterburning.
Door with glass that can withstand high temperatures. The water circuit for connecting radiators ensures rapid heating of the coolant. The hob may have one or two burners. This makes it possible to use the oven for cooking.
Advantages:
- Good heat dissipation;
- Spacious ash drawer;
- Comfortable handles made of heat-resistant material;
- Vertical chimney.
Flaws:
- The paint takes a long time to burn during the first fires.
Ecofireplace Bavaria Prismatic
The Russian company offers to buy a model with a water circuit for owners of cottages with an area of up to 130 sq.m. The equipment is made of heat-resistant boiler steel and gray cast iron. The firebox is lined with cast chamotte to increase its service life. The body is lined with tiles. A French-made hob allows you to cook food.
The heating device has one of the highest efficiency in its class - 80%. This is achieved through a secondary combustion system with a constant air supply. Power is adjustable in the range from 9 to 16 kW. One stack of firewood or briquettes can work for up to 5 hours. The door with heat-resistant self-cleaning glass has a large glass area.
Advantages:
- Volumetric firebox for large logs;
- Adjustable clear glass;
- Slide valve with rigid rod;
- Side opening door for added safety.
Flaws:
- Heavy weight.
Varieties
It is important to understand what types of Swedish stoves there are, since the layout and location in the house will depend on this. The following models are popular:
- with a fireplace, when the stove for cooking is turned towards the kitchen, and the fireplace is directed towards the living room;
- Swedish stove with stove and oven - used for heating the entire room;
- with a couch for a comfortable rest while simultaneously heating the house.
Regardless of the chosen type of structure, it is necessary to correctly determine the pipe cross-section parameter. To do this you need to know:
- dimensions of the combustion chamber by multiplying the length of the firebox by its width and height;
- specific calorific value of fuel - tabular data is used.
When calculating heat transfer, the calorific value in specific units is multiplied by the volumetric characteristics of the firebox. The resulting value is multiplied by:
- Efficiency – 40%;
- combustion level – 80%;
- fuel load level – 63%.
Types of furnaces and their characteristics
There are several models of the Swedish stove:
- a heating and cooking stove, which has only a stove, and also, if desired, additionally equipped with an oven, a water heating tank and a niche for drying;
- a fireplace stove, which can be located in such a way that the heating and cooking part of the structure will go into the kitchen, and the decorative fireplace side into the bedroom or living room;
- a Swede with a stove bed - such a stove has a more complex design, but it can serve as a warm bed in winter.
A Swedish stove with a stove bench is an analogue of a Russian stove and until relatively recently was quite common. Now such designs have been replaced by more compact classic versions.
However, the positive effect of such stoves on colds is widely known. Our ancestors believed that if you sleep on a well-heated stove, the disease will go away.
The model is selected depending on the area that can be used for it, since some of the varieties are quite massive, while others, on the contrary, have compact shapes.
When choosing a stove, in addition to the area, of course, the requirements for functionality are taken into account.
For example, if a Swedish oven is installed in the kitchen and its location does not border on other rooms, then the choice usually falls on a compact heating and cooking stove.
If it is necessary to heat the entire house, then an appropriate place is selected for the stove, where it will heat two rooms at once, or an option with a stove bench, from which a fairly large amount of heat also emanates.
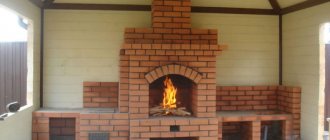
A Swedish stove with a fireplace is perfect for a romantic interior - it is usually chosen by those owners who like to spend evenings near the fire. If the fireplace compartment is laid correctly, it will also be able to heat the room into which its firebox opens.
Regarding the construction of the shield, such furnaces are also divided into several types:
- In the case of a horizontal shield, the structure is heated evenly.
However, to clean such a system, a large number of cleaning holes equipped with doors is necessary, which makes such a structure more difficult to construct and expensive.
- In the case of a vertical arrangement of gas ducts, such a stove may have only one cleaning hatch.
Since most often such stoves are located between two rooms, one of them will warm up faster than the other. This is explained by the fact that in the first channel, located on the furnace side, the temperature will be significantly higher than in the third, where somewhat cooled gases are discharged.
- Swede with bell-type firebox.
This option has the advantages of both systems described above. In this case, the oven heats up evenly, and the structure itself requires only one cleaning window. Another plus is that the construction of such a furnace requires less bricks. In addition, this design cools down relatively slower.
The construction process of the Swedish
The process of constructing a Swedish stove. For the construction of the furnace, the following calculations are taken: for the stove - 71 by 41 centimeters; for the firebox (height, width, depth) 30 by 35 and 45 centimeters; for oven 30 by 35 and 50 centimeters. These dimensions may vary depending on the oven version. The metal walls for the oven must be at least 4 millimeters. The distance from the edge of the grate to the oven should be about one brick. There should be a gap of a quarter brick from the back of the oven to the firebox. The oven is made of dense cast metal.
Orders of the Shvedka stove
When the oven approaches the firebox, the walls are additionally protected with vermiculite. The door must be cast iron. It is attached to the masonry, which guarantees reliable fixation.
Before laying the brick stove, thermal insulation of the floor is done. Insulation can be made from basalt cardboard. The insulation is laid so that at the end a 1.5 centimeter layer is formed. The middle layer is made from a foil sheet. The foot of the oven (the first 2 rows) is laid out with widened centimeter seams, this creates a protrusion. The brick is moistened before laying. The next two rows form an ash pan and three doors are installed for cleaning the oven. The doors are mounted with a gap. An asbestos cord is inserted into the gaps.
| ORP Shvedka (Swedish stove) No. 3 |
With a two-layer stove made of red and fireclay bricks, a distance of 6 millimeters is made between them. The internal lining of the furnace is lined with fireclay bricks. The grate bars are inserted. And the oven is inserted into the same row. From the sixth to the ninth the combustion chamber is formed. The door is inserted. The tenth row covers the oven.
Next, the slab is laid and smoke channels are made. When laying the slab, quarters are cut out of the bricks. From the twelfth to the sixteenth, the cooking chamber and smoke exhaust channels are laid out. The next two are laid with trimmed bricks. From the twenty-first to the twenty-eighth there is a chimney. In the twenty-seventh, a valve is inserted with a basalt cord gasket in the gap. From the twenty-ninth row there is an extension for the cornice of 5 centimeters. The channels (except the pipe) are closed.
The next row is made even wider by 5 centimeters. Then the size is reduced to the original size. The pipe is laid out in 5 bricks. In front of the ceiling, 3 rows of pipes are fluffed up. The thickness of the pipe is one and a half bricks. An iron smoke cap is placed on top of the pipe. The pipe running outside the house is lined with cement mortar.
Which long-burning stove is better?
It is not possible to choose a universal option: heating equipment is used in homes and commercial real estate with different usable areas. The models differ in their functionality, which is not always in demand by property owners. The VyborExperta.ru team recommends taking into account the scope of application and advises paying attention to the following brands:
- TMF Fire-battery 7 – for a country house;
- Rainbow PO-1 – for a small greenhouse or garage;
- Vesuvius AOGT 00 – choice of the workshop owner;
- Invicta Mesnil - for a small country house;
- Stoker 120 Aqua-C is a good backup heat source;
- Eco-fireplace Bavaria Prismatic is the choice of the owner of a cottage located in the forest.
All the presented samples deserve attention, but only the most efficient and functional stoves from our review received the title of best in their categories.
Preparatory work before assembling the stove
An important part of the preparatory stage is choosing the location of the stove in the overall layout of the house. Since the main task of the stove is heating, the optimal location is considered to be the center of the room
But usually, for practical reasons, the location is shifted closer to the front door. As a rule, the stove is folded simultaneously with the construction of the walls and roof. To do this, the foundation is prepared in advance, because the stove weighs about 3 tons. Only a well-filled, well-established foundation can withstand such a load per 1 m2.
The optimal location of the stove in a residential building is at the intersection of interior partitions near the entrance doors
If the stove is being built in a house that has already been built, it is necessary to take into account the chimney outlet above the roof
When installing the pipe, it is important not to violate the rigidity of the roof frame and not to get on the rafters, as this will significantly complicate the task of building a chimney
The summer-autumn period is considered a favorable time for carrying out preparatory work. It is best to give the foundation time to dry for at least 1 month, but ideally six months, filling it in advance in the fall.
Holes in the attic or interfloor ceilings are made immediately before laying the stove.
The roofing covering is disassembled last, when the laying of the chimney riser is completed.
Pouring the foundation
Let us dwell in more detail on the manufacture of a foundation for a Swedish stove, since this is a very important point for its further operation.
- The depth of the foundation is determined depending on the region. The starting point is the depth of soil freezing in winter. If you make the foundation higher than this layer, displacements in the horizontal plane are possible. Therefore, on average, a depth of 0.8 to 1.0 m is selected.
- Linear dimensions are calculated according to the dimensions of the furnace itself. The foundation is laid 10–15 cm wider and longer than the dimensions of the stove. This is a generally accepted standard for the construction of soil supports.
- A sand cushion 15–20 cm high is poured between the soil and concrete. With its help, the base of the future foundation is leveled and the pressure on the soil is evenly distributed. In addition, sand perfectly allows water to pass through it. In the future, it will remove moisture from the foundation when groundwater enters.
- After sand, it is allowed to use a large fraction of crushed stone, broken brick, slate, tiles and other construction waste. They are bonded with cement mortar. If possible, use natural stone, which is highly durable.
- The reinforcement is placed closer to the upper layers. Its purpose is to strengthen the concrete mass and evenly distribute temperature changes throughout the entire area. Therefore, the metal mesh is laid in a horizontal plane 10–15 cm from the surface of the concrete screed.
- Immediately after pouring, the upper plane is leveled with a rule (or a wide spatula). And after setting and drying, several layers of roofing material are laid on it, which will act as waterproofing. Some craftsmen prefer roofing felt to roofing felt. Others are synthetic materials with metal foil on one side. In any case, waterproofing is necessary, and you should not forget about it.
- The hole in the floor is cut in such a way that it is convenient to make the stove masonry. And after completing the work, add flooring directly to the stove body and install baseboards. To do this, add at least two additional joists on which the edges of the floors rest. They are usually made from construction timber (50x75 mm and above) and attached to uncut floorboards with self-tapping screws. The logs are placed along the walls of the furnace after work on the foundation is completed.
Practice has shown that a feature of the Swedish stove, like the Dutch stove, is a powerful downward flow of thermal energy. Therefore, before starting masonry, several layers of heat-insulating material are laid under the base of the furnace. Usually this is basalt cardboard - an inexpensive and durable heat insulator with a thickness of 5 mm. A more expensive, but also widely practiced method is to lay the first row of the stove base with fireclay bricks. The low thermal conductivity of the brick prevents the foundation from heating up.
Basalt cardboard is an inexpensive and reliable heat-insulating material for constructing furnaces
Distinctive features
The operation of any of the systems based on long-term combustion of fuel occurs by ensuring the combustion of pyrolysis gases . They are released when organic fuel burns slowly.
Air ducts in such structures have their own characteristics, due to which the wood smolders and releases hydrocarbons in the form of gas.
The operating principle of fireplace stoves is as follows:
- Pyrolysis gases, which are formed during the slow oxidation of organic-based fuel, come into contact with air and then enter the combustion chamber. As a result of the process, a significant amount of thermal energy is released.
- The resulting heat can be used to transfer temperature to a coolant or a boiler with an indirect type of heating.
IMPORTANT! An important advantage of a fireplace stove is the minimal level of soot formation during combustion of pyrolysis compounds.
But it is worth considering that when installing such a device, you need to properly install the chimney . It will allow for high-quality removal of waste gases, ensuring the safety of residents and the efficiency of the furnace.
Brickwork
By following this construction scheme, you will get an excellent heating and cooking installation, made by yourself.
The first row must be perfectly level, because the entire harmony of the future heating installation depends on this. As in other stove models, the masonry is continuous, without gaps or holes.
In the second row everything is repeated, and it is also completely filled with ceramic material. The place of the fireplace insert is laid out with sand-lime brick, and after the installation of this row is completed, the holders are attached and the fireplace grate is welded.
Blower chamber
In the 3rd row there is a blower chamber, cleaning channels and a place for an oven (if the Swede comes with an oven). Here they begin to form a vertical chimney. A fireplace fuel chamber is installed on the reverse side of the structure. Also, at the same time as the masonry, the doors tied with wire are fixed.
On the back side of the oven installation site, a corner of the brick is cut off to ensure connection with the cleaning chamber. The 4th row completely repeats the previous one, but fits into the dressing.
In the 5th row above the blower, a place for the grate is formed, but otherwise there are no differences from the previous stages. In the area of contact with open fire (grid), silicate material is used. An oven rewound with asbestos rope and a grate are also installed here.
At the next stage, the firebox door is installed. The silicate brick between the firebox and the oven must be placed on the rib part, which will contribute to better heating of the oven (the channel between it and the vertical one must be blocked here).
The 7th row is no different from the previous one, and two strips of metal are laid on top of it, which will serve as a support for further masonry.
Stages 8 and 9 are performed according to a given pattern, but in the last stage two metal strips are laid above the oven. This will help relieve the load on the supporting areas of the camera.
Hob
The 10th row is distinguished by the formation of a place for the hob, under which asbestos strips are laid. We use a corner to strengthen the area above the oven and the firebox door. On the left you need to provide a gap for the purifier door, into which you can immediately install it.
Stage 11 provides a cooking niche. The bricks to the right of the stove should bridge the gap between it and the oven wall. At level 12, the bricks that cover the firebox are cut obliquely, which helps direct the smoke in the right direction. Row 13 - according to the diagram.
Levels 14 and 15 involve the installation of a fireplace mantel. The sixteenth is covering the cooking niche with strips of steel and laying a corner on the front edge.
Until stage 19, everything is carried out according to the scheme, and then the chimney openings are formed. Doors are also installed on the cleaning channels. Then everything follows the diagram, and in rows 21 and 22 the doors are mounted on the cleaners.
23 - according to the diagram, 24 and 25 - installation of valves on the fireplace chimney. Row 26 involves installing the last door on the purifier and combining the gas outlet with a vertical channel. Next, the next two rows follow the pattern.
Levels 29 and 30 are solid masonry with all channels blocked, excluding the chimney, on which a damper is installed in the next row. From the 32nd row a chimney is formed, the height of which depends on the height of the ceiling, and the thickness should be at least half a brick.
Video description
About the Swede with a do-it-yourself bed in the following video:
Pipe requirements
The technology for laying the chimney of a Swedish heating and cooking stove differs in some details from the method of forming the body. While working, you need to remember the following subtleties:
- The height of the chimney generally depends on the roof configuration. But to ensure good traction, the length is set to at least three meters.
- The chimney is built exclusively from whole bricks. If you use halves and quarters of material, the area of the seams will increase, and this will reduce the reliability and safety of the entire structure.
- For lining (cladding) fireclay bricks are used (they are laid on the edge).
The pipe needs reliable thermal insulation Source termopaneli59.ru
- The chimney is a place of increased fire hazard, therefore, when constructing it, the rules of SNiP are observed: the distance between the chimney and the wall of the house is maintained (at least 40 cm). At the point of passage through the ceiling, thermal insulation is carried out with asbestos.
- The joints between the bricks are carefully sealed. High-quality seams will increase heat transfer, provide maximum traction and protect against the penetration of combustion products into the home.
Which brick stove to choose for your dacha?
The choice of stove design determines the size and type of room. Large cottages will require a massive stove structure with thick walls, which will take a long time to heat up, but at the same time be able to maintain the temperature for a long time. Building such a stove is not an easy task. This will require some experience and knowledge.
But even a beginner can handle a small stove for heating a small dacha if you strictly follow the diagram and do not change the laying rules.
The first place in the popularity of heating and cooking stoves is worthily taken by the Swede, which enjoys well-deserved love and respect among Russian stove makers.
This design is a compact, ergonomic shape with a small cooking surface and a three-channel chamber. It is ideal for a small cottage, the length ranges from 880 to 1250 mm.
For the location of such a stove, the place most often chosen is between the kitchen and the living room. Thus, the stove performs a double function: it serves for cooking and decorates the living room with a fireplace.
Today you can find hundreds of different layouts for laying a Swedish stove with a hob on the Internet, so it won’t be difficult to implement it for your dacha. Many stove makers have added additional options to the standard masonry scheme, so each design is called by the name of its creator: the Buslaev, Kuznetsov stove, etc. But the principle of operation in them is the same.
Traditionally, a Russian stove can be called a bulky, massive structure, which is decorated not only with a hob with an oven, but also with a spacious bench.
This stove is not only a functional device for cooking, but also a place for relaxation. It allows you to warm up the room well, retaining heat for a long time, and has a beneficial effect on the human body, thanks to which the owners of such stoves are less susceptible to colds.
The building usually has two fireboxes (main and additional). Thanks to the special design of the oven, heating is carried out evenly, from bottom to top. Any solid fuel is suitable for kindling, and there are no particularly strict requirements for the materials for laying a Russian stove.
A special place among small heating and cooking stoves is occupied by the little V.A. Potapova, created by a famous engineer at the beginning of the 20th century. To lay it, you need only 211 bricks, and the dimensions of the stove are only 630 * 510 mm.
Moreover, this little thing contains a single-burner stove, a small oven for baking and a hood. This type of stove would be an excellent solution for a small garden house or one-room cottage.
In this article, we invite you to study the rules and main points of laying a small heating and cooking stove.
Cooking oven order
The process of constructing a small-sized furnace
The small-sized oven occupies only 0.4 square meters.
It is laid out from bricks placed on edge or flat. If you know the basic rules for building a stove, then you won’t even need a diagram or preliminary calculations to build it. Due to the relatively light weight of the mini-oven, it does not require a foundation, but in this case a thick, durable board, well secured to the joists, should be used for the floor.
Order of masonry
The first row of bricks is laid out on the sand (12 bricks are used without fastening) strictly horizontally, which can be checked with a level. On top of the first row we thinly apply a clay solution and install the blower door. Pre-wrap the door with a piece of asbestos cardboard or wrap it with cord. Secure it with wire.
The temperature expansion coefficients of clay and cast iron differ significantly, so it is impossible to lay a cast iron hob on top of clay.
It is better to install an attached or nozzle pipe made of light iron. This stove provides for the installation of a direct chimney.
Source
Useful tips for laying swedes
- During the entire laying process, try to monitor the thickness of the seam. It should be 5 mm.
Seam between firebox and masonry
- To prevent the brick from absorbing moisture from the mortar during laying, it is recommended to wet it before construction work. It is enough to dip it in water for at least 1 minute so that it absorbs a sufficient amount of moisture.
- Do not forget to check the vertical and horizontal evenness of the masonry. To do this, use a building level and a plumb line. Use corners to check the evenness of the corners of the oven.
- After laying the stove, wait 2 weeks until it dries well. If you build a stove in the summer, it will dry out naturally. In cold weather, use a fan.
- Any furnace master will tell you that the less metal in the furnace, the better.
Leave a gap between the seams
But for hanging masonry you cannot do without metal corners, because arched vaults are not suitable here (Swedish vaults are distinguished by their compactness). The only condition that must be observed is that you cannot do anything close to the iron or place the iron on bare brick. In all places where it is planned to join metal parts with brick, a layer of mortar of 5-6 mm should be laid.
- When laying the hob on a brick, it is necessary to lay a layer of clay mortar on it. This will protect the brick from heating.
Swedish stove
By following our detailed instructions, you will definitely be able to arrange the oven correctly. A useful video will help you clearly understand the masonry scheme.
Schemes of small brick stoves
Compact stoves do not take up much space , which is especially important for small spaces. The heaters have a rectangular cross-section at the base. The height of the stoves depends on the height of the building and the chosen model. A brick chimney is often replaced with a factory-made steel pipe.
Heating and cooking mini-oven
In small stoves designed for heating the home and cooking, a niche for the stove .
An oven or water heating container can be built into another niche located above the firebox . Niche space is often used for drying things.
Let's consider a specific diagram of a compact stove with a base size of 0.64 x 0.51 meters (2 x 3.5 bricks) and a height of 2.15 meters (32 layers of masonry) .
This heater model is designed to heat small and medium-sized houses with an area of 25 to 40 square meters . Ceramic solid (ordinary) brick is suitable for masonry.
The oven is built in the kitchen (in the middle of the room or against the wall). The furnace of this model contains the following structural elements:
Metal elements for the heater are purchased at a hardware store. The list of factory parts includes :
Photo 1. Fire door measuring 30 by 30, made of polished cast iron and fire-resistant glass. It is possible to regulate traction.
The oven and hot water tank are welded from steel sheet. Asbestos cardboard of the same size is placed under the firebox sheet For furnace work you will need:
Small heating device
Let's consider a specific heater circuit. The base of this model has the shape of a rectangle measuring 0.89 x 0.51 meters (2.5 by 2 bricks) . The height of the stove is 2 meters 38 cm .
Compact dimensions allow the heater to be installed in a corner or in the center of the room. If the dacha has a kitchen and a couple of living rooms with a total area of up to 40 square meters , the heater is built into the wall openings (interior partitions).
The main elements of this model:
A door with heat-resistant glass in a metal frame or a solid cast-iron door is built into the firebox portal. The furnace is built on a solid foundation buried in the ground. The foundation is made solid or columnar.
Important! The stove is made of ceramic and fireclay bricks. The firebox is made of fireclay bricks, and the lower and upper parts of the heater are made of ceramic bricks. The masonry is done using sand-clay and fireclay-clay mortars.
