Home› Services› Floor insulation
Floor insulation technology: dry method (open laying).
Recommended insulation thickness:
- floor, ceilings - 150-200mm; non-residential attic - 300-400mm; attic - 300-400mm;
Insulation density: ~35kg/m3.
Insulation technology:
The recommended design is described at the link: proper insulation of the attic
When insulating open horizontal surfaces, such as floors and interfloor ceilings, the open laying method of ecowool is used. The insulation is evenly distributed over the surface from a hose, after which it is covered with the floor covering.
If open installation is not possible (a finished floor is laid), the insulation technology is similar to roof insulation. The only difference is that the surface is not inclined, but horizontal.
Insulating a cold attic
When insulating the attic, there is no need to cover the ecowool with anything.
There is also no need to remove old insulation when reconstructing an attic space. This is possible thanks to seamless insulation technology. Ecowool will fill all cavities and leave no voids.
As for the thickness of the insulation: we recommend a layer of at least 30 cm for a non-residential attic. This is due to the fact that warm air from throughout the house will rise upward and large heat losses will occur at the top point of the building. It is there that the heat must be reliably retained by the insulation.
You can read more about the process of insulating houses with Ecowool in the section Installation of Ecowool.
Examples of our work:
In many cases of individual house construction, it is possible and advisable to also build an attic. You may need it, for example, for your office, creative workshop, and in the summer your guests can relax in the attic. The cost of construction will not increase much, but the advantages are obvious.
- Review of ecowool materialPreparation for insulationMethods of ecowool insulation
Therefore, let's talk about how to insulate the attic, because this is the coldest part of the house in winter, and the hottest in summer.
Ecowool as the most effective insulation
Ecowool is a cellulose heat and sound insulating material that is widely used in both individual and industrial construction. Ecowool usually consists of 80% crushed newsprint, 12% borax and 8% antiseptic (boric acid is used as the latter).
The appearance of ecowool is unremarkable
All components of ecowool are absolutely harmless to humans (the common belief that newsprint contains printing lead is incorrect, since for many years newspapers have been printed exclusively using the offset method).
By the way, at the International Competition of Environmentally Safe Products, ecowool was included in the register of natural products and awarded the corresponding medal.
Why is it recommended to use ecowool for attic insulation?
Here the following advantages should be taken into account:
- ecowool ensures a seamless coating, which is of particular importance when insulating in places where the wall meets the roof of a house; ecowool has excellent soundproofing properties (for romantics who like to enjoy the sound of raindrops on the roof, please do not read this); ecowool protects the room well from overheating in summer season; ecowool does not require a vapor barrier, which is especially important for the attic floor, because the walls and ceiling of this room actively remove water vapor to the outside. As a result, ecowool most effectively regulates the relative humidity in the attic.
We recommend watching a voluminous and very detailed video about ecowool; you will find comparisons, prices, installation, and of course a full description of the material:
Preparation for insulating the attic with ecowool
The source material is transported in compressed form, which is why the insulation process begins with “fluffing” the ecowool.
For this purpose, it is “loosened” in any suitable container: vat, trough, etc., using a conventional drill. Next, you should definitely check the condition of the rafters: if the supporting structure is not reliable enough, it should be strengthened.
To apply ecowool to the floor, you need to remove the flooring
The next preparatory stage is the installation of waterproofing of the laid roof of the house, while it is advisable to install air channels on the roof slopes in order to properly ventilate them. Then they begin to prepare the attic room itself: it is advisable that there is no floor covering in it (otherwise, before insulating it with ecowool, it will have to be temporarily removed). It is also necessary to thoroughly clean the room from dust, and install protective screens in places where electrical wiring is installed or where electrical appliances are located.
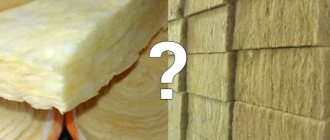
Mineral wool
The use of mineral wool has become popular due to such advantages of the material as:
- durability;
- good thermal insulation properties;
- high reliability;
- good moisture resistance.
Mineral wool
Basic data of mineral wool products are characterized according to a number of regulatory documents:
- GOST 9573-96;
- GOST 21880-94;
- GOST 22950-95.
Most modern manufacturers produce mineral wool according to their own specifications. However, these specifications meet more serious requirements than those previously included in GOST.
Mineral wool is an excellent thermal insulation material
Insulating an attic with mineral wool is not at all a difficult job. The process should begin with the roof, conducting a thorough inspection of the roof and removing any defects found. It should be remembered that the thickness of the attic insulation with mineral wool for the upper floors of structures, according to the standards, should be at least 150-200 mm.
It is imperative to take into account such a parameter as the thermal conductivity coefficient of the insulation, which is always displayed in the certificate for a particular material, otherwise the required thermal insulation effect will not be obtained.
Important! When working with mineral wool, be sure to use a respirator, gloves, goggles and protective clothing. This will protect the respiratory tract from small particles from this material.
Protective equipment - let's stay healthy!
Methods for laying ecowool
Three methods of insulation are used:
The dry backfill-ramming method. Its advantage is that this insulation technology can be implemented independently. The loosened ecowool is evenly laid out on the insulated surface, the consumption of ecowool is approximately 3 packs per 1 m2 of roofing, and the filling density must be at least 45 kg/m3. It should be noted that it is quite difficult to check the latter indicator in everyday conditions;
The method of wet-adhesive spraying, for the implementation of which it is advisable to invite specialists. The method is implemented using special blow molding equipment, and the density of the finished coating increases to 60 kg/m3 due to special treatment of ecowool with a water-based adhesive composition;
Dry blowing of ecowool using pneumatic transport
A dry blowing method that ensures insulation of all hard-to-reach areas of the roof. The popularity of this method lies in the fact that it provides optimal ratios of speed and quality of insulation, and the filling density reaches 70 kg/m3. For dry blowing, professionals are also invited, however, you can master it yourself, but you will have to rent the equipment necessary for this;
A combined insulation method in which the process takes place in two stages: the first layer is applied using the wet-glue spray method, and all underfilled volumes are blown in using the dry method.
Regardless of the method, the optimal thickness of the insulation layer is 20…30 cm.
Do-it-yourself insulation of the attic, as well as insulation of the roof from the inside, will allow you not only to save on heating in the future, but will also guarantee an optimal microclimate inside the room.
Complex thermal insulation of the attic
In this article we will figure out how to properly insulate an attic with your own hands, what technology for insulating gables, floors and ceilings, and what materials are best used for this.
Recommendations from professionals ↑
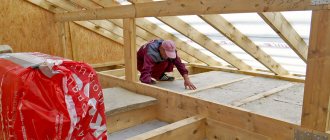
- If the distance between the ridge and the attic ceiling is more than 80 cm, this allows work to be carried out through the attic room.
- Insulation can also be applied from the ceiling side, using technological holes in the inner lining.
- If the distance between the ridge and the attic ceiling is too small to carry out the work, installation is carried out using technological holes in the inner lining, from the ceiling side.
- The chimney exit to the roof is carried out taking into account the fact that ecowool will begin to smolder at high temperatures.
© 2022 stylekrov.ru
1Why do you need to insulate the attic?
One of the most important stages in converting an attic into a full-fledged attic is the thermal insulation of the roof, walls and floor of the room.
The question of creating an attic, in most cases, arises when there is an acute lack of free space in an already used house. Therefore, the attic, basically, has to be equipped from a room that was not originally designed for use for year-round living.
The starting point is an ordinary attic, as when insulating a roof along the rafters, the roof of which is a rafter system made of wooden beams, lined with slate or tiles.
In addition to the lack of thermal insulation properties, the roof of the house is characterized by multiple micro-gaps and holes through which drafts can easily pass, and, in very advanced cases, precipitation can leak.
The lack of monolithicity of the roof structure is fraught with the fact that it is unlikely that it will be possible to properly warm up the attic furnished from the attic even when using a very powerful heating system, since the heat loss from the room will be colossal.
Insulating the attic floor (gables, ceiling and floor) eliminates all of the above problems. The insulated attic will turn into a room comfortable for year-round living. Insulation guarantees an optimal indoor microclimate.
You will be able to maintain the desired temperature without any problems, since in winter the thermal insulation will prevent heat exchange between the warm air inside the attic and the frozen roof and cold air outside, and in the summer it will protect the room from heating up under the influence of sunlight.
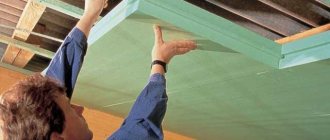
Installation of waterproofing film on the attic roof
A thermally insulated attic, as well as insulating the ceiling of a cold attic with mineral wool, provides enormous space for maneuver - it can be equipped with a full-fledged living space, a recreation area for children, or functional rooms - a workshop, a bathroom, a study or a library.
1.1What is “correct” insulation?
The technology of complex thermal insulation of the attic involves the use of not only insulation materials - materials with low thermal conductivity, but also additional waterproofing and vapor barriers that will protect the room from precipitation and any drafts penetrating from the outside through the roof.
It is worth understanding that such multi-layer insulation will certainly take up some amount of free space, but not everything is so scary - properly thought-out thermal insulation, the thickness of the insulation in which does not exceed the thickness of the load-bearing rafters, will “eat up” space equal only to the thickness of the decorative cladding, since the the insulation will be recessed between the rafter frame.
The first layer when insulating the roof, to which maximum attention is paid in the do-it-yourself attic thermal insulation technology, since it is through the roof that maximum heat loss occurs, is the waterproofing layer.
For this, special waterproofing films are used, as when insulating the roof of a house with your own hands, which tend to allow steam to pass through, but prevent the penetration of water. Such films reliably protect the insulation from any precipitation that has penetrated through the roof of the house, and allow the condensation formed on it to evaporate.
The second layer is the insulation itself - a material with low thermal conductivity, which is a barrier that prevents heat exchange between the warm air inside the attic and the cold air outside.
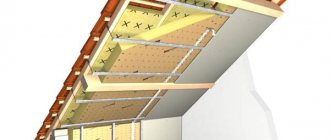
Scheme of proper attic insulation
Next comes a vapor barrier film, which protects the insulation from the formation of condensation due to air humidity and temperature changes. And our “sandwich” is completed by cladding, which can be made from any decorative material - plasterboard, OSB, chipboards.
Work order, technology, diagram
The main task of insulating an attic is to reduce heat loss through the roof, so when carrying out the work yourself you need to create the correct operating conditions for the insulation cake.
The step-by-step work order is as follows.
- Roofing material.
- Lathing.
- Waterproofing.
- Insulation.
- Vapor barrier.
- Interior decoration.
The diagram clearly shows the sequence of layers of the insulating cake.
Let's take a closer look at the main stages of the work.
Laying waterproofing
The waterproofing is laid in horizontal rows and secured to the rafters using a construction stapler. The edges are overlapped by 10-15 cm and secured with mounting tape.
Attention! It is not recommended to use stationery tape to fix the vapor barrier, since at sub-zero temperatures and a humid environment its adhesive layer loses its properties.
Laying insulating material
Insulation is laid on top of the waterproofing. Starting from the bottom, the insulation mats are laid in a checkerboard pattern. The seam in the previous row should be joined by a single sheet in the next row.
The width of the insulation should fit tightly between the rafters, leaving no gaps.
Installation of vapor barrier
The last step is to cover the insulating structure with a vapor barrier membrane. The film is attached to the rafters with a construction stapler, with an overlap of at least 10 cm at the joints, and the edges are secured with mounting tape.
The sheathing is stuffed over the structure so that there is a gap of at least 3 cm between the sheathing and the facade for air circulation. OSB or plasterboard is attached to the sheathing. After this, you can begin interior finishing work in the attic.
1.2 Requirements for attic insulation
Since they resort to arranging an attic in a house where it is necessary to create additional free space, it is very important to use this free space as rationally as possible.
Insulation of the gable using insulation for the roof, ceiling and floor of the attic with your own hands must be done using materials with low thermal conductivity in the range of 0.03-0.04 W/mk, which allows you to obtain effective thermal insulation with a minimum thickness of insulation.
When choosing the thickness of the material, proceed from the fact that it should not be greater than the length of the rafters, since the heat insulator recessed between the beams makes it possible to attach the sheathing directly to the rafters, which further saves free space.
It is also recommended to give preference to materials that, in addition to low thermal conductivity, have good sound insulation properties. The roof of the house itself, as a rule, is made of slate or tiles - materials that practically do not suppress sounds, so additional soundproofing of the attic will not be superfluous.
When choosing the best way to insulate your attic, try to avoid flammable materials. Fire resistance is an important factor due to the fact that the attic structure itself consists almost entirely of wooden elements. This requires responsibility in addressing the issue of fire safety.
Thermal insulation of attic floor joists
2Review of the best materials
Based on the above requirements, we can conclude that for do-it-yourself attic insulation, three types of heat insulators are best suited
- Insulation based on mineral wool (excellent insulation of the attic of a private house); Ecowool (cellulose insulation); Insulation made from extruded polystyrene foam;
These materials are from approximately the same price category, but each of them has certain advantages and disadvantages that must be taken into account when choosing.
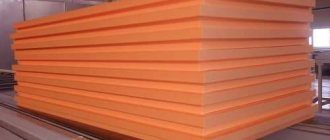
It is worth saying that do-it-yourself attic insulation can also be done using budget materials, the same polystyrene foam, which is excellent for thermal insulation on the outside of the gable, or for insulating a joist floor.
In general, the best option for insulating the attic ceiling is mineral wool. This is a lightweight material with low thermal conductivity (about 0.035 W/mk), low hydrophobicity (the percentage of absorption when completely immersed in water for 24 hours is 1% of the volume of insulation), and durability.
Insulating the attic with ecowool (not to be confused with mineral wool), a loose cellulose insulation material, is an excellent option for floor insulation. You won’t be able to apply ecowool on vertical and sloped surfaces with your own hands, since special equipment is required, but the thermal insulation of a log floor with this material is carried out using improvised means without any problems.
Roof insulation with mineral wool
Briefly about the main thing
The very name of ecowool hints that it is an environmentally friendly and harmless insulation material. In fact, one can argue with this statement, as well as with the fact that this is one of the cheapest and most effective thermal insulation materials.
But when compared with expanded polystyrene or mineral wool, it actually has many impressive advantages, in particular - excellent heat capacity, vapor permeability, resistance to harmful biological factors, and a high degree of sound insulation.
Disadvantages can be found in any material, the main thing is that they are not critical and can be leveled out by following the installation technology. In this regard, ecowool is a very worthy insulation material.
Read later
We will send the material by email
2.1 Insulation of the pediment outside the attic
We’ve sorted out the materials, now let’s look at how to properly insulate an attic in practice and insulate the roof using polyurethane foam.
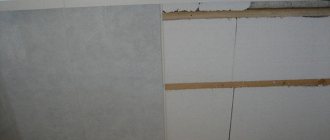
It is recommended to insulate the outside of the pediment using slab insulation, since they do not require a supporting frame and can be attached to the surface of the pediment using glue.
- The surface of the pediment is cleaned of dirt; if there are oil stains on the material, they must be degreased with gasoline or acetone; The pediment is coated with a deep penetration primer, which is necessary for better adhesion of the adhesive mixture and the pediment; Along the lower contour of the pediment we mount a metal profile that will hold the first row of insulation; We dilute the adhesive mixture according to the manufacturer’s instructions. We evenly apply glue to the back surface of the slab insulation and install the thermal insulation from bottom to top; The top row of insulation must be adjusted in size so that the gap between it and the roof is minimal; The joints between the thermal insulation and the roof are sealed with polyurethane foam; The surface of the thermal insulation is covered with a moisture-repellent primer; Next is done plastering the insulated pediment using fiberglass reinforcement mesh; If desired, the plaster can be painted, or the pediments can be finished in any other way.
Safe wallpaper
Let's say that you decide not to buy vinyl wallpaper because you are not sure that you will be able to correctly choose the appropriate option. What alternative should I find for them?
Fiberglass wallpaper is safe and of high quality. Another option is expensive wallpaper made from safe materials, such as bamboo or cork. Well, or just take paper ones, they are not so strong and not so durable, but still, from a safety point of view, they definitely won’t let you down.
https://youtube.com/watch?v=g1H4iN9DUuk
2.2 Floor insulation
Thermal insulation of the floor can be carried out with any material that meets the requirements of thermal conductivity. The best option is insulation with mineral wool, polystyrene foam, or ecowool. When insulating an attic with ecowool, be prepared for the fact that the material will shrink by about 20%.
Installing a vapor barrier over insulation
Let's consider the simplest option for insulating the lag floor of an attic with mineral wool.
On the rough floor covering, a vapor barrier film is laid and secured.
We fasten the film with a stapler so that it fits tightly to the joists and cross boards; We lay insulation between the joists. When using roll or slab thermal insulation, the insulation must be adjusted in size so that it is in close contact with the joists, since the presence of cracks increases the overall thermal conductivity of the insulation; A second layer of vapor barrier film is rolled out and secured on top of the insulation. The film must be solid - the logs are covered together with the insulation; The front covering of the floor is installed from wooden boards.
Installation process
We have already managed to study the features and characteristics that environmentally friendly insulation materials have; it remains to consider the method of installing them on the surfaces being treated. The installation of rolls, slabs and mats made from plant components is no different from the installation of mineral wool.
Preparation
At the first stage, the surface is prepared by removing old sheathing and insulation elements. It is better to plaster large chips and defects.
It is also necessary to clean the walls from dirt and dust. Now you can begin the main work.
Lathing
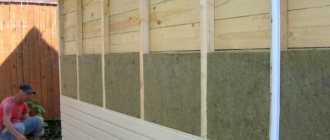
For the best effect, it is necessary to install a slatted frame made of wooden planks or metal profiles on the external walls of the facade. The thickness of the sheathing should correspond to the thickness of the insulation. The step between the frame elements is marked taking into account the sizes of the slabs or insulation rolls.
Laying the material
Mats or slabs of vegetable insulation are placed tightly and without gaps between the guide rails, starting from the bottom. A cladding is installed on top of the insulation. If the attic space is being treated, the material is placed between the rafters.
2.3 Ceiling insulation
- We check the rafter system for defects, and if they are found, we replace or restore the damaged areas; Using a construction stapler, we attach a waterproofing film over the entire surface of the ceiling; We install insulation between the rafters. Mineral wool is a light but dense material; if the size is correctly adjusted, it will stay between the rafters without additional fastening, however, if necessary, metal staples can be used for fixation; We fix a vapor barrier film on top of the thermal insulation; We carry out cladding with decorative material - plasterboard, OSB, fiberboard, plywood.
2.4 DIY attic arrangement (video)
Nowadays, low-rise construction and frame wooden housing construction are developing rapidly. But the size of the plots and expensive land force us to take a thoughtful and thorough approach to the design of a residential building.
To increase the area of a functional home, the most successful solution would be to design a house with an attic room. But in the future, special attention should be paid to insulating the attic and taking into account its design features. Namely, that it does not have a “thermal cushion”.
The attic has more contact with the street than any other room in the house. And if the under-roof space is not insulated properly, then all the warm air will escape outside.
In this regard, it is necessary to thoroughly approach the issue of thermal insulation. Unlike insulating an attic, in an attic it is necessary to insulate the floor, walls and roof. Another important feature is the need to insulate the inclined surface (This is at least two slopes.
At the same time, do not forget about the gables.). Often it is the insulation of the attic roof that causes the greatest difficulties. Therefore, it is necessary to approach the choice of insulation material wisely.
Previously, the choice was between several slab insulation materials presented on the Russian market. But now there is an alternative. Ecowool is a cellulose loose insulation material.
When insulating an attic, ecowool is placed in the interframe space. Insulation is carried out both at the construction stage and in a completely finished frame. The difference is that at the construction stage, installation can be done not only mechanized, but also manually during the gradual construction of the frame structure.
If the frame is already installed, then technological holes are made in it, and cotton wool is blown through them using a blowing machine. To do this, it is not necessary to involve specialists. All work can be done independently.
How was the roof insulated?
At the facility that you now see behind me, the roof was insulated in the summer of 2022, when the entire country was covered by coronavirus quarantine. The craftsmen insulated the under-roof space with mineral wool. We sewed everything up with a vapor barrier film. Everything was done using technology. No complaints. Actions were performed in a certain sequence in accordance with the rules and recommendations, but...
When the time came to heat the country house, certain difficulties arose. The customer, who is also the homeowner, started up the heating system and began to observe the following problem. He was surprised by condensation and water leaks from the vapor barrier film. Why did this happen? Where did the condensation form and most importantly, what triggered its appearance? The owner’s natural desire was to find out everything thoroughly.
The customer called a team of careless builders and forced them to dismantle part of the isolated under-roof space. The first thing we saw here?! When we arrived here, we saw that the membrane and vapor barrier were installed incorrectly on the side of the ventilation gap. Conventionally, there was an incorrectly folded film. And the condensate that passed through the insulation layer of mineral blocks hit the vapor barrier.
For obvious reasons, the condensate could not escape further into the ventilation gap. Accordingly, the mineral wool got wet. Over time, more and more water was formed. The cold weather has arrived. The mineral water mats stuck together with the vapor barrier, look at the screenshot below. They literally couldn’t even tear her off. Thus, we see here a clear violation of technology - an incorrectly installed membrane.
As for the roof structure, everything seems to be in order. There is a ventilation gap. There is a sheathing. The rafter system here is 150th. According to the standards of our region, roof insulation should be two hundred, at least 200 millimeters. When we arrived, we observed a layer of one hundred and fifty millimeters here. Taking into account all the features, we decided to increase the roof to twenty centimeters. Now let's go upstairs and see what's happening there.
On the second floor of a country house
Well, dear friends, we have climbed to the top floor of this wonderful country house. Our craftsmen have already prepared the entire roof for blowing in ecowool. We are currently in the process of installing fluff pulp. The cavities are prepared. Now you will see everything for yourself. Don't switch to other videos. Be sure to watch this video to the end to get comprehensive answers to all your questions.
In short, what else would you like to tell?! We will now insert photographs of the roof that was before and after the preparatory measures. What have we done? First, they completely cut off the vapor barrier film, which, as you remember, was laid in gross violation of technology. We completely removed the vapor barrier from the side of the ventilated beam. An additional ventilation gap was installed.
Instead of a vapor barrier sheet, a three-layer super diffusion membrane was installed. Why did we do this? What is the function of the membrane? It acts as a waterproofing and wind protection from the street side. It also draws out condensed water formations from the insulation on the side of the house, respectively. This is physics. All the heat rises up, and it will rest against the insulation.
Of course, a dew point will form there. The condensate will go further into the very ventilation gap that we are talking about today, in fact. It is necessary to put film there. Otherwise, it would have been impossible to install a category “B” vapor barrier there. This led to the subsequent dismantling of the entire insulation pie, which hit the client’s finances. Let's not dwell on this and move on to the constructive.
Correct actions with the rafter system
Let me remind you for those viewers who listened. We increased the rafter system from 150 to 200 millimeters. Why did we do this? To comply with insulation standards in a specific region of the Moscow region. If we left 15 centimeters, there would be a risk that we could observe icicles on the roof eaves in the future. There would be freezing. Moreover, when the heating was turned on here, the boiler would have to work at its maximum capacity.
Two hundred millimeters of insulation is perfection itself. That's how it should be done. We tightened everything completely again with a membrane. They hemmed it with a board that was not the first freshness, so to speak, as shown in the picture just below the text of the article. They were already here, lay there for a long time, dried up, dried out. Why did we use a board of obviously poor quality?! The question is quite appropriate. First of all, because a suspended ceiling will be installed here.
The board, for obvious reasons, will be closed. A priori it will not be visible. Everything will look its best – beautiful, prestigious. The most important thing for us is functionality. What have we achieved by redoing this roof? We have received correct, good, solid insulation, through which air will not leak out somewhere and heat will not escape. But most importantly, we have completely eliminated any risk of condensation. He will never be here in his life!
Spliced rafter system is another problem
There is one more thing I would like to say, dear viewers. What problem did we encounter when we arrived at this site upon request? This is a spliced rafter system. I don't know why the vast majority of builders neglect this and put flax wool between two rafters. They simply, stupidly put everything on ordinary nails. They don't seal. For this reason, the board naturally moves. The structure begins to dry out. Bridges of cold open.
When this fact is not taken into account during insulation, a relatively small hole creates a very serious problem. How do we solve this problem? We go through all these things with flax wool. We take an ordinary chisel and begin to caulk each of these cracks. Nothing complicated at first glance, but this is for us - specialists with higher education, many years of experience, skills and experience gained over more than ten years.
A few words about the roof transom system
I would like to devote several paragraphs of the current article to her. I already talked about this below, but now I’ll remind you, may the viewer forgive me for the tautology. Here it is in front of you - the first (left) and second (right) roof slope. Accordingly, a crossbar system runs across it. What function does it perform? This is a re-upholstery of the rafter system, some kind of reinforcement. It is insulated horizontally and does not require compliance with the 65th density. There will be a mound of cellulose 200 millimeters thick.
With a horizontal laying density of ecowool of 35 kilograms per cubic meter, this is more than enough. The maximum permissible shrinkage of ecowool in these circumstances is two to three centimeters. It should be noted that all of this applies to 35th density. When laying dry cellulose with a density of sixty-five kilograms per cubic meter, there is usually no risk of shrinkage. Ecowool with a density of 65 kg/m3 does not shrink.
Now I'm talking about dormer windows. What we did on the left and right, respectively. We must have very good ventilation over there! So that the condensate that will get there will evaporate on its own. Now let's get back to the design features. Our craftsmen left us a small technological area. What is it for? So that the installer can freely get here and do his insulation work.
We will fill this relatively small distance under the roof with ecowool. See the picture below in the text. Let's leave it. I don’t know whether you can see it in the background or not. We just have a hole cut. This is the kind of preparation we have here. Everything here will be filled with premium cellulose. Pay attention to tightening with blind bolts. We did this additionally, on purpose, because before us everything here was secured with ordinary nails.
On the other hand, we observe the so-called dormer window. For those who do not know what it is, a clear definition is given below. This is the first one. The second window is located on the back side, yes, of course. A dormer window is a structural opening in the roof of a building, specifically designed for natural lighting and ventilation of attic spaces, sometimes for access to the roof.
The rafters here lie 150 - one hundred and fifty millimeters, respectively. There is no need to increase anything here a priori. Let's bring the insulation to 150 - ten centimeters higher. A relatively small supply of air will remain, which is necessary to remove condensed moisture with all the ensuing problems. Of course, it is impossible to completely block this; I would say it is strictly prohibited.
What will happen here after insulation with ecowool?
After we insulate, our guys will stretch the membrane fabric - three-layer, super diffusion. Secure everything with a stapler. They'll shut up. They will stick a hose here, after which they will carry out additional insulation of the under-roof space with ecowool. This concerns the crossbar system, which, I think, we paid enough attention to. If anything was not clear, write questions in the comments under the video.
Two words about floors and plasterboard walls
What else would you like to focus on? Pay attention to the walls made of plasterboard sheets. What did we do with them? This house is built of red brick, more precisely from foam block, which is lined with brick on the outside. After a short study, we decided to insulate everything from the inside with eco-wool under plasterboard. We made a profile system and tightened it. Especially for you, dear friends, we left one small layer to clearly show everything.
We made improvised technological holes. They blew it. The thickness here is about seven dashes ten centimeters. It's in every room. For one square meter of plasterboard sheet we get three to four holes. To process everything correctly and clearly without errors or any omissions. Ecowool lies tightly in them. She won’t go anywhere, she won’t sit down, of course. Then everything is covered with a second layer of drywall.
Thanks to our masters. Everything was carefully and competently prepared. Oh, something broke, but nothing terrible in principle. It's all tightened with self-tapping screws. Using the frame posts and plasterboard walls, we additionally insulated the Mauerlat part of the roofing system. Our rafter leg goes further. There is a purr on top. It is covered with cotton wool. What did we get in the end? Closed loop and proper insulation of the second floor, respectively.
How ecowool insulation occurs - a clear example
In my hands you see a metal horn. We use it to insulate the roof with ecowool. How exactly does this happen? What are we doing? In fact, everything is elementary and simple to the point of genius. When we have fully prepared for the thermal frame system. We stretched the membrane and mesh, and installed a counter block. We make a puncture, watch the video at this moment. I show it clearly. We immerse the hose to the very end.
An important point in this process is to immerse the pipe to the end point so that all parts are blown with dry cellulose without any omissions. Accordingly, our needle touches the inner wall of the thermal frame. When the master starts pumping cotton wool here, when moving in different directions, the cellulose particles will scatter into all the holes and crevices. As a result, ecowool will fill the entire insulated space, leaving no chance for the cold bridge.
And now, dear friends, we will try to run ecowool through a hose and begin pumping the cavities that are prepared for this. Pay attention to how carefully and meticulously the master works - blowing through every centimeter, if not millimeter, of the under-roof space. This is clearly visible in the close-up of the video. Don't miss out on the main thing! Rewind to watch again and get as much information as possible.
While the pumping is going on, I wait quietly and calmly. Upon completion, you should get a kind of pillow, which we call “ecowool in stone.” At the exit we have a slightly convex, protruding cavity, I would say, filled with ecowool. Here now there are about 55 kilograms per cubic meter. Later, when we finish filming the video, the master will perform additional compaction to sixty-fifth cellulose density.
Shrinkage of ecowool does not occur even at fifty-fifth density with such a roof slope. The slope here is about 26 degrees, if measured by eye. The cotton wool will definitely never go away. We guarantee this not even 100, but 200 (two hundred) percent. Read longreads about ecowool on our website, as well as on the Yandex Zen channel, if you want to learn as much objective information as possible about this insulation.
Once again about the roofing system of a country house
Our roofing system consists of a rafter leg and crossbars with a cold attic space under the roof. When we arrived here, one interesting detail caught our eye! The design was missing one of the most significant elements. It lacked a cold, relatively small triangle. In other words, there were no leaks on both sides. For obvious reasons, there was no blowing. Condensation was everywhere and everywhere, as they say.
How did we solve this problem? Please note that at the top we have placed a ventilation grille in a characteristic white color. The same thing happens on the back side of the building. How did we do it? They simply knocked out one brick on one side and the other, respectively. In this way we ensured proper ventilation of that same triangle. This way we got rid of condensation and reduced the risk of its formation to a minimum.
Now condensed formations, even if they form in small quantities, the air will weather them naturally. Remember, friends. Air is necessary, like water, for the life of a person or animal. To my surprise, many builders do not do this, neglecting the technology or clearly violating it. Nothing good, as you understand, will come of this, but let’s not talk about sad things, let’s move on.
