Often homeowners prefer to assemble simple and useful homemade products from scrap and unnecessary materials, instead of buying ready-made ones. And a potbelly stove is one of these useful devices.
The main feature of a potbelly stove is that it heats up as quickly as it cools down. Therefore, the scope of its use is narrowed mainly to those rooms where it is necessary to provide rapid heating, while the appearance of the device is often completely unimportant for the user.
You can make a potbelly stove with your own hands, and, if desired, modernize it to achieve more efficient heat transfer.
Are you also thinking about assembling such a homemade product and don’t know where to start? We will help you in implementing the task - the article discusses the procedure for assembling various versions of a homemade stove, drawings and diagrams are provided.
Also discussed in detail are ways to improve a homemade potbelly stove, as a result of which the efficiency of the stove will become noticeably higher.
Setting the register
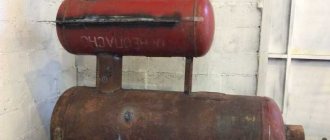
You can make water heating using a boiler welded from sheet steel or a coil from pipes with your own hands if you have the skills to work with a welding machine.
When making it yourself, you need to take into account that the thickness of the sheet metal or pipe walls must be at least 3-5 mm. Heating of such a coil will occur slowly compared to thin-walled devices, but its service life will be much longer. Burnout of thin metal walls will lead to a major overhaul of the furnace in which the heating element is installed. In self-made coil designs, an old battery (heating radiator) made of cast iron can be used. To use it as a heat exchanger, preliminary preparation is required: the radiator must be disassembled into sections, washed from the inside to remove scale and rust with appropriate compounds and checked for defects (leaks). Reconnect the serviceable sections, using an asbestos cord impregnated with drying oil as a seal between them. The prepared radiator can be installed in the firebox of a brick or metal stove, either on the side or above the flame. In the latter case, the battery must be located in a horizontal plane.
The welded heat exchanger of a water heating system can have different shapes. If the oven is not planned to be used for cooking, the register or boiler can be made in the form of a U-shaped structure from pipes or sheet metal. So the efficiency of a homemade boiler can be increased by increasing the surfaces heated by the flame. To allow cooking on a stove located above the firebox, a different design will be required. In this case, the containers located on the side surfaces of the furnace and the stove, located as it is usually installed in cooking structures, will heat up.
Determining the volume of fuel fill
For the potbelly stove to operate efficiently, it is important to load the optimal amount of fuel into it, and for each type of fuel it is necessary to find its own indicator. If you overload the furnace, there will be too many combustion products and they will block circulation; if you underload, there will be few of them, which also makes circulation impossible.
The volume of the bookmark is selected as follows:
- fuel is collected in a bucket,
- take a handful from the bucket and, placing it in the firebox, set it on fire,
- add fuel in small portions until the initial section of the hog is cherry red hot. Now they estimate how much fuel is taken from the bucket - this is the minimum volume of the stowage,
- continue to add fuel (the portions must be increased) until the dimensions of the hot section reach 80%-85% of the length of the “hog”. At this moment, the volume of fuel taken from the bucket will correspond to the maximum fuel load.
The test is carried out in moderate lighting: if during the day, then in cloudy weather (winter), if it is clear outside, then in the late afternoon. When loading high-calorie fuel (pellets, anthracite), the hot area sometimes takes the form of a ring with different widths, occupying different positions along the length of the hog.
Then the volume of the bookmark is determined as follows:
- maximum: the section of the hog farthest from the furnace is hot for 1/3 of its length,
- minimal: the hot zone is located in the middle and is 3-4 palms long.
Furnace design, its specifics
The important elements of a potbelly stove are:
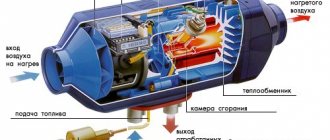
Furnace compartment. It is located approximately in the middle third of the oven. Designed for burning fuel - wood or coal. Equipped with a door on the side wall of the oven for loading. An ash pan is necessary to collect solid residues after burning wood or coal. It is disconnected from the part for the firebox at the top by grates, which are cast iron rods of a specialized shape. Ash awakens in the gap between them and penetrates into the waste collection tray. At the bottom of the ash pan, a bottom is made of sheet metal 1.2–1.5 mm thick. The container with the coolant is a tank made of sheet metal, filled with water or the rest of the heating agent. This device requires absolute tightness. At the top of the tank there is a hole for the outlet of water, at the bottom there is a return pipe through which the coolant cooled in the heating system is returned. The smoke exhaust duct is installed on top of the stove body; it can be vertical, horizontal or inclined. It is brought out through the wall. For potbelly stoves, in most cases a pipe diameter of 150 mm is used. The supporting part is legs made of profile metal, providing a clearance between the body and the floor of at least 20–25 cm. Under them it is necessary to install a protective sheet of metal with an asbestos backing
This is very important if the heating unit is placed on a floor made of combustible materials.
Pipe coils
The design of this unit depends on the design of the furnace. There are different types:
- With right angles. Such thermal units are made of sheet metal up to three millimeters thick. Naturally, the most technologically advanced pipe coil is made in the form of a jacket located around the combustion chamber. The distance between the walls of the jacket and the furnace body depends on the volume of the heat exchanger. The higher it is, the very slowly the heating of the coolant in it occurs. Often containers are installed on top of the combustion chamber, but in this case the surface for cooking the stove becomes inaccessible.
The quadrangular shape of the stove is most suitable for a potbelly stove
Cylindrical vertical potbelly stove is very cheap
A potbelly stove can be made from a metal pipe needed for a high-pressure pipeline
Lining can be compared with thermal insulation
You can also heat the room with sawdust
How to increase the efficiency of a potbelly stove and create a homemade efficient stove
Considering all the innovative ideas offered on the Internet to turn an ordinary potbelly stove into a super economical device, it is not difficult to come to the conclusion that most ideas come down to the following methods:
- Increased efficiency by using the effect of a pyrolysis boiler;
- Installation of additional screens to create a convection effect;
- Conversion into a long-burning furnace;
- Installation of additional heat exchangers for additional fan blowing;
- Installation of additional elements for accumulating and preserving heat after the combustion process has ended.
One of the most justified methods for increasing the efficiency of a potbelly stove is the option of introducing additional elements into the design. Simply put, converting the furnace into something resembling a small pyrolysis boiler. To do this, 2-3 plates are welded into the upper part of the firebox, which change the direction of movement of combustion products and light gases. A tube with a gate is welded through the furnace body into the cavity between these plates to supply air into the secondary combustion chamber. When the furnace is ignited, the damper closes and the air supply to the chamber stops. After the stove reaches the required temperature and the firewood or briquettes begin to decompose into simple substances under the influence of temperature, the damper opens and air begins to flow into the secondary chamber. Under the influence of temperature and when oxygen is supplied from outside, the light gases in the secondary chamber ignite, and thus the combustion process begins. With such re-equipment, the efficiency of the potbelly stove increases to the maximum, adding another 12-15% to the usual 50-70%.
It is theoretically possible to turn an ordinary potbelly stove into a Burelian, but it is unlikely to work. But increasing efficiency through the use of convection is quite simple - you just need to install additional screens on the side walls. By the way, this is exactly the type of stove that is used in sauna stoves, with the only difference being that in a sauna stove a heater is placed at the top, but here the screens simply contribute to the beginning of the movement of air masses.
To increase the burning time of a potbelly stove, it is necessary to ensure a tight fit of the firebox doors and the vent to the body. In this case, the combustion process can be controlled and maximum efficiency of fuel combustion in the furnace can be achieved.
You can achieve quick heating of the room by installing heat exchangers in the housing. When a small fan blows heated metal, the room will warm up faster, which will have a slight positive effect.
But there are several ways to preserve heat from a potbelly stove. The easiest way is to place a container on the stove and fill it with quartz sand. Only 20-25 kg of sand can keep warm for 12-15 hours. The second option is to build a brick wall from fireclay or red brick around the walls of the furnace. This technique will allow you to retain heat for an even longer time.
Now that we know several ways to increase the efficiency of a conventional potbelly stove, it’s quite easy to decide on the best option and try to optimize the design yourself.
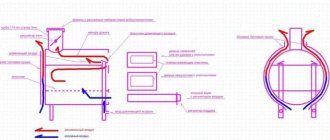
Making a potbelly stove with a hydraulic circuit with your own hands
When installing this type of heating system, you can either build a water boiler into a potbelly stove or create the stove itself from scratch. Thanks to this, figuratively speaking, the process can be divided into 2 stages.
Development of the potbelly stove
Before work begins, drawings are drawn up that include all dimensions of the furnace, and key materials are prepared for working with metal: an inverter unit, a hammer, an angle grinder, as well as pliers and special protective clothing.
When creating a diagram of a potbelly stove with a water jacket with your own hands, it is important to take into account the thickness of the components of the future unit. Once the metal has been cut, we proceed to the next steps:
Once the metal has been cut, we proceed to the next steps:
Combine the bottom with the walls, excluding the front. All parts should be welded at right angles.
Important: It is better to place the bottom of the stove at a level of 25-30 cm from the floor. Likewise, engineered iron legs can reduce the effect of heat on the flooring
A partition is welded into the space between the combustion chamber and the blower. You need to drill several longitudinal holes in it through which the ash will be removed.
The blower opening must be up to 3 cm smaller compared to the blower itself.
- Openings for doors are made on the front wall. After which it can be placed to the key structure;
- Roof protrusions are added to both sides of the front part and doors are installed;
It is better to equip all doors with deadbolts
A chimney pipe is welded to the part on top of the stove. At the end of the work, all parts should be checked for flaws in the seams. If none are found, we proceed to the second stage - adding a hydraulic circuit.
Adding a hydraulic circuit to a potbelly stove
The basis of a similar type of furnace is a pipe coil, which can be constructed from various materials, for example, hollow steel pipes or steel sheets. In addition to the heat exchanger, to create a potbelly stove with a hydraulic circuit you will need:
- Finished furnace body.
- Heating appliances.
- Pipes.
- Sheets of metal.
The system installation process is as follows:
Two holes are made on top of the base of the potbelly stove for the supply and return of water.
Drawing up a drawing of a future potbelly stove with a hydraulic circuit, created on your own, can help make the work easier.
- A water tank is formed from metal or other suitable non-usable materials; the largest space should be allocated for it when compared with the combustion chamber and ash pan. Holes for the pipes are made in the tank, then it is placed behind the combustion chamber. The space is disconnected by a sheet of metal.
- Next comes the process of installing the pipework. It can be one-pipe, two-pipe or manifold.
Important: A two-pipe design is considered more preferable, as it makes it possible to change the temperature using installed taps and provides the same heating, unlike a single-pipe design. The collector is considered very difficult for independent construction
The next step is the methodical connection of pipes with heating devices throughout the house.
It is recommended to install heating appliances under windows. This will increase the heat conductivity of the stove. The design of a potbelly stove with a hydraulic circuit is examined for the absence of holes where water can leak through the circuit.
An expansion tank is installed to the supply line, which will prevent the supply of cold water. Its size is selected based on the volume of water that will be located in the entire system - the tank must be made 20% larger.
Example of a potbelly stove with an expansion tank
With proper construction, the water will heat up in the heat exchanger, pass through the pipes to the heating devices, cool and return to the pipe coil.
We recommend reading in detail about the types of heat exchangers for all this material.
The finished structure can be painted or finished using brick, depending on what appearance the owner prefers.
Video: project of a potbelly stove with a hydraulic circuit
With the help of a potbelly stove with a water jacket, designed with your own hands, you can save a lot on heating a country house. Such a structure can provide the required amount of heat to any room.
Care and maintenance of the potbelly stove
The stove will serve you for a long time if you follow the rules for caring for it:
- The condensate collector installed on the chimney must be opened weekly to drain the water.
- at the beginning of the heating period, the chimney must be cleaned of soot with a specialized tool.
- During operation, the stove body and pipe must be constantly monitored for smoke penetration into the room.
- Monitor the condition of supply and exhaust ventilation.
Self-made iron wood stoves can not only be spectacular, but also become a real interior decoration of the room. But do not forget about the need to follow all installation and operation rules.
Registers for a water-heated furnace
When creating a water heating system, a heat exchanger is used. It may be in the form:
- small boiler;
- coil;
- register.
The main advantage is that a standard water-type heating design can be connected to the heat exchanger.
Registers may have different structures. Most often they are made of steel sheets or metal pipes.
A high-quality register should work in such a way as to ensure the highest heating of water and its continuous and uniform circulation throughout the system.
When creating a register, it is necessary to pay special attention to the heating area and a suitable shape that will give better water circulation. It should be noted that a heat exchanger made of steel sheet is easier to use. It is easy to clean from the deposits that have formed, and it is much cheaper in cost.
However, its heat-absorbing properties are not so high. Registers and coils are more efficient since they are made from pipes and provide maximum heating area
It is easy to clean from the deposits that have formed, and it is much cheaper in cost. However, its heat-absorbing properties are not so high. Registers and coils are more efficient because they are made of pipes and provide maximum heating area.
Material selection and tool preparation
The following materials are required to make a potbelly stove:
- body: steel sheets 5 mm thick,
- chimney: pipe with a wall thickness of 3 mm,
- legs: any rolled metal, for example, angle, profiled or round pipe, etc.,
- water heating tank: steel sheets 3 mm thick,
- oven doors with hinges.
A set of tools required:
- grinder with several cutting discs for metal (diameter of the working part - 125 mm),
- welding machine designed for welding current from 200 A,
- hammer,
- pliers,
- metal brush.
Construction of an exhaust furnace with a water circuit
The design consists of two chambers connected by a pipe through which air is supplied. When heated in the lower tank, the fuel forms oil vapor. In the pipe it mixes with air, causing the combustion process to become more intense, and in the upper chamber it burns out. The products of the chemical oxidation reaction of the substance are removed through the pipe.
When making a unit with your own hands, the design is often supplemented and changed depending on the required functions of the product and the material used. The thicker the steel of the body of a homemade oil furnace for mining with a water circuit, the longer the device will last. In addition to sheet steel, unnecessary cylindrical products (for example, gas cylinders) are also used.
Equipping a potbelly stove with a hydraulic circuit
To remove this significant design disadvantage, such heating units are equipped with an additional heating system.
The purpose of this modification is to increase the overall heat capacity, which will make it possible to maintain a favorable temperature in the room for a longer period and, therefore, to fire the stove less often.
The heating medium is heated directly from the combustion chamber of the furnace. There are several options for this:
- Arrangement of “pockets” on the side walls into which the coolant is poured.
- Installation of a water tank with outlets to a traditional heating system.
- The process of installing a collector around the chimney very close to the stove, passing through which the air is heated specifically from the chimney.
- Installation of a water heater in the combustion chamber of a furnace.
The potbelly stove can be used for traditional heating
When starting to make a potbelly stove with a water heater, the home craftsman focuses, first of all, on the materials available and determines the heating method himself.
The advantages of this heat supply device include its speed. The room can be heated to a suitable temperature too quickly, and maintain the required level for a long time.
The disadvantages usually include the following:
- Such a stove requires continuous attention and timely heating within 24 hours.
- In a house outside the city, where you sometimes appear as a coolant, it is necessary to use antifreeze or mineral oils, preferably transformer oil, but regular oil can also be used. Otherwise, the water will freeze in winter and rupture the parts of the heating system. Repairs in cold weather are unrealistic.
An iron furnace with a water jacket has a high level of efficiency
Free fuel
Note: If you want to minimize the cost of fuel for your potbelly stove, consider making a homemade heating structure using car oil drained from the car.
The potbelly stove is especially good for garage owners. Its design drawing includes two tanks connected by a pipe, as well as a chimney.
To create a stove for mining you will need the following materials:
- Metal 4 mm thick for a potbelly stove.
- Metal 6 mm thick for the top tank cover.
- Metal rods for the legs of the stove (3-4 pieces of suitable thickness).
- Pipe made of heat-resistant material for connecting tanks (diameter at least 100 mm, length about 400 mm).
- Chimney pipe (length at least 4 m).
Work on the formation of a potbelly stove during mining is carried out in the following order:
- Legs are welded to the lower tank.
- A lid with holes made for oil and air is welded onto the top of this tank.
- At least 50 holes with a diameter of 9 mm are made on the connecting tube.
- Weld the tube to the lid of the lower tank.
- A second tank with a filling neck and a chimney pipe is welded on top.
Using this potbelly stove is easy. Oil is poured into a cold device through the filler neck almost to the top, not reaching the reservoir cap by just a few centimeters. Kindling material in the form of rags or newsprint is also placed there. All you have to do is set it on fire, and soon you will enjoy the warmth.
Scheme of a potbelly stove during development
As a rule, such stoves “consume” from 700 to 2000 ml of waste oil per hour. Potbelly stoves during mining allow you to boil water and cook simple food. However, their operation requires the presence of good ventilation in the room to remove carbon monoxide, as well as compliance with fire safety rules (you cannot place flammable materials near the stove, use flammable materials such as gasoline, acetone, etc.). The waste tank must be protected from water. Refilling with oil is carried out only after the stove has completely cooled down.
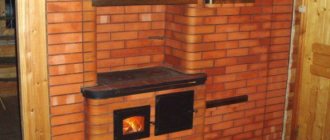
Furnace design with a water circuit
The classic design of the stove consists of a firebox divided by grates into a firebox and an ash pan, surrounded by walls made of brick or metal. When fuel burns, heat is transferred to the premises through radiant heat transfer from the enclosing surfaces of the furnace. The use of furnaces is usually caused by objective reasons:
- Lack of other types of fuel other than firewood and coal, namely natural gas and electricity of the required power;
- The relative cheapness of firewood in many regions of our country;
The main disadvantage of the heating design is the uneven distribution of heat throughout the heated rooms, as well as the cyclic mode of operation of the heating unit. In addition, the ovens are operated manually.
The introduction of a water circuit into the furnace design greatly improves heating performance. A metal heat exchanger allows you to remove part of the heat from fuel combustion and ensure its transportation through a liquid coolant - water or antifreeze.
Furnaces with a water circuit are divided into 2 types:
- Brick;
- Metal.
Brick kilns are built independently or with the assistance of specialists. Metal furnaces are made from steel or cast iron and can be built independently, but this requires professional skills as an electric welder. Moreover, industrially produced models have better characteristics compared to home-made ones - they are made of heat-resistant steels and are carefully calculated by designers.
Brick kilns take longer to heat up, but they also give off heat over a long period of time. In essence, brickwork partially functions as a heat accumulator.
Metal stoves heat up and cool down at a faster rate. Cast iron stoves are more profitable than their steel counterparts in this regard - cast iron accumulates a significant amount of heat.
Heat exchangers for water circuits of furnaces are usually made of steel. Heat exchangers have a wide variety of shapes and sizes and differ in location. In shape, these can be rectangular containers connected by round or profile pipes, coils, registers, and so on. The thickness of the steel for their manufacture is at least 3 – 5 mm.
In brick kilns, heat exchangers are most often placed in the fireboxes. It is not recommended to place devices in areas directly surrounded by flame, especially in furnaces using coal as fuel. The temperature in these areas reaches high values and the service life of the metal will be significantly reduced. Heat exchangers are placed in the edge zones of the flame and along the path of movement of hot combustion products.
In metal furnaces, heat exchangers are often made in the form of water “jackets” encircling the furnace space of the combustion chamber. In essence, stoves with a water circuit are an analogue of a solid fuel boiler.
Heat exchangers are equipped with threaded pipes for connecting heating system pipelines. Smoke removal is carried out using natural draft, that is, the construction of a chimney is required. The amount of combustion air supplied is regulated by a chimney damper and a damper on the air intake.
It is worth noting that to improve heat removal, smoke ducts are sometimes equipped with a labyrinth type or an additional heat exchanger is installed in the chimney duct for DHW or heating needs. In this case, the aerodynamic resistance increases sharply and a more accurate calculation of the parameters of the chimney will be required - and at a minimum, an increase in its height.
In addition to water heating circuits, stoves can be equipped with additional elements:
- A door with fireproof glass - a fireplace stove is created;
- Hot water preparation tank;
- Hob;
- Oven.
With an increase in the number of options, the dimensions and weight of the oven increase, and the cost increases. Some models of factory-made stoves are equipped with heating elements built into the heat exchanger (with the ability to be removed and replaced). Usually they cannot completely cover the entire thermal power of the furnace and serve as an additional or backup heat source.
Features, advantages, disadvantages of a potbelly stove
Potbelly stove - metal stove
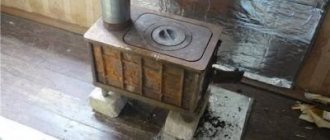
A potbelly stove is usually called a metal stove designed for heating rooms of limited volume. The purpose of the device is to heat up as quickly as possible and transfer heat to the room.
Oven features
The design of a potbelly stove is simple and necessarily includes:
- a housing that combines structural elements and limits the combustion zone;
- combustion chamber;
- ash pan;
- a grate separating the firebox and ash pan;
- fuel chamber screen (smoke circulation partitions), which improves the efficiency of the furnace;
- chimney with an adjustable damper (valve);
- legs;
- cooking hole with lid (if necessary).
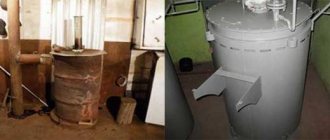
The shape and location in space of a homemade potbelly stove depend on the materials used. Gas cylinders, steel cans and barrels, rectangular containers and large diameter pipe sections are used as a basis.
Advantages and disadvantages
One of the advantages is compactness
The advantages of stoves include:
- simplicity of design;
- quick access to working mode;
- reliability;
- unpretentiousness to fuel, which is used as wood, waste from furniture workshops (chipboard and laminated chipboard), coal, waste;
- easy maintenance during use;
- compactness;
- various design options;
- versatility - space heating, cooking, warming up a steam room in a bathhouse;
- ease of installation and mobility - the ability to remove the stove from the room during the warm season and use it for cooking outside;
- safety with proper installation and operation.
The disadvantage of such stoves is their high fuel consumption.
At the same time, the simplicity of the design leads to negative properties:
- potbelly stoves consume a lot of fuel;
- the device is suitable for heating one room;
- for operation it is necessary to regularly add fuel;
- hot gases quickly burn through the chimney and enter the room, which can lead to poisoning;
- the average service life with regular use does not exceed 4–5 years;
- the surfaces of the body and chimney heat up to high temperatures, and accidental touching them causes burns;
- it is impossible to accurately regulate the room temperature;
- It is difficult to choose the combustion mode when cooking food.
Making a potbelly stove is not difficult, so at home such designs are preferred even against the backdrop of all the negative aspects.
Scope of application
You can take a small potbelly stove with you fishing
Functionality, simple design and operation, and low weight allow the device to be used in a variety of cases. A potbelly stove for a dacha, made by yourself, will quickly warm up the room in any weather, and in the intervals between visits to the site does not require maintenance.
A wood stove in a garage runs only as long as needed and does not waste electricity. Potbelly stoves are used for heating temporary buildings, construction sheds and truck bodies. Small devices can be taken fishing and used as a cooking surface or smokehouse.
There is an exception: a brick potbelly stove, built with your own hands, partially serves as a constant source of heat and can be used in rooms where it is necessary to maintain the temperature for a long time, for example, in rooms with farm animals.
Conditions for optimal fuel combustion
How to properly install a potbelly stove in your home to get maximum heat transfer from fuel combustion?
In order for the draft in the stove to be sufficient, the height of the chimney (counting from the stove grate) must exceed 5 mm. If the installation of a potbelly stove is carried out in a one-story house, the roof ridge is located at the highest height. In this case, it is possible to save the maximum amount of heat by placing most of the chimney inside the house. At the same time, the attic (or attic) space is also heated, contributing to the overall heating of the house. The absence of a temperature difference along the length of the chimney will also help stabilize the draft in the stove, which depends, among other things, on the heating level of the chimney.
Why increase efficiency?
The compact dimensions of the stove mean that the surface that heats up during operation is small. Not much heat flows outside and the room quickly cools down. Sometimes it seems that the return from the potbelly stove is weak.
To help it increase efficiency, several tasks are solved:
- the duration of combustion and smoldering increases;
- a sufficiently high combustion temperature is ensured;
- a high level of traction is achieved.
Standard potbelly stove efficiency
We can talk about the efficiency factor in relation to a potbelly stove in a conditional manner. This parameter is approximately 65-70%.
What is a potbelly stove with a water circuit? The advantages and disadvantages of a popular stove
A potbelly stove is characterized by high heat transfer and fuel burning rate. These qualities are given to it by the materials from which the firebox is made (cast iron, steel, iron). The potbelly stove quickly flares up and heats up, and if a water circuit is connected to it, then the warm flue gases along the way also manage to heat the water for domestic needs.
When choosing the material from which it is best to make a potbelly stove, you need to be guided by the following indicators:
- Thermal conductivity is the property of metals, liquids and gases to conduct heat through themselves. The faster heat is transferred, the faster the object heats up or cools down. Foam plastic has low thermal conductivity - 0.036–0.050 W/m*C. Taking it in our hands, we will immediately feel that it is warm, because the foam does not transfer heat, but accumulates it. If you take a metal bar, you will feel the cold due to the high heat transfer.
- Heat capacity is the property of a material to accumulate heat. Water has the highest heat capacity, air is in second place, and cast iron, steel and iron are at the end of the list. Therefore, a metal stove heats up quickly and cools down just as quickly. In city houses, central heating radiators are filled with water, which gives off heat for a long time, heating the home.
List of materials used to create a potbelly stove:
- Steel.
- Cast iron.
- Iron.
- Brass.
- Aluminum.
- Copper.
Copper is the most thermally conductive material of all those listed in the table. Its disadvantages are cost and melting point. Aluminum and brass have the same limitations. At high temperatures, a cast iron or steel stove will only turn red, but will do its job, while a copper, aluminum or brass stove will melt.
Potbelly stoves are most often made of steel because it has a high melting point and the highest heat capacity among all available materials
Making a stove from steel, iron and cast iron is justified due to the prevalence of these materials. From the point of view of thermal conductivity and heat capacity, they need fine-tuning. It is more expedient to use the thermal energy of the stove to heat water, otherwise it will simply go down the chimney
To limit heat loss, it is also very important to achieve complete combustion of the fuel.
The ideal way for a potbelly stove to work is when barely warm air comes out of the pipe, and all the energy is directed into hot water supply and heating the house.
Table: advantages and disadvantages of a potbelly stove
As can be seen from the table, a potbelly stove has a lot of disadvantages, so if you decide to install this design, you will have to take into account all its weaknesses.
Grid with stones
Modernizing a potbelly stove with a mesh with stones is quite one of the most common improvements. Almost everyone had a bath and steamed in the steam room. There you saw a set of stones that warm the air in the steam room.
The principle of this modernization method is similar. It is necessary to line the potbelly stove with stones, which continue to retain heat for a long time. It is worth remembering that you should not use galvanized material for manufacturing, since when heated, toxic fumes are released into the air.
Materials and tools
For this event we will need:
- a set of good stones (you can use high-quality clay bricks), preferably of medium size, similar to those you came across in the steam room.
- dense metal net, you can use a chain-link net.
- if you plan to do it like an adult, then you will need fittings and a welding machine.
Instructions
Making this improvement is simple:
- It is necessary to make a frame of metal mesh (or reinforcement) near the stove, which will not block access to the technological openings of the potbelly stove.
Design example
- After creating this frame, it is necessary to fill the cavities between the stove and the frame as tightly as possible with prepared stones.
You can also fill the cavities between the stones with clean clay, which will also help retain heat.
Precautionary measures
It is strictly forbidden to use flammable materials and metals with low melting points to create this improvement. Also, this structure should ensure free maintenance of the potbelly stove, not block access to the firebox, to the ash pan, and not interfere with the removal and replacement of outlet pipes.
Installation of the system in a finished oven - all the nuances
If the house already has a stove, then only a certain part of it is disassembled and a register is installed. In this case, more frequent fuel supply will be required.
If desired, you can change the number of smoke channels or their direction. However, this is only allowed in the most difficult situations.
All work must be carefully thought through, since after the actions taken it is important to maintain good traction. When dismantling the structure, it is recommended to sketch the location of the masonry
In the future, using this scheme it will be possible to easily disassemble the oven
When dismantling the structure, it is recommended to sketch the location of the masonry. In the future, using this scheme it will be possible to easily disassemble the stove.
If the brick remains in good condition after dismantling the masonry, it can be reused
If it is necessary to replace the material, it is important to select bars of the same quality and shape as the previous ones
Efficiency of using a stove from a gas cylinder in a garage
A potbelly stove made from a gas boiler allows you to burn heat more slowly, processing all the fuel. In this case, you can control the air supply and the combustion process using a special damper. This increases the efficiency and combustion duration. That is why homemade stoves are used in garages, greenhouses, bathhouses, and workshops.
Advantages of the oven:
- Easy assembly. Construction can be completed quickly and easily.
- Independent fuel. The boiler does not require electricity, only solid fuel. In this case, the type of solid fuel does not matter.
- Small dimensions allow the structure to be placed in any corner of the house.
- Easy to use. The mechanism is simple, wood burns for a long time and does not require constant monitoring.
But for the stove to work, good ventilation will be required, otherwise the necessary draft will not arise. The heat capacity of the structure is also not encouraging. This is due to the small area of the boiler.
You can increase the heat capacity by equipping a jacket.
Only dry logs should be used for the stove. The disadvantages include the difficulty of cleaning the structure from soot and ash. But the disadvantages are less than the advantages. At the same time, the equipment of the furnace will not be expensive.
Installation work
For water heating in the garage you will need a set of instruments and parts, including:
- heating boiler;
- metal radiators with good thermal conductivity;
- connecting pipes made of metal or plastic;
- accessories for fastening;
- locksmith tools.
Project development
Before installing the heating system, you need to determine the diameter of the pipes that will connect the radiators. Risers with a large cross-section will increase the flow of hot water to the batteries, increasing the efficiency of the design.
It is worth considering that heating large volumes of liquid will lead to increased electricity costs. The optimal scheme is a balance between the room temperature and the cost of heating. These parameters are also affected by the number of radiators in the insulated garage.
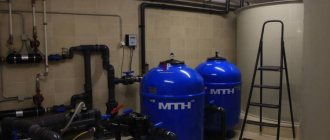
Expansion tank
The design of the garage heating system involves the use of expansion tanks. These items are made from simple plastic containers or large canisters with fill holes cut in the top.
The water circulating in the system constantly evaporates and requires regular addition of liquid, and the steam formed during boiling needs to be removed. The tank is installed at the lowest point of the heating system and at a half-meter distance from the floor.
Boiler
Before installing the boiler with your own hands, you will need to prepare a metal pipe of a certain diameter with a half-meter or meter length. Its extreme end is tightly welded with a metal sheet.
The next step will be assembling flanges for attaching tubular electric heaters and fixing them to the boiler using bolts. To supply the working fluid to the installation, two sections of pipe with the diameter that will be used in the heating system are welded.
Radiators
Heating batteries are attached to the walls of garages using special reinforced dowels. The distance from the floor to the radiator should be at least fifteen centimeters. For effective heating, you need to leave a few centimeters of free space between the walls and the heating elements for air circulation.
The individual structural elements are connected into a system using metal or plastic pipes with special fittings. The seams of their joints and forks require special attention during installation so that leaks do not occur in the future during operation.
Installation
The connection of metal pipes is carried out using a welding machine. Working with polypropylene will require the use of a special soldering iron. Regardless of the material of the pipes, they should be placed on the walls at a slope - this will improve the circulation of liquid.
The water heating system is considered ready after connecting the radiators to the risers and connecting them to the boiler using a rubber hose. Before starting operation, it is recommended to re-inspect the line, search for defects and seal problem areas.
Making a potbelly stove from a steel can
Stock up on a hardened chisel, a hammer, a chimney, a piece of rod with a diameter of 0.6 - 1.0 cm. Prepare an electric drill with a drill one centimeter in diameter. If you have an angle grinder, you will speed up the assembly twice as much.
In one part of the cover, at the very bottom, drill 5 - 7 holes for future traction. Bend a long rod like a snake and with at least four legs. These will be the grates when you insert them into the can.
Straighten the snake inside so that it lies horizontally and firmly just above the holes. Wood will burn on this “grill”, and good air draft will flow through the holes and through the chimney. It will be a combustion catalyst.
For the chimney, use a piece of water pipe, even a used one, with a diameter of 7-8 inches. Near the bottom or at the very bottom, strictly perpendicular to the grates, cut a circle with a chisel or saw with a grinder.
Insert the pipe a few centimeters into it, and secure it firmly from the outside with a clamp on the bolts or weld it to the can. The can-stove is designed for a horizontal position.
Weld the legs to it and place it where the potbelly stove will heat the house or garage. This is a very flammable device, so place it on a metal sheet and at least half a meter away from wooden structures.
News site- Features of electrical wiring installation in houses made of SIP panels
- How to choose a cast iron bath
The disadvantage of the stove: you can’t even heat a kettle on it – there’s nothing to put it on. And yet it will be an effective potbelly stove with your own hands, and read about the improvements below.
How to make a potbelly stove with a water circuit
To heat several rooms or premises with a potbelly stove, the stove, first of all, must be made of durable, reliable material.
Ideally, you should consider a material such as sheet steel or brickwork. At the first stage of construction, it is necessary to develop a sketch drawing. First, to do this, you should decide on the placement of the stove. Using a tape measure and other measuring devices, it is necessary to take measurements, after which the dimensions of the structure itself will be calculated. These measurements will form the basis of the drawing.
When the drawing is ready, we begin marking the foundation and laying it.
In order to lay the foundation, it is necessary to dismantle the floor coverings and dig a rectangular pit 40-50 cm deep
The bottom of the pit is filled with rubble, which can be fine brick chips, crushed stone, or sand. The rubble mixture is poured with cement, and it is important to maintain the horizontalness of the pour by checking it with a building level. Several layers of roofing material are laid on the dried layer of cement, which serves as a waterproofing material and a material that prevents the influence of moisture from the soil on the furnace structure
How to make your own stove with a heating circuit
The main part necessary for installing water heating on wood with your own hands is a heat exchanger. This unit can have a different design: made of pipes (register, coil) or in the form of a closed container (boiler). In any case, its purpose is to heat the volume of coolant contained in it in a short time and send it to the distribution pipes. The hot coolant flows through the pipes throughout all rooms, heating the radiators, and cools back to the boiler. This system is called gravity and can be used to heat small rooms.
If it is necessary to heat a residential building, especially one with 2 or more floors, the circulation of the coolant in the pipes must be forced. For this purpose, an electric pump is installed on the return line. Its purpose is to pump cooled water under pressure into the heat exchanger, forcing it to circulate more intensively and not stagnate in the radiators. The use of a pump is also possible for one-story buildings in order to speed up the heating process of pipes and radiators when igniting the furnace.
So, to install a water heating circuit you will need:
- heat exchanger (boiler, register);
- large diameter pipes for wiring;
- water heating radiators, convectors of any design;
- expansion tank;
- electric circulation water pump;
- welding machine;
- "Bulgarian".
Do-it-yourself stove from a gas cylinder: preparatory work
To create a wood-burning stove from a metal cylinder, you will need to use welding. That is why you should choose a room for work in advance. This should be a well-ventilated room with reliable wiring and constant access to electricity.
You should immediately prepare all the tools for work. You will need a welding machine and a grinder.
The process of making a potbelly stove can last several days. It will be better if the room has a roof. Good sound insulation is welcome, because during work it can be noisy, and this will not please the neighbors.
Materials for creating a potbelly stove:
- Frame. Can be made from an old propane boiler. It is best to choose a large 50 liter cylinder.
- In some cases, the stove may be equipped with legs. For this purpose, sections of pipe, fittings, and metal profiles are suitable.
- Using scraps of rebar you can make potbelly stove handles. A similar handle will be located on the firebox lid.
- You can make the door yourself or buy a ready-made one from cast material. The stove will require 2 doors: for the firebox and for the vent. The first one should be bigger.
Separately, it is worth taking time to prepare the cylinder. First, you will need to bleed the propane from the tank. The operation is performed outdoors. Open the supply tap and wait until the hissing stops.
Next you will need to rinse the bottle. The main thing is to get rid of the unpleasant odor, which is used by the supplier to detect a leak. Bleach is used for washing, and then the structure is washed with water.
General requirements
In the case of installing a heating system with your own hands, the property owner can personally choose the timing and need to turn it on.
Most often, the heating is turned on during repair work, and turned off while the car is being stored.
Safety
One of the main requirements for garage heating is its safety. The room contains a large amount of fuels and lubricants, as well as highly flammable items.
In cooperatives where structures are located end to end, a fire in a separate area can lead to the burning out of a significant area. For this reason, all heating systems must be capable of emergency shutdown in the event of an emergency.
Feasibility
For property owners, the economic feasibility of the methods used is important. If the installed heating system requires significant operating costs, you should think about choosing a different method.
Proper garage heating should be reliable and resistant to temperature changes outside the room. This also applies to energy supply interruptions.
Insulation
The garage heating scheme involves preliminary thermal insulation of the room. Heating unprotected buildings is pointless - the heated air will escape through the cracks of the enclosing structures.
Basic models of homemade potbelly stoves
According to its principles, a potbelly stove is practically no different from models of a special solid fuel device.
This is a certain type of very simple stove in the fireplace category. There are also special models that are equipped with hobs and special bath devices. Material used to make the stove Often, a potbelly stove is made of high-quality steel, but in some cases cast iron can be used. For different types of metal, elements made of natural stone are often used. If cast iron is used, then you should count on low heat capacity parameters; it is very difficult to find and it is not easy to cook. Many people prefer steel for this very reason; it is much easier to work with. Moreover, the thicker the material, the longer it will last. If you plan to make a device for rare use, for example, for emergency situations with the heating system, then make it from simple iron, whose thickness is 1 mm. In the process of making a stove, all factory fittings may well be used. This applies to elements such as grates, the necessary doors, burners and valves. Many craftsmen make them with their own hands using steel.
Shape and material for the body If you want to make a potbelly stove using drawings or photos, you must use the method of cutting a metal sheet.
- In addition, the following elements are used:
- Molding profiles;
- Square shaped pipe;
- Special corners;
- Fittings;
- Rod.
Various metal cabinets and boxes can be used as a base. Often these are cylindrical elements, for example, large-diameter pipes, cans, gas cylinders.
In the process of making a stove with your own hands, you will definitely need to use welding
If the metal is not very thick, the furnace can be made using bolts, screws and a drill. Regardless of the chosen model, it is important to use drawings as the basis for manufacturing, because Despite its relative simplicity, certain instructions for implementing the heating device must be followed.
Calculations of potbelly stove indicators
Thermal engineering calculations of furnaces are the most complex. In construction and manufacturing, such operations are performed by specialized laboratories. For domestic use, they are significantly simplified, leaving only the key indicators of thermal units for independent determination:
- Calculation of the thermal resistance of a room, in other words, the designation of its ability to retain heat. This indicator depends on the material and thickness of the floor and walls, its thermal conductivity, the structural properties of window and door structures. But in any case, heat resistance also depends on the quality of all components.
- Calculation of the cross-section of smoke exhaust channels, since the quality and rate of fuel combustion in the furnace depends specifically on this parameter. If the diameter is larger than good, then most of the heat will be lost without return, reducing the efficiency of the device. On the contrary, an insufficient cross-section can lead to incomplete combustion of fuel and gas pollution in the room. To determine the size of the chimney pipe, an indicator of 2.7 is used in relation to the volume of the furnace firebox. If this figure is 40 liters, then the suitable chimney size will be 40 / 2.7 = 14.8 cm.
The classic size of a metal chimney pipe is 150 mm. In most cases, 15–20% is added to the calculated value. The final adjustment of the draft in the furnace is carried out using a damper, which makes it possible to perfectly adjust the cross-section of the chimney. It must be said that the amount of thrust will depend not only on the diameter, but also on the weather, so the use of a gate is considered necessary.
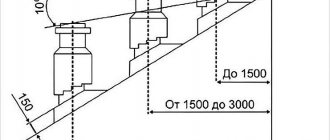
The height of the chimney is of priority. There is a limiting parameter - its total height should not be more than 5 meters counting from the point of exit from the combustion chamber. The level of elevation above the roof depends on the location in relation to the ridge.
It is fundamentally important to determine the dimensions of the chimney correctly