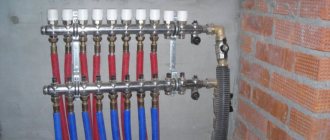
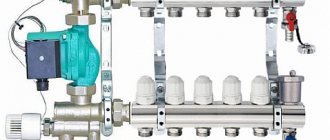
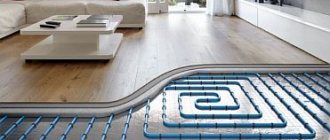
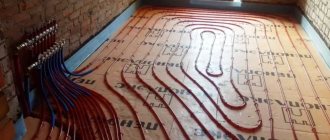
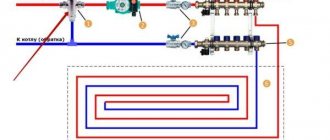
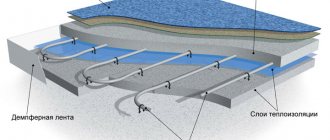
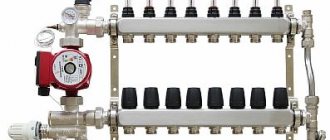
A mixing unit in a heated floor water system is needed to adjust the temperature of the coolant. The installed boiler heats the coolant to the required temperature - 55 degrees. This is enough to warm the floor up to 30 degrees. This indicator is comfortable for the cold season. In the manifold, the mixer independently mixes hot and cold water to the desired temperature.
If you plan to have a heated floor without a pump, then the coolant is supplied to the system at a given temperature, but this requires a separate boiler or a centralized heating system.
Will underfloor heating work without a pump and how well?
In a heated floor system, the pump is designed to pump liquid through pipes.
The pump can be installed either on a single circuit or on the entire underfloor heating manifold, which serves to combine all circuits. It is not recommended to make the length of one heated floor circuit more than 100 meters. Otherwise, the circular pump may not cope with the volume of liquid. Well, what happens if you make a warm floor without a pump at all? Will heated floors provide heat and how well?
Conclusion
The installation scheme for a heated floor is selected based on the area of a specific room, based on the heating option. Laying pipes with a snail is a universal and economical way to heat a room in any weather conditions.
The longer the plastic pipes are, the more powerful the pump should be. After all, you will need good pressure and the need to overcome large hydraulic resistance.
It is better to purchase and install adjustable pumps that have three speeds.
Water heated floor without a pump - is this possible?
Modern heating systems are effective, but they have one common drawback: a large number of various sensors and elements that can easily fail. The output of the temperature sensor will lead to a failure of the boiler automation, and airing of the circulation pump will cause the heated floor to stop heating.
It seems that there is nothing wrong with automating the heating system, but people become dependent on automation. If you make a heated floor without a pump, you can save not only on electricity, but also not worry about its absence.
The scheme for operating heated floors without a circulation pump really works, and it’s true. There are only a few restrictions for its normal functioning. Firstly, a heated floor will work if it is laid on a screed poured at a slight slope.
Secondly, the scheme works in small areas, no more than 4-6 square meters. Otherwise, the warm floor will not heat. In all other cases, installing a circulation pump is inevitable. All this applies to a heating system that does not have a pump at all.
Will underfloor heating work from a heating boiler?
Much fewer problems arise if a gas or electric boiler is installed in the house, which already has a circulation pump in its design. In this case, you can refuse to install a separate pumping and mixing unit on heated floors, and increase the heating area up to 20 square meters.
In this case, a thermostatic three-way valve is installed between the heating boiler and the heated floor. The thermostatic valve is installed on the supply line of the heated floor, and a jumper is connected to the return line. The task of a thermostatic valve is not only to regulate the temperature of the coolant, but also to protect the heating system.
With all this, there is one caveat. In order for the heated floor to work without a separate pump, a sufficiently powerful circulation pump must be installed in the heating boiler. It doesn’t matter whether it is a gas or electric boiler, the pump power should be enough to pump the heated floors.
And if it happens that after installation, the heated floor does not heat, the reason may be precisely the insufficient pump power in the boiler. In this case, there is nothing left to do but install a separate circulation pump on heated floors and forget about the problem once and for all.
Source
How to connect a solid fuel boiler
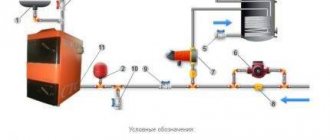
The canonical connection diagram for a solid fuel boiler contains two main elements that allow it to function reliably in the heating system of a private home. This is a safety group and a mixing unit based on a three-way valve with a thermal head and a temperature sensor, shown in the figure:
Note. The expansion tank is not shown here, since it can be located in different places in different heating systems.
The presented diagram shows how to connect the unit correctly and should always accompany any solid fuel boiler, preferably even a pellet one. You can find various general heating schemes anywhere - with a heat accumulator, an indirect heating boiler or a hydraulic arrow, on which this unit is not shown, but it must be there. This is explained in more detail in the video:
The task of the safety group, installed directly at the outlet of the supply pipe of a solid fuel boiler, is to automatically relieve pressure in the network when it rises above a set value (usually 3 Bar). This is done by a safety valve, and in addition to it, the element is equipped with an automatic air vent and a pressure gauge. The first releases the air appearing in the coolant, the second serves to control the pressure.
Attention! It is not allowed to install any shut-off valves on the section of the pipeline between the safety group and the boiler
How the scheme works
The mixing unit, which protects the heat generator from condensation and temperature changes, operates according to the following algorithm, starting from kindling:
- The firewood is just starting to burn, the pump is on, the valve on the side of the heating system is closed. The coolant circulates in a small circle through the bypass.
- When the temperature in the return pipeline rises to 50-55 °C, where the attached remote-type sensor is located, the thermal head, at its command, begins to press the three-way valve stem.
- The valve slowly opens and cold water gradually enters the boiler, mixing with hot water from the bypass.
- As all the radiators warm up, the overall temperature increases and then the valve closes the bypass completely, passing all the coolant through the heat exchanger of the unit.
This piping scheme is the simplest and most reliable; you can easily install it yourself and thus ensure the safe operation of the solid fuel boiler. There are a couple of recommendations regarding this, especially when piping a wood-burning heater in a private house with polypropylene or other polymer pipes:
- Make the section of the pipe from the boiler to the safety group from metal, and then lay plastic.
- Thick-walled polypropylene conducts heat poorly, which is why the surface-mounted sensor will openly lie, and the three-way valve will lag. For correct operation of the unit, the area between the pump and the heat generator, where the copper flask is located, must also be metal.
Another point is the installation location of the circulation pump. It is best for him to stand where he is shown in the diagram - on the return line in front of the wood-burning boiler. In general, you can install the pump on the supply side, but remember what was said above: in an emergency, steam may appear in the supply pipe. The pump cannot pump gases, so if steam gets into it, the circulation of the coolant will stop. This will speed up a possible explosion of the boiler, because it will not be cooled by water flowing from the return.
Way to reduce the cost of strapping
The condensate protection circuit can be reduced in cost by installing a three-way mixing valve of a simplified design that does not require connecting an overhead temperature sensor and thermal head. It already has a thermostatic element installed, set to a fixed mixture temperature of 55 or 60 °C, as shown in the figure:
Special 3-way valve for solid fuel heating units HERZ-Teplomix
Note. Similar valves, which maintain a fixed temperature of mixed water at the outlet and are intended for installation in the primary circuit of a solid fuel boiler, are produced by many well-known brands - Herz Armaturen, Danfoss, Regulus and others.
Installing such an element definitely allows you to save on piping the TT boiler. But in this case, the possibility of changing the temperature of the coolant using a thermal head is lost, and its deviation at the output can reach 1-2 °C. In most cases, these shortcomings are insignificant.
The nuances of arranging water floor heating without the use of a mixing unit
The main disadvantage of installing a water heating system without mixer and manifold units is that it is necessary to minimize the loss of water temperature along the heater-circuit path, because the temperature on the floor covering must be kept constant. Therefore, it is recommended to take into account the following requirements:
- insulate the walls of the building;
- lay thermal insulation material in the floor covering cake;
- install high-quality window frame designs;
- install the floor covering as close as possible to the heater;
- The area of the room should not be more than 20 square meters. m.
Attention! The main mistake in installing a water brushless floor system is trying to use it over large areas. Therefore, it is necessary to calculate the duration of the pipes and the laying scheme so that the temperature in the return pipe is not too low. Otherwise, a lot of condensate will form in the boiler, and this will lead to its breakdown.
Some experts say that in the case of a cold return, connecting a condensing boiler with a high efficiency helps - it is not afraid of low coolant temperatures.
Pump parameters
In addition to having additional functions and type, the pumps differ in their initial parameters. Namely, productivity and pressure. Since water will need to be supplied to the system, the performance will be equal to dividing the power of the heating circuit, multiplied by 0.86 and the difference between the supply temperature and the return coolant temperature. This difference, as practice shows, is 500.
If there are several circuits in the system, it is necessary to determine the performance of each of them and summarize the results obtained among themselves.
The created pressure depends on the hydraulic resistance of the pipe, its length and the power reserve factor. To calculate the pressure, it is necessary to add the product of the hydraulic resistance of one meter of pipe by its length with the power reserve factor and divide everything by 1000. The pressure is necessary for normal coolant circulation in the system.
A parameter such as power depends on the quadrature. There are tables corresponding to the heated area and the required pump power. When calculating them, it is assumed that the house is normally insulated and is not located much north or south of the middle zone. Experts recommend adding about 20% to this parameter in case of severe frosts.
Options for installing a heated floor system without using a unit and a manifold
To install a water heating system for heated floors without using a collector, the following materials and devices are required:
- pipes for the circuit;
- boiler;
- components for the pipeline;
- three-way thermostatic valve.
Scheme for laying a heated floor from a centralized heating system
Some craftsmen try to use the easiest installation method - to equip a heating system by connecting it to the central heating. This solution may subsequently lead to pipeline malfunctions, since the temperature of the radiator coolant is significantly higher than that required for the floor. And if supervisory organizations discover the presence of this “homemade device” without permission from the relevant authorities, the owner will be issued a considerable fine and will be required to dismantle the water heated floor system.
Laying the pipe circuit
Several methods are used to lay the pipeline contour, the most acceptable are snail and snake. These circuits consist of two parallel water floor loops (supply and return). The advantage of the “snake” is the distribution of heating zones; for example, you can bypass plumbing. The advantage of the “snail” is uniform heating of the area. After installation, the pipes are connected to the boiler according to the connection diagram.
To speed up the movement of water through the pipes under the boiler, a supply pump is installed, which is controlled automatically or manually. In a system where there is no mixing unit, a three-way thermostatic valve closes the circuit between the pipeline and the boiler.
Attention! In order for the heated floor to function without a pump, it is recommended to choose a powerful boiler, no matter gas or electric. The main thing is that its power is enough for a warm floor covering. It is worth choosing a boiler with a built-in pump.
Common mistakes
Most common mistakes made during installation work:
- The pipes were poured into the floor and they forgot about insulation. A foil backing is not suitable ; it is better if it is foamed polystyrene. Otherwise, half of the heat will go to heating the floors or the ground.
- Installation is carried out only under tiles (with the exception of electric heated floors). When professionally assembled, buildings with a thick layer of coating on the floor can be heated.
- The heated floor structure is connected to the boiler without a mixer. This is a necessary part that maintains the temperature to power the system.
- Laying metal-plastic pipes in a snail pattern in all rooms.
Different rooms require different installation approaches. For example, a pipe that runs from the outer walls at a distance of 40-80 cm must be installed tightly to compensate for heat loss.
Installing a heated floor without using a mixing unit
The need to install a pump is completely eliminated if you purchase and install a boiler with a built-in pump. The main advantage of such a boiler is its well-chosen equipment. This means that you should not choose a boiler based on any characteristics; it is enough to determine the required power.
The installation methods described do exist, but it is better to purchase all the elements once, connect the heated water floor system correctly and not worry that the money spent on installing such a floor will be wasted.
Source
Three-way valve for heated floors: types, connection diagrams and installation
The uninterrupted operation of any heating device depends on the correct selection of components, and water heated floors are no exception. In this design, an important point is given to maintaining the temperature level and intensity of coolant supply - this function is assigned to shut-off valves: a two-way or three-way valve.
In our article we will tell you what a three-way valve is, the principle of its operation, and what types there are. You will also learn which valve to choose for a heated floor, as well as how to install it yourself.
Installation of a thermostatic valve for warm floor coverings
three-way thermostatic valve
The valve is mounted on the coolant supply, and a jumper is installed to the return pipe. The valve is designed to regulate the temperature of the coolant; it is a mixer, inside of which a temperature-sensitive element is installed. The valve protects the system - it automatically stops the flow on the supply pipe at the right time.
Functions
Water heated floors have significant differences from standard radiator heating. The floor pipeline, which lies in a cement screed, requires water at a certain temperature level, much lower than that circulating in the radiators. Therefore, it is necessary to install a three-mix running unit, in which the coolant will be brought to the required degree.
Bringing the liquid to the required degree of heating that meets the standards for underfloor heating (which ranges from +35 to 55 degrees) is the main function of a three-way thermomixing valve.
Installation instructions
The installation technology will differ, which is influenced by the design of the base of the heating circuit. The base is selected based on the load-bearing capacity of the interfloor and floor coverings. Warm water floors are usually floating; in this scheme, a damper tape is laid around the perimeter of the room and each circuit. If the room has independent sectors, a damper tape is necessary. Its width should be approximately 15 cm. The expansion joint will be the edge film, which is laid along the height of the screed.
The safety of the floor covering is ensured by a shock absorber and heating circuit during vibration, thermal expansion and structural movements. The tape will reduce heat loss in those places where there are joints between the slab and the external walls. When laying a water-heated floor, you will need to lay it on a concrete slab, laying it in a cement screed.
The base is covered with waterproofing, followed by a layer of insulation and reinforcement. Pipes are fixed to the frames with clamps, steel wire or special clamps. If necessary, a reinforced screed is laid on top of the pipe circuit. This allows the operating load to be evenly distributed. The pipes are secured to the surface of the substrate with clamps with tips. The contour loops should be strengthened on profile mats; additional fasteners will not be needed.
Profile mats can have an improved appearance, in which case they are covered with waterproofing and supplemented with a system of locking protrusions. When laying a warm water floor with your own hands, you must choose the right pipes, which can be made from:
- metal-plastic;
- cross-linked polyethylene;
- polypropylene;
- copper
The material must be made using seamless technology. The circuit is formed from a solid pipe, and the butt joint can only be used for circuits made of corrugated pipes. Coils of pipes for heated floors should not be unraveled in advance, because careless handling of them can lead to the formation of creases. Installation should begin from the manifold supply comb.
Design and principle of operation
A mixing valve is a device for mixing and regulating water flows; it has three openings: two inlet and one outlet. In the space between the inlet holes there is a heat-sensitive damper; it is responsible for regulating the movement of liquid - cooled and heated. Modern devices are equipped with a thermal head or control valve.
The heating floor valve operates continuously. The step-by-step process is as follows:
- heated water is supplied to the first inlet - its temperature is determined in the valve;
- if the heating degree of the water exceeds that required for heated floors, then the supply of cooled liquid from the return line opens through the second hole;
- inside the valve, heated liquid is mixed with cooled liquid;
- after obtaining the desired temperature, the return flow is closed;
- The coolant is supplied through the outlet to the underfloor heating pipes.
For the thermal valve to work effectively, it is necessary to maintain constant pressure in the line.
When operating an automatic thermo-mixing tap equipped with a servo drive, heating is carried out in 3 minutes ; if there is a thermal head, the liquid is heated in 15 minutes .
Three-way thermal valves come in separate and mixing types. For underfloor heating, mixing valves are used.
In addition, they have different implementation methods; they can be manual or automatic. They also differ in their design - the location of the holes (inlet and outlet).
Manual
The price of a manual device is not high, but it is rarely used because it is not convenient. Suitable only for small rooms - bath, kitchen. The temperature level and volume of supplied coolant are adjusted manually using a handle.
Automatic
Automatic valves have a thermal head or an electric drive, which can be controlled by a sensor.
- Simple - if the temperature rises, the liquid expands, the damper opens, cold and hot water mix.
- Three-way valves with a thermal head with a remote thermostat for heated floors are more advanced models. They are widely used because they are accurate and do not require electricity to operate. Average price from 500 rubles to 2500 rubles.
- Three-way valves for heating with a thermostat - they regulate the flow of heated and cooled water, and also control the temperature with a built-in thermostat. The expansion and contraction of the holes occurs automatically, depending on the temperature of the liquid.
- With an electric drive (drive with a magnet or servo drive) - the damper in the valve is activated under the influence of an electric motor, it is controlled by a controller, and a signal is received from a temperature sensor. They are easy to connect, so they are widely used. But unreliability is their main drawback, since they depend on electricity. Their cost is higher than with a thermal head, approximately 4 - 5 thousand rubles.
- With pneumatic or hydraulic drive - used more often in production, for devices with high pressure. They have a high cost, but their service life is longer.
- Electronic - adjustment is carried out by a built-in electric motor or a control element with a thermometer.
Laying schemes
There are several types of pipe heat distribution schemes. Each of them is used in different cases.
Before reading the diagrams, it is important to understand what a “laying step” is. It assumes the distance between the pipes.
It is often made the same. But, if there is a place in the room that needs to be heated more intensely, a smaller step is taken in this place, this causes the pipes to be located closer to each other and warmer.
Snake
The snake is the easiest to install. More often used in small, cozy rooms. The heat transfer of the snake is lower than other options. The classic snake pitch is 150 mm (100 mm at the wall and cold zone).
Below, in this diagram (on the left), you can see that the pipes heat up only on one side (by half), the other part begins to cool, and by the end of the snake the water has completely cooled down. This is the main disadvantage of such a system. But, it is ideal in rooms where one part of the room needs to be warmed up, and it is desirable to leave the second part cool or less warm.
The problem of uneven heating can be corrected by using a double snake circuit. Its diagram is shown below (right).
There is also an angular snake. It is used if the walls extending from both sides of the corner face the street. These walls cool down during the cold period, so it is recommended to install a corner option along these walls. Moreover, the heating part of the snake will pass right next to these walls. The closer to the center of the room, the less heating.
Watch a video in which a heated floor installer lays the coolant in a “snake” pattern. At the end, the video briefly describes how to connect the snake to the pump and distributor.
Do-it-yourself water heated floor. Part 2. Pipe installation
Snail
This type of floor is a spiral, hence the name “Snail”. Compared to a snake, it is more efficient in heating the room. Heat is distributed evenly.
Laying starts from the edge of the room, runs along the walls and reaches the center, then turns around and continues from the center to the edge. The step for this installation is from 1 cm. Most often, a step of 2-3 cm is used.
If the room is large, you should not stretch the cochlea, as heating the room will be ineffective. It is better to divide the snail into 3 different circuits, as shown in the figure below:
A more visual montage of the snail is shown in the video. The master lays the pipes step by step. Gives useful tips that make floor installation easier. Several snails are used per room for better heating of the room.
Water Heated Floor, installation
Combined layout scheme
When installing a heated floor in this way, a snake and a snail are used together. For example, given a room of 4 rooms. The largest of them will be a snail. The smaller ones are like a snake.
You can make 2 turns of the snake in one of the rooms, and then continue with the snail. Those. There is a combination of schemes in 1 room.
Below is a diagram of the combined installation:
This method is recommended to be used only by experienced specialists, and not just for “diversity”. It is important to correctly calculate the distribution of heat throughout the room and rooms, to think about where the cold zones should be (places where furniture will be placed). If the combination is not necessary, then it is not used.
We invite you to watch a useful video. The master in the diagram shows the principle of laying a combined floor system (snake + snail). For example, a room of 4 separate rooms (kitchen, bedroom, etc.) is used.
3 How to make a layout diagram for a heated floor contour
Manufacturing materials
Three-way thermomixing valves are made from the following materials:
- Brass is a copper alloy with zinc additives. The product is not subject to corrosive destruction, it is strong and durable. Sometimes these thermomixers have a chrome or nickel coating, which protects against darkening. This option is most often used in residential areas.
- Bronze is a copper alloy with tin additives. It is rare, although the quality is no worse than brass.
- Stainless steel is an excellent metal for making control products. It is characterized by durability, strength, and corrosion resistance. But the cost of appliances made from it is high, so they are not suitable for a private home.
Advantages and disadvantages
Three-way thermostatic mixing valves are simple in design, yet reliable and durable. Their use allows for high-quality and precise control of the floor heating level.
Thermostatic valve for heated floors: types and their design, how to choose, installation diagrams and alternative connection methods
The devices are sealed and compact. Plus - they do not allow the pipes and screed to overheat, which extends the life of the system.
The benefits of control valves are irrefutable, but they have a number of disadvantages:
- They increase hydraulic resistance - this negatively affects the functioning of a unit that has more than one collector.
- There is a risk of a large volume of hot coolant entering the floor pipes. And this can lead to leakage and airing of the system. Such problems most often occur when the device is starting up.
Where to place the security group and what element the scheme cannot do without
The security group should be located at the top point of the system. When the boiler does not have an expansion tank, it is additionally built into the system. Although this scheme is used, it is not so often, since it is often used as a supplement to radiator heating.
Before connecting the heated floor to the heating system, you must check whether the boiler has a built-in circulation pump; if not, then you will need to use another scheme in which such a pump is connected additionally.
Manufacturers
Preference should be given to mixing valves from manufacturers that have proven themselves well in the market. Such companies include:
- Esbe (Sweden) - occupies a leading position in the quality of products of this type. The valves are reliable, with a warranty period of more than 5 years.
- Valtec is a Russian-Italian company; its mixing taps have good characteristics at an affordable price. Warranty - 7 years.
- Honeywell (America) - the priority of mixers from this company is considered to be convenient and uncomplicated installation. They are reliable, but expensive.
However, it should be remembered that even high-quality products if installed incorrectly will not ensure correct operation of the system.
How to choose?
It is recommended to select a three-way valve in specialized stores. When choosing a model, you need to take into account its characteristics. When purchasing a device you need:
- study all documentation - warranty, manufacturer’s certificate, installation and operating instructions;
- give preference to bronze or brass devices - they will not expand when heated;
- based on the valve capacity - this parameter must correspond to the boiler performance;
- select a valve with a cross-section that exactly matches the size of the floor pipes; if there is a mismatch, you will have to buy adapters.
An important point is that even the apparent coincidence of the diameters of the valve inlet and outlet does not indicate the throughput level. This is affected by the size of the internal cross-section of the holes. This parameter is specified in the accompanying documents.
You need to choose a device based on the size of the heated room - for large areas an automatic device is recommended; it is able to maintain heating at the proper level. For small rooms, a simple one with a thermal head will do the job, so there is no point in overpaying for a more complex model.
When purchasing, you must visually inspect the device for chips and cracks. If the device is brass, then the inside should be golden.
Purchasing automatic devices will facilitate the adjustment process. And the presence of software will allow you to adjust the temperature taking into account the time and day of the week.
Installation Features
Installing a mixer has its own nuances that must be taken into account. All rules should be followed for more complete and uninterrupted operation of the system. Peculiarities:
- a two-way valve is more resistant to various changes. It is usually used for small areas. This type of valve is more reliable and easier to maintain;
- The three-way valve has many disadvantages that can be eliminated with proper primary balancing. If this is not done, then due to temperature changes the entire floor heating system may become unusable. For example, with a sharp change in temperature, if the valve has not been adjusted, then pressure surges are created in the pipes, which can lead to the pipes bursting;
- When using a three-way valve, all parts must be carefully checked for defects. In addition, it is advisable to use all components from one manufacturer;
- in the presence of various temperature fluctuations, which can be associated with both weather conditions and seasonal changes, it is necessary to use a controller that allows the system to independently regulate the level of stabilization;
- The location for installing the mixture must be selected in advance. In this case, the installation of the device must be done up to the floor contour and in a special collector-type box;
- The system is first installed, then connected to all pipes. After this, the summer resident sets the temperature, as well as pressure and pressure;
- if the unit is not fixed to a rigid hydraulic supply system, then rigid fastening to the wall is necessary;
- three strokes in the valve allow the mixing process to be adjusted automatically;
- The use of the simplest system is possible only in cases with a very small area. In all other cases, two- or three-way valves should be used;
- when purchasing the entire component assembly, you must first read the instructions, as well as the technical characteristics;
- For a large area you can install either one large mixer or several small ones. It all depends only on desire, as well as on heating requirements;
- if you plan to install several small mixers, then the entire area is divided into equal sections, after which it is provided with units;
- electricity is connected to the system only after all installation work has already been completed. This is especially true for three-way valves;
- the entire installation process must have a clear structure - selection of a mixer, installation point, arrangement of the site, installation process, connection, balancing and finding the optimal mode;
- Now there are various modifications of mixers that can be used in various individual and general networks. But at the same time, the standard equipment of the unit includes a thermostatic and tuning valve, a thermostatic head, a pump unit, various temperature instruments and other indicators.
The entire process of self-installation must take place in stages, that is, all preliminary measures, including arranging the site, must be completed. Most accessories are usually installed only at the request of the installer.
This also applies to changes in weather conditions, as well as to various temperature and pressure stabilizers. In addition, the installation process itself should begin only after the calculations have been made. For example, for 150 square meters one two-way valve will be sufficient if there are no secondary factors.
It is quite possible to install the unit yourself, but you must comply with all the conditions and requirements for the heating system. In addition, it must be remembered that many characteristics of various installation schemes must be taken into account in advance.
The choice of unit configuration depends on the conditions and requirements that will be installed for full operation. Installation should be carried out by a specialist or a person with experience, as this will avoid most mistakes.
