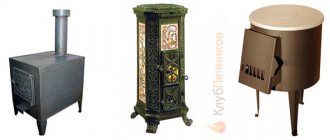
A potbelly stove is a simple heating device with more than a century of history. And if at the dawn of its appearance it was made from scraps of pipes and metal barrels, today a stove made from a gas cylinder is becoming an increasingly popular option for heating garages and baths. We figure out how to choose a cylinder for work, what kind of stove can be made from it, and in what order the work is performed.
Potbelly stove - a compact and efficient heating device Source ytimg.com
Methods of use and varieties
In our native land, a homemade stove made from a gas cylinder is a common source of heat in the winter. Most units are designed quite simply. According to the principle of operation, they are similar to a metal wood-burning stove: heat is released into the surrounding space through a body that is heated due to the combustion of wood (or other fuel). Homemade designs are used in the following situations:
- In the summer at the dacha for cooking food for people and animals.
- In winter for heating a garage, workshop, utility rooms.
- In residential areas for cooking and heating (enough for one or two small rooms).
- For heating the bath.
- A backup option in case of emergency failure of the main heating system.
Stoves converted from a gas cylinder do not have a single standard, but nevertheless, they can be classified according to the following parameters:
- According to the location of the cylinder. There are vertical and horizontal stoves; There are combined and double options. A vertical stove can often be found in a garage or utility room; horizontal ones are used for cooking and heating baths and living quarters.
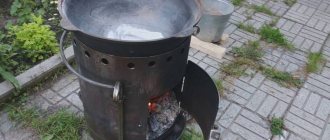
Potbelly stove with hob Source termopaneli59.ru
- By design. A standard stove has a rather low efficiency; a significant part of the energy literally flies down the drain. There is an improved option: pyrolysis furnaces, which include the bubafonya furnace and the rocket furnace. They are designed to maintain long-lasting combustion.
- By choice of fuel. Mostly, potbelly stoves run on natural fuel - wood, but there are models that use coal, waste (diesel), peat, and pellets (pressed sawdust).
Pros and cons of the design
Every car enthusiast knows how uncomfortable it is in a garage without heating during the cold season. But excellent thermal conductivity and quick heat generation are not the only benefits of using a potbelly stove from a gas cylinder. Owners of garages, cottages and bathhouses are aware of other advantages of the heating device:
- Saving. Manufacturing requires standard, inexpensive parts. You get a unit at minimal cost, which is pleasantly different from the price tag of a finished metal stove. Available fuel is used for combustion.
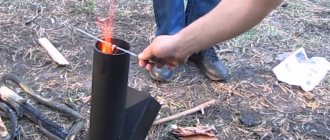
Furnace in operation, operating mode Source ytimg.com
- Ease of manufacture. The work can be done on your own, without the involvement of specialists. There are a lot of videos collected online that can help you learn the technology for assembling a potbelly stove of any design.
- Convenient dimensions. You can make a device to fit the size of a bathhouse or garage.
- Easy operation and maintenance. The cylinder produces a stove suitable for heating baths, residential and utility rooms.
It is important to know about the following disadvantages of the device:
- To work, you need to choose reliable, proven drawings; The efficiency of a random unit may be low.
- Due to its design and material, the structure does not retain heat: as soon as the fire goes out, it immediately cools down.
- It is strictly forbidden to heat a potbelly stove with waste (used lubricants) in a residential area. This is not only harmful to health, but also a potential explosion and fire hazard. The place for installing any stove is finished with fire-resistant materials.
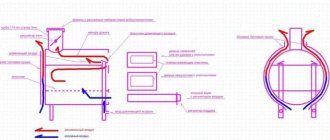
Diagram and dimensions of a country potbelly stove Source technicalservice59.rf
Stoves operating on exhaust have a separate drawback: due to the specifics of the fuel, more soot is formed, and the chimney has to be cleaned more often. In any case, when using liquid fuel, good air circulation is necessary, and this is possible with an established ventilation system.
Design features and principle of operation
Like any other direct combustion solid fuel stove, the unit, made from a gas cylinder, consists of several parts:
- firebox combined with the body;
- grate;
- blower chamber;
- chimney.
The blower is located at the bottom of the stove and is a small chamber (essentially a channel) necessary to supply oxygen to the combustion zone. To regulate the amount of air, monitor the process and remove ashes, the ash pan is equipped with a door.
Simple design is one of the components of the success of cylindrical potbelly stoves
In the middle part of the furnace there is a combustion chamber, which is separated from the ash pan by a grate. Being the main module of the heating device, the firebox simultaneously plays the role of a loading compartment and a heat exchanger. Like the vent, the firebox is equipped with a door through which firewood is placed into the potbelly stove and ash is removed.
The chimney is a channel necessary to remove combustion products from the working area. A damper must be installed in the chimney, which is closed after the wood burns out. This prevents heat from escaping from the room when the stove is not in use.
The operation of a heat generator from a gas cylinder is not difficult. After the firewood is placed on the grate, they are set on fire and the combustion chamber door is closed. The blower must be open at this time - air passes through it to the fuel. The intensity of combustion is controlled by closing or opening the bottom door. Heated gases are removed through the chimney.
To increase the efficiency of heat exchange, the potbelly stove is equipped with additional elements that allow the residual heat of the flue gases to be removed. To do this, an air heat exchanger or a water jacket is installed on the chimney. Often the modification consists of lengthening the part of the chimney that is located in the room.
Selection and preparation of the cylinder
The first thing you need to decide is the size of the metal container. The size is chosen based on the area of the room in which the cylinder stove is supposed to be installed. You can choose from the following options:
- 5 l cylinder. A five-liter container can heat a small room. Little fuel fits into it, and only in the form of chips or briquettes.
- For 12 l. The furnace will be able to provide small (up to 3 kW) thermal power. The heat is enough to warm a small workshop, utility room or gatehouse.
- For 27-30 l. You will receive up to 7 kW, which will be enough to heat a garage, garden house or greenhouse.
- For 40 l. Industrial cylinders have a small diameter and thick walls, therefore, the fuel load will be small. It is better to shorten such a container and make a small stove that will hold heat longer and last longer.
Potbelly stove with heater for a bath Source s-proms.ru
See also: Catalog of companies that specialize in the design and installation of fireplaces and stoves
- For 50 l. A propane cylinder is considered the best option for making a potbelly stove; Such dimensions are capable of providing heat to the cottage.
The cylinder needs preparation: removal of gas residues. If cleaning is neglected, an explosion may occur when cutting metal. The cylinder will become safe after the following measures:
- Unscrew the valve to get rid of any remaining gas. You need to set aside a day, so the container is left to vent the gas in the open air or in a non-residential area with good ventilation.
- Then the container is turned over to drain the condensate (any unnecessary container with a lid will do - condensation has a pungent odor).
- At the end, the container is filled with water to the very top for several hours to displace residual vapors. After draining the water, the cylinder can be cut without danger.
Features of operation of a pyrolysis furnace
The main difference between pyrolysis furnaces is the ability to use a wide variety of fuels. In solid fuel stoves, it is possible to burn not only traditional flammable substances, but also rubber, plastic and other materials that are strictly not recommended for burning conventional stoves.
This feature is associated with complete decomposition of the fuel and secondary combustion of the resulting gases in a separate chamber. After this, only carbon dioxide and water vapor remain in the smoke emissions. No harmful emissions into the atmosphere occur during pyrolysis.
But when using such fuel at the ignition stage, a persistent smell of burnt rubber remains in the room. Therefore, such heating units must be installed outside residential premises.
What materials and tools are needed
To make a garage or sauna stove from a gas cylinder, choose a steel, seamless propane (household) cylinder with the following dimensions:
- Case length: 1660-1755 mm. Diameter: 219 mm.
- Wall thickness: 5.2-8.9 mm.
The gas must be removed from the container Source f12.pmo.ee
Dimensions may vary, but maximum deviations (especially in thickness) must comply with GOST 949-73 standards. The tools you need to prepare are:
- Welding machine (200 A). Protective equipment (welding mask with light filter, gloves). Electrodes for welding structural steels (diameter 3-4 mm).
- Grinding machine (grinder). It requires cutting and cleaning discs for metal (diameter from 180 mm).
- Workbench with a vice.
- Drill and set of drills.
- To clean up welding slag: metal brush (with metal bristles), sandpaper.
- Tools: pliers, chisel, hammer.
- For marking: tape measure or folding meter, chalk (marker).
The range of materials depends on the size, shape and purpose of the structure. The middle list includes the following items:
- Pipe for chimney. Approximate dimensions: cross-section 120-150 mm, length 400 mm.
- Sheet of steel (thickness minimum 3 mm). The oven door is made of steel.
Stove with a horizontal heating device Source usamodelkina.ru
- Steel reinforcement or rod. Suitable for making a grate, you can make a handle for a door or a heater (if the stove is intended for a bathhouse).
- Metal corner or profile pipe. The materials will be useful for making legs.
If you plan to use a gas cylinder sauna stove, you will need a brick - this is used to build the foundation for the sauna structure. Diabase is ideal for filling the heater. Granite is not recommended; under the influence of high temperature it will quickly collapse.
If you do not have the opportunity to make a grate or other parts, you can purchase them ready-made. At this stage, you need to decide on the type of potbelly stove in shape. Taking into account the orientation of the housing (whether it will be located vertically or horizontally), all working operations are carried out.
Furnace modernization
Improving the operating parameters of the furnace is associated with an increase in its heat transfer. For this purpose, additional heat exchange surfaces are used on the furnace body. Such parts can be made from various metal profiles, including strips, angles, and profile pipes. The choice of material depends on what is available from leftovers.
Additional heat exchangers made of metal profiles increase the efficiency of the device
Additional heating surfaces can be installed not only on the outer surface, but also inside the firebox, which allows you to intensively heat the air in the room. A negative result of such a solution will be oxygen burnout at high temperatures.
Manufacturing procedure
The orientation of the housing is chosen depending on the location and purpose of use. The horizontally positioned design is more convenient for cooking or bathing. The vertical version is often used for heating; They place it in garages: it takes up little space, and the traction in it is stronger.
Potbelly stove made from two cylinders in the garage Source ad-cd.net
Installation of a horizontal stove
The stove-stove is assembled in the following sequence:
- A square hole is marked and cut at the end to install the loading door (sometimes the end is cut off entirely).
- At the opposite end, according to the markings, a round hole is cut out for the chimney pipe.
- A hole for the grate is marked and cut out at the bottom. A box for collecting ash is welded under it (it is made of sheet metal).
- The ash chamber simultaneously plays the role of a blower, so it is supplemented with a door for adjusting the draft. To make the door, a fragment cut from the body is suitable, but you can supply a purchased part. The finished door makes the task easier, as it is equipped with a frame and a latch.
- To make a grate, thick reinforcing (knitting) wire is suitable; a lattice of the required size is cooked from it.
- For safe operation, reliable support is needed. Legs from a corner or runners from a profile are suitable as a stand. The supports are fixed to the body using spot welding; as a result, they must support the weight of the structure along with the loaded fuel.
Grate option Source ytimg.com
- A pipe - an adapter - is welded to the rear round hole, through which the chimney pipe is connected. The pipe needs a thick wall, otherwise it will quickly burn out under the influence of hot combustion products.
Instructions for making a potbelly stove with your own hands
Before you cook a long-burning wood stove, you should prepare all the necessary power tools:
- welding inverter;
- grinder, also known as an angle grinder;
- drill with a set of drills.
Note. We will not list hammers with pliers here, since a good owner will always have a full set of tools in his house.
Of course, you will need an old propane tank, from which you need to twist the valve and be sure to fill it with water before cutting. The fact is that propane is heavier than air and its residues will not leave the tank on their own. To push them out of there, water is used. The order of further work depends on the chosen design.
Assembling a three-pass furnace
In addition to the cylinders, to make this potbelly stove you need to prepare the following materials:
- sheet metal 2 mm thick will go to the ash chamber and ribs, 3 mm - to the doors;
- a piece of round pipe with a diameter of 100 mm - for the chimney pipe;
- corners or profile pipes for legs;
- asbestos, or better yet, graphite-asbestos cord for sealing the doors;
- steel profile 20 x 20 mm or reinforcement of the same cross-section - to strengthen the grate.
Joining two cylinders (left) and welding door frames (right)
Advice. Handles - locks with beautiful ebonite linings are easier to buy than to waste time on homemade ones. To give the stove a modern look, purchase heat-resistant paint (sold in aerosol cans).
To prevent the rods from bending from high temperatures, they need to be reinforced with welded profiles.
First of all, cut the metal into blanks according to the dimensions indicated in the drawing of a long-burning potbelly stove presented in the previous section. The furnace manufacturing technology is as follows:
- At the end of the first cylinder, cut an opening for the door and a hole in the wall for the gases to escape. Cut off the bottom of the second vessel, and make a 100 mm hole at the end for a pipe. Make semicircular cutouts on the walls so that one cylinder sits tightly on the other.
- Cut the slits in the grate. From the outside, weld amplifiers from a 20 mm profile to it.
- Make an ash pan and door frames, weld them to the body. Install the legs at the same time.
- Weld the doors and seal the junctions with the frame. Install the sashes and handles.
- Use the cut out walls of the cylinder as partitions, welding them inside the vertical tank.
- Connect the two vessels together by welding. Install the chimney pipe and boil it.
- Attach heat transfer fins to both housings. At this point the oven is ready.
A few words about how to make tight doors for a long-burning potbelly stove. The technology is simple: a channel is formed from narrow steel strips welded to the inner surface of the sash, into which a graphite-asbestos cord is subsequently stuffed. The main thing is to clearly determine the location of the groove. Upon completion, all metal must be degreased and painted in 3 layers with breaks for drying.
Advice. Before painting, it is advisable to heat the welded stove in order to burn out all the old paint.
Manufacturing of a two-chamber pyrolysis stove
The assembly diagram of this high-efficiency potbelly stove is in many ways similar to the Collider, only 1 gas cylinder is used, and pipes with a diameter of 57 and 20 mm are added from materials (for the heat exchanger and secondary air supply, respectively). The work order is as follows:
- Cut holes in the tank for the loading door and for installing the heat exchanger. The dimensions of the platform for it are 260 x 200 mm.
- Make an ash pan and install doors as described above. Weld the supports.
- Make a heat exchanger by cutting pipes in a staggered pattern between two sheets of metal. Observe the center distances indicated in the drawing.
- Bend the 20 mm pipe at an angle of 90° and weld it to the heat exchanger. Attach the latter to the opening cut in the cylinder.
- Weld the secondary chamber with the chimney pipe. As a lid, use a semicircular blank that used to be the wall of the cylinder. The heater is ready.
Stages of assembling the firebox door - non-combustible insulation is laid in the center, graphite cord is laid along the edges
Note. If you use a standard cylinder, then the work algorithm does not change, only the ash pan needs to be made larger (the size is shown in the drawing).
A little about how to properly supply air to the secondary chamber of a long-burning potbelly stove. Before installation, the end of the tube must be plugged, and 5-6 cuts in the form of a Latin V must be made on the sides. Then the pipe is inserted into the hole in the upper platform of the heat exchanger and scalded. If you make a potbelly stove with your own hands from a pipe taken instead of a cylinder, then you will need to weld the back wall and the front panel of metal at least 4 mm thick.
Such slits need to be made on the sides of the tube - air passes through them into the secondary chamber
Photo of the potbelly stove assembly process
We install a frame for the furnace doors We weld the ash pan from sheet metal We cut the grate bars and reinforce them with a welding profile Weld the ash chamber to the cylinder We put handles and locks on the doors We cut out an opening on top for installing pipes View of the grate bars through the opening for the heat exchanger We cut holes for pipes in the flanges of the heat exchanger We weld the heat exchanger Assembling the second chamber with a heat exchanger and stove
Making a potbelly stove on video
Assembling the Bubafonya heater
The manufacturing technology of this stove is one of the simplest. Take a 50 liter gas cylinder, cut off the top part along the factory seam, and then perform the following steps:
- Weld a grate from periodic profile reinforcement with a diameter of 20-24 mm and install it according to the drawing. Below, cut an opening and install the ash chamber door.
- Make a hole in the cut-off lid for the air pipe, and weld a steel strip to the outside of the cylinder for sealing.
- Attach a disk weight with welded air diffusers to one end of the 57 mm pipe by welding, and place an air damper on the other.
- Install the chimney pipe.
- Insert the air pipe into the firebox and put on the lid.
In fact, 3 parts are the entire Bubafonya stove
For reference. Many home craftsmen do not install grates and an ash pan door in a Bubafonya-type stove. This simplifies the work, but complicates the operation: after the firewood burns out, the body has to be turned over to shake out the ash.
Installation of a grate made of reinforcing bars
Video description
About making a stove from a cylinder for heating a garage in the following video:
Installation of a vertical potbelly stove
A vertical stove for a bath from a gas cylinder is made in the following order:
- The cylinder is fixed in a vertical position, the upper part is cut off with a grinder (where the fittings are), future holes for the firebox and ash pan are marked below (through which the potbelly stove will be cleaned of ash).
- Two holes are cut out on the front of the body using a grinder. The upper, large hole is for the firebox, the lower, smaller one is for the ash pan. You can use a gas or plasma cutter.
- A grate is installed between the furnace chamber and the ash pan. It is difficult to find it ready-made, of the required size and shape, so the lattice is made independently from reinforcing bars. The reinforcement is cut into pieces of the required size and welded inside the cylinder to the walls along a pre-marked mark.
Location of the firebox and blower Source vsaunu777.ru
Will a small bottle suffice?
You can also work with a small balloon. It is made according to the same plan as a horizontal stove.
- But in this version, instead of drilled holes in the bottom of the stove, a cast iron grate is installed. A window of the required size was cut out for it.
Installation of a cast iron grate
- The blower in combination with the grate is welded as follows.
Ash pan made from a piece of channel
- Next, the legs are welded onto the ash pan box, the structure is turned over and the chimney pipe is installed on top and secured by welding.
- After completing work on the potbelly stove, it is installed in a permanent place and the chimney is taken out into the street.
Subtleties of operation
Like any potentially dangerous structure, a homemade sauna stove from a gas cylinder is made taking into account fire safety standards. To ensure its operation is correct, safe and economical, the following rules have been developed:
- A minimum gap of 20-30 cm should be maintained between the stove and concrete (brick) walls. There should be at least half a meter to other surfaces, while adjacent surfaces are finished with metal.
- For fire safety purposes, the stove is installed on a metal or concrete (brick) base.
- It is recommended to equip the chimney with a view (damper). This will help regulate draft and save firewood.
- Caring for a potbelly stove includes cleaning the chimney. It is carried out twice, before and after the heating season.
Two-story potbelly stove with increased heat transfer Source aviarydecor.com
How to increase efficiency?
To make your stove more efficient, there are several simple ways. First, you should insulate the chimney pipe to retain some of the heat that escapes with smoke gases. Various methods can be used to increase the area of contact between the heated metal and the surrounding air.
The installation of a kind of cap from an additional gas cylinder will help to significantly improve the thermal performance of a potbelly stove built from a gas cylinder:
Image gallery
Photo from
An ordinary stove from a cylinder in the garage
Preparing a smaller capacity cylinder
Installation of a smoke circulation chamber
Device for increasing heat transfer
Some craftsmen recommend making the chimney not strictly vertical, but curved. This will increase the path of combustion waste and allow some of its heat to return to the room. But it should be remembered that the complicated design of the chimney can negatively affect the draft, so you should not get carried away with excessive bends.
Sometimes metal wings are welded to the body of the potbelly stove, for example, made from a corner or any suitable strips of metal. If the size of the stove allows, you can weld a horizontal sheet of metal on top and make an additional hole in it not for the chimney, but for a pan or kettle.
The hole is closed with a special composite lid made of several concentric circles. By removing or adding circles, you can adjust the degree of heating.
Another option for upgrading a potbelly stove is a brick case. The masonry is done around the stove, leaving a small gap between the metal body and the brick. The brick will absorb some of the thermal energy and then gradually release it to the surrounding air.
If you wrap the chimney with a metal mesh and place stones in the resulting gap, you can increase the heating efficiency. Even after the wood burns out, the stones will continue to give off heat for some time.
An alternative version of this modernization is a metal mesh around the chimney, into which pieces of brick or stone are placed. This is a popular solution for stoves installed in a bathhouse, a variation of a heater. But it should be remembered that only river “pebbles” of uniform color and without inclusions are suitable for this. If the stone is made up of layers of different types, it may rupture when exposed to high temperatures.
If you need a stove of substantial size, the master has two gas cylinders at his disposal; you can combine them into one design. One of them is installed horizontally, and the second is installed vertically as a pipe for the chimney. The heating area increases, such a potbelly stove will work more efficiently.
Metal pipes built into the body of the potbelly stove in combination with a fan allow you to increase the rate of heating of the room, but to achieve this effect you will need electricity
Finally, you can insert pipes inside the upper part of the body through which air will circulate. If you place a fan at the end of these pipes, the air will move faster. This equivalent of a fan heater will allow you to warm up the entire room in a few minutes and distribute thermal energy more efficiently.
Briefly about the main thing
A potbelly stove, converted from a gas cylinder, has remained a popular heating device for decades. It confidently copes with heating small rooms, has convenient dimensions, and can be done by a home craftsman with basic skills in welding and plumbing.
Large household gas cylinders are best suited for production. By design, horizontal and vertical models are distinguished; the former are convenient for cooking, the latter often serve as a source of heat in the garage, bathhouse or country house. The finished stove is installed in a prepared room and operated in compliance with fire safety rules.
Video: How to make a super wood-burning stove from a used cylinder
The proposed options are only a small part of what was invented by folk craftsmen. Look how the craftsman combined brickwork and a gas cylinder in one potbelly stove:
If you have an understanding of working with the tools described above and all the necessary materials, you can try to make this convenient and sometimes irreplaceable stove yourself. By making it yourself, you can save quite a large amount, and also make an already unnecessary gas cylinder function. The most important thing is to approach this work responsibly and do it slowly, checking every action.
A simple potbelly stove made from a can
The simplest potbelly stove is made with your own hands from an ordinary can. There is no need to talk about the durability of such a structure, but it is quickly built, easy to install and provides enough heat.
9677458bec7c3e40a0c0a5cd64bffdd0.jpe
All the work consists of installing the legs, arranging the outlet pipe and some cosmetic operations. To work you need:
- Can
- Flue pipe
- Wire for grate
- Welding machine
- Tools
Let's get started
- We install the can horizontally and mark where the blower will be, shaped like a rectangle or sickle. Place it under the lid
- A hole is cut in the wall or bottom of the can, equal to the diameter of the chimney pipe
- To make a grate, you need to stock up on steel wire. It is bent, carried inside through the lid and carefully unbent so that the zigzag is positioned in the desired position, while it remains convenient to lay wood chips, firewood, etc.
- The can must be secured to legs, which are cut from tubes or corners and welded
- The chimney is welded
A reflector can be attached to the outside of the tank, thanks to which less generated heat will evaporate. Having welded the handles on the sides, the structure can be moved to any other place.
Pros and cons of homemade potbelly stoves
Among the many advantages of such a nondescript but useful installation are:
- Full autonomy and energy independence
- Working with any solid fuel, including plant residues, allows you to save a lot of money
- The versatility of the design, which can not only be installed in various rooms, but also used for cooking
- A simple design that you can build yourself from materials available in the garage
- There is no need to construct a monolithic foundation and install a capital chimney pipe
But despite the significant and numerous advantages, a number of disadvantages of potbelly stoves can be identified:
- The high thermal conductivity of the metal leads to rapid fuel burnout and cooling of the furnace
- If the wall thickness is insufficient, they will soon begin to burn out and the oven will fail.
- You need to watch the combustion process and add firewood in time, control the draft
- Resinous and damp logs cause difficult to remove soot in the chimney pipe
Video - another option for making a stove
A homemade potbelly stove is a reliable and effective assistant in a cold workroom or your own garage. Its production is not difficult, and to start work there is no need for large material investments.
Good material is collected in your article. For a very long time I thought about buying a ready-made one or making it myself, but I finally decided to do it myself. I used a 200 liter fuel barrel as a raw material. I was guided by a detailed drawing that I found at https://kamin-maker.ru/pechi/pechka-burzhuyka-iz-bochki/ I won’t say that the option for a potbelly stove made from a barrel is very good, There is also a drawback, such as thin metal, which means the service life is no more than a year, but a huge plus is the very cheap and uncomplicated production of this unit. Based on my experience, such a stove perfectly heats a room of 80 m2, I use pressed sawdust as a raw material, one bookmark lasts me at least 6 hours. I resisted doing it for a long time or not, but in vain, it’s a great thing!
5bdedcb7ed5bd81554f3482ed13711bc.jpe
Potbelly stove made of metal sheets
Let us present the features of making a stove from metal sheets that use different raw materials for heating: waste and firewood.
Furnace in production
To start working with your own hands, a metal sheet of about 5 mm is prepared (this is the width that allows the stove to quickly warm up and effectively heat the garage) and pipes (needed for the chimney and some other elements). For a more accurate understanding of the manufacturing principle, look at the drawing:
Drawing of a potbelly stove being processed
Let's get started:
- According to the given dimensions, you need to cut out the elements from the sheet from which the stove will be made. Try to clean up the cut edges as much as possible.
- The part for fastening the components of the potbelly stove is being prepared - a pipe with holes.
- Parts of the upper tank are prepared for installation of the chimney pipe. To do this, according to the data given in the drawing, you need to make a hole shifted to the left in relation to the cent. Also, another hole is made at the bottom of the tank (offset to the right) - it is intended for installing a connecting pipe.
- The component parts are welded together and a finished tank is obtained.
- The lower tank is welded in the same way. Only a hole is made to install the pipe in the center. You also need to make another hole with a slight offset - recycling will be poured into it. A special sliding lid is made over the filling hole.
- The lower tank is attached to the upper one (they are welded to the connecting pipe). Strengthen the structure using brackets.
- Don't forget to weld the legs to the lower tank.
- To increase service life, the stove is cleaned and painted.
You connect the potbelly stove to the chimney and try to heat the garage. To do this, pour fuel into the lower tank and set it on fire. When it flares up, you need to close the processing hole with a sliding lid.
Rectangular wood stove
Drawing of a rectangular potbelly stove
This option is suitable when you need to heat a garage or bathhouse rooms intended for relaxation.
The features of the model, the manufacture of which we will describe with our own hands further, are high heat transfer and the ability to adjust the traction force.
Our oven will have dimensions 45x45x80. These dimensions are enough to heat an average room. It will hold long pieces of wood and is easy to move.
In this case, we will not provide a specific drawing, and will try to explain it in words as much as possible. Before starting work, we buy:
- Steel 3-4 mm thick. A sheet of one and a half by two meters will be enough.
- A piece of pipe. Choose with a diameter from 90 to 100 mm. Length: 0.4 m.
- Reinforcement 16 mm. You need exactly 6.2 m.
- Five kilograms of electrodes.
- Four door hinges.
- A steel rod, half a meter long and about 10 mm in diameter.
- Seven meters of corner with a 40 mm shelf. The walls should have a thickness of 5 mm.
When everything necessary is prepared, we begin to work with our own hands in the following sequence:
- The future walls of the structure are cut out of the sheets.
- The corner is welded in such a way as to form a frame. When performing this and the first point, you need to remember the above dimensions of the stove (45x45x80).
- The reinforcement is cut and welded to the frame at intervals of 2 cm.
- The finished frame is scalded with tin.
- Along the diameter of the smooth rod in the section of the pipe that will be the chimney, you need to make 2 holes. The pipe is welded to the frame (before this you need to make a hole for it).
- A curved rod is inserted into the chimney holes. It should be shaped like a right angle. A piece of round tin, slightly smaller in size than the internal diameter of the chimney, is welded to it - it will be used for adjustment.
- The potbelly stove must have doors. They are cut directly from the body. Loops are welded onto the removed piece of metal, with the help of which they are attached to the stove.
- The doors are equipped with bolts and handles, which can be made of any convenient type. The main thing is that they guarantee maximum fixation of the door (if you don’t want to burn down the garage).
- When the work is finished, you can check the result of the work with your own hands and start heating the garage.
Schemes of potbelly stoves
The main advantage of a rectangular stove
. unlike oval products made from pipes or gas cylinders, it consists of a larger heated surface area, so its efficiency will be much greater. The optimal size for a potbelly stove is 800x450x450 mm. A stove of this size will not take up much space and will easily fit even in a small room.
The simplest design is the “Gnome” stove, which consists of a box with a pipe welded to it
An important difference between the Loginov stove
is the presence of two plates (
reflectors
) in the upper part of the combustion chamber.
Since the path of gas movement
increases, the heat transfer of such a potbelly stove is significantly higher than that of a conventional metal stove.
Advice
. If you need to reduce the size of the Loginov oven, then it is advisable to change only its width. If the length and height of the structure changes, its efficiency may decrease significantly.
Detailed diagram of Loginov's potbelly stove
Top combustion furnace structure
The design of this type of heater is very different from traditional wood-burning stoves. The vertical stove “Bubafonya” consists of the following elements (see drawing):
- a cylindrical firebox with an ash pan door and a removable top cover;
- disk weight with air distributors welded to the end of the air pipe;
- grate;
- chimney connection pipe.
Drawing of a stove made from a standard 50 l gas cylinder
Reference. The simplest version of “Bubafoni” is made without grates at all. But cleaning the stove is extremely inconvenient; you have to disconnect the chimney and turn the body over.
The cylindrical shape of the walls of the combustion chamber is due to 3 reasons:
- From an aerodynamic point of view, a round pipe is always better than a profile one. Rising along the walls, combustion products evenly heat the body of the potbelly stove.
- There are no fillet welds - the weak point of any steel furnace or boiler.
- During the combustion process, fuel residues do not “hang” in the corners, which is observed even in some long-burning boilers.
The upper end of the air pipe is equipped with a damper for manually regulating the air supply to the firebox. A disk-shaped weight is attached to the bottom (other popular names are pancake, piston). Straight or curved air flow distributors are welded to the bottom of the disk. The pipe itself passes through the firebox cover with a minimum gap of 2-4 mm.
The furnace is ignited from above (photo on the left), combustion continues under the piston (on the right)
How the Bubafonya long-burning stove works:
- We fill the chamber to the top with solid fuel - firewood, coal, sawdust. We ignite the fuel directly from above, as shown in the photo. Then insert the piston into the firebox and close the lid.
- Open the damper at the end of the air duct. When the stove lights up, close the air supply about halfway.
- Combustion occurs in the upper zone of the fuel fill, under the pancake. It is there that air from the pipe enters under the influence of the natural draft of the chimney. Distributors promote better flow dispersion.
- Hot gases pass through the gap between the disk and the body, give off heat to the walls of the chamber and rush into the chimney.
- As the wood burns, the load lowers under its own weight until it rests on the grate.
An important feature of Bubafoni. Since fuel combustion occurs from top to bottom, the combustion zone gradually moves behind the piston. The walls around the flaming layer of firewood are heated to the maximum (sometimes red-hot), the temperature of the rest of the body is much lower.
The zone of greatest heating is clearly visible from the outside when the potbelly stove heats up red hot
What and how to make doors from
Doors for potbelly stoves can be purchased cast. You will need a small height for the ash pan and a larger one for storing fuel. There are ready-made blocks - a flow door with a blower in one design. In this case, a frame made from corners welded to size is welded into a hole cut to size, and the casting is already bolted to it. To prevent air from blowing in from the cracks, a small edge is welded around the perimeter of the cutout under the door - a 1-2 cm strip of metal.
How to attach a cast iron stove door to a gas cylinder
You can not buy doors, but use a cut piece of a balloon wall. Then you will need some kind of hinges or replacement parts. It’s clear with the hinges: mark the places, weld them. There is an interesting version of homemade loops: several links of a thick chain.
The hinges on the door can be made from several links of steel chain
A latch will need to be welded to such a door.
What is a potbelly stove with a water circuit: the advantages and disadvantages of a popular stove
A potbelly stove is characterized by high heat transfer and fuel burning rate. These qualities are given to it by the materials from which the firebox is made (cast iron, steel, iron). The potbelly stove quickly flares up and heats up, and if a water circuit is connected to it, then the warm flue gases along the way also manage to heat the water for domestic needs.
When choosing the material from which it is best to make a potbelly stove, you need to be guided by the following indicators:
- Thermal conductivity is the property of metals, liquids and gases to conduct heat through themselves. The faster heat is transferred, the faster the object heats up or cools down. Foam plastic has low thermal conductivity - 0.036–0.050 W/m*C. Taking it in our hands, we will immediately feel that it is warm, because the foam does not transfer heat, but accumulates it. If you take a metal bar, you will feel the cold due to the high heat transfer.
- Heat capacity is the property of a material to accumulate heat. Water has the highest heat capacity, air is in second place, and cast iron, steel and iron are at the end of the list. Therefore, a metal stove heats up quickly and cools down just as quickly. In city houses, central heating radiators are filled with water, which gives off heat for a long time, heating the home.
List of materials used to create a potbelly stove:
- Steel.
- Cast iron.
- Iron.
- Brass.
- Aluminum.
- Copper.
There are many articles on our website that describe instructions for making stoves. In the following material you will find installation instructions for a potbelly stove operating on waste oil:.
Table: thermal conductivity, heat capacity and melting point of popular materials for creating a potbelly stove
| Material | Thermal conductivity, W/m*oС | Heat capacity, J/kg*oС | Melting point, oС |
| copper | 382–390 | 400 | 1085 |
| aluminum | 232–236 | 920 | 660 |
| brass | 97–117 | 400 | 900 |
| iron | 74 | 460 | 1539 |
| cast iron | 62,8 | 500 | 1200 |
| steel | 47 | 540 | 1500 |
| water | 0,6 | 4200 | — |
| building brick | 0,2–0,7 | 880 | 1000–1100 |
| Styrofoam | 0,036–0,050 | — | 150–200 |
| air | 0,025 | 1100 | — |
Copper is the most thermally conductive material of all those listed in the table. Its disadvantages are cost and melting point. Aluminum and brass have the same limitations. At high temperatures, a cast iron or steel stove will only turn red, but will do its job, while a copper, aluminum or brass stove will melt.
Potbelly stoves are most often made of steel because it has a high melting point and the highest heat capacity among all available materials
Making a stove from steel, iron and cast iron is justified due to the prevalence of these materials. From the point of view of thermal conductivity and heat capacity, they need fine-tuning. It is more expedient to use the thermal energy of the stove to heat water, otherwise it will simply go down the chimney. To limit heat loss, it is also very important to achieve complete combustion of the fuel.
The ideal way for a potbelly stove to work is when barely warm air comes out of the pipe, and all the energy is directed into hot water supply and heating the house.
Table: advantages and disadvantages of a potbelly stove
| Advantages | Flaws |
|
|
As can be seen from the table, a potbelly stove has a lot of disadvantages, so if you decide to install this design, you will have to take into account all its weaknesses.
You can also make a simple diesel stove for the garage. Our material offers three designs. More details here: .
