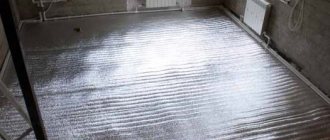
Insulating the concrete floor of the first floor will not only make your home more comfortable, but also significantly save on heating costs. The explanation is quite simple: if heat saving is low, then more resources will be required to maintain optimal temperature conditions. Moreover, contact with a cold floor can cause many diseases, which is especially true if small children live in the house, so thermal insulation of a concrete floor should be taken seriously.
Insulation of the concrete floor of the first floor
Review of insulating materials
The problem of cold floors on the ground floor is typical for both private houses and urban high-rise buildings. To properly resolve the problem, you need to find out the reasons for this situation:
- for private houses the reason often lies in poor quality/absent thermal insulation of the base;
- in high-rise buildings, a cold floor is a consequence of an unheated basement.
In the first case, everything is quite simple - you need to get rid of the cracks in the floor. For this purpose, the base is checked, and all detected cracks are sealed with polyurethane foam. Next, the floor is insulated using one of the possible methods.
Foaming cracks in the floor
Note! The ventilation holes, which are located in the basement of the house, must under no circumstances be closed, otherwise the increased humidity will lead to rotting of the wooden floor elements (such as, for example, sheathing).
The ventilation hole cannot be removed or sealed tightly
And if everything is clear with private houses, then with city apartments everything is much more complicated. There are a number of possible insulation methods; let’s take a look at each of them.
Insulation with mineral wool. This material has excellent sound and thermal insulation properties, it is impervious to aggressive chemicals and high temperatures.
Minvata
Types of mineral wool by density
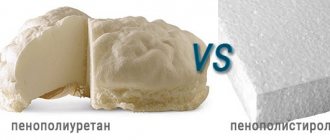
Thermal insulation with foam plastic. Among its advantages, it is worth noting low cost, good insulating properties and durability. The material is lightweight and can be laid not only on concrete, but also on tiles, wood, etc.
Styrofoam
| Brand of foam boards | PSB-S15 | PSB-S25 | PSB-S25F | PSB-S35 | PSB-S50 |
| Material density, kg/m3 | 10-11 | 15-16 | 16-17 | 25-27 | 35-37 |
| Compressive strength at 10% linear deformation, MPa, not less | 0,05 | 0,1 | 0,12 | 0,16 | 0,16 |
| Bending strength, MPa, not less | 0,07 | 0,18 | 0,2 | 0,25 | 0,3 |
| Thermal conductivity in dry condition at a temperature of 25 (+-5 degrees), W / (m * K), no more | 0,037 | 0,035 | 0,037 | 0,033 | 0,041 |
| Humidity of slabs, %, no more | 1 | 1 | 1 | 1 | 1 |
| Self-combustion time, sec, no more | 3 | 3 | 3 | 3 | 3 |
| Water absorption in 24 hours, %, no more | 1 | 1 | 1 | 1 | 1 |
| Service life, years (minimum-maximum) | 20-50 | 20-50 | 20-50 | 20-50 | 20-50 |
Thermal insulation with plasterboard or fiberboard.
Drywall
Using a "warm floor" system.
Electric heated floors
Insulation with expanded clay. Not the most reliable, but affordable option. It is characteristic that expanded clay can not only be used to fill the base, but also added to the concrete screed.
Insulation with expanded clay
| Material | URSA | ISOVER | IZOVOL | IZOBEL | ECO WOOL |
| Thermal conductivity, W/m*°С | 0,04 | 0,041 | 0,034 | 0,035 | 0,035 |
| Operating density, kg/m3 | 11 | 11 | 35 | 28 | 35 |
| Recommended layer thickness, mm | 200 | 200 | 150 | 150 | 150 |
| Cost of insulation, rub/1m3 | 1347,22 | 1470 | 1800 | 1270 | 1050 |
| Cost of insulation, rub/1m2 | 269,44 | 293,8 | 270 | 187,5 | 157,5 |
The disadvantages include
– fragility (with intensive use, the laminate will last no more than 5 years)
– impossibility of restoration
– coating hardness
– unnaturalness
Having familiarized yourself with all the pros and cons of laminate, we can definitely say that laminate has much more advantages. Now you need to understand whether it is possible to lay laminate flooring in half an apartment located on the ground floor?
To answer this question, we need to return to the components of the laminate.
– the top layer is protective. It is this layer that is resistant to mechanical stress.
– middle layer – decorative
– bottom layer – it is the bottom layer that plays an important role during temperature changes in the room, and it is this layer that is resistant to changes in humidity levels.
In other words, thanks to its bottom layer, the laminate will withstand the humidity and low temperature, which, one way or another, affects the general condition of the apartment located on the ground floor, i.e. Laying laminate flooring is possible on the first floors.
But only the bottom layer of the laminate will not be enough to absorb moisture coming from the basement into the apartment, therefore, when laying the laminate, it is necessary to use substrates.
Material selection criteria
When choosing insulation, you should pay attention to the main parameters.
- The material should not have any visible defects, as they may interfere with installation.
- Preference should be given to insulation with minimal thermal conductivity, i.e. the ability to transfer thermal energy from heated places to cold ones. The lower this indicator, the warmer the house will be.
- The shape and dimensions of the material must correspond to specific conditions. Of course, if mineral wool is used, it can always be compressed or bent, but rigid insulation can cause certain difficulties in the case of non-standard sizes.
The shape and dimensions of the material must correspond to specific conditions
- Moisture absorption is another important parameter. The first floor is located very close to the ground, therefore, the humidity on it is constantly increased. And if the foundation is poorly waterproofed, then capillary suction of moisture will occur, which, having penetrated into the insulation, will increase heat loss. In this case, you need either effective waterproofing or insulation with minimal moisture absorption.
- The density of the material should also be taken into account. So, if there is a basement, then the installation will be carried out on the floor between it (the basement) and the finishing level. As a result, the load on the structure will increase, which in some cases is unacceptable. Therefore, the material with the lowest density is selected or accurate calculations are made. Although there are exceptions - concrete floors installed directly on the ground.
SNiP 21-01-97. FIRE SAFETY OF BUILDINGS AND STRUCTURES
SNiP 21-01-97
Let's consider in what situations it is advisable to use each of the options, and also read the installation instructions.
| Name of materials | Advantages | Flaws | Application area |
| 1. Wood (sawdust) | cheap, environmentally friendly | rots, ignites | Old wooden houses |
| 2. Expanded clay | does not burn | Ineffective, use of lifting mechanisms, labor-intensive installation, heavy weight | Floors, attics, layered masonry |
| 3. Foam plastics (penoizol, extruded polystyrene foam, expanded polystyrene foam) | rigid, easy to install | for all foams: limited heat resistance and flammability; smoldering begins at 80 C; not environmentally friendly - release of cumulative toxins, poor vapor permeability - does not “breathe”, formation of condensation, mold. Foamed polystyrene foam has water absorption up to 900% and a short service life. | Walls, roofs, floors |
| 4.1 ISOROC mineral wool (IzoLANt, IzoVent, IzoRuf V) | non-flammable base, low thermal conductivity | shrinks, clumps, fibers break and turn into dust, settles when moistened | layered masonry, ventilated facade, roof |
| 4.2 Mineral wool ROCKWOOL (LightButts, KiwittyButts, RoofButts V) | non-flammable base, low thermal conductivity | shrinks up to 20%, after moisturizing up to 25% | Non-loaded structures, middle layer in layered. masonry, roofing |
| 4.3. Minplate (P125, P75, PPZh-200) | non-flammable base, rigidity, ease of installation | binders and water-repellent components burn out already at 250 C; poor vapor permeability - does not “breathe”; formation of condensation, mold; humidification by 1% leads to a deterioration in thermal conductivity by 8%; large shrinkage, which leads to the formation of “cold bridges” in the seams of the insulation | layered masonry, roof, facade for plaster |
Insulation with mineral wool
This method is optimal for city apartments in which the finishing coating is made of wood. The algorithm of actions should be as follows.
Stage 1: First, the old flooring is removed to leave a bare concrete base. If the coating is still good, then it is removed carefully, after numbering the boards (this is necessary to maintain order when re-laying). Next, all debris is removed, the working surface is cleaned of dust and dirt.
If the screed is fairly smooth and without cracks, then it is enough to clean it with a vacuum cleaner.
Stage 2. In most apartments and houses, the floors are uneven, so it is recommended to level them, which will not only ensure comfort, but will also greatly simplify further work. Often a screed is used for leveling, although there are other, cheaper methods.
An example of leveling a floor with a self-leveling mixture
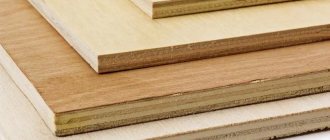
An example of leveling a floor with plywood
Note! As already noted, a cold floor can be a consequence of the presence of cracks and cracks in the base. Therefore, if any are found, they are carefully sealed.
Stage 3. After leveling, a vapor barrier material is laid, which can serve as an ordinary polyethylene film. The vapor barrier is laid with an overlap of 15-20 cm and extends onto the walls to the height of the future insulating layer along with the logs.
Floor waterproofing
Stage 4. Next, logs are installed on the floor. It is advisable to do this in increments of at least 90 cm, since the smaller it is, the more even the load distribution will be. More specific step sizes are determined by the width of the mineral wool slabs and the area of the room.
Note! The logs should be installed at the same pitch and securely fixed in the appropriate places.
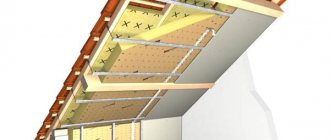
Stage 5. After installing the logs, mineral wool is laid. To do this, it is cut according to the dimensions of the grooves and installed between the guides.
Installation of mineral wool on logs
Note! The material should fit as tightly as possible to the guides, the presence of any gaps is excluded. This is quite simple to do: the insulation should be cut into strips, the width of which will exceed the pitch between the joists.
If the ceiling height is sufficient, mineral wool can be laid in two layers. But the second layer must be laid so that the joints of the first are in the center of the slabs of the second layer. Note that builders who are not conscientious often neglect this, since such installation requires a lot of time. But this is the only way to prevent the leakage of thermal energy.
An example of the correct multi-layer laying of mineral wool slabs
Waterproofing is installed on top of the insulation.
Stage 6. The insulation procedure is completed by laying the finished floor. First, a durable material is attached to the previously installed joists, which is necessary to distribute the entire load during operation. Drywall, chipboard or plywood can be used as such material. Next, the flooring is laid (in our case, marked boards) and the room is cleaned.
Chipboard flooring
Laying floorboards on an insulated floor
Foam insulation
Thermal insulation of a concrete floor with this material can be done in one of two ways:
- installation of foam plastic under a wooden floor;
- installation from the basement.
First, the basement is examined for communications that may prevent the installation of thermal insulation sheets. If there are no such communications, then you can begin installing the slabs from the basement side.
Stage 1. First, the required insulation area is determined. To do this, use a long tape measure to measure the distance between the load-bearing walls.
Stage 2. Next, the perimeter of the room on the 1st floor is marked on the ceiling of the basement (a tapping cord will be required). On each side you need to step back about 50 cm beyond the line.
Applying glue to foam plastic
Bonding foam boards
Stage 3. Then you can begin directly gluing the foam sheets, for which you will need:
- comb 10 mm;
- special dowels;
- glue-cement.
Note! Work can begin from any angle; if necessary, the sheets are cut. As a result, the gaps between them should remain, although minimal.
Stage 4. The foam is puttied and covered with waterproofing mastic, which prevents moisture absorption.
An example of foam putty. The same is done on the ceiling.
As for installation under a wooden floor, the procedure is practically no different from that described above (using mineral wool), and the only difference is the minor gaps mentioned above. Upon completion of the installation work, the gaps between the insulation and the joists are filled with polyurethane foam to form a continuous monolithic layer.
Insulation of the first floor floor with foam plastic
Mats and slabs
Insulation of this type has low thermal conductivity and light weight; they are ideally suited for insulating the concrete floor of the first floor.
They can be used in conjunction with thin roll materials, which increases the overall thermal insulation.
Insulation in the form of mats and slabs is made from foam plastic, mineral wool, basalt fiber, based on polystyrene foam and other composite materials.
Since ancient times, mats made from plant fibers, such as straw, have been used to insulate floors in private homes, which is an excellent environmentally friendly insulation material. The only negative is that organic matter decomposes over time.
Using plasterboard or fiberboard
Another option for insulating a concrete floor is to install plasterboard sheets. Below is the sequence of actions.
Stage 1. First, the old floor covering is removed, the bare base is thoroughly cleaned of dirt and dust.
Stage 2. If the surface is uneven, then the protrusions are smoothed and the recesses are filled with putty.
Stage 3. After this, a vapor barrier layer is laid with mandatory access to the walls to the height of the planned insulating layer.
Stage 4. The first layer of thermal insulation material is laid; the thickness of the sheets in this case should be 1.2 cm.
The photo shows laying drywall on a concrete screed
Stage 5. Drywall is treated with adhesive mastic, after which the second layer of material is laid. It is important that the joints of the sheets in layers No. 1 and No. 2 do not coincide.
Stage 6. As soon as the adhesive mastic has dried, the surface is primed and puttied. Then the floor covering is laid.
Note! In order to compensate for moisture/temperature expansion of the material, an edge strip is placed between the ends and the surface of the walls.
Video - The principle of laying drywall on the floor
If fiberboard sheets are used for insulation, the procedure will be even simpler.
Stage 1. The floor covering and baseboards are dismantled.
Stage 2. Sheets of insulation (grade PT-100 or M-20) are nailed to the pre-installed joists.
Stage 3. The fiberboard is covered with a floor covering - roofing felt or carpet. For fixation, it is advisable to use Bustilat glue.
Stage 4. Operation can begin after the glue has dried (usually this takes a maximum of 24 hours).
Covering the floor with fiberboard sheets (self-tapping option for fastening the sheets)
Protection of the floor from heat loss in a private house from the room side
Thermal insulation of the floor in a wooden house from the room side can be done using rolled mineral wool, the width of which is 1 cm greater than the width between the joists. How to insulate a wooden floor with your own hands? The insulation technology is quite simple and consists of the following steps:
- Removing the old wooden floor. The boards are inspected, old paint is removed, sanded and impregnated with an antiseptic and fire-retardant solution.
- Cleaning the rough base from debris and dust.
- Inspection of logs, their repair and replacement of rotten areas.
- Treatment of logs with antiseptic and fire retardant.
- Laying polypropylene film. The film sheets are secured to the joists with a construction stapler, and the joints are taped with special tape.
- Installation of insulation. Mineral wool is placed tightly between the floor joists in a wooden house.
- Installation of a vapor barrier layer. The vapor barrier membrane material Izospan B or Yutafol N is spread as a continuous cover, with the mirror side facing up. The canvases are attached to the joists with a stapler and the joints and edges are sealed with adhesive tape.
- Installation of finished plank flooring and installation of skirting boards.
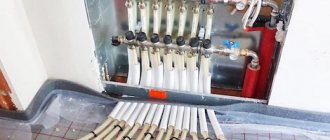
"Warm floor"
If there is not enough space in the room to lay thermal insulation material, then you can resort to an alternative option - installing electric heating. “Warm floor” involves laying a heating cable, for which you should follow the steps below.
Stage 1. First, the old floor covering is completely dismantled.
Stage 2. Penofol is laid on the concrete.
Laying penofol
Stage 3. In accordance with the manufacturer’s recommendations, the heating cable is laid. The cable is connected to thermostats.
Electric heated floor. Scheme
Stage 4. The floor is filled with a layer of concrete mortar 3-5 cm thick.
Filling the heating cable with solution
Stage 5. Once the concrete has hardened, the floor covering is laid on it.
Note! “Warm floor” provides the most favorable microclimate for the human body in the home, since both over-drying and overheating of the air are completely eliminated. The room will warm up evenly, therefore, convection currents will not form.
The advantages of laminate include
– variety of decor
– prostate mounting
– water resistance
– heat resistance
– resistance to various types of mechanical stress
– ease of care
Use of expanded clay
Let’s say right away that this method is the least effective of all those given above, but you can also resort to it. One of the few disadvantages is that the screed will take quite a long time to dry - about 1 month. Obviously, filling with expanded clay can only be done where the height of the ceilings makes it possible to raise the floor by 15-20 cm.
This is also true in multi-storey panel-type buildings, in which the floors can hardly be considered warm, especially in winter.
Stage 1. The old coating is dismantled, the concrete slab is cleaned of dirt and debris.
Stage 2. Next, a layer of waterproofing is laid - in other words, a polyethylene film is laid down. It is necessary to ensure that the latter extends onto the walls to the height of the future insulating layer.
Stage 3. Dry backfill of thermal insulation material is made on top of the waterproofing. In order to ensure uniform backfilling and maintain a uniform level, beacons (wooden slats) are placed. The first beacon is installed 3 cm from the wall, the rest - parallel (the step depends on the length of the rule with which the level will be set).
Expanded clay backfill
Expanded clay is backfilled from the far wall towards the front door.
Stage 4. The surface of the insulation is treated with “cement laitance”, which will ensure more effective adhesion of the granules to each other. Preparing such “milk” is not difficult: clean water is mixed with cement in a ratio of 4:1.
Expanded clay filled with cement laitance
Note! Experienced builders recommend insulating the floor with multi-fraction expanded clay. So, for a city apartment you need to mix granules with a diameter of 5 mm or 10 mm with expanded clay sand.
A day after the insulation is leveled and secured with mortar, the surface is covered with a concrete screed.
Floor screed with expanded clay
Using Spray Polyurethane Foam
We’ll talk about this insulation technology separately, because it requires the participation of professionals - you can’t do it on your own, especially without the appropriate equipment. The material is laid in the form of foam having a cellular structure; the foam expands after application and forms a seamless monolithic mass. For application, a special machine is used - in it the liquid polymer is mixed with carbon dioxide at high pressure.
Stage 1. The concrete base is prepared - the old coating is dismantled, debris is removed (it can worsen the adhesion of the foam). It is characteristic that the floor does not need any leveling in this case.
Stage 2. Next, wooden logs are installed (they can be made from timber or 40 mm boards) in increments of 0.7-1 m. To fix the logs, dowels, screws or corners can be used.
PPU floor insulation
Stage 3. To improve adhesion, the concrete base is moistened. Foam is applied between the joists, but it should be taken into account that in the future it will increase in volume.
Stage 4. The foam hardens for about 24 hours, after which the floorboard or any other floor covering is laid.
Floor insulation with polyurethane foam
Note! Do not leave polyurethane uncoated for more than two to three days, as it may deteriorate when exposed to sunlight.
Advice from professionals
The following recommendations from professionals will help you properly insulate the floor in your apartment:
- to protect the thermal insulation layer from moisture, you need to take care of its waterproofing;
- in addition to the floor covering, it is necessary to insulate the foundation and basement;
- Gaps must not be left between the insulating boards.
Many people have to deal with floor insulation. It is worth noting that this is not an easy job to prepare for. Therefore, it is recommended to understand in advance how to properly insulate and what materials are used for this.
