Today, almost every owner of a private house or apartment has the issue of insulating their home on their agenda. First of all, this is due to high tariffs for heat energy, as well as the desire to improve the indoor microclimate.
To achieve this goal, the correct choice of insulation is of great importance. One of the best materials in this area is considered to be penoplex - extruded polystyrene foam, which differs from others in greater density, hardness and moisture resistance.
High-quality insulation of the floor base with such material will provide the home with warmth and comfort for a long time.
To work on laying insulating material, you will need:
- fine gravel and crushed stone;
- sand;
- cement;
- reinforced mesh;
- alabaster;
- foam boards;
- aluminum coated adhesive tape;
- aluminum beacons;
- waterproofing material;
- building level;
- a stationery knife or a special hot chrome-plated string;
- rule;
- manual rammer;
- solution container.
The insulation technology consists of the following stages:
- Preparing the base. The soil level should be located half a meter below the calculated surface level of the floor being constructed. The soil must be dry, leveled and compacted. To do this, it is leveled, the loose ball is removed and compacted, then left to stand for 2 weeks. After this, a layer of gravel about 40 cm thick is poured and compacted; a sand cushion is laid on the gravel in a 10-centimeter layer and thoroughly compacted again. It is advisable to use a level for adjustment.
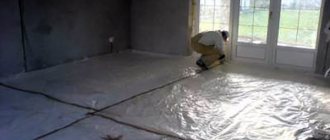
- Laying waterproofing material. The prepared base is covered with plastic film, through which a blanket is created. Its edges will cover the walls of the pit.
The third stage is laying penoplex:
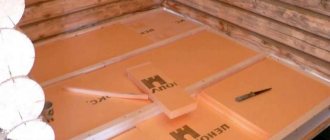
In rooms where there are no mechanical loads on the base, penoplex can be laid directly on the sand layer. To do this, it is advisable to use plates with connecting grooves along the edges, the joints of which should be glued with aluminum-coated adhesive tape.
The thickness of the insulating material is used depending on the climate zone, the quality of the floor insulation and the presence of foundation insulation. For example, if the base of the house was insulated, you can use slabs 3-5 cm thick, otherwise - 5-10 cm.
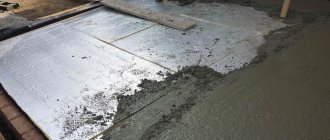
After laying the insulating material, it is again covered with polyethylene film, on top of which a cement-sand screed 5 cm thick is placed. The screed is reinforced with reinforced mesh. You can replace the screed, which is based on concrete, with a self-leveling mixture. Whatever screed option you choose, its surface should be perfectly uniform.
Its thickness is proportional to the degree of load and can range from 5 to 10 cm. After the screed has completely hardened, heat-insulating material is placed on top of it. A reinforcing cement screed is poured onto the insulation and an additional layer of waterproofing, the thickness of which also depends on the planned loads. Alternatively, instead of the initial screed, you can increase the gravel layer to 60 cm, in which case one reinforcing screed is performed above the slabs.
Insulation of a wooden floor
List of required materials and tools:
- hammer;
- self-tapping screws;
- screwdriver;
- grinding attachment;
- antiseptic primer solution;
- vapor barrier material;
- sheets of chipboard, OSB or plywood;
- level;
- a stationery knife or a special hot chrome-plated string;
Insulation work is carried out in the following sequence:
- The old flooring is removed, leaving only the support beams.
- on the base as waterproofing so that the joists are completely covered and recesses are formed.
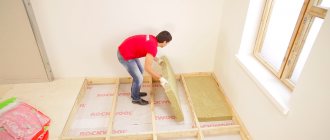
- in a checkerboard pattern so that it fills 2/3 of the recess space. The remaining part will serve as a ventilation gap.
- The insulation can be secured using special adhesives or dowels. The joints between the plates are filled with polyurethane foam.
- Penoplex is covered with plastic film.
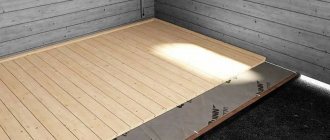
- After laying the thermal insulation material, the boardwalk is installed.
General recommendations
Make sure the wood is dried and treated with antiseptic or bitumen. This will significantly extend the service life of the structure. When the humidity is more than 20%, the tree can become warped, compromising the integrity of the structure. Boards brought from a warehouse should lie at room temperature for several days. This is especially true during the winter season. It is not recommended to lay the floor when the air humidity is less than 60%.
You should not saw or plane boards in the room where the floor is being installed. Sawdust can cause rot.
Don't forget to use waterproofing. For sound insulation, as a rule, fiberboard, rubber, polyethylene foam, slag or sand are used. The heat in the house will remain longer if you fill the voids under the floor with mineral wool, expanded clay, expanded polystyrene or isospan.
Use the rule after installation. Lay it across the beams, remove gaps, leveling the height. This is easy to do with the help of special modern adjustable fasteners that have appeared on the construction market. The floor is laid only after all leveling procedures.
The smaller the pitch, the longer the floor will last. However, the main indicator of durability is the material of the coating and base. The most durable wood is larch.
The installation of beams is usually carried out along the window, i.e. across the room. The floor boards are then placed along the length of the room, i.e. from the window. However, this is just a recommendation and a matter of taste.
The floor is laid from the corner, placing the boards perpendicular to the joists. The distance from the walls should be about 1 cm. It is left in case the wood deforms depending on the temperature and humidity of the environment. This distance is covered by the baseboard. If the boards lie close to the wall, the floor may swell.
A board is attached to each beam. Holes for screws should be drilled in advance to avoid delamination.
The most common option for the space between the joists is from 50 to 56 cm. As a rule, it does not exceed a distance of 69 cm.
Removing joists and wooden floors is quite simple. It is necessary to remove all the furniture from the room, remove the baseboards, and open the boards or sheets of chipboard. After inspection, the old boards are replaced with new ones. The logs themselves can be partially replaced. Simply cut out a piece of rotten wood and install a new one.
Don't forget to use a protective impregnation on new boards. Check the ends of the beams for rot, and inspect the base insulation, if any. Repairing the floor can be a reason to insulate your home.
Joists are deservedly the simplest and most popular way to create a reliable foundation for our floor. If desired, everyone can take up this interesting business and achieve their goal step by step. The most pleasant reward for your efforts will be a warm and cozy atmosphere for many years.
Insulation of the concrete base
During the work you will need:
- foam boards;
- putty;
- primer mixture;
- waterproofing material;
- construction glue;
- “self-leveling floors” mixture;
- building level.
scheme for insulating a concrete floor
The technological process for laying heat-insulating material is as follows:
- Inspection of the concrete base. The floor is inspected and its condition is assessed: evenness, presence of chips, crevices and cracks.
- Preparing the base. A smooth, defect-free surface is cleaned of dust and dirt. A base with obvious bulges or defects requires certain work to be performed: all recesses are filled with putty, the protrusions are beaten off and leveled with a screed. Afterwards the surface is treated with a primer mixture.
- Laying waterproofing material. It is recommended to lay this layer if the concrete floor is the basis of a basement or ground floor. This is due to the fact that moisture, penetrating into the joints of the plates, can damage the insulation.
- Installation of insulation. On a flat surface that does not have slab defects, it can be mounted directly on the floor. Otherwise, penoplex is laid on a dried screed and covered with waterproofing. To fix the thermal insulation, adhesive mixtures are used.
- A cement-sand or self-leveling screed is applied on top of the waterproofing
Insulation under “warm floor”
The main task of insulating underfloor heating is to reduce the consumption of thermal energy in undesirable directions. Due to the lack of heat dissipation, energy costs are reduced. Otherwise, not only your floors are heated, but also the ceilings of neighboring apartments or the basement.
List of materials and tools needed to complete the work:
- penoplex;
- polyurethane foam;
- polyethylene film;
- foil;
- reinforced mesh;
- adhesive solution;
- self-tapping screws;
- separation tape;
- cement, sand or self-leveling mixture;
Insulation technology under “warm floor”:
- Preparing the base. The floor is leveled using screeds on beacons.
- Laying insulation. Plates are placed on the screed, the joints of which are filled with polyurethane foam. Slabs up to 5 cm thick can be used as thermal insulation. The insulation can be fixed using an adhesive solution after treating the surface with a primer mixture. If the base surface is flat, it is permissible to lay the material directly on the floor, followed by fixing it with dowels with plastic attachments.
- Installation of a waterproofing layer. The insulation is covered with a polyethylene film on top, which serves as waterproofing. The joints of the film are covered with tape, its edges are placed on the walls, and dividing tape is glued along the markings.
- Laying the substrate. A backing – foil – is placed on the waterproofing layer, which helps reflect heat.
- Placement of the "warm floor" system. If a water system is used, then a reinforced mesh is placed on top of the substrate, which is fixed using dowels and washers. The heating cable can be mounted directly on the foil backing.
- Finish screed. The screed is applied in a uniform layer of 5 cm. The base can be a cement-sand mortar in a ratio of 1:3, respectively, with the addition of a plasticizer or a special mixture for heated floors.
Advantages and disadvantages of penoplex
It should be noted the positive characteristics of the material:
- The moisture absorption of the insulation is 3%, therefore, the material prevents the penetration of steam and moisture without auxiliary vapor barrier and waterproofing, does not settle and retains its properties.
- Easy to use boards during work: easy to cut and glue.
- It is light in weight , this is due to the fact that penoplex consists of 98% air.
- Resistant to high temperatures (withstands short-term contact with materials whose temperature is over 100 degrees, but changes in shape and shrinkage occur from constant exposure to temperatures from +80 degrees).
- It prevents cold air flows from entering the room during the cold season, and in the summer it prevents hot air from entering, thus providing a kind of climate control throughout the year.
- Affordable pricing policy.
- High-strength - can withstand loads of up to 400 kilograms, which makes it possible to insulate the floor base without installing supporting structures.
- Safe for human health - it is an environmentally friendly material.
- Resistant to flammability - this property makes it possible to lay insulation in both brick and wooden buildings.
- It interacts ideally with the “warm floor” system , therefore it is used to heat the floor covering.
- It has a low degree of thermal conductivity , which is due to the cellular structure of penoplex.
- Resistant to the growth of bacteria , fungi and mold.
- It has a long service life and does not lose its thermal insulation qualities over time.
Despite a lot of advantages, penoplex also has disadvantages:
- Susceptible to destruction by rodents.
- It is not resistant to constant high temperatures, the material changes shape and loses its properties.
- Despite the fact that penoplex has a low degree of flammability , high temperatures can cause it to melt and burn.
- It has a fairly low level of sound insulation.
The latest insulation materials
The range of thermal insulator materials is expanding more and more. Traditional materials are giving way to the latest advances. Physical and technical characteristics are becoming more and more advanced. The names of types, brands and types are enormous.
Penofol
The foil reflective layer of foam material and its small thickness gives results that are many times superior to conventional materials. Laid in one layer, it does an excellent job not only of heat preservation, but also of waterproofing. Can serve as a vapor barrier. Long service life, ideal for use in a wooden house. The new Penofol-2000 has protection on both sides in the form of aluminum foil. The efficiency of the material is much higher than that of its predecessors.
Izolon
The use of new generation materials with a uniform cellular structure will give the entire structure even greater strength and elasticity. Foam material with a cellular structure. A thin layer of such material is an unsurpassed heat insulator. Economical in price, elementary in its use and operation. Combines with any other materials, great for use in wooden houses. Eco-friendly.
For insulation with a thin layer, you can use extruded polystyrene foam, which also has a foamed cellular structure; it will be a good choice. Plates made of expanded polystyrene - penoplex, will also be a good heat insulator. The material is laid on a leveled floor base, attached to it using plastic anchors. After installing such insulation, you should immediately begin installing the main floor covering.
Blitz tips
- To insulate a wooden base instead of polystyrene foam, it is more advisable to use a material of lower cost, for example, expanded polystyrene or glass wool. In this case, qualities such as strength and moisture resistance are not particularly important; the insulation does not take mechanical loads, but only fills niches. The installation of plank floors in residential premises is almost never carried out on a substrate with high humidity.
- If a “warm floor” system is installed under the floor covering, due to the fact that the insulation expands when heated, it is recommended to place a separating tape in front of the steam protection device.
- parquet, laminate or carpet are to be laid in the future
- If large gaps form between the insulation boards , they should be paved with glass wool. However, you should know that when placing the slabs there should be small gaps of 1 cm around the perimeter of the walls.
- together with penoplex .
- If the concrete floor is the base slab of a building or the floor above a basement, it is recommended to apply a layer of waterproofing on top of it. If the slabs are laid on a moisture-resistant adhesive mixture, which is applied continuously, waterproofing on such a base does not need to be performed.
- To fix the insulation, exclusively plastic self-tapping screws are used. Over time, metal fasteners expand the holes in the penoplex, which entails a loss of the thermal insulation properties of the material, as well as its displacement from the installation site.
- When performing the final layer of screed , it is recommended to use special mixtures instead of concrete-based mortar.
A few words about materials
Today there are a large number of different thermal insulation materials on the market. We will look at the most popular and frequently used ones.
The insulation must have a certain set of qualities. Therefore, you should pay attention to: weight, environmental friendliness, thermal conductivity, compressive strength, moisture resistance, service life. In addition, the insulation must have average, or better yet, high adhesion to the wooden surface.
Thermal conductivity indicators of popular insulation materials according to SNIP. The lower the value of the indicator, the warmer and drier the room will be
Also, one of the criteria for choosing insulation is its thickness. This indicator is critical for residents of multi-storey buildings.
In addition, the choice of material is influenced by the type of foundation and floor, the presence of a basement, as well as the features of operation - permanent living space or summer house.
Wool (mineral, stone, glass wool). This material requires high-quality waterproofing, since any cotton wool quickly gets wet.
Mineral wool is one of the most affordable materials for insulating wooden floors; it is unpretentious, easy to work with and retains heat well.
Most often, mineral wool combined with good waterproofing is used to insulate a wooden floor. Mineral wool is produced in the form of rolls and compressed slabs. It is quite easy to work with, as it is light and cuts easily.
To insulate the first floor, it is worth using mineral wool with a thickness of 20-30 mm, and for the second floors and above - 10-15 mm.
Classic insulation involves laying mineral wool between joists or directly on the subfloor.
Another popular insulation material is sawdust . They come in several types: wood, sawdust pellets, sawdust, wood concrete. They require very high quality waterproofing. You need to use prepared sawdust that has been lying in a dry place for at least 5-6 months. It is better not to use this material for insulating residential premises, as it quickly gets wet and begins to rot.
Sawdust, in order to reduce heat loss, should be laid in a thick layer, at least 30 cm. This is the best option for insulating a summer house or outbuildings.
An equally popular material is expanded clay , which is made from clay. This is a cheap and environmentally friendly insulation. It is most often used for dry screed or simply poured onto the subfloor or between joists.
Granular expanded clay should be laid in a thick layer. It should be about 5 times more than wool-based insulation
Polystyrene foam or extruded polystyrene foam can be used in rooms with high humidity levels. These materials are quite dense in structure and sheets of various thicknesses can be purchased.
Polyurethane foam can also be used as a thermal insulation material. To install it, special spraying equipment is used. It can be used on any foundation, and the foam itself can last up to 10 years.
Penofol is a fairly popular Russian-made thermal insulation material. Insulation sheets with dense reflective foil. Available in several types. The classic version is made in the form of sheets of polyethylene foam covered with foil. There is also self-adhesive Penofol S, and on one side of it moisture-resistant glue and anti-adhesive film are applied, and on the other there is aluminum foil.
Fibrolite is also considered popular . It is made from sawdust filled with liquid cement mortar. Available in slab form.
Isolon insulation is produced in the form of rolls and has low thermal conductivity. Comes in the standard silver color, but in other bright colors. It has excellent sound insulation, despite the fact that the sheets are quite thin.
Most often, insulation is used in the form of rolls, so they are easy to install.
Isolon in rolls should be laid overlapping, not butt jointed. Seams can be fastened with bitumen mastic or polymer glue
Description of penoplex
The material is based on foamed polystyrene. Unlike polystyrene foam, it has a dense and elastic structure. Penoplex holds air well and does not allow water to pass through, so it is used to insulate both heated and unheated rooms. Many experts note excellent protection from the cold when insulating floors with penoplex.
There are different types of material that differ in density, thickness and fire resistance. The usual width of the slabs is 600 mm, length - 1200 or 2400 mm. They have a thickness from 20 to 100 mm. The insulation is sold in packs of 4-20 sheets.
Penoplex has the following advantages:
- low moisture absorption;
- high degree of vapor and heat insulation;
- strength and reliability;
- resistance to microorganisms;
- environmental friendliness.
This video will tell you how to insulate the foundation of a building with penoplex with your own hands:
Well-laid penoplex protects from low temperatures, noise, moisture, and creates comfortable living conditions. Its disadvantages include low resistance to solvents and high temperatures.
Thick and dense penoplex is used in places where good thermal insulation is required. It is often used in construction. It insulates floors with a concrete or soil base well. Often the material is laid in 2 layers.
How to choose the right lag section
The cross-section of the beam for making logs is determined by 2 factors: the span length between the support points (columns, pads or cross beams) and the maximum load under which the floor will be placed during its operation (for a residential premises it is no more than 300 kg/m2).
The cross-section of the beams should be rectangular in shape with a width that is a multiple of 1.5 and a height of 2, that is, the aspect ratio in the section should be 1.5x2. When laying beams, the larger side should be vertical.
This will allow you to achieve maximum structural rigidity with minimal volumes of wood and, accordingly, minimal costs. Table 1 shows the dependence of the beam cross-section on the span dimensions.
Table 1
Also, the cross-section of the beam will depend on the thickness and strength of the floor covering
When installing the floor, you should pay attention to the layer of thermal insulation material
This means that the timber must be purchased taking into account the size of the ventilation gap.
To construct a wooden floor along joists, it is recommended to use timber with a small section margin. Beams can be mounted either on a concrete base or directly on the ground. The differences in these installation methods lie in the supports that will be used under the beams. If the base is soil, then concrete or brick columns should be used as supporting elements, which are installed every 1.2 m. These elements are made of M100 red brick.
Using columnar supports allows you to save on wood thickness. So, with a log length of 400 cm, just one support installed in the middle will allow you to reduce the cross-section from 180x100 to 110x60, which will ultimately have a significant impact on your budget.
Self-installation
The insulation is mounted on foundations made of reinforced concrete, soil and wood. When working, the following rules should be observed:
- strictly follow the installation instructions;
- Carefully adjust the slabs to each other so that there is no free space between them.
- Distortions and rolls are unacceptable.
If the material is laid in two layers, then you need to ensure that the joints of the upper plates do not coincide with the joints of the lower ones. Otherwise, pockets filled with air will appear in the insulating layer. Condensation will accumulate in them. Such defects impair thermal insulation and subsequently lead to delamination of the insulation.
A special compound is used to glue the boards together. It improves the thermal insulation properties of insulation. A “finish floor” is laid on top of the penoplex, for which the following materials are used:
- laminate;
- linoleum;
- parquet;
- polymer coating;
- ceramic tiles;
- boards.
Decorative coating is mounted on foam boards
Ground mounting
Penoplex is widely used to insulate earthen floors. Floors on the ground are installed as follows:
- Carefully level the installation site.
- Cover it with expanded clay and sand to a height of 40 cm. The layers should be positioned strictly horizontally.
- Insulation boards with a thickness of 5 cm or more are laid. The sheets are carefully joined together, leaving no gaps. The joints are sealed with tape.
Penoplex can be used to effectively insulate an earthen floor
- The entire base along the edges is covered with roofing felt or polyethylene. They are also mounted on penoplex.
- Cement is poured on top, on which a metal mesh is laid to strengthen it. Its layer must have a thickness of at least 5 cm.
- The screed must be strictly leveled horizontally, otherwise difficulties will arise when laying the floors.
Installing a floor in a bathhouse has its own characteristics. Here the screed is installed at an angle to ensure water drainage. To cover the floor, it is better to use sanded boards mounted on joists.
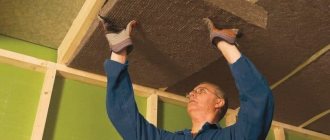
Assembling the sheathing
First, we fasten the beam under the window sill, leaving a gap of 1-1.5 cm at the top. We cut the beam 1.5-2 cm shorter than the length of the parapet, place the beam against the wall and drill holes with a diameter of 8 mm with a hammer drill for dowel nails in increments of 50-70 cm.
We fasten the lower beam in the same way, retreating from the floor by 1-2 cm.
After we have secured the upper and lower beams, we proceed to fastening the cross beams using the same method. The distance between the transverse bars should be 60 cm. If the balcony is often exposed to wind loads, reduce the step of fastening the transverse bars to 40 cm.
Every 2.5 meters, two beams are attached in a row (see the picture below!) This is done so that we can then attach a sheet of drywall to them!
After all the cross bars are secured, we move on to the side walls of the balcony. How to understand which walls to insulate and which not? Everything is very simple, if the wall is load-bearing, it does not need to be insulated. But to achieve an ideal result, you will have to insulate both side walls, the ceiling and the floor. The wall adjacent to the room is usually not insulated. That's what we'll do!
Installation on a finished base
To properly insulate the floor with penoplex, you first need to remove the old floor covering: linoleum, tiles, laminate, boards. Otherwise, the new coating will inherit all the defects of the old one. After this, carefully inspect the concrete base. Correct all imperfections: cracks, chips, unevenness. To level the surface, you can use a small layer of filler floor.
Before laying foam boards, it is advisable to dismantle the old floor covering
Insulation is laid on a flat base. Its installation is carried out using a special glue that does not corrode penoplex. Waterproofing is laid on top of the insulation, and then a concrete screed is made.
The floor insulation on a balcony or loggia is carried out in the same way. The old floor covering is removed, the concrete base is leveled, insulation, waterproofing and a layer of concrete screed are laid. If a balcony or loggia is located above the first floor, then for insulation it is enough to use foam sheets 3 cm thick. The concrete screed can have the same thickness.
For a small balcony or loggia, instead of a cement screed, you can use any waterproof material of sufficient rigidity. For loggia walls, thin foam sheets can also be used as insulation.
Preparatory work
The first thing you need to do before insulating the floor on a loggia or balcony is to check whether the ceiling is well reinforced. For example, if the balcony is not reinforced with a lower support, then this deficiency will have to be compensated for, for which support brackets are used. Unfortunately, it is not always possible to install them, since this requires the consent of the neighbors below.
You can strengthen the balcony using a metal frame, which is mounted on top of a concrete slab and attached to the wall of the building. Installing such a frame allows you to reduce the load on the floor. However, in most cases, the balcony slab is initially laid on concrete supports, and problems do not arise with such a design.
The next important point is the material from which the outer wall of the balcony is made. Often, a metal lattice covered with sheets of thin material is used to make the outer wall.
If the floor slab rests on a reliable support, then the outer wall will need to be laid with foam concrete. True, such work will require coordination with architectural services so that problems do not arise in the future. The situation will be much better if the outer balcony wall is made of concrete - such a structure will not have to be changed or remodeled.
Next, the balcony needs to be glazed with high quality. The meaning of this stage is clear: in the absence of high-quality window frames or their poor-quality installation, all the heat will escape from the balcony to the street. The choice of suitable frames is completely individual: most often apartment owners choose reliable double-glazed windows with low thermal conductivity, but sometimes good wooden frames are chosen for balconies, which, if properly processed, can also retain heat well.
This is important: any leaky joint can cause dampness, which will significantly worsen the performance of the insulation. After some time, mold will appear and all building materials will begin to deteriorate, and sealing the cracks is needed precisely to prevent such effects. Wide gaps in the slabs are best eliminated using special rollers, for the manufacture of which foamed polyethylene is used
By placing such rollers in the gaps and sealing them with sealant, you can achieve good tightness.
Wide gaps in slabs are best eliminated using special rollers made from polyethylene foam. By placing such rollers in the gaps and sealing them with sealant, you can achieve good tightness.
Often, insulation rollers are used instead of polyurethane foam to save money. This is done like this: first, a little foam is applied to the required place, and a roller is placed on top of it. When the foam expands, it will fill all the free space and provide a good connection to the seal. Small gaps can be eliminated using conventional sealant.
Having dealt with the problems at the joints and walls of the balcony, you need to start eliminating similar flaws in the floor. All cracks are cleaned of dust and various debris, after which the floor surface must be treated with a primer. After this, each crack is filled with a sealant or cement-based adhesive mixture.
Having noticed deep and narrow cracks, you need to widen them with a drill or grinder, and then fill them with sealant: in this case, the composition will penetrate well into the surface and fill the entire space.
