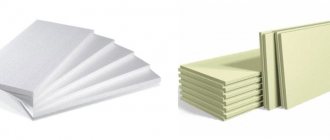
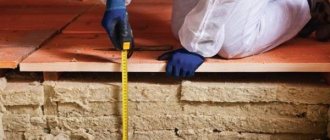
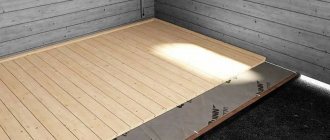
What material to choose for insulation
On the construction market there is a large selection of artificial and natural materials intended for floor insulation. What criteria should be followed by a homeowner who decides to insulate the floor in a wooden house?
There are a number of requirements for materials intended for insulation of premises. That is, when choosing a material for floor insulation, you should be guided by the following parameters:
materials for insulation
Thermal insulation indicators - the more effectively a material resists cold in winter and excess heat in summer, the better. Weight of material. The low weight of the insulation leads to a reduction in the cost of the structure as a whole. This is achieved by reducing costs for fasteners, transport, and labor intensity. When using lightweight insulation, there is no need to strengthen the foundation and other structures. Vapor permeability - it ensures the removal of excess moisture from the rooms and thus drains the building structure as a whole. The thing is that the wetter the structure, the lower its thermal resistance. If steam is poorly removed from the room, then it is necessary to provide good ventilation, and this will ultimately lead to an increase in the cost of the structure. Finishing options. The insulation must ensure the use of finishing materials of different types. Service life.
In addition to the specified requirements that the insulation must meet, you can also add its environmental safety. The material must meet environmental safety requirements. In addition, it must resist excessive heat and open flames.
But it should be noted that for many homeowners, price is a key factor. Let's consider various options for materials used for insulation.
How can you insulate the floor?
When choosing a material, you need to understand that all types of insulation have different thermal conductivity coefficients. Of course, the lower it is, the better. This means that the insulation has a good ability to retain heat inside the room. The lower this indicator is for the material, the thinner the coating layer will be needed to protect the building.
Table. Thermal conductivity coefficients of different types of insulation.
| Material | Thermal conductivity coefficient, W/(m*C) |
| Expanded clay | 0,1 |
| Stone wool | 0,038…0.047 |
| Glass wool | 0,035…0,05 |
| Extruded polystyrene foam | 0,028…0,04 |
| Polyurethane foam | 0,02…0,04 |
| Ecowool | 0,04 |
| Linen insulation | 0,038 |
| Penoizol | 0,03…0,4 |
| Styrofoam | 0, 0033…0,038 |
| Sawdust | 0,07…0,1 |
In addition, it is necessary to pay attention to the density of the product, its moisture, fire resistance and other characteristics. An important aspect for owners of country houses is the interest of insulation for rodents. After all, for example, the fire resistance of a material is unlikely to help if a wooden house catches fire. And the places where mice live and their passages, which they make in thermal insulation, can seriously deteriorate the characteristics of the laid coating.
Another important aspect is the design of the building; the type of thermal insulation largely depends on this. The climatic conditions of the region also cannot be discounted.
Expert opinion
Masalsky A.V.
Editor of the “floor screed” category on the Pol-exp.com portal. Engineering systems specialist.
In general, all types of insulation can be divided into three categories: bulk, slab (or roll) and sprayed. Everyone chooses for themselves which type is more convenient to install.
Important ! I would like to note that if piece products have to be joined, adjusting the products to the required size, then when spraying mixtures, seams and the formation of cold bridges can be avoided.
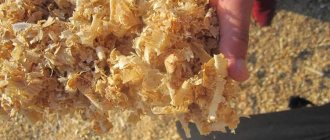
Thermal insulation with sawdust
When building a private house made of wood or stone, the developer must solve many problems, and one of them is creating effective insulation of the building.
Thermal insulation with sawdust
There is a large selection of materials on the market for room insulation, in particular floors, but many believe that one of the best options is to use sawdust. At the same time, they are guided by the following criteria of cheapness and environmental friendliness of this material.
Sawdust is considered the lowest cost material that can be used for thermal insulation. This insulation represents waste that is obtained during wood processing. It should be noted that many houses built in the past, or even the century before last, that have survived to this day, are insulated with sawdust and have not lost their thermal insulation properties.
What are the advantages and disadvantages of this material?
The undoubted advantages include:
Cheapness. Many wood processing companies are willing to give this material away for free. In this case, there will be costs for their delivery to the construction site. Sawdust does not emit any harmful substances, they do not cause allergic reactions in residents. In addition, they have high thermal insulation rates; in this parameter they are comparable to mineral wool.
To adequately evaluate this insulation, one cannot fail to mention its shortcomings. These include:
This is a flammable material. They can become a place for small rodents and insects to live
To avoid these shortcomings, cement, gypsum and some other materials are added to sawdust. After obtaining the mixture, it is treated with copper sulfate. As a result of these operations, the sawdust will not burn, and rodents will not like such food.
Proper sound insulation of wooden floors
The technologies described above are designed to insulate floors as efficiently as possible. It is important to remember that in addition to thermal insulation, there are other important standards related to the sound insulation criterion. Some insulation insulates noise well and does not require additional measures in this direction. Noise coming from the street should not exceed a human-comfortable level of 45 dB. Below are ways to achieve this result using different building materials.
- Laying mineral wool with a density of 50 kg/m3 and above in a layer of 100 millimeters or more.
- Installation of special acoustic mats with a density of 30 kg/m3 and a thickness of 100 millimeters.
- Construction felt stuffing. Its density is from 20 to 30 kg/m3, the required layer thickness is from 20 to 40 millimeters.
Thermal insulation with expanded clay
Thermal insulation with expanded clay
Expanded clay is a granular material, light in weight and obtained as a result of clay compression. This material is considered natural and environmentally friendly. It has a number of properties that allow it to be used as insulation. Among them are:
- sound insulation – muffles extraneous sounds; retains heat well;
- resistance to low temperatures and it should not be destroyed when exposed to them;
- resistance to high temperatures and open flames;
- strength - this material does not change its structure;
- strength – does not change its structure under the influence of cold/hot water; long service life, it does not change its characteristics under the influence of many factors, including time.
We must not forget about its cheapness. Compared to many modern materials, it is much more profitable to use.
Tips for use
In order for the thermal insulation layer to last long enough, it is worth taking a responsible approach to the procedure for its operation. It is necessary to regularly carry out measures to help extend the life of the floor covering and the insulation underneath. This can be achieved if:
- do not walk on the floor in street shoes, the soles of which always contain dirt and small pebbles that act as an abrasive on the floor covering;
- use a powerful vacuum cleaner for cleaning, helping to collect dirt from hard-to-reach places;
- protect wooden flooring from direct sunlight;
- try not to exceed the maximum load that can act on the floor surface.
By following these recommendations, you can significantly extend the service life of the floor surface. It does not matter what type of insulation was preferred when performing installation work. This will extend the life of the insulation and help maintain its properties.
Thermal insulation with mineral wool
Mineral wool can be classified as a group of materials, which includes a whole group - glass wool, slag wool, basalt, etc.
Thermal insulation with mineral wool
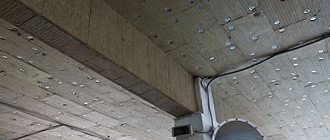
Mineral wool is a material obtained from rock melts; in addition, blast furnace slag is used for its production. Those materials that are made from rock are distinguished by a long service life, resistance to many loads and high humidity. Cotton wool obtained from slag cannot boast of these properties and is therefore widely used in suburban construction. In addition, it is used in the construction of temporary buildings.
Regardless of the raw material used, cotton wool has the following characteristics:
Resistant to fire and high temperatures. This is ensured by the fact that non-combustible rocks are used in its production. In addition, this material gets in the way of fire.
Resistance to aggressive substances with various properties. In addition, rodents and insects cannot live in mineral wool. It is not susceptible to fungal infection.
During the entire period of its operation, it does not change its geometric parameters. This eliminates the possibility of cold bridges appearing at the junction of the wool sheet and the enclosing structure.
Mineral wool has low thermal conductivity. If we compare it with other materials, we can see that, to ensure the thermal conductivity that a 100 mm mat creates, 2 meters of sand-lime brick will be required.
In addition to the above parameters, we can also name such parameters as high sound insulation, strength, and corrosion resistance.
Ease of processing and installation is also an indisputable advantage of this material.
In regions located in mid-latitudes, it is used to insulate building structures, in particular floors.
Insulating floors using this material is not an easy task. In fact, insulation with its help is the creation of a multi-layer sandwich, which includes:
Compacted soil. Rough floor. Waterproofing. Minvata. Vapor barrier.
Only after laying all the components can you begin to construct the floor covering.
Cotton wool is supplied either in the form of rolls or in mats. Each type has its own geometric dimensions and density. The thickness of this material ranges from 50 to 200 mm.
Price for materials and services
The cost of insulating any type of floor depends on the selected material and square meters of the structure. Sometimes the work includes laying vapor and waterproofing, sometimes not. This service is considered separately. The work also sometimes includes cleaning the ceiling from old insulation.
Thus, insulation of 1 m2 of flooring costs :
laying mineral wool with vapor barrier – 70-180 rubles;- laying polystyrene foam – 70-150 rubles;
- insulation with expanded clay granules - from 150 rubles;
- application of polyurethane foam - from 850 rubles;
- cleaning floors from old insulation – 400 rubles;
- laying vapor barrier/waterproofing – 100 rubles.
Cost of materials:
- basalt wool slabs – 800-900 rubles. (depending on thickness);
- polystyrene foam 1 m2 - 300-350 rubles;
- sawdust machine - 3500-5500 rubles;
- cube of expanded clay fractions - 1800 rubles;
- cube of foam glass from 10,000 rubles;
- vapor barriers – 700-4000 rubles/roll;
- self-adhesive tape – 50-150 rubles/linear meter;
- waterproofing – 700-2000 rubles/roll.
Ecowool thermal insulation
This material basically contains waste paper and other paper waste. To preserve it from fire, rodents and insects, it is treated with special compounds.
This cotton wool is a loose material and the higher its density, the lower its thermal conductivity.
Ecowool thermal insulation
In addition to high thermal conductivity parameters, it, of course, after treatment with special compounds, firmly resists strong heat and open flame. This material contains boron. When heated strongly, it provokes the appearance of water contained in the material, that is, self-extinguishing occurs.
It can be poured dry; this is the method used for thermal insulation of the floor. It is simply poured between the joists (see Figure 4.)
Among all the properties inherent in insulation, this one has several disadvantages: after a certain period of time, it can cake and become denser. In addition, it absorbs moisture well and begins to rot. Of course, this happens if it is not protected from moisture.
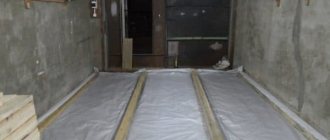
Instructions for laying vapor barrier on the floor
Surface preparation
Before laying a vapor barrier on the floor, all wooden structural elements (joists, boards, bars) must be treated with antiseptic agents that will protect the wood from rotting.
If a vapor barrier is laid on an existing floor, you must first remove the finished floor boards and also remove all layers of previously made heat and vapor barrier. Then they remove debris, dirt and dust, carry out an antiseptic treatment of the wooden parts of the subfloor and install them in place.
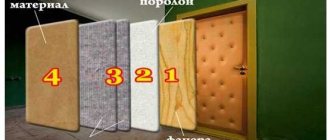
Insulation with isolon
When insulating a floor, the material that is used plays a key role. In recent years, material such as isolon (foamed polyethylene) has been particularly popular. Its use provides the following advantages:
Insulation with isolon
The use of this material allows you to achieve high results with minimal expense.
Foil-coated isolon avoids the use of hydraulic vapor barrier materials. It itself has low vapor conductivity.
Low hygroscopicity allows it to be used in rooms with high humidity without any special preparation.
The thickness of this material ranges from 1 to 5 mm. It is often used as a substrate for laminate or parquet. Its use significantly insulates the floor. In addition, as already noted, its installation avoids the use of vapor barrier films.
Foil-coated isolon is used together with heated floor systems. Heat cables laid on top of foil-coated isolon emit only into the room.
Sand as a soundproofing layer
Soundproofing with sand has been used for a long time because the material has the ability to absorb both low and high sounds. In its mass it is porous with small cells inside between the particles. It is there, reflected from the walls of the air chamber, that sound waves are damped.
But sand has several negative characteristics:
- high specific gravity, which requires the construction of floors using powerful beams and a rough foundation (ceiling);
- high thermal conductivity, it is impossible to insulate floors with sand, you will have to add an additional layer of thermal insulation material;
- If you do not assemble a sealed structure, sealing all the cracks and holes, then sand will penetrate into the premises of the house.
Sand is used as a soundproofing layer in wooden floors
Penofol insulation
Insulation with penofol
Penofol is a multilayer material that consists of a base and polished foil. Polyethylene foam of different densities, sizes and internal structures is used as a base. The foil used in penofol is polished to a coefficient of 97%. Its thickness is only 20 microns. It can be applied to both sides of the material. By the way, this material came to us from the space industry. It was used in the production of space suits.
The peculiarity of this material is that it does not retain the heat coming from the room, it reflects it in the opposite direction.
Which side to lay the vapor barrier
Which side to lay the vapor barrier
Not all manufacturers indicate this on the film or indicate this in the instructions, so you should adhere to the basic rules for installing vapor barriers:
- The smooth side of the double-sided film is always placed on the insulation, and the rough side is on the outside. The fleecy surface absorbs and retains steam and moisture well inside, preventing it from passing to the heat insulator.
- Single-sided laminated polypropylene film is also laid with the smooth side inward and the woven side outward.
- Films with foil coating are placed with the aluminum side facing the room.
- When rolling out any rolled vapor barrier, the outer part is inside the roll, and the inner part is on top.
- If the two sides of the film are different colors, the outer surface will be the one that is darker.
- Conventional polyethylene films have two identical surfaces, so they can be laid on either side.
Calculation of average insulation thickness
Many homeowners don't fully appreciate the importance of insulation. Meanwhile, properly selected insulation can save up to 30% on heating costs.
Particularly high savings can be achieved through the use of a heated floor system. It must be insulated from below so that it does not transfer heat to the floors or the ground.
Choosing the insulation that is best suited for your home is only half the battle. The main thing is that its thickness provides the maximum possible thermal insulation. The fact is that even the best insulation will not be able to provide effective thermal insulation if it is not laid in a sufficiently warm layer. But an excessively thick layer will reduce the volume of the room.
When choosing a thermal insulation material and the required thickness, it is necessary to be guided by the climatic indicators of the place where the house is being built. These data can be found in the following regulatory documentation.
It is impossible not to take into account the design features of the house. For example, in areas with a cold climate, especially if the base of the house is not insulated, then it makes sense to lay insulation with a thickness of 150 - 200 mm. In areas with a temperate climate, a layer of insulation 100 mm thick is sufficient.
In fact, the thickness of the insulation in a house located in Crimea will be significantly less than that built in the Krasnoyarsk region.
Bulk insulation materials
The use of bulk thermal insulation is possible only on horizontal surfaces. To achieve a certain effect, the layer of bulk materials must be at least 25 cm thick. The insulation is reused after removing the material. Bulk materials include expanded clay, perlite, sawdust, vermiculite, penoizol. For the efficiency of bulk materials, it is necessary to install additional beams for the finished floor and raise the floor level.
Ecowool
Ecowool is shredded newsprint treated with antistatic agents and fire retardants. Shredded waste paper in ecowool 81%. Boric acid acts as an antistatic agent. Its share in the material is 12%. The component of ecowool is fire retardant borax. It is 7% in the material. Ecowool has a low density, so it is not used for insulating floors on the ground. But you can’t find a better material for insulation along beams. The ecowool layer should be at least 20-25 cm.
- it is used for thermal insulation of complex structures, because it fills all the cracks, retaining heat;
- ecowool is non-toxic;
- environmentally friendly.
Ecowool
But ecowool quickly absorbs moisture. Moisture causes shrinkage of the material. It loses its positive properties. Therefore, it is not used in areas with a humid climate.
Wood sawdust
Sawdust is obtained as a result of wood processing. These are small particles. They absorb moisture, so sometimes they rot. Subject to rotting and the appearance of mold and mildew. To compensate for these shortcomings, sawdust is mixed with clay, lime or cement. For insulation, only fine sawdust is used, obtained by processing wood on machines at high speeds. Before use, they are treated with insect and rodent repellent. Environmentally friendly material retains heat, dampens noise and extraneous sounds. The cost of sawdust is low.
Vermiculite
The basis of vermiculite is mica, so it has a layered structure.
- he is not afraid of moisture. In case of severe wetting, the water is distributed over its entire area and then discharged outside;
- it has high thermal insulation properties. Even a 10cm thick layer of vermiculite reduces heat loss by 92%;
- it is environmentally friendly and does not contain harmful impurities;
- service life is unlimited;
- the material does not burn;
- it does not harbor pathogenic microorganisms: fungus and mold;
- the material is light in weight, so it does not place a significant load on the floor slabs.
Enlarged view of vermiculite
Loose penoizol
It is based on urea resin. As a result of its crushing into small particles measuring 10-15 mm, the volume of the material increases. Externally, penoizol looks like snow flakes. It can be confused with particles of expanded polystyrene, but its fractions are much softer, more elastic and smaller.
Penoizol
- The material is very light, so it is difficult to fill it with your hands: it scatters in different directions. To fill it, a special blowing machine is required;
- it doesn't burn;
- moisture resistant.
Expanded clay
Expanded clay is a bulk material with high heat and sound insulation properties.
- environmentally friendly expanded clay is made from lance or clay and does not emit harmful substances;
- resistant to temperature changes;
- it has a porous structure and is light in weight"
- this is the cheapest insulation;
- it is not flammable;
- does not absorb moisture;
- It does not grow mold and mildew.
Expanded clay
The disadvantage is that it seals under its own weight, so it is not recommended to use it for insulating a frame house on stilts. It is capable of foundation subsidence.
Perlite
Perlite is made by melting volcanic ore and removing the moisture from it. The result is a porous material.
Perlite
- it is moisture resistant and does not absorb moisture;
- has high vapor barrier properties;
- to turn the material into an ideal insulation, it is treated with bitumen. Under the influence of bitumen, the particles stick together and become a single insulating material that can insulate walls, roofs, floors, and floor slabs.
The procedure for self-insulation by joists
Thermal insulation of the floor can be carried out both during the construction stage and some time after the housing is in use.
The procedure for self-insulation by joists
Thermal insulation of a wooden floor requires the performer to have appropriate knowledge and skills in working with construction tools. In practice, two methods are used to install thermal insulation on joists. The first method implies that the logs are laid directly on the ground, and the second, when the logs are laid on concrete slabs. But this method is often used in rooms located above the first floor.
In addition, it must be remembered that under the floor there can be empty space of different sizes. In addition, in permanent buildings, a cellar is often installed under the floor, intended for long-term storage of food, preparations, etc.
It should be understood that the presence of such a cellar requires taking additional measures to insulate the floor. The whole point is that cold air enters through the hatch that leads into the room. That is, this place can be called a bridge of cold.
Floor insulation on joists on the ground is carried out in several stages, which are given below.
It is necessary to build concrete or brick, or monolithic concrete pillars. The installation step of these posts should be 2 meters. Their height must correspond to the floor height specified in the project. When installing supports, it is necessary to use a measuring tool, in particular, a building level. The tops of the columns should be located in the same plane. Even a small difference will cause the floors to skew. Cement mortar can be used to level the tops. If the leveling layer is more than 30 mm, then it must be reinforced with reinforcement. To do this, you can use reinforced mesh or small rods.
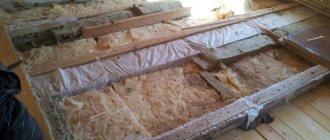
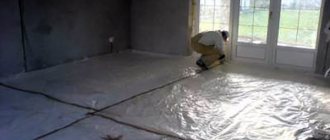
Once the posts are built, floor joists can be installed on them. The optimal cross-section of floor joists is considered to be 100*50 or 150*50 mm. Of course, you can use more massive bars. The width of the insulation, as a rule, lies in the range of 600 mm. Accordingly, based on this value, it is necessary to select the step for laying the lag. To attach the logs to the posts, you need to use fasteners. As a rule, anchors, dowels, etc. are used for this. Before installing the logs, they must be impregnated with antiseptic and fire-retardant compounds. This will ensure long-term and safe operation of the structure. To the bottom of the logs, which are already laid on posts, it is necessary to install a mesh made of galvanized steel. It is allowed to install boards with a thickness of at least 20 mm, which are nailed with some clearance. Nails, staples, and other fasteners can be used to secure the mesh or boards. It is necessary to lay material such as isospan on top of the fixed mesh or boards. It resists wind and water. In addition, this material prevents heat from escaping from the soil. The film is laid on top of the joists, in a direction transverse to the joists. When laying the canvas, it is necessary to lower it so that it lies on the nailed boards or mesh. This film is sewn to the joists using a construction stapler. The purchased insulation can be placed in the cells that were formed after laying the film. It must be installed tightly, this is necessary to prevent the formation of cold bridges. If there is a need to lay a second layer of insulation, then on top of the installed joists, it is necessary to install an additional beam with a height of at least 50 mm. The step when installing them should be within the width of the heat-insulating material being laid. After the thermal insulation material is laid in place, it is necessary to lay another layer of water vapor barrier material on top of it. The joints of the strips must be taped with special tape. Cover the resulting structure with a base for the finishing coating.
Types of wooden floors
There are 2 main types of wooden floors: they are installed on the ground and on joists.
By lags
Logs are an important part of arranging a wooden floor. They perform a supporting function for the finished floor; with their help, sound and heat insulation is installed, and the level of the coating is adjusted.
Preparatory work
Floors with joists, type 1
Floors with joists view 2
The logs are placed on beams 20 by 20 or 25 by 25 cm wide and attached to them with screws. The length of the logs is about 2 m. The logs are installed with a gap of 2-3 cm between them and the walls of the house to compensate for thermal expansion.
It is important to install them with a special step. You can mount logs on supporting posts. The joists are treated with an antiseptic before installation to protect against mold and mildew. Thermal insulation is placed between the joists, leaving a small gap of 1 cm.
If the insulation is afraid of moisture, then you need to put two waterproofing layers. They extend 20 cm onto the walls. They are secured with construction tape. The hermetic structure formed as a result of connecting the waterproofing will protect the insulation from getting wet. Boards are nailed onto the joists. The nail should go two-thirds into them. If parquet is laid, then 2 layers of plywood 2-2.5 cm thick are laid on the leveled logs. The plywood is secured with self-tapping screws. Parquet is installed on top of the plywood.
On the ground
A wooden floor on the ground is arranged in a certain sequence:
- remove the layer of soil with vegetation;
- make a sand and gravel cushion. Each 15 cm layer is spilled with water and compacted. Pillow layer 30-40 cm;
- lay strips of waterproofing film with an overlap of 10-15 cm, fastening them with construction tape;
- install thermal insulation in the form of extruded polystyrene foam;
- damper tape is glued along the perimeter of the walls;
- a 5 cm layer of concrete is poured onto the insulation;
- reinforce the concrete by laying a metal mesh;
- finish the screed by pouring the rest of the concrete;
- Concrete is leveled according to the rule.
Warm floor system
Underfloor heating system
Underfloor heating is a heating system that supplies heat from below.
There are several ways to set up such a system.
Water heated floor
To install a heated floor, which uses water from the heating system as a coolant, the following types of pipes are used:
Made from cross-linked polyethylene, but they create certain difficulties during installation. They are difficult to bend. But during operation, they do not burst when the coolant freezes and they can be repaired. Metal-plastic pipes are distinguished by ease of installation and low price. Copper pipes are expensive and require a protective coating that protects against alkaline attack.
Water heated floor
The water floor contains several layers in its design. Its height will be from 8 to 14 cm. In addition, it creates an additional load of 300 kg per square meter.
By the way, water heated floors are the most bulky design that can “steal” some volume of the room. That is why they began to be used less and less. In addition, in the event of a leak that may occur in the pipe, you will have to dismantle the floor and remove the screed laid on top of the pipes.
The warm water floor system is powered from the house heating network, then when the supply of thermal energy to the house stops, the warm floor also stops heating. Electrical systems do not have this drawback; they can be turned on at any time.
To perform waterproofing, you can use polyester film or specialized materials. Almost any material can be used as insulation. Its task is to prevent heat leakage towards the base.
Water floor on the ground
A water floor on the ground is also a rather complex structure consisting of:
- soil 150 mm;
- crushed stone 10 cm; PGS 50 mm;
- rough screed;
- hydraulic insulation;
- damper tape laid around the perimeter of the room; extruded polystyrene foam with a thickness of at least 50 mm.
Water floor on the ground
The layer of soil and crushed stone must be thoroughly compacted. This will avoid making a warm screed.
Warm electric floor
This design uses an electric cable as a heater.
There are several options for creating a warm electric floor.
Warm electric floor
Installation directly into the screed layer, on top of which the finishing coating will be installed. Laying under the finishing coating, this method involves the use of film floors.
The first option is suitable for use in rooms of any type. When using it, it is assumed that cable floors will be installed, on top of which a thin screed will be formed. The cable must be laid on a layer of hydraulic insulation and insulation.
If the finishing coating is made of parquet or laminate, then it makes sense to lay a film floor. It is laid on insulation made of foil-foamed polyethylene foam. If necessary, a layer of waterproofing film can be laid.
Construction material
Before you begin installing the floor on the second floor using wooden beams, you should make a list of all the necessary materials. This will allow you to avoid unexpected downtime and delays during work caused by the need to purchase additional building materials.
Beams
A beam section of 15 x 15 will be sufficient.
The basis of the entire structure of interfloor wooden floors is beams. They act as load-bearing elements, and the strength of the structure depends on them. For them, a beam or carriage with a section of 15 x 15 cm or 18 x 18 cm is usually taken.
This cross-section is usually enough to provide sufficient rigidity for a specific load of 400 kg per sq.m. In this case, it is necessary to comply with the parameters recommended by construction standards: the span length is 4 m, and the step between the beams is 60 cm. Based on these parameters, you can also calculate the required amount of timber.
The table shows the recommended cross-sectional dimensions of the load-bearing beam for a certain span length.
No. Span length (mm) Beam cross section (mm)
| 1 | 2000 | 75×150 |
| 2 | 2500 | 100×150 |
| 3 | 3000 | 100×175 |
| 4 | 3500 | 125×175 |
| 5 | 4000 | 125×200 |
| 6 | 4500 | 150×200 |
| 7 | 5000 | 150×225 |
However, in the absence of timber and small values of the expected loads on the floor, it is quite possible to use boards 50 or 40 mm thick, knocked together in pairs and placed on edge. This option is suitable for installing floors in an attic or in a small country house.
For the first floor of a residential building, this option is not suitable due to the low load-bearing capacity of the boards: to ensure the necessary rigidity, the pitch between the board beams will have to be significantly reduced, which will lead to an unjustified waste of material.
Pine is most often used as a material for beams.
This is the best option in terms of price-quality: its wood is quite affordable and at the same time has good technical characteristics. Beams made from wood of stronger species (larch, oak) can rarely be found on the open market, and their price is incomparably higher, and pine wood, after appropriate treatment with antiseptics, will be little inferior in durability to the same larch.
When purchasing timber, you should choose a material with dry wood. Otherwise, after installation of the beams, they may become deformed during the drying process - bending and twisting.
Flooring
Wooden flooring laid on the beams will be a rough base for the floor covering.
Typically, the flooring of interfloor floors is made in two tiers: below are rough floors on which insulation is laid, and on top is a pre-finish flooring mounted on top of the load-bearing beams. Decorative flooring is laid directly on it.
To determine the nature and amount of material for the flooring, you should clearly think through the design of the floors.
When constructing a subfloor, either 5 x 6 cm bars, packed onto load-bearing beams, or grooves made in the beams can be used as support for the flooring boards. The latter option is quite labor-intensive, so most often 5 x 6 cm bars are used to create support.
To calculate the required number of bars, it is enough to count the number of beams and multiply them by the length of each of them. We multiply the resulting footage (the total length of all beams) by two more (since the bars will be packed on both sides of each beam).
A wide range of materials can be used for finishing flooring. This can be plank flooring, plywood, chipboard panels, MDF, OSB, etc. Each of these materials has its own advantages and disadvantages, after reading which you can choose one of them. To calculate the required amount of material, simply calculate the area of the room.
When purchasing building material, you should always purchase it with a reserve of 10–15%, since during construction unforeseen material overruns are inevitable.
This will save you from having to interrupt your work and buy the missing part.
Impregnations
An antiseptic will extend the service life of wood.
To maximize the service life of wooden structures, they must be treated with antiseptic materials.
It would also be useful to treat the wood with fire retardants, which increase its fire safety.
To calculate the required amount of impregnation, you should read the instructions for its use - the approximate consumption of the mixture per sq.m. is always indicated there.
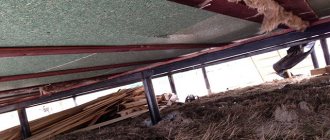
Insulation of the floor above the low underground
By the way, the thermal insulation of the floor in a wooden house will be much more effective if the basement is insulated. You can use polystyrene foam for this. This material with low thermal conductivity and almost zero water permeability will be the optimal solution for insulating this part of the building. Its thickness is calculated based on the composition of the soil and, of course, the depth of freezing. After laying the expanded polystyrene sheets to the foundation, they can be covered completely with soil. The polystyrene foam that is placed on the outside can be covered with some decorative material.
Insulation of the floor above the low underground
Before you start insulating the floor in a wooden house, you need to make sure that the underground space is dry enough. If necessary, it must be dried. In addition, the soil laid in the basement must be compacted and a sand-gravel mixture must be poured onto its surface, the thickness of which should not be less than 150 - 200 mm.
Work order
Remove floorboards. Bars are nailed to the joists and a roll of boards is attached to them. It must be fixed without any gaps or cracks. If this is not possible, then OSB boards can be used instead of boards. A waterproofing film or coated paper is laid on the constructed structure. This will ensure waterproofing. Insulation is applied over the waterproofing material; its choice must be decided in advance. Any of the listed materials are nailed on top of the insulation - chipboard, OSB, unedged boards. This will form the basis for creating the finishing coating.
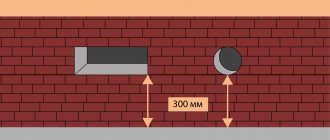
By the way, it makes sense to leave a gap of 1 cm between the floor and the wall. It is necessary for organizing ventilation. Upon completion of the work, it is covered with a plinth.
If the homeowner’s plans do not include dismantling the floors to insulate them, then it is possible to insulate the basement floor from the basement side.
To do this, you must perform the following operations:
Install a vapor barrier on the basement ceiling. You can use slats for this. The strips must be laid with an overlap of 10 cm. Strengthen the beams at a certain distance. Between them it must correspond to the dimensions of the insulating material. After this, you can install the heat insulation slabs. It makes sense that the slabs would fit into the spacer between the beams. The last operation will be to stuff the boards on top of the insulating material.
Construction requirements for wooden floors
In order to install a durable and safe wooden floor between the 1st and 2nd floors with your own hands, you must strictly comply with the technical requirements for them.
Thermal insulation layer
Thermal insulation of the floor will improve the temperature in the room on the second floor.
If a wooden floor separates the upper and lower rooms with a temperature difference between them of more than 10 ° C, it will be necessary to construct a thermal insulation layer.
This is necessary, for example, when arranging floors between the first floor and the subfloor, basement, or between the first/second floor and an uninsulated attic.
Beam strength
Beams and floors must withstand up to 180 kg/sq.m of load.
When constructing the floor of the second floor on wooden beams, special attention should be paid to the strength of the load-bearing structures. The safety of the building depends on how strong the wooden floor beams are.
According to building standards for wooden low-rise buildings, the maximum load on the floors of the first floor should not exceed 210 kg per sq.m., the pressure on the wooden floor of the second floor should not exceed 180 kg/sq.m., and for attics and attics this figure should be less than 105 kg/sq.m.
Maximum deflection
In addition, building regulations also impose requirements on the deflection values of wooden floor beams. According to SNiP, this coefficient should not exceed 1 to 250. That is, the maximum deflection of wooden load-bearing structures during operation should be less than 4 mm per meter of beam length.
According to this standard, the deflection of a beam structure 4 m long in the center should not be more than 1.6 cm (4 m: 250 = 0.016 m). If it is planned to place massive furniture and household appliances in the room, tile flooring, etc., then the requirements for structural rigidity increase to 1 to 400.
That is, the deflection should not exceed 2.5 mm per meter. For non-residential attics and attics, a higher deflection coefficient is allowed - 1 to 200 (5 mm per 1 meter).
Soundproofing
Fifty-millimeter mineral wool will not only insulate the floor, but will also become a good sound insulator.
According to building regulations, the sound insulation threshold for interfloor ceilings of residential buildings should be 50 dB.
To meet this requirement, it will be sufficient to cover the floor of the second floor under the finishing coating with mineral wool 50 mm thick.
Length of supporting beams
The length of the beam should be no more than 5 m.
The maximum permissible length of free sag of wooden beams should not exceed 5 m for interfloor and 6 m for attic floors. If the design length of the room is more than 5 m, it will be necessary to install additional support under the load-bearing beam. The fact is that the optimal length of a load-bearing wooden structure is 4 m.
With a further increase in its length, the rigidity and strength of the supporting structure sharply decreases and the requirements for the thickness of the beam section increase disproportionately. So, in order for the deflection indicators for an 8 m beam to “fit” into SNiP standards, its thickness should be about 40 cm. For example: the same deflection indicator is shown by a 4 m beam with a cross section of only 15 x 15 cm.
Wood is a material quite vulnerable to external influences, primarily dampness and fire, therefore, before proceeding with the construction of load-bearing structures, all wooden elements must be treated with antiseptic materials and fire retardants.
Insulation of the finished floor in a wooden house with a high cellar
The insulation procedure is similar to that described above, but it can be done much faster if there is no need to disassemble the floor. The sequence of work will look like this:
An inspection is carried out and, as necessary, repairs are made to the beams on the underground side. Using a construction stapler, waterproofing is attached to the beams. Beams or a profile made of galvanized material are sewn to them. The distance between the fixed beams should be 2 - 3 centimeters narrower than the width of the insulating material. For example, the width of a roll of cotton wool is 60 cm, then the distance between the bars should be 57 - 58 cm. This solution allows you to install insulation mats in a spacer. A vapor barrier is sewn onto the installed mats. Install the subfloor.
Insulation of the finished floor in a wooden house with a high cellar
By the way, to prevent the movement of rodents, a fine-mesh steel mesh can be installed between the insulation layer and the subfloor boards.
Tools and consumables for work
The required materials can be divided into 3 categories:
- hand tool;
- fasteners;
- main material for insulation;
- chemistry.
Hand tools include everything that is useful to a craftsman during fastening, adjusting material, and making holes in wood:
- hammer;
- stapler;
- chisel;
- screwdriver;
- drill;
- hacksaw (chainsaw);
- roulette;
- stationery knife.
Fastening materials include:
- Staples;
- metal corners;
- self-tapping screws;
- nails.
Material for insulation and insulation:
- slabs or mats (foam, shavings, etc.) for insulation;
- polyurethane foam;
- rolls of membrane vapor barrier;
- rolls of waterproofing.
Chemistry is needed for processing wooden materials:
- antiseptics;
- flame retardants.
You will also need boards for sheathing and to simply move along the floor until the subfloor is laid, as well as facing material at your discretion.
Preparatory work before installation
When laying insulation, it is imperative to use various construction and measuring tools. Regardless of what kind of insulation will be used, the installer must keep a level, tape measure, hacksaw, screwdriver, etc. on hand.
To fasten and close the joints of the waterproofing film, you must use construction tape or polyurethane foam.
If the work is carried out in a house where the floor has already been installed, it is necessary to inspect the load-bearing beams and, if necessary, make minor repairs. You must be prepared for the fact that some of them may have to be replaced.
It wouldn’t hurt to treat them with antiseptic and fire-fighting compounds. By the way, during an inspection, traces of small rodents may be found; accordingly, measures must be taken to prevent their movement in this space.
In addition, it is necessary to remove debris and dust that has accumulated during the use of the floor.
All wooden materials (beams, boards) must be dried. There should be no traces of rotting on their surface
Optimal thermal insulators
What material is best to use for finishing the rough coating with your own hands? To insulate wooden floors, both natural and synthetic thermal insulators are used. The most popular of them include:
- Wood sawdust;
- Expanded clay;
- Minvatu;
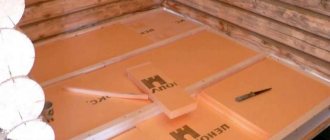
- Izolon;
- Styrofoam;
- Penofol.
Each material has its own technological features and thermal insulation parameters. To understand their disadvantages and advantages, let’s consider all of the above heat insulators in more detail.
Materials used for work
You should stock up on everything you need in advance so that there is no downtime during the work. The list may vary, but the main components remain the same:
| Beams | The strength and reliability of the partition directly depends on these elements, so you should choose products with a cross-section that provides the required load-bearing capacity. Universal options are 150x150 and 200x200, this is usually enough to provide rigidity in most buildings, most often the material used is pine. It is important that the wood is dry, otherwise there is a risk that the elements will begin to deform after installation |
| Flooring materials | The top and bottom of the beams are covered with rough flooring, which can be done in different ways; we will look at them in more detail below. There is no fundamental difference, and you just need to choose the option that is best suited for certain conditions |
| Waterproofing material | In order for the tree to serve as long as possible and not be subject to negative impacts that occur due to changes in temperature and humidity, it must be protected. There are several options, we will also consider them below |
| Heat and sound insulation | To keep the noise level as low as possible and to retain heat in the rooms as best as possible, special materials must be laid between the beams. Otherwise, any movement from above will be heard from below, and warm air will freely escape through a poorly insulated partition |
Important! The quality of all materials must meet the highest standards, this guarantees excellent results and ensures the reliability and safety of the entire structure.
There is no point in saving on floors
Main workflow steps
The instructions for carrying out the work will be divided into several stages so that you can understand all the features as best as possible. And we will start by laying out the main supporting elements.
Fastening beams
Work in wooden buildings can be carried out in several ways; consider the sequence of required operations:
- First of all, you should prepare the products - clean them of dirt and bark residues, if any, and also coat them with a special fire-retardant composition. This will protect the wood from fire and damage from woodworms and will significantly extend the life of the structure.
It is most convenient to carry out the treatment before attaching the elements; if you have a sprayer, the work can be done with your own hands very quickly
- Next, all the necessary measurements are taken; if cutting of beams is required, then it is better to double-check all the dimensions, since cutting off the excess will simply ruin the product, the price of which is quite high. Cutting is easiest done with a chainsaw or other special woodworking device.
Fastening is carried out in three main ways:
- The first is cutting out recesses to fit the ends of the beams and securing each element in special recesses. This option has been very widely used for several centuries. It is important to cut the material carefully so that the laying level of all elements is the same, the joints are sealed and thermally insulated using tow, this helps protect all cutouts from the penetration of cold air.
Article on the topic: Is it necessary to insulate a wooden house from the outside when covering it with siding?
Laying in recesses is convenient because each element is located in its place, which is prepared in advance
- The second solution is laying on the ends of the walls, with each of them fixed in a stationary position using staples or special screws. This option is applicable if cutting the recesses would be too time-consuming and complex, and the configuration of the building allows the beams to be laid with sufficient overlap on the walls so that they rest securely and provide high load-bearing capacity.
- The newest option - the use of special supports for timber - is used if it is necessary to make a partition anywhere on the wall surface without cutting out recesses or where the beams extend into the walls only a few centimeters. The work is simple: the fastening element is fixed to the base, after which the element is inserted into it and fixed using self-tapping screws.
The supports are highly durable and provide the necessary load-bearing capacity
Ring fastening, waterproofing and insulation
After the beams are installed, you can begin covering the structure with rough flooring, the work is carried out in different ways, we will consider the simplest and most cost-effective option:
- The underside is filled with rough flooring, which is most often made from inexpensive unedged boards of the same thickness. The optimal solution is a 20-25 mm pine board. Its cost is low, and for this type of work it is ideally suited.
Important! Be sure to remove the bark from the ends if there is any, as it may contain pest larvae, which can greatly harm your home in the future. Also, do not forget about treating all elements with a fire-retardant composition.
- The boards can be laid on a cranial block specially fixed at the lower level of the beams (50x50 mm in size) or screwed directly to the beams. We strongly recommend using self-tapping screws for these purposes; they are much more reliable than nails and will hold all the elements much better.
This is what the construction of the second floor floor in a wooden house using a cranial block looks like
- Next, the surface must be waterproofed, and if previously various options were used for this - from clay-based putty to roofing felt, then in our time special materials have appeared that release moisture from the wood, but prevent its penetration from the outside. These are so-called membranes, and we recommend using them.
Special membrane materials are an excellent solution for floors
- Now let's look at how to insulate the floor of the second floor of a wooden house. Previously, different options were used - from sawdust and slag to expanded clay and various mixtures. With the advent of mineral wool, all work has been simplified - this type of material is characterized by high performance properties and excellent heat retention. In addition, mineral wool is an excellent sound insulator.
Article on the topic: When a wooden house is recognized as unsafe
Insulating the floor of the second floor in a wooden house using mineral wool is a quick and simple process; it is important to lay the material as tightly as possible
- From the outside, the surface is covered with another layer of waterproofing material, at which point this stage of work can be considered complete.
Floor construction
The floor of the second floor on wooden beams can be laid in two main ways:
- Directly along the surface of the structure, this option is applicable if the thickness of the insulation inside the structure is less than the height of the beams and there is a small cavity below for ventilation. If the mineral wool is located flush with the top edge of the beams, then it is better to use the second option.
- Logs are laid on the beams, which makes it possible to create a so-called “floating floor”, since it is not rigidly connected to the walls and can move slightly due to temperature changes. This option allows you to improve sound insulation in a wooden house.
The work also varies depending on the material used:
- If you decide to make a wooden floor, then purchase a special board 32 mm thick or more with a special tongue-and-groove fastening system. The work is simple: the board is secured with screws or nails through the recess, i.e. groove, then the next element is inserted so that the connection is tight; if necessary, you can tap the end with a mallet. This results in a smooth surface without nail heads or screws.
- If you decide to lay laminate, parquet or other covering, the easiest way to cover the surface is with sheet materials: plywood or oriented strand board. The second option has high moisture resistance, so it is used more often. The work is simple: the sheets are combined so that the connections go along the beams and are screwed with self-tapping screws.
Work goes much faster with sheet materials
