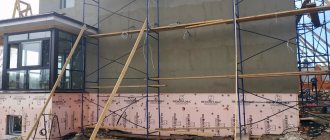
Thermal protection device for the base is a necessary stage in the construction of any facility for residential and industrial purposes.
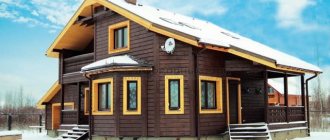
Thermal insulation with polystyrene foam is an energy-saving measure. High-quality and modern thermal insulation “Penoplex” professionally protects the base and foundation from freezing.
Similarly, the energy efficiency of the building increases, which enhances the structural protection of the building, leads to careful use of energy resources and significant savings on heating costs.
We will tell you about insulating the base with Penoplex with your own hands in the article.
What is expanded polystyrene?
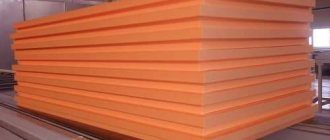
This is a snow-white foam material in the form of polystyrene balls, consisting of styrene, which forms its cellular structure, and a foaming agent - pentane. Both constituent components are hydrocarbon compounds obtained as by-products in oil and gas production cycles.
Characteristics of expanded polystyrene:
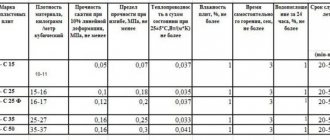
High heat-protective qualities, since the insulation has low thermal conductivity in the range of 0.029 - 0.037 W/(m•K).- Mechanical strength is ensured by the flexibility of the technological process, when it is possible to set a given strength for specific applications.
- It has special abilities to maintain stable dimensions at air temperatures up to + 80 C.
- Low water absorption - the insulation is not hygroscopic.
- High chemical resistance to salts and alkalis, but can easily be destroyed when treated with solvents.
- High resistance to atmospheric influences and aging processes.
- Low fire resistance - insulation is highly flammable. Modification of this material with fire retardants significantly reduces its flammability.
Why Penoplex?
Penoplex or, to be more correct, “Penoplex” is a Russian brand for the production of insulation from expanded polystyrene (high-density foam). For the sake of fairness, it is worth mentioning other brands, for example:
- Technoplex;
- URSA;
- Primaplex.
However, in the domestic space, the word “Penoplex” has become an eponym - a case when a proper name becomes a common noun. And, in fact, the name of this brand is now applied to many types of polystyrene. However, for the sake of fairness, in this article we will focus specifically on Penoplex insulation in the classical sense of the word. What's so good about this material?
By the way, in one of the articles we compared two brands of polystyrene: Which is better, Technoplex or Penoplex?
The most popular manufacturers, packaging price
In Russia there are about a hundred enterprises of varying capacities that produce polystyrene foam insulation boards.
Professionals, when purchasing base insulation in a retail chain, choose products from market leaders. This will serve as a guarantee of the quality and durability of the thermal insulation coating of the base.
List of popular polystyrene foam manufacturers.
TechnoNikol
Russian manufacturer, its facilities are located in 7 CIS countries and the EU. "TechnoNikol XPS" with a thermal conductivity of 0.028 W/(m*K) , is produced in packages of 4 slabs, dimensions 100x580x1180 mm, total area of 2.74 m2, packaging cost - 1200 rubles.
URSA
A product of a Spanish concern, production is also located in Russia in Serpukhov. “URSA XPS G4”, with a thermal conductivity of 0.030 W/(m*K), package of 4 slabs with dimensions 100x600x1180 mm, total area of 2.83 m2, packaging cost - 1500 rubles.
Penoplex
Produced by a company in St. Petersburg. “Penoplex Foundation”, with a thermal conductivity of 0.030 W/(m*K) , package of 4 slabs with dimensions 100x585x1185mm, total area of 2.77 m2, package cost 1540 rubles.
Theplex
Nizhny Novgorod plant are produced in the form of slabs. “Teplex 35”, with a thermal conductivity of 0.030 W/(m*K), a package of 4 slabs with dimensions 100x600x1200 mm, a total area of 2.88 m2, packaging cost - 1350 rubles.
Polyspen
The plant is located in Kirov. This is foamed polystyrene, which is produced by extrusion. “Polyspen 35 G4” has a thermal conductivity of 0.028 W/(m*K) , the package consists of 7 sheets measuring 50x600x1200mm, with a total area of 7 m2, the cost of packaging is 950 rubles.
Glue, foam or dowels?
This question is very relevant for a correct understanding of the process of insulating the foundation and blind area of the house from the outside with polystyrene foam. Experts recommend using simultaneous fastening with glue and dowels for those areas of the surface that will later be finished with any facing materials. The glue creates a dense, without large voids, base for the insulation sheets; disc-shaped dowels make it possible to more securely fix the slabs on the facade. For underground sections of the wall (lower part of the plinth, foundation), the use of dowels is not considered mandatory, since the soil, backfilled after insulation and compacted, does not allow the heat insulation panels to move.
recommends this installation scheme.
The choice between cement-based adhesive mortar and foam adhesive is related both to the convenience and speed of work, and to the cost of the material. Cement-based adhesive compositions are applied to the surface of the slabs using a spatula and either leveled with its jagged edge or form “blots” with a more or less uniform arrangement. After this, the side of the sheet with the solution is pressed against the wall and held until initial setting. The hardening time before completing finishing work is 12...48 hours, before continuing to stick adjacent slabs - 5...10 minutes.
The diagram below shows options for applying adhesive composition to the surface of sheets.
Foam adhesive is applied according to the same principle, the main difference is that it cannot be spread over the surface with a spatula, since the foam is highly sticky and will not stick to polystyrene foam. Using a special gun, the adhesive foam is blown out in relatively thin strips, placing them in a zigzag or chaotic manner, but with the obligatory edging of the slab along the edges.
Important: with both adhesive options, it is necessary to limit the area of application so that the adhesive composition is located at least two to three centimeters from the edge. Otherwise, the foam or adhesive mixture will be squeezed out into the spaces between the sheets and make further work difficult.
The main stages of the process of insulating the foundation of an already built house are shown in the video.
Why is the material preferred for thermal insulation?
All structural parts of houses located underground are subject not only to enormous loads, but also to the negative effects of groundwater, acids and other aggressive substances located in the surrounding soil.
Thermal insulation of the base is a necessary and mandatory part of construction activities that provide high-quality and safe protection of the structure from a variety of external factors.
It, together with the waterproofing of the object, prevents the building structure of the plinth and base from freezing from destruction by natural water, which expands at subzero temperatures, leading to cracks.
The easiest, most reliable and durable option for thermal insulation of the base is to insulate it with polystyrene foam sheets. They can be installed on a variety of building materials: concrete, brick, reinforced concrete and aerated concrete, both outside the structure and inside.
Blind area
To construct a blind area along the foundation, we dig a shallow trench 30-35 cm deep and 70-100 cm wide. If backfilling was performed, then simply leave 30-35 cm at the top to the ground level of the uncovered foundation, and then the trench is expanded to the required size.
At the bottom of the prepared trench, with careful tamping, we arrange a “cushion” of 10-15 cm of sand or sand-gravel mixture. Rolled waterproofing material is laid over the “cushion”, with the joints carefully connected. After this, there can be two options: reinforced concrete is poured over the waterproofing and a blind area is installed, or foam plastic is first laid, and then the blind area is laid over it. The second option, although more expensive, provides additional thermal insulation of the foundation, especially in the case where the underground part was not insulated.
Installation of insulated blind area
For strength, the blind area is reinforced with longitudinal and transverse reinforcement with a diameter of 8-10 mm or a metal mesh with a cross-section of 4-6 mm. To drain water, its surface is inclined, with a slight slope away from the house.
What is the best way to insulate the foundation?
Thermal protection of the base is carried out in 2 cases: directly at the stage of construction of the house and after its completion.
At the same time, experts believe that it is advisable to carry out heat-protection measures at the stage of building a house , then it will be more difficult to implement effective insulation. In addition, there are two methods of thermal protection of the foundation base - external and internal.
With internal insulation, it is to some extent possible to insulate an object from negative temperatures. At the same time, condensation still collects between the wall and the heat insulator, which will lead to the destruction of the base, and subsequently to deformation and a decrease in the strength characteristics of the house.
External thermal insulation makes it possible to protect the house and the building materials of the basement from the cold . Because the dew point shifts towards the protective sheet, which is much more stable with respect to moisture and negative temperatures than the base. The end result will be a warm home with an extended service life.
Features of application
Strip foundation
made of monolithic reinforced concrete - a popular technical solution for the construction of private houses. It is simple to implement and applicable in construction on most types of soil. Two types of foundation: deep and shallow. The first type is used in the construction of buried premises: basements, garages, technical rooms, basement floors. When constructing such structures, it is recommended to use PENOPLEX®EXTREM. The second type is used in construction without buried premises throughout Russia. To speed up construction using this technology, a permanent formwork system with PENOPLEX® has been developed.
Slab foundation
- an excellent solution for constructing a foundation on water-saturated and heaving soils. It is divided into two types: slab, where the thermal insulation is located below the reinforced concrete slab, the so-called insulated slab. This design is ideal for heaving and water-saturated soils, because... The slab is floating, which allows you to avoid deformation of the walls of the house even during soil heaving. An insulated slab involves transferring all loads from the structure (its own weight, operational loads, snow, etc.) to the insulation layer, which is why high strength requirements are imposed on the heat-insulating material used. The second option: the insulation is placed on top of a reinforced concrete foundation slab. This type of foundation is also called ground floors. This type of foundation is mainly used in areas where there is no or minimal soil freezing or on strong soils that are not subject to heaving. The most rational option for use in this design is thermal insulation boards PENOPLEX FOUNDATION®, which have virtually zero water absorption and high compressive strength.
Pile foundation
- a popular solution for a private home. In modern house construction, pile foundations are made of reinforced concrete or metal and differ in the type of arrangement: driven, bored, screw.
Today, metal screw piles are often used for frame houses. Among the advantages are high speed of installation, low cost, and the possibility of installation on various soils. The selection of piles is carried out taking into account existing soils and loads.
In houses on screw piles, two types of floors on the first floor can be made: a floor on joists (ventilated underground) and a floor on the ground. To reduce heat loss through a ventilated underground, the floor is laid on joists with thermal insulation made from extruded polystyrene foam PENOPLEX FOUNDATION®. Thermal insulation is also necessary in ground floors to reduce home heating costs. It is mounted on top of a reinforced concrete slab.
Columnar foundations
They are free-standing house supports and are made of reinforced concrete, natural stone or solid brick.
How to determine the required thickness of the insulating layer?
Calculation of a thermally insulated base consists of calculating the thickness of the insulating layer: by. The minimum dimensions of the thermal insulation layer are determined in a tabular manner or using a complex software package available to engineers of design organizations.
In practice, the design characteristics of thermal insulation are calculated based on the frost index (MI) in the area where the house is being built. In the case when the calculated IMs do not agree with those indicated in the table, the next larger value is taken.
For example, the minimum thermal insulation layer of Penoplex for cities with MI:
- Rostov-on-Don - 30000 S.hour, layer thickness, by-30 mm;
- Moscow - 60000 S.hour, layer thickness, by-74 mm;
- Ekaterinburg - 90000 degrees C.hour, layer thickness, by-116 mm.
How to determine the amount of building material?
After the minimum thickness of the protective layer has been determined, we begin to determine the insulation area and select Penoplex and auxiliary materials.
To determine the area, measure the length and width of the building, then determine its perimeter, multiply the result by the height of the base and obtain the required area in m2.
For example, for a residential building with a plan of 10x10 m and a plinth height of 1.0 m, the insulation area will be: (2*10+2*10)* 1= 40 m2.
To calculate the amount of insulation you will need to know its type and dimensions. Calculation of the amount of polystyrene foam and the cost of work for a basement insulation area of 40 m2:
- Foam plastic PSB-S.25 1000-1000-100 mm, 40 sheets, 40*322= 12888 rub.
- Bonding mixture “Teploskrep” De Luxe, 8 bags, 8*295= 2360 rub.
- Reinforcement mixture Ceresit ST-190, 8 bags, 8*475= 3800 rub.
- Reinforcing mesh, alkali-resistant, reinforced 4x4, 45 m.p., 45*40.3=1813.5 rub.
- Ready-to-use primer Tiefgrund LF, 10 l, 10*53 =530 rub.
- Number of fasteners, facade dowel 200 pcs., 200*9.8=1960 rub.
- Decorative (finishing) plaster Quarzgrund weiss, 7 bags, 7*25*81=14175 rub.
- Facade paint, “Egalisationsfarbe”, 10 l, 10*202=2020 rub.
- Total materials: 39546.50 rub.
- Priming the base, 40 m2 *50 = 2000 rub.
- Basement insulation, 40*400=16,000 rub.
- Base reinforcement, 40*400=16,000 rub.
- Total work: 34,000 rub.
- Total cost of insulating the base with polystyrene foam: 73546.5 rubles.
Calculation of the amount of polystyrene foam and the cost of work for a basement insulation area of 40 m2:
- Expanded polystyrene Penoplex Comfort 1185-585-100 mm - 58 sheets, 15 packs * 1390=20850 rub.
- Bonding mixture “Teploskrep” De Luxe, 8 bags, 8*295= 2360 rub.
- Reinforcement mixture Ceresit ST-190, 8 bags, 8*475= 3800 rub.
- Reinforcing mesh, alkali-resistant, reinforced 4x4, 45 m.p., 45*40.3=1813.5 rub.
- Ready-to-use primer Tiefgrund LF, 10 l, 10*53 =530 rub.
- Number of fastenings, facade dowel 300 pcs., 300*9.8=2940 rub.
- Decorative (finishing) plaster Quarzgrund weiss, 7 bags, 7*25*81=14175 rub.
- Facade paint, “Egalisationsfarbe”, 10 l, 10*202=2020 rub.
- Total materials: 48488.50 rub.
- Priming the base, 40 m2 *50 = 2000 rub.
- Basement insulation, 40*400=16,000 rub.
- Reinforcement with reinforced mesh, 40*400=16,000 rub.
- Total work: 34,000 rub.
- Total cost of insulation: RUB 82,488.50.
Insulation of the foundation with penoplex: we understand the thickness of the insulation in different regions
The basis of any home is a reliable foundation. The integrity, safety, durability of the building, and, to a certain extent, even the indoor microclimate directly depend on its condition. That is why it is necessary to use the most reliable and high-quality structures and materials to build a foundation. However, it is not enough to simply build this part of the house - it needs special protection from external influences.
Insulation of the foundation with penoplex
One of the publications on our portal describes in detail the issues of foundation waterproofing . Usually, in combination with these measures, with the right approach, its insulation is immediately provided. For this, various construction technologies can be used, but the most common, simple, and easy to do independently is insulating the foundation with penoplex.
This article will discuss the reasons for the need for thermal insulation of the foundation, the properties of the insulating material - penoplex, and outline the sequence of the process of carrying out such work and the technological methods used.
Why is the foundation insulated?
It would seem - why insulate the foundation? It may seem that it is enough to isolate it from moisture penetration, and this will completely ensure its safety. All living spaces are located above, do not directly interact with the basement part and have their own thermal insulation. This opinion is quite widespread, and therefore many homeowners simply discount the need for such work, without even including it in the construction plan. Meanwhile, foundation insulation is necessary for several reasons:
- The massive structure of the foundation and plinth becomes the “main route” for the penetration of cold. A significant part of the heat loss of a house is always associated with the poorly insulated floor of the first floor. But even with seemingly reliable thermal insulation, a cold bridge operates from the foundation through the walls. This leads to significant losses in terms of energy costs and an uncomfortable indoor environment. And properly carried out insulation provides up to 30% of total heat savings.
- The base of the foundation is usually located below the freezing level of the soil, and its temperature is fairly constant due to the constant influence of geothermal heat. The upper part is subject to significant temperature changes. Such unevenness causes internal stresses of the reinforced concrete structure associated with the difference in the linear expansion of the material, which leads to its rapid “aging”. In order for the entire foundation mass to have approximately the same heating, regardless of the time of year, reliable thermal insulation will be required.
- A layer of insulation on the foundation walls shifts the dew point outward, and concrete structures will not become damp from the formation of condensation caused by the difference in external and internal temperatures.
- Although any reinforced concrete structure has a certain reserve of frost resistance, expressed in the number of cycles of complete freezing and thawing, it is better not to waste this “internal reserve” by minimizing or completely eliminating the effects of negative temperatures.
- Along with insulating the foundation walls, it is advisable to also carry out thermal insulation of the adjacent layers of soil backfill by placing a horizontal thermal insulating belt at the level of the base (for shallow foundations) or under the concrete blind area. This can reduce the risk of soil heaving during freezing, which is dangerous due to the appearance of deformations and violation of the integrity of the foundation.
- The insulation layer becomes another fairly reliable barrier to soil moisture. In addition, it well covers the applied waterproofing layer, which is vulnerable to mechanical stress.
Expert opinion: Afanasyev E.V.
Chief editor of the Stroyday.ru project. Engineer.
Insulation of the foundation should be carried out along its outer wall. Thermal insulation material placed inside the basement (basement) room will only slightly improve the microclimate there, but will not solve the main problems.
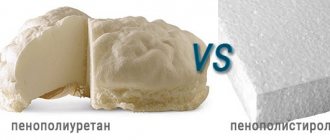
Penoplex is the optimal material for foundation insulation
Of all the existing thermal insulation materials, penoplex is probably the most optimal for insulating the foundation and basement. Of course, other technologies are also used, for example, spraying polyurethane foam, but still, for carrying out such work independently, it is still difficult to find better than penoplex both in terms of physical and operational qualities, and in price.
Penoplex is perhaps the best modern material for foundation insulation
Penoplex is a slab of extruded polystyrene foam. Extrusion technology, that is, melting a mixture of polystyrene granules, foaming it with special agents and then pressing it through a molding nozzle (extrusion head), makes it possible to obtain a high-density material while maintaining excellent thermal insulation qualities.
- The density of penoplex varies, depending on the brand, from 30 to 45 kg/m³. This allows the materials to withstand significant mechanical loads. Thus, the limit of compression force with volumetric deformation of up to 10%, even for the “lightest” penoplex, is at least 20 t/m², and for the densest it reaches 50 t/m². These indicators are quite sufficient not only for insulating the foundation walls, but also for laying a thermal insulator under its soles or installing it as a basis for pouring a slab foundation.
Video: testing extruded polystyrene foam for strength
- Due to its saturation with air, penoplex has excellent thermal resistance. Thus, the thermal conductivity coefficient is only 0.030 W/m×Cº - one of the lowest among all modern thermal insulation materials.
- At the same time, the closed cellular structure of the material resists moisture penetration well. Water absorption on the first day does not exceed 0.2% of the total volume, during the month - no more than 0.4 - 0.5%, and subsequently this value does not change throughout the entire service life.
- The temperature range at which penoplex does not change its physical properties is from -50 to + 75 ºС.
- The material is absolutely harmless from an environmental point of view, does not decompose over time, does not emit harmful substances, and its service life is estimated at no less than 30 - 40 years.
Penoplex is produced in the form of rectangular slabs, usually orange, 600 × 1200 mm in size, with a thickness of 20 to 60 mm (in 10 mm increments), 80 or 100 mm. The slabs have a locking tongue-and-groove part, which makes installation extremely simple and minimizes “cold bridges” at the joints of the panels.
Several types of penoplex are produced, which are divided into classes, from “Penoplex 31C” to “Penoplex 75”. The main difference is the level of density of the material, which is quite clearly expressed by a digital indicator. In addition, the composition of Penoplex 31 and 35 additionally contains fire retardants, which significantly increase their fire resistance. However, for external insulation of the foundation this indicator is not decisive. For such work, they usually purchase material of class “35C”, “45C”, and for installation under a sole or under a slab foundation - “45”.
Prices for thermal insulation materials
Thermal insulation materials
Schemes and calculation of foundation insulation parameters
So, in order to achieve effective thermal insulation of the foundation and the thickness of the adjacent soil, the insulation system must include two sections:
Approximate layout of insulation and possible errors
- Vertical - a layer of insulation is installed directly on the foundation walls from the outside, from the very bottom to the top edge of the base. This solves the problem of eliminating “cold bridges” through the walls and basement of the building.
- Horizontal - laid out in a continuous layer around the perimeter of the building and prevents freezing of the soil around the foundation walls, thereby completely eliminating or reducing heaving processes to the maximum extent. Depending on the depth of freezing in a particular area, on the type of foundation and its depth, this layer can be located at the level of the base, or higher, at a depth above the freezing point. In practice, very often a horizontal layer of insulation is placed directly under the concrete blind area.
Scheme of thermal insulation of a foundation with an insulated blind area.
At the same time, experts recommend that the horizontal insulation belt be thickened at the corners of the building, at a certain distance along the walls - this will be discussed below.
What should be the thickness of penoplex for the insulation to be effective and fully justify its purpose? There are special calculation methods used by specialists. With some simplification, you can make a similar calculation yourself.
The thickness of the penoplex for the vertical section can be determined based on the following formula:
R = h 1/ λ 1 + h 2/ λ 2
R is the value of heat transfer resistance, a constant established for specific regions taking into account their climatic characteristics;
h 1 – thickness of the foundation walls;
λ 1 – thermal conductivity coefficient of the material from which the foundation is made;
h 2 and λ 2 – respectively, the required thickness of the penoplex layer and its thermal conductivity coefficient.
The value of R is easy to clarify in any local construction organization - it is established by SNiP 23-02-2003. For example, the table below shows this minimum value for some regions of Russia:
| City (region) | R - required heat transfer resistance m2×°K/W |
| Moscow | 3.28 |
| Krasnodar | 2.44 |
| Sochi | 1.79 |
| Rostov-on-Don | 2.75 |
| Saint Petersburg | 3.23 |
| Krasnoyarsk | 4.84 |
| Voronezh | 3.12 |
| Yakutsk | 5.28 |
| Irkutsk | 4.05 |
| Volgograd | 2.91 |
| Astrakhan | 2.76 |
| Ekaterinburg | 3.65 |
| Nizhny Novgorod | 3.36 |
| Vladivostok | 3.25 |
| Magadan | 4.33 |
| Chelyabinsk | 3.64 |
| Tver | 3.31 |
| Novosibirsk | 3.93 |
| Samara | 3.33 |
| Permian | 3.64 |
| Ufa | 3.48 |
| Kazan | 3.45 |
| Omsk | 3.82 |
For example, you can calculate how thick a vertical layer of penoplex should be on a concrete foundation 500 mm thick in the Moscow region:
R = 3,28
h 1 = 0.5 m
λ 1 for concrete - W/m×°K
λ 2 for penoplex – 0.032 W/m×°K
3,28 = 0,5 / 1,69 + h2/0,032
Simple arithmetic calculations give 0.0955 m. We should, of course, round up, and as a result we get a 100 mm layer of penoplex.
Calculator for calculating the thickness of foundation insulation
To make the work easier for site readers, we present a special built-in calculator that allows you to quickly and accurately calculate the thickness of thermal insulation for different materials and sizes of the foundation, and for various types of insulation materials appropriate in this case.
Go to calculations
You can use another calculation method. In a certain sense, it is even more convenient, since it will show not only the thickness of the vertical insulation, but also the parameters of the horizontal foam belt - its thickness and the necessary reinforcement in the corners of the building.
There is such a thing as the “frost index” ( IM ). This given indicator expresses the number of days with negative air temperatures and the magnitude of these temperatures characteristic of a particular region. It is expressed in degree hours. of IM with isotherm lines .
Scheme of the approximate distribution of the frost index (MI) in the European part of Russia
Having found out the IM for your area, it is easy to design vertical and horizontal insulation of the foundation, based on the data in the table:
| THEM | thickness of the vertical insulation layer (mm) | width of horizontal insulation belt (m) | thickness of the horizontal insulation belt (mm) | length of thickened sections from the corners of the building (m) | Thickness of the thickened section (mm) |
| up to 35000 | 84 | — | — | — | — |
| 35000 | 91 | 0.3 | 18 | 1.2 | 25 |
| 40000 | 98 | 0.6 | 32 | 1.2 | 44 |
| 50000 | 112 | 0.9 | 49 | 1.5 | 69 |
| 60000 | 126 | 1.2 | 63 | 2 | 95 |
| 70000 | 140 | 1.5 | 81 | 2.5 | 121 |
| 80000 | 154 | 1.8 | 102 | 3 | 152 |
| 90000 | 168 | 1.8 | 133 | 3.5 | 200 |
The values obtained from the table are rounded up. Then they must be brought to the existing standard foam thicknesses. When insulating the vertical part, it is recommended to provide two layers of slabs - this way all joints will be reliably covered and there will be no “cold bridges” left. Thus, if, for example, with a “frost index” of 50,000 degree-hours, a foam thickness of 112 mm is required, then it would be advisable to use two layers of insulation of 60 mm each.
Knowing the height of the foundation and its basement part, having determined the insulation parameters, it will not be difficult to calculate the required amount of material, based on the fact that the area of one panel is 0.72 m².
Video: tips for insulating the foundation with penoplex
How to insulate the foundation with penoplex
Vertical insulation of foundation walls
The table below shows an approximate sequence of work on vertical thermal insulation of the underground part of the foundation. It is clear that this work is closely related to the waterproofing of the concrete base, so this topic will also be briefly touched upon - as one of the stages of the insulation process.
| Illustration | Brief description of the operation performed |
| To ensure high-quality insulation of the foundation throughout its entire height, right down to its base, at the point of hardening and full strength gain, the formwork is removed, the soil is removed to its full depth, along the entire perimeter of the building - so that there is freedom of movement for workers. | |
| To ensure high adhesion of concrete to the waterproofing layer, good adhesion of rolled materials and insulation blocks, its surface should be thoroughly cleaned of dirt, dust, adhering debris, small irregularities (saggings) formed during pouring of the tape and identified after stripping. | |
| This cleaning is carried out using a grinder, equipped with a special grinding wheel for concrete. The operation is very dusty and labor-intensive, so many people often neglect it. However, to ensure a truly high level of waterproofing and insulation, skipping this step is not recommended. | |
| A primer is applied to the cleaned surface - a special bitumen waterproofing mastic. There are many of their brands on sale - Russian builders often choose domestic products, in particular, as shown in the illustration, “Primer No. 01,” which is excellent for pre-priming concrete bases. | |
| The primer is applied to the surface in a thick layer, so that all remaining unevenness in the concrete is completely covered. Particular attention is paid to small depressions, which often remain “dry”. The primer can be applied over large areas using a medium-pile roller, but in corners, in the area of transition fillets and in other difficult areas, a brush must be used. The surface of the foundation is completely covered from the outside with primer, from the base to the top edge, and in addition to this, the horizontal surface of the tape from which the construction of the base or wall of the building will begin is immediately primed. | |
| Next, the stage of basic waterproofing of the foundation surface begins. In the example under consideration, the craftsmen use the weldable roll material TechnoNIKOL Linokrom OM. To operate, you will need a gas burner and a propane tank. | |
| Fusing of rolled waterproofing is carried out by two people. One worker heats up a section of roofing material with a gas burner until the protective film melts. The second one rolls out the roll and presses the heated area to the wall surface. It is important that the roll must be correctly oriented - there are markings on its surface indicating the side to be melted (in the “standard” winding of the roll it is located on top). Work begins from the base of the foundation. Cover the outer side of the sole, transition fillets, with a layer of waterproofing, and go onto the vertical wall of the tape. | |
| After the outer layer has melted, the roll rolls upward, and the roofing material adheres perfectly to the primed surface. | |
| After gluing the entire measured piece of roofing felt to the top, you need to go back down - there the “starting” strip remains unglued. It is also carefully melted from below with a burner flame, then pressed and finally fixed on the wall surface. | |
| The work is usually carried out “tier by layer”, that is, first the lower part of the foundation tape with the sole is completely glued along the entire perimeter. This creates a kind of “reinforcement belt” in this complexly configured area of the foundation. Adjacent strips of roofing material must overlap each other by at least 100 mm. | |
| Particular attention is paid to the external and internal corners of the foundation. The strip of material must extend at least 150 mm onto the adjacent wall. If necessary, appropriate incisions are made. | |
| Then this entire “knot” will be covered with another sheet, heated on the adjacent wall. The same principle applies to internal corners. | |
| After the lower waterproofing belt is installed along the entire perimeter, moving higher - to the vertical part of the foundation strip. Strips are cut from the rolls in such a way that they overlap at the bottom with the already glued fragments by 100 mm... | |
| ...and in the upper part they completely covered the horizontal surface of the foundation strip. | |
| The work is carried out in the same order. The measured and cut roll of material is first, gradually rolled out, fused from bottom to top on the vertical surface of the tape. | |
| Then the horizontal surface of the foundation is glued. | |
| And, as before, the installation of the cut roll of roofing material is completed - fusing the bottom strip from which the work began. This continues until the entire foundation is covered with a primary layer of waterproofing. | |
| For reliability, it is recommended to cover this first layer of built-up waterproofing with a second, continuous layer, from the base to the upper edge of the foundation strip. | |
| The second layer will completely hide the “reinforcement belt”, and such waterproofing will no longer be afraid of any pressure of groundwater, rain or flood water. The waterproofing process is not shown in sufficient detail because on our portal a separate publication is devoted to this issue - “Do-it-yourself foundation waterproofing” , which discusses various methods, including the use of self-adhesive roll materials. | |
| After the waterproofing is completely ready, you can proceed to the installation of Penoplex insulation panels. To do this, one of several methods is used. Firstly, insulation blocks are often mounted with a special glue designed specifically for thermal insulation work. It can be sold in the form of a dry construction mixture, and then it will need to be diluted and kneaded to the required consistency in accordance with the attached instructions. An example of such glue is shown in the illustration. | |
| The adhesive composition may also be sold in ready-to-use form, in a paste state. It goes on sale packaged in jars or buckets. | |
| To install penoplex, you can also use bitumen mastic, the same one that was used to waterproof the foundation walls. The only condition is that the mastic must be water-soluble, since organic solvents (acetone, benzene, alcohols and other similar compounds) have a destructive effect on extruded polystyrene foam. However, a special bitumen mastic is produced, designed specifically for the installation of polystyrene foam insulation boards - this will be the optimal solution. | |
| They begin gluing the Penoplex boards from the bottom. If the foundation has a complex shape, for example, a pronounced stepped sole, then the insulation layer installed on it must exactly repeat it. In this case, you should strive to leave minimal gaps on the internal and external corners, carefully adjusting the cut pieces of penoplex. | |
| The glue is applied to the panels pointwise (in slides), but in such a way that after pressing them to the surface, the contact area is at least 40% of the total area. If the surface of the wall after waterproofing is highly even, then you can use a notched trowel with a ridge height of 12–15 mm to apply the adhesive. In any case, no matter how the glue is applied, it must be done in such a way that when the slab is pressed to the surface, it does not protrude at the seams and does not interfere with the joining of subsequent insulation slabs. | |
| When installing penoplex, be sure to combine the tongue-and-groove connection, achieving the tightest possible fit of the panels to each other. | |
| The entire underground part of the insulation is mounted exclusively on an adhesive composition. The use of any “mushroom” type anchors is strictly prohibited. Photos or videos circulating on the Internet with a similar method of attaching penoplex to the underground part of the foundation only indicate that the “masters” publishing this do not understand this technology well enough. Firstly, drilling holes for “fungi” will inevitably break the tightness of the created waterproofing layer, and all the work done in this regard will go down the drain. And secondly, there is no need for additional mechanical fastening - the soil backfill will reliably fix the Penoplex on the vertical surface of the foundation strip. | |
| The area located in the basement, ABOVE GROUND LEVEL , is additionally fixed to the surface using plastic dowels - “fungi”. A hole of the required diameter is drilled directly through the insulating panel, with a depth of 35 - 50 mm into the concrete (brick) layer, the “fungus” is inserted until it stops, after which the fixing core is driven in (screwed in, depending on the model). Subsequently, the cap of the “fungus” will be hidden by the finishing of the base. | |
| If the technology of fusing rolled material was used to waterproof the foundation walls, then another method of subsequent fastening of thermal insulation slabs is also practiced. Using a gas burner, surface melting of the glued roofing material is carried out, of course, very carefully to prevent through burning. | |
| For a whole panel of Penoplex, two or three such molten “spots” are enough. | |
| After pressing the panel, it is held for 10–15 seconds - the bitumen filling hardens, and the insulation is sufficiently securely fixed to the wall. | |
| After the entire surface is covered with penoplex, it is necessary to carefully seal the seams between the panels. In case of large gaps, they can be closed with scraps of material; for small ones, it makes sense to use polyurethane foam. However, if foam is used, then after it has hardened and cut off, it will be necessary to coat the seams with excess bitumen mastic to prevent moisture from getting on it - this can cause the polyurethane foam to begin to decompose over time. For Penoplex, it is best to use branded adhesive foam, which, by the way, is also well suited for gluing insulating boards to the surface of the foundation. | |
| If it is decided to place thermal insulation panels in two layers, then the second layer is laid offset, so that neither the vertical nor the horizontal seams coincide. This will practically reduce the likelihood of the formation of “cold bridges” to zero. | |
| After sealing the seams, it is recommended to protect the installed insulation from direct chemical exposure of the soil. Here you can do different things: | |
| The first option is to lay a reinforcing serpyanka mesh on the surface of the insulation and apply a thin layer of plaster, using the same adhesive composition or a special mixture for coating waterproofing work as a solution. | |
| The second option is to cover the Penoplex with a layer of inexpensive roofing felt or glassine, laid on bitumen mastic with an overlap of adjacent sheets of 100 mm. This, in addition to protection, will create another waterproofing barrier. But the best option is to use a special profiled membrane of the “PLANTER – standard” type. This modern coating becomes an impenetrable barrier to moisture, and the raised protrusions will serve as a kind of “damper pads” that prevent damage to the insulating layer when backfilling the foundation with soil. | |
| Waterproofing and insulation of the underground part of the foundation has been completed. Everything is ready to start backfilling. | |
| For large volumes of work, it is advisable to use special equipment. Please note that for additional insurance, the craftsmen installed temporary wooden supports. As the foundation is filled with soil, it is easy to remove them, and after filling the pit, thermal and waterproofing of the foundation, nothing can damage it. It should be noted that when backfilling soil, it is recommended to place a layer of sand (sand-gravel mixture) near the walls - this will help reduce the load on the foundation walls. Sometimes expanded clay is also used for these purposes, which will make the insulation even more effective. | |
| The backfilling has been completed - it will only need to be tidied up manually. This will be done at the stage of creating insulated blind areas. | |
| And the foundation strip itself became the basis for further work - laying out a plinth made of clinker bricks. |
Video: sequence of waterproofing and insulation work on the foundation
Horizontal soil insulation belt around the foundation
Approximate diagram of an insulated blind area
- When filling the soil, it is compacted sequentially. When about 300 mm remains to the surface level, the soil is compacted as much as possible and wooden formwork is installed so that it rises above the ground by 100 - 150 mm. The width of the insulation belt is indicated in the table above. As a rule, even if its table value is less than a meter, it is still recommended to maintain a minimum of 0.7 - 1 meter.
- A sand cushion with a thickness of at least 100 mm is laid and carefully compacted. Then a layer of rolled waterproofing material - roofing material - is laid, with the overlaps between the sheets glued with bitumen mastic.
The panels of the horizontal insulation belt should be as close as possible to the vertical ones.
- Penoplex slabs are laid on top of the roofing felt. It is necessary to achieve their maximum fit to the vertical panels so as not to leave a path for the cold. The joints between the plates are filled with adhesive or polyurethane foam.
- The foam boards are covered with a thick polyethylene film on top, leaving a small overlap on the base part. To strengthen the structure of the blind area, you can lay a reinforcing metal mesh or several parallel reinforcement bars on top of the film.
Reinforcing the blind area before pouring concrete
- The blind area is being filled. Concrete of a standard composition is poured into the formwork - 3 parts sand to 1 part cement. The solution must be thick enough to slope from the walls of the building to the edge of the blind area.
The finished blind area can later be tiled
- After the initial setting of the poured concrete, it can be hardened using ironing technology. Another, more optimal option is to cover the blind area with paving slabs.
Video: well-executed insulated blind area
The insulated basement part is also subject to mandatory finishing with plaster or facing with tiles, artificial stone or special panels. More information about plinth cladding technologies can be found in the corresponding portal publication.
Features of insulation of slab foundations
If any structure requires a slab foundation, then the main feature is that it is insulated with penoplex foam immediately during the pouring process.
Approximate layout of layers of insulated slab foundation
- Excavation work is carried out on the marked site - soil is selected to the depth specified by the project. The bottom of the resulting pit is leveled as much as possible by hand.
- A sand cushion with a thickness of at least 100 mm is poured. One must be thoroughly compacted. It is advisable to lay a layer of geotextile - dornite - over the sand cushion.
- The next layer is the so-called concrete preparation - the surface is filled with a thin layer of concrete filled with crushed stone. In this case, no reinforcement is provided.
- After the concrete substrate has hardened, it must be covered with a waterproofing roll material - roofing felt. One layer laid on mastic with careful gluing of the overlaps of adjacent sheets is enough.
- The formwork is installed around the perimeter to the required height of pouring the foundation.
- Penoplex slabs are laid out over the entire area with careful adjustment of the tongue-and-groove joints. For such work, it is better to use high-density polystyrene foam - brand "Penoplex 45" with a thickness of 50 to 100 mm. All joints, if necessary, are carefully sealed with polyurethane foam.
Before pouring the foundation, the laid foam slabs are covered with thick polyethylene film
- A polyethylene film with a thickness of at least 200 mm is laid on top of the laid slabs. The overlap of adjacent canvases is at least 150 mm, with the obligatory gluing of these places with construction waterproof tape.
- Next, the necessary reinforcement and pouring of the foundation are performed in accordance with the building design.
- After the foundation has finally gained the required strength, the formwork is removed and the vertical walls of the resulting slab must be insulated with penoplex. The installation of an insulated blind area is also carried out - it will not differ in any way from the process described above.
So, the process of insulating the foundation with penoplex is quite voluminous and labor-intensive. However, ignoring the importance of such work would be an unforgivable mistake. A foundation that has received reliable protection from both moisture and temperature changes will reliably serve without repair for decades, thereby maintaining the integrity of the entire structure of the house.
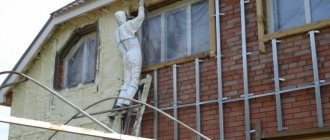
We insulate from the outside
Before you begin to insulate the base, thoroughly clean its surfaces of cement, knocking off dirt with a hammer and brushing it off with a brush. Identified surface defects or cracks are sealed with cement mortar. After which it needs to be allowed to dry, and only then do they begin to perform thermal insulation.
Next, the base surfaces are coated with a primer to ensure reliable connection of the adhesive composition to the walls. The base structure of the foundation usually has a height of 0.30-0.50 m, while Penoplex is produced in larger sheets. Therefore, it will need to be adjusted to the base.
For this purpose, measure the height of the structure and mark the insulation sheets accordingly, cutting them with a hacksaw.
Consumables and tools
To thermally protect the base with penoplex, the master must prepare the following tools and accessories:
- metal brush for cleaning the surface,
- pick,
- shovel,
- buckets,
- trolley for excavating soil near the basement structure.
To prepare and apply solutions you will need a container, a roller, a spatula and a trowel. The insulation is adjusted using a hacksaw. Using a mounting gun - attach vapor and waterproofing.
Basic building materials needed to perform thermal insulation work:
- extruded polystyrene foam, usually comes in bags of 4 to 10 sheets;
- waterproofing film;
- fiberglass reinforced mesh;
- adhesive composition for securing insulation sheets;
- dowels;
- putty;
- bitumen mastic.
Finishing technology
Waterproofing is applied on top of the treated and cleaned base surfaces. An indispensable requirement is the deep drying of its cover. Otherwise, the slabs will creep to the sides.
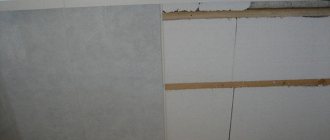
Insulation installation technology:
- The sticker starts from the bottom, the insulation sheets are placed horizontally in one row.
- The next layer of sheets is installed end-to-end and secured to the plane of the previous cover.
- Thermal protection boards must be of equal thickness.
- The next row is made with offset joints, placing the slabs in a checkerboard pattern; the seams between the tiles should be 5 mm.
- Fit the edges of the sheets tightly.
- The glue is applied at a number of points.
Having completed the stages of insulation and external decoration of the base, you will also need to insulate and equip the blind area.
Insulating the base with extruded polystyrene foam, video instructions:
Installation instructions
The work is carried out after complete hardening of concrete structures poured or excavation of foundations operated without an insulating layer. A trench is prepared along the perimeter of the structures, providing free access to the foundation and protecting it from crumbling soil. Read more about how much it costs to dig a trench for a foundation and how to do it correctly here.
The installation technology for different structures may differ, but Penoplex slabs are in any case mounted on clean, dry, intact and even surfaces, insulated from moisture with mastics or rolled materials.
Violation of the integrity of the slabs in buried areas is not allowed and is considered a critical violation ; fixation by mechanical means is carried out only in the outer areas of the base. Adhesion is provided by glue or liquid waterproofing, tight pressing of the slab and the pressure of the soil itself.
Ideally, the slabs are laid in two or more layers, with the joints necessarily offset. The best results are achieved when using slabs with an L-shaped edge. If this is not possible, the slabs are mounted as tightly as possible, followed by sealing the cracks.
The external finishing of the insulation deserves special attention. Areas covered with soil do not need it; open basement areas, on the contrary, are protected from UV and mechanical influences.
Slabs that are not pressed down by soil are fixed mechanically , namely with disc-shaped dowels according to the scheme recommended by the manufacturer (from 4 fasteners per slab). When choosing cladding, preference is given to moisture-resistant plaster, porcelain stoneware, tiles and similar materials for finishing the basement area.
From the video you will learn how to insulate the foundation of a house from the outside with Penoplex:
Possible mistakes
Despite the fact that information about the choice of insulation and the technology for its installation on basement surfaces is publicly available in sufficient quantities on the Internet, in practice, contractors make a large number of mistakes that lead to deformation of not only the heat-protective layer, but also the structural elements of the building.
The biggest mistake that home craftsmen make is saving when choosing the thickness and density of Penoplex. The optimal thickness of base heat insulation sheets for the central regions of Russia is from 80 to 100 mm.
How to eliminate them?
Most errors made during the installation of thermal insulation cannot be corrected ; a complete rework of the base thermal protection system will be required. For example, if solutions not intended for this purpose were used as an adhesive or reinforcing mixture, for example, tile adhesive.
You also can’t save money by mixing glue with sand or adding cement to it for “strength.” It is no less dangerous to use cheap reinforced mesh or violate the technology of its installation. It is better if it is alkali-resistant, with a density of at least 140 g/m2.
A common cause of cracks in the thermal insulation of the base is when the reinforcing mesh is mounted directly on a layer of thermal insulation sheets. It needs to be deepened into the reinforcing layer so that it is 1/3 in the center of the layer. Another common mistake when reinforcing is connecting reinforced mesh sheets without an overlap of 10 cm .
Cost of services in companies in Moscow and St. Petersburg
Owners who want to insulate themselves should take into account that the price of penoplex varies significantly depending on its thickness. On average, a 20 mm slab costs 65 rubles, 50 mm – 170 rubles, 100 mm – 300 rubles.
If you trust the insulation to professionals, then the average prices in Moscow and St. Petersburg for their work are as follows:
- base primer – 30 rub/m2;
- installation of penoplex – 350 rub/m2;
- surface reinforcement – 350 rub/m2;
- finishing the base with decorative stone – 1150 rub/m2;
- plastering – 450 RUR/m2.
Although thermal insulation with polystyrene foam by craftsmen is expensive, high-quality insulation of the foundation and base will extend the service life of the foundation and will allow you to avoid spending money on its constant repairs.
Pros and cons of use
Expanded polystyrene is characterized by a large number of useful properties, which, compared to other thermal insulation materials, is very advantageous and preferable for use.
The main advantages of polystyrene foam for basement insulation:
Low thermal conductivity prevents the transfer of cold from outside air and heat from the premises.- High moisture resistance, even when in the rain it remains dry.
- Permeable building material allows wall structures to breathe.
- Has high biological protection against fungi.
- High sound insulation characteristics.
- High strength, does not deform during operation.
- Environmentally safe material, does not have radioactivity.
Expanded polystyrene also has disadvantages, but they are not so numerous. The main one is flammability. Although manufacturers have learned to deal with this by adding anti-flammable compounds to the composition. This insulation is also resistant to solvents and small rodents.
You will find a lot of important and useful information about basement insulation in this section.
Insulation methods
Depending on the tasks, penoplex insulation is performed in three ways:
- The horizontal insulation method is used for thermal insulation of the base of strip and slab foundations. A horizontal layer is also laid along the walls of the house to protect the soil from freezing and to reduce the amount of heaving. Near shallow foundations, penoplex is laid at the level of the sole. In other cases, above the freezing point of the soil.
- The vertical method is used to insulate the outer walls of foundations from the base to the top edge. Penoplex is glued with acrylic glue or special mastic. When insulating plinths, the slabs are additionally secured with dowels.
- The blind area is performed to reduce soil heaving and, accordingly, protect against deformations that occur with temperature changes. Penoplex is laid on the prepared cushion, then poured with concrete.
Proper foundation insulation
Advantages and disadvantages of insulating the base with penoplex
The main advantages of penoplex include the following:
- High density, thanks to manufacturing technology (20-22 t/m2);
- Low moisture permeability;
- When burning, it does not emit harmful chemical compounds;
- Relatively low price;
- Light weight of a structure made from this insulation, which does not carry additional load on the walls, foundation, and basement of buildings;
- Long service life (up to 50 years).
The disadvantages of penoplex include:
- Low vapor permeability (steam does not pass through, but is blocked);
- Combustion class G3 - the material melts and burns;
- Like polystyrene foam, it attracts rodents.
Sequence of activities
Controversial issues have been resolved - it’s time to get to work. The first step is to prepare the object, namely: concrete structures that will be subject to finishing measures must be freed from soil.
The technology for insulating the base with penoplex is similar to the sequence of work using polystyrene foam. There are some deviations towards complicating the process.
Excavation
A trench is dug around the house, sometimes reaching the bottom of the foundation. For a shallowly buried tape this is justified. Deeply lying belts that go below the soil freezing level do not require such drastic measures. It is enough to open the concrete below the soil surface by 25-60 cm.
Concrete structures are freed from soil, leveled, and allowed to dry. Then they are cleaned of dust and treated with a deep penetration primer. Irregularities with height differences of 2.5 cm or more require leveling with mortar. The base walls are plastered, rubbed, and left to dry. The presence of significant protrusions and depressions makes it necessary to perform priming several times.
Waterproofing of concrete structures
The next step is waterproofing. It is done in two layers. Bituminous mastic is applied first. It can be purchased ready-made at retail outlets. If you have a dry bitumen block, then by heating it, then mixing it with used motor oil, you obtain a suspension suitable for waterproofing a concrete base. A layer of 2-4 millimeters is applied to the concrete.
Next, Technonikol sheets are laid. Heat the film with a gas burner, stick it on, smoothing it out and squeezing out air bubbles from under it. The sheets are applied with an overlap of 10 cm, the joints are coated with mastic.
From this point on, the technology for performing work proceeds in two ways: from the soil level - up and down. The underground part of the base is insulated with bedding, the above-ground part with penoplex.
Drainage arrangement
Foundation drainage
For houses with a large roof area, there is a need to lay drainage and drainage (blind area) around the perimeter of the foundation. Geotextiles are laid into the existing trench. Its edges are brought to the surface of the soil. Pipes with holes (drainage) are laid on top of the canvas. They are then connected to the storm sewer system. The pipes are covered with a layer of crushed stone 10 cm thick and the whole thing is wrapped in geotextiles. The trench is filled with expanded clay backfill. The slope of the pipes must be at least 3 degrees. The structure of the backfill promotes intensive outflow of water, and also serves as an insulating layer to protect concrete from freezing and damage from frost heaving of the soil.
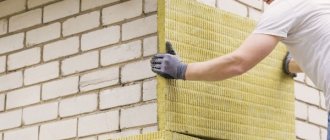
Installation of EPS
Mark the level of the bottom row of insulation. Using pre-prepared dowels and screws, the start profile is attached, on which the penoplex will rest. A special adhesive is applied along the perimeter of the slabs. In the middle, add a few dots of glue. The mortar on the slab, after pressing it against the wall, should occupy at least 40% of the surface area.
The EPS is placed in the profile and pressed against the wall. The slabs are placed so that the protruding parts of the selected quarter are on the side of the foundation. In this case, water will not have a chance to get under the insulation. The adhesive composition is also applied to the ends of the slabs. This will ensure their gluing together and the formation of a monolithic ring around the entire base.
The front surface of the EPS is again coated with an adhesive composition. It is recommended to secure the above-ground part of the insulation with special plastic mushrooms. Each plate should be secured with five clamps: in the corners and in the center. A perforated metal corner is fixed along the upper edge of the insulating layer, protecting the penoplex board from damage. A reinforcing mesh is applied. Use a spatula to embed it into the adhesive.
Watch the video: using extruded polystyrene foam
Laying the blind area
Depending on the size of the roof canopy, a warm blind area is installed. Based on a depth of 30 cm, a 10 cm layer of sand is poured. It is compacted, covered with waterproofing, on top of which a layer of penoplex is placed. This entire sandwich is filled with cement mortar. The resulting concrete screed should have a reverse slope in order to drain water away from the house. The width of the blind area should exceed the overhang of the canopy by 50%.
Do-it-yourself technology for insulating the foundation plinth from the outside with penoplex
Before you begin installing the insulation after the initial preparation of the base, you should apply a waterproofing material.
The most commonly used is bitumen mastic, which is characterized by its low cost and ease of use.
The mastic is applied to the entire area of the base with a brush and left until completely dry. It is not recommended to preheat the material and glue penoplex directly onto it - this design will not last long.
Do not dilute the mastic with acetone or gasoline, since these solvents will destroy the penoplex by reacting with it. Mastic can be purchased in a ready-to-use form or made independently by melting the bitumen in a container and mixing it with used machine oil in a ratio of 1:3, which will give the material greater elasticity and the mastic will not crack even in severe frosts.
It should be applied in a layer 3-5 mm thick. After application, you must wait until it dries completely. The next stage is gluing sheets of waterproofing, for example TechnoNIKOL, carried out using gas burners, which should be kept at a distance of at least 20 cm from the surface to be treated so as not to damage the material.
How to finish a base on top of penoplex?
So, the penoplex is installed, but the base of your house is ugly, it has acquired the characteristic appearance of an orange inflatable boat! How to fix it? To do this, firstly, you need to apply plaster over the penoplex.
Well, now, on top of the primer, you can install the selected finishing material. There is no limit to imagination here. You can decorate the base with natural wild stone to create the impression of “my home, my fortress.” You can use a brick finish. There are ceramic tiles of various types and textures, and there are decorative plasters - the so-called textured ones.
Having finished finishing, you can rejoice: you have significantly increased the thermal insulation properties of your home.
The final stage of insulation of the basement part of the foundation
There is one important point here. The walls of the house should always be slightly wider than the basement. Otherwise, water will flow from them into the cracks, which will cause not only excessive moisture in the structure, but also a breakdown in strength.
Types of base
If a mistake was made during the design or construction of the house and the base part of the foundation is wider than the wall, then additional measures will have to be taken to drain rainwater. The easiest way is to use metal canopies around the entire perimeter of the base.
Protection of the base from precipitation
Flashings for the foundation plinth
If the excess thickness is insignificant, then it is eliminated after insulation of the facade walls. And in the vast majority of cases they will have to be insulated; these are today’s state requirements for the thermal protection of buildings. And not only public, but also private houses. Building a residential building without a project is prohibited by regulations, and no one will sign the project if the latest building codes and regulations are not followed.
As for the use of dowels to fix the insulation on the base part, there are two opinions among professionals.
Dowels for thermal insulation
First, if you wish, you can drill holes and use special dowels with large heads. The practical effect in terms of the strength of the insulation will be insignificant, but it will take a lot of time and labor
We don't even take into account the cost of materials
Second. Carefully fix all slabs protruding above the ground. If in the lower part air pockets are allowed between the slabs and foundations, then on the base part the fit should only be continuous. Is the concrete surface on the plinth too uneven? You will have to carefully scrape off all the protrusions or pre-plaster them.
What thickness is needed - calculation of parameters
To calculate the minimum required thickness of penoplex for foundation insulation, you must use the formula:
R=h1/λ1+h2/ λ2 , where
- R – heat transfer resistance ((m2*°С)/W for a certain region according to SNiP 23-01-99;
- h1 – base thickness (m);
- λ1 – thermal conductivity of the foundation (W/(m*°С));
- h2 – insulation thickness (m);
- λ2 – thermal conductivity of penoplex (W/(m*°С)).
Let's take for example the value R=3.23 (the norm for St. Petersburg), h1=0.4, λ1=1.69, and λ2=0.032.
As a result, we get the following formula:
- 3.23=0.4/1.69+h2/0.032;
- 3.23=0.24+h2/0.032;
- h2=2.99*0.032;
- h2=0.09568, which is approximately equal to 95 mm, but if you take it with a margin, then slabs 100 mm thick will do.
To calculate the approximate number of slabs that are needed to insulate the foundation, let’s take a 10x8 house (approximate perimeter 10*2+8*2) and a base height of 1 m. This gives a coverage area of 36 m2. If you take a standard slab with a surface area of 0.72 m2, then for insulation you will need about 50 pieces.
Nuances that should be taken into account when insulating the base
Upon completion of the work, the trench is buried with the same soil or it will be replaced with expanded clay and sand, which improve thermal insulation.
and at a depth of about 30 cm from the top of the trench, a ten-meter layer of sand is poured and compacted tightly. After this, roofing material is laid, the width of which is slightly greater than the width of the dug trench, and its joints are coated with bitumen.
When the bitumen has hardened, penoplex is glued to the bottom of the trench on top of the roofing felt with acrylic glue, its joints are coated with polyurethane foam or the same glue. After the glue has dried, you should make a concrete screed with a slope away from the base, which will allow excess moisture to be drained away from the house.
The final finishing of the base can be done from clinker tiles, stone or using other materials. Insulating the foundation base helps reduce heat loss by more than 20%. Carrying out the work also protects the base from mechanical damage, protects against the formation of cracks and mold, and the development of fungus.
If external thermal insulation is not done, the service life of the foundation is significantly reduced due to the fact that it is exposed to harmful factors - frost, moisture. You can carry out external insulation of the foundation plinth with your own hands; for this you should purchase materials and carefully study the technology for carrying out the work.
For a master class on insulating the foundation base from the outside, watch the video step by step: