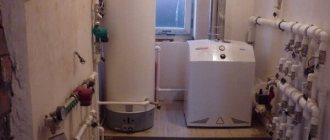
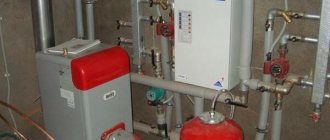
Pressure testing and washing
Pressure testing is not always done due to the lack of a special pump and the reluctance to call a team, but if the heating fails in the midst of cold weather, the costs can be much higher!
It is especially important to check a new system and one that, on the contrary, has been in use for several years. The cost of crimping in construction companies is from 3000 rubles
Additionally, they may charge a fee for visiting the site (about 2 thousand rubles). By the way, a manual pressure testing pump will cost 4.5 – 6 thousand rubles
The cost of crimping in construction companies is from 3,000 rubles. Additionally, they may charge a fee for visiting the site (about 2 thousand rubles). By the way, a manual pressure testing pump will cost 4.5 – 6 thousand rubles.
Technical characteristics and device
Keber boilers are distinguished by their reliable assembly and long service life. The manufacturer provides a 15-year warranty. Also, units of this brand are characterized by high efficiency.
The Keber gas boiler equipment includes:
- stable heating of the coolant;
- maximum complete combustion of fuel.
In addition, these elements are distinguished by high anti-corrosion properties.
Due to the fact that Keber boilers have gas burners, the size of their fuel chambers is smaller than that of similar heating devices produced by other manufacturers. Thanks to the special design of the Danko automation, fuel burns as efficiently as possible, even if the flame height reaches 7 cm.
Also included in the package is the Arbat automatic system, which is responsible for regulating the operation of heating equipment and its safety. There are five levels of protection. If the pressure in the water or gas supply system decreases, the unit will turn off automatically. The design of the automation is simple, which has a positive effect on its reliability, and in case of problems, repairs will be simple.
It is worth saying that, if desired, users can order from the boiler manufacturer Keber a model with a more expensive, but at the same time more reliable and high-quality Italian Eurosit automation. Such units can operate practically without third-party intervention.
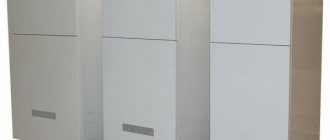
The assortment of the company that produces Keber boilers includes a wide selection of models of different powers: 10, 12.5, 16, 20 kW, etc.
Let's look at the technical characteristics of the device using the example of the Keber 12.5 floor-standing model:
- type of execution - floor-standing;
- combustion chamber - open;
- power - 12.5 kW;
- Efficiency - from 85%;
- mechanical control;
- — 1.62 m³;
- weight - 39 kg;
- heated area - 125²;
- The maximum water pressure in the heating system is 3 bar.
Gas non-volatile boiler KS-G Keber 12.5 with EUROSIT automation
Self-diagnosis
The process of operating heaters is simplified if they have a self-diagnosis function. Almost all European manufacturers have equipped their products with it.
For example, German “” heaters, displaying error codes on the display, allow the user to quickly understand the cause of the problem and take measures to eliminate it. If code A7 appears on the screen, it is clear that the hot water temperature sensor is faulty.
If A8 is displayed, the connection to the BUS bus is broken. This function greatly simplifies the use of gas equipment, making it easier and more comfortable.
Peculiarities
The ATEM brand has invested all its efforts in the development and production of high-quality devices for autonomous heating. For more than 27 years, the company has been providing heat to its consumers in the form of Zhytomyr gas boilers. Since the introduction of the first boiler, a huge rebranding has been carried out, the device has received changes from the internal base of spare parts to the external design. Today, the Zhitomir boiler is a neat, small-sized unit with switching instructions that even a child can handle. The main quality inherent in boilers of this brand is the quality and reliability of the device. Product specifications have also changed as new technologies emerge. Not only these components, but also many other facts allowed the ATEM brand to receive the European Quality award.
About the manufacturer
Since 2006, Keber gas boilers have been produced by the domestic company, which is part of the Tactical Missile Arms OJSC corporation. These heating devices are well adapted to Russian operating conditions; they operate smoothly even in places characterized by very low temperatures.
If necessary, such heating devices can be used for heating premises in the Far North.
Keber's product range includes both household and industrial models.
Single-circuit and double-circuit units are distinguished. The first are used exclusively for heating, while others provide the room not only with heat, but also with hot water.
Who releases
The Keber boilers are produced by the Russian company, which is part of the Tactical Missile Arms OJSC corporation. This company was registered in 2004. That is, it has been operating on the market for about 15 years. This company exclusively supplies heating equipment to specialized stores. Products from this manufacturer have received very good reviews from consumers. Heating units from Zvezda-Strela Trading House LLC are actually very popular among the population.
In addition to the boilers themselves, this manufacturer supplies the market with components for them. It will be absolutely easy for owners of country houses to find spare parts for Keber equipment if necessary.
Technical parameters of Atem gas boilers
Atem company produces:
- floor-standing gas boilers Zhytomyr;
- wall-mounted devices ().
Units installed on the floor are also divided into single-circuit and double-circuit. Devices with two circuits can heat water for two or three consumers at low costs. See the technical characteristics of all Zhytomyr floor-mounted gas boilers in total.
The productivity of the hot water supply circuit of floor-standing installations with two lines is from 175 to 1400 l/h with a temperature difference of the heated liquid of 35 °C. The device can be equipped with a circulation pump, which is installed as a function. Parameters of the model range of double-circuit gas boilers Zhytomyr parapet type in the table.
Parapet 2-circuit units provide warm water flow from 160 to 345 l/h with a liquid temperature difference of 35 °C.
From the tables we can conclude and make sure that the wall-mounted and floor-standing boilers of this manufacturer are adapted to the conditions of low gas pressure in pipelines, and this is their huge advantage. A significant disadvantage is the maximum pressure of the coolant in the heat exchanger, which is possibly quite low. For boilers mounted on the floor, this is up to 2 kgf/m², and for mounted boilers, up to 0.7 kgf/m². While imported analogues can operate at system pressure up to 3 kgf/m². Therefore, you can make sure that Atem gas equipment is more suitable for gravity systems and small houses with one or two floors.
Experts do not recommend buying wall-mounted devices for two-story cottage buildings, since there simply won’t be enough pressure for high-quality operation of the system.
Design Features
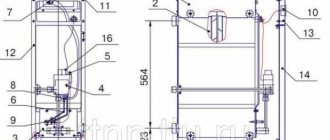
The main elements of the Zhitomir boiler are:
- a housing in which the main components and equipment are installed;
- gas burner unit located in the firebox. Here gas combustion occurs and heat flow is released;
- recuperative heat exchanger, in which heat exchange occurs between combustion products and coolant;
- gas exhaust system, its responsibilities include removing combustion products outside the boiler and releasing them into the chimney.
In order to increase the efficiency of heat transfer, the gas boiler Atem Zhytomyr 3 has the following design features.
- The heat exchanger pipes made of heat-resistant steel have a rectangular cross-section; this device allows you to increase the contact area of the flue gas and the coolant.
- The counter movement of coolants was organized, this solution made it possible to increase the efficiency of the heat exchange device to 92%;
- To increase the area of interaction between combustion products and the coolant, as well as to prevent the accumulation of soot on the surface of the steel pipes of the ATEM boiler heat exchanger, turbulators are installed. Soot accumulates on the lower surface of the turbolizers, while the pipe walls remain clean. To remove soot, you need to periodically remove the turbolizers and clean them of soot.
- Gas double-circuit turbocharged boilers in Zhitomir have a coil of copper pipelines around the heat exchange heating pipes.
To organize a stable gas combustion process, a POLIDORO gas burner device is used. Its distinctive feature is a single-stage atmospheric burner. The edges of the burners themselves are made of heat-resistant steel, which allows you to maintain the combustion mode at different gas supplies to the firebox. Even at low gas consumption, the heating of the edges is sufficient to maintain stable combustion.
The gas supply mode is regulated by the EUROSIT gas valve. This device automatically switches the gas supply to the burners depending on the temperature of the coolant. The user independently sets the temperature of the coolant, focusing on the temperature in the open air. As the ambient temperature decreases, the temperature of the coolant increases.
Sources
- https://www.stroy-podskazka.ru/otoplenie/kotly/zhitomir/
- https://ProfiTeplo.com/gazovye/56-kotly-zhitomir.html
- https://SpetsOtoplenie.ru/gazovoe-otoplenie/gazovye-kotly-evropejskogo-proizvodstva/chto-nado-znat-pro-gazovyj-kotel-zhitomir.html
- https://teplospec.com/gazovoe-otoplenie/kak-zapustit-gazovyy-kotel-vpervye.html
- https://microklimat.pro/otopitelnoe-oborudovanie/kotly/kak-vklyuchit.html
Posting rules
- The area of the room in which the heater is installed is at least 7.5 m².
- Ceilings - from 2.2 m.
- There must be a window providing access to air from the street.
- The door should open in the direction of movement of the person leaving the room.
- It is prohibited to install switches in the boiler room. If they are already installed, you will have to take them outside the premises.
- It is necessary to equip supply and exhaust ventilation. For every m³ of fuel consumed - 15 m² of air.
- The distance from the heater to elements capable of burning is 25 cm or more. To non-combustible elements - 5 cm. From the chimney to combustible parts - 40 cm, to non-combustible parts - 15 cm.
- The device is mounted on a perfectly flat plane, without slopes.
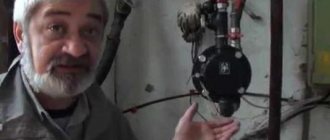
Let's move on to cleaning the column
Turn off the gas supply valve to the boiler. Using wrench No. 10, unscrew the fastening screw under the boiler door and remove the door.
Disconnect the wire connecting the piezoelectric element and the ignition electrode.
Using key No. 10, unscrew the thermocouple clamp. Using wrench No. 9, unscrew the thermocouple from the valve.
Note:
It is necessary to ensure that the thermocouple does not turn while unscrewing.
We note the depth of insertion of the nozzle into the main burner so as not to disturb the boiler settings.
Using wrench No. 17, unscrew the nut securing the copper tube from the burner to the valve. Using wrench No. 10, unscrew the ignition electrode from the pilot burner and the copper tube from the pilot burner and valve. Using a flat-head screwdriver, unscrew the two screws securing the pilot burner.
The gasket installed under the pilot burner has become unusable. It will need to be replaced.
Remove the nozzle from the pilot burner.
Tip: if the nozzle is stuck, you can lightly tap the burner with a key.
We unscrew the four screws securing the main burner to the boiler body and the screw securing the housing to be able to remove the main burner.
Lowering the main burner down, remove the copper tube from the valve.
Remove the main burner.
Remove the thermometer sleeve from the boiler body.
Using wrench No. 10, unscrew the four screws securing the top cover of the boiler and remove it and the insulation sheet under it.
Unscrew the two nuts securing the flue to the boiler body.
Remove the terminals from the draft sensor.
We remove the gas duct.
We remove the swirlers from the boiler heat exchanger. We clean them with a brush. If necessary, use a metal brush.
Clean the outer part of the heat exchanger with a metal brush. We clean the heat exchanger channels with a brush to the full depth. Clean the bottom of the heat exchanger with a brush. We also clean the gap between the boiler body and the floor. We clean the loose debris using a vacuum cleaner.
Using wrench No. 13, loosen the screw that fixes the depth of insertion of the nozzle into the main burner and remove it.
We clean the burner with a brush and a brush, and clean its holes with a vacuum cleaner. We clean the flue of dust from the outside and inside.
We clean the outer surface of the nozzle with a brush, then clean the nozzle holes with a needle or wire.
Note: The needle should be smaller in diameter than the nozzle hole. Even a slight increase in the diameter of the nozzle hole can affect the combustion mode.
We install the main burner in place.
We install a copper tube with a nozzle and attach its nut to the gas valve.
Only after this do we secure the nozzle to the burner at the mark using wrench No. 13.
Note:
This sequence is necessary in order not to strip the threads in the valve body.
Finally tighten the nut of the copper tube with wrench No. 17.
Clean the pilot burner with a metal brush.
This is how the thermocouple should be installed in the pilot burner (the tip of the thermocouple opposite the flame).
We install the pilot burner on a new gasket.
Before installing the nozzle into the pilot burner, it must be slightly rubbed against the tip of the copper tube for better sealing. The nozzle should also be cleaned or purged.
We connect the copper tube to the pilot burner and to the valve using a number 10 wrench.
The remaining parts of the boiler are assembled in the reverse order. When connecting, the ignition electrode should not be clamped with a key; it is enough to do it by hand, since it is made of ceramic and can easily crack.
We carry out control washing of all compounds. It will be possible to check the tightness of the connections of the copper tubes to the main and pilot burners only when the boiler is turned on.
Rules for filling the system with water before turning on the gas boiler
Before lighting a gas boiler and turning on the heating system, it is first filled with cold coolant, which, after heating, will circulate through the pipes and radiators. During the first launch, everything is carefully checked so that further operation is uninterrupted and the equipment does not require repairs.
These pressure parameters can be changed as they depend on the manufacturer's requirements for the operating pressure in the heating system. But filling with cold water does not end there, since replenishment will be required after the structure is freed from air pockets.
Precautionary measures
Despite the desire of manufacturers to ensure the safety of gas appliances, they can still become a source of danger. The Ministry of Emergency Situations regularly reminds owners of any gas-powered equipment about the following precautions:
- You need to buy gas-powered appliances from organizations that have the appropriate sales license.
- Installation should only be carried out by specialists from the relevant services.
- The kit should include an instruction manual.
- It is prohibited to change the design of the device in any way.
- A technical inspection must be carried out annually.
- It is prohibited to reduce ventilation openings in windows and walls.
- If there are sealed windows, it is necessary to organize air flow.
- Materials that can quickly ignite should not be stored in the boiler room.
- It is prohibited to increase the coolant temperature above 90°C.
Removing air pockets before lighting a gas boiler
Before lighting a gas boiler, you need to fill the heating structure with liquid cold coolant. But just filling with water is not enough. It will either not work, or the degree of heating of the room will be insufficient. A full first start is impossible without releasing the air accumulated in the system. Often modern gas boilers have a special system that automatically bleeds air when filled. But often its effectiveness is insufficient: you will still need to manually reset the air locks. Only after this can you start.
It is necessary to remove air pockets before turning on the gas boiler not only from the heating unit, circulation pump, but also from all heating radiators. The process should begin with batteries - for this, as mentioned above, they will be equipped with Mayevsky cranes. They are opened by placing a container underneath. First, a slight whistle will be heard, indicating that air is gradually leaving the system. After removing the plugs, water begins to flow. Then the taps are closed. A similar procedure should be done with each of the radiators. “How to choose a Danko boiler - types of heating gas boilers, features, advantages.”
When air is removed from the batteries, the pressure gauge needle should settle at a certain value. Before lighting a gas boiler, coolant should be added to the system and thus recharged. “How to turn on the Lemax boiler - operating rules.”
Ignition instructions
Heaters differ in the type of ignition, so when starting different modifications there are some nuances. Before turning on the device, you need to read the ignition instructions to ensure everything is done correctly. Let's look at ignition using the example of the Italian boiler "". Before turning it on, it is important to check the system for leaks. For this purpose, the thermostat is turned on to maximum so that the switching occurs automatically. Ariston ignition process:
- the device is connected to the power supply, and the heating regulator is set to the desired temperature value;
- When the pump is turned on, a slight noise is heard;
- when all air pockets in the pipes are eliminated, the noise will disappear;
- When the electric ignition is triggered, the boiler turns on automatically.
Varieties
Today, several types are involved in the production of Zhytomyr boilers - parapet (wall-mounted) and floor-mounted. In turn, floor products also have divisions into single-circuit and double-circuit.
Floor-standing
If a gas boiler is needed only for heating purposes, attention should be paid to single-circuit models. They are unpretentious, practical and economical
The equipment of the single-circuit boiler “Zhitomir” primarily involves imported components. Thanks to them, the device can be turned on and off if necessary. And if there is a need, in addition to heating, to have hot water in direct access, you will need to choose from dual-circuit options.
In terms of their technical characteristics, floor-standing boilers mostly have the following similarities:
- the maximum temperature limit is +90 degrees;
- efficiency is 92%;
- gas pressure – 635 Pa.
But when choosing a model you definitely like, you need to consider its specific characteristics and capabilities.
Wall mounted
The same separation as in floor-standing boilers is also present in wall-mounted boiler models. They can also be single-circuit or double-circuit. The efficiency of all devices is the same. The same applies to gas pressure.
But it’s still worth considering their characteristics p>
- the power of parapet boilers must be no less than 5 kW and no more than 20 kW;
- the coolant in the device is no more than 17.5 liters;
- depending on the chosen model, natural gas consumption is considered; according to the standard - 0.56–1.67 cubic meters per hour;
- profitability due to imported automation.
For its part, the manufacturer provides a wide range of boilers to choose from, but the Zhitomir-3 KS-G-020 SN model is still in great demand. This device differs from its counterparts not only in terms of availability in terms of price, but also has clear technical data. The design of the device is designed in a minimalist style; the appearance of the boiler looks like a cabinet. It should only be placed on the floor. On the front of the model there is a small door behind which hides a button for turning on and adjusting the device settings. In the same part there is a control window, with the help of which you need to monitor the performance indicators of the boiler.
The basic package includes a housing, which also includes heat exchanger elements. On the outside, it is covered with heat-insulating material and a casing made of steel. The burners are presented in two pieces: one is the main one, and the second is the ignition one. The package includes a gas duct and an automatic gas valve, which is responsible for safety during operation.
Electric convector calculation of kW consumption.
Agree, buying an electric convector is one thing, but how much we will have to pay for the heat received is quite another, that is the question. We emphasize that our calculation of consumption is based on personal operating experience, and not on manufacturers’ formulas. Let us also make it clear that we do not heat the house in the frosty winter, we raise the temperature in the room to a comfortable state. Let's consider an average room of 18 m2. The technical characteristics of any manufacturer for heating a room of such area regulate the purchase of a 1000 W convector.
Let us clarify that to start central heating, municipal authorities are guided by the Decree of the Government of the Russian Federation dated May 6, 2011 N 354, according to which the street temperature must drop below +8 ºС and not rise for 5 days. I think many will agree that usually, in the off-season, it can take a month to achieve this goal, and the temperature outside the window is + 12°C, already reducing the temperature in city apartments to + 16 – 17°C.
Consumption calculation
When the set value is reached, the temperature control system will work and the consumption of electrical energy will stop. As it cools down, noticeably after 20 minutes the temperature sensor is triggered and turns the convector back on. Considering that the next switching on does not require heating from 17 °C, but starts from 20 °C, then the time to reach the value is 22 °C. much less, no more than 10 minutes. Then the on/off cycle is repeated and the average heater operation does not exceed 20 minutes per hour.
Actually, based on the experimentally obtained data, we obtain the consumption of an electric convector. Divide 1000 W by 60 minutes and get 16 W - we determined the electricity consumption of one minute of operation. In our experiment, the convector worked for no more than 20 minutes. Now we multiply 16 W by 20 minutes and get the power that the convector consumed per hour of operation - 330 W. Thus, the convector “eats” 1 kW in three hours. The cost of one kilowatt at the beginning of 2022 is 4 rubles.
Gentlemen, per evening we will need no more than 9 hours of operation of an electric convector - 12 rubles. A month in the off-season will cost about 360 rubles. To be on the safe side, let’s add another 30% to this amount (for those who sit too long in front of the TV). The total cost of operating the convector will be 400 – 500 rubles for normal temperature conditions for a month. Let me ask you a question: is it worth saving this amount, exposing your body and your household to the risk of cooling? Sick leave and a bad mood are much more expensive; drops for a runny nose alone can offset this kind of savings.
Turning on the boiler
- The gas boiler is plugged into an outlet.
- The switch must be set to zero.
- The gas supply is turned on (the tap on the gas pipe is opened).
Further actions may differ for different models of gas boilers.
For example, the switch for Aton or Danko boilers needs to be set to the “star” icon, press the entire switch and hold it for 5-10 seconds.
Then, without releasing the switch, press the button located nearby.
The unit will respond with a characteristic click and hum. After which the regulator is released and the required power is set.
To turn on the Baxi boiler, you also need to turn on the gas, plug in the plug and press the “Start” button. The operating sound will appear. You need to give the device a little time, and it will automatically ignite the flame. After that, you need to press the power button again and connect the heating circuit (the corresponding icon will appear on the display). Finally, using the buttons, the desired temperature is set.
We will look at the types of generators for gas boilers here.
To organize a full-fledged heating system in a private house, it is necessary to install a boiler. The article https://microklimat.pro/otopitelnoe-oborudovanie/kotly/kak-vybrat-dlya-chastnogo-doma.html discusses the main criteria for choosing heating equipment.
How to properly turn off radiators when it’s hot
Proper disconnection of radiators
The owner of a private house with an autonomous heating system has the opportunity to turn off the boiler at any time, depending on the weather outside or based on other considerations.
To shut off the heating device, ball valves are required
For those who live in houses with central heating, questions about how to turn off the radiator usually arise in two cases:
- if the weather is warm outside and the central heating has not yet been turned off, since the heating season has not officially ended;
- if necessary, replace, repair or paint the radiator, repair the wall behind the radiator.
In this case, one should take into account this point: there is always a coolant inside the battery. It is drained only in case of repair work in the system. This is due to the fact that the main part of the heating devices installed in old houses, as well as the intra-house wiring, are made of steel.
The liquid inside the heating battery contains a certain amount of oxygen in dissolved form, which over time completely reacts with the metal, as a result of which corrosion stops.
You cannot leave the system or a separate heating device unfilled for a long time - moisture remains on the inner surface of the steel or cast iron battery, which does not evaporate for a long time in a confined space. This significantly accelerates the corrosion process. Thus, the coolant is drained only in exceptional cases.
Is it worth turning off heating appliances?
In principle, most residents of city apartments do not turn off the radiators at the end of the heating season.
This happens for various reasons:
- there is no possibility (below we will describe what conditions are needed for this operation);
- They don’t see the need for this.
Why is it worth turning off the water in the battery, especially if you have installed a new modern radiator? The fact is that at the end of the heating season at the beginning, as well as during test tests when preparing the system for the new winter, coolant under high pressure is pumped through the entire network. This means that it is clogged with mechanical impurities - particles of sediment that have managed to build up in old pipelines.
Don’t forget to turn off the device from the water supply after the heating season before the start of the next one - this way you will keep it as new and reliable
When contaminated liquid passes through the radiator, there is a risk of it clogging, and this will become clear only at the beginning of the heating season, when it will not be able to operate at full capacity. You may have to dismantle it and clean it. To avoid such problems, it is worth turning off the coolant supply to the heating radiators.
What is required to shut off heating appliances?
If it’s hot in the apartment or you need to disconnect the radiator without calling a plumber to shut off the entire heating riser in the entrance, it is important that:
- Between the supply pipe and the return pipe there was a vertical jumper - a bypass; it is through it that the coolant flow will pass without entering the installed battery after you turn it off. The absence of a bypass automatically means that you are cutting off the flow to the entire riser.
- American ball valves must be installed on the supply and return pipes between the bypass and the heating radiator. They are the ones who make it possible to disconnect.
- Ideally, an air valve is installed at the radiator inlet.
Attention! Ball valves cannot be used to regulate the flow of coolant if you want to reduce the heating of the batteries! This valve is a shut-off valve; its use for other purposes leads to destruction of the valve and leaks.
Based on the above, if there is no bypass, but ball valves are installed, the battery can be dismantled independently for repair or replacement, but not during the heating season.
Heater with installed bypass
The bypass (jumper) is mounted parallel to the radiator and is usually a pipe whose diameter is equal to the diameter of the supply pipes or one step smaller. If you plan to shut off the radiators after the heating season or install a radiator with a thermostat, be sure to take care of installing a bypass. Otherwise, your actions will lower the temperature of the coolant and your neighbors.
Is it possible to shut off by closing both taps?
Let's imagine that you closed both taps while the coolant in the system is still hot.
Knowing the elementary laws of physics, you can easily understand that
:
- As the water in the battery cools, its volume will decrease;
- This will lead to the formation of a vacuum in the enclosed space of the radiator;
- As a result of the resulting pressure, the battery will become deformed or lose its seal and will need to be replaced.
- Various chemical processes take place in the liquid inside the battery, since the coolant cannot be chemically pure;
- As a result of these processes, gas formation occurs;
- Since the gases have no way to escape, the increased pressure may cause the radiator to depressurize.
- The top tap is closed and the bottom tap is open. If repair work is carried out at the neighbors below or in the basement, or on the branch that supplies the house, the coolant will be drained and your radiator will be empty. If it is steel or cast iron, it will cause corrosion.
- The bottom tap is closed and the top tap is open. Regardless of any repairs, the radiator will be full.
So, in search of an answer to the question of how to turn off the battery if it gets hot in the apartment, you already know that this should under no circumstances be done by closing both taps! Now it remains to figure out whether it is worth using both taps after the heating season, when the coolant has already cooled down.
As we already know, the central heating system stays full all year round. In some areas, the coolant is drained if repair work is required, and then refilled. So there is liquid inside your radiator.
If you turn off both the upper and lower valves, the following happens:
:
Thus, if an air vent (Mayevsky tap) is not installed on the battery, it is strictly not recommended to close both shut-off valves, even if the coolant temperature is room temperature.
How to properly shut off a battery?
The answer to the question of how to turn off the heating battery is extremely simple - just close one tap, leaving the second open. But which tap should you turn off?
As we understand, water is supplied to the heating riser from below.
So, we have learned how to shut off the battery for the summer season: to do this, close only the lower ball valve.
When cold weather sets in, watch for announcements at the entrance about the beginning of the heating season. Then close both ball valves so that no debris gets into the radiator - let it all pass through the bypass. In this case, there is no risk of battery rupture with the taps closed - in one or two days, sufficient pressure will not be able to form inside the radiator. During this time, the apartment will also not have time to freeze, especially since the room will be slightly heated from the riser.
How to turn on the radiator? There is nothing complicated about this - just open both ball valves and the coolant will begin to circulate normally through the switched on radiator.
On the first day of turning on the heating, when you hear the murmur of water in the system, do not rush to open the ball valves. The next day you can open them using the Mayevsky valve to release air. Attention! If you live on the top floor, you must have an air vent installed on your radiator. This will avoid the formation of air pockets, due to which the heating device does not perform its functions.
Conclusion
Knowing how to close a radiator, you can decide how to prepare for the new heating season in the summer.
This will require
:
The work of installing bypass and ball valves must be done by professionals with the assistance of a plumber who will shut off the water in the riser. Please note that welding and related equipment will be required.
Emergency heating battery replacement
Ball valves and bypass are an option
:
- ensure the safety of your batteries from corrosion and contamination;
- do not suffer from the heat during sudden warming during the heating season;
- ensure safety in the event of an emergency - if the radiator fails, it can be disconnected from the system, while the neighbors will not suffer from a flood or lack of heat;
- at any convenient time, replace the old radiator with a new one;
- Remove batteries for washing or painting.
- successfully use modern radiators with a thermostat without disturbing your neighbors.
A competent approach to organizing apartment heating is a concern for comfort and safety.
How to shut off the battery in an apartment
Every year we are faced with the problem of turning off the heating system, which occurs at the end of the season. So, let's figure out how to shut off the battery in an apartment correctly. To do this, you need to know some important features of such systems. Thus, each heating network is filled with coolant, which remains in it throughout the year. The role of the coolant is usually played by water. In winter, the heating system is filled with hot water, and in summer - cold.
Why is the water not drained at the end of the heating season?
As you know, water remains in heating networks even in summer. This is explained by the fact that in this way corrosion processes inside radiators and pipelines are reduced. And it is water that will help prevent corrosion, since in this case steel and cast iron will be much less susceptible to rust. No matter how paradoxical it may sound, it really is so. For what reasons does this happen? Everything is quite simple: (See also: How to disassemble a cast iron heating radiator with your own hands)
Before turning off the radiator, you need to study the other side. According to established standards, the heating network must always contain water. At the same time, some management organizations often neglect this requirement in order to save money. Thus, during repairs, it is necessary to drain water from the system, and then refill the network with it, wasting time. If batteries are replaced and repaired in several apartments over the course of one summer, the management company will have to drain and refill the system each time. Therefore, in some cases, pipes are left without water at all during the summer. Due to the closed system, the pipes will not be able to dry from the inside, and moisture will trigger corrosion processes.
Let's start shutting off the heating battery
In order to properly shut off the battery, let’s pay attention to the features of its design. Modern models are equipped with two taps, and if necessary, we can turn off the tap on the battery. You can use one tap, two, or not touch them at all. Let's consider each of these options separately.
What happens if you don’t turn off any taps? This is not the best solution. This is explained by the fact that during the process of starting and stopping the supply of hot water, a large amount of rust passes through the pipeline. Therefore, if you do not turn off a single tap, then the dirtiest water will flow through the battery. In the worst case scenario, the battery may even become clogged. (See also: DIY installation of heating radiators)
Another option is to turn off both taps. Is it possible to shut off the battery in this way? Of course not. To explain this answer, let’s remember our school physics course. After turning off the hot water and turning off both taps, it will begin to cool. In this regard, its volume in the battery will decrease, which will lead to the formation of a vacuum. This is a very dangerous situation!
Just remember what will happen to a plastic bottle if you remove the air from it. It becomes very deformed due to increased pressure. You can imagine what pressure will be exerted on the heating system battery if a vacuum arises in it. It may become deformed or even crack, which is unacceptable. Therefore, under no circumstances close both taps at the end of the heating season.
But which decision will be the right one? A reasonable option is to turn off one tap and open the second. It is optimal to open the top and close the bottom tap. Thanks to this solution, the availability of water in the heating radiators will be guaranteed throughout the year, and any possibility of vacuum formation will be excluded and, as a result, everything will be fine with the battery. (See also: How to properly install a heating radiator)
How to behave when turning on the heating in the fall
In fact, even in the fall it is important to properly turn off the radiator. After you find out about the heating switch-on date, you need to take some actions. You remember that when you turn on the heating, only rust will pass through the pipes. That is why in this case it is recommended to close both taps at the same time, which will eliminate the possibility of clogging the battery.
It is enough to leave both taps closed for one day. And don’t worry if a sharp cold snap is predicted the next day: the water will not cool down so much that a vacuum begins to form in the battery. Then you can open both taps and leave it like that until the end of the heating season, when you need to turn off the radiator in the apartment again.
Replacing the battery in winter
One of the frequently asked questions is whether it is possible to shut off the battery in winter? In general, this is prohibited. At the same time, it is technically possible. In any case, in winter it is recommended to turn off the batteries only if an emergency occurs, since this most often leads to the need to turn off the heating risers. However, there is an option in which you don’t have to turn off the heating risers. Then the radiators must be equipped with bypasses - specialized jumpers with taps. Thus, the access of water to the radiator will be blocked and, at the same time, will not disrupt the circulation of water in the system. (See also: How to choose heating radiators)
What else you should know
If you are wondering how to turn off the battery if there is no tap, then there is a solution here too. True, the option of blocking the riser is inevitable here. In this case, not only the individual battery will be blocked, but also part of the heating system. In small cities, the practice of turning off the heating independently is often used, just by shutting off the riser. It is turned off using a valve in the basement. At that point he approaches the sun lounger. Water valves are usually within sight.
You can find out which fittings are suitable for shutting off the heating in the technical documentation. Additionally, this should be known to an experienced plumber who is familiar with local utilities. In most cases, the heating system is shut off using a brass valve or a valve.
In the event that the window sill blocks the battery, there is no single solution. It all depends on the degree of overlap. So, for example, if the window sill completely blocked the battery, then this is considered unacceptable. This is explained by the concept of convection, in which warm air rises. There it replaces cold air, which goes down, after which it is heated by the battery. Thus, the room is heated. If the window sill completely blocks the radiator, then the convection process is hampered and the room does not warm up well. But there will definitely be a way out of this situation. You can make several rectangular holes in the window sill and cover them with decorative grilles.
- So, shutting off the batteries in an apartment is possible and, in some cases, even necessary. This can be most conveniently accomplished with special taps.
- After the end of the heating season, it is recommended to close one of them and leave the second open.
- On the day of heating, we close both taps for 1-2 days so that rusty water flows and eliminates the possibility of blockages.
- If there is no tap, then you will have to shut off the riser using a special valve or valve, which are most often located in the basement of the building, and usually in a visible place.
The main thing is to do everything thoughtfully and strictly in accordance with all standards and requirements. Do not close both taps at the end of the heating season, this may cause deformation and cracks in them. Do not forget about the basic rules that will help you shut off the battery in your apartment safely and correctly.
Use of materials is permitted only if there is an indexed link to the page with the material. For any questions please contact
How to properly shut off the battery in an apartment with central heating
In this material, we set ourselves the goal of explaining to residents of apartment buildings how to shut off the radiator connected to the central heating. Such a need may arise for various reasons at any time of the year. In a private house this is not a problem, but in an apartment whose radiators are connected to a common network with neighboring heating devices, shutting off the radiators can lead to negative consequences.
When to turn off radiators
There are several situations when you need to turn off the water in the battery:
- in the event of an emergency that threatens to flood your own and neighbors’ homes with hot coolant;
- if you decide to paint the radiator during the heating season;
- when you need to change or wash the battery without blocking the riser;
- you need to limit the flow of heat into a room that is hot in winter.
Radiators that are too hot are the cause of heat and stuffiness in the apartment
Note. Some apartment owners practice shutting off heating radiators for the summer while preserving the coolant. The goal is to protect heating devices from clogging during the autumn start-up of the system, when a lot of rust flows through the pipes. Below we will explain how to do this correctly.
Now the main point: you will never have problems with how to disconnect a radiator from a centralized system if it is connected according to the correct circuit using shut-off valves (ball valves). You will be able to shut off the coolant flow at any time if such a need arises, without disturbing the thermal conditions of adjacent apartments. The shutdown algorithm is simple:
Correct connection of the heating device to the central heating risers
A separate question is how to properly turn on the heating radiator so that there is no air pocket left in it, which prevents maximum heating of the surface and air in the apartment. Here the algorithm is similar: you need to open the lower valve, then the upper one, and at the end release the remaining air using the Mayevsky tap.
The handle stands along the axis of the pipe - the valve is open, across it - closed
Note. If you do the opposite and open the top valve first, you risk leaving some air inside the sections of the device. This is not critical, but the de-airing procedure will have to be repeated several times.
Location of the Mayevsky crane
What to do with a stuck ball valve
If ball valves are not rotated for years, they tend to sour and jam. In such a situation, do not try to resolve the issue physically and do not force the “butterfly” with pliers or a gas wrench. It is made of a brittle alloy and will probably break. Proceed like this:
An adjustable wrench can be used to firmly grasp the edges
Advice. If you have WD-40 spray lubricant in your household, apply it to the stem and wait 5-10 minutes before rotating.
Be doubly careful when turning off radiators with soured taps during the heating season. If you hurry too much and apply too much force, you will break off the metal rod or ball, and in the worst case, the valve body will burst. A stream of hot water can shoot out from the crack, which can burn you. While you go down to the basement and close the heating riser, the coolant will cause damage to the interior of the room, and you can roughly guess how much it costs to renovate the apartment now.
If you are not sure of your actions, call a plumber. More information on how to close a jammed ball valve in order to disconnect the radiators is described in the video:
Disabling radiators without fittings
It is no secret that in most apartments to this day there are old cast iron radiators or steel convectors without any shut-off fittings, which makes it impossible to shut them off during the heating season. Moreover, according to the old heating scheme, convectors in high-rise buildings are connected to risers without straight sections - bypasses. Therefore, if an accident occurs with a coolant leak, you must act as follows:
While your water is flowing onto the floor, your neighbors’ suspended ceiling turns into a bubble
A few words about how to properly turn off the heating riser. Find in the basement the heating point of your entrance and vertical pipes embedded in a large-diameter main or into a common collector. Follow where they go to determine the emergency riser, and turn it off with a tap. Contact by cell phone someone in the household who can confirm that the geyser eruption in the apartment has stopped. If you couldn’t find your pipe, close all the valves one by one until you find the one you need.
Attention! Don't try to force yourself on basement valves that are stuck due to rust. When they cannot be closed manually, it is better to wait for a team of plumbers; they will find a way to stop the flow of coolant. Otherwise, a very awkward situation will arise when you also break the main fittings, leaving the apartment building without heat during repairs.
Example of an access heating point and riser connection
It is also worth considering the question of how to shut off the battery if it is hot in the apartment due to the service provider’s failure to comply with the temperature schedule of the boiler room. It would seem that if there are shut-off valves, the problem is solved by manually closing the taps. But after the temperature in the rooms drops, the valves will have to be opened again. This way you will get tired of turning the taps long before the end of the heating season, so you need to think about how you can adjust the heat output of the radiators. The options are:
- if possible, install a thermostatic valve on each radiator, limiting the flow of coolant and automatically maintaining the set temperature in the room;
- It is nice to cover the heating device with a blank screen with small holes if there are no shut-off valves on the connections.
Important. The ball valve is not a means of adjustment; it is intended only to completely cut off or open the passage of the coolant. In the “half closed” mode it will not give the desired effect and will fail much earlier.
Thanks to worn-out pipelines, district heating systems are notorious for dirty water that quickly clogs small passages. Therefore, ordinary valves with thermal heads will not last long here; you need to buy special valves with increased capacity, which are produced by the well-known brands Danfoss and Herz. How to install them on the connection to the radiator is shown below in the diagram and described in this material.
Radiator thermostat installation diagram
When it’s hot in an apartment in the middle of winter and there are no control valves, residents have no choice but to cover the radiator in the room with a decorative screen. The principle is simple: the radiator will heat the air inside the box, after which the intensity of heat transfer will sharply decrease due to the small difference in the temperatures of the air and the surface. That is, the coolant will give off less energy, and the amount of hot air coming out from under the screen will be limited by the size of the decorative openings. How to assemble and install a nice MDF box on a heating device is shown in the video:
How to shut off batteries for the summer
The purpose of the event is to avoid dirt and rust entering the radiators, which travels along with the coolant through the pipeline network during the autumn start-up of the system, which is important for aluminum and bimetallic batteries with narrow ducts. The method is simple: in the spring you need to close the taps on the connections to the heater, since it is not known whether there is water in the radiators in the summer. Typically, during this period, technical services empty risers and heating appliances in apartment buildings, contributing to the damage of metals by corrosion.
Advice. If you have Soviet or new-style cast iron batteries installed in your apartment, then there is nothing to worry about blockages and corrosion. Cast iron is valuable because it is “friendly” with low-quality coolant, and the flow sections in it are large enough not to become clogged.
The order of the event is as follows:
Another tip. In the event that you miss the moment of emptying the heating system, still turn off the taps on the battery. In the fall, turn them on 1-2 days after the heating system starts operating, as shown in the video:
There is a myth that hot water, after cooling, will decrease in volume and create a vacuum, causing the body of the heating device to crack. This is unreliable information, since compressing water by 5-6% will not create pressure that can destroy the metal. For a cast iron radiator to be damaged, it must reach a value of at least 15 Bar, for a steel radiator it will require over 20 Bar, and aluminum products will withstand 30 Bar.
Conclusion
The procedure for shutting off heating radiators in an apartment is very simple when they are correctly connected to the heating network and quite troublesome if there is no shut-off valve. This means that the work is carried out in winter and the pipelines are under coolant pressure; such problems do not exist in summer. Finally, a recommendation: to remove and replace radiators, choose warm weather outside, then according to the temperature schedule, the boiler room will not supply too hot water. Repair work will become more convenient and safer.
We recommend:
Comparison of heating radiators by heat transfer Which taps are best to choose for heating radiators How the weight of a cast iron radiator affects its parameters and price
Radiators and heaters > How to properly shut off the radiator in an apartment with central heating
- Choosing steam heating batteries Equipping with steam heating is an integral part not only in the construction of new buildings, but also in the reconstruction...
- How to properly turn off a heating radiator if it’s hot How to properly turn off heating radiators For the owner of a private house, adjusting or repairing heating radiators is enough...
- How to properly install heating radiators in an apartment Installing radiators in an apartment is a job accessible to a non-professional In order to undertake independent installation...
- Vertical heating radiators Buy vertical heating radiators TO VIEW A PHOTO OF THE PRODUCT, SELECT A CATEGORY AND CLICK ON THE PRODUCT! All…
Malfunctions of Keber gas boilers
Of course, any equipment can fail. Keber boilers are no exception. Let's look at the most common problems that owners of such equipment have to face:
- Unstable work . This problem is usually solved by cleaning the nozzle. In some situations, it is necessary to check the meter, since it may not allow gas to enter the system in the required quantity.
- The gas burner goes out a few minutes after being turned on. There can be many reasons that lead to this, but most often it is due to the failure of the traction sensor. It is best to contact specialists.
- There is no gas supply to the injectors. If you purchased a boiler with an Arbat automatic, then most likely the stem is jammed in the middle part of the structure. You can drop a little machine oil yourself, then check the automation for gas leaks. If the above steps are unsuccessful, then you should contact a specialist.
1. 2. 3. 4.
When arranging a heating structure, many homeowners prefer installing double-circuit gas boilers
These heating units, when installed in modern models, are reliable, they are economical and allow you to provide hot water supply in the house, but it is important to know how to start a gas boiler correctly the first time.
Dangerous situations
The greatest danger is a malfunction associated with the operation of the burners. If the flame goes out, gas may accumulate in the room, which will subsequently cause an explosion. Reasons for the fire going out:
- gas pressure has dropped below the permissible norm;
- no draft in the chimney;
- the supply voltage has disappeared;
- The pilot light went out.
In an emergency, it is necessary to immediately shut off the fuel supply to the burners - automatically or manually. Modern versions are equipped with automation devices necessary for prompt shutdown of equipment. The operation of such devices is not only convenient, but also safe.
How to prevent gas accumulation indoors
Modern safety standards provide for the installation of gas analyzers in boiler rooms; they are necessary for signaling when gas appears in the room. A special electronic valve reacts to their signals, automatically stopping the flow of fuel to the burners.
Characteristics
Today, products represented by Zhitomir boilers are the most modern and in demand. To understand why this particular brand has received consumer recognition, it is necessary to consider the model range in more detail. Each individual piece of equipment has a huge advantage over similar devices from other manufacturers. There are disadvantages in Zhitomir boilers, as in any product, but the presence of advantages outweighs the significance, showing that the equipment has much more advantages.
Gas boilers "Zhitomir" have a number of advantages, due to which they are in high demand on the market.
- The heat exchanger of the device is steel. Thanks to this, the water receives maximum heat that is generated during the combustion of gas.
- The design of the burner is thought out to the smallest detail. It is this feature that helps to increase the productivity of the device, and the level of emission of harmful impurities is minimal.
- Imported automation of each boiler allows us to achieve the most suitable characteristics.
- Ease of device management. There are no unnecessary buttons or switches.
- The design of the equipment is developed according to the latest fashion. The boiler does not take up much space, and in appearance it looks like a small bedside table that fits into any environment.
- During the production process, each individual model undergoes several stages of international standard testing. And after completing all tests, he receives a quality certificate.
Many settings in the Zhytomyr boiler system allow you to choose the optimal and comfortable state for yourself. Special sensors, which the system is also equipped with, monitor the safety of the device and uninterrupted operation. Considering all the advantages described above, we can safely say that Zhitomir boilers are ideal for heating private houses and will do their job well in apartments and other rooms. It is worth noting that not only the beautiful design and ease of use attract consumers, but also the price issue.
What other safety regulations are there?
- Do not disassemble or dismantle gas appliances yourself.
- Handle the power cord carefully.
- Do not place foreign objects on the device.
- Don't stand on the boiler. Do not stand on chairs, tables or other unstable objects to clean the wall-mounted boiler.
- Monitor the coolant and add it to the system on time.
- Be careful - in some modifications the use of antifreeze is prohibited.
- If you smell gas, immediately turn off the gas and open windows and doors. Leave the boiler room and call the gas service.
- turn the thermostat knob counterclockwise to align the “star” icons on the panel knobs;
- smoothly press the thermostat knob in the axial direction until it stops and hold it;
- continue to hold the thermostat knob pressed for at least 10 seconds. (until when it is released the igniting burner goes out);
- release the thermostat knob (the ignition burner should be lit);
- turn the thermostat knob counterclockwise towards position “7”, the main burner should light up.
Switching off the boiler with automatic “EuroSit 630”
- it is necessary to smoothly turn the temperature setting knob clockwise until the white asterisk aligns with the “asterisk” sign on the panel;
Putting the boiler into operation with the MiniSit 710 automation
- make sure that the gas valve on the gas pipeline in front of the boiler is closed;
- make sure that the boiler is turned off - the thermostat knob is in the ignition position;
- open the tap on the gas pipeline supply;
- press the ignition button and keep it pressed;
- press the piezo lighter button several times (the burner should light up);
- continue to hold the ignition button pressed for at least 10 seconds. (until when it is released the igniting burner goes out);
- release the ignition button (the ignition burner should be lit);
- turn the temperature setting knob counterclockwise towards position “7”, the main burner should light up.
Attention: if the ignition burner goes out, the ignition operation should be repeated again, but not earlier than after 3 minutes.
Turning off the boiler with automatic “MiniSit 710”
- you need to smoothly turn the temperature setting knob clockwise and press the shutdown button;
- it is necessary to close the tap on the gas pipeline inlet.
Putting the boiler into operation with the Kare automatic system
- make sure that the gas valve on the gas pipeline in front of the boiler is closed;
- turn the temperature sensor adjustment knob counterclockwise until it stops;
- open the tap on the gas pipeline supply;
- press and hold the solenoid valve trigger button;
- press and release the piezo lighter button (you may have to press several times until the igniter starts to burn);
- When the ignition burner starts to burn, continue to hold the solenoid valve start button for at least 30 seconds. (until when it is released the igniting burner goes out);
- by turning the nut on the ignition burner, you need to achieve a blue flame on the burner;
- turn (smoothly, effortlessly) the thermostat knob to the right until the main burner lights up;
- set the desired temperature.
Attention: if the ignition burner goes out, the ignition operation should be repeated again, but not earlier than after 30 seconds.
Turning off the boiler with automatic “Kare”
- it is necessary to smoothly turn the thermostat handle to the left until it stops;
- it is necessary to close the tap on the gas pipeline inlet.
Putting the boiler into operation with the Sit 820 NOVA mv automation system
- press and turn the round control knob to the “asterisk” position (ignition);
- press the control handle all the way and, without releasing it, press the piezo igniter button. Do not release the handle for 10 - 15 seconds;
- release the handle and check that there is a flame on the pilot burner;
- if there is no flame, repeat the ignition procedure, increasing the time you press the control handle;
- to turn on the main burner, turn the control knob counterclockwise to the “flame” position;