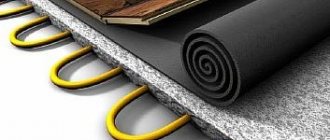
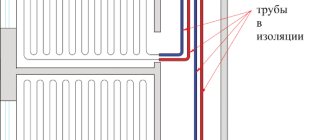
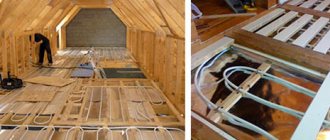
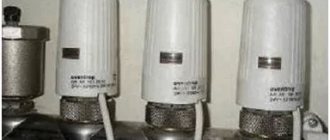
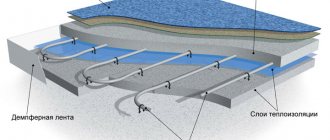
Home comfort is largely determined by the microclimate that reigns in the house. However, the central heating system does not always create the desired conditions, so often the best solution is a heated floor system, which effectively copes with its task even in severe cold, providing fast and high-quality heating. The room warms up most evenly; in apartments on the first floors this is a real salvation. From this article you will learn how to properly connect a water heated floor to central heating using a plate heat exchanger.
The design of a heat exchanger as an intermediary
But first, let's take a closer look at how exactly it works. So, heat exchangers of the type under consideration are divided into non-separable (soldered) and collapsible; they are made from a wide variety of materials. Steel and brass are intended for use under high pressure conditions. Copper options are used with great success in the beer industry, they are convenient for sharp cooling of beer, there is no high pressure, but you need a good rate of thermal conductivity, which is exactly what this non-ferrous metal has. Therefore, this heat exchanger is suitable for connecting water heated floors to central heating.
In general, such heat exchangers have a wide range of applications; they are successfully used in cooling and heating systems, when working with chemicals, together with solar collectors when connected to a boiler, and also when connecting water heated floors to central heating .
Features of calculating thermal loads
The calculated values of indoor temperature and humidity and heat transfer coefficients can be found from special literature or from the technical documentation supplied by manufacturers to their products, including heating units.
The standard methodology for calculating the thermal load of a building to ensure its effective heating includes the sequential determination of the maximum heat flow from heating devices (heating radiators), the maximum consumption of thermal energy per hour (read: “Annual heat consumption for heating a country house”). It is also required to know the total consumption of thermal power over a certain period of time, for example, during the heating season.
Calculation of thermal loads, which takes into account the surface area of devices involved in heat exchange, is used for different real estate objects. This calculation option allows you to most correctly calculate the parameters of the system, which will provide effective heating, as well as carry out an energy inspection of houses and buildings. This is an ideal way to determine the parameters of emergency heat supply to an industrial facility, which involves reducing the temperature during non-working hours.
Why do you need a heat exchanger?
Let's consider a non-separable plate heat exchanger. There are four outputs on the case, that is, two circuits. The device separates flows by pressure, temperature, etc., can be used for cooling, however, we need it for heating to ensure the correct connection of heated floors. This system is connected to one circuit, and the thermal power plant to the other. Direct connection of a water heated floor to central heating may be associated with the danger of rapid failure of heated floors, since the coolant of a thermal power plant is characterized by high temperatures, high pressure, there are also special chemicals and a lot of debris . All these factors clearly will not contribute to extending the service life of heated floors.
Thus, a heat exchanger allows you to create an autonomous floor heating system with uncontaminated water and optimal pressure at home. On one side of the plate there is dirty water from the thermal power plant with high pressure, and on the other there is clean water from our autonomous system with low pressure. Such a plate provides a clear hermetically sealed separation, high-quality heat transfer, and mixing of flows is completely eliminated. The number of such thin plates determines the power characteristics of the heat exchanger.
Very accurate calculation of heating radiators
Above we gave an example of a very simple calculation of the number of heating radiators per area. It does not take into account many factors, such as the quality of wall insulation, type of glazing, minimum outside temperature and many others. Using simplified calculations, we can make mistakes, resulting in some rooms being cold and others too hot. The temperature can be corrected using shut-off valves, but it is best to foresee everything in advance - at least for the sake of saving materials.
If during the construction of your house you paid decent attention to its insulation, then in the future you will save a lot on heating. How is an accurate calculation of the number of heating radiators in a private house made? We will take into account decreasing and increasing coefficients
First, let's touch on the glazing. If the house has single windows, we use a coefficient of 1.27. For double glazing the coefficient does not apply (in fact it is 1.0). If the house has triple glazed windows, we apply a reduction factor of 0.85
How is an accurate calculation of the number of heating radiators in a private house made? We will take into account decreasing and increasing coefficients. First, let's touch on the glazing. If the house has single windows, we use a coefficient of 1.27. For double glazing the coefficient does not apply (in fact it is 1.0). If the house has triple-glazed windows, we apply a reduction factor of 0.85.
Are the walls in the house laid with two bricks or is insulation provided in their construction? Then we apply a coefficient of 1.0. If you provide additional thermal insulation, you can safely use a reduction factor of 0.85 - heating costs will decrease. If there is no thermal insulation, we use an increasing factor of 1.27.
Please note that heating a home with single windows and poor thermal insulation leads to large heat (and monetary) losses. When calculating the number of heating radiators per area, it is necessary to take into account the ratio of the area of floors and windows
Ideally, this ratio is 30% - in this case we use a coefficient of 1.0. If you like large windows and the ratio is 40%, you should apply a factor of 1.1, and if the ratio is 50%, you need to multiply the power by a factor of 1.2. If the ratio is 10% or 20%, we apply reduction factors of 0.8 or 0.9
When calculating the number of heating radiators per area, it is necessary to take into account the ratio of the area of floors and windows. Ideally, this ratio is 30% - in this case we use a coefficient of 1.0. If you like large windows and the ratio is 40%, you should apply a factor of 1.1, and if the ratio is 50%, you need to multiply the power by a factor of 1.2. If the ratio is 10% or 20%, we apply reduction factors of 0.8 or 0.9.
Ceiling height is an equally important parameter. We apply the following coefficients here:
Table for calculating the number of heating radiator sections depending on the area of the room and ceiling height.
Is there an attic or another living room behind the ceiling? And here we apply additional coefficients. If there is a heated attic upstairs (or with insulation), we multiply the power by 0.9, and if there is a living space - by 0.8. Is there a regular unheated attic behind the ceiling? We apply a coefficient of 1.0 (or simply do not take it into account).
After the ceilings, let's start with the walls - here are the coefficients:
- one external wall - 1.1;
- two external walls (corner room) – 1.2;
- three external walls (the last room in an elongated house, hut) – 1.3;
- four external walls (one-room house, outbuilding) – 1.4.
The average air temperature during the coldest winter period (the same regional coefficient) is also taken into account:
- cold down to –35 °C – 1.5 (a very large reserve that allows you not to freeze);
- frosts down to –25 °C – 1.3 (suitable for Siberia);
- temperature down to –20 °C – 1.1 (central Russia);
- temperature up to –15 °C – 0.9;
- temperature up to –10 °C – 0.7.
The last two coefficients are used in hot southern regions. But even here it is customary to leave a substantial reserve in case of cold weather or especially for heat-loving people.
Having received the final thermal power required to heat the selected room, you should divide it by the heat transfer of one section. As a result, we will receive the required number of sections and can go to the store
Please note that these calculations assume a basic heating power of 100 W per 1 sq. m
If you are afraid of making a mistake in your calculations, seek help from specialized experts. They will perform the most accurate calculations and calculate the thermal power required for heating.
Selection of a heat exchanger for connecting a thermal power plant
In order to choose the right heat exchanger for connecting a water heated floor to central heating, you need to determine the degree of contamination of the coolant in order to understand how much the water needs to be cleaned. If the deposit is small, then a coarse filter that retains chips and scale will be sufficient. Such a filter can be cleaned with special means if after some time it becomes dirty and requires cleaning.
Each heat exchanger must contain information about the type of product, the manufacturer, the maximum and test pressure, the maximum operating temperature, the mounting location diagram, and the designation of the circuits, which can be located both diagonally and in the vertical plane. A special arrow shows the direction of installation of the product, that is, in what position it should be installed. It is important to understand how the outflow of coolants occurs. The circulation itself is carried out by the so-called circulation pump.
You can usually find on the diagram in the passport how to carry out the installation correctly. For example, one option is to press the product to the wall with a fastening tape or console and, using a special corner, screw it. Filters are required to be installed; at least a coarse filter is required.
Recommendations for choosing screed thickness
In the reference books you can find information that the minimum thickness of the screed is 30 mm. When the room is quite high, insulation is placed under the screed, which increases the efficiency of using the heat given off by the heating circuit.
The most popular backing material is extruded polystyrene foam. Its heat transfer resistance is significantly lower than that of concrete.
When installing a screed, in order to balance the linear expansion of concrete, the perimeter of the room is decorated with a damper tape. It is important to choose the right thickness. Experts advise that for a room area not exceeding 100 m², install a 5 mm compensating layer.
If the area values are larger due to the length exceeding 10 m, the thickness is calculated using the formula:
b = 0.55*L , where
L is the length of the room in m.
Heat exchanger installation
Installation is most often carried out vertically. The connection diameter, dimensions and power of connecting a water heated floor to central heating may vary in different devices. I would like to pay special attention to the connection diameters. It is better to take power with a reserve, because this parameter does not correlate with the dimensions, the difference can be only a few centimeters. At the same time, the inertia of heat removal increases. This is especially true in cases where the temperature from the thermal power plant is not too high, for example, if it is no more than seventy degrees.
After the underfloor heating distributor is installed, a pump with a three-way valve is assembled onto it. Next, the electric boiler is installed (for off-season use), including the necessary attachments. That is, first the heat exchanger supply from the boiler is connected, then the tees are cut in, the distributor is connected to the valve, thermometers are installed and the expansion tank is installed in the most convenient place, for example, you can do this under the sink. It is necessary to carry out installation in such a way that convenient access to all equipment is provided.
Watch a detailed video on how to connect a water heated floor to central heating through a heat exchanger:
If the circuit was installed incorrectly, the consequences can be negative, so mistakes should never be made. It is better to entrust such work to experienced professionals who are aware of all possible nuances.
Calculation of different types of radiators
If you are going to install sectional radiators of a standard size (with an axial distance of 50 cm in height) and have already chosen the material, model and desired size, there should not be any difficulties in calculating their number. Most reputable companies that supply good heating equipment have on their website the technical data of all modifications, including thermal power. If it is not the power that is indicated, but the coolant flow rate, then it is easy to convert to power: the coolant flow rate of 1 l/min is approximately equal to the power of 1 kW (1000 W).
The axial distance of the radiator is determined by the height between the centers of the holes for coolant supply/discharge
To make life easier for customers, many websites install a specially designed calculator program. Then the calculation of heating radiator sections comes down to entering data on your premises in the appropriate fields. And at the output you have the finished result: the number of sections of this model in pieces.
The axial distance is determined between the centers of the coolant holes
But if you’re just evaluating possible options, then it’s worth considering that radiators of the same size made of different materials have different thermal power. The method for calculating the number of sections of bimetallic radiators is no different from calculating aluminum, steel or cast iron. Only the thermal power of one section can be different.
To make it easier to calculate, there are averaged data that you can use as a guide. For one radiator section with an axial distance of 50 cm, the following power values are accepted:
- aluminum - 190W
- bimetallic - 185W
- cast iron - 145W.
If you are just figuring out which material to choose, you can use this data. For clarity, we present the simplest calculation of sections of bimetallic heating radiators, which takes into account only the area of the room.
When determining the number of heating devices made of bimetal of a standard size (center distance 50 cm), it is assumed that one section can heat 1.8 m 2 of area. Then for a room of 16 m 2 you need: 16 m 2 /1.8 m 2 = 8.88 pcs. Let's round up - we need 9 sections.
We calculate similarly for cast iron or steel bars. All you need is the following rules:
- bimetallic radiator - 1.8m2
- aluminum - 1.9-2.0 m 2
- cast iron - 1.4-1.5 m 2.
This data is for sections with an interaxial distance of 50 cm. Today, there are models on sale with very different heights: from 60cm to 20cm and even lower. Models 20cm and below are called curb. Naturally, their power differs from the specified standard, and if you plan to use a “non-standard”, you will have to make adjustments. Either look for passport data, or do the math yourself. We proceed from the fact that the heat transfer of a heating device directly depends on its area. As the height decreases, the area of the device decreases, and, therefore, the power decreases proportionally. That is, you need to find the ratio of the heights of the selected radiator with the standard, and then use this coefficient to correct the result.
Calculation of cast iron heating radiators. Can be calculated by area or volume of the room
For clarity, we will calculate aluminum radiators by area. The room is the same: 16m 2. We count the number of sections of standard size: 16m 2 /2m 2 = 8 pieces. But we want to use small sections with a height of 40 cm. We find the ratio of radiators of the selected size to standard ones: 50cm/40cm=1.25. And now we adjust the quantity: 8pcs * 1.25 = 10pcs.
Varieties
Let's consider panel-type steel radiators, which vary in size and power level. Devices can consist of one, two or three panels. Another important design element is fins (corrugated metal plates). To achieve certain thermal output values, several combinations of panels and fins are used in the design of the devices. Before choosing the most suitable device for high-quality room heating, you need to familiarize yourself with each type.
Steel panel batteries are available in the following types:
Type 10. Here the device is equipped with only one panel. Such radiators are light in weight and have the lowest power.
Type 11. Consists of one panel and a fin plate. The batteries are slightly heavier and larger than the previous type, and have higher thermal power parameters.
- Type 21. The radiator has two panels, between which there is a corrugated metal plate.
- Type 22. The battery consists of two panels, as well as two fin plates. The device is similar in size to type 21 radiators, however, compared to them, they have greater thermal power.
Type 33. The design consists of three panels. This class is the most powerful in terms of thermal output and the largest in size. In its design, 3 fin plates are attached to three panels (hence the type number - 33).
Each of the presented types may vary in the length of the device and its height. Based on these indicators, the thermal power of the device is formed. It is impossible to calculate this parameter independently. However, each model of panel radiator undergoes appropriate testing by the manufacturer, so all results are entered into special tables. Using them, it is very convenient to choose a suitable battery for heating various types of premises.

