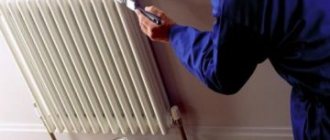
For prompt repair of heating radiators, in accordance with all norms and regulations, an emergency team must travel during the heating season, an “ambulance” for radiators. But in life, these rules usually apply in rare cases; otherwise, you have to do everything yourself and not rely on the wizard from the housing office. And if so, then a variety of methods, even the most incredible ones, can be used, although cold welding for radiators is not magic, but a completely realistic method of eliminating leaks.
The most common problems with cast iron radiators
First of all, it is necessary to outline the range of problems that can be solved using cold welding or adhesive when repairing heating radiators.
Traditionally, cast iron batteries are considered the most vulnerable. Here, many problems lie in the design and properties of the metal itself. First of all, cast iron, unlike steel radiators or bimetallic batteries, is very fragile. Yes, cast iron is very strong, but at the same time it is a fragile material - it can withstand great pressure, and with a small impact it can crack.
The second point is the property of cast iron - it is a porous material, which contributes to the formation of craters on the inner surface and the gradual destruction of the wall.
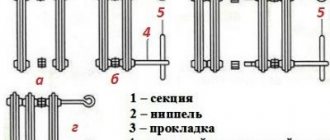
Third, when assembling modern radiators, sections are connected using internal nuts, and the space between the sections is treated with a special compound that reliably cements the connection. In the recent past, flax and red lead were used to seal these joints, which over time led to a breakdown in the tightness of the joint.
So based on the above, the most common problems with cast iron radiators are:
- Violation of the tightness of the battery section after mechanical impact - an impact from the outside or a sharp increase in pressure from the inside;
- Leakage through the body of the radiator due to the formation of a hole in the wall due to metal corrosion;
- Failure to seal the connection points of the radiator sections, pipe supply points, and plug nuts.
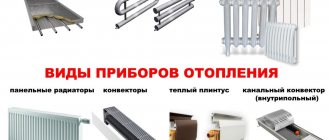
As for other types of radiators, similar problems are less common; here, most often the cause of damage to the body of the section is metal corrosion or mechanical deformation of the walls when the battery freezes, when freezing water ruptures the metal.
Causes and types of leaks
The elements of the heating system located in residential premises are pipes and metal radiators; the risk of depressurization is highest in the areas of their connections. A leak is the direct release of coolant to the outside; it can manifest itself in the form of rusty smudges on the battery and drops falling on the floor.
Experts identify 4 key types of defects, which manifest themselves depending on the specifics of the installed connecting elements:
- cracks that have appeared in the radiator section,
- loss of tightness of pipelines leading from the riser to the battery,
- leak between radiator sections,
- depressurization of the area connecting the pipe and the battery.
When a radiator leaks, it is important to take immediate action to prevent flooding of the room and neighbors below
Depending on where the problem occurred, specific measures are taken to eliminate it.
Cold welding - what is it, application for heating system
For gluing various materials, adhesives of different compositions and purposes are used. Thus, for paper, office glue and PVA are used, in construction, synthetic glue with vinyl fillers is used for wallpapering, and rubber glue is used for shoe repair.
Unfortunately, universal adhesives have not yet been invented, but there are already compounds that can reliably glue metal. An example of such a composition is cold welding.
Cold welding technology is based on epoxy adhesive, consisting of epoxy resin and a hardener. In its normal state, it is a substance reminiscent of thick sour cream, only yellow in color, but when mixed with a hardener, epoxy resin becomes more liquid and is suitable for application to even the most complex surfaces. This moment lasts relatively short - only 10-15 minutes, after which the resin begins to harden, forming a durable coating.
The advantage of this technology is the high strength of the connection due to the high adhesion of the substance to the surface of the metal being bonded and resistance to aggressive chemical materials. Unfortunately, there are also disadvantages: the glue itself can withstand high pressure, but under mechanical stress there is a high probability of breaking the strength of the connection.
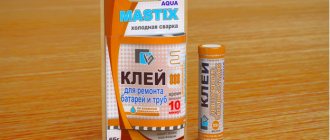
In cold welding compositions offered on the market for gluing metal, the hardener and resin are not in a liquid, but in a paste state. The glue is in a stable state and can be stored in packaging for a long time. It consists of an inner layer - consisting of a hardener, and an outer layer, which includes a resin. The third component included in the adhesive for gluing metals is sulfur or aluminum powder; these substances play the role of a reaction catalyst - when mixed, they heat up, as a result of which the hardening process accelerates, so that a welding effect is obtained.
The second option for cold welding is a traditional two-component adhesive based on epoxy resin - the resin and hardener are stored in tubes. To obtain the required amount, you must mix the components according to the instructions and apply to the surfaces to be bonded. To obtain a more durable connection, aluminum powder or bronze powder is added to the composition.
The pipe is leaking - what to do at the first stage
In the event of a fistula appearing on the central heating riser, from where water is gushing out, we offer the optimal plan of action:
Organize the coolant drain into a bucket or basin by quickly wrapping the pipe with any rag. This way you will preserve the flooring, personal belongings and furniture, and prevent flooding
Proceed with caution - in winter the temperature of the network water reaches 90 ° C.
Spend 2-3 minutes calling the dispatcher of the heating supply organization. Report the accident, call the plumbers. While the repairmen are getting there, try to close the riser yourself
Too hot a coolant will still not allow you to close the fistula under pressure. Taps should be found in the basement heating point located under the entrance. Observe where the riser penetrates the ceiling and close the nearest valve. As a last resort, turn off the main house tap during repairs.
In the current reality, craftsmen often have to wait 2-3 days (reasons: holidays, weekends, accidents at other facilities). It is impossible to leave residents without heat for a long time, so in case of delay, make an improvised clamp from scrap materials:
- Find a rubber glove, a bicycle tube, or a ready-made medical tourniquet. The second component of success is soft steel wire with a diameter of 2-4 mm.
- From a glove (bike inner tube), cut a strip 4-5 cm wide, as shown in the photo.
- Applying the end of the strip to the pipe 1 cm below the fistula, wind it with tension. The goal is to tightly seal the hole with several layers of rubber.
- Hold the “bandage” with your hand and secure it with wire. It is better to wind the latter tightly, turn to turn, helping with pliers. Now the common valve in the basement can be opened.
Also use the procedure described above when a cast-iron central heating radiator is leaking heavily and there are no shut-off valves. Typically, radiators leak at the joints between sections, and a temporary clamp should be applied there.
When a leak forms from under the nut, the connection must be repacked
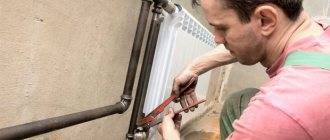
If a trickle of water is observed at the place of the threaded connection of iron pipes, you need to unscrew the fixing nut from the coupling with a gas wrench. Wrap the exposed thread with a braid of fresh flax (clockwise) and tighten the nut again. The plumber will show the considered sealing options in the video:
Watch this video on YouTube
In a private home, eliminating a leak is greatly simplified - just shut off the required valve or quickly empty a section of the heating network. It is not necessary to wind the rubber; it is better to repair the hole using a more reliable method. When the leak in the apartment is temporarily fixed, you don’t have to wait for locksmiths - choose the right time and finally seal the hole using any of the methods presented below.
Types of cold welding used to repair cast iron batteries
Not all types of epoxy compounds are used to repair heating radiators. Despite the general disadvantages that are inherent in all types of adhesive compositions, the industry has mastered the production of several compositions that have their own specialization. So there are mixtures for repairing plastic, metal, aluminum and gluing wood, there are universal compositions. For repairing heating appliances, a mixture for gluing ferrous metals and steel or a special composition for repairing radiators and steel heating pipes is best suited.
Cold welding for heating radiators, unlike other compositions, has its own characteristics - it must be heat-resistant, quickly fixed on a metal surface, and form a coating that has a linear expansion coefficient similar to metal.
Simple or universal compositions can solve the problem of sealing a leak, but at the same time, the service life of the composition will be limited. Cold welding for heating radiators must withstand not only high pressure, but also temperature. It is recommended to use compositions for repairs in which the temperature range is greater, with the upper limit being no less than 200-250 degrees Celsius.
Another point that needs to be taken into account when choosing the type of glue is the setting time. If 3-4 hours are enough to splice parts under normal conditions, then if the battery leaks, there is no such time, here the count is in minutes, therefore, the faster the patch hardens, the better.
Temporary solution
So, if water runs in a thin stream from any place in your radiator, and you do not have the opportunity to stop the flow of coolant, then you can try to block the damaged area in such a way as to prevent further troubles. To do this, you will need something rubber: for example, an old rubber boot, an inner tube from a bicycle or car wheel, a household or medical glove - in general, anything as long as it is made of rubber.
The algorithm of actions is simple.
- Cut the rubber product into strips. The longer they are, the better. The width of each strip should be such that the leak can be completely covered.
- Now you need to wrap the damaged area with the resulting strips. Start the process near the place where the water is flowing, gradually moving towards it. The turns should overlap each other slightly. It is necessary to wind the rubber as tightly as possible - the tighter the fit of the strips, the more reliable the effect will be.
- After the winding is done, it needs to be fixed. To do this, make a tie using a fabric tourniquet - it must be placed over the leaking area. Instead of fabric, you can use strong wire, but it must be wound in the same way as rubber, in turns across the entire width of the original winding. A car clamp is also suitable - this is generally quite a useful thing that can be useful on the farm many times, so it is recommended to purchase more of them for the future. Another option for securing the patch is a strip of tin. It can be tightened over the rubber using bolts.
Of course, such a solution is only temporary. Ideally, after eliminating the leak in this way, it is still advisable to call the emergency service so as not to risk it. But in many cases, such a rubber patch helps you survive until the end of the heating season, and then you can safely do more general repairs or replace the battery.
You can make your life even easier if you purchase special plumbing clamps to eliminate such troubles. They are designed specifically for pipe repair. Such a clamp is a metal product with rubber attached to the inner wall. That is, in essence, this is the same patch described above, but its application is much more convenient - fixing the leak will take about a minute.
If this solution does not work, and the coolant still continues to leak from under the patch, then you still need to either call an emergency team, or, if possible, stop the heating system yourself and begin serious repairs. There are several ways to eliminate a leak. The simplest of them is gluing.
How to prepare the composition for use
When purchased, the finished cold welding composition is packaged in a sealed package. The outside is a plastic tube, and inside the container there is a piece of glue in a plastic film. To obtain the required amount of material, you need to cut a piece with a regular knife. The cutting is done perpendicular to the axial one, this is one of the important points. The fact is that the composition of the glue during manufacturing is dosed so that when cutting perpendicular to the center line, the ratio of resin and hardener is always the same.
After receiving the required amount of glue, the remaining composition is wrapped in film and hidden in a container. And the part necessary for work is thoroughly kneaded until smooth. This is done intensively, so that all the components are thoroughly mixed and the mass becomes homogeneous.
In the preparation of the composition, sulfur is initially used; during the mixing process, it is evenly distributed throughout the volume of the glue and enters into a chemical reaction, due to which the temperature rises significantly. The glue can remain in this blurred state for 2 to 10 minutes. After this time, the cold welding for radiators begins to solidify.
Eliminating a leak at the connection between the radiator pipe and the main pipe
Leaks at the joints of the pipe and radiator pipe are caused by:
- improper installation when connecting the battery. The connection is made either by welding or threading. In both cases, the slightest carelessness during assembly, for example, non-compliance with welding conditions or misalignment of the pipes being connected, when their ends are pulled together with force to align, different pipe diameters will manifest themselves already in the first months of operation;
- mechanical bending loads in the joint area. They arise as a result of a simple everyday situation, when one of the residents uses the battery as a support, wanting, for example, to straighten a curtain on a curtain rod. Even if a hundred-kilogram owner stood on the radiator, there would still be a distortion and a break at the junction of the two pipes.
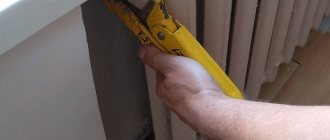
To stop the leak, you can use a car clamp or use a rubber band and a piece of soft wire. The rubber from a bicycle inner tube will cope with the task of temporarily stopping the leak. You need to prepare strips 4-5 cm wide and up to 35 cm long. Secure the rubber strip wrapped around the damage with wire. Automotive clamps are good because they are inexpensive and allow the possibility of securely and evenly fastening them to a damaged joint, without the risk of overdoing it when tightening, as is the case with wire.
Features of surface preparation for applying adhesive composition
The use of an epoxy resin-based adhesive requires the fulfillment of a number of conditions regarding the preparation of the surface for gluing. First of all, it is the cleanliness of the surface. Cold welding fits perfectly on metal surfaces and, when it contains metal powder, forms a strong connection, which subsequently also forms a diffuse connection. But in order for the plastic mass to be evenly applied to the surface of the metal, it is necessary to prepare it.
When preparing you need:
- Remove traces of drips;
- Remove the paint layer down to the metal;
- Clean the metal with sandpaper;
- Degrease the surface to be coated.
There are no minor operations in the list of operations; all of them are important for proper gluing of surfaces. True, it is worth dwelling on degreasing in more detail. During mechanical processing, dust and other particles, such as paint residues, enter the battery repair point in the roughness of the metal. In order for the glue to adhere as closely as possible to the metal, the area is additionally degreased so that the surface is as clean as possible. This operation will avoid the formation of a fatty film on the metal, which, after the cold weld has dried, will form a cavity into which water will leak.
Constant hydraulic pressure and temperature fluctuations will quickly expand the area of the cavity, and the coolant will again begin to seep out.
Signs of damage or “I didn’t touch anything”
Let us note several possible reasons for the failure of heating radiators:
- The radiator was chosen incorrectly from the very beginning. Depending on the diameter of the pipes, the pressure and temperature of the water in the system, different types of radiators are installed.
- Repair of a heating battery can also be caused by the fact that it was incorrectly connected to the pipes of the heating system.
- If the central heating system creates harsh working conditions. For example, if the coolant has increased acidity and sharp pressure changes are observed, this leads to the metal experiencing electrostatic or electrochemical corrosion.
- If the coolant is of poor quality, it will form deposits at the joints of the battery sections and in the places where the pipes are attached.
- Poor quality coolant will also clog radiators and pipes - this will entail the frequent need to flush them.
Plaque in heating system pipes
- Intersectional gaskets can wear out and threaded nipples can be destroyed. Therefore, you need to regularly change the gaskets between sections.
- Clicking noises in the heating radiator are not necessarily a breakdown, but if they appear, you need to call a specialist; you may need to soundproof the heating radiators. Since the heating radiator makes noise, it can cause discomfort or cause its breakdown.
Now let’s outline the main signs that your batteries require careful inspection and repair in the future or urgently:
- When the heating season is in full swing in the literal sense of the word, the rooms suddenly become noticeably colder, that is, the heating radiator does not heat.
- Plaque has appeared at the joints and fastening points; this may cause the heating radiator to not work in the future.
- The heating battery has leaked or the heating radiator has burst.
If your batteries are already older than you, it is better to replace them, because, most likely, you are guaranteed to permanently repair the heating battery yourself. After all, modern models will be more efficient, since their thermal conductivity is higher: the rooms will become warmer, and heating costs will be lower. In addition, the new batteries will be more beautiful.
Sometimes it's easier to replace an old battery than to repair it
If it is not possible to replace the batteries, then you will have to repair the heating radiator yourself, and as soon as possible. It’s best - whether it’s a problem of how to fix a leaking heating battery, or you just hear noise in the heating batteries, immediately contact specialists who will carry out professional diagnostics.
Methods for repairing cast iron radiators using cold welding
Before starting to describe methods for repairing a battery using cold welding, it should be noted that cold welding is a temporary remedy for eliminating an individual leak. A repaired welding leak can last for several seasons with normal handling, but the battery can only be properly repaired by disassembling it and replacing the broken section with a new one.
Another point that you need to pay attention to is the size of the patch and the possibility of repairing various damages. If a small leak has formed in a section, then cold welding will cope with this task quickly and efficiently. Another thing is when a large gap has formed in the metal, you will have to use additional reinforcement - in addition to the first layer applied by cold welding, you will have to use liquid glue and make a bandage. And the most difficult case is when an entire fragment of metal breaks off due to an impact. Cold welding cannot handle such repairs; here you must immediately shut off the coolant supply and call a repair team.
Repair of small leaks on the vertical surface of the section
If a leak has formed on the outer or inner surface of a section and the size of the crack does not exceed 1-2 cm in length, in addition to cold welding, you will also need a metal brush, 100 and 200 grit sandpaper and paint solvent or alcohol.
Before starting work, the supply and drainage of coolant to the battery is shut off and, if possible, water is drained from it.
Use a metal brush to remove the paint at a distance of 1-1.5 cm on both sides of the crack. After this, first with 100-grit sandpaper, and after 200, sanding is done so that the spot at the site of the future patch is sanded down to bare metal.
After this, glue is prepared and the surface of the radiator is degreased. Cold welding for a heating battery is applied to the surface of the patch so that there is a gap of 1-2 mm between the cleaned metal and the paint on the surface of the battery.
After applying the glue, it is actively pressed and left to crystallize for the time specified in the instructions.
Repairing leaks at the joints of radiator sections
This repair case allows for higher quality leak sealing. The fact is that repairing pipes and cylindrical surfaces is easier than repairing a crack on a flat surface. In this case, in addition to the usual plastic mass, you can later use two-component glue with an additional bandage to increase the strength of the connection.
When repairing the junction of sections, not only the leak site is cleaned, but the entire circumference of the junction. The fact is that an incorrectly made connection of sections with an existing leak will subsequently allow coolant to flow around the entire circumference, since the mechanical tightness in it is broken.
The sequence of actions here is as follows:
- The battery is disconnected from the coolant supply;
- The entire surface around the circumference of the joint is cleaned;
- An adhesive composition is being prepared;
- The area where the glue is applied is degreased;
- A layer of cold welding is applied along the entire circumference of the joint of the sections;
- After the first layer has dried, a liquid glue composition is prepared;
- A layer of liquid adhesive is applied to the area, followed by a fiberglass strip and another layer of adhesive applied over it.
- To consolidate the result, 3-4 turns are made with mandatory glue impregnation;
- After this, a metal clamp is placed on top and secured with a screw.
Repairing leaks in nuts and fittings
For repairs in these places, plastic cold welding for radiators is usually used. As in previous cases, the leak site is cleaned from paint to metal. When cleaning, it is recommended to remove part of the tow from the joint to a depth of 1-1.5 mm, this will make it possible to strengthen the gluing area by cold welding.
After cleaning and degreasing, the process of preparing and applying cold welds is identical to the previously described cases.
Thus, cold welding is currently the optimal means for temporary repair of cast iron heating radiators.
Recommendations for the care and prevention of battery leaks in the summer season
All of the above methods are relevant in winter, when you urgently need to do something. After the end of the heating season, it is necessary to organize scheduled maintenance of radiators and pipes. The batteries are removed and disassembled into sections, the old seal is removed from all threaded connections, sometimes it is necessary to replace the nipples with new ones, a mandatory measure is the preparation of new intersectional gaskets. If fistulas are found, they need to be welded, then you can return the radiator to its place.
If the house has not undergone a comprehensive replacement of all components of the heating system, the risk of a leak increases due to the natural wear and tear of communications. Experts recommend always having at least rubber gaskets and clamps and cold welding available to immediately block the flow of moisture.
