Hello! On this page I have collected the names of the elements of the Russian stove . If you have anything to add, write by email or in the comments.
I recommend reading something interesting on my blog, KaminTeplo: Project of a Russian stove with a stove bench, stove and firebox. Project of a budget stove “Finka Stove”. Project of a stove for a black sauna. Project of a sauna stove “Russian Steam” with drawings and procedures for a Russian steam bath.
Look at my work on the topic Russian oven, Ukrainian oven, oven for cooking by following the link to my old website: Russian oven in the restaurant Khutor Vodograj, Zbiten
How to fold a stove: step-by-step laying, photo
Step-by-step instructions for laying furnace elements:
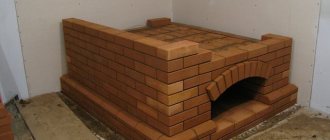
- Sub-bake. Not all types of stoves have a firewood drying compartment. You can use reheated brick for it. An arch is installed above the oven using a special arc-shaped formwork (which is best made collapsible).
Photo 6. Finished brick oven. Used for storing firewood and other materials.
- Firebox. It is installed on the ceiling (arch); fireclay bricks are used for its laying.
- Under. The bottom of the combustion chamber is often made inclined towards the hearth. For this, a backfill of clay and sand is used.
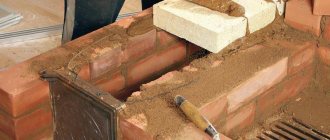
- Crucible. This element is the most difficult when laying a stove. Its walls should be as smooth as possible. They are erected at a slight slope from hewn fireclay bricks. The furnace ends with an arch - the mouth, where a damper is later installed.
Photo 7. The process of building a crucible, it is the most difficult to build. Used directly to start a fire.
- Firebox vault. Like the arch of the oven, it is made using special formwork. The width is half a brick. The surface of the firebox roof should be as smooth as possible. To ensure the strength of the vault, each middle brick of the row is hewn in the shape of a wedge.
- Six. The compartment in front of the cooking chamber consists of a base, a wall with an arch and side walls, as well as a vault with a chimney opening. It is laid out from ceramic bricks at the same time as the crucible.
- Reroof. Upper part of the oven. The masonry is made of brick in 3 rows. To comply with fire safety rules, the distance from the ceiling to the ceiling of the room must be at least 35 cm.
- Chimney. It is laid out especially carefully; its internal walls should not have protrusions to avoid the danger of soot accumulation. The seams should be tight and without cracks.
Photo 8. Sequential diagram of the order of the chimney for the stove. Contains seven stages.
As the furnace is being built, dampers and doors are installed, which are purchased in advance. After the masonry is completed, the stove is usually treated with a special heat-resistant putty or plaster to better seal the seams.
Device order
Laying layers in rows:
1. Laying reheated bricks without screeds on a material that will protect the structure from water penetration.
2. Solid bricks on the sides of the future hearth must be placed edge-on.
3. It is recommended to install a blower door.
4. Conventional bricklaying
It is important to remember to leave a gap for the cleaning channel
5. Continuation of the cleaning channel. Construction of the base for the arches.
6. Narrowing the cleaning channel and installing a grate.
7-8. Placing a sheet of steel. Fastening the wire for tight installation of the combustion door.
9. Creation of sand bedding. The hearth bricks are installed in a complete row on edge.
10-11. Installation on top of the hob. On the edge of the hearth you need to lay out bricks, divided in half.
12, 13, 14. The rows are laid out similarly to the previous ones.
Photo 4. Option for arranging a Russian brick stove with a firebox and a hob. The construction includes 27 stages.
15. Raising the arch.
16-18. Laying knitting metal wire. Narrowing of the arch.
19-21. The final stage of building a bed.
22. Raising the height.
23-31. Formation of a pipe channel. Installation of blower and valve.
Difficulties when working with your own hands
A number of difficulties that you may encounter during construction:
- Insufficient knowledge of the stove craft.
- Delays in the construction of the device due to lack of time or experience.
To facilitate the construction process you need:
- Lay bricks only one at a time. If you are a beginner, it is better to lay out each new row on a dry, flat surface.
- Before laying, thoroughly clean the brick from crumbs and dust with a hair brush.
- Dip the ceramic brick into clean water for a few seconds, then shake it off. The rule does not apply to fireclay bricks.
- If the brick lays incorrectly the first time, it needs to be removed, cleaned off the mortar and put back.
- Do not forget that the removed solution is not suitable for use.
Important nuances and tips
Experienced stove makers sometimes ignore the dry masonry stage, but for novice craftsmen it is mandatory. This will help you understand the internal structure of the stove, all its channels and cavities, in order to prevent possible errors.
For the firebox, fire-resistant fireclay brick is used, the pipe and the stove mass are made of solid red brick. It is prohibited to use sand-lime brick in the construction of furnaces. Each element must be cleaned of any contamination before laying.
In almost every row, some bricks are adjusted to size. Experienced stove makers advise that when dismantling dry masonry, separately fold the elements of each row. You can also take a marker and put the row number and the number of the element’s place in the masonry on each brick.
Instead of mortar for dry masonry, it is most convenient to use wooden slats of the same thickness. They will also be useful in the future to control the amount of mortar between the bricks.
The work is carried out as follows:
- During “wet” masonry, each row is first laid out dry to once again check the position of all elements.
- On the bottom row, narrow slats that were used previously are placed on the sides.
- A layer of solution approximately 10-12 mm thick is applied on top.
- Lay the brick and hammer it with a rubber hammer until it settles on the mortar to the level of the slats.
- The laying continues in the same way.
- After removing the slats, the resulting cavities are filled with solution.
- The resulting fresh seam must be immediately embroidered to give the masonry an aesthetic appearance.
The slats are removed only when the row is third or fourth from the top. Now they can be reused. To carry out the work you will need about four sets of such slats.
Each row that is laid on the mortar must be checked by level and plumb for its position relative to the horizontal and vertical.
Crushed bricks cannot be used in laying parts of the furnace that are subject to constant temperature loads. In general, it is undesirable to use elements with cracks and chips in the construction of solid wood and chimneys. Crushed bricks may only be used to fill the base for the foundation of the stove.
Old brick obtained from dismantling destroyed structures is suitable for laying a foundation if it is not severely damaged.
The quality of the masonry largely depends on the adhesion strength of the brick and mortar.
To improve this point, experienced professionals recommend:
- Before laying, red brick is soaked for 7-10 minutes. Fireclay only needs to be dipped in water and shake off the drops.
- Place the brick in place in one clear movement, without moving or tapping it.
- Apply only the required amount of mortar to the masonry site. The seams in the solid wood should not be more than 5 mm, in the firebox - no more than 3 mm.
- During the laying process you need to “mop”, i.e. use a stiff brush to rub the inside surface of the smoke ducts and oven chambers to create the smoothest possible surface along the flow path of the flue gases.
If it was not possible to immediately put the brick in place, you should completely clear the mortar from both the element itself and the place where it is installed, and lay the brickwork on a fresh layer of mortar.
When laying pipes, it is allowed to use only red solid bricks, which are well resistant to acid deposits and temperature changes. The smoother the internal surface of the chimney, the better the draft and the less blockages. You can treat the insides of the pipe with liquid glass.
On our website there are articles with a detailed description of the technologies for constructing different types of brick kilns, we recommend that you read:
- DIY mini Russian stove: specifics and procedures for building a compact stove
- Do-it-yourself Russian stoves with a stove bench: construction manuals with diagrams and procedures
Foundation
Before you build a Russian stove with your own hands, you need to carefully study the drawings and only then begin building the foundation and purchasing materials.
Although it is better to lay the foundation for the structure at the stage of forming the foundation for the house. However, they should not be connected. A separate foundation for a Russian stove with a gap of at least 5 cm - wet sand is poured here and compacted. Source chertegnik.ru
If it happens that the stove needs to be built in an already rebuilt house, then you should cut the floor down to the ground, make formwork and pour concrete, if necessary, with reinforcement. Depending on the location of the furnace, there are the following nuances of constructing its foundation:
- If the Russian stove will stand against an internal wall with a shallow base, then both soles should be at the same level, and the upper platform for the stove remains 14 cm below the finished floor.
- If the furnace is planned to be placed against a load-bearing wall on a buried strip foundation, then the foundation pit for the furnace base is expanded, a sand and gravel layer is made with a tamper, and concrete is poured into the formwork. In this case, the gap between the two foundations of 5 cm is filled with sand, the sidewalls directed into the house are formed with brickwork. The depth of the sole should be at least half a meter.
The foundation for the stove is in the corner - on both sides of it there is the foundation of the house. Source remont-system.ru
If the structure is located in a cut-out opening in a load-bearing wall, then the interrupted lower crown should be connected with steel strips (6 mm thick and 60 mm wide) by placing them on both sides of the ends of the logs and tightening them with bolts (16 mm diameter). The resulting opening is framed with wooden posts; the resulting gap (cut) should be 5 cm.
When you have decided on the location and foundation, you can.
Drawing plan of a Russian stove from different anglesSource kaminproekt.ru
How does a traditional Russian stove work?
The dimensions of the Russian stove and, accordingly, its weight are significant, so it requires the construction of a fairly strong foundation. In the past, wood and stone were used for its construction, at the moment - concrete and brick.
The lowest part of the oven is called the base. It contains the oven, which is a chamber designed to accommodate various utensils and firewood. The presence of such a base creates more comfortable conditions for operating the stove due to the fact that the entire structure rises slightly above the floor level. The vault, which has a semi-circular shape, covers the arches. Sand or clay is poured onto it, after which a bottom, called a bottom, is installed. For uniform combustion of fuel, the firebox is arranged in such a way that it is at a slight angle to the rear wall.
The structure of a Russian stove
The main elements of the firebox are the cooking chamber and the crucible. The front part of the firebox has a mouth, which is an opening equipped with a metal damper. A domed or gently sloping vault is the upper ceiling of the cooking chamber. The first of them reduces the load on the walls, while the other contributes to a more uniform process of heat reflection. Formwork, made of boards or metal, serves as the basis for installing the vault. The design of the chimney does not provide for any turns or horizontal sections. It has a vertical arrangement and is placed directly above the oven.
The Russian stove operates according to the following principle: fuel is burned in the chamber due to the supply of oxygen from the lower part of the mouth; combustion products move to the roof and then move along the chimney. The rate of fuel combustion depends on its moisture content. Dry wood burns faster, thereby increasing the heating rate of the stove.
Cooking is carried out after the process of burning the logs and heating the internal space of the oven is completed. During the combustion process, the temperature in the furnace reaches 600 degrees Celsius. As the wood burns, it drops to the optimal temperature for cooking various dishes of 220-250 degrees Celsius.
Installation process
If you nevertheless decide to lay the furnace with your own hands, then familiarize yourself with the features and technology of carrying out the main work. This will help you complete the process correctly and avoid mistakes during installation. According to experts, many are able to complete all stages of construction without outside help.
Foundation and foundation
It is very important to take care of constructing a reliable foundation for a brick structure. It must withstand heavy loads and not sag under them
The lower part of the oven is reserved for baking and remains free. It is convenient to store household supplies and kitchen utensils there. Concrete slabs or steel beams in combination with brick are chosen as the floor for the oven.
Due to the high fire danger, the use of wooden supports is not recommended, but is not prohibited. If you still cannot replace such material with anything, do not forget about antiseptic wood treatment. Otherwise, the ceiling may be damaged by insects.
It is also necessary to pay attention to the seams and their correct processing. They should look neat after applying the cement mortar.
External walls are plastered with conventional mixtures intended for interior decoration.
Brick walls are laid parallel to each other in two rows on top of the foundation, observing the alignment. In the third row, a door for the blower is installed. Next, the masonry continues, and doors for cleaning the firebox are installed in the fifth row, and lining is also performed (internal lining made of refractory bricks). The next row will require installation of a grate.
In the seventh row we form blind channels, thanks to which we will get a warm place for the bed. Here we install the furnace door. Then you need to create channels (lowering and rising). Up to the eleventh row, the whole process is repeated, and only in this row the combustion door is closed and suction channels are formed (from the heil to the side channel, from the firebox to the riser and two transitions between the blind chambers).
Next, the suction channels are blocked and the formation of the caps (blind channels) is completed. In the thirteenth row, it is necessary to complete the lining and shut off the fuel chamber. The next layer of masonry consists of floors.
Starting from the sixteenth row, it is necessary to form a vertical channel (smoke) and a partition for protection from fire. This process lasts until the twenty-second row, in which the chimney valve is installed. Now all that remains is to lay out the chimney and you can move on to the decorative finishing, thanks to which the Russian stove with a warm stove bench, created by yourself, will organically fit into your interior.
Construction Technology Tips
The construction of a Russian heating stove is a serious matter. It will be very difficult for a homeowner without experience in the stove business, so we recommend stocking up on time and patience. We published detailed instructions for preparing the mortar and laying it in an article about building a fireplace; we advise beginners to familiarize themselves with the specified material.
Here we will give general recommendations regarding the Russian home stove:
- Even the mini version of the heater weighs over 2 tons. The foundation slab must be supported on a stable soil horizon; the depth can be determined by the occurrence of the existing foundation of the dwelling.
- In the finished building, the “sole” must be arranged separately from the foundation of the house, retreating at least 10 cm. At the stage of construction of the cottage, the foundations, on the contrary, are combined - a common formwork is set up and concrete is poured.
- You need quality bricks and mortar, not a gully clay mixture. The correct geometry of the stones will make your work much easier - uneven bricks will have to be filed down.
- Soak the red brick in the bucket for 2-3 minutes, as shown in the photo. Do not immerse the refractory in water, just rinse it to remove dust.
- It is allowed to lay the furnace and firebox from ceramic bricks, as our ancestors did. But remember: such cameras are afraid of accidental overheating; the material begins to crumble and crumble.
- A bed built on a loose base is also afraid of temperature fluctuations. This is why it is recommended to fill the void above the vault with clay mortar. If you fill the cavity with sand, small cracks may appear on the roof. No sooner had the stove been built than repairs needed to be done.
- The refractory masonry is not tied to the ceramic; cardboard is inserted to provide a gap between the two walls. Horizontal seams are laid with kaolin non-combustible wool.
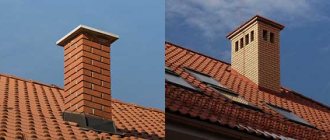
- The pipe does not have to be made of brick all the way to the top. Lighten the structure - after cutting, install a sandwich - a chimney that goes out onto the roof, as shown in the photo.
Finally, a few words about how to properly heat a new stove.
After drying the stove for 2-3 days (in summer), first build a small fire on the top damper. When the pipe warms up, start heating the furnace little by little, then the lower chamber. Increase the amount of firewood slowly, do not rush. The task is to uniformly heat the furnace body for final drying. Date: September 25, 2022
List of tools
To make work easier when laying a Russian stove with your own hands, you need to prepare working and measuring tools in advance. The working tool set should consist of:
- bayonet shovel;
- containers for preparing masonry mixture. It should be wide enough and have low sides;
- a shovel and two metal sieves with mesh sizes of 2x2 and 1x1 mm. This tool is used to sow clay and sand;
- trowel - a special trowel, which is used to take the mortar and distribute it among the masonry elements, and also remove excess mixture that protrudes beyond the seam;
- hammer - pickaxe. They can be used to divide a whole brick into several parts and trim the resulting surfaces;
- jointing, which helps to seal masonry joints and give them the desired shape;
- scraping - a rubber plate with a handle. It cleans the internal surfaces of the masonry from excess mixture and seals the seams in hard-to-reach places;
- saws - grinders. It can be cut more accurately and bricks can be adjusted for laying curved structural elements;
- rules - for leveling the upper plane of the foundation.
Control of vertical and horizontal masonry joints and geometric parameters of the entire furnace structure is carried out using:
- bubble level;
- plumb line;
- square;
- roulettes.
Features of the work
Were you afraid of the difficulties and decided to build a stove? Then you need to decide on the type of construction and get a masonry plan
Please note that it is not recommended to carry out work at temperatures below +5 degrees. In winter, you should not build a stove. So, let's start making the design
The step-by-step guide looks like this:
So, let's start making the structure. The step-by-step guide looks like this:
- First, you need to lay two rows of bricks on the foundation. A layer of waterproofing is required between them.
- Wet the clay brick and lay out the first row at the level of the finished floor. Use only whole blocks; be sure to tie the corners with the next row. Three-quarter bricks are used for this. Three such blocks need to be laid in each corner. The joints must be less than 5 mm thick, and the mortar must be distributed over the entire surface of the brick. Constantly monitor the horizontalness of the masonry - otherwise you will not be able to make a high-quality stove.
- You need to lay out the second row with solid bricks. It is imperative to leave a small gap for baking. If you do not plan to finish, then immediately open all the seams before the solution hardens. Bricks must be cleaned of any remaining mortar using a damp cloth. After the second row, horizontality must be assessed using a plumb line.
- The third and fourth rows need to be tied in the corners. To lay the fourth, you need to use solid bricks. The arch of the oven will rest on the outermost briquettes located at the opening. They need to be squeezed.
- After the fifth row you need to use formwork. With its help, the arch of the oven is made. From one heel to the other, the seams are tied, the bricks are pressed against each other as tightly as possible. The eighth row is the last for the vault.
- The walls must be laid out in one brick. The dressing is done up to the 10th row, in which a platform for the underlay is provided. Under the arch, the space in the oven must be filled with sand or glass. In this case, the oven will be able to give off more heat.
- The 11th row is laid out like the previous ones. This is a coating for the underlayment.
- The 12th row is under. It is made using refractory bricks, no mortar is used. All gaps must be filled with sand. On the left it is necessary to provide a hole for ash and coals.
- Now let's start laying the furnace. It is made entirely of refractory bricks. Seams no more than 3 mm. First you need to lay the bricks on the edge along the inner contour. As for the walls, they need to be made of ¾ bricks, bandaging is required. To increase the strength, you need to cut the briquettes located in the front two corners at an angle of 45 degrees. Install formwork between them.
- The 16th row is the arch of the crucible. The entire space between the walls and the vault must be filled with sand. You need to lay out the arch from the edges, gradually moving towards the middle. Use twine to check the masonry.
- The pole window has the shape of an arch. It is laid out after the arch.
- On the 20th row, the walls of the stove are erected, while the space above the hearth is reduced.
- The 25th row is done in approximately the same way as the 10th. The seams must be tied. The space above the pole needs to be reduced to form an overtube.
- Row 22 – the over-pipe needs to be made even smaller. Then you put the samovar channel there.
- 23rd row - at this stage you need to provide a place for soot and a window for cleaning.
- 24th row - block the cross-pipe. Provide an opening for installing a view. Opposite it you need to put a door. The view will open and close through it.
- 29th row - the samovar channel and the over-pipe are connected.
- 32nd row - the overpipe is blocked using a solid brick. Leave one hole and close it with a latch. After installing it, you can begin laying the chimney.
All wood formwork can be removed a week after the masonry mortar has gained strength. It is not recommended to remove it earlier. By the way, the same principle is used to lay a stove or fireplace in a country house. It is also possible to build a Russian stove using this technology, but the main thing is to follow the instructions.
Procurement of materials
To build a Russian stove with a stove and a stove bench, you need high-quality solid ceramic bricks without chips or cracks. Quantity - at least 2000 pieces, excluding the construction of the pipe, about 100 buckets of mortar will be required. The quality of the latter should not raise the slightest doubt, so it is best to purchase a ready-made building mixture in a retail chain; clay from the nearest ravine will definitely not work. In addition, the following elements and fittings are required:
- cast iron stove with 2 burners;
- firebox door 140 x 250 mm;
- ash door 130 x 130 mm;
- grate 260 x 280 mm;
- valve with hole 260 x 240 mm – 2 pcs;
- view with a hole 220 mm;
- steel water tank 400 x 260 x 280 mm;
- corner, strip and roofing steel.
Having covered the foundation slab with a layer of thermal and waterproofing (you can use steel sheet, basalt cardboard, etc.), the construction of the furnace begins. When working, the following masonry scheme is used: the prepared brick is lowered into a bucket of water, then a layer of mortar is applied to the base with a trowel or by hand and a brick from the bucket is placed on it. Next, moving it in different directions, the brick is ground in, and then pressed down with force. Excess solution that comes out is removed with a trowel.
During laying, you should constantly check the horizontal, vertical and accuracy of the corners. Don't forget to measure the diagonals of the rectangle, they should be equal. The following tools are used here:
To perform the correct masonry, an inexperienced stove maker will be helped by the diagram and order of a Russian stove. Below are drawings and sections of a stove with a stove bench and serial diagrams for laying and placing accessories.
Important! The solution for fastening the structure is used everywhere except the hearth. There, the bricks fit tightly one to one so that there are no differences
Products of folk arts and crafts in the Russian Crafts store
The “Russian Crafts” store is an online store of single and rare items, gifts and souvenirs of Russian folk art.
We offer traditional works of Russian folk art crafts, made by the best authors and craftsmen in different regions of Russia. We guarantee the authenticity of folk art, the exclusivity of the products presented and the uniqueness of each item.
Explore our offers
Share link:
- Click here to share content on Facebook. (Opens in a new window)
- Click to share on WhatsApp (Opens in new window)
- Click to share on Pinterest (Opens in new window)
- Click to share on Skype (Opens in new window)
- Click to share on Telegram (Opens in new window)
- Click to share on Twitter (Opens in new window)
- Click to share posts on Pocket (Opens in new window)
- Click to share on Reddit (Opens in new window)
- Click to share on LinkedIn (Opens in new window)
- Click to share posts on Tumblr (Opens in new window)
- Send this to a friend (Opens in new window)
- Click to print (Opens in new window)
Choosing a stylistic direction
Modern style
This style welcomes deep blue furniture, clear straight lines, multifunctional household appliances and an abundance of gloss. It is acceptable to use other colors as accents, such as white and gray.
Classic
The classic set is a structure made of natural wood and equipped with a countertop made of natural stone.
Marine shades can be present not only in the colors of the facade, but in the form of textiles - they can be used in tablecloths, curtains, upholstery, potholders and towels.
The blue color scheme is in stunning harmony with the plank floors and exquisite decor.
Loft
When looking at a photo of a blue kitchen interior, decorated in a loft style, no one has any doubt that the rich blue set perfectly complements the concrete floors and red brick walls.
Country
The atmosphere in such a kitchen breathes the comfort and warmth of a home. Blue furniture goes well with natural wood. Complementary elements can include woven rugs, hand-embroidered tablecloths, and painted ceramics.
Recommendations from the designer
- Apron for the kitchen - 115 photos of modern ideas. Review of the best apron ideas with an exclusive design + instructions and video
- Plasterboard ceiling in the kitchen: design ideas, application features and current ceiling structures (100 photos)
- Kitchen design 10 sq. m. - real photos of the application of stylish solutions and an overview of the most beautiful combinations in design
Sea style
Blue is the best color for creating an interior in a marine style. The optimal scenario would be to combine a kitchen set in a blue palette with white trim. Don't forget about accents. Themed accessories and textiles with marine patterns can play their role.
Usage [ edit | edit code ]
Cooking [edit | edit code ]
They boiled, steamed, fried, baked, heated and “simmered” in the oven. They fried at the mouth (before the burning fuel), boiled and steamed directly in the crucible with a melted or dying stove, heated it on a stove, baked and simmered in the crucible after heating.
Bread and other baked goods were baked on the hearth of the oven. To do this, the stove was thoroughly cleaned of coals and ash. There should be “hot heat” in the oven - the most optimal temperature to start baking; it is determined by throwing a handful of flour onto the floor - the flour should brown fairly quickly, but not char. Thanks to the large heat capacity of the Russian oven, the temperature in it decreases gradually over a long period of time, which is conducive to obtaining good pastries and breads - first, a crispy crust quickly forms, and then the inner layer “reaches.”
For cooking, they used cast iron pots moved by grips (horns), and frying pans with frying pans (tsapelniks, chapelniks). The dishes were mostly made of cast iron, but clay pans and pots were also used; Aluminum pots and pans became widespread in the 20th century. In clay jugs, fatty baked milk with brown foam turned out to be especially tasty. At the stove, in addition to three grips and a frying pan, there were two more pokers for mixing coals and ripping out ash.
The design of the furnace could have a separate entrance for connecting a coal samovar pipe to the chimney of the furnace.
Heating [edit | edit code ]
Usually the stove began to be heated in mid-October (from the Intercession) and was heated until April (before the Annunciation) or May. The Russian stove was located almost in the center of the room and heated it evenly. A sun lounger (bed) was placed on the stove - the warmest place in the house. A golbets (stuffed cabbage) was traditionally built next to the stove, in which household utensils were stored, and the top of it could be an extension of the lounger. The size of the sun lounger varied, the largest allowed up to 5-6 people to sit on the stove, but usually it was double. The height of such a lounger most often allowed a person to sit. In winter, with regular heating on the stove, the temperature is stably maintained at +25...+27 °C. The stove was whitewashed or decorated with tiles.
Washing [edit | edit code ]
In ovens with a wide (up to 1.5 m [14]) and high (up to 1.2-1.4 m [14]) crucible, one could wash and steam [15].
Principle of operation
How the process of fuel combustion and removal of combustion products occurs is shown in the cross-sectional drawings of a Russian stove presented below:
The movement of gases in a Russian stove is carried out not only due to the natural draft created by the chimney, but also due to the peculiarities of the combustion process. Cold air from the room enters the mouth, meeting along the way with the opposite flow of flue gases. At the same time, they practically do not mix; air occupies the upper zone of the passage, smoke - the lower. Having met at the outlet and the mouth, the flows exchange heat, as if a natural gas-air heat exchanger was working.
To build a Russian stove, you need to understand very well how all the processes take place in the firebox. Heated air enters the combustion zone, and flue gases leave it through the upper zone of the firebox, exiting through the mouth, high and further into the chimney. But this does not happen immediately; the combustion products make several revolutions inside the firebox and are burned, giving off as much heat as possible to the walls of the stove. They are forced to do this by the inclined configuration of the chamber and the presence of a threshold, whose role is identical to the fireplace tooth in large English fireplaces. That is, within the firebox, multi-pass heat transfer by gases is organized without the installation of unnecessary smoke channels.
On the one hand, due to the large dimensions of the firebox, the size of the Russian stove with a stove bench is also quite large. On the other hand, the efficiency of the furnace is at least 60%, which is an unattainable indicator for most other solid fuel air heating units. Not to mention the ability to maintain temperature for a long time and the healing properties of the Russian stove.
And only in it you can cook amazingly tasty dishes, you just need to do it correctly, using the simmering process after the crucible has died down. Finally, a well-finished Russian stove looks great even in a modern interior.
Over the years, the ancient design has undergone a number of modernizations, resulting in many modifications, for example, a heating and cooking stove with a low bench. In this case, although the principle of operation of the Russian stove is preserved, the heating of the floors no longer occurs due to the furnace, but from flue gases passing through many channels. This modification is quite difficult to implement, especially for beginners.
Therefore, it makes sense to consider how a conventional Russian stove with a stove bench and stove is laid. Only here the heat source is equipped with one more function - heating water for household needs. Let's look at the whole process in order.
Where did the custom come from?
Even in ancient times, Russian people understood that cleanliness is the key to health, and they tried to observe its manifestations in everything: in everyday life, in clothing and, most importantly, in taking care of their own body.
It is not for nothing that ancient Russia was not affected by the numerous diseases that raged in Europe and were caused, first of all, by a complete lack of personal hygiene and unsanitary living conditions. Travelers visiting our country often noted that the inhabitants of Russian settlements look completely different: fresh clothes, clean hair and a washed face. This is not surprising, because in Rus' at that time only the lazy could not wash.
Antique stove from 1890
Baths were a mandatory attribute of ancient Russian settlements. If the family did not have enough strength or funds to build a bathhouse, water procedures were carried out in stoves.
It is difficult to establish where exactly the custom of washing in the stove began. Different parts of Russia have preserved evidence of the use of this method since the 15th century.
This tradition extended not only to villagers, but also to city dwellers, since the stove was the only means of heating the premises. According to ethnographers, the custom of washing in the stove survived among some population groups until the 20th century.
Specifications
Modern modernized Russian stoves with a built-in surface for cooking allow you to slightly modify the usual design options and customize them “to suit you.” Using a stove, you can use an additional source of heating, since in this case it becomes possible to heat the side panel or lower stove part without the main firebox running.
In the case of side heating, the adjacent room will be supplied with heat. As for the lower heating, all the walls of the heating chamber are heated here. Thanks to this feature, one large room can be heated while cooking.
Features of devices with flooding
The design of a Russian stove with a flood includes a cast iron stove where you can cook various foods, as well as a crucible designed for cooking traditional Russian dishes and drying mushrooms or berries. The base of the device is a niche-furnace, heating of which occurs from above and from the sides. On the sides there is a firewood rack where the material that will later be used to light the stove should be stored.
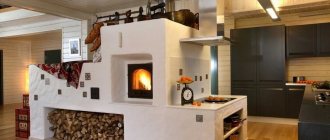
Photo 1. Ready-made Russian brick stove with firebox and stove bench. If the device is installed near wooden structures, they must be treated with special fire-resistant materials.
Diagram of a Russian stove with a firebox and a stove bench
- foundation;
- woodshed - a place for stacking firewood;
- a trough, which is used for spilling material;
- under;
- crucible.
Photo 2. Diagram of a Russian brick stove indicating the dimensions of the device. Additionally equipped with a hob.
The dimensions of the device are 2x1.5x2.5 m.
Advantages of the heating device:
- long-term use (more than 25 years);
- simultaneous heating of several rooms;
- an unusual solution for the interior.
Photo 3. Sectional diagram of a Russian brick stove with a firebox and a stove bench. View from three angles.
Flaws:
- the need to hire a master for masonry;
- high consumption of firewood.
