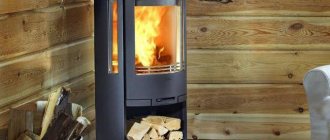
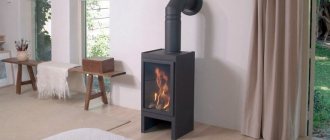
Having a working fireplace in your own home is prestigious, convenient and, in a sense, even romantic. Few people will refuse to build it at their dacha or in a private country house. This article tells you how to build a fireplace at home with your own hands.
You can build a fireplace in almost any residential space - in a private house, in a country house, and even in an apartment located within a city high-rise building. The most important thing is to choose the right variety, as well as the design of this useful and aesthetic structure.
The design of the structure is selected depending on what function this object will perform in your home. After all, it can be either an effective structure for heating a home or simply a decorative decoration that creates the illusion of a living hearth.
Types of fireplaces
All fireplaces, depending on the method of their construction, can be divided into two large categories:
- Homemade fireplaces that require construction . Capital brick structures that are built from scratch. Installing a fireplace of this type requires a lot of effort and time.
- Ready-made fireplaces that are quite easy to install . This version of fireplaces is much simpler in terms of the effort spent on installation - but it is also quite expensive.
However, there is also a kind of middle, combined option - a ready-made combustion chamber is purchased, and a platform is laid out around it with your own hands and finishing work is carried out. Installation and installation of fireplaces in this case require a minimum of knowledge, but assembly will still take a lot of time. When choosing a firebox, it is better to give preference to cast iron models - they are more durable and have higher heat transfer.
In any case, before installing a fireplace in the house, it is worth considering a couple of design options in more detail in order to have an idea of the work ahead and its intricacies.
Where to begin?
You always need to start by determining the location: where in the house the fireplace will be located. It must meet certain requirements:
- reinforced floor;
- heat-resistant coating,
- being away from the main passages;
- good thermal insulation of the room;
- the possibility of bringing the chimney to the street.
Surely, you already have a rough plan in your head: what the future fireplace will look like and where in the house it will be located. Will it stand close to the wall or divide the room into parts? There are the following types of fireplaces:
- wall-mounted, its back wall is adjacent to the wall;
- with an end connection to the wall, such a fireplace divides the room into zones;
- an island fireplace that stands separate from the walls, allowing residents to observe the play of flames from both sides of the transparent firebox;
- corner, perfect for small spaces.
The main thing that determines the choice of fireplace type is the parameters of the room. A corner fireplace takes up virtually no usable space, making it an ideal choice for a small room. A fireplace, standing alone or adjacent to the wall at the end, is suitable for spacious rooms that require additional zoning.
Corner fireplace option
Preparation of tools and materials
To make your own fireplace, you need the following set of tools:
- Master OK;
- Mason's hammer or rubber mallet;
- Notched and regular spatula;
- Buckets for mixing the solution;
- Hammer;
- Screwdriver;
- Construction mixer or drill with an appropriate attachment;
- Building level;
- Water level;
- Plumb;
- Roulette;
- Pencil or marker;
- Bulgarian;
- Device for cutting tiles.
The list of required materials is as follows:
- Red stove brick brand M-200;
- Facing brick;
- Steel corners with a section of 50x50 mm;
- Steel strips measuring 50x5 mm;
- Self-tapping screws with wide washers;
- Plastic dowels for self-tapping screws;
- Heat-resistant masonry mixture;
- Heat-resistant mastic;
- M500 grade cement and sand;
- Thermal insulating foil material in the form of plates;
- Minirite slab (required for installing a fireplace in a wooden building);
- Ceramic tiles or porcelain stoneware;
- UD and CD profiles for drywall;
- Drywall sheets;
- Set of decorative grilles for ventilation windows;
- Heat-resistant sealant.
Installation Requirements
Before equipping a wooden house with a fireplace, you need to take into account a number of fire safety requirements. The equipment should be located at a safe distance from wooden walls, and also away from curtains, drapes, clothing and other flammable products and objects. Open fire and heated surfaces pose a potential threat to the safety of the log house.
In addition, it is necessary to act on the basis of SP 55.13330.2016, which contains information on the relative position of various equipment and furniture in residential buildings. This set of rules emphasizes that the house must be designed to withstand the load from a factory-made fireplace. Combustion products must be discharged into the chimney.
All chimneys and chimneys are placed on the basis of SP 60.13330. The chimney should not pass through the living space. Its surface temperature is strictly 20 °C less than the ignition temperature of the material.
To install the chimney, it is recommended to use materials and metal structures that have not been previously used.
A brick fireplace has a unique appearance and a simple installation process, and it fits harmoniously into any part of the house.
Fireplace installation
Of course, installing a fireplace in a home can have a lot of parameters, each of which has to be dealt with on the spot. For example, a lot depends on the size of the firebox, and the installation site has a serious impact on the features of the future design, and therefore the technology for its installation.
Simplified installation of a fireplace includes the following steps:
- Preparation of the foundation in a permanent building . Considering the fact that a modest-sized fireplace weighs much less than a traditional stove, there is no need for a reinforced concrete foundation. The base for the fireplace can be a regular screed or a powerful ceiling. Installing a fireplace with your own hands begins with laying porcelain stoneware or tiles in the area where the fireplace will be located.
- Preparation of the foundation in a wooden house . If the building is made of wood, then before installing the fireplace you need to take care of high-quality protection of the base from heat. Under the tiles or porcelain stoneware, you need to lay a layer of heat-resistant material - for example, a 15 mm minirite sheet. Sometimes asbestos cement sheets are used for these purposes, but they are less resistant to heat, so the risk of fire will be higher. The heat-resistant plate is attached to the floor with self-tapping screws in the desired area, which is usually located directly under the chimney. To make it easier to navigate, you can use a plumb line.
- Tile installation . It is recommended to lay the tiles under the fireplace in a seamless manner. In addition, for installation you need to use heat-resistant mastic. The tiled base must be made so that it protrudes at least 15 cm beyond the perimeter of the fireplace. In the front sector (where the firebox door will be located), you need to equip a platform with a length of at least 50 cm. When installing a fireplace on the second floor or higher, you need to be aware of the weight restrictions for different types of floors - wooden structures can withstand no more than 120 kg, and concrete slabs – up to 750 kg.
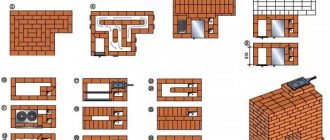
- First row . When the base is assembled, you can begin laying the first row. The fireplace is made of red brick (facing brick is also good for the body, but its cost is much higher). The platform is laid out using cement-sand mortar, and the bricks around the combustion chamber are laid using a clay-fireclay mixture. The first row is laid out in a continuous layer.
- Second row . Next, installing a fireplace with your own hands involves laying bricks so that the platform is U-shaped. Inside the brick platform, the base of a square column is laid.
- Third and fourth rows. Assembling the fireplace at this stage is no different from the previous one. After laying, you will have a base 4 bricks high. This is enough - according to the standards, the metal combustion chamber can be located at a height of at least 20 cm from the floor.
- Laying the slab near the firebox . The stove located at the bottom of the firebox is an important and most visible structural element. For its masonry, facing bricks are used, but if you have a budget, you can purchase stone products. In any case, the slab is supported on the back side by an angle, and two steel strips are laid underneath it. The assembled slab should protrude beyond the base by a quarter of a brick.
- Installation of side elements . The dimensions of the side overhangs must be selected depending on the specific conditions. The easiest way would be to think through the design in advance so that the bricks can be laid out without cutting - in this case, the corners of the outer bricks are simply cut off at 45 degrees. If this condition is not met, then the cutting angles will have to be calculated individually. On the inside of the structure, the bricks are laid so that the combustion chamber can be placed on top of them.
- Installation of the firebox . The firebox is installed so that part of it extends onto the facade slab. Step-by-step instructions for installing a fireplace insert with your own hands will help you understand the details. The back of the firebox is placed on a brick column, and on both sides of the column there are gaps intended for air intake from the lower part of the structure.
- Arrangement of gaps . The brickwork should not be very large - this makes no sense. As a rule, there is about 20 cm of space between the firebox and the inside of the brick body.
- Thermal insulation of the fireplace at the back . In principle, brickwork can cover the firebox from the back, but such a design is only possible if the walls are made of blocks and covered with plaster. You can replace the brickwork with a 50 mm layer of thermal insulation, which is attached to the wall using self-tapping screws.
- Thermal insulation of the wall of a wooden house . The wooden wall located behind the fireplace must be treated several times with a fire retardant. When the wood dries, a layer of thermal insulation is attached to the wall in the same way as described above.
- Formation of a brick box . Around the installed metal firebox, 7 more brick rows are laid, the last one being made with a 25 mm overhang. The eighth row can be made with the same protrusion, but this is a purely decorative aspect, so if you don’t want to, you can safely ignore it.
- Arrangement of the pediment on top of the firebox . This structure is laid out in the same way as the bottom slab - first a corner with a strip is laid, and the top is covered with brick. If the bricks rest against the combustion chamber, they need to be carefully trimmed.
- Installation of the top plate . If facing bricks are laid on edge, then the masonry will be below the level of the upper cut of the pediment. In this case, the free space can simply be filled with mortar, having previously placed the formwork around the entire perimeter of the structure. A regular solution is suitable for pouring the slab - the ratio of cement and sand is 1:3. It would not be superfluous to reinforce the slab with metal mesh. When setting up the formwork, you need to use a level, and carefully remove the poured but still liquid mortar with a spatula to get a flat surface.
- Chimney installation . In the room itself, the chimney consists of two elements - the chimney pipe itself and the insulated frame around it. To assemble the frame, metal profiles for plasterboard are used. The profiles are connected using self-tapping screws. The lower part of the chimney is represented by a regular metal pipe, and on top it would be advisable to install a sandwich pipe covered with a layer of thermal insulation.
- Installation of thermal insulation . Next, you need to mount a box, the outer part of which is made of plasterboard sheets. Thermal insulating sheet material is glued to the inner surface of the drywall using heat-resistant mastic. The seams between the sheets must be covered with foil tape. On each side of the box you need to cut out hatches for ventilation, which will subsequently be covered with grilles.
- Chimney separation . The upper part of the chimney box must be separated from the lower part so that they do not communicate with each other. An excellent dividing material is foil insulation. Gaps and seams remaining after installation must be sealed with heat-resistant sealant and sealed with foil tape.
- Installation of a chimney duct . First you need to cover the bottom of the box with thermal insulation and install drywall on top of it. A ventilation window is created in the center of the box located at the top, and the rest of the surface is insulated. The top plasterboard panel is installed in its place and equipped with ventilation grilles.
- Functionality check . After installing the fireplace, you need to wait a few days for the solution to harden. After this period, you can light the fireplace and make sure that all its elements are functioning normally. If everything is in order, then all that remains is to decorate the structure. The finishing of cast iron fireplaces is as follows: the chimney box is plastered, the concrete fill is sanded and painted, and the brickwork is exposed with heat-resistant varnish.
At this point, the installation of the fireplace is complete and it can be put into operation. The installation technology cannot be called too simple, but if you know how to install a fireplace correctly, then there will not be any particular difficulties in the process.
Construction device
The main parts of the fireplace are the firebox and chimney.
The main functional parts are the firebox and chimney. There are also other important components:
- heating device;
- valve;
- ash pan;
- lining;
- grate;
- forced convection system;
- safety doors;
- fire cutter.
The external device consists of a cladding and a portal. The latter serves for decoration and maintaining a certain style of the room.
Installation of the fireplace can be done using separate parts purchased in the store, or you can create it yourself from the necessary building materials. An industrial firebox is usually made of cast iron or steel. Do-it-yourself masonry is possible using refractory bricks.
Required materials and tools
The set of tools in this case looks much more modest:
- Building level;
- Water level;
- Plumb line, tape measure and pencil;
- Two different spatulas;
- Hammer;
- Rubber hammer;
- Screwdriver.
Additional materials are not included in the finished fireplace kit, so you will have to go to the hardware store with the following list:
- Self-tapping screws with a set of wide washers;
- Plastic dowels for self-tapping screws;
- Heat-resistant mastic and sealant;
- Foil-coated 50 mm thermal insulation boards;
- Profiles for drywall;
- Several sheets of drywall;
- Two grilles for ventilation windows.
Heat exchange
The principle of operation of the fireplace is simple. The spread of heat in the room is carried out due to radiant energy from the fire and heating structural elements, which creates a slight movement of convection currents.
The impressive size of the chimney prevents carbon dioxide from entering the room. The draft is quite large, the required speed of air movement in the pipe is at least 0.25 m/s.
The heat transfer of a classic fireplace is small - 20%, the rest comes out through the pipe.
You can increase the intensity of heat transfer in several ways:
- additional installation of side and rear walls of the structure;
- using metal as lining of the walls of the firebox;
- equipping the portal with a fireproof door that completely covers the firebox (for metal products).
On sale you can find a wide variety of ready-made fireboxes made of fire-resistant steel. Professionals recommend giving preference to cast iron models: they are protected from deformation at high temperatures. But the main guideline for finished products is the compliance of the model characteristics specified in the data sheet with the conditions of your particular premises.
Limiting the open fire area also affects the heating intensity.
- two walls of the portal on the sides - the power is only enough for small rooms; To increase radiation, the side internal walls are shaped like a trapezoid with an extension towards the room.
- one side panel - such shapes contribute to increased extraction of air from the room into the pipe, but heat radiation spreads over a larger radius;
- the flame is open on all sides (Alpine or Swiss fireplaces) - ineffective for heating, although heat can radiate in all directions.
Manufacturers of combustible biomaterials and pellets have also achieved a slowdown in the combustion process due to the composition of the feedstock. They claim that their products increase heating efficiency to the level of a Dutch oven or Swedish oven.
Heat transfer can also be increased by increasing the area of the chimney: its surface heats up and can also serve as a heat source. For this, a recuperator is used - a ribbed insert into the chimney made of stainless steel. Its length ranges from 0.5 to 1 m. The cross-section of such a pipe must coincide with the diameter of the chimney.
Installation technology
Installation of a factory fireplace kit is carried out using the following technology:
- Connection to the chimney . Since the weight of the finished structure is much less than a capital fireplace, it can therefore be installed even on the top floor of a building. The fireplace simply crashes into an existing chimney using conventional technology, more details about which can be found in the corresponding article.
- Installation of the base . The same tiles or porcelain stoneware are used as the base. The base material is secured using heat-resistant mastic.
- Dry assembly . Before installing the fireplace, it is worth checking the kit for completeness, for which you just need to assemble all the elements without using a solution.
- Leveling the firebox . In order for the design to work correctly, you need to think in advance about how to install the fireplace correctly. The firebox in factory fireplace kits is usually installed on legs equipped with adjusting bolts that allow the structure to be adjusted according to its level.
- Taping the blocks with tape . When assembling the structure dry, it is advisable to seal them with tape around the perimeter. This operation allows you to quickly and painlessly remove all traces of mastic from the floor after installation.
- Installation of fireplace blocks . First, the ends of the blocks are coated with mastic using a narrow spatula. In this case, you need to use a little mastic so that it does not protrude beyond the edges of the blocks. The supporting elements are also smeared and installed in their place, after which the external blocks can be installed. The installed blocks must be checked for alignment before the mastic hardens. During installation, it is worth taking masking tape and using it to secure the blocks so that they do not fall apart while the mastic is in a fresh state.
- Decoration . Since the standard factory kit does not include finishing elements, they will need to be purchased separately. Cladding a cast iron fireplace can easily be done with artificial stone, which is easy to install and looks good.
- Assembling the chimney duct . The technology for creating a chimney duct looks the same as in the previous case, but thanks to fusing the chimney into the wall, you can get by with a single-chamber duct that does not require division into sections. At the end of installation, openings are cut in the surfaces of the box for installing ventilation grilles.
Conclusion
There are many types of fireplace designs, and the complexity of their arrangement varies over a fairly wide range. The described installation technologies are quite simple, so you can safely use them when assembling a fireplace yourself. In any case, before installing a fireplace with your own hands, you need to carefully and in detail study each stage of this work, so as not to encounter unexpected difficulties in the process.
High-quality fireplace insert lining
Finishing of the fireboxes or portal is required to decorate the fireplace and in order to reduce the likelihood of burning upon contact with it. It is worth noting that it is not so easy to cover a cast iron firebox, and first you need to decide what the combustion chamber will be like.
A fireplace insert trimmed with brick will look great in the interior.
There is a certain classification according to:
- The material from which it is made;
- Finishing style;
- Shape, that is, square, triangular, horizontal, rectangular or arched;
- Width of the structure;
- Finishing.
A firebox lined with brick or aerated concrete blocks can be lined with natural stone, brick, tiles, artificial stone, plasterboard sheets, which can be covered with decorative plaster. If we compare the construction of fireclay bricks and steel sheet, then cast iron has high heat transfer. The operation of the fireboxes is carried out intensively and economically.
Maintenance and operation are much more convenient, and assembling a fireplace with such a firebox can be much easier than installing the most ordinary fireplace. Fireplaces with cast iron fireboxes are much more convenient, since if necessary, they can be moved to any other place or even transported, which cannot be said about monolithic and immovable brick structures.
