Strengths and weaknesses of Bubafoni
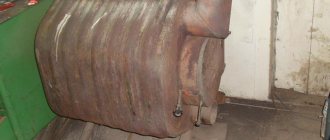
The pyrolysis stove has a number of positive qualities:
- Simplicity of design. Having welding skills and experience working with metal, building a stove will not be difficult.
- Universalism. Bubafonya is very unpretentious in terms of fuel: you can throw firewood, coal, sawdust, chips and other types of wood waste into it. The stove also copes well with pellets – inexpensive, environmentally friendly granules.
- Duration of work. The time it takes for one stack of firewood to burn out is almost a day: during this time, the stove regularly generates heat. This indicator may vary depending on the modification of the device, the volume of its firebox, the oxygen circulation rate, etc.
It is also worth mentioning the main disadvantages of Bubafoni:
- Low efficiency. The reason for this is uneven heating of the device body with sufficiently low heat transfer. More “advanced” pyrolysis furnaces are much more efficient in this regard: their efficiency often exceeds 90%.
- Inconvenient to clean. There is no ash pan as such in the design, so the remaining combustion products are removed through the top. Some modifications of the stove are equipped with a door at the bottom, which facilitates the procedure for removing ash and ash.
- Low aesthetics. The appearance of Bubafoni can hardly be called beautiful, so it is mainly used for heating utility rooms.
Vertical oven assembly process
A vertical oven is more difficult to manufacture, but requires less space for its installation and has better user qualities. The volume of the cylinder is used more rationally. The principle of operation of the furnace does not change, but is implemented with greater efficiency. In the vertical version, two doors are made - for loading fuel and for the ash tray. Grate bars made of reinforcement are welded between these doors.
In principle, the entire upper part of the furnace can be dedicated to loading fuel, which will ensure long-term operation on one load. However, the volume of the combustion chamber is often reduced to accommodate additional heat exchangers in the upper part. One of the interesting options is through metal pipes welded into the upper part of the gas cylinder, through which air is driven by a fan (necessarily heat-resistant).
The process of assembling a vertical stove from a cylinder
Such a device will significantly increase heat transfer and reduce the heating time of the room several times. If forced water circulation is established through the passage pipes, a water heating system can be installed.
Fireplace for gas heating at home
In terms of equipment costs, gas fireplaces are comparable to their electric or wood-burning counterparts. But gas fuel is much cheaper.
And, unlike firewood, gas heating using a fireplace in a country house means there are no problems with ash. Plus, you don’t have to constantly monitor the operation of the firebox and worry about chopping logs.
Fireplaces that convert gas into thermal energy are used in heating systems because... are not equipped with the devices necessary to service two circuits
According to the type of installation, gas fireplaces are:
- wall;
- island;
- built-in
In terms of their general design and internal contents (burners, automation, design of combustion chambers), they completely replicate gas boilers. In both cases, the technology for connecting to networks is identical. Differences exist only in the principle of heating the premises.
According to the principle of connecting and organizing the heating system, gas fireplaces are similar to floor-standing heating boilers
A hot water boiler is initially designed to heat water, and a regular fireplace is designed to convect air from the body and front screen, behind which fuel combustion occurs.
Features of operation, cleaning and repair
Here are a number of useful tips for proper and economical operation of the stove.
- The stove is installed 20-30 cm from the surface on which it stands. This is the optimal gap for heating the room.
- It is recommended to install a shut-off damper (view) in the chimney to save firewood by reducing/increasing natural draft.
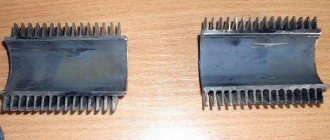
- You can create a radiator version by welding metal strips/plates to increase the heating area of the stove walls at a distance of 5-7 mm.
- It is not necessary to paint the stove, but if the aesthetic appearance is important, only heat-resistant paint should be used.
- The stove must have a concrete/brick/metal support underneath it for fire safety purposes.
- It is advisable to clean the chimney 1-2 times a year before and after the heating season. To reduce heat loss, the chimney is sometimes insulated with non-combustible materials.
- All chimney joints must be made as airtight as possible, or at least they should not let harmful combustion products and smoke into the garage.
- A prefabricated chimney is the optimal solution. The assembly should begin from its outer part, and not from the potbelly stove. In this case, its dismantling for maintenance, cleaning or repair will be more comfortable.
- In a garage made of brick or concrete, the shortest distance to the wall is not defined. But in any case, everything that is not fireproof must be at least half a meter away from the stove body.
- If the interior decoration of the floor, walls or ceiling of the garage is made of flammable materials, the floor must be covered with a sheet of non-combustible material. It should protrude from the firebox by 700-800 mm, the adjacent walls are covered with a non-flammable substance to a height exceeding the dimensions of the stove by at least half a meter.
The following video will clearly show you how to make the most convenient and functional version of a potbelly stove from a gas cylinder.
Preparation stage
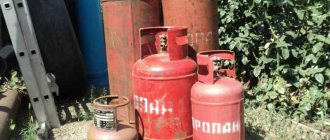
To be used as a housing for a furnace, the cylinder must meet the following number of parameters:
- The cylinder must be all-metal; composite materials are not suitable - they are not heat-resistant and are quite explosive;
- The volume of the gas cylinder must be at least 12 liters. Stoves made from smaller volume cylinders are not economical due to the low ratio of volume to surface area. The fuel in such a stove will not burn completely due to high heat loss. Cylinders with a volume of 12 to 27 liters are suitable for the manufacture of small stoves for heating small rooms from time to time. The most suitable volume of a gas cylinder is 50 liters. Stoves of this size are suitable for long-term operation and use any fuel efficiently;
Industrial pneumatic cylinders (the common size is 40 liters, smaller sizes are used for helium) are not suitable for converting them into any heating devices using household means. They have very thick walls, and they themselves are heavy and bulky; their shape is not suitable for use as a firebox - they are too elongated in length.
Making from a barrel
Among other options, you can use a barrel to make a homemade stove. For example, a sauna stove made from a 200-liter barrel would look good; let’s look at the stages of its manufacture:
- The first step is to determine the required height of the barrel using a grinder;
- Next, the inner walls of the barrel are lined with refractory bricks;
- You can limit the combustion chamber using metal sheets or mesh. Remember that the minimum height of the combustion chamber is 60 cm;
- Stones are laid out on a sheet of metal or mesh;
- Next, you should weld a lid to the barrel and install special doors for ease of use.
What materials are used
As mentioned earlier, to make a stove for a gas bath with your own hands, it is recommended to use fireclay (fireproof) brick, metal or stone. Stone stoves take much longer to heat up (4-5 hours), but the temperature is maintained 3-4 hours longer than metal stoves. Brick ones are characterized by similar indicators. In turn, metal units heat up faster (rooms up to 50 sq.m. completely warm up in 2.5-3 hours), but also cool faster.
At the same time, metal stoves are lighter than their brick counterparts and are easier to manufacture, and if the outside is lined with fireclay bricks, then there will be no fundamental difference between the 2 units.
Recommendations for masters
When making a stove from a cylinder with your own hands, you need to take into account several nuances. It is necessary to adhere to the basic recommendations and operating rules:
- the chimney should consist of broken sections, since all the heat will quickly escape through a short pipe;
- fuel can be anything - coal, firewood, wood waste, household waste;
- the efficiency increases with increasing chimney length, but straight and downward sections must be avoided;
- heat transfer increases if another container is placed inside the main body, but of a smaller size. This way you can increase draft and prevent smoke from entering the room.
More information about a wood-burning stove made from a gas cylinder:
Boiler thermal insulation
Boiler connection diagram.
Before installing the boiler, you need to make its own thermal insulation. This should be done to reduce heat loss and increase system efficiency. Using glue, wrap our boiler with insulating building material. You can also use foam for installation. You can also make thermal insulation using two containers of different sizes. In this option, we isolate the space between the containers we use. This insulation option increases the performance of the water heater and reduces energy costs.
By making a boiler with our own hands, we save a lot. The quality remains virtually unchanged.
Long burning stoves
The cylinder is used to create not only ordinary potbelly stoves, but also long-burning stoves. Today there are several ways to create such heaters. Bubafonya stoves are especially popular. The design has many advantages, among which it is worth highlighting:
- simple design;
- high efficiency;
- the ability to use various types of solid fuel.
If desired, the stove can be connected to a water heating system. The only drawback is the difficulty of maintenance. To get the ash, you need to turn the case over.
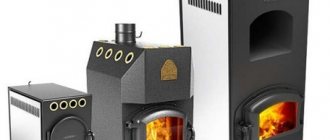
Ready-made long-burning boilers
Design
Furnaces of this type use top combustion. Thus, the wood burns from above and the flame spreads downwards. The principle of operation is explained very simply. The flame comes on slowly, but this does not reduce the heating efficiency. Within a few minutes after starting, the oven will begin to release a sufficient amount of thermal energy.
Often a vertical round furnace is made, which makes it possible to use a gas cylinder or barrel as a workpiece. The design has only a bottom
The secret of the furnace lies in the presence of an important element - the load. This is what ensures air circulation
The firebox has a simple design
The load is presented in the form of a circle with a pipe, which is welded in the center below. Corners or channels are welded from below along the radius. The structure is covered with a lid in which there is a hole for a load pipe. The chimney is installed on the wall closer to the top.
How does the stove work?
The body is filled with fuel and set on fire. A lid is placed on the pipe. When the wood is burning, install the lid. The pipe provides the air needed to maintain combustion.
The weight circle has a slightly smaller diameter than the furnace body. This ensures the movement of combustion products, which generate a lot of heat. To ensure sufficient air flow, the lid must be leak-proof.
The efficiency of the stove is ensured by the ignition of gases, which provide heat no less than firewood. Exhaust gases are discharged through the chimney. When the wood burns out, a new stack is carried out. After combustion, a small amount of ash remains, which must be removed after several deposits.
The operating principle is based on the movement of gases
Manufacturing
The oven is manufactured in the following sequence:
Rinse the container and cut off the top part. It will be used as a lid. Therefore, cut off a few centimeters from the walls. File the cut areas.
It is important to wash the bottle thoroughly
- Remove the valve and adjust the hole. A pipe will pass through it. Weld a metal strip around the perimeter of the lid, which will ensure reliable fastening to the stove.
- Cut a circle from a metal sheet, the diameter of which will be slightly smaller than the diameter of the cylinder. File the edges.
The balloon is cut very carefully
- Weld a pipe to the circle and make a hole. Secure the corners that will not reach the edge. The welding must be well done. This will determine how efficiently the air in the furnace chamber will flow.
- Cut a hole on the top of the body and secure the iron chimney. Check the seam for tightness.
At the final stage, handles are welded to the body and lid. All that remains is to assemble the structure and test it in operation.
The valve is removed as the pipe will pass through it
Improvements
We are talking about the introduction of modern techniques that ensure ease of use and maintenance of the structure. The main disadvantage is that for cleaning you need to turn the structure over. Therefore, an ash pan and grates are additionally made. The door must be airtight to prevent unnecessary suction.
The improvement also affected the corners that are welded to the load. It is recommended to use curved strips instead. Thanks to this shape and quantity (6-8 pcs.), uniform air distribution is ensured.
Modern models of fireboxes are somewhat improved
Bubafonya with a water jacket
Many home craftsmen make this stove with a water circuit, turning it into a full-fledged long-burning boiler for water heating at home. If you want to follow their example, we suggest studying the drawing of a heating unit made from a pipe with a diameter of 40 cm:
During assembly you will encounter one difficult moment. At home, it is impossible to roll a steel sheet 2 mm thick and give it a cylindrical shape; rollers are needed. There are several ways out - take a larger diameter pipe or bend the metal at different angles. How you can make a square and hexagonal water jacket for Bubafoni is shown in the diagram:
The rest of the work is done as follows:
- Cut openings for the doors in the body and install grates as described in the previous section. Make a piston with air distributors.
- Weld the door frames and water jacket hermetically. Do the same with the chimney pipe.
- Install fittings with a diameter of 40 mm to connect the water heating system.
- Test the Bubafoni water circuit for leaks, then wrap it in basalt fiber insulation and cover it with painted thin metal.
Reference. The resulting top-burning boiler is capable of operating not only on wood, coal and sawdust, but also on waste oil supplied through the air duct by drip. How to organize this, watch the video:
Potbelly stove in the garage: pros and cons
Car enthusiasts install a homemade potbelly stove in the garage for several reasons:
- the stove heats the room in winter;
- you can cook food or heat a kettle on a potbelly stove;
- With a design approach, a homemade heating device can become a decoration for the garage.
We advise you to read in more detail why a potbelly stove smokes and find answers to your questions.
A potbelly stove has a number of advantages compared to other heating devices:
- For kindling, you can use a variety of fuels - firewood, coals, construction waste, petroleum products, waste oil, etc.
- The main advantage of a potbelly stove is the speed of heating the room. Thanks to its high efficiency and power, the stove will heat a garage of 50-60 square meters. m. in 15-20 minutes.
- The stove distributes heat evenly regardless of where it is located.
- A potbelly stove is an economical heating device. For example, heating a garage with a potbelly stove will cost several times less than with an electric heater.
- An additional advantage of a potbelly stove in the garage is the ability to cook or warm up food. When creating a stove yourself, it is enough to attach a metal cooking surface to its upper part.
- A homemade stove will cost the car owner almost free if there is an unnecessary barrel, sheet of metal and pipe lying around in the garage.
We previously wrote an article about installing a potbelly stove for heating and recommended adding it to your bookmarks.
The potbelly stove will fit harmoniously into the interior of any garage. In addition to the heating function, the heating device has a “cooking mode”. A hob is installed at the top of the stove, where you can heat a kettle or cook food.
The disadvantages of a potbelly stove in the garage are:
- the need to install a chimney in the garage;
- periodic cleaning of the chimney;
- the need for constant fuel supply;
- inability to accumulate heat.
Self-production of a balloon furnace
We take a medium or large cylinder, but it should not be too small. In addition, we will need:
- a small curved pipe (diameter approximately 15 cm);
- a long pipe of the same diameter for making a chimney;
- material for making the door handle;
- door hinges;
- box needed for making a ventilation hole;
- long rod to regulate air flow.
Tools:
- angle grinder;
- welding machine.
The furnace manufacturing process begins with emptying the gas cylinder:
- To do this, in a well-ventilated place, open the cylinder valve and let the gas escape. But that is not all. Then you need to unscrew the valve and release the gas. Then you need to fill the cylinder with water, which will finally displace the gas from the cylinder.
- Next, cut off the top of the balloon. The resulting edges need to be sanded. We mark a hole in the side for the door and on the opposite side for the chimney. Next you need to cut out the door and attach it in place on the hinges. It will be closed using a special latch. The cut is made using an angle grinder.
- Next, a hole for the chimney is made in the same way and a pipe that was prepared in advance is welded. The chimney pipe is made by welding two pieces of pipe: a curved one and a long one.
- Next, a third hole is made - the air duct. It is made below the door. This is a rectangular hole 5 by 5 centimeters. A rectangular box without a lid is welded there. There, a piece of metal is welded onto the central axis. By rotating it using a small lever, you can adjust the airflow for the oven.
- In order to get rid of gaps on the door, small steel strips can be welded around the perimeter. This completes the furnace manufacturing process.
A little more about the chimney
It is worth noting here that thanks to the design of the stove, which consists of two sections, a chimney pipe that is too long will not “steal” heat - an increase in draft will only contribute to increased combustion and an increase in temperature. The main thing is to secure it so that the wind does not uproot it. But it’s worth thinking about the deflector (protective cap). If there is snow or a blizzard at night, the pipe may become completely clogged. In this case, lighting a potbelly stove will be quite problematic. In the photo below you can see that I raised the chimney quite high. However, when this photo was taken, the deflector had not yet been installed.
This is the chimney pipe I got
Making a stove from a gas cylinder with your own hands
In this case, it is necessary to select the orientation of the stove position (horizontal or vertical).
The difference between these options is the purpose of use.
- A horizontal stove is usually used more for cooking.
- A vertically located stove is for heating due to greater draft and space saving.
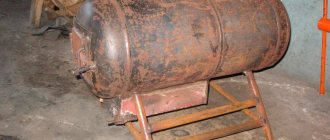
Manufacturing of horizontal version:
- the upper part of the cylinder, where the valve is located, is cut off to install the door (the photo shows another option, where instead of cutting off the upper part, a ready-made cast iron door is used);
- holes for the grate are drilled in the wall of the cylinder, or fasteners are welded inside to install a removable grate;
- supports/legs/runners, etc. are attached from below;
- if the grate is drilled into the cylinder body, an ash pan made of sheet metal is attached to the bottom;
- an adapter for the chimney is welded into the wall of the cylinder as close to the bottom as possible;
- the chimney pipe must contain a so-called “elbow”.
Manufacturing a vertical version:
- cut off the valve and weld a 10-15 cm chimney pipe in its place;
- Make a hole 5-7 cm above the bottom for the blower;
- another 5-7 cm are retreated from it and an opening for the door is cut out;
- inside the container, in the opening between them, a grate is inserted, or fasteners for a removable grate are welded;
- install doors with latches and supports/legs/runners.
Potbelly stoves - proven and simple designs
Potbelly stoves were a hit of the 20s of the last century. At that time, these stoves competed with brick stoves and were installed everywhere, even in apartments. Later, with the advent of centralized heating, they lost their relevance, but are used in garages, dachas, and for heating utility or outbuildings.
Sheet metal
Potbelly stoves from a cylinder, barrel or pipe
The most suitable material for making a potbelly stove for a garage is propane cylinders or a pipe with a thick wall. Barrels are also suitable, but you need to look for ones that are not very large in volume and have a thick wall. In any option, the minimum wall thickness is 2-3 mm, the optimal is 5 mm. Such a stove will serve for many years.
By design they are vertical and horizontal. It is more convenient to burn horizontally with firewood - longer logs will fit. It’s easier to make one extended upward, but the firebox is small in size, so you’ll have to cut the wood finely.
A potbelly stove for a garage can be made from a cylinder or pipe with a thick wall
Vertical
First, how to make a vertical stove for a garage from a cylinder or pipe. Divide the selected segment into two unequal parts. Below is a smaller one for collecting ash, above is the main one for storing firewood. The following is the order of work:
- Cut out the doors. Small at the bottom, solid at the top. We use the cut pieces as doors, so we don’t throw them away.
- We weld the grates in the chosen place. Usually this is steel reinforcement cut into pieces of the required length with a thickness of 12-16 mm. The reinforcement installation step is about 2 cm.
- Weld the bottom if there is none.
- We cut out a hole in the lid for the chimney, weld a strip of metal about 7-10 cm high. It is better to make the outer diameter of the resulting pipe fit standard chimneys. Then there will be no problems with the installation of the chimney.
- We weld the lid with the welded pipe into place.
- Using welding, we attach the locks and hinges to the cut-out door pieces and install it all in place. As a rule, potbelly stoves are not airtight, so there is no need to make seals. But if desired, you can weld a strip of metal 1.5-2 cm wide around the perimeter of the doors. Its protruding part will cover a small gap around the perimeter.
Overall, that's it. All that remains is to assemble the chimney and you can test a new stove for the garage.
Horizontal
If the housing is located horizontally, the ash box is usually welded from below. It can be welded to the required dimensions from sheet steel or a piece of channel of a suitable size can be used. Holes are made in the part of the body that will be directed downwards. It’s better to cut something like grate bars.
How to make a potbelly stove for a garage from a gas cylinder
Then in the upper part of the body we make a pipe for the chimney. To do this, you can weld a cut piece from a pipe of a suitable diameter. After the piece of pipe is installed and the seam is checked, the metal inside the ring is cut out.
Next you can make the legs. The best fit is pieces of a corner, to which small pieces of metal are attached from below so that they stand stable.
The next step is installing the doors. You can cut a piece of metal onto the ash pan, attach hinges and a lock. There are no special problems here. The gaps around the edges do not interfere - combustion air will flow through them.
There will be no difficulties if you are making a door from metal - welding the hinges is not a problem. Only here, in order to be able to at least slightly regulate the combustion, the door needs to be made a little larger - so that the perimeter of the opening is closed.
How to install stove casting on a metal stove
It is problematic to install furnace casting. Suddenly someone wants to have not a steel door, but a cast iron one. Then you need to weld a frame from a steel corner, attach the casting to it with bolts, and weld this entire structure to the body.
From two barrels
Anyone who has used a potbelly stove knows that very hard radiation comes from its body. Often the walls become heated to a red glow. Then it is impossible to be near her. The problem is solved with an interesting design: two barrels of different diameters, inserted one into the other. The gaps between the walls are filled with pebbles, clay mixed with sand (calcined over a fire, then filled in only after it has cooled). The inner barrel acts as a firebox, and the outer one is just the body.
This stove will take longer to heat up. It will not immediately begin to give off heat, but it will be more comfortable in the garage and after the fuel burns out, it will warm the room for another couple of hours - releasing the heat accumulated in the bookmark.
https://youtube.com/watch?v=PEWZxL2ebXE
We improve heat transfer
The biggest problem with potbelly stoves: inefficient heat consumption. Most of it literally flies into the chimney with flue gases. This disadvantage is effectively combated in upper combustion furnaces with afterburning of flue gases, such as the Bubafonya furnace (also, by the way, can be made from a gas cylinder) and Slobozhanka.
A variant of a potbelly stove made from propane cylinders with secondary combustion - the efficiency is higher than that of “conventional” models.
Another way to improve heat transfer is to make the chimney longer, thereby increasing the amount of heat that will remain in the room. When designing such a broken chimney, it is better to avoid horizontal sections, and even more so areas with a negative slope.
This gas cylinder stove runs on wood. We increased heat transfer by making a long broken chimney
Another option to use the heat of flue gases is to weld a vertical cylinder-smoke pipe to a horizontally located cylinder-housing. Due to the larger area, heat transfer will be higher. You just need to create good draft so that the smoke does not go into the room.
Such a potbelly stove made from a gas cylinder will warm up the room faster
You can do it the way they do in sauna stoves: put a mesh around a metal pipe and pour stones into it. They will take heat from the pipe and then release it into the room. But. Firstly, until the stones heat up, the air will warm up slowly. Secondly, not all stones are suitable, but only the round ones that are along the rivers. Moreover, they are uniformly colored without inclusions. Others cannot be filled in: they can explode from high temperatures no worse than a fragmentation shell, or emit radon, which is very harmful in significant concentrations.
The solution can be found at sauna stoves: build a grid for stones on the pipe
But this solution also has advantages: firstly, the pipe will not burn. The stones produce even heat. Secondly, after the furnace goes out, they will maintain the temperature in the room.
Often you need to quickly heat a room. To do this, you can use a regular fan that will blow through the body and/or pipe of the furnace. But the same idea can be implemented with a stationary version: weld through pipes into the potbelly stove cylinder in the upper part. On one side, attach a fan to them (heat-resistant, preferably with several speeds, so that you can regulate the temperature).
Pipes are welded into the upper part of the cylinder and pass through. On one side, a fan is attached to them, which drives air through them, quickly warming up the room.
Another option that allows you to achieve active air movement along the walls of the case and not use a fan: make a casing around the case at a distance of 2-3 cm, but not solid, but with holes at the bottom and top. Buleryan stoves or metal sauna stoves work on this principle.
One of the options for such a casing around a horizontally located cylinder is visible in the photo below. Through the gaps at the bottom, cold air located near the floor is sucked in. Passing along the hot body, it heats up and comes out from above.
This is a stove lying on its side: the casing is not solid, there are decent gaps at the bottom and top
The principle is not new, but it is no less effective. Look at the photo below to see what the finished stove looks like with such a casing.
Potbelly stove with improved convection around the body for quick heating of the room
Here is another implemented casing, around a potbelly stove made from a horizontally located cylinder
Note the non-standard door fastening
This shiny sheet improves room heating
A homemade boiler from a gas cylinder for water heating can be made using the same principle: weld a water jacket around the cylinder and connect it to the radiators. Just don’t forget that the system must have an expansion tank with a volume of 10% of the total displacement.
You now know how to make a potbelly stove from a gas cylinder and how to improve it. Watch another video about an interesting option for a combined stove for a summer house or garage made of brick and a gas cylinder.
https://youtube.com/watch?v=SMVD6li2QI4
Other stove options
Of course, not everyone chooses potbelly stoves. Many car owners, in search of the most economical ways to heat their garage in winter, opt for options that run on exhaust gas or from gas cylinders. Despite the fact that the operation scheme of such furnaces is approximately similar, we will still dwell in more detail on the alternatives so that you can complete the project yourself without any help from specialists.
On used oil
The main difference between this design and a standard potbelly stove is that it consists of 2 chambers. They are connected to each other by a metal pipe with holes: it is from them that the flame comes out.
- lower chamber - designed for spent fuel, here it burns and turns into gas;
- the upper chamber is for mixing the resulting gas with air; the more optimal the design, the better the heat transfer.
Operating procedure:
- we take sheet metal and give it the desired configuration, you can skip this step if you have a ready-made round or rectangular metal container;
- we make a lower section out of it, into which spent fuel is poured, and make a damper so that the air entering the chamber can be regulated;
- we attach legs from the bottom made of thick wire or any available material - they will ensure the stability of the stove;
- We insert a perforated pipe with thick metal walls into the hole from above - it serves as a support for the upper compartment and is constantly exposed to high temperatures, so it must be reliable;
- to make the upper chamber, we take a cylindrical metal blank;
- the final touch is the chimney, installed on top.
Long burning
Such a stove can be easily made from an old gas cylinder. Or a metal barrel with strong walls. Required conditions:
- cylindrical shape;
- vertical arrangement.
To make it, you need to weld together a metal circle that acts as a weight and a small pipe. They are placed directly into the workpiece and ensure uniform combustion of fuel due to a stable air supply.
A removable lid should be installed on top, and the smoke will come out through a pipe from the top side. It’s good if you can weld the handles - convenience!
Firewood, sawdust and any other type of solid fuel are placed both in the primary combustion chamber - the very bottom of the cylinder, and directly on a metal circle. Such stoves are called long-burning precisely because the wood used for kindling slowly smolders and releases gas, which burns in the upper part, providing the required level of heat.
Brick
Perhaps the most labor-intensive and not always justified option, which captivates with its aesthetic appearance and high efficiency.
In order to give the structure stability and increase fire safety, it is necessary to build a foundation.
Brickwork is also carried out according to a special scheme in order to increase strength to the maximum level. Clay mortar is used for gluing, and the seams between the fragments reach 1.5 cm.
You will also have to make a combustion and blower door. For ash you need to install a grate. Don't forget about the cast iron panel: solid fuel will be placed on it. The final point seems to be the execution of the valve, but this is a trifle in comparison with what remains to be done before.
Drawings of projects already tested in practice will help you.
How to calculate the consumption of natural and liquefied gas
The main indicator on which the calculation depends is the area of the room and the power consumption of the equipment. Outdoor temperature readings taken during the coldest time are also taken into account.
The calculated figure is ideally always 35-50% higher than actually consumed, since the air temperature always changes up or down. When choosing ready-made equipment, this fact should be taken into account and instead of, for example, 100 W of energy, you can take 50.
The amount of natural gas is calculated using the formula: L = Q / (qH x 0.92), where:
- L – calculated volume of fuel (1 cubic meter per hour);
- Q – heating power, kW;
- qН – maximum fuel combustion power, for natural gas 10.175 kW/m3;
- 0.92 – efficiency of a gas boiler/furnace.
On average, for heating a room with an area of 100 sq.m. the calculation will look like this: 5 / (10.175 x 0.92) = 0.53 m3 / h, which corresponds to the consumption of natural gas per unit of time (hour).
Based on such indicators, it is possible to determine the nominal gas consumption in any room for a certain period of time. Since the bathhouse is not used daily or around the clock, this consumption will be less.
Bottled (liquefied) gas is more expensive and its consumption will have to be calculated not by liters, like natural gas, but by kilograms. The heat of combustion of gas remains the same - 10.175 kW/m3 = 12.8 kW/kg, heating power - 5. We get: 5 / (12.8 x 0.92) = 0.42 kg/h, which corresponds to 0.78 liters per hour. Considering that 1 liter of bottled gas weighs 540 mg. Based on the approximate number of days and hours of operation of the bath, you can calculate the required volume.
In order to make a stove for a gas bath with your own hands, you need to decide on three main parameters:
- Material;
- What kind of gas burner will it be?
- Placement of the container – built-in or remote tank.
Now about each of them in more detail.
Drawing up a drawing
The main proportion in the process of making a homemade Bubafonya stove from a gas cylinder is the mathematical ratio of the parameter of the internal diameter of the body and its height. It should be between three and five to one. The optimal diameter is from 30 to 80 cm.
Making the diameter of the stove body less than 30 cm is not effective, since oxygen will circulate too quickly through the combustion chamber without fully reacting with the wood. This leads to a noticeable decrease in the efficiency of the device. In chambers with a diameter of more than 80 cm, another problem arises - in it, the firewood on the edge burns very slowly, and in the center - faster. As the fuel burns out, a hole appears into which the piston descends. As a result, the flame gradually fades away. In the drawing, it is more convenient to denote the diameter by the letter D, and the height by H.
Balloon oven options
There are several main options for such designs:
The simplest of them is an ordinary potbelly stove. It is customary to use a 12-liter or 27-liter cylinder for it. For efficient heating, it is advisable to use a horizontal elbow for the chimney. The most difficult part is attaching the door for the opening through which the fuel is loaded. Convenient for storage in a city apartment. It is short-lived due to the gradual burning out of the walls of the cylinder.
Special long stoves. They work as long-burning stoves. The basic principle of operation is that the fuel burns continuously with only a small amount of fuel. Pyrolysis products are then formed, which burn in a separate combustion chamber. To ensure combustion efficiency, it makes sense to preheat the air that enters the furnace. The oil garage stove requires vertical installation. Used engine oil is used as fuel. Adjusting the combustion temperature The design looks something like this.
"Rocket". Its name comes from the fact that it sometimes makes a noise similar to the roar of rocket engines. However, this can happen if the oven is not adjusted. A properly functioning structure makes only a quiet rustling sound. Its design is not particularly complicated and a 50 liter gas cylinder is very convenient for its manufacture. This type has many important advantages. They heat the room well, are economical to use, and relatively simple to manufacture. They can be adapted to heat a bed. But, on the other hand, they must be done accurately and carefully. If the furnace is poorly adjusted, it will be ineffective. The fuel is firewood (usually thinly chopped chips or branches). It comes through a pipe from above. Air enters through the hole at the bottom left. Combustion occurs in the lower pipe. The blowing here is very strong. The combustion products rise upward and exit through the pipe on the right, heating the room. Let us tell you what a stove called “bubafonya” is. It uses a special principle of working with pyrolysis products. The combustion chamber is located vertically. Pyrolysis products are contained by a special metal “pancake”, which limits the combustion space from above. The efficiency of this design can reach eighty-five percent. This stove is not designed to use wet fuel. Humidity should not exceed 12 percent. The stove is very economical in fuel consumption. Convenient to use for heating garages or other utility rooms.
A rocket stove can be made not only using gas cylinders, but also using barrels, cans and other means.
Selection principles
When choosing, you need to consider a number of factors:
Oven dimensions. Its dimensions should not interfere with free movement around the bath premises
It is recommended to choose a design with an external combustion chamber. Fuel consumption. If there is no warm water in the bathhouse, you need to choose a model with a water tank. If you want to buy a universal model, it is recommended to pay attention to units powered by gas or solid fuel. A special mechanism is installed inside the structure, which divides the combustion chamber into two parts for different types of fuel.
The volume of the water tank depends on its location. If it is built-in, the capacity will be small. If it is external, the volume will be greater.
Selection of oven
Advantages and disadvantages
Advantages:
- Small size. The design does not have a large combustion chamber as in stoves that run on solid fuel.
- Furnace equipment allows you to set different temperature conditions. Thanks to this, you can set the optimal temperature and maintain it for a long time.
- If you don’t need to heat the sauna, you can simply heat the water in a mounted or built-in tank.
- Fast heating.
- You can connect gas cylinders if it is impossible to connect a pipe with a central gas supply.
- Fuel efficiency.
- Universal models can use 2–3 types of fuel.
Flaws:
- The risk of explosion is higher than that of equipment operating on other types of fuel.
- It is necessary to constantly change gas cylinders or connect the stove to the central gas supply system.
If there are no problems with the gas supply, there are fewer disadvantages.
Popular models and prices
Popular models:
- Furnace "P-20GT". Power - 20 kW. Suitable for heating steam rooms with a volume of up to 22 m3. There are fastenings for installing a water tank.
- KUTKIN Standard G-2.0. Model for heating rooms up to 16 m3.
- Termofor Taimyr INOX. Suitable for heating steam rooms with a volume of up to 18 m3. The design has two heaters - internal and external.
- Termofor Urengoy Carbon. Made from high strength steel. Suitable for heating rooms up to 12 m3.
- Heat-Malyutkagaz. Equipment power - 16 kW. Designed for heating steam rooms with a volume of up to 12 m3.
The average price of gas stoves is 16,000 rubles.
Types of furnaces
Requirements
If the oven is used for cooking food, then one important problem arises. There must be a surface where food will be placed. At the same time, the heat flow in this place should be sufficient for high-quality cooking.
If, first of all, the tasks of heating the room are important, then other features come to the fore. Here the following are of particular importance:
- long burning;
- fuel efficiency;
- high requirements for fire safety.
The last requirement plays a vital role in the operation of various types of furnaces. However, when heating, the stove, in fact, can be left without direct supervision for a long time. This greatly increases the risk of an accidental fire. Another important issue is the possibility of legalizing a self-made stove. This process is not simple or easy.
