Cleaver, its types, characteristics, recommendations for choosing this tool and rating of popular models.
Considering that the majority of the population of developed countries lives in cities, there are people who have no idea how firewood is collected for the winter.
In fact, in order to simply warm up the bathhouse, you need to prepare a decent amount of wood fuel, which is impossible with an ax.
And although there is an opinion that an ax is the main tool for preparing firewood, in fact it is intended for cutting down trees.
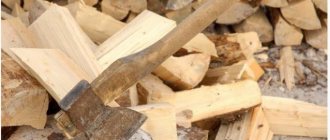
But the cleaver, the purpose of which is hidden in the name, is used to split logs and sawn tree trunks, turning them into logs in one movement.
Main characteristics
The cleaver is not an ax in the full sense, but it is directly related to it.
A hand tool has an ax handle on which a wedge-shaped working part (head) is mounted without sharp sharpening.
The cleaver is designed for a single blow, after which the log will split into pieces.
What is important here is not the sharpening of the blade, but the force of the blow.
Externally, the cleaver resembles more a sledgehammer than a classic axe.
One side of the head is flat (butt), and the opposite is wedge-shaped, made in the form of a double-sided cut at an angle of 40 - 50 degrees.
The weight of the cleaver reaches 5 kg, which allows it to cope even with large logs.
The meaning of this design lies not in cutting through the wood fibers, but in their delamination.
The thickness and length of the ax depends, first of all, on the size of the cleaver's head.
At the same time, the size of the handle directly affects the efficiency of work, since a long ax paired with a heavy head concentrates a decent impact force on a small area.
Blade
As already mentioned, the blade of the cleaver does not have a sharp edge.
Depending on the shape, wedge-shaped (wedge-shaped) and eared options are distinguished.
The second type, as the summer residents themselves note, is much inferior to the wedge-shaped ax in terms of ease of use.
It is noted that the head, due to the presence of “ears” set apart, often gets stuck in logs, after which it is difficult to remove.
The manufacturers themselves respond to this claim by saying that this design is designed to work with dry wood.
In reality, the owners of a private house use a tool to split raw, recently cut trunks, which is incorrect.
The piercing edge can be straight or rounded.
The first version of the cleaver is suitable for working with large dry logs.
The rounded blade has a larger size, which allows it to cope with resinous and damp wood.
The cleaver's head is made using the following methods:
• Stamping
Medium carbon steel is used.
In most cases, stamped cleavers weigh more than 2.5 kg, and their center of gravity is concentrated in the head. This allows you to use such a tool for working with large logs.
• Casting
The blade is made of hardened steel and is usually smaller in size compared to the option mentioned above.
They come in both straight and rounded.
Cast axes are more reminiscent of an axe.
Handle
The wooden ax handle is a classic.
It has always been used and will remain relevant for decades to come.
Unlike metal, wood has the beneficial property of absorbing shock and vibration.
In addition, wooden handles are relatively cheap and easy to manufacture.
All this affects the cost of the instrument for the better.
However, among the disadvantages it is worth noting the fact that the ax handle, if the technique of working with the cleaver is incorrect, splits.
An alternative to wood is fiberglass, a composite material with good strength properties.
Some models are produced with a rubberized handle, thereby increasing ease of use.
At the same time, it is lightweight, which allows you to shift the center of gravity of the instrument towards the head.
Fiberglass handle is a suitable solution for heavy cleavers.
What types of wood splitters are there?
All wood splitters are divided into two types:
- vertical,
- horizontal.
Of course, both are designed for chopping wood. Horizontal log splitters have a horizontal frame on which the log is placed. There are two options: either the cleaver moves towards the log, or vice versa - the log is directed towards the knives.
The bed is not high above the ground. This means that you do not need to make any serious effort to lift the workpiece to a height. The operator himself can adjust the height of the machine to suit his height. For safety, the knife is always located in the opposite direction from the worker.
Vertical wood splitters have a frame that is installed vertically. The log is fixed, and the cleaver moves down onto the log. Here it must be said that the efficiency of these machines is much higher. The only drawback is emergency situations when working with crooked logs. There are cleavers that are made of hardened steel. They cut the log in half or into four parts.
Operation of a vertical wood splitter: video of splitting wood
https://youtube.com/watch?v=Ufxx0WLTRcE
Each wood splitter has specific dimensions and parameters. So, you can install only a certain size and length of logs. Household wood splitters allow you to split logs no more than 50 centimeters in length. But vertical industrial devices can easily split logs up to 140 centimeters in length. The same situation occurs with width. Home wood splitters work with 30-centimeter logs, and industrial ones - up to 70 centimeters. It should be noted that vertical wood splitters have twice the productivity.
Different types of wood are used for harvesting. Consequently, wood splitters have to exert different amounts of effort. In order to split soft trees, a press force of five tons is enough. Machines with a horizontal bed can handle this type of work. If you have to split dense tree species, you need to take a force of up to nine tons
At the same time, pay attention to the material from which the cleaver is made
Depending on how much wood will have to be chopped, one or another type of device is used. If you need to prepare firewood for a fireplace, stove or bathhouse, then a wood splitter with a horizontal frame is sufficient. An engine of 2.5 kilowatts and an effort of 5 tons will be sufficient. Vertical wood splitters are used for work in enterprises. They will have to work there for several hours. At the same time, a large amount of firewood is processed. The force is up to 25 tons.
Electric wood splitter AL-KO KHS: horizontal feed
https://youtube.com/watch?v=c__bkGWPN-I
In order to use wood splitters at home or in the country with your own hands, you need to buy equipment with a horizontal frame and a force of up to five tons. At the same time, they can be connected to a regular electrical network. In any case, it is necessary to consult with specialists about the chosen technique.
Main types of cleavers
Hand cleavers can be divided into types depending on the size and shape of the head.
Modern instruments, due to their design features, can have several types of features at the same time:
Big cleaver
Large massive head and long handle.
Weight can reach 5kg.
Mini cleaver
It weighs from 1.5 kg and has a relatively short handle, up to 60 cm, which limits the scope of use of this tool.
Not suitable for working with large logs, and for thin branches it is preferable to use an ordinary ax.
“Iron”
A classic of domestic production.
A large tool with a hole for the handle located close to the butt.
Sledgehammer
A heavy tool designed for working with large logs.
The presence of a striking butt allows the tool to be used for driving in wedges.
Wedge-shaped
It has straight bevels and looks like a wedge.
Eared
Thin blade, like an ordinary axe.
At the same time, there are special “ears” on the head, designed to sharply expand the crack during an impact.
Chinese
The Chinese cleaver deserves special mention.
It is distinguished by a narrow nose, which, in fact, is a wedge with a handle.
It gets stuck into wood the first time, but often gets stuck tightly.
You can remove the head by hitting the butt on a log or by rocking.
As a result, you can observe a burst eye or a violation of the attachment of the ax to the cleaver.
Assembling the screw and hydraulic apparatus
A suitable engine with a speed of 500 rpm and a power of 1.5-2 kW will greatly simplify the design of the cleaver. This electric motor connects directly to the cone; there is no need to install a belt drive. If a unit with these characteristics cannot be found, prepare the following set of materials:
- 2 single-groove pulleys of calculated diameter, reducing the shaft rotation speed to 500 rpm;
- V-belt;
- bearing blocks and driven shaft;
- screw splitting cone made according to the drawing;
- profile pipes or other rolled products for making a table;
- electric motor mounting plate made of sheet 8-10 mm thick;
- metal 2-3 mm on the tabletop;
- mounting bolts and nuts.
Recommendation. Do not order a screw “carrot” from a turner until you know the diameter of the driven shaft or the main shaft of the engine. The thread of the working cone is made with two starts, the steel grade is St35...St45 (high-carbon).
You need to weld a table from metal profiles and fasten a sheet of metal on top. The motor is mounted on a plate under the tabletop, the secondary shaft with a cone is on top. The pulleys are placed on keys or fixed with locking screws. When connecting the power cable, be sure to ground the unit.
Important point. When chopping wood with a screw device, you must correctly move the block towards the tool - strictly in a vertical position. If you lay it on its side, one log will get stuck between the cone and the countertop.
On the stationary version, the oil station is located separately
The assembly of a hydraulic splitter differs in the installation of equipment. Instead of an electric motor and a carrot, you need to install a blade, a pusher plate and a working cylinder. Please note that the remaining components can be placed separately by connecting high-pressure hoses from the hydraulic pump to the cylinder.
The manufacturing process of a hydraulic unit is shown in very detail and clearly in the video:
Rules for working as a cleaver
Having even the most expensive branded cleaver at hand, you will not be able to work effectively without experience.
However, at first, the following tips will help you cope with this problem to some extent:
• The widest log with a flat cutting area serves as a stand for logs. Installed in a stable vertical position.
• To make the work easier, you need to wait until the freshly sawn logs dry out. Otherwise, the wood will be viscous, and this will lead to jamming of the tool. In winter, it is better to let the raw material freeze. So it will become loose.
• For rational fuel consumption, it is better to chop the lumps into pieces with a diameter of about 10 cm.
• It may not be possible to split large logs in half the first time. To save time, it is better to chop off pieces along the edge and then cut the “core”.
• If there is a crack in the log, it is advisable to hit it with a cleaver. When working with knotty material, it is necessary to hit the tool either along one of the branches or between them.
• An old cleaver with a wooden handle must first be soaked in water. The ax handle at the junction with the head will swell and securely lock, preventing the metal part from falling off during operation.
• The handle of the tool always has an extension at its end. This is done so that the hands do not slip when struck. You should take the tool right at the extension in order to achieve maximum impact force using the lever.
A tool stuck in the deck can be removed in several ways:
• Loosen.
• Hit the butt with a sledgehammer, which will cause the wood to split.
• Swing the cleaver together with the block, turn the tool in the air and hit the butt on the log stand.
Due to the enormous impact force, working with a cleaver carries the risk of serious injury.
By following the simplest rules, you can significantly reduce or eliminate the risk:
• The block of wood must be placed on the edge of the deck on the far side. If you miss, the instrument will stick into the stand.
• You need to hold the cleaver by the edge of the handle, keeping your legs wide apart. Again, if you miss, the blade will go into the ground, not into your leg.
• To avoid shock absorption by the deck - stand, it must be installed on a hard surface (asphalt, concrete).
• The work area must be clear of foreign objects. It is better to immediately remove already split logs from under your feet.
• The presence of people in the immediate vicinity of the workplace is unacceptable, since wood chips flying in all directions are dangerous.
Criterias of choice
Before you start leafing through brochures and browsing the websites of companies offering equipment, you should determine the following key selection parameters:
- need for firewood;
- quality of the forest (what species, straight, knotty, dry, damp);
- physical capabilities of the person who will work;
- reasonable purchase price;
- the amount of operating costs during service.
The choice of cleaver depends on the type of firewood and physical abilities. So, which cleaver to choose for chopping firewood? If, based on the results of these assessments, it is decided that an ordinary hand cleaver will be sufficient, then you need to hold it in your hand and wave it several times. Please note that you will have more than one hundred such swings. To chop dry, thin logs without knots, an ordinary wedge cleaver weighing 1.5-2 kg will be sufficient.
If there are damp and knotty logs ahead, then it is better to choose a heavier ax with a long handle with additional protrusions in front of the butt, weighing 3-5 kg. Of course, it must be within the capabilities of the worker.
The handle is very important. it should be smooth, without burrs or roughness. Heels of logs for the fireplace or Saturday barbecue can be split with a regular birch handle. For large volumes, a plastic handle with rubber pads is better suited. It will better dampen vibrations and shocks that are inevitable when splitting dense, damp and knotty wood.
If the performance of a manual wood splitter is not satisfactory, then when choosing a mechanized model, you must take into account the following points:
- A place to work. A flat area is needed, preferably under a canopy from bad weather, to place a mountain of logs, the unit itself, and the logs chopped during operation.
- For vertical devices, the height of the room or shed should allow the longest logs to be laid freely.
- If the unit will operate outdoors, you will need a place to store it.
- The capabilities of the power supply network must match the power consumption of the drive.
- For complex devices, you need to immediately decide who and where will service and repair them if necessary.
And finally, a very important factor for deciding which cleaver to choose is the reputation of the manufacturer. An unnamed Chinese machine is unlikely to last long, and its repair may cost more than a new unit from a good brand.
How to choose a cleaver
A cleaver is not a universal tool.
For this reason, there is simply no general advice on choosing the best model.
It is necessary to build on the shape of the blade, the length of the handle and the weight of the head.
The kinetics of the impact directly depends on them.
However, before you buy a specific cleaver you like, which in theory will perform the task, you need to check it for mechanical damage and absence of cracks.
The ax handle should sit tightly in the head; any play is unacceptable.
The handle should be comfortable and long enough, well polished.
Some models come with a case that will ensure safe storage and transportation of the tool.
It must cover the blade and sit securely.
Do-it-yourself ax sharpening
Overheating of the metal leads to a decrease in hardness exactly where it is most needed, near the cutting edge, therefore, when sharpening an ax on an electric sharpener, you need to be extremely careful.
When starting to sharpen an ax, you should not rush, you should not take on this work tired or in an irritated state. To succeed, you need to focus on the sensations of your fingers holding the tool you are sharpening. Next to the sharpener there must be water in a sufficiently wide vessel to cool the blade. It is necessary to minimize grinding wheel runout. Dressing of the wheel is carried out with special cutters, but in the absence of a cutter, the runout can be eliminated using a piece of another abrasive wheel, preferably one that is harder and coarser-grained. At the same time as eliminating runout, dressing the wheel refreshes its working surface: old, dull abrasive grains are chipped away, and new grains with sharp edges come into play, which remove chips better and heat the metal less.
Rice.
When sharpening, the ax is held so that the ax handle is located at approximately 45° to the plane of rotation of the circle (Fig. 2), with the blade facing the rotation. One hand holds and guides the head, and the other supports the axe. Pressing the chamfer of the blade against the rotating circle, move the ax with a smooth movement so as to grind off a strip of metal on the chamfer from one edge to the other of the blade. First, they grind the metal on the back of the chamfer, and then, having adjusted to the sharpener, they gradually approach the front edge.
After each pass, the blade is cooled in water. The drying of a wet blade opposite the zone of its contact with the sharpening wheel indicates the rate of heating of the blade during the sharpening process. This signal is used to regulate the force of pressing the blade against the circle and the speed of its movement across the circle.
Sharpening is carried out alternately on one and the other side of the blade, achieving a symmetrical descent of the chamfers. At the very edge of the blade, the conditions for heat removal from the contact zone with the wheel are the worst, and there it is most difficult to avoid metal burns, therefore, when processing the front part of the chamfer, it is necessary to reduce the pressure of the blade on the wheel, and the blade must move across the wheel without delay. The work on the sharpener ends when a burr forms on the entire edge.
Rice. 3
Sharpening is continued by hand on a wide wet block until the mark left by the grinding wheel is ground off on the entire surface of the chamfer. You need to be careful not to fill up the chamfers after switching to the block. In a cross-section of the blade, the chamfers should appear as straight lines. All other forms of sharpening: oval and “razor” (Fig. 3) - in practice they do not provide any advantages, but only mislead regarding the true sharpening angle at the top of the cutting edge.
When sharpening a new axe, the width of chamfer A should be approximately twice the thickness of blade “B” at the base of the chamfer (picture above). In this case, the angle B at the apex will be approximately 28°. In the future, this angle can be adjusted based on the results of operation: if the cutting edge becomes wrinkled or crumbles, in both cases, angle B needs to be increased, and if it holds an edge well enough, you can try to reduce the angle.
They finish sharpening the ax by straightening the chamfers with a whetstone moistened with water. When straightening, the ax is held in the left hand with the blade facing away from you, and the whetstone in the right. Lightly pressing the whetstone against the chamfer, move it in a circular motion. Editing ends when the burr formed during the previous stages of sharpening spontaneously falls off.
Thanks to Yuri Kasyanov for the review. The original is here.
Review of the Finnish knife and ax sharpener - Fiskars xsharp.
The Finnish company has a great product that will provide quality care for your ax and knife.
How to sharpen a cleaver correctly
The question of sharpening the blade of a cleaver ax remains open today.
Is it worth sharpening it at all?
The thickness of the blade, as a rule, does not exceed 5 mm over the entire surface, and experts advise using a floating sharpening (sharpness increases towards the center of the tool blade).
This will allow you to cope with wood of various species.
The sharpening angle also matters.
For most cleavers, the wedge is sharpened at an angle of 40 - 60 degrees.
At the same time, an angle that is too sharp is not suitable for working with soft and wet material.
The tool will get stuck in the fibers.
An obtuse angle is not suitable for frozen and dry logs, as the tool will simply bounce off.
The blade is sharpened with an electric sharpener at low speed.
Periodically, you need to moisten the wedge of the tool with water, which will prevent it from overheating during friction.
Tips for use
A cleaver, like an ax, is a tool with increased risk of injury, so it should be properly sharpened and used with precautions. Many questions arise when choosing a product - the tool must ideally match the physical characteristics of the worker
Finding the ideal option is only possible when the cleaver is tested in practice. Even experienced woodcutters do not always “guess” which cleaver is ideal for them
Many questions arise when choosing a product - the tool must ideally match the physical characteristics of the worker. Finding the ideal option is only possible when the cleaver is tested in practice. Even experienced woodcutters do not always “guess” which cleaver is ideal for them.
It is important to choose the right deck - it should be of medium diameter, its height should be 5 centimeters above the knee
When starting work, you should take care of gloves and glasses. Also, clothing should be loose enough and not restrict movement. During work, there should be no people or animals within a radius of 2 meters - chips can fly off at considerable speed and injure others.
From standard medium-sized logs, 4-5 logs are obtained. Larger logs can produce 10 logs. When working, there is no point in splitting a massive piece of wood right away. It is much more reasonable to trim the tree from different sides, cutting off fragments.
It is better to keep logs in the open air in winter - then the wood will not become soggy and loose. When working with wood, it is recommended to start working from those places where there are cracks. Often, cleavers are inserted into such recesses and hit with sledgehammers.
To learn how to make a cleaver from an ax with your own hands, see the following video.
How to properly store a cleaver
Storing a cleaver is no different from storing an ordinary axe.
Branded models are paired with plastic or leather cases, which allows you not only to store, but also to safely transport the instrument in a car or even public transport.
The metal part is coated with lubricant to prevent rust formation.
A tool with a large head can be safely coated with a thin layer of automotive oil.
For branded expensive models, a special lubricant for the ax is sold.
Tools with a wooden ax should not be stored in direct sunlight.
It is also not recommended to work in temperatures below -20.
It is best to store axes in rooms with average humidity.
Design Features
Outwardly, a “classic” manual wood splitter resembles a sledgehammer sharpened on one side. When purchasing, take into account the parameters and features that directly affect the speed of work and the physical effort involved.
Toporische
The handle of the cleaver is longer and more massive than that of the axe. This is explained by the fact that they work with two hands, which means they need more grip space.
When struck correctly, the block is affected by the kinetic energy obtained from the movement of the heavy “head”, and not by the user’s force. The wider the swing, the more energy the head exerts on the material.
The ax handle is made of soft wood and should bend when struck. Most often used:
- maple;
- elm;
- birch
It would be a mistake to buy a tool with an oak or acacia handle; it will cause inconvenience in work. Rigid hard wood weakly absorbs impacts, the force of which is transmitted to the hands - as they say, “dries out the hands.” The ax handle quickly breaks down with frequent use.
Modern models are equipped with handles made of composite materials and plastic. The best handles are those made of fiberglass, which has excellent damping properties and is close to metal in strength.
The price of the tool is higher, but the hands become less tired when working, the handle does not dry out, which means there is less risk of injury from a flying working part.
Attractive appearance and applied design solutions become important for many buyers.
Working part
There are two types of tools on sale:
- wedge or “classic”;
- “eared” or “cheeked”, as you prefer to call them.
The first option is suitable for any logs - soft and hard, dry and wet. Options with protrusions-ears are preferable to use only when working with dry material. But this is based on reviews from netizens. If you have experience in collecting firewood, then the buyer will decide this issue for himself, or you can ask to try such a model “in practice”, for example, from your neighbors.
Firewood is most often needed on damp autumn and winter days, so the logs are most likely damp, so it is better to choose a classic wedge model.
Angle of sharpening and convergence
For most types of raw materials, it is better to choose a cleaver without sharpening the cutting part, or rather, with a blade edge thickness of 3-6 mm. The sharp edge often penetrates into the thickness of the wood and gets jammed there - to free the tool you will need physical strength and extra time.
The angle of convergence of the cheeks of the head in most models ranges from 40 to 60 degrees. When choosing, a simple rule applies: if the logs are damp - stored in the open air - then choose a convergence angle of 60 degrees, and buy a 40° model for dry material (from a barn).
Weight
When choosing according to this parameter, they are based on the physical strength and height of the person who will use the cleaver. The dependence is directly proportional. The taller and stronger the “woodcutter”, the heavier the model becomes.
Trade enterprises offer splitting axes weighing from 1.5 to 5 kg. For the average user, the optimal solution would be to purchase a tool weighing 2-2.5 kg.
What else can you use to chop wood?
Manual wood splitter KOLUNDROV “Standard”
The closed ring shape serves to hold the deck. How it works: insert the log into the ring on the piercing edge and hit it on top with a sledgehammer. This is a very safe device that will protect you from injury. It is also a plus that the split logs do not scatter to the sides.
Buy
| Characteristics | |
| Construction type | manual |
| Location | vertical |
| Deck diameter | 18 cm |
| Top ring inner diameter | 20 cm |
| Weight | 6.6 kg |
| Add. information | 8 layers of anti-corrosion coating with patina; material: steel st-3; 4 mounting holes; internal diameter of the upper ring is 20 cm; protective cap for a sharp blade; 3 year warranty; packaged dimensions: 30 x 30 x 36 cm |
