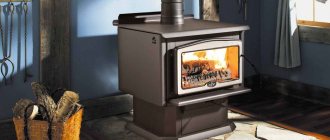
Low ambient temperature significantly reduces labor productivity and living comfort. Therefore, heating domestic and industrial premises performs an important function that requires significant financial costs for the purchase of special equipment. To save money on heating appliances, you can assemble a heater yourself. Which is especially important for those rooms and locations where there is no need to care about its aesthetic appearance and design.
Idea N1: Making a local mini-heater
For this design, you will need two rectangular pieces of glass, metal foil, a paraffin or stearin candle, a wooden block (or a block of other dielectric material), an electrical cord with a plug, and sheet metal for contacts.
The manufacturing procedure for such a mini heater is as follows:
- Take two identical pieces of rectangular glass, in this example the dimensions are 4x6 cm, but this is not critical, you can take a different ratio, the main thing is that the area is about 25 cm2. Clean and degrease their surface.
- Using a lit candle, carefully apply a layer of soot to one surface of the glass. Make sure that the carbon black is evenly coated and distributed, as it will act as a conductive material.
Figure 1: elements for making a heater - Using cotton wool or an ear stick, clean the edge of the smoked glass, approximately 5 mm.
- Cut a piece of foil the same width as the soot-covered glass surface. In length it should protrude 3–4 cm beyond the edge of the glass. Place the foil on the glass.
- Coat the edge of the glass with sealant and align the two halves together with the foil in between.
Rice. 2: Combine two glasses
Fold the edges of the foil under the glass to one side.
- Attach metal contacts to a wooden block and solder the ends of the electrical wires with a plug to them. Place the glass on the block - the heater is ready.
Rice. 3: Fix the contacts on a wooden block
It should be noted that the maximum temperature of such a heater should be about 40ºC. Naturally, you won’t be able to heat a house, cottage, or garage with such a homemade heater; it is suitable for heating tents, a work area in front of a workbench, or other space directly in front of the work surface. If the device gets too hot, you will need to reduce the resistance of the conductive elements; for this you can use thicker foil or increase the thickness of the soot.
Types of heat fans
Homemade heat fans come in completely different varieties. It depends on the purpose of their use.
Asbestos heater
For example, a structure made of asbestos pipe. To create a heating device, a pipe with a diameter of 15 centimeters and a wall thickness of 10 centimeters is suitable. The body can be half a meter or more, but the most optimal option is 60 centimeters. They use a pipe to wrap it in a spiral, and then install it between two supports.
Heat gun
Sometimes a device is needed to heat a large area. In such cases, our craftsmen can build a heating system called (Heat Gun). This is the largest model. Heating of a large space is guaranteed.
The fan heater is a fairly simple device in design.
Whether the heating device is water-based or not, you can make it yourself, but be careful. Because design safety is the most important rule so that the device does not lead to a fire or various types of injuries.
Idea N2: Infrared heater
To make an infrared heater with your own hands, you can use several device options. Let's look at the two simplest to implement, for one of them we will use IR film used in a heated floor system, and for the second we will make a heating panel from improvised means. If you still have a film IR heater from the floor or have the opportunity to get it, then this will greatly simplify your task.
Film IR heater
To make such an infrared model, you will need a piece of rolled foil thermal insulation, a heating film, a power cable for connecting to the electrical network, terminals for connecting the wire to the film, a thermostat or other devices for changing the temperature of the heater.
The manufacturing process consists of the following stages:
- Choose a location, since the film heater cannot stand on its own on the floor or table; it must be attached to a wall, ceiling, frame or other hard surface.
- Cut the thermal insulation to the size of the infrared film and prepare the foil surface for gluing the film.
Rice. 4: Cut the thermal insulation to the required size - Glue the film to the prepared roll, ensuring a tight fit along the entire length. To fasten surfaces, you can use both adhesives and double-sided tape. But the adhesive application points should not be located on the infrared emitters.
Rice. 5: places for applying adhesive composition - Attach the terminals along the edges of the film; first solder a wire to the terminals to supply electrical energy.
Rice. 6: Solder the terminal to the copper bus bar - Insulate electrical connections using electrical tape, heat shrink, or bitumen tape. This is necessary in order to eliminate the risk of electric shock from the heater when connecting the heating device to the network and to isolate live parts from walls and other structural elements of buildings.
Rice. 7: Insulate electrical contact points - Include a thermostat in the design of the electric heater; the most convenient switching point is the power wire. Since the control element can be placed in the most convenient and accessible place. This will allow you to control the heat output of the heater to heat your garage.
- Mount the IR heater on a wall or other structural element. If you want to install it on the floor, you can make a wooden frame.
Panel IR heater
The working element of an infrared heater can be made independently. We take the design of a ceramic heater as a sample; for it you will need two identical panels of heat-resistant plastic (about 1 m2 in area), graphite flour, epoxy glue, and a power cord for an electric heater. Graphite flour will act as a conductive medium; it can be purchased separately, taken from used electric batteries, or made from a construction pencil.
The whole process is divided into the following stages:
- Prepare the surface of the plastic, first clean and degrease the side on which the conductive mixture will be applied.
- Mix graphite powder with epoxy glue in a ratio of 1:1 or 1:1.5, it should be noted that with an increase in the amount of epoxy glue, the resistance of the heater will increase and the power of the device will decrease. With a larger amount of graphite, the conductivity of the heater circuit will increase, the flowing current and power will increase.
Rice. 8: production of conductive composition - Using a putty knife, apply a mixture of graphite and epoxy glue to the cleaned plastic surface, as shown in the assembly diagram below:
Rice. 9: diagram of applying a graphite track - Wait for the graphite-epoxy mixture to dry and glue a second sheet of plastic on top. Install the terminals where the conductive path breaks.
- Connect an electrical cord to the terminals to subsequently connect the device to the power supply.
The finished heater should be tested using a multimeter - install the probes on the plug terminals and measure the electrical resistance. After this, the allocated power should be calculated using the following formula: P = U2 / R
Where P is the power of the device, U is the supply voltage, R is the resistance of the heater circuit.
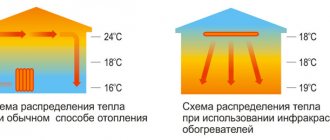
The advantage of such a heating device is infrared radiation, which will heat all objects, and from them the room is already heated. Due to this, specific objects and people located in the radiation zone are immediately heated. Therefore, it is beneficial to use an IR heater for heating garages, terraces, gazebos, verandas and such premises where there is no need to spend resources on constantly maintaining the air temperature.
Rice. 10: advantages of an IR heater over a convection heater
If the design of the heater does not seem strong enough for use in any room, it can easily be improved with a wooden frame around the perimeter.
Electric fan heaters
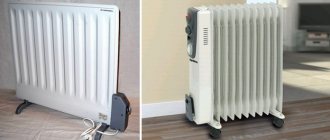
Buying an industrial fan heater of an electric modification would be an advisable solution if it is not possible to install water-based analogues.
If the object requiring heating is not equipped with a heating system, and there is no possibility of connecting to hot water pipes, the installation of electric industrial fan heaters will be optimal, since it can be organized in the shortest possible time and will require a relatively small initial investment. True, in operation, industrial electric fan heaters are somewhat less energy efficient than water ones. Currently, several variations of electric fan heaters are produced that operate from the electrical network. You can buy industrial fan heaters with the following types of electric heating elements:
- Spiral. They belong to the most budget category of fan heaters. But at low cost they have some disadvantages. For example, due to the high degree of heating, the spirals have a drying effect on the interior of the heated room. Industrial spiral-type fan heaters are not used in explosive areas and production workshops, the technological process of which is associated with significant dust formation. Dust falling on an open hot coil burns, which leads to the formation of an unpleasant odor.
- Ceramic. Electric industrial fan heaters with ceramic heating elements are much safer and ergonomic units. Mainly because the temperature of ceramic heaters cannot exceed one hundred degrees during operation, therefore, the likelihood of dust ignition and gas explosion is significantly reduced. The same factor practically eliminates the possibility of drying the air in a heated room. However, the cost of industrial fan heaters with ceramic heaters is higher compared to their spiral counterparts.
Idea N3: Oil heater
Since technical oil has good heat transfer functions, it is widely used in heaters. You can assemble this oil heater yourself at home. To do this, you will need an old heating radiator (cast iron or bimetallic battery, register or other tubular structure), a tubular heating element, the oil itself as a coolant, sealed plugs for placing the heating element.
Rice. 11: Example of using a register control unit
To maximize the safety of the oil device, it can be supplemented with a heating sensor, the open contacts of which are connected to the power circuit.
The manufacturing process of an oil cooler is as follows:
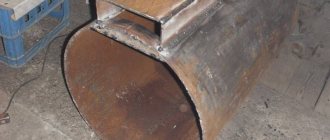
- Take the old radiator, it is important that it is replaced due to the modernization of the system, and not due to a violation of the integrity of the case. It is advisable to verify this yourself by adding liquid or at least through an external inspection.
Rice. 12: Take an old radiator - Prepare two holes in the heater - for the heating element and for filling the oil. The first hole must be equipped with a thread and located in the lower part so that the heated masses rise upward. It is more convenient to place the second hole in the upper part; when putting the heater into operation, it will also have to be sealed. In addition, holes can be made for draining the oil and for the emergency pressure relief valve.
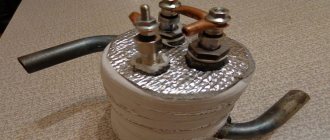
Rice. 13. Prepare two holes - Screw the heating element into the hole on the radiator. When choosing a specific heating element model, it is important to make sure that the thread diameter matches the hole diameter, and that the kit includes oil-resistant rubber gaskets.
Rice. 14: screw the heating element into the bottom hole
Another important point is that the diameter of the heating element must be such that it never touches the walls of the radiator. For sealing, linings, special compounds and tow are used.
- If you left necks for oil drainage and for installing sensors, install the appropriate equipment in them. Seal all holes that will not be used in the future, leaving only the neck for filling the oil.
- Fill the heater with technical oil approximately 85% of the total volume. A margin of 15% is necessary for the free space that the liquid will occupy after heating and thermal expansion. Never fill oil too close. Close the oil filler neck.
Rice. 15: Close the oil filler neck - Ground the heater to a ground loop.
It should be noted that to increase the service life of such a device, the heating element should be selected in accordance with the housing material. Otherwise, due to the large difference in the output voltage of the particles of these metals, destruction of the elements will occur. Also note that the heater will have a decent weight, so it is advisable to ensure it is securely fixed in space or make a structure for ease of movement.
Rice. 16: Wheeled design
How to install it yourself?
Water thermal curtains, just like air curtains, can be installed in a horizontal or vertical position. Since the curtains are produced in different lengths, installation on the front door or window can be done in a row, using several devices. The connection of this system has a simple diagram consisting of the following elements:
- thermal curtain;
- coarse filter;
- air balloon;
- check valve;
- shut-off valve;
- pump;
- boiler
After drawing up the diagram, the curtains are installed, having previously marked the places for attaching the brackets on which the equipment will be installed. The brackets must be placed evenly, taking into account the size of the doorway. The distance between the top edge of the curtain and the wall or ceiling must be at least 30 cm. This is necessary so that warm air can move freely in the room.
After the brackets are fixed, proceed directly to fastening the thermal curtain, using bolts for this. Since all connecting pipes are located at the same level, it is recommended to additionally install an extension (up to 5 cm). This will make installation work easier in the future. Quick-release connections are installed on the extensions; they are needed for ease of connecting or disconnecting the air curtain.
As for laying the main pipeline, it can be done along the attic floor, maintaining the integrity of the walls. To do this, two holes should be made under each thermal curtain, through which the coolant “return” will be connected to the main pipeline pipes. After installing the shut-off valve, you need to connect the curtains to the system using fittings and polypropylene pipes with a diameter of up to 25 mm.
The installation is completed by filling the system with water and checking the operating pressure, excess air is released through the relief valves. Then you need to check the tightness of all joints and put the system into operation.
The following video provides an overview of the Teplomash water heat curtain KEV-98P4121W.
Idea N4: Heater with a spiral
The classic version of a spiral-type heater involves connecting heating coils to the network. Heat-resistant dielectrics were used as the basis for installing the spiral in such models. But these are quite simple options, so in this article we will look at the principle of manufacturing a device whose characteristics are not inferior to a gas heater. It uses the same principle as a heat gun, but with less heat output.
To make it, you will need a heating coil, an electric fan, a metal pipe or box for the housing, a dielectric heat-resistant frame, and a power cord. The heater manufacturing process includes the following steps:
- Cut the asbestos cement pipe to the required length (in this example it will be used to make the supporting frame).
Rice. 17: Cut the pipe to the required length - Drill several holes in the pipe from different sides so that you can insert a nichrome spiral into them.
- Insert a spiral into the holes, in this example they are made in the form of a lattice, but this is not important, it is important that the heating elements have a different angle of inclination.
Rice. 18: position of the spiral in the pipe
If you are assembling several pieces of spiral, connect them together on the outside of the pipe.
- Place a fan on one side of the pipe to force air flow. The direction of the blades should ensure the movement of air towards the spirals stretched in the pipe. The distance from the fan to the heating element must ensure safe operation so that the blades do not melt. For additional cooling, the fan and asbestos pipe can be separated in the housing.
Rice. 19: separation of fan and pipe with heater - Insulate the electrical connections both from the fan to the power cord and from the nichrome spiral. To insulate the spiral joints, you can use micanite tape, which is wound directly onto the asbestos surface.
- Place the finished heater in the most suitable housing. In this example, to protect against accidental contact with the spiral, an additional grill is installed in front of the pipe.
It should be noted that the fan power should not be too high so that the coils have time to warm up. In practice, you should achieve a blowing effect, and the heating performance can be adjusted by the length of the spiral. It is also advisable to coat the inside of the asbestos pipe with heat-resistant varnish to prevent asbestos particles from entering the air. It would be a good idea to ground the heater body to a ground loop.
Directional heat gun
A heat gun of our own production has enough power to easily heat a garage, utility room or office in the house.
For assembly you will need:
- a piece of plywood 16 mm thick;
- fan (duct);
- temperature and speed controllers;
- PBEC heating element (2.2 kW);
- fasteners (clamp, bracket, studs, nuts, washers);
- wheels.
We cut out a rectangle of approximately 47 cm x 67 cm from plywood, sand the rough edges and corners.
The plywood base was not chosen in vain: it is light, flat, and most importantly, it does not conduct electric current, which is important in the event of force majeure circumstances
We connect two central parts with a coupling - the fan and the heating element. We fix the resulting structure on a plywood base using a bracket and a plumbing clamp.
We select fasteners in such a way that they firmly fix the elements of the device and do not cause them harm. For example, self-tapping screws are perfect - they do not destroy plywood
Self-tapping screws (16 mm) are suitable for fastening. We install a temperature sensor (for example, TG-K 330), which is necessary to control the temperature, next to it there are two more devices - for adjusting the speed and temperature.
When connecting the parts of the fan heater to each other, do not forget about the safety of the device: the connection points of wires and cables must be insulated
Pulsar 3.6 is suitable as a thermal regulator. After installing all the necessary devices and parts, we connect them according to the diagram.
Device control circuits can be found in specialized literature, instructions for devices such as an electric fan, or on specialized websites
For ease of use, we screw wheels to the plywood base.
Small rollers screwed on the bottom side make the homemade fan heater more convenient to move around the room, especially if it is heavy.
Well, that’s all - the homemade heat gun is ready.
Try to place the device parts in such a way that, if necessary, it is easy to disassemble each of them and replace failed elements
Like any homemade fan heater, this device has disadvantages. For example, when the device is stopped, the voltage on the heating element remains, and this is quite dangerous, since overheating occurs and an emergency situation is possible. The situation can be corrected by installing a relay to timely turn off the power supply to the temperature controller. Another disadvantage is inadequate heating of the room, but this is a disadvantage of almost all stationary fan heaters.
Disposal rules
Many packages indicate that batteries should not be thrown away - only recycled. There are enough harmful compounds inside the battery to cause irreparable damage to soil, water and air. The contents of food sources are also toxic for our health, so we must follow the rules for their disposal.
In some areas of the country it is difficult to find special collection points for waste energy sources.
In this case, proceed as follows:
- Agree with friends and family that you or someone else will be responsible for collecting and disposing of dead batteries.
- Find collection points in your nearest locality. Every large city has at least one battery collection point. Most often they are located next to hardware or furniture stores.
- If you live in a populated area far from the metropolis, you can negotiate with the local Ministry of Emergency Situations or representatives of factories that recycle batteries.
Never leave old batteries in the public domain. Store them in plastic boxes until disposal. Don't forget: Toxins seep into the air you and your loved ones breathe.
Additional functions
More expensive fan heater models have a number of additional functions:
- Splash-proof housing. It allows the device to be used in rooms with high humidity, for example, in the bathroom;
- Timer. This is convenient, because the device automatically turns off at the specified time;
- “Temperature maintenance” function, which allows you to maintain the desired microclimate in the room;
- Function “protection against overheating” and turning off the device when tipping over;
- Convenient display and touch control;
- Built-in humidifier. A special water container is provided for this purpose.
It is important that the device has a thermal relay that turns off the device if it overheats. But even this option does not eliminate the need to constantly monitor the fan heater so that it is not accidentally covered
Of course, in this case the system will work, but the possibility of ignition of flammable materials cannot be ruled out. This is especially true for models with a spiral. Well, don’t forget about the rule that the minimum distance from the heater to any other object should be more than 50 centimeters.
Let's say a few words about the design. Fan heaters are not only a source of heat, but in many cases they are also a stylish device. Manufacturers produce heaters in all sorts of colors, which delight the eye with smooth lines and a variety of shapes.
Why should you use a heating cable?
The main advantages of using cable heaters:
- Safety. Excellent insulation system. Reliable protection from external chemical, mechanical and thermal influences.
- Versatility. The heating cable can be equipped with a pipeline located both underground and outside.
- Easy to use.
- Saving. After connecting the cable heater, it is possible to adjust the heating power when the air temperature changes.
Homemade hair dryer or 12 Volt car heater
Making a 12 V car heater with your own hands is a fairly simple task that does not require special skills or expensive components. The only thing is that it is not always needed for its intended use.
Main components for the heater:
- Power supply from a computer;
- Small fan;
- Tile;
- Bolts and nuts;
- Nichrome wire.
The main part of a car heater is the housing in which all the components of the device are installed. In order to make a case, you need to remove all components from the computer power supply (cooler, board with various circuit elements and wires). It is worth noting that in addition, you need to remove all plastic elements from the block.
Next, to carry out heating, you need to make a heating element from nichrome wire. To do this, take any cylindrical object (pencil or pen) onto which this wire is wound to form a spiral. The use of this type of wire is due to the fact that this alloy has a very high resistance value.
According to the resistance force of the heating element, the connection diagram to the vehicle's electrical network is selected.
Next, we prepare the surface on which the spirals will be located. In ordinary tiles, holes are drilled, to which heating elements are screwed using bolts.
How to choose a fan heater
- The majority of heat fans are made from plastic. The main requirement for the body is strength. This ensures both durability and safety of use.
- The required power is calculated based on the area of the largest room in which the fan heater is supposed to be installed. It is calculated at the rate of 1000 Watts/10 sq. m.
- You need to choose a mobile or stationary device based on your needs. If heating equipment is required in several rooms, a portable fan will be needed. Stationary models are more powerful and create less noise.
- The noise level also depends on the structure of the fan. The “quiet” type is considered tangential. The axial type of fan does not have this advantage.
- Don't forget about safety. Shutdown functions in case of a fall, cooling in case of overheating, a safe heating element - these parameters will protect users from fire.
- Fan heaters use two types of ceramics: glass and metal. Of these, preference should be given to glass.
- The maximum number of operating modes in modern fans is 3. This number of modes makes the operation of the fan-heater comfortable and economical for users.
Battery device
The battery is a simple, cheap and reliable source of energy for household appliances.
Battery design.
Inside such a device are:
- Positively and negatively charged poles.
- Catholyte.
- Mercury, nickel, lead, cadmium, nickel.
- Resin.
- Carbon rod.
The most important indicator of a power source is the charge capacity. It determines the price and operating period: the larger the capacity, the longer the battery will last.
Malfunctions
- The most common problem is a malfunction of the fan heater motor.
- It is possible that there may be troubles associated with the entry of a foreign body (wire, rope, thread) onto the electric motor shaft, resulting in excessive heating of the winding. In this case, the entire fan heater motor is replaced.
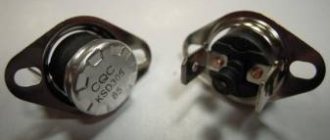
- Another reason for the breakdown is the overheat protection function is turned off, which is why the thermostat does not respond to exceeding the temperature threshold. As a result, the heating element and the wiring of the fan heater burn out.
- Sometimes the cause of a breakdown is an increase in voltage in the electrical network. For preventive purposes, you should regularly submit the fan heater for technical inspection.
- Overheating of the fan heater often occurs due to clogging of the outlet and inlet air holes with foreign objects.
- Devices rarely break down due to wear and tear on switches, thermostats and fuses. Sometimes the heating element breaks down, but this is a difficult case, and then the device must be repaired in a workshop.
Before starting self-repair, determine the validity of the fan's warranty, since a device that has been opened is automatically removed from it.
The second rule is to never carry out repairs yourself if you are not sure of its high-quality completion.
First of all, disassemble the device body. To do this, unscrew the bolts that connect the two parts of the housing. Use a flathead or Phillips head screwdriver. Once both parts of the housing are removed, inspect the contents of the fan and look for burnt parts.
If there are any, replace them with new ones. At the same time, make sure that this does not happen again. If the inspection does not give positive results, then the problem is more complex.
You can detect it in several ways:
- The first method is based on searching for a broken contact in the connecting wire. Sometimes replacing the entire cord helps solve the problem, and sometimes a partial replacement is carried out with the correct connection and insulation of the wire.
- The second method involves replacing the fan heater fuse. There are two types of fuses, they are located next to each other.
One serves for thermal protection, the other for temperature protection. Use a tester to check the functionality. If no current passes through them, replacement is made.
- The third method is associated with a malfunction of the heating coils, when the fan is running but there is no heating. In this case, you need to determine the location of the contact break and connect them.
- The fourth method requires replacing the heating mode switching unit. In most cases, such spare parts are made in China and sometimes fail due to poor quality.
- The fifth method is to correct the most complex breakdown: combustion of the device’s electric motor. The likelihood of purchasing a new fan heater in this case borders on the cost of repairs, because more often the entire electric motor needs to be replaced.
If the device breaks down, replacement parts are purchased if they cannot be repaired. The average price of large parts, such as a spiral and an electric motor, varies from 600 to 1000 rubles.
Small parts like a switch and cord will cost from 50 to 120 rubles.
Precautionary measures
Do not dispose of it yourself. Do not burn or bury batteries, no matter how many. According to the latest data, one old battery harms the territory that can be inhabited by a hedgehog, 2 trees and a thousand worms.
Do not store batteries in metal boxes. The contents cause metal corrosion and seep into the soil and groundwater.
Failure to recycle causes irreparable damage to the environment and public health. Recycling old batteries is an event organized solely for the purpose of preserving the environment.
Total
Supplementing the standard interior heating in winter with a homemade car fan heater is one of the simple solutions. It is easier to implement than installing heated seats on a low-spec Lada Granta. The importance of a heating installation in creating an internal microclimate is exclusively auxiliary due to the low efficiency of such heating. The advantage over store-bought options is reliability, lower cost, and maintainability.
The product is assembled from nichrome spirals with a diameter of 0.6 mm, fans, terminal blocks, wires, a cigarette lighter connector and a button. Most of the elements fit into the case. Power is supplied from the cigarette socket. Current load – no more than 15 A. Effective power – about 150 W.
An alternative solution is to make a car heater from a hair dryer. The product’s motor is designed for 12 V. The heating elements will have to be cut into several sections and connected in parallel, having previously measured the current strength. The hair dryer should be connected exclusively via a relay.
If you have access to a household power supply, heating the room is not a problem: the stores are full of products for every taste and budget.
But what should someone do who, instead of a full 220 volts, only has 12?
It turns out that such a modest voltage can also serve as a source of life-giving heat, but you will have to make a device for its extraction yourself. How to make a 12 volt heater with your own hands?