To create a warm and comfortable atmosphere in the house, not only traditional heating systems are used, but also other methods, including underfloor heating. What kind of system is this and how can the correct technology for laying heated floors help improve the comfort of living in houses and apartments? This will be discussed in more detail in this article.
Do-it-yourself warm floor
Warm floor and finishing coating
The warm water floor system is best combined with installation under porcelain stoneware and tiles.
- Firstly, both materials are strong and durable.
- Secondly, they do not emit harmful substances when heated.
- And thirdly, heating perfectly complements the tiles (the material itself is cold), and you can even walk on it barefoot thanks to its high heat capacity.
Of course, heated floors can also be installed under laminate, linoleum, PVC tiles and even carpet, if there is a special mark.
But, for example, there is no point in heating the carpet, and the surface temperature cannot be exceeded above 31°C, according to SNiP 41-01-2003. Otherwise, it will provoke the release of harmful substances.
| Zones | Floor temperature, °C |
| Living spaces | 26°C (average) |
| Rooms with high humidity | 31°C (average) |
| Non-residential premises | 31°C (average) |
| Above the pipe | 35°C (maximum) |
| Parquet and laminate floors | 27°C (maximum) |
| Permanent stay of children (according to sanitary standards VSN-49-86) | 24°C (maximum) |
Flooring
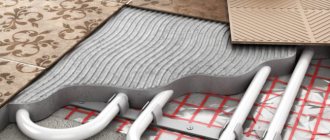
You can glue tiles and other floor coverings onto the finished concrete base.
In this case, glue intended for heated floors is used. If the tile falls on an expansion joint, then one part of it must be glued, and the second must be placed on silicone. Silicone adhesive absorbs thermal movements of the base, and the tile will not crack from overstress.
Installation in an apartment
Probably, many residents have had the idea to independently connect water heated floors “for free” to a central heating or hot water system. And some even do this, but in most cases it is prohibited by local law.
For example, in Moscow there is government decree No. 73-PP dated February 8, 2005; Appendix No. 2 clearly states that it is prohibited to re-equip public water supply systems for floor heating.
If you break the rules, at best, you can get a fine on your first visit to the plumbers. And at worst, there is a risk of leaving your neighbors without heating.
In some regions the ban does not apply, but connection requires an examination so as not to disrupt the operation of the system.
In general, from a technical point of view, such options are possible, but only if a separate pumping and mixing unit is connected and the pressure in the system is maintained at the outlet.
Note! If there is a jet pump (elevator) in an apartment building, then metal-plastic and polypropylene pipes cannot be used.
Elements of such a heating system
The operating principle of a water heated floor is quite simple.
Under the flooring there are pipelines through which hot water circulates.
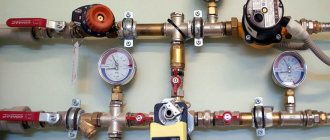
The design of a water heated floor is quite simple. It necessarily includes a heating boiler, a collector, a circulation pump and a pipeline filled with coolant
Floor installation methods
There are several ways to create a warm water floor.
- The most popular and reliable of them is concrete screed. Unlike electric types, 16 mm pipes cannot be hidden in tile adhesive, and it will not work. Therefore, the screed is poured at least 3 cm above the pipes.
- The second method is to lay pipes in cut-out polystyrene foam grooves. The grooves are made by hand, pipes are laid inside, then the screed is poured.
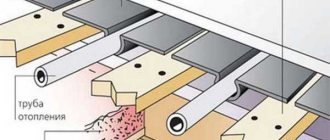
- The next option is often used in houses with wooden floors, although it requires a lot of labor - laying it in wooden grooves. To do this, boards are placed on the floor, which create a gutter of the desired shape for installation.
Choosing the optimal step
The distance between pipes during installation depends on the type of room (find out what the distance between loops should be), heat losses from it and the calculated heating load. Typically the step is from 10 to 30 cm. It can be variable or constant:
- When the heating load is less than 50 W per square meter, the circuits are laid with your own hands in constant increments of 20-30 cm.
- With a large heating load (from 80 W per square meter or more), the recommended distance between turns is 15 cm.
- In other cases, a variable step is used. For example, along the external walls, through which the greatest heat losses occur, the distance between the network loops is made the smallest (10 cm). In the internal areas of the room, the gaps between the turns of the network increase (20 cm).
The number of turns with the smallest pitch is calculated when designing the heating. A distance of 25-30 mm is most often used in very large rooms. To deliver coolant, they use contours with a cross section of 20 mm.
Types of pipes used
Three types of pipes are suitable for a warm water floor.
- Pipes made of cross-linked polyethylene (PEX-EVOH-PEX) are inconvenient to work with because it is difficult to give them the desired shape (they straighten when heated). But they are not afraid of liquid freezing and are repairable.
- Metal-plastic pipes are the best option: low price, easy to install, and keep their shape stably.
- Copper pipes are expensive; when used in a screed, they must be covered with a protective layer to prevent alkaline attack.
What material is best to choose pipe rolling materials from?
To install water floors, you can use products from the following materials:
- copper;
- cross-linked or linear polyethylene;
- combinations of aluminum and polyethylene or polypropylene;
- composite of polyethylene and polyvinylethylene (fiberglass).
Copper pipeline has the best characteristics. It has the highest level of thermal output, is very durable and does not corrode. However, copper products are expensive and additional equipment is required for their installation. In addition, such a system must be protected from alkali.
The best option is to choose polyethylene products for installing heated floors. It can be cross-linked (PE-X) or linear (PE-RT).
Product advantages:
- High level of thermal conductivity.
- Long wear resistance.
- Increased flexibility.
- The inner walls are smooth, so they become clogged with deposits very slowly.
- The material does not corrode.
- It can withstand repeated freezing of the coolant.
- Self-installation of such network elements is simple, since their proper installation does not require the use of special tools and devices.
PE-XA is the most reliable. This material has the highest cross-linking density (85%). Thanks to this, it has a pronounced “memory” effect. In other words, after thermal expansion, network elements always return to their original state. This makes it possible to use the axial type of fittings with sliding rings; they can be embedded in the screed without any problems.
PE-RT analogues do not have the “memory” phenomenon. Because of this, only collet-type fittings are used with them. It is forbidden to wall them up. However, when the contours of the system are laid in solid sections, then all connections will be only on the collector. In this case, the use of PE-RT is justified.
Manufacturers also make pipes for water floors from composites. In this case, the top and bottom layers are made of polyethylene, with aluminum foil (PE-X-Al-PE-X or PE-RT-Al-PE-RT) glued between them. The metal reinforces the elements of a warm water floor and serves as a barrier to oxygen.
The disadvantage of aluminum plastic is that it is heterogeneous. Different degrees of thermal expansion of metal and polymer can lead to delamination of the material.
Based on this, the best choice would be polyvinylethylene reinforced polyethylene (EVOH) products. It significantly reduces the penetration of oxygen into the water coolant through the pipe walls. This reinforcement can be a top covering or located between layers of polyethylene. The second option is more preferable.
Water heated floors can be laid from pipes of the following sizes:
- 16×2;
- 17×2;
- 20x2 mm.
Calculation of a warm water floor
Before installation and purchasing materials, it is necessary to calculate the heated floor. To do this, draw a diagram with contours, which will later be useful when carrying out repair work in order to know the position of the pipes.
- If you are sure that furniture or plumbing will always be in a certain place, pipes are not laid in this place.
- The length of a circuit with a diameter of 16 mm should not exceed 100 m (the maximum for 20 mm will be 120 m), otherwise the pressure in the system will be poor. Thus, each circuit approximately occupies no more than 15 square meters. m.
- The difference between the lengths of several circuits should be small (less than 15 m), that is, they should all be of uniform length. Large rooms, accordingly, are divided into several circuits.
- The optimal pipe laying pitch is 15 cm when using good thermal insulation. If in winter there are often frosts below -20, then the step is reduced to 10 cm (only possible near external walls). And in the north you cannot do without additional radiators.
- With a laying step of 15 cm, the pipe consumption is approximately 6.7 m for each square of the room, when laid every 10 cm - 10 m.
In general, the question of how to calculate a warm water floor requires separate consideration, since many nuances are taken into account when designing: heat loss, power, etc.
The graph shows the dependence of the flux density on the average coolant temperature. The dotted lines indicate pipes with a diameter of 20 mm, and the solid lines indicate 16 mm.
The graph shows data that is valid only when using a 7 cm thick cement-sand screed covered with tiles. If the thickness of the screed is increased, for example, by 1 cm, then the heat flow density decreases by 5-8%.
- To find the flux density, the amount of heat loss in the room in Watts is divided by the area where the pipes are laid (the distances from the walls are subtracted).
- The average temperature is calculated as the average value at the entrance to the circuit and the return exit.
The optimal temperature at the inlet and outlet should not differ by more than 5-10 degrees. The maximum coolant temperature should not exceed 55°C.
To calculate the length of the circuit, the active heating area in square meters is divided by the laying step in meters. To this value add the size of the bends and the distance to the collector.
Using the above diagram, you can only perform a rough calculation and make final adjustments using the mixing unit and thermostats. For accurate design, be sure to contact professional heating engineers.
Unit #2 - collector
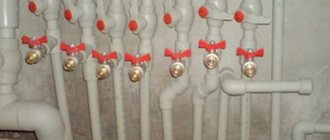
The collector is a device responsible for distributing hot water through heating circuits, as well as setting up and adjusting heated floors. The device must have a sufficient number of terminals to connect all circuits to them.
The simplest models are equipped only with shut-off valves. They are extremely cheap, but do not provide even a minimal opportunity to customize the system. Devices with control valves allow you to adjust the water flow for each circuit, which allows you to adjust the heated floor for the most uniform heating of the premises.
The manifold of any model must be equipped with a drain outlet and a special air vent valve. The most convenient to use are devices with servo drives on valves, equipped with pre-mixers that mix the heated water supplied to the system with the cooled water returning and thereby regulate its temperature.
Such a device fully automates the functioning of a heated floor, but its cost is very high.
Manifold with servomotors on valves and pre-mixer. Necessary system adjustments are made automatically
Warm floor pie
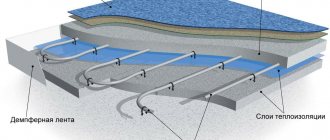
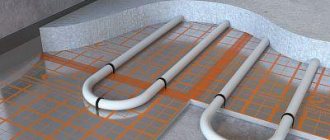
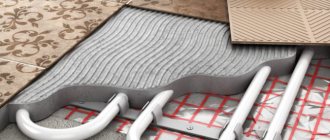
The technology for laying a warm water floor consists of several layers, which are laid in a certain sequence. The total thickness of the cake is 8-14 cm, the load on the floors is up to 300 kg/sq. m.
If the base is a concrete slab:
- waterproofing;
- damper tape around the perimeter;
- insulation;
- reinforcing mesh;
- water heated floor pipe;
- screed
For waterproofing, it is permissible to use ordinary polyethylene film or special materials. Damper tape is made from cut strips of thermal insulation 1-2 cm thick, or you can buy a ready-made version with a self-adhesive base. The choice of insulation depends on several factors: region, base material. For example, for floors on the ground, extruded polystyrene foam with a thickness of at least 5 cm (optimally 10) is used, and if there is a warm base under the floor of the first floor, then thinner options from 3 cm can be used.
The main purpose of insulation is to direct the heat from the heating upward and prevent large heat losses.
If the base is ground floors:
- bulk soil 15 cm;
- crushed stone 10 cm;
- sand 5 cm;
- rough screed;
- waterproofing;
- damper tape around the perimeter;
- extruded polystyrene foam at least 5 cm;
- reinforced screed with coolants.
It is important to carefully compact the preparatory layers for the rough screed layer by layer. If the base is compacted tightly and extruded polystyrene foam is used, it will not be necessary to make a rough screed.
Insulation and heat reflector
The optimal insulation thickness is 5 cm.
When laying on the ground or if increased protection from the cold is needed, when the level below is an unheated room, the thickness of the thermal insulation can be increased to 10 cm. To reduce heat losses, it is recommended to lay a heat-reflecting screen made of metallized film over the insulation. It could be:
The metallized layer is quickly destroyed by the aggressive action of concrete, so the screen itself also needs protection. Such protection is provided by polyethylene film, which is used for greenhouses and in greenhouse farming. The film thickness should be 75-100 microns.
In addition, it provides the necessary moisture for the maturing concrete screed throughout the entire period of its hardening. The pieces of film must be overlapped, and the joint must be sealed with tape.
Installation of heated floors
Let's say a good foundation has already been prepared: a flat concrete slab or backfill layer without strong drops. Differences should not exceed 7 mm when checking with a two-meter rod. If there are uneven spots, they can be filled with sand.
Waterproofing
Some people put waterproofing under the bottom of the insulation, some, on the contrary, at the top, and some use both. If extruded polystyrene foam is used, it practically does not need waterproofing, so its position is not so critical. But it will not allow cement laitance to penetrate between the seams of the insulation and go into the slab and will additionally hold back moisture from below. If you attach it to the bottom of the insulation, then you can attach the pipes to the heated floor directly to the insulation. If the waterproofing is laid on top, then laying a mounting mesh will be required to secure the pipes.
We lay the waterproofing with an overlap of 20 cm on the walls and on each other. We glue the joints with tape to seal.
Damper tape
If you bought ready-made tape, simply glue it around the perimeter. It usually has a thickness of 5-8 mm and a height of 10-15 cm. The height should be above the pouring level, the excess is cut off with a knife. If the tape is made by yourself, then be sure to glue or screw it to the wall with self-tapping screws.
The linear expansion of concrete is 0.5 mm per meter when heated to 40°C.
Insulation
Sheet insulation for a warm water floor is laid with offset joints so that it is tightly connected.
Reinforcement
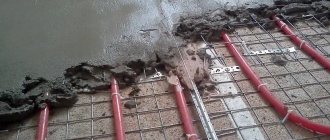
The first layer of reinforcing mesh is usually laid on the insulation and used as a base for attaching the contours and uniformly distributing heat over the surface. The meshes are tied together with wire. The pipes are attached to the mesh using nylon clamps.
The diameter of the mesh rods is 4-5 mm, and the cell size depends on the pipe laying pitch, for convenient fastening.
In addition, it is imperative to lay the reinforcement on top of the pipes, since even when using a mesh from below, it will have almost no effect if it lies at the very bottom. Or, during pouring, place the mesh on stands, creating a gap.
Pipe fixation methods
A water heated floor can be laid in several ways, we list them.
- Polyamide tension clamp. Used for quick fastening of pipes to the mounting grid. Consumption – approximately 2 pieces per 1 m.
- Steel fastening wire. Also used for mounting to a grid, the consumption is exactly the same.
- Stapler and clamps. Suitable for quickly fixing pipes to thermal insulation. The consumption of clamps is 2 pieces per 1 m.
- Fixing track. It is a U-shaped PVC strip that serves as a base for laying 16 or 20 mm pipes into it. Rigidly attached to the floor.
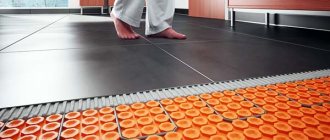
- Mats for warm water floors made of polystyrene. A pipe is laid in the middle of the grooves between the posts.
- Aluminum distribution plate. Used when installing on wooden floors, it reflects and evenly distributes heat over the surface.
Application of various types of pipe fasteners
Pipe laying
The pipes are laid with a distance of 15-20 cm from the walls. It is highly advisable to make each circuit from a single pipe without welding, and their length should not be more than 100 m. The pitch between the pipes near the walls is 10 cm, closer to the center - 15 cm.
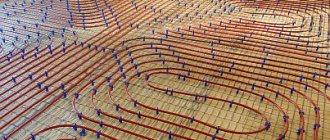
The layout of a heated floor can be different, for example, a spiral or a snake. On external walls, they try to make the laying step more frequent or draw a contour from the feed next to cold walls. An example of a circuit for enhanced heating of external walls is shown in the photo; this option is best used in cold regions:
In other cases, the contours are usually laid in a spiral (snail), this is a universal option.
In places with a large accumulation of pipes, in order to avoid overheating of the surface, some of them are covered with a heat-insulating tube.
Metal-plastic 16 mm and 20 mm are easy to bend manually, without the use of special tools. In order to bend the pipes evenly with an angle of a small radius and at the same time prevent it from cracking, the corners are bent in several passes (hand interceptions). At an angle of 90° you will need approximately 5-6 interceptions. This means, first, resting your thumbs, make a slight bend, then move your hands slightly towards the bend and repeat the actions.
It is unacceptable to have kinks on the pipes in places of sharp turns.
Polypropylene pipes are much more difficult to bend because they are springy. Therefore, to bend them, they are heated or welded using special fittings, but in the case of heated floors, they are simply attached to the mesh, making the bends less sharp.
Installation of a water heated floor begins by connecting the first end of the pipe to the distribution manifold, and after laying the room, immediately connect the return (second end).
Connecting circuits
In most cases, the circuits are connected through a distribution node. It has several functions: increasing the pressure in the system, adjusting the temperature, uniform supply to several circuits, and combining with radiators.
There are many connection schemes to the boiler, which we wrote about in the article about pumping and mixing units: with manual adjustment, with weather automatics and automatic adjustment using servo drives and sensors.
Eurocone fitting
The pipes are connected to the manifold using Eurocone clamp fittings.
Crimping
When you have completed the installation of all circuits, be sure to conduct pneumatic tests of the system for leaks. To do this, crimping is done using a compressor. A small household compressor with a pressure of more than 6 bar is suitable for testing. The pressure in the system is brought to 4 bar and left for the entire time until the system is started.
Since air molecules are much smaller than water molecules, even small depressurization can be detected. In addition, the water may freeze if you do not have time to turn on the heating, and nothing will happen to the air.
Fastening connections for water heating pipes
Pipe fasteners are installed on the thermal insulation.
Its purpose is to secure adjacent pipe branches and position it along the floor in strict accordance with the preliminary plan. The fastener holds the pipe until the concrete screed reaches the desired degree of hardness. The use of fasteners facilitates the installation of the floor and ensures correct placement of the pipe in the thickness of the concrete pad.
Fasteners can be special metal strips, metal welded mesh, plastic brackets that pin the pipe to the foam base.
Metal strips are used when the thickness of the concrete pad is increased.
They slightly raise the pipe relative to the heat insulator, due to which it is closer to the upper surface of the concrete pad. The pipe simply snaps into the shaped recesses of the planks. The metal mesh not only secures the pipe, but also reinforces the layer of concrete pad. The pipe is tied to the mesh with pieces of wire or plastic clamps.
Fastener consumption is 2 pcs. per linear meter. Additional fasteners can be used in places where there are curves. Plastic brackets are installed manually.
They pin the pipe to the polystyrene foam as it is laid. Do-it-yourself semi-industrial heated floors are made using a special stapler. But its purchase is justified only with intensive professional use.
In recent years, manufacturers of underfloor heating systems have begun to offer another very convenient solution. We are talking about special sheets of dense polystyrene foam with a profiled surface. Typically, the surface of such sheets consists of intersections of grooves or rows of protruding elements, between which heating pipes are easily laid.
The surface of the sheets is smooth, extruded, all pores are closed and no additional waterproofing film is required. Having a special thermal cutter, you can cut grooves in polystyrene foam yourself. But to carry out this work you need at least minimal experience.
Important! Metal-plastic pipes are supplied in coils. When laying, the coil rolls out along the pipe placement path. Do not pull the pipe from a lying coil, as this will cause it to twist and may lead to delamination of the internal layers.
Heated floor screed
Filling the screed is done only after installation of all circuits and hydraulic tests. It is recommended to use concrete of at least M-300 (B-22.5) with crushed stone with a fraction of 5-20 mm. The minimum thickness of 3 cm above the pipe is done not only to obtain the required strength, but also to distribute heat evenly over the surface. Weight 1 sq. m of screed with a thickness of 5 cm is up to 125 kg.
If the screed thickness is more than 15 cm or under high loads, additional calculation of the thermal regime is required.
As the thickness of the screed increases, it takes more time to heat it up to a certain temperature after switching on, and the inertia of the system also increases. The lower the thermal conductivity of the screed, the higher the coolant temperature will need to be set.
Expansion joints
Examples of dividing a large room into zones
The absence or incorrect position of temperature gaps is the most common cause of screed failure.
Shrinkage seams are made in the following cases:
- the room has an area of more than 30 sq. m.;
- the walls are more than 8 m long;
- the length and width of the room differ by more than 2 times;
- above expansion joints of structures;
- The room is too curved.
To do this, a damper tape is laid around the perimeter of the seams. At the seam site, the reinforcing mesh must be separated. The deformation gap should be 10 mm thick at the base. The upper part is treated with sealant. If the room has a non-standard shape, it needs to be divided into simpler elements of a rectangular or square shape.
If pipes pass through expansion joints in the screed, in these places they are laid in a corrugated pipe, 30 cm of corrugation in each direction (according to SP 41-102-98 - 50 cm on each side). It is recommended not to separate one circuit with expansion joints; supply and return pipes should pass through it.
Correct passage of contours through technological seams
When laying tiles on expansion joints, the likelihood of them peeling off increases due to different expansion of adjacent slabs. To avoid this, the first part is laid with tile adhesive, and the second part is attached with elastic sealant.
For additional separation, partial profile expansion joints can be used. They are made using a trowel, 1/3 of the thickness. After the concrete has hardened, they are also sealed with sealant. If pipes pass through them, they are also protected with corrugation.
Cracks in the screed
A fairly common occurrence is the appearance of cracks on the screed after drying. This can be caused by a number of reasons:
- low density of insulation;
- poor compaction of the solution;
- absence of plasticizers;
- the thickness of the screed is too thick;
- absence of shrinkage seams;
- concrete drying too quickly;
- incorrect proportions of solution.
It's very easy to avoid them:
- insulation should be used with a density higher than 35-40 kg/m3;
- the screed solution must be plastic when laying and with the addition of fiber and plasticizer;
- in large rooms you need to make shrink seams (see below);
- You should also not let the concrete set quickly; to do this, cover it with plastic wrap the next day (for a week).
Screed mortar
For heated floors, it is necessary to use a plasticizer to increase the elasticity and strength of concrete. But you need to use special types of non-air-entraining plasticizers for heated floors.
Without experience, it will not be possible to make a cement-sand screed for a warm floor without crushed stone/gravel, and the correct branded DSP will cost more than factory-made concrete. Therefore, in order to avoid cracks due to a violation of the composition of the solution, concrete with crushed stone is poured.
Mortar M-300 from cement grade M-400, washed sand and crushed stone is made according to the following proportions.
- Mass composition C: P: Shch (kg) = 1: 1.9: 3.7.
- Volumetric composition per 10 liters of cement P: Shch (l) = 17:32.
- From 10 liters of cement you will get 41 liters of solution.
- The volumetric weight of such M300 concrete will be 2300-2500 kg/m3 (heavy concrete)
There is also another option using granite screenings instead of sand; the following elements were used for its preparation:
- 2 buckets of crushed stone with a fraction of 5-20 mm;
- water 7-8 liters;
- superplasticizer SP1 400 ml of solution (1.8 liters of powder is diluted in 5 liters of hot water);
- 1 bucket of cement;
- 3-4 buckets of granite screenings with a fraction of 0-5 mm;
- bucket volume – 12 liters.
High-quality concrete should not release water during installation (delaminate). If everything is done correctly and the air temperature is 20°C, it should begin to set after 4 hours, and after 12 hours it will not leave marks from heels.
3 days after pouring, the screed will gain half its strength, and will harden completely only after 28 days. It is not recommended to turn on the heating system before this point.
The sequence of laying pipes in a concrete screed
Despite all its labor intensity, installation of a heating network in a concrete screed is now the most common. The technology looks like this:
- First, the base is prepared. The subfloor is cleaned of debris; if there are sagging or bumps on it, they are removed with a hammer drill.
- Then waterproofing is laid on the floors of the room.
- After this, thermal insulation is installed on top of it.
- Further, the installation rules require installing a compensation (damper) tape between the pre-calculated areas and along the perimeter of the walls of the room.
- Reinforcing mesh is installed.
- According to the chosen scheme, the heated floor pipes are laid. They are attached to the fittings with their own hands using harpoons.
- To check the system, it is filled with water and pressurized.
- Then guide beacons are installed.
- Lastly, the cement-sand screed is poured.
Find out what to do if there is a need to connect TP pipes to each other.
Installation on a wooden floor
Wood does not conduct heat as efficiently as concrete, but installation on it is also feasible. For this purpose, distribution plates made of aluminum are used. The pipes are laid in wooden grooves made by attaching pre-prepared boards.
For installation of linoleum, carpet and other materials that require a flat surface, a leveling layer of chipboard, plywood or gypsum fiber board is laid over the pipes. If parquet or laminate is used as the finishing coating, the design of the heated floor can be slightly simplified, without the use of a leveling layer.
When choosing plywood and chipboard, make sure that they have sanitary, hygienic and thermomechanical characteristics that allow them to be used together with heated floors.
Preparatory work and calculation of materials
Such a responsible job as installing a heated floor with your own hands should begin with the preparation of materials and planning. Strictly speaking, an accurate calculation can only be made by specialists who have information about the level of heat leakage in a given room. But for individual needs, approximate calculations are often used that satisfy the requirements.
First you need to draw a plan for the placement of pipes. The clearest and most visual diagram will be a diagram drawn on paper in a checkered pattern, the warm floor on which can be calculated based on the square footage of the room. Each cell will correspond to a pitch - the distance between the pipes.
Perforated tape
The tape is made of galvanized steel. It is used for fastening water pipes and heating cables under the screed. The material does not oxidize and can withstand high loads. The tape is produced in rolls.
- Mounting width – 30 mm.
- Thickness 1 mm.
- Roll length 25 m.
The roll is rolled onto the surface for laying the liquid line. It is secured to the concrete surface using dowels. There are special holes in the tape for this purpose. The mount is attached to the soft surface with staples.
To hold pipes or cables on the tape there are petals and a rod. The petals are lifted up, the outline is laid, the petals are lowered, grasping the rod. It is recommended to pre-mark the surface of the base. The tape can be laid on a foil screen.
Dry screed technology
This option is no less reliable than described above. It is called dry because during the manufacturing process it does not need to be filled with concrete-sand mortar. Below we provide brief step-by-step instructions for installing and installing an electric floor in a house or apartment yourself:
Concluding the topic of laying electric flooring, it is necessary to refute the false statement that it is impossible to use it in a wooden house (or made of timber). Below is an example diagram for such an installation.
Advantages and disadvantages
Using a special device, you can quickly secure pipes
The advantages of anchor brackets include:
- high speed and ease of installation of products in comparison with other methods;
- reliability of fastening of pipe blanks;
- durability;
- relatively low cost.
The fastening element can be used to fix other types of pipelines that are not related to heated floors. Due to the presence of protective plastic teeth, the products in question are highly resistant to impact loads. The disadvantages of fasteners of this class include the complexity of installation on some types of water and electric heated floors.
Using a tucker
Heated floor pipes can be secured using a tucker. This is a mounting stapler. It has a long handle and a mounting location for staple cartridges. One cassette contains 100 staples. They are metal, made of aluminum alloy.
- Before installing the pipeline, markings must be made. A pipe is laid across it.
- The tucker is adjusted to a certain pipe diameter.
- The work is carried out by 2 people; one lays the contour, the other strengthens it with a tucker.
- The staples are attached to the insulating material. Recommended pitch is 30 cm.
- At the point where the contour turns, 3 brackets are installed that hold a certain bending radius.
The installation of the main line is quick, but it requires careful preparation. It will be difficult to detach the bracket from the floor. This can damage the insulation material.
Instructions for laying an electric floor on an old subfloor
If you make fasteners on concrete, then the heat loss as a percentage will be about 30-35%.
Provided that the axis of the thermal cable is located at a distance of 10.0 mm from the base, and the pitch is 70.0-75.0 mm. In this case, you should opt for a cable with a rating of 10.0 watts per meter. The cable is attached to the base using mounting tape (you must first lay insulation on the base).
An even layer of tile adhesive is applied on top. When it dries, you can lay tiles without a screed or other covering in compliance with the technology of its installation, for example, pre-lay a bed under the laminate before installing it.
Water circuit installation diagrams
Schematically, laying pipes for arranging a liquid circuit can be done in one of the following ways:
- coil;
- double coil;
- snail.
Coil. The method of laying such a contour is the simplest and is performed in loops. This option will be optimal for a room divided into zones with different purposes, for which it will be convenient to use different temperature conditions.
The first loop is installed around the perimeter of the room, then a single snake is inserted inside. Thus, a maximally heated coolant will circulate in one half of the room, while a cooled one will circulate in the other, and accordingly the temperature will be different.
The coil turns can be spaced evenly, but the bends of the water circuits in this case will have strong creases.
The serpentine pipe placement method is ideal for rooms with little heat loss. They are used not only for apartments and private houses, but also for industrial facilities where there is a need to heat all year round
Double coil. In this case, the supply and return circuits are located next to each other throughout the room.
Angle coil. It is used exclusively for corner rooms where there are two external walls.
The advantages of the serpentine shape include simple planning and installation. Disadvantages: temperature changes in one room, pipe bends are quite sharp, so you cannot use a small pitch - this can cause a pipe break.
When laying the contour in the edge zones of the room (floor areas where external walls, windows, doors are located), the pitch should be smaller in comparison with other turns - 100-150 mm
Snail. Using this arrangement, supply and return pipes are installed throughout the room. They are placed parallel to each other and installed starting from the perimeter of the walls and moving to the center of the room.
The supply line in the middle of the room ends in a loop. Next, parallel to it, a return line is installed, which is laid from the center of the room and along its perimeter, moving towards the collector.
The presence of an external wall in the room may require double laying of pipes along it.
Due to the alternation of two lines when laying using the snail method, temperature fluctuations in the supply and return lines can be up to 10 °C
The advantages of this method include: uniform heating of the room; due to smooth bends, the system has little hydraulic resistance, and savings in consumables can reach 15% compared to the serpentine method. However, there are also disadvantages - complex design and installation.
What is cable electric underfloor heating?
Since a heated floor is called electric, it is absolutely clear that it is heated using electricity.
Or rather, an electric cable, which, heating itself, warms the floor. There are two types of such cables: resistive cable and self-regulating cable. What is their difference?
The first type of cable (resistive) heats itself due to the electricity that flows through it and heats the surrounding space, that is, the floor. The cable can be single-core or double-core.
Single-core is when there is only one wire running throughout the entire cable - the core. It is covered with braid and insulated. A two-core cable, accordingly, consists of two identical insulated conductors.
IMPORTANT! During installation, the single-core cable must begin and end in the same place. That is, it must be closed. This rule does not apply to a two-core cable.
IMPORTANT! Single-core and two-core resistive cables have two disadvantages - they emit an electromagnetic field (however, two-core cables are weaker). Heavy furniture cannot be placed on a resistive cable heated floor; the cable may overheat. The same can happen if the technology for laying resistive heated floors is broken.
The second type of cable (self-regulating) is much more complex and free of previous disadvantages. Accordingly, the cost of such a cable is much higher.
So, you have figured out the types of cable heated floors. Now I’ll tell you how to determine how much cable to buy?
Which way is better?
The choice of the best method is influenced by the quality of fastening and the price of the issue. For professional craftsmen who perform large volumes, convenience and speed of installation play an important role.
Fastening to reinforcing mesh has been used for a long time, its advantages are ease of installation and minimal costs. However, it is difficult to call the method convenient: you have to work all the time bent over, tying nylon ties with your hands. And the use of a grid does not cause unanimous approval. There is an opinion that it gradually cuts the plastic and over time the pipes begin to leak.
More and more craftsmen are resorting to working with a tucker, which allows them to produce large volumes of work in a short time. At the same time, the quality does not suffer compared to other methods.
The same can be said about the use of polystyrene foam mats with fixation. Time will tell which method will become the most common.
This video shows common installation methods
Reinforcement mesh
The most inexpensive element for attaching a floor water line is reinforcing mesh. Select a material with a cell of a certain size. It depends on the step length with which the pipeline is laid: 10*10 cm, 15*15 cm.
Among the advantages of this fastener, the reliability of the fittings is noted. It serves as additional reinforcement for the concrete screed, which is formed for the water-heated floor.
- The pipes are secured using staples or tape. The brackets are made of heat-resistant plastic. They have spines pointing downward; securely hold the pipe in place.
- The staples are installed in a certain order on the entire surface of the reinforcing mesh. They have hooks on the underside. With their help, fastening to the fittings is made. The step between staples is 30-40 cm.
- In places where the pipe bends, it is necessary to place 3 staples. One is designed to hold the pipe in the center, the others provide a certain bending radius.
- The outline is drawn with a snake; push the pipe into the fastener with your foot. Use soft shoes.
Instead of staples, the line is reinforced with plastic tape. It has teeth on the inside. There is a loop at the end. The tape is wrapped around the pipe and inserted into a loop. In this case, the teeth are held by the edges of the loop, securely fixing the contour.
We recommend: How to lay a water-heated floor under tiles?
The work is more labor intensive. In this case, the plastic comes into contact with the reinforcing mesh. When using staples, the product is placed on a slight elevation. The grid remains at the bottom.
Types and design, as well as features of heating elements
A single-core wire or a two-core cable is most often used as an electric floor heating element.
The first option is notable for its low cost, but the increased background EMR imposes restrictions on its use in residential premises. The heating cable has two cores, one of which plays the role of a regular conductor, and the second - a heating element. This design can significantly reduce electromagnetic radiation, but increases the cost of the product.
More detailed information about the above heating elements can be found on the pages of our website.
Installation can be greatly simplified if you use a heating mat. This design is nothing more than an ordinary thermal cable laid with a certain step width on a reinforcing mesh.
As a rule, the width of the mats is about 0.45-0.5 m, and the length can vary from 0.5 to 12.0 m (accordingly, the maximum heating area for one segment is limited). There is no standard for mat sizes, so they may vary slightly from one manufacturer to another. The electromat, like the thermal cable, is a solid structure, the footage of which cannot be changed arbitrarily.
Rod structures are considered a subtype of electric mats. They use special carbon rods with the addition of copper and silver as heating elements. Heating elements are connected in parallel with a certain step.
The main advantage of this design is self-regulation. That is, if the temperature on any rod has increased due to poor heat transfer (for example, furniture has been placed), then the heat release is reduced. Thanks to this property, you can lay the mat over the entire area of the room.
Infrared film. This heating element became widely available relatively recently, literally at the beginning of the century.
The term “infrared” used in the name is a marketing ploy aimed at distinguishing this product from a number of other heating elements.
As you know from a school physics course, infrared emitters are also called thermal, therefore, any heating device can be classified in this category. The design of the film infrared heating element for a heated floor is shown in the figure below.
Do-it-yourself installation of heated electric cable floors
What should you do first when laying any electric heated floor with your own hands? Select a thermostat and a location for its installation.
A thermostat is a device that controls a heated floor: it maintains the set temperature and regulates heating on and off. Choose a thermostat based on the power of your heated floor.
After you have chosen the thermostat and the place where you will install it, proceed directly to installing the thermostat and laying the heated floor, having first leveled the floor surface with a cement screed.
Apply damper tape around the perimeter of the room. Lay thermal insulation at least 2 cm thick. It is needed so that the cable heats only your floor, and not someone’s ceiling below or basement.
There are two main ways of laying heated floors - parallel and spiral. The names speak for themselves.
It is more convenient to install cable heated floors using the second method. You will need: mounting tape, cement screed, the cable itself.
The floor is ready. It is smooth and insulated.
Now lay and secure the mounting tape to the prepared floor surface. And mark the cable laying step on it. Remember you calculated it earlier?
IMPORTANT! The cable must not cross itself!
All that remains is to install the temperature sensor. In the prepared groove on the floor and on the wall (from the heated floor cable to the thermostat) we place a cable with a temperature sensor at the end.
Tip 1: To ensure that the temperature sensor serves you faithfully longer, protect it with a plastic corrugated pipe. A plastic corrugated pipe is a special hollow tube into which the temperature sensor wire is placed and the end is closed, for example, with insulating tape, so that nothing unnecessary gets inside the tube. Place the cable with the temperature sensor in a corrugated tube along the floor between the turns of the cable.
Tip 2: After laying the electrical cable for the heated floor, check its functionality.
That is, you take a special tester and measure the resistance of the laid cable. The data obtained should not differ from those indicated in the technical passport by more than ten percent. If you don't have a tester, just connect the cable to electricity and at least check whether it heats up or not.
Everything is fine? Now you have come to the finish line. All that remains is to fill everything with cement screed.
The thickness of the cement screed should be from 3 to 5 cm. Leave the screed to dry. After it has dried (28 days are recommended), you can begin connecting the cable heated floor to electricity.
Connect the temperature sensor, floor cable wires, and electrical wires to the back of the thermostat.
Tip 3: If you are not sure that you can connect the heated floor to the thermostat yourself, ask a professional to do it (for example, a neighbor - an electrician).
At this point, the installation of underfloor heating cable electric is completed. On top of a cement screed with an installed electric cable heated floor, you can lay floor coverings such as tiles, laminate, carpet, cork flooring, and so on.
Installation of electric heated floor
Cable heating systems can be installed in any premises, both residential, office or industrial buildings. Proper laying and installation of electric heated floors will ensure reliable and safe operation for many years. Installation of an electric heated floor begins with the preparatory work.
Preparatory work is carried out for one single purpose - calculating the required amount of materials and elements. The main task before laying an electric heated floor is to calculate the power of the heating cable.
