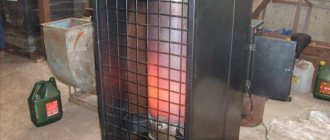
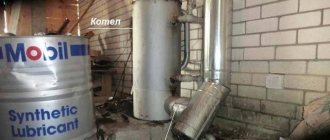
How to weld a simple stove
Then the heat is released in greater quantities into the room, rather than being “thrown out” to the street.
Another upgrade is to make an iron drawer. Oil is poured into it. With this design, the stove is easier to maintain. The drawing contains all the necessary dimensions. Before assembling a homemade oil stove, it is necessary to select the correct diameter of the firebox and body. Here everything depends on the volume of the room that needs to be heated. If it is a garage of 3 by 6 meters, take a profile of 80x80x4 mm. The fuel box is made of metal 60x60x4. It is more difficult to work with round rolled metal.
The step-by-step instructions look like this:
- Cut the metal according to the drawings to make a casing, drawer, afterburner. If the latter has a bend, the tube is cut at an angle of 45 degrees.
- For a profile of a smaller standard size, one wall is cut out with a grinder. Plugs are welded to the sides. The result is an open container to which you need to attach a handle.
- The structure is welded. It is necessary to drill an air hole at the top of the fuel chamber. The pipe is perforated. At this point the work is completed.
It should be taken into account that you need to calculate the number and diameter of holes in the afterburner. If you use a profile of 80 by 80 mm, then the cross-sectional area will be equal to 6400 square millimeters. This value is divided in two
Pay attention to the markings of the drill used. If it is 8 mm, then the hole area will be 50 sq. mm
Now 3200 must be divided by 50. The result is that 64 holes will be required to work effectively. However, as a result of customization, their number can be increased.
It is important that the chimney is of sufficient length. The elevation of the chimney outlet must be at least 5 meters
Then the operation of the stove during testing will ensure the highest possible efficiency even without supercharging. Otherwise, the pipe will have to be extended to this mark. But you can further increase productivity if you organize an inclined chimney running along the wall. The heated metal will release heat into the room. Only in this case is it important to follow fire safety rules. There should be no wooden shelves above the pipe, and no wallpaper on the walls. Even better is to cover the wall with a metal sheet.
Making a drip heater
Professionals who have assembled more than one “dripper” use old propane cylinders with a diameter of 200 mm. Oxygen ones are also suitable, since their cross section is 220 mm. the latter benefit due to thick walls. They serve for a long time, do not burn out, and accumulate heat. Pipe C-10 is also suitable if it has a wall thickness of 5 mm. An excellent option for a durable housing is pipes made of heat-resistant stainless steel alloys, alloyed chromium, molybdenum or nickel (for example, 15X1MF or 12X18H12T) with a wall no more than 3 mm. However, it is not advisable to specifically purchase this raw material due to its high cost.
Technologically, the manufacturing process is as follows:
- A flame bowl is made using a piece of pipe or ready-made steel containers. This one is pulled out through a rubber hatch, so it is not made too big.
- The openings necessary for connecting the chimney pipe and the cleaning service hatch are cut out in the body. The latter is framed and closed with a door. Bolts can be used for fastening.
- An afterburner is being made. All holes are not made at once. Usually the bottom 2-3 rows are drilled, and the rest are drilled during the setup process. If you do everything at once and there are too many of them, you will have to make a new one.
- Weld the cover with the air duct and flange. The latter is necessary for installing the fan. The fuel supply device is connected. Photo and video instructions will help here.
Now assemble all the components and connect the electrical wiring. The structure will be more stable if you make a metal frame. A heavy metal profile is suitable for this.
Making a drip heater
Most often, craftsmen use old oxygen and propane cylinders with a diameter of 220 and 300 mm, respectively, to assemble droppers.
The former are preferable because of their powerful thick walls that can last a long time and not burn out. A pipe made of low-carbon steel (St 3-10) with a wall thickness of 5 mm or more is also suitable. Select rolled metal for other parts according to the drawing of the furnace with top feed of waste into the combustion zone. The blower fan is a “snail” from a VAZ 2108 cabin heater or its Chinese equivalent, the fuel line is a stainless tube with a diameter of 8-10 mm.
The manufacturing technology is as follows:
- Make a fire bowl from a piece of pipe or take a ready-made steel container. It must be removed through the inspection hatch, so do not make the tray too large.
- Cut openings in the body for the chimney pipe and cleanout hatch. In the latter, make a frame and install the door (possibly bolted).
- Make an afterburner. Take your time to drill all the holes indicated on the drawing; do the bottom 2 rows first. You will complete the rest while setting up the oven.
- Weld a cover and an air duct with a flange for mounting the fan to the afterburner. Attach the fuel supply device as shown in the photo.
- Assemble the heating unit and connect it to the chimney.
To regulate the heating power, it is necessary to provide control of the fan speed and a device for dosing the fuel supply (as a rule, an automatic drinker with a jet break is used). According to reviews from craftsmen on a popular forum where heat extraction issues are discussed, fuel consumption in the furnace can be monitored visually. The trend is this: if the oil flows in drops at the break in the stream, then less than 1 liter per hour burns, and when a thin stream flows, more than 1 liter per hour.
After ignition and warming up of the heater, it is necessary to set the optimal operating mode. The procedure is carried out according to the same scheme as with the miracle stove: you need to achieve the most transparent smoke from the chimney by drilling additional holes in the afterburner. The ideal flame color is blue, normal is yellow, and reddish is unsatisfactory. In the latter case, low heat transfer, high consumption and soot formation are observed. For details about the design and assembly of the furnace, see the video:
How to build a stove from a pipe?
Do-it-yourself sauna stove from a pipe
One of the common homemade options is a bath stove made from a pipe. Let's consider how such construction is carried out.
Pipe is an excellent “semi-finished product” for constructing a furnace
Metal stoves can be made from a sheet of steel or, for example, from an old barrel. But if there is a piece of pipe of suitable diameter on the farm, then it is worth using this “blank”.
A homemade stove for a bathhouse made from a pipe can be made with a vertical or horizontal direction of a piece of rolled pipe. By using prefabricated stove pipes, the amount of welding work required when making sheet metal stoves is reduced.
Only high-quality pipes without signs of corrosion are suitable for the manufacture of furnaces.
If the pipe has been lying outside for a long time, it should be inspected first and reinforced in problem areas by welding patches.
Preparing parts
To make a good stove from a pipe, you will need a piece of rolled pipe with a diameter of 50 cm and a length of 1.5 meters. The thickness of the pipe walls must be at least 10 mm.
The workpiece should be cut into two parts, measuring 0.6 and 0.9 meters, respectively. A longer piece is needed to build a firebox and heater, and the remaining piece will be used to make a tank.
Making a furnace
An example of using a pipe stove in a bathhouse
- First of all, you should take care of the blower. A hole 5 cm high and 20 cm wide is cut at the bottom of a long section of pipe. A thick round steel plate is welded above the hole.
- Next, a niche for the firebox is formed and a door is made for it. The door is hung on hinges or hooks.
- A piece of pipe is welded above the firebox, which will be used as a heater. The height of the segment is 30-35 cm.
To fill the heater, you should use rounded cobblestones; in extreme cases, you can pour electrical insulators made of ceramics.
A steel coupling is installed in the upper part of the future furnace, which will be required to fix the water heating boiler.
Making a water heating tank
Assortment of pipe bath stoves
When building a sauna stove with your own hands, a water heating tank is also formed from a pipe.
- For its manufacture, a piece of pipe 0.6 m high is used.
- A steel circle – the bottom – is welded to the end part of the pipe section.
Advice! The thickness of the metal for making the bottom of the water tank is at least 8 mm
A hole is cut in the bottom of the tank to accommodate the chimney. It should be moved towards the rear wall of the tank. The chimney is fixed to the bottom of the tank by welding
It is important that the seam is of high quality to prevent water leaks into the firebox. The upper part of the tank is closed with a metal lid with holes made for the passage of the chimney and for filling with water. The chimney is welded tightly to the lid, and a neck with a lid is installed in the hole for filling water.
Furnace technology
A drawing of a furnace operating on waste oil is shown in the figure.
Drawing of a waste oil furnace
- Making the lower chamber. The primary combustion chamber in such a furnace is combined with a fuel tank. It is a round tank with a lid; the lid has holes for filling oil and for a pipe, which is the second chamber of the furnace. According to the dimensions indicated in the figure, cut out the parts of the lower tank, clean the edges with a grinder and weld them. It is more convenient to make the walls from pipe trim. Weld a bottom made of sheet metal and legs from a corner to the walls of the tank. Cut out a cover with holes: a 100 mm hole in the center and 60 mm closer to one of the edges. The lid can be removable - this will make it easier to clean the tank and transport the stove.
- In a piece of pipe with a diameter of 100 mm and a length of about 360 mm, holes are drilled for air supply. Their diameter should be approximately 1/10 of the pipe diameter; in this case, the figure shows a size of 9 mm. The holes should be spaced evenly around the circumference and height of the pipe.
- The pipe is welded to the lid of the lower tank, maintaining perpendicularity. There is also an air damper on the lid; it can be held on by a rivet or bolted connection. The diameter of the hole for the damper is 60 mm. Through the same hole, oil is poured in and the stove is ignited.
- The upper tank is made in the same way as the lower one. It is also convenient to make the walls of the tank from a 355 mm pipe. In the plate that acts as the bottom, a 100 mm hole is made, offset to one of the edges of the bottom. From the bottom, a small piece of pipe with a diameter of 110 mm is welded to the hole - it is used to put it on the perforated combustion chamber of gases.
- The lid of the upper tank is exposed to the highest temperatures, so it is better to make it from 6 mm metal. A hole is made in the top cover for the chimney; it is located on the side opposite the hole in the bottom of the chamber. Between them, a cutter is welded to the top cover - a partition made of thick metal. The cutter should be located closer to the smoke hole.
- A chimney pipe is welded to the top of the lid, which is later connected to the chimney. To impart rigidity to the structure, a spacer from an angle or pipe with a diameter of 20-32 mm is welded between the lower and upper chambers. The stove itself can be painted with high-temperature metal paint.
Where to apply and how to modify
Due to a significant list of disadvantages, waste oil heaters are rarely used in housing. But they are widely used for heating technical and production areas. Motorists use them in garages, gardeners - in greenhouses, livestock breeders - in outbuildings. There is always a place for them at car washes, service stations, and warehouses where there are no flammable materials.
Often basic designs are subject to various kinds of modifications. For example, a water jacket or water heating coils are used for these purposes. Such equipment is included in water heating. Furnaces of this type must operate using automation, otherwise their functioning will have to be closely monitored.
What is a potbelly stove with a water circuit: the advantages and disadvantages of a popular stove
A potbelly stove is characterized by high heat transfer and fuel burning rate. These qualities are given to it by the materials from which the firebox is made (cast iron, steel, iron). The potbelly stove quickly flares up and heats up, and if a water circuit is connected to it, then the warm flue gases along the way also manage to heat the water for domestic needs.
When choosing the material from which it is best to make a potbelly stove, you need to be guided by the following indicators:
- Thermal conductivity is the property of metals, liquids and gases to conduct heat through themselves. The faster heat is transferred, the faster the object heats up or cools down. Foam plastic has low thermal conductivity - 0.036–0.050 W/m*C. Taking it in our hands, we will immediately feel that it is warm, because the foam does not transfer heat, but accumulates it. If you take a metal bar, you will feel the cold due to the high heat transfer.
- Heat capacity is the property of a material to accumulate heat. Water has the highest heat capacity, air is in second place, and cast iron, steel and iron are at the end of the list. Therefore, a metal stove heats up quickly and cools down just as quickly. In city houses, central heating radiators are filled with water, which gives off heat for a long time, heating the home.
List of materials used to create a potbelly stove:
- Steel.
- Cast iron.
- Iron.
- Brass.
- Aluminum.
- Copper.
| Material | Thermal conductivity, W/m*oС | Heat capacity, J/kg*oС | Melting point, oС |
| copper | 382–390 | 400 | 1085 |
| aluminum | 232–236 | 920 | 660 |
| brass | 97–117 | 400 | 900 |
| iron | 74 | 460 | 1539 |
| cast iron | 62,8 | 500 | 1200 |
| steel | 47 | 540 | 1500 |
| water | 0,6 | 4200 | — |
| building brick | 0,2–0,7 | 880 | 1000–1100 |
| Styrofoam | 0,036–0,050 | — | 150–200 |
| air | 0,025 | 1100 | — |
Copper is the most thermally conductive material of all those listed in the table. Its disadvantages are cost and melting point. Aluminum and brass have the same limitations. At high temperatures, a cast iron or steel stove will only turn red, but will do its job, while a copper, aluminum or brass stove will melt.
Potbelly stoves are most often made of steel because it has a high melting point and the highest heat capacity among all available materials
Making a stove from steel, iron and cast iron is justified due to the prevalence of these materials. From the point of view of thermal conductivity and heat capacity, they need fine-tuning. It is more expedient to use the thermal energy of the stove to heat water, otherwise it will simply go down the chimney
To limit heat loss, it is also very important to achieve complete combustion of the fuel.
The ideal way for a potbelly stove to work is when barely warm air comes out of the pipe, and all the energy is directed into hot water supply and heating the house.
Table: advantages and disadvantages of a potbelly stove
| Advantages | Flaws |
|
|
As can be seen from the table, a potbelly stove has a lot of disadvantages, so if you decide to install this design, you will have to take into account all its weaknesses.
Making a pyrolysis furnace for mining
Now you know how to assemble a stove from a gas cylinder with your own hands. The unit running on exhaust or any oil will delight you with a lot of heat. For example, the exhaust furnace diagram presented above is designed to heat a room with an area of 70-80 square meters. m. Let's now look at the scheme for creating a pyrolysis unit - that is, a small potbelly stove.
Assembly diagram of a pyrolysis furnace operating on waste.
This oven will consist of three main parts:
- Oil container with lid and flap;
- Combustion/pyrolysis chamber;
- Afterburner chamber.
It all culminates with a chimney. Its recommended length is at least three meters, but chimneys with a height of 4-5 meters work best.
The oil container is made from a piece of pipe with a diameter of 344 mm, its height is 100 mm. We weld a sheet metal lid on the bottom. Our top cover is removable, it is made from a pipe with a diameter of 352 mm - sides with a height of 600 are welded to it. In the cover we make a central hole for the combustion chamber with a diameter of 100 mm. We make a hole nearby with a diameter of 60 mm - it will serve as a blower. This hole is closed with a simple rotating lid.
By adjusting the clearance of the blower, we can regulate the intensity of combustion, which will affect the air temperature in the room. If you completely close the vent while the stove is running, it may go out.
We make an afterburning chamber - we use a pipe with a diameter of 352 mm and a height of 100 mm. In the lower part we make a hole with a diameter of 100 mm into which the combustion chamber pipe is inserted. In the top cover we make a hole with a diameter of 100 mm for the chimney. Inside, closer to the chimney opening, we weld a small partition 330 mm wide and 70 mm high. Our do-it-yourself oven is almost ready.
It remains to modify the combustion chamber. Everything is simple here - take a drill and a 9 mm drill bit, drill 48 holes (6 rows of 8 holes each). With a total combustion chamber pipe height of 360 mm, the holes should be located in an area 20 mm from the bottom and 50 mm from the top.
After completing all the work, check the tightness of all welds - this will allow you to count on maximum efficiency of the stove.
Check the performance of the resulting unit outside. This will protect you from possible fire and other accidents.
We start testing the furnace - we install it outside, pour the waste into an oil container, and add kerosene on top. Carefully set it on fire, leaving the ash pan open. After some time, the stove will return to operating mode - you can adjust the burning intensity using the blower. After this, the stove is moved indoors (it must be ventilated).
In order for heating to be as efficient as possible, install the furnace in a corner, and line the side walls with galvanized iron so that all the heat is reflected into the room.
Heat exchanger
For a drip-type furnace, this element is not mandatory. When the room is small and without partitions, then the heat coming from its walls is sufficient for heating. If it is necessary to achieve greater efficiency of the unit, an air or water type heat exchanger is made. It is placed in the upper chamber.
A heat exchanger is made from a section of 100 mm pipe. Its length should be such that the ends protrude beyond the walls of the housing by 10–20 centimeters on both sides. Two holes are created at opposite ends of the cylinder, a pipe is passed through them and fixed by welding.
A flame divider made of a sheet of iron must be welded above the heat exchanger so that it divides the flame into tongues, increasing heat transfer.
A swirler is placed inside the air heat exchanger, accelerating the air flow. It is made from a strip of steel or a corner divided into bent blades.
Then air ducts made from an uninsulated chimney pipe and corners are connected to the heat exchanger pipe. A duct fan is installed on one side of the air duct. It is connected to the network directly or through the contacts of a thermal relay installed on the fan housing, or by adjusting the temperature mode.
Improvement options
The model presented above is a basic base, onto which additional elements can be attached at the request of the master. For example:
- To increase the efficiency of the stove, a heat exchanger can be built in its upper part. Passing through the labyrinths, hot air heats it, and therefore the air in the room. Then, to the method of heating with infrared radiation, air is also added.
- Sometimes a reflector is made consisting of two pipes. One of them forces cold air in; hot air will come out of the other. This option is good because the heat from this pipe can be transferred to the next room.
- You can “dress” the stove in a brick coat. When warming up, the brickwork retains heat for some time.
- You can also build a permanent water tank in the upper part and use the stove as a boiler.
- A metal tube and any container (even a plastic bottle) is suitable for making automatic oil supply, based on the principle of communicating vessels.
How to paint the stove? To make paint, you need to mix liquid glass (500 g), aluminum powder (200 g) and chalk (20 g). Mix everything. Ready!
Secrets of successful operation of a potbelly stove
In order for a potbelly stove running on waste oil to be effective and safe, you need to follow a few tips. The oil must settle before use. You need to fill it into the oil tank to 2/3 of its volume.
For safety reasons, all elements of the stove should be cleaned regularly. To simplify this task, its top module should be removable. This will provide access to the chamber where the combustion of the mixture occurs. To remove soot from the walls of the chimney, it should be tapped.
To extend the service life of the combustion chamber and the furnace as a whole, it must be painted using paints that are resistant to high temperatures. The potbelly stove should be installed on a non-combustible base. Do not place it in a draft, under the influence of which a flame could escape.
Comparison with modern models
As for today's stoves, they are not at all similar to the old prototypes, with the exception of the potbelly stove, which retains the original principle of operation. In the sixties of the last century, the combustion of fuel to the state of carbon dioxide and water vapor was not considered something harmful, which cannot be said about the present time. Now any greenhouse gases are a dangerous enemy of the environment, so people are trying to abandon systems that pollute the environment. It is still impossible to ensure complete afterburning of the waste, but achieving maximum efficiency is quite possible.
Modern oil furnaces are different from the original ones
Also, in the distant past, there were no motor oils on the market with synthetic additives and clever additives, which can reduce the fuel consumption of internal combustion engines several times, but if burned incorrectly, they release carcinogens, toxic substances and mutagens. And people then were more resistant to various environmental influences, and the population was about 2.5 times smaller than now.
And in the end, Soviet engine oil was a natural petroleum product made on the basis of saturated carbons, which could not reach a high combustion temperature. This means that the appearance of harmful and dangerous nitrogen oxides in those heaters was practically eliminated. Modern installations emit such substances in significant quantities, which forces us to look for cleaner and alternative solutions.
What is mining
Waste oils are engine oils that have lost their beneficial properties for a car. During the replacement process, used fluids are sent to waste, so you can purchase fuel for the furnace at a low price and in large quantities. For the convenience of obtaining oil, enter into an agreement with the nearest auto repair shop.
The flow rate is 2 liters per hour. Depending on the size of the room and method of operation, the figure may vary. An oil-fired stove is suitable not only as a heater for a work area, but also heats water for various needs.
How to make a burner yourself
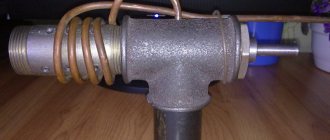
To understand how to make a Babington burner device, you need to study its design from the drawings. You can find quite a few of these on the Internet, but for manufacturing it is better to adopt the experience of specialists and use a proven prototype for work. Below is a drawing of a burner made and tested by one of the experienced participants in one of the specialized forums:
Now a few words about what the unit can be made from according to this drawing. The author used a regular steel tee with threads for connecting pipes with a diameter of 2 inches (DN50) as a body. Instead of a tee, a cross of the same size will do. The remaining elements are in accordance with the list:
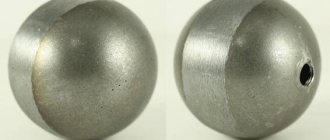
- Any metal part with a hemispherical end can act as a nozzle
Hemisphere or hollow ball for a Babington burner. There are several options - starting from a brass door handle and ending with various spherical nuts.
- The nozzle is made from a metal pipe with an external pipe thread, length – 150-200 mm.
- Copper tube with a diameter of 10 mm for the fuel path.
- Metal tube for organizing air supply. Diameter – at least 10 mm.
- Threaded fittings are used to connect a copper tube to the body.
You will also need a small pump to pump used oil. Units from a VAZ car or motorcycle cope well with this task; you just need to ensure their rotation from an electric motor. Any low-power compressor is suitable, including one from a refrigerator, since the pressure in the air path should be low (nominal - about 2 Bar, maximum - 4 Bar).
An important operation is to drill a calibrated hole of very small diameter in the improvised nozzle. But first you need to select a drill of the required size, because the power of the future homemade Babington burner will depend on the size of the hole. Calculating power will be discussed in the next section, and how to make a small hole yourself is shown in detail in the video:
Conversion of a solid fuel stove for testing
When the household already has a potbelly stove, but is not happy with the fact that it runs on solid fuel, you can modernize it and it will become universal. For this purpose, an attachment is made that resembles in its design a stove with processing in its lower part.
There is also a perforated pipe here, but not straight, but bent at a right angle. It is connected to the side wall of the furnace, which serves as the final combustion chamber. If you weld the potbelly stove door and make a hole in it for the pipe to enter, then the stove will only work during exhaust.
The modernization of this stove consists not only of adding a special attachment to it, but also of an original solution to protect nearby objects from fire using the principle of convection. For this purpose, pipes were welded to the side wall of the furnace. Cold air entering them from below cools the structure
To make it possible to use not only industrial oil for heating, but also firewood, two replaceable doors are made. The standard one is hung when it is planned to lay firewood, and the modernized one with the appropriate hole is hung when the stove will operate on waste oil.
We also suggest reading an article on how to assemble a potbelly stove using waste oil from a pipe - to familiarize yourself with the material, follow the link.
How does an exhaust boiler work?
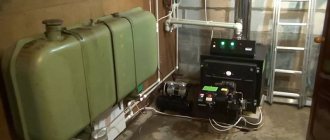
Heating a private house with a waste oil boiler is organized thanks to several important elements of the fuel supply, filtration and heat exchange system. The design contains the following components:
- Oil pump - connected to a preheating chamber and a filter that traps solid particles. Pump function, optimization of supply of waste quantity to the burner device.
- Preheating chamber - to reduce the percentage of underburning, used oil is preheated to a temperature optimal for combustion.
- Turbines - fuel is sprayed into the combustion chamber in the form of fine dust, while at the same time a stable flame is maintained. To operate, the simultaneous operation of two turbines, a combustion fan and a compressor is required.
- The controller is the heart of domestic oil recovery boilers. Ensures synchronous operation of all important components of heating equipment. Modern stations are connected to a remote control and warning unit and have a multi-level protection system that prevents emergency situations.
- Heat exchanger – depends on the type of boiler:
- Convection models - air heaters, do not have a heat exchanger at all.
- Domestic boilers for the home are equipped with one or two circuits connected to the heating and hot water system.
For use in domestic conditions, it is impractical and dangerous to install homemade heaters. It is allowed to connect exclusively factory-assembled boilers registered by Rostechnadzor.
An oil-fuel heating boiler for a private home or cottage, using waste oil, is economically beneficial for several reasons:
- Availability of fuel.
- Low cost of development.
The average calculation of the required amount of oil is calculated in the following way:
- Find out the maximum performance of the boiler; information is in the technical documentation.
- Divide it by 10.
- The result obtained is multiplied by 1000 50%.
The principle of boilers operating on recycled fuel is the same in all cases. It consists of evaporating the oil and burning the steam from it.
Principle of oil evaporation
But there are small nuances in this technology. All used oils contain many heavy metals, additives and other elements. The task is to build a unit that will allow you to accumulate heat inside, and not immediately discharge all these elements into the chimney. Complete oxidation of all elements occurs only if the maximum temperature inside the boiler is reached - 6000C.
The temperature indicator in this case is a very important point. Without going into lengthy explanations of chemical processes, we can say briefly: harmless combustion and evaporation of fuel can only occur at a temperature of 600 degrees. A deviation of 200 degrees to one side or the other will provoke the release of very harmful toxic substances.
Exhaust boiler with water circuit
Used oil is poured into the lower tank. The top layer of oil in the evaporation chamber heats up, resulting in the formation of steam. As it rises, it exits into a perforated pipe and connects with air, reaches the upper tank and burns. And the combustion products themselves are discharged through the pipe through the chimney.
Thus, the room is heated, but no toxic waste is released that is harmful to human health. This fact immediately answers the main question that interests many before building such a unit: “How harmful is a boiler during mining?”
Waste oil boiler diagram
You should clearly understand the operating principle and technology of oil evaporation in such a unit. It is not the oil itself that burns here, but its vapor. Due to the fact that the spent fuel heats up and begins to evaporate even before combustion begins, it becomes possible to decompose such burning fuel into lighter elements.
Where are similar heating units used?
- in production premises;
- in premises for keeping animals;
- in auto repair shops, service stations;
- in greenhouses;
- in warehouses and garages.
Almost any oil, including shock-absorbing oil, can be used as fuel for such a boiler.
The principle of operation and advantages of such a stove
Fuel combustion in a waste oil furnace occurs in two stages. First, the fuel poured into the tank burns. The resulting gases are mixed with air. At the second stage, it is this gas-air mixture that burns, so the potbelly stove during mining consists of two compartments.
The design of the furnace for processing includes two combustion chambers, in one of which waste oil is burned, and in the other - a mixture of oil vapors and air
The first compartment is a tank into which used oil is poured. It burns at a relatively moderate temperature. Above there is another compartment, designed for the combustion of products mixed with air, formed during the combustion of waste. Here the process occurs at a much higher temperature, it can reach 800 degrees.
An important condition when building a potbelly stove for mining with your own hands is to ensure air access to both combustion chambers. For this purpose, a small hole is made in the lower tank, which serves to fill fuel, as well as to regulate the air supply. The hole is closed with a special valve. Secondary air usually enters the upper chamber through small holes (approximately 10 mm), which are drilled in the pipe connecting the tank and the second combustion chamber.
To ensure access of air to the second combustion chamber of the potbelly stove during mining, it is necessary to make small holes in the pipe connecting this chamber and the oil tank
The ability to use almost free fuel from waste oil is not the only advantage of such a unit. Thanks to the high combustion temperature, the exhaust furnace heats the room quickly and efficiently. If the device works correctly, it does not emit any unpleasant odors or substances hazardous to human health, therefore, from an environmental point of view, a potbelly stove during mining is considered completely safe.
However, the use of flammable substances in such a stove, for example, gasoline, solvent, etc., may pose a danger. It should also be remembered that some types of used transformer oil can release compounds harmful to health when heated.
Drawing of the simplest and most popular waste oil stove (click to enlarge)
Step-by-step manufacturing of the stove according to the drawing above
Owners of waste furnaces stock up on fuel in the summer. To do this, place a container in the garage into which the used oil is drained. By winter, quite a decent amount of fuel accumulates in it. Used oil can be obtained inexpensively or completely free from auto repair shops, service stations, etc.
Types of Russian-made waste oil burners
During the cold season, not only residential but also auxiliary premises need heating. Currently, devices using different types of fuel are used for heating, including waste or waste technical oil. On the Russian market you can find devices that process different fuel bases, as well as having a narrow specialization. Based on the type of fuel burned, such devices are:
In terms of functionality, burners used for testing are not only heating, but also welding and lighting.
- gas;
- liquid fuel;
- combined.
The simplest and most economical device for heating a room is considered to be an exhaust burner. According to functionality, burners are divided into 3 subtypes:
- welding;
- lighting;
- heating.
The operating principle of these devices was borrowed from primitive kerosene gas back in the 50s. Quite quickly, the simplest burners became popular; they began to be purchased for heating country houses and garages. In those days, any fuel was inexpensive, but over time, zealous owners, inventors and innovators began to look for a replacement for gasoline, diesel fuel and kerosene. Fuel oil and waste oil were used, which are now used as full-fledged fuel. Today, the device is still relevant, and is also an excellent way to preserve the environment.
Note! In a room where any liquid fuel device will be used, be it a homemade gasoline burner, a working unit, or a DIY diesel fuel burner, there must be a fire extinguisher! By type, burners for processing are liquid fuel, gas and combined
Compliance with safety regulations
For safe operation of homemade heating during testing, it is necessary to pay special attention to the quality of the oil. It should not contain substances that are easily flammable - gasoline, acetone and others.
The quality of automobile waste, as a rule, leaves much to be desired. When using them, carbon deposits may form, which will have to be cleaned off from time to time.
You can see how hot a boiler can get that uses waste oil as fuel: you can’t dry socks near it, put a kettle of water or lay out dry boards
In addition, the following safety precautions should be observed.
- The diameter of the chimney should not be less than 10 cm. A sandwich chimney is preferable: less soot is deposited on its surface.
- There cannot be any flammable substances near the boiler, including the fuel tank. Only at a safe distance.
- Avoid getting water or other liquid into the chamber with hot oil. The consequences of such a leak are presented in the video in the final part of this article.
- During the operation of a boiler using waste oil, heating temperatures significantly exceed those achieved during the combustion of solid fuel. Therefore, thick-walled materials are chosen for this design.
- It is advisable to equip the boiler room with a forced air circulation system.
Do not leave the unit running unattended. This is an effective, but quite dangerous thing.
Disadvantages of the furnace during mining
Furnaces under development
Of course, such designs have a significant advantage - low cost of fuel. But there are also many disadvantages:
- To ensure uninterrupted combustion of the furnace, constant and sufficiently strong draft is required
- high fire hazard (we will discuss the rules for operating the furnace during mining below)
- frequent cleaning of soot: if you make the body one-piece, after a couple of months you simply will not be able to use the stove - it will begin to smoke mercilessly
- high fuel consumption - you will need at least 2 l/hour
- The heat transfer of devices is not that great; most of the energy, unfortunately, flies into the chimney
Most of these shortcomings can be smoothed out by improving the design - installing a fan to increase the combustion temperature, an expansion tank, etc. But due to these shortcomings, stoves are used mainly for temporary heating of utility rooms.
Even if you make a stove according to proven drawings, in any case you will have to bring it to perfection yourself: adjust the draft force, fan rotation speed and fuel dosing. It’s also not worth making all the holes in the afterburning pipe right away - do the first two bottom ones first, and drill the rest after full setup.
General operating principle
If we want to get high-quality heating based on waste, we cannot simply take the oil and set it on fire, as it will smoke and stink. To avoid these unpleasant and hazardous side effects, you need to heat the fuel so that it begins to evaporate.
Volatile substances obtained as a result of heating will burn. This is the basic principle of operation of the heating unit during testing.
Image gallery
Photo from
Heating device made from improvised means
Homemade model with turbocharging
Connecting the module to a conventional stove
Miniature coffee stove
Application of perforated tube
To implement this principle, the design of the stove includes two chambers, which are connected to each other by a pipe with holes. Fuel enters the lower chamber through the filler hole, which is heated here. The resulting volatile substances rise up the pipe, becoming saturated with air oxygen through the perforation.
A schematic diagram of a two-chamber stove with a connecting perforated pipe allows you to understand exactly how a simple unit functions during mining
The resulting combustible mixture ignites in the chimney, and its complete combustion occurs in the upper afterburning chamber, separated from the chimney by a special partition. If the process technology is properly followed, virtually no soot or smoke is generated during combustion. But the heat will be enough to warm the room.
Using the plasma bowl
In order to achieve maximum efficiency of the process, you can go a more complicated route. Let us recall that our goal is to separate volatile components from the fuel by heating it. To do this, a metal bowl should be placed in the only chamber of the unit, which must not only be heated, but heated.
Through a special dispenser, waste will flow from the fuel tank into the chamber in a thin stream or drops. Once on the surface of the bowl, the liquid will instantly evaporate, and the resulting gas will burn.
The efficiency of this model is higher, since fuel supplied by drip burns better, and the problem of topping it up during the operation of the furnace disappears by itself
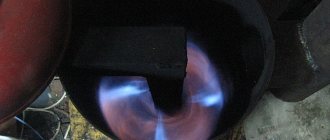
If everything is done correctly, the combustion of gases should be accompanied by a bluish-white flame. A similar flame can be observed when a plasma burns, which is why the red-hot bowl is often called a plasma bowl. And the technology itself is called drip feed: after all, fuel must be supplied in exclusively small doses.
With all the variety of designs, the operation of all heating units using waste fuel is based on the principle described above.
Popular options for pre-fabricated furnaces, their characteristics
The Teplamos NT-612 stove is often chosen as a device used for heating a garage. The power of such a drip fanless heater can vary between 5-15 kW. Fuel consumption is 0.5-1.5 l/hour.
This furnace for use in a garage is a closed type device. It is equipped with a chimney, an air supply pipe and a built-in tank designed for 8 liters of fuel. Fuel combustion occurs in the inner chamber. The operation of the device begins with electrical heating of the plasma bowl. When the required temperature is reached, fuel is supplied and air is forced into the combustion chamber. The average cost of the device is 30 thousand rubles.
Another popular model is the Zhar-25 (MS-25) stove. This device can operate not only on waste oil, but also on diesel fuel. The device operates from the electrical network, which powers the internal fan. The thermal power of the furnace varies from 25 to 50 kW. It is designed to heat a room up to 500 square meters. m. Maximum fuel consumption is 4.5 l/hour. The device has large dimensions. Its weight reaches 130 kg. This stove needs to be equipped with a good chimney. You can buy it for 45 thousand rubles.
The exhaust furnace is equipped with a chimney, an air supply pipe and a built-in tank
Do-it-yourself stove made of sheet metal and pipes
Depending on the type of device, the structure can be created from pipes of different diameters or from iron sheets. To work you will need the following tools:
- grinder with cutting and grinding wheel;
- sheet metal and pipes;
- welding machine and electrodes;
- metal corners;
- metal paint that can withstand high temperatures.
Before making a furnace for testing, a detailed drawing of the apparatus is made. You can create it yourself or use ready-made options that are easy to find on websites on the Internet.
The first step is to make the lower part of the chamber connecting to the fuel tank. It looks like a rounded or straight tank with a lid where two pipes are located. The first is used to supply oil, and the second is used to strengthen the pipe that goes into the middle part of the device. Elements for the tank are cut out with a grinder and connected according to the drawing.
Depending on the type of device, the structure can be created from pipes of different diameters or from iron sheets
The bottom and metal corners are welded to the walls of the tank, which act as the legs of the structure. To create a lid, a sheet of metal is taken and holes are made in it. The first, with a diameter of 100 mm, is located in the center; the second, 60 mm in size, is located closer to the edge. The lid should be removable, which will make cleaning the stove easier.
A pipe about 37 cm long and 100 mm in diameter is used to supply oxygen. It has holes along the entire length of the element necessary for the supply of oxygen. The pipe is welded perpendicular to the cover at the bottom of the apparatus. An air damper is fixed on it, which will be secured with a rivet or bolts. The hole under the damper should be 6 cm in size. It is intended for supplying oil and igniting fuel.
The design of the upper tank is carried out by analogy with the design of the lower tank according to the drawing of a furnace using waste oil with your own hands. The walls of the product must have a thickness of at least 350 mm. A bottom with a diameter of 10 cm is cut out of the bottom of the tank, which should be placed closer to the edge. A small piece of pipe with a diameter of 11 cm is welded to the bottom of the hole. This is necessary to connect the element to the gas combustion tank.
Before making a furnace for testing, a detailed drawing of the apparatus is completed
Since the top cover of the supercharged exhaust furnace is exposed to high temperatures, a metal sheet with a thickness of at least 6 mm should be used for its manufacture. There is an opening in the lid for the chimney pipe, which should coincide with the opening at the bottom of the container. Between these elements, a partition made of dense metal sheet is mounted, located near the smoke hole. A pipe is attached to the top of the lid, connecting to the chimney part. The self-production process can be seen in detail in the video of the furnace being tested.
List of popular stove models
Great demand for installations operating with waste creates supply on the market. The Belamos company, manufactured in Germany and Russia, can boast of good quality products. You can also highlight the following options for efficient heating:
Don't miss: How to properly heat a coal stove in a house - basic rules and features of the firebox
Emelya - exhaust heater with a power consumption of 40 W, capable of heating up to 200 sq.m.;
Heat pump NT 612 – positioned as a garage unit and suitable for small spaces;
Heat 25 – suitable for air heating with hot steam;
Master wa 33 – used for heating industrial premises;
Polarus - units from Polarus have a power adjustment function from 20 to 60 kW;
Euronord at 306 – drip design with a radial-type blower;
Typhoon is a heating device for garages, car services and workshops, thermal power ranges from 4 kW to 15 kW;
Herringbone - suitable for heating small rooms;
Thermobile at 306 – manufactured from Russia, technical or diesel fuel is used for operation;
Kronburg d15 is a convenient device at an affordable price that uses machine oil;
Multeat plus - products manufactured from Novosibirsk, are distinguished by smokeless combustion of the fuel mixture.
Some Belamos models are suitable for use in a bath; they do not emit black smoke if you follow all the rules of use. Stav products from Russia performed well. Many users learn about the features of using devices from the Thermoportal forum: stoves from various manufacturers are carefully discussed by their owners, highlighting the pros and cons.
Buleryan can be distinguished separately - the device operates in a combination of firewood and oil. To remake the model, you can arrange a door at the front of the installation to add a liquid component, and also make a reservoir. The Zhuchka stove is excellent for heating a car service center, as it is small in size and has low fuel consumption.
Ready-made installations or models made by yourself are beneficial to use: they save money, have low resource consumption and are affordable. Making the unit yourself is not difficult, and this model will last a long time.
How to build your own apparatus based on the Babington burner principle: drawings
The principle of operation of a homemade burner, made based on the idea of Robert Babington, is clear from the drawings, where the components of the unit are visible:
Drawing of a waste oil burner according to Babington.
- waste oil tank;
- waste tray;
- fuel supply pipe;
- a small fuel pump for supplying portions of oil;
- hemisphere for spraying with a small hole;
- heating chamber with heating element (may be missing).
On a note! The testing nozzle is not a mandatory element for organizing the smooth combustion process. It can be successfully replaced by a nozzle - a small hole for supplying an air stream and fuel. To ensure that it does not become clogged, its serviceability must be monitored.
The used oil evaporates and flows down the hemisphere. These oily vapors are mixed with the air mass, resulting in a fuel mixture. The remaining oil that has not had time to be utilized flows into the pan, and from there through the tube back into the fuel tank.
This unit, based on Babington's patent, designed to burn liquid fuel, is quite simple. Therefore, it can be reproduced from scrap parts in a home workshop. Success depends on the exact compliance of the parts with their intended purpose and on the coordinated operation of all components. Therefore, before making a burner with your own hands, you should carefully calculate all the parameters.
The design of the burner is quite simple, so it can be made from available materials. Note! If you take one option as a basis, for example, the Gnome burner, using ready-made drawings and recommendations from craftsmen, it is difficult to make a mistake in the size and functionality of the parts.
Stages of making a homemade potbelly stove
The construction of this heating equipment consists of several stages. You need to think about its size and determine what it will be made of. Next, a drawing of a potbelly stove for the garage is drawn up. It indicates not only the parameters of the entire structure, but also the amount of material used for its construction.
It’s quite easy to make a “potbelly stove” for the garage with your own hands. Drawings of this equipment are drawn up independently. You can also seek the help of specialists.
Then the structure is welded and refined.
Furnace using a gas cylinder
Materials and tools for making a stove
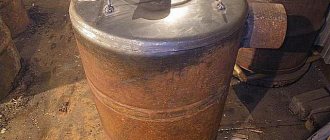
The easiest way to make a furnace is from a used gas, oxygen or carbon cylinder. The cylinders have good wall thickness, thanks to which such a stove will last for many years. A heating unit from one cylinder can heat a room up to 90 m2. This design can also be converted for water heating. A stove from a cylinder will not require forced air supply, and the oil will flow by gravity. To prevent the cylinder from heating up to fire-hazardous temperatures, it is necessary to set the height of the unit contour in accordance with the height of the combustion source inside the device. To make a stove from a used cylinder you need to purchase:
- chimney pipes with an internal diameter of at least 10 cm, a wall thickness of no more than 2 mm and a length of at least 4 m;
- fuel tank with a volume of 8−15 liters;
- burner pipes;
- welding machine and electrodes;
- Bulgarian;
- file;
- steel corners;
- drill and set of drills;
- level and roulette.
Manufacturing technology
up to 1.5 cm thick, filled to the top with water
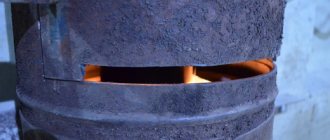
The top of the cylinder is cut off with a grinder. After the first cut, water begins to flow into the pan or onto the ground. When the water has drained, you can continue cutting the top. Most of the bottom will serve as a chamber, and the cut off top with a valve will become the oven lid.
Using a welding machine, we weld 20 cm “legs” for the stove from steel corners to the bottom of the cylinder. Then the balloon is placed on its “legs”. In the upper part of the sawn-off lower half of the cylinder, we retreat 10-15 cm from above and, using welding, cut a hole for the main exhaust pipe along the diameter of the pipe.
As a hood, you need to choose a thin-walled chimney pipe with a diameter of at least 10 cm and a length of at least 4 m. We insert it into the hole made, hold it strictly vertically and weld it. You also need to make a small hole in the chimney pipe, covered with a plate. With its help you can regulate the air supply.
In the same pipe, at a height of one meter from the floor, a hole is made for a new pipe with a diameter of 5-8 cm and a length of 2-4 m. The pipe is inserted parallel to the floor and welded.
A hole with a diameter of 5-8 cm is cut in the cut off upper part of the cylinder. Recycled oil will be poured into it.
In the upper removable part of the cylinder you can connect a “tray” on which you can heat a mug of water or porridge. To do this, a small square or rectangle is cut out of a steel sheet and welded to the lid. Or it can be installed on a pipe that is parallel to the floor.
Oven operation
Used oil is poured into 2/3 of the container. Then you need to light a sheet of paper, place it on top of the oil and close the oven lid.
After a certain time, the temperature inside the furnace will begin to rise, the oil will evaporate and spontaneous combustion of oil vapors will occur.
After finishing work and cooling the oven, you need to empty it of its contents. Clean the upper removable part from accumulated soot by tapping the lid on the cylinder.
Bottom of the firebox chamber and burner
I cut out the bottom from steel. I decided to make the burner 20 cm long - that would be enough.
This will be the burner
I made many holes around the circumference so that air could easily get to the fuel. Once all the holes were done, I sanded down the inside of the burner. You should definitely do this too, because... soot will begin to actively accumulate on the protrusions and other defects.
First, I welded the burner into the bottom of the upper chamber, and then installed them in their proper place. You can safely lay wood on such a stove shelf. Relevant for cases when it is not possible to replenish mining reserves.
First I welded the burner into the bottom of the upper chamber
Installation and first ignition of the device
If possible, the chimney should be positioned strictly vertically, and its length should be 4 meters or more. The exhaust gas exhaust pipe must be insulated. Otherwise, condensation will form. It is desirable that the stove has a collapsible design, especially for the chimney. This will make it much easier to clean the unit when it becomes clogged with soot.
Both mineral oil and its synthetic analogue can be used as the main energy resource. Do not fill fuel more than half the tank capacity. After pouring the waste, you need to leave the lower chamber damper open for a while - this will allow the fuel to be fully enriched with oxygen.
For ignition, use special fireplace matches or a wooden splinter, which is lowered into a container with fuel through a special hole. After the oil flares up, the hole in the homemade furnace during mining is half blocked. This is necessary to regulate the oxygen supply, which ensures uniform combustion of gases in the furnace of the unit.
Features of the design of dropper furnaces
Such units consist of a rectangular or cylindrical body. Inside there is a combustion chamber, in the lower part of which there is a container intended for waste oil and holes that provide air flow.
After heating, the fuel evaporates, and then the vapors combine with the air in the chamber. The resulting mixture as a result of convection is directed upward through the firebox, where, when burned, it releases a significant amount of heat.
If desired, a water or air heat exchanger is built into the upper part of the drip furnace during processing, as a result of which it becomes possible to heat the room more evenly and better or to arrange a circuit for supplying hot water.
Drip supply occurs through a metal tube, which is connected to an oil evaporator. Its second end is brought out and connected to the tank with a flexible hose. In the upper compartment of the drip-type furnace during exhaust there is a smoke pipe, which is connected to the chimney.
Furnace add-ons
When making a drip-type furnace with your own hands, you must remember that it can be supplemented with some elements. This will allow the structure to be used for heating several rooms at once. The stove will have this functionality if it is connected to the heating system. Initially, you need to install a tank for heating water, which must be connected to the system, only after that the return line is connected. Thus, the installation will not only be able to heat rooms, but will also allow heating water and cooking food. A design of this type has many advantages, one of which is its small dimensions, which allow the stove to be dismantled in a short time and then installed in another place. You will definitely need to equip homemade drip-type furnaces with your own hands with a chimney, the height of which should not be less than 4 m. Make sure that the chimney is devoid of horizontal sections. In order to be able to clean the pipe, which will have to be done once a week, you need to equip the element with a system that will allow dismantling.
Read also: Kirchhoff’s second law determines the ratio
Potbelly stove in the garage: pros and cons
Car enthusiasts install a homemade potbelly stove in the garage for several reasons:
- the stove heats the room in winter;
- you can cook food or heat a kettle on a potbelly stove;
- With a design approach, a homemade heating device can become a decoration for the garage.
We advise you to read in more detail why a potbelly stove smokes and find answers to your questions.
A potbelly stove has a number of advantages compared to other heating devices:
- For kindling, you can use a variety of fuels - firewood, coals, construction waste, petroleum products, waste oil, etc.
- The main advantage of a potbelly stove is the speed of heating the room. Thanks to its high efficiency and power, the stove will heat a garage of 50-60 square meters. m. in 15-20 minutes.
- The stove distributes heat evenly regardless of where it is located.
- A potbelly stove is an economical heating device. For example, heating a garage with a potbelly stove will cost several times less than with an electric heater.
- An additional advantage of a potbelly stove in the garage is the ability to cook or warm up food. When creating a stove yourself, it is enough to attach a metal cooking surface to its upper part.
- A homemade stove will cost the car owner almost free if there is an unnecessary barrel, sheet of metal and pipe lying around in the garage.
We previously wrote an article about installing a potbelly stove for heating and recommended adding it to your bookmarks.
The potbelly stove will fit harmoniously into the interior of any garage. In addition to the heating function, the heating device has a “cooking mode”. A hob is installed at the top of the stove, where you can heat a kettle or cook food.
The disadvantages of a potbelly stove in the garage are:
- the need to install a chimney in the garage;
- periodic cleaning of the chimney;
- the need for constant fuel supply;
- inability to accumulate heat.