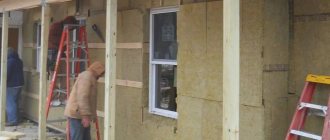
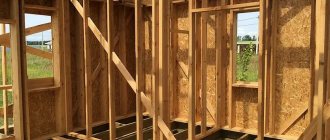
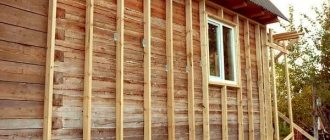
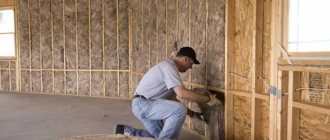
Panel houses are an ideal solution for a summer cottage, as they are cheaper than buildings made from other materials, and at the same time have all the necessary qualities of an ideal country house.
Panel houses are often built for temporary residence - in the summer, on vacation or on weekends.
If the house is planned to be used only in the summer, single-layer insulation of the house is used, and heating is not provided at all.
What to do if you built a country house for summer use, and then decided that it would be a good idea to make it suitable for living in the winter?
How thick should the walls be? It is necessary to carry out additional insulation of the panel house with your own hands.
Construction of a panel house
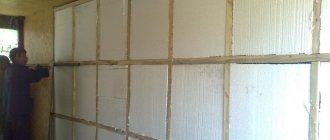
How to insulate a panel house from the inside
A simpler method is to insulate the house internally.
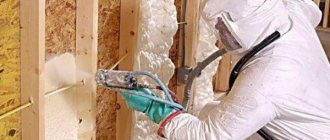
It can be produced after construction is completed. Now liquid polystyrene foam (penoizol) is often used for these purposes, which has many advantages over polystyrene foam slabs, which were widely used in insulating buildings until recently. Such slabs could not adhere accurately to the surfaces, causing heat loss, but liquid foam does not have this drawback. With this insulation method, heating costs are reduced significantly, and the service life of these materials is over 50 years. According to its parameters, a 10-centimeter layer of penoizol is equal to 30 centimeters of ordinary polystyrene foam. Penoizol can be used to insulate not only walls, but also roofs and floors. To calculate materials, data is used according to which, with a house wall thickness of 25 cm, the insulation layer must be at least 15 centimeters.
Panel house insulation technology
- Before insulation, it is necessary to carefully prepare the surfaces: clean the walls from dirt and remnants of the old coating, eliminate defects (irregularities, old nails, protrusions, etc.), plaster the surfaces for greater evenness. Then the walls must be primed to ensure better adhesion of the base and the thermal insulation layer.
- Then they begin to fix the insulation. If sheet materials are used, they are mounted on a pre-assembled frame. The distance between wooden or metal profiles is calculated based on the width of the slabs or rolls of insulation.
- The insulation itself is secured either with glue or using fasteners. If you choose a gluing method, you should select an adhesive that can withstand outdoor conditions (high humidity, temperature changes, etc.). Sheet materials are glued from top to bottom, placing the insulation strictly horizontally.
- When fastening with dowels, holes are first made in the facade of the house and then the fasteners are driven in there. Plastic fasteners are more often chosen, since metal ones can oxidize over time or create cold bridges. Typically, five dowels are used to secure the insulation sheet - four in the corners and one in the center. You can replace special dowels with self-tapping screws with wide heads.
- After this, a reinforcing layer is created. A special aluminum fiberglass mesh is used for it, and a layer of plaster is placed on top.
- Walls insulated in this way require the creation of a vapor barrier layer - a film that will create a reliable barrier against moisture getting into the insulation.
- It is possible to lay two layers of insulation, while the second layer is laid offset and thus there are no seams in the structure. If the option of insulation in one layer is chosen and gaps have formed, they can be filled with liquid polystyrene foam or construction (installation) foam. A layer of protective mastic or plaster is applied on top of the hardened composition.
Summary
Now you know how to insulate a panel house from the inside. Additional information on various insulation technologies is available in the video in this article. I wanted to ask, have you ever insulated a frame house lined with brick? What material was used for this and how did it work? Post your answers in the comments to the material.
Did you like the article? Subscribe to our Yandex.Zen channel
September 1, 2016
Cottage, House, Buildings, Thermal insulation
If you want to express gratitude, add a clarification or objection, or ask the author something, add a comment or say thank you!
How to make an economical version of a greenhouse for winter
If finances do not allow you to build a permanent greenhouse, do not despair. With the right amount of ingenuity, you can achieve excellent results at minimal cost. We invite you to see for yourself. A video from the “Four Hundreds” program will tell you how to build a winter greenhouse simply and inexpensively with your own hands:
Even in the summer, the owners of such a building should think about how to insulate the panel house for winter living. Such a house is usually built in a fairly short time, and if it happens in the warm season, there is a chance to temporarily not pay due attention to it and forget that it will look quite significant during the winter cold and winds.
Such buildings are often erected on summer cottages: they are cheap, quick to manufacture and fully meet all the requirements of country life. But - only when it’s warm and even hot outside. In winter, a typical frame house is very cold, even if you have provided some kind of heating in it (which, without insulation, is usually a waste of money). A heated floor system, which many consider a panacea, will not help either.
It's all about very poor thermal insulation; By turning on the boiler, you are actually heating the street. Of course, there are options for panel buildings designed for year-round habitation. But at dachas, the simplest, summer modification is usually installed - most people do not expect to return to gardens and vegetable gardens until spring. And if you have new interests, circumstances and hobbies that call you to live in the country in the cold, you need to take care of its comfort. At least in terms of the amount of insulation work completed.
How to insulate a panel house for winter living?
The process can be broken down into three equally important steps.
Removing cracks
The survey begins with the walls
. The most likely places for cracks to form are the corners of the room, the joints of walls and floors (often the cracks here are covered with baseboards, but it still blows from under them), window openings (the entire perimeter is checked here, but especially meticulously - below, under the window sill, if it is installed , or under the lower casing). On the planes of the walls, if the house is not too old, there are usually no cracks.
The gaps found are caulked. You can use old-fashioned materials for this, that is, tow or jute rope. A little PVA glue is applied, and the chopstick is firmly driven into the hole found.
The ceiling is also subject to inspection: warm air, as we know from physics lessons, tends to rise. And if the ceiling is leaky, it will heat the unnecessary attic, instead of remaining in the room. The integrity of the ceiling is easy to check in winter: place a bowl of snow under the roof; if it doesn’t melt, it means there is no access from the lower room. When cracks are found, they are blown out from the roof side with polystyrene foam from a sprayer.
Having eliminated such defects, you can proceed to the thermal insulation itself. And first you need to choose an insulating material.
What is good for thermal insulation?
External insulation
- The walls are cleaned, any defects found are caulked, and the surface is impregnated with antiseptics.
- The sheathing is being filled. If the insulation is sheet, it will be cellular, and the dimensions of the nest between the slats correspond to the dimensions of the slab.
- If it is rolled, the planks are packed without jumpers along the entire length or height of the house with a distance the width of the roll. The evenness of the sheathing is controlled by the level: the smoothness of the wall after finishing depends on this.
- Waterproofing is laid over the entire surface. Its role will be perfectly performed by construction polyethylene attached with a gun.
- The panels should overlap each other and not be stretched so as not to interfere with the subsequent installation of the insulator. The joints are taped with tape.
- The heat insulator is placed inside the sheathing and attached either with glue or with dowels. If glue is chosen, it is recommended to sand the wall for better adhesion of the materials.
Internal insulation
If you think that only chipboard and plasterboard are not enough, you can use calcium silicate boards. They are approved for internal insulation work (since they are breathable sheathing), have high thermal insulation characteristics and are thicker than conventional materials. Yes, and don’t believe those who assure you that a frame house is only for summer, since insulating a panel house for winter living is not only possible, but also quite inexpensive.
Popular thermal insulators
A variety of insulation materials for finishing frame structures is represented by derivatives of polystyrene foam and mineral wool, as well as their modern analogues in the form of polyurethane foam and foam glass.
All of them are available for purchase on the construction market, but they differ significantly in their price, durability and heat-shielding properties.
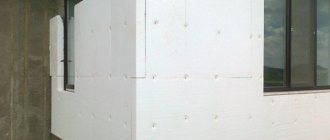
Styrofoam
A health-safe and environmentally friendly material that is used for work inside and outside a frame house. Based on the features of the construction of a particular structure, you can choose foam of any available thickness and appearance.
A negative point will be poor sound insulation, as well as the vulnerability of the material to sunlight. Proper external insulation will require plastering or applying an additional layer of paint.
Expanded polystyrene
Possessing all the characteristics of foam plastic, this insulation is reinforced with aluminum foil. With a smaller thickness, it provides better heat-shielding properties.
Self-adhesive surface improves ease of use. Depending on the construction site and installation technology, roll and slab materials are used.
Mineral wool
Mineral wool and its derivatives have high fire resistance, do not caking and retain heat well. Such insulation will protect the room from noise and temperature changes. Stone wool, made from molten basalt rocks, is durable and environmentally friendly, but vulnerable to steam penetration.
Glass wool can withstand temperatures up to 500 degrees, but it strongly cakes and breaks during installation, creating a serious health hazard.
Ecowool
This material is made from cellulose and does not contain toxic components. The dry installation method consists of filling the walls of the building with ecowool and carefully compacting it. The wet method involves wetting and applying between frames.
Although these methods can be done with your own hands, they are quite time-consuming and labor-intensive. Another drawback is that after fifteen to twenty years the insulator may settle.
Polyurethane foam
Modern insulation with a high level of thermal insulation and noise protection. The insulation process consists of mixing chemical components and applying them to the walls using a special sprayer.
The resulting mixture quickly fills corners and walls, acquiring the properties of polyurethane foam.
Insulation of a panel house for winter living, choice of materials and technology
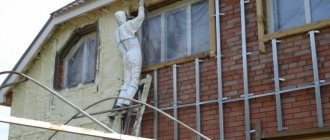
In the first case, the insulation is attached to the facade with glue, a reinforcing mesh is glued over the insulation and facade plaster is applied. In the second case, the thermal insulation is attached between the guides made of bars, then the insulation is covered with a vapor barrier film and sheathed with siding.
Insulating a garden house with polystyrene foam from the outside
Insulating a garden house from the inside
In addition to insulating floors and walls, do not forget about protection against heat loss through doors and windows in the summer house.
Window openings, especially window slopes and window sills, require careful insulation. It’s good if you have a small vestibule, then the cold will not penetrate into the house, but it is better to insulate the front door in a country house. For this you can use dermantin, padding polyester and furniture nails.
Insulating a garden house with mineral wool from the inside
General principles
The internal placement of the insulation layer implies that:
- the insulation is installed between the supporting elements of the frame without additional sheathing;
- work processes are carried out from the inside without unnecessary difficulties in any weather conditions;
- the material is well protected from adverse external influences;
- reconstruction is combined with decorative finishing of rooms.
The insulation is installed between the supporting elements of the frame.
The approximate distribution of heat losses through different parts of the structure should be taken into account (maximum in %):
- walls and corner connections - 15;
- windows and entrance group - 20;
- floor and plinth (basement) - 15;
- roof - 30.
This list confirms the feasibility of improving the insulation parameters of the facility.
To increase the effectiveness of the event, the project should be supplemented with systems modernization:
- heating;
- ventilation;
- conditioning.
The list of materials and construction tools will help you correctly draw up a purchase plan and financing scheme.
Based on the correct calculation of the “dew point”, drawings along with additional documents can be prepared independently. It is not necessary to follow design standards. However, even a simple freehand drawing with dimensions will prevent mistakes.
Answers from experts
Ruff:
Try typing “heat loss calculation” into the search bar, find a calculation calculator, set your parameters - material and wall thickness, area of windows and doors, get the insulation thickness. But I advise you to entrust the implementation to specialists. They correctly write here that both the ceiling and the floor must be insulated, the creation of “cold bridges” should be avoided, etc. etc. In general, it’s not just putting a “fur coat” on the house, it’s more complicated. You also need to have a “hat” and “felt boots”, and fasten all the “buttons”)
Nicholas V:
There are no such houses. you are confusing something.
Cat Walking by himself:
Insulate the walls with polyethylene foam or polypropylene foam. To start with, 20 mm. It won't be enough, sew more. Don't forget about the floor and ceiling.
TRAMP:
I think it's impossible! Justified - as a rule, the ceiling height is 2 meters! It is necessary to open the floor and make 20cm of insulation. The floors will rise and the ceiling will be lower! Roof overhangs are usually short and will not allow you to extend the wall from the street.
GOD DANDELION:
My house has a wall thickness of 100mm... the insulation is Rockwool basalt slab... the walls are made of OSB slabs 12mm from the street... there is hypocardboard inside... I live all year round... it's cool in the summer, it's warm in the winter... the area of the house is 75 sq m... the heating is an electric boiler
Olga:
We have 90mm timber + 100mm insulation and siding on top. The inside is lined with clapboard. During the winter holidays we live there and heat the stove once a day.
Drinker in the thorn bush:
Well, a friend has a frame house. sandwich panel walls b. u. We didn't freeze last winter. They decided to insulate this one. We screwed it with OSB screws and five styrofoam on top of the dowels. In the spring they will throw a net and tighten it with glue.
Irina Dedushenko:
If a frame house is built correctly, it is warm in winter. An insulation thickness of 15 cm is sufficient if the insulation is polystyrene foam and the joints are airtight. If the insulation is mineral wool slabs, then this is also acceptable, but it is better (to save fuel) to make it 20 cm. The mistake we made earlier was to insulate the floor with mineral wool 10 cm thick. With a ventilated underground, this is not enough - you need 15 cm or add polystyrene foam. As insulation, mineral wool slabs are better, but they must be laid carefully so that over time they do not slip and form gaps between themselves. The frame, if it is wooden, must be treated with an antiseptic
And be sure to pay attention to waterproofing. Often, to waterproof walls from the foundation, roll waterproofing is used - one layer of roofing material
It is necessary to use waterproofing, and if roofing material, then glued on bitumen mastic in two layers. The advantage of a frame-panel house is that you do not need to wait for precipitation, as in log and timber houses, to caulk it, etc.
Andrey Enyutin:
At the price of timber that we now have, a frame panel house is a perversion for our climate. however, a house made of timber, finished with rokla, turns into the so-called. 0 house.
Lion Heart:
Any structure is good in itself. The most important thing was always the finishing. A frame house can be insulated and finished intelligently and with high quality, and it will be super. Each material has its own pros and cons. But again, the most important thing is the finishing. A lot of friends have purchased frame houses and do not regret it.
Alexei:
Girl, factory-made laminated veneer lumber, dried, cut into tenons to fit,
grooved (for example, 2 grooves), albeit with a rokla (we have a jute insulating gasket between the beams), and even after a year, an industrial gun, a compressor, sealant in soft packaging is passed along the seams with sealant..
This is forever.
Frame barracks used to be built, I have one that rolls around the dachas, it has already withstood 3 moves, oblique, crooked, the shields are already crumbling. Barack
Insulation of other structures
You can usually insulate the floor using the same material as for the walls - polystyrene, polystyrene foam, mineral wool. In addition to them, expanded clay, a porous material of a reddish-brown color, obtained by firing clay or shale, would be a good solution. If you plan to live in the attic or store something for which excessive cold is harmful, then the attic must also be insulated. The insulation material is laid between the roof rafters. If the attic is non-residential, insulating the attic floor is sufficient. Due to its low cost, low weight and good thermal insulation properties, expanded clay or sawdust are often used for this purpose. Sometimes expanded clay (and other similar bulk materials) is also used for vertical structures - walls
In this case, special attention should be paid to compacting the materials so that they do not sag over time.
In addition to round timber, timber can also be used for the construction of wooden houses. Such buildings, if the construction technology is followed, will last for decades and will remain comfortable even in severe frosts.
Mineral wool
Mineral wool is the dominant insulation material in the construction market. About 80% of the internal filling of frame walls is a variety of roll or slab variations of this material. Working with them does not require special devices or high qualifications. Almost every home craftsman, armed with the necessary minimum knowledge, can cope.
In terms of durability - it retains thermophysical properties for 30–40 years under optimal operating conditions - basalt wool is a well-deserved leader in this category of slab insulation. High density with excellent thermal insulation qualities protects against sagging, and accordingly, the service life of the insulating cake increases without repair. Installation is simplified due to the ability to maintain its shape for a long time.
The thermal insulator breathes well, releasing steam outside. But hygroscopicity - the ability to accumulate moisture inside that is harmful to the material - cancels out all the advantages. In addition to the fact that water destroys mineral wool, as a result of destructive changes, the necessary physical properties are lost and formaldehyde is released. Additional hydrophobic impregnations protect against getting wet, but this occurs at the expense of vapor permeability.
Which construction material to choose
The timber does not have to be of square or rectangular cross-section; timber with a rounded surface is also widely used in construction. The price of lumber can vary significantly, but choosing the cheapest option is not always justified; it can simply result in big problems in the future.
For construction, the following type of timber can be used:
solid - the cheapest option, it is obtained from tree trunks. And the main disadvantage can be considered large deformations of the house. The main difficulty at the production stage is to achieve acceptable humidity. If there are no special problems with a cross-section of 15x15 cm (it’s enough to just keep it in the drying chamber), then larger sizes, for example, 25x25 cm, are more difficult to dry;
if your budget allows, then it’s better to go with laminated timber. It differs from a solid one in that it is assembled from several boards, which are glued along the entire length. Due to this, it is possible to achieve the required level of humidity, and the profiled surface will make the joint of the individual beams very strong and reliable.
Winter houses made of laminated veneer lumber have much less shrinkage. And if it is recommended to wait about 1-2 years before starting interior decoration, then laminated veneer lumber allows you to remove this pause. Shrinkage does not exceed 0.5-1.0%, and the likelihood of cracking is reduced to a minimum.
As for the length and thickness, the dimensions can vary over a wide range. Typically, the thickness of glued beams is up to 30 cm, and the minimum value is 7.5 cm; the length, as a rule, does not exceed 12 m.
Execution Process
When insulating a house from the inside, the main requirement for the material is its ability to breathe.
Sheathing is usually made from chipboard or gypsum board sheets. Do-it-yourself thermal insulation of such houses from the outside occurs in the same way when using any insulation:
- First you need to clean the walls and treat the surface with an antiseptic.
- After this, the crate is stuffed. When using sheet insulation, it is made cellular according to the size of the slabs, and if it is rolled, then the strips must be filled according to the width of the roll.
- Waterproofing must be laid over the entire area. In this case, construction polyethylene is perfect, which is attached with a gun; the joints are glued with tape (they should overlap).
- After this, the heat insulator itself is attached inside the made sheathing using glue or dowels.
Expert advice: it is recommended to cover the thermal insulation from the inside with a vapor barrier. This is necessary so that the steam generated in the house does not get on the insulation, which because of this loses its properties.
The basic principle of work is the same as for external work. First, a sheathing is created on which the insulation itself is attached.
If chipboard sheets are used, they are fixed to the wall with self-tapping screws, which greatly reduces the level of insulation, since it does not create a layer of air between the insulation and the wall. If gypsum board or chipboard sheets are not enough, you can also use calcium silicate boards. They are recommended to be used for insulation from the inside.
Therefore, if someone tells you that you can only use a panel house in the summer, do not believe him. After insulating such a frame building, it will be suitable for living even in severe winter.
Watch the video in which a specialist explains the features of insulating a frame-panel house:
Is it damn cold in your new house, not only in winter, but even in autumn? Then it will have to be insulated, and as soon as possible. And it is necessary to insulate it from the outside. Firstly, it saves internal space. Secondly, external insulation is much more effective, because it prevents the walls from cooling, rather than simply retaining heat inside.
Since this procedure is within the capabilities of even a novice builder, you can insulate a panel house from the outside with your own hands. And this means savings on the cost of insulation up to 50%! The main thing is to choose the right material.
Preparing a house on stilts for winter life
Houses on stilts can also be prepared for living in the cold season.
Since such houses are raised above the ground, this increases the ventilation of the house.
A house that has a monolithic foundation rarely freezes from the ground. But in houses on stilts this often happens.
To prevent this from happening, it is necessary to insulate the floors in the room, and at the same time it is advisable to make warm barriers for the foundation.
Installation of panels for floor insulation in a house on stilts
You can insulate the floor from the inside using mineral wool, which we lay on the base and waterproof.
This is necessary to prevent water from getting into the insulation, even if water is spilled on the floor. Water often gets inside when washing floors.
At the same time, you can further insulate your house using so-called heated floors, which you can read about here.
However, the space under the house, in which cold air circulates freely, contributes to high heat loss.
Therefore, it is advisable to cover this space with shields and insulate it with foam plastic. An additional air cushion will keep you warm in winter.
If you have not decided on the choice of material for insulating your home, read our article about all methods of insulation by following the link.
Insulation of the base of a pile foundation
However, insulating a frame and panel house will not make it suitable for winter use, since insulation only allows you to keep the rooms warm, but does not make the house warm on its own.
In order to use a panel house for winter recreation and living, it is necessary to provide heating.
It can be of different types, but for temporary use the easiest way is to use electric air heaters.
Read about how to properly install windows and reduce heat loss.
Source
How to insulate
According to the technology, thermal insulation material is placed in the gaps of the wall frame. Load-bearing wall elements can be made of wood or steel. The work is carried out in several stages.
Preparatory
It will not take much time, but will significantly increase the quality of work. Before starting work, the wall frame is cleared of construction debris, dirt and dust. Next, the walls are inspected for the presence of protruding fasteners that could damage the insulating material. Protruding nails are driven in with a hammer.
All cracks in the frame are insulated with polyurethane foam. The moisture content of the wood is checked; if the wall frame elements are damp, they should be dried with a hair dryer. Next, the next stage of work begins.
Waterproofing and vapor barrier
Protection of the wall frame from moisture is required in the following places:
Scheme of vapor barrier for walls of a frame house
- resting the wall on the foundations (at the junction of elements made of materials of different properties, horizontal waterproofing);
- on the outside of the wall, on top of the insulation to protect against atmospheric moisture;
- A vapor barrier is installed on the inside of the wall to protect against moisture coming from inside the room (warm steam).
Thermal insulation
The insulation is installed between the studs of the wall frame. The distance between the load-bearing elements is selected so as to ensure easy installation, namely:
- 580 mm clear between mineral wool posts;
- 600 mm for polystyrene foam and extruded polystyrene foam;
- for polyurethane foam, the distance does not matter much.
Mineral wool is fixed using dowels
It is important that there are no gaps between the racks and the heat insulator through which cold can penetrate. For foam plastic, you can use special nails or glue
Polyurethane foam is held in place by its own adhesion to the surface and penetration into small crevices of the structure.
Sheathing
At this stage, differences in technology for different materials occur. Unlike all the others, mineral wool does not allow the sheathing to be attached directly to it. It is necessary to provide an air-ventilated layer of the wall to remove excess moisture. The layer is located after the waterproofing; its thickness is 5-10 cm.
Sheathing scheme for a frame house
Polyurethane and polystyrene allow you to install wall cladding without a ventilation gap. After completing the cladding of the frame house, the thermal insulation work is completed.
Thermal insulation of floors and roofs
To build a frame house for winter living, it is also important not to forget about reliable insulation of the first floor and attic roof. If the house has a cold attic, then thermal insulation is installed in the ceiling pie of the upper floor
Thermal insulation of the attic of a frame house
Rigid mineral wool slabs are most often used for roofing. To ensure ease of installation, the pitch of the rafters is predetermined so that there is a clear distance of 580 mm between them. Thermal insulation is fixed after installing the waterproofing and sheathing.
Insulation of the ground floor floor must be done using durable, wrinkle-resistant material. Penoplex would be an excellent solution. If the insulation does not have high rigidity and strength, install it between the joists. To do this, boards or bars are fixed to the floor, which will take the load from people and furniture, and a heat insulator is laid between them. Proper insulation of the frame will make the house a comfortable and economical home.
Owners of panel houses should think about insulating their homes for winter living even in the summer.
Such houses are built quite quickly and often in the warm season, so thermal insulation is often forgotten.
However, in winter, during winds and cold weather, this will be significantly noticeable.
Ventilated facade
To preserve the physical conditions of mineral wool for many years and carry out insulation in accordance with building codes, a ventilated facade is installed. Initially, the walls are treated with an antiseptic, and after complete drying, they are treated with a fire retardant composition. Then the joints, cracks, and leaks are caulked or filled with foam. We fasten timber along the perimeter of the outside of the frame house, orienting the laying of the slabs transversely relative to the internal insulation. The distance between the guides is 2–3 cm less than the size of the insulation board, so that sagging does not form in the future. Using a stapler, the vapor barrier layer is attached. Installation of vapor barriers vertically and horizontally is allowed; the main requirement is complete sealing in order to protect structural elements from moisture.
In order to avoid sagging and fit as tightly as possible to the wall, the insulation is attached with a mushroom dowel at several points. A wind barrier is placed on top of the laid mineral wool. Vertical slats for facade ventilation are packed at intervals of 50 mm for air circulation in the horizontal direction. Gaps on the same line are not allowed. The thickness of the slats varies depending on the number of floors of the frame house: 20–30 mm for a one-story house, 50–60 mm for a two-story house.
Choosing materials and how not to harm the structure of the house
Considering that initially a frame house is quite light, it is often built on light foundations - columnar, shallow strip and pile. They are initially calculated for light-weight structures. Therefore, making the finished house heavier may require strengthening the foundation. Yes, and the additional load on the floors must be taken into account.
Dew point - why doesn’t the insulation “work”?
The main reason for the deterioration of the quality of all hygroscopic insulation is the moisture that accumulates inside. After all, water is an excellent conductor of heat - water-cooling units are much more efficient than air-cooling units. Moisture microparticles in the insulation layer work in the same way - they absorb heat and release it to a colder external environment.
And even ideal vapor and waterproofing will not save you from dampening the insulation if you incorrectly calculate the dew point at which condensation begins to form. So, the image clearly shows what will result from an insufficient layer of external insulation, in this case expanded clay with a density of 200 kg/m3 and a layer thickness of 10 cm.
The black graph illustrates the decrease in cake wall temperature from 20 degrees inside the building to -25 degrees outside. With such strong differences, an insufficient layer of outer insulation will lead to cooling of the inner layer, at the point of contact of which steam will begin to condense.
The ideal solution is to increase the thickness of the insulation, in this case to 20 cm.
This option will either completely remove condensation or shift it to the outer layers. Then, if there is a ventilation gap between the insulation and the waterproofing, excess moisture will simply evaporate without affecting the characteristics of the material.
Thermal insulation boards and mats
The simplest and most affordable types of materials for external insulation are mineral wool and glass wool. To reduce heat loss by almost half, ten centimeters of insulation with a density of 25 kg/cubic meter, laid on the outside, is enough.
Thanks to this, it is possible to reduce heat loss from 42.09 kW/h to 23.37 kW/h during the heating season.
Approximately the same effect can be achieved with 10 cm of polystyrene foam. But the disadvantage of polymer insulation is its almost complete vapor permeability, which significantly worsens the natural microclimate. In other words, such a house will always have high humidity if forced ventilation is not provided. And this is a direct road to the formation of mold and fungi.
But natural insulation, for example, reed slabs, must be laid in a layer of at least 15 cm to ensure a similar level of heat loss
Of course, environmentally friendly material is always preferable, but it is worth taking into account the financial side of the issue
Thermal insulation backfills
Bulk insulation is difficult to install. They often require special equipment, but if your hand is not full, such insulation is quite difficult to do.
Although it is quite doable. According to its characteristics, 10 cm of ecowool with a density of 35 kg/cub.m. are in no way inferior to mineral wool. But the density is 60 kg/cub.m. will already lead to an increase in heat loss to 25.43 kW/h.
When insulating walls with expanded clay, you need to be prepared for the fact that you will have to increase the thickness of the walls by 25 cm. It is better to use expanded clay crushed stone with a density of 200 kg/cub.m. Increasing density up to 600 kg/cub.m. will lead to an increase in heat loss with a similar thickness of the insulation layer to 27.22 kW/h. Also, do not forget about the weight of the building - such an amount of expanded clay will significantly make the building heavier.
15 cm of expanded vermiculite as external insulation will reduce heat loss to 25.18 kW/h. This is a good option if there is a vermiculite production facility nearby. Otherwise, the delivery of the material will negate all the cheapness of the insulation itself.
If there is a sawmill nearby that is willing to give away sawdust for free, the walls can be insulated in a fairly economical way. In addition, 15 cm of sawdust with a density of 250 kg/cub.m. provide only 24.48 kW/h of ash loss during the heating season. And so that the sawdust does not rot and has sufficient protection from fire, a clay or cement mixture is made.
For example, to make “homemade” wood concrete you will need 100 kg of sawdust, 25 kg of sand, 6 kg of slaked lime and 200 kg of cement. You need to mix everything in one container, adding water in an amount sufficient for normal mixing. The final mixture should not crumble when compacted, but water should not leak out.
Self-coverage
In any case, the step-by-step instructions require installing a layer that protects from moisture. The only exception is made for those situations where such protection is already in place outside (or inside). The reason is simple - two-way blocking of water deprives it of outlet. The liquid will accumulate inside the walls and gradually destroy them.
The first step is usually to measure the external surfaces and cut the waterproofing material according to their size.
It is recommended to fasten the material with your own hands using a stapler on the racks, ensuring that the frame is completely sheathed. The optimal installation of waterproofing is with an overlap, when the top layer overlaps the bottom by approximately 10 cm.
Next comes work with the vapor barrier. This point cannot be avoided even when hydrophobic or neutral substances that tolerate contact with water are used for insulation. After all, besides them, the “pie” also includes other parts that are much more sensitive to getting wet. When insulating inside and outside, it would be correct to use a special film or foamed polyethylene to contain water vapor. Such materials are attached to the frame racks, ensuring maximum tight pressure against the insulation.
Only when all this is finished do they begin to work with the filler itself.
The final step is to cover the walls from the inside. In terms of the sum of their qualities, plasterboard and oriented particle boards will be unrivaled. It is recommended to install gypsum boards if the frame is perfectly flat, then the outer surface will be smooth. But OSB, thanks to its rigidity, will cope with flaws as efficiently as possible. But in any case, this is only preparation for the real finishing touches.
Features of the design of a warm winter house made of timber
Quite often, wooden houses are considered exclusively as an option for temporary residence, for example, in a country house. In this case, living in it is planned only in the warm season for a relatively short period.
But log houses can also be used for permanent residence, and thanks to the low thermal conductivity of wood, even a relatively small wall thickness will ensure comfort in the house.
Optimal wall thickness
The thickness of the timber for a winter house should be selected based on the standard value of the heat transfer resistance of the wall. In this case, you can be guided by the requirements of the SNiP 23-02-2003 standard (dedicated to the thermal protection of buildings and structures).
From the entire document we will be interested in only 2 points:
For seasonal living, you need to take into account sanitary and hygienic requirements and comfort in the house. In this case, the heat transfer resistance should be about 1.26 m2∙ᵒC/W, that is, the wall thickness should be at least 17 cm;
A timber wall thickness of 50 cm is absolutely meaningless, so builders use a different approach - they use a layer of thermal insulation on the outside of the house. Thanks to this, a winter house made of timber becomes warm even with a small wall thickness. For example, with a wall thickness of 15 cm and the use of a thermal insulation layer (10 cm), the heat transfer resistance coefficient will already be 3.1 m2∙ᵒC/W, which is even slightly more than the standard requirement.
Insulation of a house made of timber
You can insulate a house both outside and inside. But when using a heat insulator inside, the usable area is reduced, so they are often limited to only the outer layer of the heat insulator. And if a beginner may have problems with building a house, then anyone can insulate a house with their own hands.
The work is performed in the following sequence:
- first the wall is cleaned of dust and dirt;
- then the sheathing bars are installed (their thickness is selected depending on the thickness of the insulation layer). As for the step between the individual bars, it can be taken at a level of 60 cm. The lathing can be done using only vertical bars, or the bars can also be installed in the horizontal direction;
then a vapor barrier film is placed on top of the insulation layer, this is necessary so that the thermal insulation material does not become damp. If this happens, the wood will rot faster and the heat insulator itself will lose its characteristics. Vapor barrier film differs from ordinary polyethylene in that it allows moisture to pass through only in one direction, so that moisture will leave in the direction from the wall, but will not get back;
Finnish house
For the first time, such houses appeared on the territory of the former USSR after the Second World War as an option for prefabricated housing for temporary residence. The structure was a wooden frame-panel structure. The frame of such a house is sheathed on the inside with plywood, and on the outside, along the vertical bars of the sheathing, with wooden “siding”. The insulation inside the frame is 3 layers of soft fiberboard 18mm thick, installed “in space” in several layers with air layers. No vapor barrier. It is clear that such houses were cold and drafty. Trying to make them warmer, the owners lined the walls with brick. True, this helped insignificantly. A more effective method of modernization - replacing the insulation inside the frame - was tested in practice by our reader, Valentin. He shared his experience of insulating his parents’ house:
“I decided to carry out the modernization from inside the house. Opening the walls showed that the wooden parts of the frame were in excellent condition - everything was dry, intact, and strong. And this despite the fact that the house was built back in 1958. I threw out the old insulation, installed 10cm stone wool in its place, covered it with a vapor-proof film, and nailed down old plywood. The walls were additionally lined with gypsum board. The house has become noticeably warmer, however, in order to meet today’s requirements for the thermal resistance of walls, it would be necessary to sacrifice the area of the house and add another 50 mm of insulation to the walls.” (You can read more about the reconstruction of the Soviet “framework” here).
Material selection
According to their composition, all insulation materials are divided into:
- bulk;
- woody;
- foam;
- mineral wool (for example,).
- blocks;
- slabs;
- rolls;
- mixtures.
And according to their appearance, these materials can be divided into the following:
- blocks;
- slabs;
- rolls;
- mixtures.
When choosing a thermal insulation material, you need to pay attention to its specific properties. The fact is that there are now many manufacturers of materials for building insulation on the market, and even seemingly identical mats or slabs can have different indicators
Let's look at the most basic of them:
- thermal conductivity coefficient, the lower it is, the thinner the layer of insulation you can get by with;
- moisture absorption coefficient, the lowest is required;
- fire resistance depends on the ignition temperature, the higher it is, the less flammable it is and the more suitable it is for you;
- durability, it is clear that we choose the one with a longer service life;
- environmentally friendly, mandatory for indoor use, insulation must comply with safety standards for human health.
Only after studying what properties the material you like has, and comparing it with others, will you be able to decide how to insulate your country house.
Rockwool insulation).
And according to their appearance, these materials can be divided into the following:
- blocks;
- slabs;
- rolls;
- mixtures.
When choosing a thermal insulation material, you need to pay attention to its specific properties. The fact is that there are now many manufacturers of materials for building insulation on the market, and even seemingly identical mats or slabs can have different indicators
Let's look at the most basic of them:
- thermal conductivity coefficient, the lower it is, the thinner the layer of insulation you can get by with;
- moisture absorption coefficient, the lowest is required;
- fire resistance depends on the ignition temperature, the higher it is, the less flammable it is and the more suitable it is for you;
- durability, it is clear that we choose the one with a longer service life;
- environmentally friendly, mandatory for indoor use, insulation must comply with safety standards for human health.
Only after studying what properties the material you like has, and comparing it with others, will you be able to decide how to insulate your country house.
Rockwool insulation - technology guarding comfort" href=»https://pro-uteplenie.ru/neorganicheskie/minvata/53-uteplitel-rockwool">Rockwool insulation).
And according to their appearance, these materials can be divided into the following:
- blocks;
- slabs;
- rolls;
- mixtures.
When choosing a thermal insulation material, you need to pay attention to its specific properties. The fact is that there are now many manufacturers of materials for building insulation on the market, and even seemingly identical mats or slabs can have different indicators
Let's look at the most basic of them:
- thermal conductivity coefficient, the lower it is, the thinner the layer of insulation you can get by with;
- moisture absorption coefficient, the lowest is required;
- fire resistance depends on the ignition temperature, the higher it is, the less flammable it is and the more suitable it is for you;
- durability, it is clear that we choose the one with a longer service life;
- environmentally friendly, mandatory for indoor use, insulation must comply with safety standards for human health.
Only after studying what properties the material you like has, and comparing it with others, will you be able to decide how to insulate your country house.
Mineral wool
Mineral wool is the dominant insulation material in the construction market. About 80% of the internal filling of frame walls is a variety of roll or slab variations of this material. Working with them does not require special devices or high qualifications. Almost every home craftsman, armed with the necessary minimum knowledge, can cope.
In terms of durability - it retains thermophysical properties for 30–40 years under optimal operating conditions - basalt wool is a well-deserved leader in this category of slab insulation. High density with excellent thermal insulation qualities protects against sagging, and accordingly, the service life of the insulating cake increases without repair. Installation is simplified due to the ability to maintain its shape for a long time.
The thermal insulator breathes well, releasing steam outside. But hygroscopicity - the ability to accumulate moisture inside that is harmful to the material - cancels out all the advantages. In addition to the fact that water destroys mineral wool, as a result of destructive changes, the necessary physical properties are lost and formaldehyde is released. Additional hydrophobic impregnations protect against getting wet, but this occurs at the expense of vapor permeability.
External panel house insulation technology
The advantage of frame-panel houses is the ability to insulate them without removing the outer cladding.
But if the walls are decorated with siding and are in good condition, it can be dismantled first. This will save you a lot of money on new casing.
The main thing when laying insulation from the outside is not to leave a ventilated gap between it and the wall. This will negate all insulation efforts, since cold air will come into unhindered contact with the wall.
General scheme of external insulation
Regardless of the material chosen, the initial pattern is always the same:
- The walls of the house are cleaned of hanging elements - canopies, antennas and drains.
- A frame is made into which the insulation will be placed. A beam of this size is used to ensure the required thickness of insulation. Unlike insulating a wooden house, there is no need to create a ventilation gap between the insulation and the wall, since a vapor barrier has already been installed from the inside of the house and moisture does not need to evaporate through the insulation to the outside.
A cornice is attached to the bottom in the plinth area - it will hold the insulation boards. After laying the insulation, it is covered with a windproof film. The membrane can be fixed to the frame with a construction stapler or nails. The joints and places of attachment to the frame are taped with butyl rubber tape. It is important not to cover the insulation with impenetrable waterproofing - any condensation from the insulation should evaporate freely!
A 25 mm thick counter-batten or siding profile is attached on top of the waterproofing to provide the necessary ventilation gap between the windproof membrane and the external finish. Exterior finishing can be done either with siding or edged boards with subsequent processing. If the insulation is laid under the plaster, a layer of reinforcing mesh is required on top, otherwise the plaster will soon crack.
To insulate with foam plastic, you do not need to build a frame. The plates are attached with special glue and secured with dowels and umbrellas.
All cracks are filled with foam
It is important not to forget to go over the foam sheets with a special grater to improve adhesion. Otherwise, the layer of plaster can easily be removed along with the reinforcing mesh
How to properly insulate your facade using mineral wool is clearly explained in the video:
Insulating a house with bulk materials
The technology of insulating a house with bulk materials also requires the construction of a frame. After this, the frame is sewn up with an edged board to a height of up to 30 cm. An unedged board is not used - the insulation will spill out through cracks and irregularities. Let's look at insulation using sawdust as an example.
A layer of sawdust is poured around the entire perimeter of the house and compacted well. Uncompacted sawdust will cake in the future and the resulting voids will no longer insulate anything. This way the sheathing is gradually lifted under the roof.
The last layer under the roof is laid wet - this way there will be no need to compact it, and thanks to natural ventilation the sawdust will dry quickly.
If insulation is planned with sawdust concrete, a special formwork is constructed into which the mixture will be placed. This is a rather lengthy task - each layer must have time to dry before you can proceed to the next one. Thus, only 50 cm of the facade will be insulated per day.
Video
You can watch a short video where a specialist gives advice on choosing a material for thermal insulation of a frame-panel house.
Sources
- https://Krysha-pro.ru/uteplenie/shhitovogo-doma.html
- https://obustroeno.com/stroitelstvo/postrojki/60033-uteplenie-shhitovogo-doma
- https://karkasnik-stroy.ru/seti/poshagovaya-instrukciya-po-utepleniyu/
- https://postroj-sam.ru/karkasnye-doma/uteplenie-karkasnogo-doma-svoimi-rukami-poshagovaya-instruktsiya.html
- https://teplodom1.ru/domutepl/405-utepljaem-shhitovoj-domik-podberem-uteplitel-rassmotrim-kak-primenit.html
- https://KarkasBlog.ru/insulation/kak-uteplit-shhitovoj-dom-dlya-zimnego-prozhivaniya.html
- https://stroikadialog.ru/articles/stenovoi_komplekt1/uteplenie-shitovogo-doma
- https://fastbuildings.ru/karkasnye-doma/tipy/shhitovye/steny-shhitovogo-doma.html
