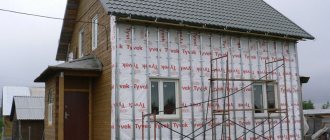
Various materials can be used to insulate a home, but polystyrene foam is considered one of the most popular and inexpensive. It is easy to install - even an inexperienced person in construction can handle it. But this method of insulation has both pros and cons, which are important to consider before starting work. A subscriber to our group vk.com Belyaev A. shared his story of insulating a house with polystyrene foam, and also talked about the advantages and disadvantages of this method.
Insulating a house with polystyrene foam: pros and cons - personal experience and detailed instructions
Insulating a house with polystyrene foam: personal experience
I want to start my story with how I generally insulated the house from the outside with polystyrene foam. This is important to know in order to evaluate the real advantages and disadvantages of this method. I scoured the Internet for a ton of information and found little useful information, so I was partially guided by the instructions and came up with some myself. I’ll briefly tell you and show you what I did and how.
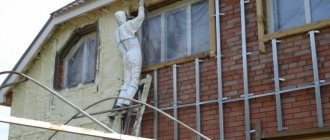
First of all, I prepared the walls - cleaned them, leveled them, eliminated various defects such as cracks and small holes. All of them need to be covered, and excess parts of the frozen solution must be removed. For convenience, you can build scaffolding - for example, from various boards that may be on the site. I rented ready-made ones to save time, especially since it was inexpensive for me.
First you need to start preparing the walls
The next step was to prime the walls. I applied two coats since my wall is made of aerated concrete blocks. At this point, the preparation can be considered complete - you can lay the foam sheets. My foundation is level, so I mounted the slabs directly on it, but if your situation is different, you will have to purchase and install a support profile as well.
We treat the walls with primer
Polystyrene foam boards are laid using special glue - you need to knead it in a container from which you can quickly and easily take it. I didn’t invent anything on my own, I diluted it as indicated on the package. I used a construction mixer for this.
I started, of course, from the bottom of the wall. I made a cutout on each slab - the photo below shows exactly how. For this I used a fine toothed hacksaw. The glue is applied first around the perimeter - the thickness of the layer should be impressive, about 2.5-3 cm. In the center, only a few “spots” of glue are enough. If the stove is large, there should, of course, be more of them. It’s better not to skimp on the glue, so you don’t have to redo it later.
Gluing the first row of blocks
Here's how to apply the glue
Important! When applying glue, be careful not to get it on the ends of the slabs.
Expanded polystyrene blocks must be installed according to the principle of brickwork, that is, with an offset - preferably by half, but by at least 15 cm. Vertical seams should not coincide. I outlined in advance on the wall exactly how the foam boards would be positioned.
In order to make sure that I was laying the foam correctly and evenly, I checked it with a building level after each slab. So I laid out the slabs in the first row - one after another.
Then you can move on to the next rows. There are some nuances with corners and openings - I’ll tell you about them later. I would like to draw your attention to the fact that all blocks must be tightly connected to each other. I filled the gaps with polyurethane foam. After it hardened, I simply cut off the excess with a knife.
Filling gaps
It is desirable that the insulation layer be even, so I sanded all protruding areas.
Important! Insulating a house with polystyrene foam is a rather complicated and labor-intensive job that can be difficult to do alone. I recommend doing this with at least one assistant - this way there will be fewer “jambs” and the work will go faster.
It is important to know
Laying foam sheets directly on the ground is not allowed: waterproofing work must first be carried out, and then a layer of screed must be poured. Otherwise, the floor may be damaged by rodents.
If all rules of use are followed, the service life of foam plastic as insulation reaches 100 years. This is its undoubted advantage.
Compliance with the rules for using polystyrene foam as insulation makes it possible to save money on heating your home, and also get rid of excess noise. It can also protect from the sun's hot rays, while preventing the outside walls from heating up. Therefore, there is no need to regularly use the air conditioner, which allows you to save on electricity.
How I insulated the corners of the house with polystyrene foam
With corners you have to “suffer” a little more - on one side the slab must protrude to the thickness of the same slab that will be installed on the other wall from the corner. Also on the second wall, foam plastic should be laid according to the “opposite” principle. If there is any excess slab left, you can simply cut it off. The sides must change, that is, first the slab “sticks out” first from one wall, then from the other, then again from the first, and so on. I specifically depicted this in the photo for better understanding.
Corners are insulated according to this scheme
Very important! The part that protrudes should remain clean, that is, there is no need to apply glue to it.
If your angles are internal, then everything happens in a similar way. Of course, I marked everything out in advance - it’s better not to do anything by eye, because it’s easy to make a mistake.
We do not apply glue to the protruding part of the block.
How I insulated window and door openings
There are also some difficulties with door and window openings. It is important that there is enough space to open and close both doors and windows. There are two installation options: either the door is mounted at the same level with the insulation, that is, its outer edge (then you need special fasteners), or at the level with the wall, that is, it will be slightly “recessed”. Then the foam plastic must be filed along the edge, otherwise it will not be possible to open it properly. I decided to install the door flush with the wall, so I determined in advance how many blocks I would need and sawed them down. This is easily done with a regular hacksaw.
Need to cut down part of the block
Styrofoam
Before installing the foam plastic, you need to install the frame, if you have not already installed it, and degrease it so that the slabs do not begin to move away.
Next you will have to work quite hard. First, we measure and cut the profiles for thermal insulation of the openings, taking into account that those that will be adjacent to the corners should be cut at an angle of 45 degrees. Immediately after that, I secured it, checking that it fit as tightly as possible.
Pin your profile
Then we use fiberglass mesh - it needs to be cut into strips, the thickness of which = the thickness of the insulation layer plus about 10 centimeters for fastening. I secured it with an adhesive mixture. It’s not scary if the mesh “drowns” in the glue. By the way, I applied another layer of composition on top.
Now you can proceed directly to the installation of foam plastic - that is, those slabs that we cut in advance.
Installation of fiberglass mesh
The situation with windows is similar - they can be installed either at the level of the wall or at the edge of the insulation. However, I would like to note that it is better if the layer of polystyrene foam covers the window block quite a bit - this will make the house warmer in the cold season.
There should be no joints of foam boards at the corners of the window opening - it is better to cut the blocks specifically for the window. The photo below shows what this might look like. Such a “trifle” can greatly affect whether the house will really be warm.
The foam should be positioned in the corners in such a way that there should be no joints
fiberglass mesh
Securely connect the insulation to the wall
Often foam plastic is attached only with glue, and this is enough, but I recommend additionally connecting the insulation to the wall using disc dowels. It definitely won’t be superfluous - it’s better to spend a little more time and money, but be sure that nothing will happen to the insulation.
Of course, the length of such dowels can be different, so for your case you need to calculate it, taking into account the thickness of the insulation, glue, spacer part of the dowel and another two to three cm “for reserve”. They can be attached directly to the block - in the corners and in the center, or at the seams. Both methods are effective.
The slabs can be additionally fixed using disc dowels
First I drilled holes for the dowels, then installed them using a drill. Sometimes these dowels simply become clogged, depending on which ones you purchased.
Then the insulation must be reinforced, otherwise the material may simply deteriorate and stop “working” as it should. You need to prepare a plaster-adhesive mixture, apply a thin layer, press the reinforcing wall and smooth it on top. It is better to start with windows and doors, and then “process” all the walls in parts. Additionally, I used a drip profile.
It is very important to take into account that if you have several pieces of mesh, they should be laid with an overlap of at least 10 cm.
Installation of reinforcing mesh
Then I leveled the surface and putty it. That's all! You can “decorate” the walls outside, but this deserves a separate post.
At the end the wall needs to be puttied
Selection and application of mixtures for work
To work with the facade, you can use mixtures of such brands as: stolite, tokan, ceresit, ecomix and others.
Regardless of what brand of mixture you purchased, keep the following in mind when working: when choosing a mixture, pay attention to the marking “for foam plastic boards.”
There are also options “for gluing slabs” and “for gluing slabs and a protective layer.” The first option for constructing a protective layer cannot be used categorically . It is not recommended to use mixtures from different manufacturers within the same work.
The mixture is consumed at the rate of about 5 kg per square meter when gluing slabs and the same amount for the rest. The proportions for mixing the mixture are indicated by the manufacturer on its packaging, however, the recommendations in this regard are as follows:
- When gluing the slab, the mixture can be made thicker than recommended by the manufacturer. When placed on a spatula, it should vibrate but not spill.
- To glue the mesh, you can make the mixture more liquid than recommended. Make sure that the mesh is well absorbed into it and that it is convenient to level it.
- The leveling layer requires a more liquid consistency so that it practically flows off the spatula.
Insulating a house with polystyrene foam: pros and cons from personal experience
I know the entire procedure for insulating a house with polystyrene foam very well, since I did this myself, insulating my house, and advised others on this matter. I want to tell you about the pros and cons of this method, so that everyone can understand for themselves whether it is really worth doing this.
So, let's start with the advantages of insulating a house with polystyrene foam.
- Air, as we know, conducts heat very poorly, and due to foaming there is a lot of it in polystyrene foam boards. It is logical that polystyrene foam is an excellent heat-insulating material, which is very often used in construction. It is often not very “trusted”, but I can definitely say that it holds the cold back very well.
- Foam boards are very light - all thanks to the same air, of which there is a lot in them. You won’t have to strain yourself or strain yourself when transporting and moving the slabs. This same advantage is also determined by the fact that foam plastic is very easy to cut - a hacksaw or even a stationery knife can easily handle this (if the slab is not very thick). To attach such a slab to the wall, you don’t need any particularly “complicated” devices - just a special glue, which, by the way, will also create an additional thermal insulation layer.
The foam is very light, so it’s easy to work with. - In addition to the fact that polystyrene foam does not conduct heat well, it also does not allow sound to pass through, which means that the house will be both warm and quiet. I think this is a huge plus - thanks to the foam "layer", you may not have to install additional soundproofing if you were planning to do so.
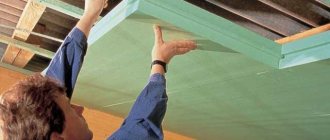
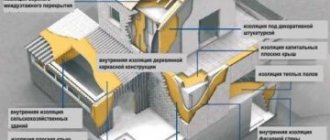
- Polystyrene foam can be easily used to insulate not only walls, but also roofs, ceilings, basements, attics, foundations, etc. However, I want to draw your attention to one nuance: if the wall faces the street, you should not insulate it from the inside with polystyrene foam. The wall will simply stop warming up (after all, as I said earlier, foam plastic does not conduct heat well). Because of this, the wall may begin to collapse, because the dew current will be displaced. It will simply be destroyed by constant exposure to moisture and temperature changes. It is better to insulate walls that face the street only from the outside - this will be much more beneficial.
- Foam plastic is not at all afraid of moisture, so there is no need to install waterproofing when installing such insulation. Also, this material is not afraid of either fungus or mold, because it does not absorb moisture.
- The lighter the foam, the better it will “thermal insulate” the room. The denser it is, the less air it contains, which means it will retain heat less well. So you can even choose cheap slab options.
Polystyrene foam can be used to insulate not only walls, but also roofs, basements, attics, etc. - Of course, one of the main advantages of polystyrene foam is its cost - it is several times lower than the prices of other thermal insulation materials.
Unfortunately, this material also has disadvantages - it is very important to take them into account.
- Foam plastic, even if it is dense, still remains fragile - it is very afraid of mechanical loads. It is easy to break and spoil, which means it must be strengthened if you are insulating the house from the outside. I told you earlier exactly how I did this, thus eliminating this drawback.
- Another disadvantage follows from the advantage - polystyrene foam does not allow air to pass through and does not “breathe” at all, therefore, if you do not think through this nuance, the microclimate in the room may deteriorate.
- Polystyrene foam does not really like paint products and some paints - the material can be destroyed under their influence. Consequently, some finishing work will have to be avoided if you insulate the house in this way. I believe that this is not such a significant disadvantage, since you can simply choose the appropriate finishing compositions.
- A more “serious” disadvantage is that foam is afraid of fire. If you understand that there is a high probability of fire in a particular room, it is better not to insulate it from the inside with such slabs.
Polystyrene foam is afraid of fire, and this is one of its main disadvantages - As I said earlier, it is better not to use polystyrene foam to insulate living rooms from the inside - this can lead to the destruction of the wall, disrupt the microclimate, and the material can also emit an unpleasant odor. This is not only unpleasant, but also dangerous to health - especially if the foam is often heated.
- Various rodents are very fond of polystyrene foam - they can gnaw passages and holes in it, violating the integrity. Because of this, the foam may simply stop “working” as it should. Even if it seems to you that mice and rats are rare guests in your area, you could be very mistaken. This can be avoided by reliably protecting and strengthening the foam. There is another option - simply use another insulation material, for example, ecowool.
Rodents love polystyrene foam.
Despite all the disadvantages, I consider polystyrene foam an excellent material for insulating a house. It's cheap, not too complicated, and the energy-saving effect is obvious - the house will really become much warmer. It is not very difficult to protect this insulation from harmful influences: the main thing is to choose a high-quality coating. I can confidently recommend polystyrene foam for insulating the outside of a house, and I hope that my experience will help you accurately decide on the material and do everything correctly.
Expert opinion: Afanasyev E.V.
Chief editor of the Stroyday.ru project. Engineer.
I have already prepared an article on the topic - what insulation mice do not chew. I recommend reading it. And I also wrote in detail about the technology of insulating a house under siding.
Characteristics
The production of polystyrene foam began more than eighty years ago. The first block was released in Germany, after which it began to be used everywhere in various territories. The basis for the insulation boards are polystyrene beads. Initially, they are elements with a dense structure that do not even remotely resemble foam plastic. At the first stage of production, they are foamed. Next, the base is dried and cured, which is subsequently immersed in a special chamber, where it is sintered with steam at a certain pressure. At the pre-sale stage, the foam comes in large blocks that are cut to specification.
The size of the standard sheet that is used for insulation is one meter long and wide; there are also options for a foam sheet with half the width. The most popular sheet size is 120 by 60 cm. The difference between types lies not only in size, but also in the density of the material. The normal density for insulating facades is 25 kg per cubic meter. Slabs with a density of 15 and 40 kilograms are also produced. This indicator directly affects thermal conductivity. The higher the number, the lower the thermal conductivity and the higher the price for the foam. Denser insulation can withstand greater loads, so it is often used for floor insulation.
Due to the fact that the balls undergo preliminary foaming, this saturates them with gas, which causes the low thermal conductivity of the foam. Its indicator is within 0.038 W/(m×K). Typically, polystyrene foam comes in white color, but during the manufacturing process of polystyrene beads, the manufacturer can add any desired pigment to distinguish their product from other options. In some cases, foam plastic can also be called extruded polystyrene foam and polyethylene foam. These materials differ from polystyrene foam in the production method, as well as in the underlying material.
