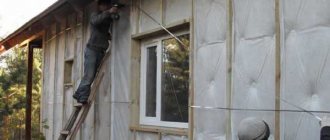
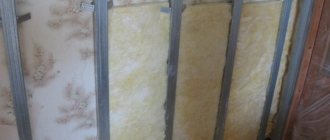
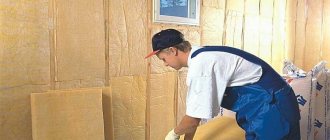
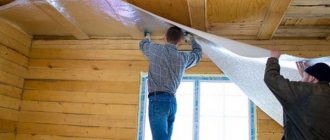
One of the most important conditions for living in an apartment is a good heat supply, for which either a centralized heating system or autonomous equipment installed by residents is responsible. However, the efficiency of heating directly depends on the correct thermal insulation of the premises.
Let's look at how to insulate a wall in an apartment to increase the air temperature and at the same time reduce energy costs for heating. For this purpose, we provide two detailed instructions on thermal insulation with popular types of insulation, in which each step is illustrated with photographs.
Also in this material we will consider less popular methods that can be used to insulate walls from the inside.
Vapor permeability is the most important factor
It is very important that it increases from layer to layer from the inner wall to the outer one.
This factor is very important because during cool seasons the humidity in residential premises is significantly higher than outside. Everyone living in the house breathes, which means the air is filled with moisture. Household processes from cleaning to cooking also play a role; as a result, the air is humidified, but does not escape outside
This factor is very important because during cool seasons the humidity in residential premises is significantly higher than outside. Everyone living in the house breathes, which means the air is filled with moisture. Household processes from cleaning to cooking also play a role; as a result, the air is humidified, but does not escape outside.
The warmer the air, the more moisture it can hold.
To prevent the walls from sweating, condensation and dampness in the corners, it is important to correctly resolve the issue of vapor permeability of the materials used in insulation. If the insulation of brick walls does not include a vapor-permeable outer layer, the wall is guaranteed to become damp
Placing insulation on the inside of a brick house is not the most effective type of insulation, since the ideal situation is when the house is insulated from the outside. If everything is not done correctly, the dew point will fall on the brick wall itself, which will accelerate the destruction of the structure, especially buildings made of sand-lime solid brick, which is most susceptible to moisture. If your house is built of exactly this, in addition to insulating the brick wall from the inside or outside, protect the walls with roof canopies, but do not forget about the outflow of steam, which in this case becomes even more important!
Insulating brick walls from the inside leads to the fact that the dew point is located directly behind the insulation; violation of the technology is fraught with dampness and mold. External insulation, of course, will ensure that the entire wall is warmed up, steam escapes out, and there is no excess moisture.
But all of the above does not mean that it is impossible to insulate inside. There are many reasons why external insulation may not be possible. For example:
- We cannot insulate the outside of architectural monuments. A high-rise building, the upper floors are insulated, but the towers are not. The neighboring walls are so close that there is no room for external thermal insulation to be done correctly.
These and other reasons force us to accept the fact that external insulation is impossible. And if you have chosen the internal option to insulate your home, you just need to clearly understand how to properly insulate a brick wall from the inside in order to be sure to follow the technology. The most important principle of which is the following: we should separate the wall and its insulation from the room and make them airtight.
And here there are two solutions:
Internal insulation with a material whose vapor permeability will be extremely low.
These can be considered penofol, which is an insulation with a layer of foil applied to polyethylene foam. Extruded polystyrene foam also has low vapor permeability if its surface on one side is denser. Mandatory condition: both the foil side of the penofol and the side of the extruded polystyrene foam, which is denser, must be laid towards the inside.
- The following solution to the problem is also possible: insulation of walls from the inside should involve the presence of a vapor-proof film, which will be located on the inside of the housing and hermetically cut off the insulation from the inner wall. If you go this route, you shouldn't leave even a tiny gap for moisture, be sure to overlap the vapor barrier film and carefully tape the seams
Dew point - physics of the phenomenon
Cold walls are not the only problem in old panel buildings. Wet surfaces are susceptible to the growth of fungus. The optimal solution to such problems is external thermal insulation, specified in the requirements of SNiP. And if it is impossible to insulate the building from the facade, internal work will need to be carried out. But in this case, some nuances appear.
Even if the cold structure was previously dry, after installing the insulator it may become damp, which is explained by a shift in the dew point.
This concept refers to the conditional boundary at which water vapor is cooled to the temperature of condensation. This phenomenon is aggravated in winter. If the house design is done correctly, then the dew point is located in the middle of the thickness of the facade material with a uniform structure.
Dew point is an important parameter that should be taken into account when carrying out thermal insulation.
With external insulation, the conditional value shifts to the area of decreasing density (towards the outer part of the wall).
If insulation is done from the inside, it ends up in the room and condensation accumulates in the insulator or on the main wall.
Methods for insulating an apartment
Insulation consists of installing a special material - a heat insulator - on the external walls. There are two methods of insulation:
- External (external). Experts unanimously believe that this method is the only correct one. The heat insulator is installed on the outside of the walls, which are separated from contact with outside cold air. As a result, the heating circuit of the room begins to operate in nominal mode, the surface temperature of the enclosing structures returns to normal, and the formation of condensation stops.
- Internal. A forced option used when it is impossible to provide external insulation. The insulator is installed on the inside of the walls. The volume of the room decreases (slightly), and it becomes necessary to install a durable protective layer on top of the heat insulator. The main disadvantage of this method is the exclusion of walls from the thermal contour of the room. From now on, they perform only the functions of an external mechanical barrier, without participating in the heat conservation of the apartment.
External insulation has a lot of advantages:
- The work is carried out outside without creating any inconvenience for living.
- The surface of the walls remains intact, the interior of the room does not change, there is no need for cladding or finishing.
- The microclimate of the room improves, a feeling of coziness and comfort appears.
The disadvantage of external insulation is the difficulty of carrying out work outside, the reasons for which may be:
- The apartment is located on one of the top floors;
- The facade of the building has architectural value, as a result of which the installation of any materials is excluded;
- There are any technical or decorative objects installed on the wall;
- The building is located close to other buildings or structures;
- Work can only be carried out during the warm season.
Internal insulation is almost completely devoid of these shortcomings; no permit is required to carry out the work; work can be done at any time of the year. And, nevertheless, experts prefer external insulation. The reason for this is the presence of water vapor in the internal air of the apartment. It is gradually absorbed into the outer walls, passes through them and evaporates from the outside. This process occurs constantly in any living space. Installing an insulator from the outside does not stop it, you just need to properly organize the progress of the work. With internal insulation, water vapor is trapped inside the apartment, which has a sharply negative effect on the microclimate. Strong humidity, a feeling of stuffiness, and lack of comfort appear.
The choice of internal insulation is usually due to the inability to work outside. Exterior work requires a permit, which is not easy to obtain. In addition, to install the heat insulator you will have to involve industrial climbers, which will be quite expensive.
External thermal insulation is more preferable, but is associated with higher costs
Therefore, most apartment owners choose a more affordable and simpler option - internal insulation
The method allows you to get a positive result; it is only important to correctly understand the physical essence of the process and organize it in the right way
Possible difficulties and errors of the process
Work on external thermal protection at height is carried out only by trained personnel who have experience in overcoming any construction difficulties.
It is only important to carry out insulation in the summer, in dry weather.
Home craftsmen make the most mistakes during internal insulation, sometimes after completing the work - they do not get the expected effect from implementing the measures. Therefore, before starting work, you need to listen to the advice of experts :
- If vertical cracks appeared, the reinforced mesh was laid incorrectly without overlap.
- The appearance of a “cobweb” on the outer finishing layer is an incorrectly laid mesh on the insulation, not glue.
- The heat insulator slabs are not located in the same plane - the finishing has peeled off and a vapor barrier has not been installed.
- Freezing of the wall - the material is not tightly joined.
Vapor permeability
In a residential building, the vapor permeability of walls should increase towards the street. The main reason lies in the different humidity levels inside and outside the house in winter. The reasons for high humidity in the house are:
There are people living in the house who breathe, cook, wash floors and dishes, and do laundry.
All these habitual operations make the air more humid. And when the windows are closed, the exchange of air is difficult and is carried out only by the forces of the ventilation system. From the course of physics, we know that heated air is capable of holding more moisture compared to cool air. For this reason, condensation occurs from “excess” moisture as the air cools.
Foggy windows and dampness in the corners of a building are a practical example of this. But water vapor leaves the house not only through ventilation, but also through the pores of the wall. If the wall outside is more permeable to steam, then it can pass through it without difficulty. Otherwise, having encountered an obstacle, water vapor begins to condense directly in the wall, which leads to its dampness.
What is the end of a building?
The end of the building is the narrowest side facade of the house.
It is clear that in square-shaped buildings there is no end, as such. In a house that has a long and narrow shape, in which the main entrance is located on a narrow wall, the end coincides with its main facade.
Architecturally, it always looks richer ; in comparison with other external walls, its decoration should attract attention, and in the old days it was decorated with stucco and various niches.
The current town planning legislation defines the front façade as a façade that is clearly visible from the main street or highway. Provided that such a facade is located on the narrow outer wall of the house, then it is impossible to say about such a structure that the house has ends. It has only facades - the main one, as well as the side and rear ones.
Types of insulation
There are many insulation materials available on the market. Let's consider the most popular insulation materials in detail.
Mineral wool
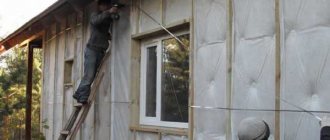
One of the most successful options is stone (basalt) wool. Usually, when we talk about mineral wool, we mean stone wool, although the term refers to a wide group of materials, which include slag wool, glass wool and other types of similar insulators. Basalt wool is more convenient to use and has a good set of operational and technical characteristics. It does not burn, does not emit harmful substances and is not subject to rotting. Available in different forms - from roll to more rigid slab. The disadvantage of mineral wool is its ability to absorb water, which makes installation somewhat difficult and requires additional operations.
Mineral wool slabs are one of the popular insulation materials for walls and other surfaces.
Styrofoam
This insulation is a confident leader among all other types in popularity. The reason for this is the low price of the material, light weight, ease of installation and processing. The material is resistant to water, has stable dimensions and plate geometry, and is impenetrable to water vapor. For internal insulation, this is the most preferable option, budget-friendly and not time-consuming.
Polyfoam is suitable for both internal and external insulation
Penoplex
From a chemical point of view, this material is a complete analogue of polystyrene foam - both of them are variants of expanded polystyrene. But unlike polystyrene foam, which is polystyrene foam granules joined together during heat treatment, penoplex (extruded polystyrene foam) is a monolithic material, hardened foam. It is stronger and heavier than polystyrene foam and has a higher price.
Penoplex does not crumble during processing and is completely resistant to moisture or water vapor.
Polyurethane foam
A specific heat insulator, sold in liquid form and applied by spraying onto the surface to be treated. In air, the material foams and hardens, resulting in a sealed layer resembling polyurethane foam. Polyurethane foam is ideal for insulating walls with complex geometry, the presence of small defects or protruding parts. The price of the material is quite high, and special equipment is used for application. These factors somewhat limit the use, although the performance qualities of the insulator are very high. It is completely impervious to moisture, sealed and perfectly covers the surface without cracks or gaps.
Wall insulation with sprayed polyurethane foam
There are other materials that can be used for internal insulation. It is impractical to list them all, since they are noticeably inferior to the named types in terms of operational and technical characteristics or are expensive.
Permeable types of heat insulators require the installation of a vapor barrier film, which increases the number of installation operations and requires additional costs. Permeable types of insulation include mineral wool and polystyrene foam; penoplex or polyurethane foam are impermeable to steam or water.
Which material to choose - mineral wool or polystyrene foam?
When choosing insulation, you need to take into account the characteristics of the room. Any material must have the following properties:
- fire resistance;
- environmental friendliness (in the case of internal insulation, this factor plays a key role);
- ability to absorb moisture;
- high thermal insulation and breathability properties.
Mineral wool
Mineral wool is made from basalt and is the most popular material for wall insulation. It retains heat well inside the room, but easily allows air to pass through, which ensures good ventilation. The air in the room is always fresh and does not stagnate, which also allows you to get rid of high humidity. The material is highly elastic, which is convenient for installation. However, over time, basalt wool tends to deform, absorbing excess moisture. Therefore, when installing mineral wool, a sheathing is installed.
For basalt wool you will definitely need a frame
Other disadvantages include harm to the respiratory system. When used indoors, the degree of toxicity is not very high, but still the material is more suitable for outdoor use. Another disadvantage is considered to be increased weight.
Styrofoam
The main advantages of polystyrene foam are its cost and high thermal insulation ability. The material perfectly allows air to pass through, it is lightweight and convenient for installation work. It is non-toxic, which makes it excellent for interior decoration. The low weight will allow all work to be carried out independently without the involvement of builders. Particularly effective for internal insulation. However, there are also disadvantages. Polystyrene foam is highly flammable and is also not suitable for insulating wooden structures, since condensation will form on such surfaces.
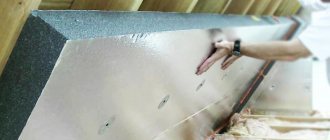
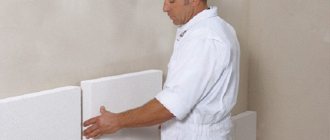
Installation of foam plastic boards
Creating a double wall
Another method of insulation is to create a double wall with heated floor elements. This method involves mounting heating elements on the wall. In order to install such a structure, it is necessary to create a second wall. This can be done using drywall or building a full-fledged thin wall from half-bricks. The presence of a false wall allows you to install insulation on its inside.
However, this method has a number of disadvantages:
- Firstly, it greatly reduces the living space.
- Secondly, the double wall does not provide the most powerful heating.
- Thirdly, this method requires a lot of electricity consumption.
Preparatory activities
Work on thermal insulation of an apartment begins with the preparation of materials and tools. In addition to the insulator, for insulation you will need:
- Vapor barrier film. It is used to protect the wall from moisture. In its absence, the surfaces will quickly become saturated with condensation and become covered with mold.
- Material for installing the frame. These can be boards or wooden beams. A profile is also suitable for installation.
- Drywall or other finishing material (plastic panels, lining, siding, etc.).
Before purchasing the listed products, you need to calculate the square footage of the walls. This will allow you to select the optimal amount of materials and plan the budget for the upcoming insulation.
Before starting work on thermal insulation, it is necessary to calculate the square footage of the walls.
Next you need to prepare the walls. It consists of cleaning the surface from old wallpaper, tiles and other coverings. If there is gypsum putty or plaster on the wall, it is best to remove it with a hammer, hammer drill or chisel. Next, the wall needs to be treated with an antiseptic, which will prevent the formation of mold.
What does this look like in practice?
Now let's look at how to insulate a brick house from the inside, in practice.
If you chose expanded polystyrene, then your insulation is quite dense, 20-40 mm, and you can glue it directly to the wall. The denser part faces the inside of the house, as you remember, and then it can be finished off: wallpapering, plastering. By the way, if you are not insulating a house, but, for example, a bathhouse, but also made of brick, extruded polystyrene foam and other polymer materials will not be suitable here, since when significantly heated they will release toxic substances into the air.
When insulating walls from the inside, start by treating the walls: they need to be leveled and primed with an antiseptic composition, which will guarantee the absence of fungi on the wall.
Armed with regular tile adhesive or a special one for polystyrene foam, apply the adhesive composition with a notched trowel onto slabs that have been previously rolled with a needle roller, which will significantly improve adhesion. Glue the slabs tightly to each other, make a vertical spread between the seams of the rows. Wait until the glue dries, then fill all the resulting seams with silicone-based sealant.
You must achieve maximum vapor tightness. You can cover the resulting surface with wallpaper, for which an aqueous solution of PVA glue will be sufficient. But if you want the inside of the house to have structural plaster, then you also need to reinforce the surface with fiberglass mesh, for which the same glue is suitable, and after the mesh has dried, proceed to decorative finishing.
The disadvantages of these materials for a brick house are high vapor permeability and low density. Therefore, proper installation is also very important here. And it is produced by lathing.
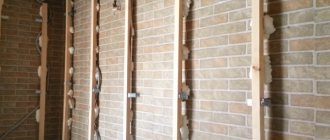
Therefore, before insulating a brick wall from the inside, we first take bars the same thickness as the slab of your insulation.
With a step not much narrower than the slab of insulating material, we erect the sheathing on the wall. We fill the resulting windows with insulation; it must be laid apart. If you decide to insulate the brick walls of your house from the inside with polystyrene foam, then take such an additional measure of protection as foaming the seams.
When the insulation is laid, a vapor-proof insulating film is placed on top. However, the most ideal protection for interior walls would be if you instead use 2-3 mm thick penofol, fastening it with an overlapping stapler. Be sure to cover the seam with construction tape.
To complete the process of insulating a brick house from the inside, you need to attach a false plasterboard wall to the bars with your own hands; you can also use lining or wall panels.
Treating windows for colds
Windows in Ekaterinburg apartments have been actively converted into plastic for more than 10 years. Nevertheless, as repairmen note, 50-60% of city residents' apartments still look at the world through glass framed in wood. Wooden windows are very good from an environmental point of view, but over time their thermal insulation properties may deteriorate. Director Timur Abdullaev notes that today the old-fashioned method of “piercing” wooden windows with ordinary cotton wool has not lost its relevance. Especially if the apartment owner is concerned about insulating the home after winter has arrived. When it’s frosty outside, it’s more difficult to properly repair wooden windows.
The Repair Center explained that a professional technician will insulate one window in about an hour. The cost of the work will be 350-700 rubles. Plastic windows provide better protection from the cold than wooden ones. But only if they are in good condition.
The problems may not be in the window itself, but in the places where it adjoins the walls. As master Alexey Zykov notes, according to construction GOSTs, a whole range of special materials and technologies must be used when installing a window. In practice, many elements are forgotten.
If cold air penetrates into the cracks between the window and the wall, then, as suggested above, you can seal them with sealant. But this will only be a temporary solution. When the frosts recede, a full cycle of work on slope insulation should be carried out. It will cost from 10 thousand rubles. for one window. By the way, cracks formed under the window sill can also be cured.
Seam insulation
The need for thermal insulation of seams in accordance with technology will eliminate the occurrence of drafts, fungus, and heat losses.
The main prerequisite for carrying out the work is a fairly long service life of the house - twenty years or more, as a result of which shrinkage and shifting of structural elements occurred.
As a result:
- joint filler has peeled off or cracked;
- there is a decrease in room temperature during severe frosts;
- damage to the plaster layer, peeling of wallpaper and other finishing materials occurs;
- constant humidity is fixed at the joint;
- the occurrence of mold;
- visual signs of seam failure from the outside.
Interpanel seam design
A panel seam is a joint between external building envelopes and is classified into a seam formed at the junction of two or three slabs.
The last type of seam requires an enhanced technological procedure, since it is the most vulnerable.
Today, the insulation of seams directly in panel houses is done with polymer materials, which has significantly increased the service life of the coating.
The choice of insulation is influenced by the following factors:
- climate zone;
- number of storeys;
- the year the building was erected and its purpose;
- availability of major repairs.
Among the widely used insulation materials:
- polyurethane foam (polyurethane-based sealant);
- Vilaterm filler;
- mineral wool and other soft insulating fibers.
Also, completely sealing the seam is a common method of thermal insulation. Plastic solutions that penetrate deeply into structural cavities are used as fillers, and sand, expanded clay, and fine gravel are considered as fillers.
All work is carried out on a leveled and thoroughly cleaned surface, and the materials used are slab-type insulation materials with a very high strength coefficient.
Selection of materials
There are many materials and solutions suitable for interior insulation work. Therefore, the choice is made only based on the planned budget that will be spent on insulating the apartment.
Minvata
Mineral wool is suitable for internal thermal insulation, but it must be covered with a layer of film. This is due to the fact that insulation particles are unsafe for the health of people living in the house, and the insulator itself quickly accumulates moisture. Also, mineral wool requires a frame.
To insulate a house from the inside, it is best to use mineral wool.
Of all types of insulation, basalt wool is best suited for apartments. It is not subject to waterlogging, is resistant to heat and is made from environmentally friendly raw materials.
Expanded polystyrene
The advantage of the material is its ease of installation. It can be laid on an adhesive mixture with additional reinforcement with dowels. A fiberglass mesh is fixed on top and covered with plaster. When choosing this method of thermal insulation, it is necessary to provide a ventilation system, since the layer has low vapor permeability.
Before laying the insulation, it is important to get rid of the old finish, including wallpaper, and cover all defects with putty. After this, the surface must be treated with a primer, for example, acrylic. It is important to choose those compounds that have antifungal properties.
A prerequisite is to attach the waterproofing film to the wall surface.
The insulation is applied in a checkerboard pattern using glue. After the mixture has dried (this takes about 2 days), holes are made in the insulator, based on the number of 6 pieces per sheet. They are necessary for inserting dowels that increase the strength of the structure. The end seams are sealed with the remains of polystyrene foam.
Then a mesh for reinforcement and a facing layer are applied.
Expanded polystyrene is glued to the wall without additional fixation with dowels.
Polyurethane foam
Insulating an apartment from the inside with polyurethane foam allows you to solve all the problems of vapor barrier and absorption of excess moisture. In addition, this material does not have seams, so even if the dew point is in the middle of the wall, it will not be able to enter the room. Therefore, polyurethane foam ensures complete sealing of the surface.
PU foam meets environmental safety standards, and harmful fumes appear only when the raw materials are mixed during spraying. During the polymerization process, the material maintains structural stability.
Polyurethane foam is applied between the sheathing and sheathed with moisture-resistant sheet material. In structure, it is a bit like a prefabricated sandwich panel.
To distribute polyurethane foam onto walls you need to use special equipment and have some experience.
Cork
Cork is sold in rolls or slabs and is made from natural raw materials, which guarantees its safety for people and the environment. The material absorbs street noise efficiently and does not require additional cladding.
But before spreading the cork, it is important to plaster the surface to remove unevenness and other defects. To do this, remove the old layer of finishing, treat the structure with an antiseptic and coat it with a primer. The final stage is the application of plaster to which the cork covering will be attached.
To insulate walls, cork insulation in rolls is used.
The same adhesive mixture is suitable for fixing the insulation as for gluing foam plastic. But it is better to purchase a special composition for balsa wood.
Styrofoam
Polystyrene foam is used to insulate an apartment from the inside quite rarely, since its effect on the body has not been fully studied. If you want to fix the slabs in the ceiling area, it is better to do this from the attic side. When searching for products, you should request a quality certificate, since samples produced in artisanal conditions do not have the required properties.
Penofol
Penofol is a mixture of polyethylene foam and aluminum foil. It can be combined with other heat insulators or attached as an independent insulation.
Single-layer material with a thickness of up to 5 mm is suitable for treating cold wall surfaces. The thermal efficiency of penofol is due to its low vapor permeability and increased reflective characteristics of the foil (up to 97%).
The material is not able to provide complete sealing. Therefore, over time, moisture accumulates on the surface of the foil. To eliminate the problem, it is enough to install a sheathing with a ventilation gap between the insulator and the finishing layer.
Keramoizol
Keramoizol belongs to the category of liquid insulation, which is produced on the basis of polymer resins. The material contains spherical mineral fillers responsible for reflecting thermal energy. When applied, the composition polymerizes, creating an imitation of a thermos.
Using ceramic insulation you can not only protect walls from heat loss, but also prevent the penetration of street noise. The material is sold in containers of different volumes and is characterized by increased vapor and waterproof properties. The insulation is laid in several layers. To obtain the desired effect, it is enough to apply it to the surface 6 times.
Penoizol
Penoizol is a liquid type of polystyrene foam and is produced directly on site. The raw materials are poured into formwork or a hollow structure. Penoizol has a low density, long service life and minimal heat conductivity. In addition, it burns poorly and meets environmental requirements.
Astratek
Liquid insulator Astratek with a microporous structure is suitable for internal insulation work. It allows you to organize a seamless coating that will reduce the degree of heat loss and will not create additional load on the ceilings and walls.
Advantages of liquid heat insulator "Astratek".
The material is suitable for use at different temperatures and on different objects. It quickly adheres to the surface being treated, does not corrode and contains organic components.
Penoplex
Penoplex is a subtype of expanded polystyrene, which is produced using the extrusion method and has a finely porous structure. It consists of small air bubbles isolated from each other.
Penoplex has low vapor absorption, long service life, resistance to aggressive environments and low thermal conductivity. However, under the influence of solvents such as acetone, gasoline or formaldehyde, penoplex can be destroyed.
Insulating paint
Insulation paint is a product of the space industry. It was developed to produce a lightweight and ultra-thin material that was used to cover the shuttle hulls.
Today such a product can be found on the open market. It is positioned as a liquid insulator for walls, pipelines and other structures. The paint contains special granules that do not allow heat to pass through.
Liquid ceramics and foil insulation
Liquid ceramics is an innovative solution and has the same properties as 50 mm thick mineral wool. Outwardly, it resembles simple paint, but with small vacuum particles inside.
Warm plaster means an energy-saving material with noise and waterproofing properties. Foil types prevent heat loss due to reflective characteristics. They are not used as the main insulation, but only complement other insulators.
Electric heated floor
An electric mat is used as a layer of thermal insulation, on top of which any other insulation (foam plastic, mineral wool, etc.) is fixed. When exposed to heat, the material warms up and retains heat in the room. At the same time, the surface of the mat prevents the accumulation of moisture inside the walls.
Electric underfloor heating is an effective and cost-effective option for protecting a building from heat loss.
What does corner apartment mean?
Corner apartments are located in the end areas of residential buildings. One or two rooms in such apartments have two adjacent walls bordering the street. The layout of such apartments is no different from the configuration of all the others in the house, only an additional window and a heating radiator appear, and such an addition is not found in all corner rooms. To compensate for heat loss through the enclosing structures resulting from an increase in the area of external walls, an increase in internal temperature by 2° is provided, which is ensured by increasing the standard number of radiator battery sections. In practice, this is achieved either by having a battery installed under an additional window in the room, or by installing a larger radiator (number of sections).
These measures rarely have the intended effect, since they are designed to solve the problems of a conventional premises and do not take into account many of the influencing factors that exist in reality:
- The outer wall is located on the windward side of the house;
- Deterioration of heating networks, non-compliance of heating mode with regulatory requirements;
- Errors and shortcomings made during the construction of a house.
These factors are often present all together, significantly changing the temperature in the apartment for the worse. The cold surface of the walls begins to get wet due to the active formation of condensation, and the apartment becomes cold and uncomfortable. Such situations occur quite often and require appropriate measures to be taken.
Wall freezing is a common occurrence in corner apartments
Detailed instructions for doing the work yourself
After preparation is completed, you can begin installing the ventilation gap. This procedure is combined with the stage of laying waterproofing. Some forums publish opinions that insulation can be done without organizing a ventilation gap. However, this scheme leads to the accumulation of moisture between the surface of the wall and the insulation.
The ventilation gap is arranged according to the following scheme:
- Wooden slats with a thickness of 2 cm or more are attached to the walls. They need to be fixed horizontally in increments of 1 m. Dowel nails are suitable for fixing. Before laying, the slats are treated with protective impregnation.
- Further, several vents are made in the wall for normal air exchange. This is done by drilling holes with a diameter of about 20 mm. To prevent them from clogging, you need to provide a protective mesh.
- Then a vapor barrier film is attached to the resulting frame. It is installed tensioned to form a ventilation gap.
Diagram of the ventilation gap.
The next stage involves installing a frame of vertical posts. They are fixed in increments equal to the width of the insulation boards. For denser material, you can reduce the step by 1 cm.
Insulation is attached to the finished frame. If the design is done correctly, the mineral wool slabs will be held in place without additional fixation. But to eliminate cold bridges, you need to fill the voids between the studs and the wall with thermal insulation material. Drywall is used to cover the frame.
Getting rid of freezing corners
This problem can be solved positively if you know how to insulate a panel house from the outside and, in particular, an apartment.
Let's consider how and with what panel houses are insulated. There are several schemes and methods of insulation using various materials.
The question of how to insulate corners in a panel house is especially acute. The corner room, due to its design specifics, has not one in common with the street, but two, which significantly increases heat loss. In addition, such rooms contain two windows, one on each of the existing external walls. This fact is remarkable only in terms of illumination, but in terms of heat retention - so-so.
Residents of such apartments are trying to solve the problem by increasing the number of heating devices in the room. But, as everyday experience shows, problems often arise with freezing of corners between external walls and, as a result, condensation appears on the wall and the consequences are not long in coming:
- the wallpaper is coming off;
- walls previously painted with water-based paint are covered with stains, and the enamel peels off in patches;
- the plaster is destroyed, which will lead to damage to the main wall;
- fungus appears, which looks unsightly and is harmful to health.
The conclusion suggests itself - high-quality insulation of the corner room is necessary and it is better not to limit yourself to just improving the corners.
You can insulate a corner room:
- outside;
- from the inside.
If insulation is not available from the outside, the issue of internal thermal insulation is considered. Condensation is an obvious “bottleneck” of internal insulation, therefore, it is necessary to protect the main wall from water vapor.
Today two solutions are known:
- the use of insulation characterized by low vapor permeability;
- protection of insulation directly with a vapor barrier film;
Average prices
The cost of work on external and internal thermal protection of panel walls depends on many factors, but primarily on the level of technical skill of the construction company. In addition, the final cost of the work is influenced by the characteristics of the insulation:
| № | Name of works | Cost, rub. per 1 m2 outside/inside |
| 1 | Insulation of mineral wool panel walls | 1450/670 |
| 2 | Insulation of panel walls polystyrene foam | 1100/420 |
| 3 | Reinforcement + finish | 1150/350 |
| 4 | Painting | 200/100 |
| 5 | Scaffolding | 130 |
When it is not possible to insulate the outside
Ideally, place a layer of insulation on the outside of the building along its facade. But owners do not always manage to implement this option. There may be several reasons for this:
- the facade of the house is prohibited from changing due to its historical value (the situation is typical for old brick apartment buildings); insulation work must be carried out at a high altitude, and the owners do not have the opportunity to turn to professional builders; the distance between neighboring houses is too small to allow work with external walls.
In all of the above cases, you will have to resort to internal insulation. The main task in such a situation is to avoid the harmful effects of condensation on the insulation.
There are two common ways to solve this:
- When using mineral (basalt) wool, the vapor barrier film is overlapped, and all seams are carefully taped. When using materials with very low permeability, you can dispense with the vapor barrier film, since the insulation does not get wet. As such a material, you can choose polystyrene foam or penofol with a foil layer.
Briefly about the main thing
Internal wall insulation is carried out only in cases where it is not possible to do it outside or when external thermal insulation is not enough to maintain a comfortable temperature in the house. Not all materials are suitable for this. Thermal insulation for walls from the inside must be selected taking into account the basic requirements: to be safe for health, preferably non-flammable and durable, so that in a few years you will not have to make major repairs. These requirements are best met by basalt wool, ecowool, cork and warm plaster coatings.
How to insulate walls in a panel and monolithic house
How to insulate walls from the inside? How to insulate a concrete wall from the inside? How to do this correctly? To insulate a wall from the inside, we will consider step-by-step instructions for insulating walls and partitions in a panel house from the inside.
Algorithm of actions:
- First you need to prepare the walls. To do this, you need to remove furniture, clean the walls from finishing material to plaster. Therefore, this procedure should be combined with renovation work in your apartment;
- next must be done. It is best to use special polymers, but you can also use regular plastic film. It is applied directly to the walls, the places where the strips are fastened are glued. To do this, use construction tape;
- Next we install the sheathing; you can use both wooden and metal guides. In the first case, the tree must be treated with antiseptics and fire-fighting solutions. When installing the sheathing, the step size must be selected depending on the insulation, so as not to form gaps and voids;
- then we directly lay the heat insulator, that is, we insulate the walls. It should fit into the openings between the sheathing. Many materials are designed in such a way that during installation they straighten out and fill the entire form, this significantly reduces installation time;
- installation . By installing it, we protect our insulation from wet steam, which is always present in the apartment. Under no circumstances should these measures be neglected, as moisture will begin to accumulate in the insulation. As a result of this, the product will lose its properties, and all your work will be lost.
How to insulate the walls of an apartment from the inside? You can insulate a corner apartment in a panel or monolithic house by following these six steps.
Installing insulation on brick walls
How to insulate brick walls inside an apartment with your own hands? Corner walls in a brick house can be insulated using the same method as in a panel house. Therefore, we will analyze the work of installing material made from polystyrene.
Insulating a wall in an apartment from the inside:
- clean the walls down to the plaster. If it is missing, then it should be applied. After this, the walls must be leveled, cracks repaired and then treated with a primer;
- you need to prepare the glue according to the manufacturer's recommendations and apply it to the walls that you will insulate. In the beginning, you can use a regular spatula. You need to apply glue to the walls, then take a notched trowel and go around the entire perimeter again. This is done in order to create an uneven surface of the glue. This promotes better adhesion of the insulation;
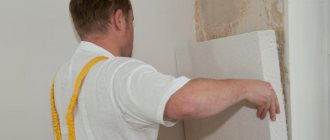
- how to insulate a wall in a corner apartment from the inside? Next, we take sheets of thermal insulation and begin installing them on the walls. First of all, the very bottom row is laid. We apply the polystyrene sheet tightly and press it through; you do not need to use dowels or other fastening materials. When installing, use a level and carefully join the edges so that no gaps form; if necessary, cut the sheets. The next row is installed so that the junction of the two sheets is in the middle of the bottom sheet. This will give greater durability to the entire structure.
Watch the surface of the insulation so that no unevenness is formed, because this will bring additional difficulties during final finishing.
- After you have installed the thermal insulation, you can begin finishing work. If you plan to cover the walls with plasterboard, then no additional work on the insulation is required. If you plan to cover it with a layer of plaster, putty, wallpaper, or paint, then you need to treat it with a primer, then install a mesh of reinforcing fiber. After this, you can begin to apply layers of plaster or putty.
By following these steps, you can insulate a corner room from the inside.
Advantages of expanded polystyrene
Scheme of insulating a brick wall from the inside with polystyrene foam.
In other words, this is the well-known foam plastic.
Easy to install, lightweight and budget option, available to anyone who wants to insulate their home from the inside. For greater fire resistance and less fragility, we recommend choosing extruded polystyrene foam. Choose the thickness and density of the sheets depending on the purposes of insulation.
Necessary materials: expanded polystyrene, polystyrene foam, glue for expanded polystyrene, mounting disc dowels, metal profile for drywall, drywall, self-tapping screws for drywall.
Necessary equipment: a knife, metal scissors, a wide spatula-comb for applying glue and a small handy spatula, a bucket for diluting glue, metal scissors, a hammer drill with a drill suitable for “fungi” and self-tapping screws, a nozzle for mixing glue or just a rod.
Nuances when processing a balcony
The specifics of insulating a balcony look almost identical to the thermal insulation of the walls inside the building. At the same time, on the loggia you also need to protect the ceiling and floor.
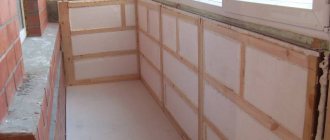
If polystyrene foam is chosen as an insulator, it can be attached to the walls using foam adhesive. The next layer is to install a wooden sheathing. It can be secured with dowels.
The optimal insulation thickness is between 50 and 80 mm.
In addition, you can insulate the balcony before painting. To do this, putty, reinforced mesh and another layer of putty must be applied to the foam plastic. After the surface has dried, it must be coated with a primer and painted. In this case, foam plastic with a density of 25 kg / cubic meter is used. m.
Methods for insulating apartments
Before installing the walls, you need to replace the wooden windows with metal-plastic ones, preferably three-chamber ones, they will act as a vacuum. If this is not possible, then you can treat the window joints with silicone and install rubber seals in the contact areas. Carry out the same work with the balcony. The most practical options for insulating a corner apartment are the following:
Polyurethane foam can be used to complete the work.
- Mineral wool - thanks to its plasticity, it is easy to install, convenient to process, made of fire-resistant material, and non-toxic. The disadvantages include the fact that it allows moisture to pass through, is quite heavy and can be deformed.
- Expanded polystyrene is able to withstand temperature changes and retains its properties for up to 35 years. But at the same time flammable.
- Polyurethane foam has excellent sound insulation properties, is non-flammable, and durable. Requires high costs; operation requires the help of specialists and additional equipment.
- Plaster acts as a barrier to heat transfer.
- Thermal paint can eliminate cold bridges and maintain an optimal microclimate in a corner apartment.
Always use a level when leveling surfaces. You can also make “warm walls” by analogy with “warm floors”. In this case, electric insulation is installed in the walls, this will warm them up enough that the formation of condensation will drop to zero. It is customary to distinguish two main methods of insulation:
- Interior.
- External.
How to insulate a corner wall of a brick house from the inside?
At the beginning of the work, the surface is cleaned and a primer with antifungal properties is applied on top. When insulating with mineral wool, a frame is built from wooden slats, between which pieces of cotton wool are laid on glue. Glue is applied to the wall. The seams are covered and rubbed, drywall, primer and paint or wallpaper are applied. When working with expanded polystyrene, glue is applied to the sheet with a spatula and glued.
There should be no gaps; the seams are covered with sealant. The finishing is done with a plaster mesh made of fiberglass, which is smoothed with a layer of glue, and drywall is attached to it. When plastering, the material is applied in three layers, and after each it dries, then it is primed and leveled. The wall is painted or pasted over. To insulate a corner room with thermal paint, the base is prepared and the paint is applied with a brush or roller. After drying, you can wallpaper the walls.
External insulation
For external cladding of surfaces, the following are used: mineral wool, polystyrene foam and polyurethane foam. Mineral wool is seated on glue and secured with anchors. The seams are rubbed and leveled with sealed materials. A reinforcing mesh is placed on top, and a layer of façade paint is applied on top of it. The technology of insulation with polystyrene foam begins with the installation of a metal frame. The walls are treated with a special solution and polystyrene foam boards are placed on the glue. The corners are rubbed down, a layer of plaster and paint are applied. When insulating with polyurethane foam, a metal mesh is installed. The material is applied using a sprayer. On top you need to apply a layer of glue and reinforcing mesh, and then plaster and paint with facade paints.
One of the frequently asked questions by most of us, especially the owners of an apartment in a panel house, is how to insulate a corner room in a panel house.
Insulating a panel house from the outside is a necessary measure, since living in a cold apartment does not add comfort and is fraught with health problems. And, most of all, this applies to end (corner) apartments in panel high-rise buildings. Over time, cracks form at interfloor joints, through which water easily penetrates into the wall and is absorbed. In winter, the water accumulated in the walls freezes and begins to attack the wall from the inside, making the living space cold and, moreover, damp.
Option for insulating a balcony from the inside
In the case of a loggia and a balcony, the situation is often completely different. If the authorities do not allow the installation of a wall, they require that the existing reinforced concrete screen be left; it is cut off from the warm air by careful thermal insulation made of extruded polystyrene foam (EPS).
Insulation of the balcony from the inside
In this case, it is better to make the insulation excessive than at least slightly insufficient. The total thickness is divided into two layers. They are laid without a gap (preferably with locks), and so that the seams of the first layer overlap the sheet of the second. There should be no through access of warm air to the screen.
It is necessary to approach very carefully the issue of insulating the floor and ceiling of the loggia/balcony, ensuring tightness at the junction of them with the walls
Also pay attention to how the glazing will be installed: there may also be problem areas: the joint with the screen, walls, insulation of the part above the frames. All of them must be well finished, excluding the possibility of contact of warm/cold air
In this case there will be no problems. Even if the balcony is combined with the room.
Requirements for insulation for interior work
It has been proven that approximately 40% of heat loss in a private home occurs through walls. Therefore, thermal insulation work should begin with the walls. When choosing insulation, you need to take into account that it must have a certain set of technical characteristics, namely:
Insulation of walls with foam plastic.
- Low thermal conductivity. The selected material should not only retain heat inside the house in winter, but also not allow warm air from the street to pass through in summer. Only in this case will accommodation be comfortable all year round.
- Low vapor permeability. The insulation should have less vapor permeability than the building material from which the house is built.
- Non-flammability. High resistance to open fire is a basic condition in terms of fire safety.
- Environmentally friendly. The material used during operation should not emit harmful substances that negatively affect the human body.
- Moisture-proof. The selected insulation should not have high absorbency, since with increasing humidity the thermal insulation properties decrease.
- Slightly thick. The thickness of the insulation will determine how much free space its installation will take.
What consumables and tools will be required?
For the process of laying insulation, both inside and outside, the type of tool will depend on its type and ventilation system. In relation to the work process, external insulation will additionally require the installation of construction scales, hanging cradles and the presence of a climbing device with insurance.
Basic tools for thermal insulation work on panel structures:
Measuring tools: square, tape measure and building level.- Hammer.
- Putty knife.
- Saw.
- Screwdriver.
- Bulgarian.
- Carpentry tools for ventilation systems.
Required Supplies:
- Glue similar to insulation type.
- Sealant for protecting panel seams.
- Reinforcing mesh.
- Plaster mixtures.
- Self-tapping screws.
- Dowels and glue.
- Vapor barrier material.
- Metal profiles or lumber for installing the frame.
Tips and tricks from the experts
If the room borders on another building, the only solution for insulation is internal thermal insulation. This will slightly reduce the internal area, but will make the interior more comfortable. In order to avoid mistakes at different stages, it is necessary to calculate in advance the optimal amount of materials, draw up an action plan and strictly adhere to it.
A vapor barrier with one-way conductivity must be secured between the finishing layer and the insulator. When designing internal insulation, it is necessary to take into account the process of dew point transfer through fences. Therefore, the vapor permeability of the insulator should decrease from building to street.
Advantages and disadvantages of insulating internal walls
Carrying out thermal insulation from the inside of the room has both positive and negative sides. The advantages include:
- saving on heating;
- in hot weather, on the contrary, it will remain cool inside;
- variety of materials;
- ease of installation;
- work can be carried out at any time of the year.
The downsides are:
- Only the walls inside the house remain protected, the outside remains under the negative influence of cold temperatures, which can lead to rapid wear of the surface;
- formation of condensation between the outside and the inside, which will lead to biological formations that cannot be seen;
- thermal insulation will take up part of the area (at least ten centimeters from each wall).
In hot weather, on the contrary, it will remain cool inside.
Is it possible to insulate walls indoors?
There is no direct ban on insulation. There are also no documents regulating how to insulate a cold wall from the inside in an apartment. The owner independently chooses the material, method of fastening, and place for insulation. If the resulting insulation does not protect well from the cold and condensation forms on it, then the owners will also have to solve the resulting problems themselves.
Note! Poor quality insulation will create an unfavorable environment in neighboring rooms, including other apartments. Therefore, when deciding to install internal insulation, remember the level of responsibility that you impose on yourself.
Heat conservation without costs
There are always simple ways to help keep warm, while spending on them will be minimal or not at all:
- Try to clear the window facing south as much as possible so that the sun's rays penetrate it and heat the room;
- Windows are often covered with thermal protective film. It does not affect visibility, but helps keep the room warm;
- Block the flue of a stove or fireplace that is not currently in use. A third of the heat may escape through it;
- If additional heating sources are needed, install oil radiators or ceramic panels. They are safe and can quickly heat up a room.
