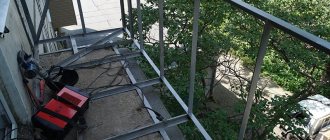
Finishing a terrace in a private house (photo) The veranda is a small room attached to the house. It can be open or glazed (closed). It is used both for agricultural needs and for recreation. How to insulate a veranda for winter living from the inside with your own hands and what materials are best to choose for these purposes? You will find out the answers to these questions below.
Insulation of the veranda - list of materials
Nowadays there are so many insulation materials that it is sometimes difficult to make a choice. All of them are good in their field and are used by builders. Nevertheless, over some time, each material has received a certain reputation, so you can make a list of the best materials for insulation. Let's take a look at it as it was compiled based on user reviews, features, and pros and cons.
Styrofoam
This material is known to everyone. It does its job perfectly and has many advantages. The material is produced in rigid slabs of a certain thickness. The greater the thickness of the foam, the better the thermal insulation of the veranda.
Advantages of the material:
- Low price and availability.
- Versatile, suitable for insulating ceilings, walls and floors.
- The material is very easy to work with.
- Has a high degree of heat conservation.
- Not afraid of moisture.
- It is light in weight and does not weigh down the structure of the veranda.
- Non-toxic and able to absorb noise from the street.
Note! You can also use polystyrene foam. Its properties are very similar to polystyrene foam, only even better
The material is durable and well processed.
Penofol
Practical material that is easy to work with. Due to the foil layer, the material additionally protects the wooden veranda from the cold.
Advantages of the material:
- It can be combined with other materials, used as one insulation material or reinforced with others.
- It is environmentally friendly and will not emit toxic and harmful substances. Therefore, you can use it inside.
- It’s very easy to work with; anyone can do the insulation process.
- It is fireproof.
- Penofol will protect the veranda from cold air from the street.
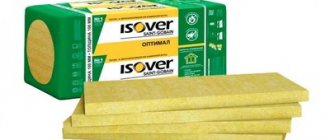
Mineral wool
No less popular insulation than polystyrene foam. Can be used as rolls or slabs. Mineral wool has earned the respect of many builders and is used very often in insulating verandas. It's all about its characteristics and advantages:
- The material is vapor permeable, i.e. it is breathable. Thanks to this, the veranda will have an excellent microclimate and optimal humidity.
- This is an environmentally friendly product that will not cause any harm to anyone.
- The quality of insulation of mineral wool is excellent.
- The material is lightweight and easy to work with.
- Just like polystyrene foam, cotton wool has the ability to soundproof a room. No extraneous sounds will penetrate into the veranda.
- Versatility. You can insulate the floor, walls and ceiling of the veranda with cotton wool.
Important! One type of mineral wool is basalt wool. The material is biologically stable, does not burn, resists moisture and is durable
PPU (polyurethane foam)
An excellent material for insulation, which is applied by spraying. It can be compared to polyurethane foam, which increases several times after application. Although, on sale you can find ready-made panels that are mounted according to the foam plastic principle. However, this method is worse than the spraying method. Why? When fixing the slabs (this applies to polystyrene foam, mineral wool and other slab and roll insulation materials), cold bridges are formed through which the cold penetrates into the veranda. And when sprayed, a monolithic layer without cracks is created.
Advantages of the material:
- No cracks.
- High quality thermal insulation.
- Polyurethane foam is not afraid of moisture.
- It is biostable.
- It is lightweight and has soundproofing properties.
- Penetrates into all cracks, creating a monolithic layer.
Advice! With all this, polyurethane foam is quite expensive, and to apply it you need to have special equipment. In addition, the material is vapor-proof.
It is from this list of materials that you can choose the insulation that you like the most. With it, your veranda will be reliably insulated. Based on the characteristics of the material, as well as your financial capabilities. If you have already chosen, then you can proceed to the insulation itself.
Choice of insulation
Based on their structure, all thermal insulation materials can be divided into 3 types.
Cellular
Such insulation is made from polymers, which are given a special structure in the form of many closed cells filled with air. They are produced in the form of rigid panels, rolled materials and foams, which harden after application to the insulated surface.
Note! Since the basis of such insulation is made up of synthetic chemical components that release toxic substances (phenol, styrene, etc.) when heated or burned, it is recommended to additionally protect them from fire.
In case of fire, people often die not from fire, but from poisoning by toxic combustion products Source rostovgazeta.ru
See also: Catalog of projects of houses with a veranda
This type of insulation includes:
- polystyrene foam and expanded polystyrene, including extruded. These materials have a very low thermal conductivity coefficient, are not afraid of moisture, and therefore do not need to be insulated from it. They are produced in the form of rigid slabs that can be fastened using a frameless method. Expanded polystyrene is also produced in granules, which are poured into the space between the walls of the frame or brickwork, and added to cement plaster mortars. The disadvantages of this insulation include vapor permeability and high toxicity during combustion. The advantages are low cost and ease of installation, which can become the main argument when you need to decide how to insulate a veranda in a private house cheaply with your own hands;
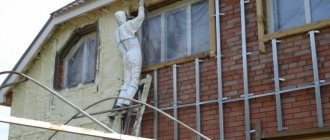
- polyurethane foam is a rather expensive insulation material. It is used in two ways: mounting plates and spraying using special equipment. The second method is more effective, as it allows you to create a monolithic seamless thermal insulation layer without cold bridges;
External insulation of brick veranda walls by spraying polyurethane foam Source i.ytimg.com
- Foamed polyethylene or penofol is a convenient rolled material for additional insulation. There are varieties covered with foil on one or both sides to reflect radiated heat. Penofol in the form of narrow tapes with a self-adhesive layer can be used to insulate windows, attic hatches and other openings, bridging the gaps between the wall and the frame.
Fibrous
With their structure, such insulation is reminiscent of unspun wool or cotton wool, hence the name - mineral wool. The raw materials for its production are various minerals and waste from ore smelting - slag. Therefore, the following types of these heat insulators are distinguished:
- basalt wool;
- glass wool;
- slag.
Solid raw materials are transformed into fibers as a result of special processing. Due to their mineral origin, these materials do not burn, but due to their fibrous structure they easily absorb moisture, losing their thermal insulation properties. For this reason, they require mandatory hydro- and vapor barrier.
Structure of mineral wool Source stroyobzor.info
See also: Catalog of companies that specialize in small forms and finishing materials
If you need to decide how to insulate a veranda for winter living in a wooden house, mineral wool will be the best choice, since it is permeable to steam and does not create an insurmountable barrier to its escape through the walls to the outside.
Available in mats and rolls of varying degrees of density. To insulate horizontal surfaces, you can use any material, but it is better to install dense slabs on vertical surfaces, since they are less susceptible to shrinking and “sliding” down under their own weight.
The process of insulating the veranda
Insulating a veranda with your own hands is quite simple if you thoroughly understand all the stages of the work being carried out. Basically, the terrace is built on the same foundation as the house. Typically these are concrete slabs or a monolithically poured concrete base. In winter, 20% of the heat leaks through it, so before insulating the veranda, you need to insulate the foundation of the structure. This process is carried out without any particular difficulties. Polystyrene foam boards need to be glued to the surface of the base.
Floor
First of all, when insulating a terrace, the floor is insulated. Some people do not attach much importance to this process, limiting themselves only to the treatment of ceilings and walls, believing that it is not necessary to insulate floor surfaces and are deeply mistaken. In wooden verandas, the floor is often laid in the following way: logs are laid on the ground or concrete base, on which boards are then laid and installed. For insulation it is necessary to carry out the following steps:
- remove boards;
- between the installed joists it is necessary to secure wooden beams with screws;
- Insulation is placed in the resulting compartments - mineral wool, penoplex or foam boards;
- when settling mineral wool, additional insulation is required when using foil or film, which will eliminate the possibility of getting wet;
- the remaining empty spaces are sealed with installation foam;
- Now you can put the floorboards back.
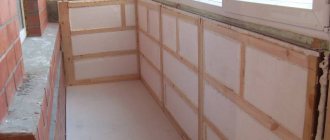
Lining inside
Insulation of the veranda can be done both from the street and from the inside. With insulation on both sides, it will be possible to achieve an incredible level of protection for the terrace during winter frosts, retaining much more heat.
- Initially, all existing cracks are sealed.
- Then you need to build a frame from a wooden beam.
- Next, a special waterproofing film is attached to the beam. It is better to install it from the inside using a construction stapler, thanks to which the process will take less time and will be much more convenient.
- After these procedures, a frame is constructed from timber or a metal profile, which is filled with foam plastic or other similar material. It is desirable that the distance between the metal profiles correspond to the width of the insulation itself.
- Drywall is installed on top of the frame.
- The final stage is plastering, painting or installing artificial covering on the surface of the walls.
Ceiling insulation
To achieve an effective level of insulation of the veranda, the ceiling of the room must also be insulated. This procedure is quite labor-intensive. For high-quality work done, you should initially decide on the insulation and application or installation technology.
Thermal insulation of the ceiling in the attic is mainly carried out during the construction of the terrace, but if it was not there initially, then it can be built some time later. Sheets of polystyrene foam or other insulating material and vapor barrier are placed into the rafter frame.
It will be a little more difficult to insulate the terrace from the inside. The thermal insulation process can be done in one of several ways.
First way:
- First, a frame of 3x3 cm beams is built on the ceiling.
- Insulation material with a similar thickness is placed into the resulting cells.
- Afterwards the ceiling is covered with plasterboard.
- The final stage is painting or plastering the surface.
Second way:
- Instead of the old ceiling covering, OSB or plywood is laid.
- Behind this is a film for waterproofing.
- A frame is constructed from beams in which mineral wool, polystyrene foam or another type of insulation is placed.
- At the end, the constructed structure of beams is covered with film, on top of which the lining is hammered.
Third way
- The third method is the easiest. Frameless insulation is carried out only using solid material.
- Sheets of foam plastic are fixed on the ceiling itself without any specially equipped structures.
- Next, a construction mesh is placed on the ceiling, which is covered with putty.
Large-scale work on arranging a warm veranda
When insulating a veranda, you cannot get by with insulating the walls alone. We have to work on the floor, the ceiling, the windows, and the door.
Let's start with the windows
Any insulation begins with windows. Usually the veranda has a very large glazing area. If the windows are old, the frames are dry and do not retain heat well, the windows will have to be completely replaced
It doesn’t matter whether the new windows are wooden, plastic or aluminum
All these types are capable of retaining heat inside the veranda, the main thing is that there are no gaps in them. In an unheated veranda, you can make windows with single glazing, but if you plan to heat it, you will have to spend money on double glazed windows.
The veranda has a large glazing area, so the windows must be of high quality
Working with walls
At this stage you need to decide on the insulation. The industry produces enough types; almost any type will do for insulating a veranda. However, in addition to the advantages, each material also has disadvantages that must also be taken into account.
42ca3a91bc73cd9d77218ac961b95c2f.jpe
The main thing you need to pay attention to is fire safety, since the veranda is a lightweight building, and besides, a summer kitchen is often placed on it. We list the main types of insulation
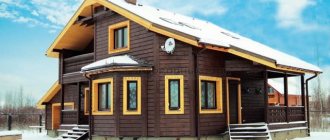
The warm veranda is comfortable and cozy at any time of the year
Sheets of insulation are attached to the walls with dowels with large diameter caps. To prevent the caps from sinking into the insulation, place thin wooden plates on top of the insulation at the attachment point. The cracks in the joints of the insulation need to be “blown out” with polyurethane foam. A block is placed on top of the insulation, to which decorating material, such as lining, is attached.
We continue work: floor and ceiling
Ideal if you can make a concrete screed. If not, at least cover the plank floor with linoleum or carpet. It would be more effective to make a double floor: a rough floor made of unedged boards is laid on the joists, any insulation is placed on top, then the finished floor, leaving a gap of 1-2 centimeters between it and the insulation.
Isn’t it a pity to leave such a corner “to be devoured” by the winter frosts?
Use any available insulation, such as mineral wool. Glass wool is undesirable, since it absorbs water well and at the same time becomes very heavy.
A layer of waterproofing is made between the insulation and the roofing material. If you don’t do this, you will end up with damp and ineffective insulation. Compared to industrial insulation, using expanded clay, soil, and sawdust for roof insulation is ineffective.
Warming thin film (thickness 0.4 mm) - an infrared film heater that converts electrical energy into heat: like the sun's rays, such a film heats not the air, but objects located in its area of action
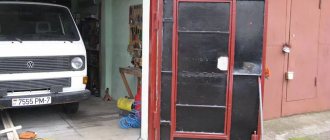
We insulate the doors
First of all, you need to insulate the door frame so that drafts do not penetrate into the cracks. The easiest way to do this is to glue a seal around its perimeter. A tubular rubber seal on a self-adhesive base is suitable. If the door frame is rotten, it will have to be replaced.
The door leaf can be insulated by covering it with batting or other soft insulation. Remove the fabric from the loops and lay it horizontally.
First, make protruding rollers around the perimeter from the outside, which will become an additional barrier to drafts. Then attach the insulation to the entire door leaf, nailing it in with nails or a furniture stapler. The top can be upholstered with dermantine.
Insulating the veranda greatly expands the possibilities of its use
Insulating the veranda will make it suitable for year-round comfortable recreation. There is no need to install a heater on it, except for the coldest days of winter. But if you still have to do this, then a few hours will be enough, and the air temperature will allow you to be on the veranda without outer clothing. Published by econet.ru
Insulation of veranda windows
Among other things, such windows will isolate the veranda from noise. Installing plastic windows is not a simple matter, however, companies that sell them provide such services. You can use them, saving energy, time and nerves. And professionals will not make installation errors that could be fatal.
As for the doors, they need to be upholstered with felt or other insulation from the inside and outside. Rubber seals can be installed on a wooden box. Inspect the places where the door frame connects to the opening. If you find cracks and holes, fill them with foam.
But even if you do not plan to change the single-glazed frames on your veranda, you can somewhat reduce heat loss by using heat-saving films. They can only be used in winter (from October to March), but in the autumn-spring season they can, to some extent, smooth out temperature changes outside and inside the veranda.
The heat-saving film is mounted on double-sided tape glued around the perimeter of the veranda frame and, after gluing, is treated with hot air from a household hair dryer.
Thanks to its ability to reflect up to 30% of infrared radiation tending to leave the room, it is almost equivalent to second glazing.
Therefore, it is better to insulate the veranda from the outside. In this case, the dew point should theoretically move into the insulation and the walls will last longer.
Which windows should you choose - wooden, aluminum or plastic - this issue is described in a separate topic and after studying the materials you will make the choice yourself. In this case, the very fact that they will be better than your old windows in terms of thermal insulation properties is important to us.
In this case, the best option would be to install a modern front door. It was originally designed to retain heat in the room:
- Companies that produce and install metal entrance doors usually have several models in their catalog intended for installation in a private home.
- If you want to avoid additional expenses, you need to insulate the structure yourself. For example, it can be covered with felt or an old stuffed blanket.
- It is better to cover the structure, both from the outside and from the inside.
- In order for the door to look aesthetically pleasing, a leather substitute, matting and other materials are mounted on top of the insulation.
- Self-adhesive rubber seals must be installed around the perimeter of the door.
- If you want to radically solve the problem of how to insulate a summer veranda, install a second internal one, this will create an additional air gap.
- After completing the work, you can begin finishing the room and continue to use it in the winter.
Insulation of the veranda, like any other part of the house, begins with the windows
First, you need to pay attention to the windows. Do existing windows retain heat well? No? We are replacing! Old windows need to be removed and good, high-quality windows installed that will retain heat in the veranda
Options for heating a closed veranda in winter
Having answered the question of how to make a warm veranda with your own hands, let's look at the most popular and affordable options for heating a closed veranda in winter.
- Fireplaces and stoves. They are an ideal option if you don’t want to bother with laying pipes and electrics. This is one of the most economical heating options. The disadvantage of this type of heating is the need to constantly monitor the maintenance of heat. This is the most fire-hazardous type of heating, so take measures to protect the floor and walls of the veranda from contact with fire.
- Heaters. Today, manufacturers offer a huge selection of heating devices: wall-mounted and floor heaters, radiators and air heaters, “warm floors,” IR and UV emitters. For a well-insulated veranda, one or two heaters are enough. They can be set at any time to temperature maintenance mode or automatic shutdown when a certain temperature is reached in the veranda room.
- Climate control. You can find a huge selection of climate control equipment on sale. Such systems allow not only heating, but also cooling the air in the room. The climate control system cannot be used in winter as a full-fledged heating source on the veranda.
Which method of insulating the veranda to choose
There are many disputes regarding the type of insulation of a veranda or terrace. Some say that it is better to do the insulation of the veranda from the inside with your own hands, while others are supporters of the method of insulation from the outside. But which one is better? We will shed some light on this mystery by comparing the advantages and disadvantages of both methods.
Let's start with insulating the veranda inside. Here are the advantages of this method:
- Work is carried out at any time of the year and in any weather.
- You can have free access to the surface at any height.
- At one time you can insulate every surface - the floor, all the walls and the ceiling.
True, this method of insulation also has its disadvantages:
- it is necessary to dismantle the finished coating;
- with this option, the freezing point begins to shift into the wall, which is fraught with its gradual destruction;
- a layer of insulation can take away precious space inside;
- During operation, debris accumulates inside;
- Some materials may contain harmful substances, so you will have to stick only to environmentally friendly ones.
This was a comparison of insulation from the inside. What can we say about the external method? The advantages are as follows:
- During operation, debris will not accumulate in the room.
- The space inside does not become smaller.
- Repair work can be done without disturbing your lifestyle. No one will have to move anywhere.
- The freezing point shifts into the insulation, so the walls will accumulate heat and not collapse so quickly.
- After insulation, the outside veranda can be decorated and transformed by covering it with clapboard, siding, decorative brick or other facing material.
- You can choose any material, regardless of its components. He will still be exactly outside.
As for the disadvantages of insulating the veranda from the outside, there are several of them:
- work can only be carried out in good weather;
- It's difficult to access every surface, especially the roof.
We have provided you with some statistics, and you can decide for yourself which insulation option to choose. Analyze the pros and cons and consider your circumstances. When you have chosen a method of insulation, you can think about thermal insulation material.
Features of this part of the house
The main thing that you will need to consider before you plan to insulate the roof on the veranda will be the absence of any heat source here. In most cases, heating is not provided in this part of the house. Therefore, you need to select materials and actually install them based on this. Most often, such extensions to the main house are located on the same foundation, but are a separate room. Therefore, the entire complex of work will be similar to the thermal insulation of a separate building.
Insulation for attic and roof
PPU is sprayed using a compressor.
Unlike the floor, insulating the attic floor and roof is a very important procedure, because warm air rises and looks for a way out. Before insulating the veranda from the inside, take into account the fact that there is a lot of moisture in the warm air, so the thermal insulation must be protected with a special film. The only material that does not require additional waterproofing is liquid polyurethane foam and penoizol. Scheme of attic floor insulation, starting from the inside:
- ceiling;
- hydrobarrier;
- insulation.
Insulating a roof with mineral wool is somewhat more complicated. Thermal insulation is laid between the rafters. How to properly insulate a veranda, layers from the inside:
- vapor barrier – protection from steam and water;
- mineral wool;
- hydrobarrier – protection only from water;
- ventilated gap;
- roof finishing.
During installation, mistakes are often made when laying films. Some people put it on the wrong side, and the membrane allows steam to pass in the opposite direction, that is, into the thermal insulation. As a result, the movement of moisture is disrupted and the insulation rots. This result is also achieved by using vapor barriers over the insulation instead of vapor-permeable waterproofing. If penoizol or polyurethane foam is used as thermal insulation, then it all comes down to spraying the material directly onto the rafters.
Based on the results of our article, we are once again convinced of the versatility of liquid thermal insulation, which, along with its excellent characteristics, makes this material a leader in its cohort. Insulating the veranda with polystyrene foam is allowed; this is probably the most budget option, but this material does not breathe at all, which is detrimental to wood.
How to insulate a veranda ceiling
The ceiling is insulated using a similar technology. The easiest way to insulate an already built veranda is from the inside; to do this, you will need to remove the cladding, if any. The work scheme is based on the same principle as the walls: lathing, laying insulation, vapor barrier and finishing.
Roof waterproofing should already be installed. If not, then this is a serious construction mistake that needs to be corrected urgently. For this, a special perforated film and metal-coated adhesive are used.
What to cook
Naturally, the basis of everything will be insulation. The choice here is not particularly large - polystyrene foam with expanded polystyrene, mineral wool or penofol. The latter should not be used independently if you need high-quality insulation - it works well only in conjunction with a more solid thermal insulator.
If the choice falls on cotton wool insulation, then you should prepare in advance not only them, but also films for waterproofing, as well as a vapor barrier. They will be necessary - cotton materials easily pick up water from the air and as a result of leaks from the roof, which means they lose their effectiveness and become unusable. Foam blocks do not need such protection. Despite the higher cost and more complex installation process, when choosing how to insulate a roof here, it is better to give preference to cotton wool - it is more effective and not completely safe, which cannot be said about polystyrene foam.
The tools you will need are the most common: a tape measure, a hacksaw, a screwdriver, a hammer and others that you have in your pantry and will facilitate all operations. In any case, even a novice master has almost everything. It is worth preparing additional gloves, a protective suit or clothing that covers the skin completely - small particles may fall out of the cotton wool, causing irritation. Goggles to protect your eyes are also required.
Preparatory activities
Preparation consists of studying theoretical information if there is no experience in such work. First you need to buy all the materials, prepare the tools, think over the plan. If the veranda is not new, the decorative trim should be removed.
Required Tools
No specific devices are required to insulate the terrace. You can get by with what the home handyman has.
You will need:
- construction knife;
- stapler;
- roller and brushes;
- screwdriver;
- hacksaw.
In addition to insulating material, you need to buy:
- polyurethane foam;
- self-tapping screws;
- gypsum;
- vapor barrier;
- wooden beam;
- tow or jute for caulking.
Tools necessary for the work.
Materials for thermal insulation of verandas
The veranda in a wooden house is also, as a rule, made of wood. Despite the fact that the construction market provides a wide selection of thermal insulation materials, not every insulation is suitable for the walls of a log and timber house
When choosing a material, you must first pay attention to such characteristics as thermal conductivity, water resistance, fire resistance
The following materials are usually used as thermal insulators for finishing verandas:
- mineral wool;
- Styrofoam;
- EPPS;
- PPU;
- Penofol;
Minvata
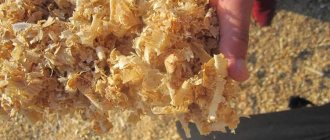
Traditional insulation for wooden structures is mineral wool. It has low thermal conductivity, is non-flammable, has high soundproofing qualities, and is considered an environmentally friendly material. Although many experts question the latter, since mineral wool uses harmful resins as binding components. In addition, the insulator strongly absorbs and accumulates moisture, which affects its thermal insulation properties. You can read more about the characteristics of the material in the article: “Features of external insulation of a house with mineral wool.”
Styrofoam
One of the most popular and inexpensive materials is polystyrene foam. The insulation shows itself to be an excellent heat insulator, is moisture-proof, biologically stable, weighs little and is easy to install. However, foam insulation has a number of disadvantages: the material is flammable, releases harmful volatile compounds when ignited, is not durable, and has low vapor permeability. In this regard, polystyrene foam is not recommended for use inside the house.
Extruded polystyrene foam
Extruded polystyrene foam is an excellent heat insulator. In many respects, it is much more effective than polystyrene foam, although it is more expensive. The thermal conductivity and water absorption of EPS is lower than that of polystyrene foam; it is resistant to solvents, durable and heat-resistant. However, the material does not withstand UV radiation, under the influence of which it loses its characteristics. This can be easily avoided if you immediately cover the insulation with cladding.
Polyurethane foam (PPU)
Available in the form of panels and polyurethane foam. The second option is more popular. Foam insulation copes with its tasks perfectly, filling even the smallest cracks and cracks. Insulation with polyurethane foam is carried out by spraying using a special installation. Therefore, in this case, you cannot do without the help of specialists.
Penofol
One side of the insulation is covered with foil, which reflects the cold air coming from the street and at the same time retains heat inside the veranda. Thermal insulation with penofol can be chosen as the main insulation, but the material has shown the greatest effectiveness when combined with other insulation.
Natural and synthetic materials for caulking
Moss, tow, and flax batting are inexpensive insulation materials used for caulking inter-crown seams and joints. They are made from natural materials and do not violate the environmental friendliness of a wooden house. Available in the form of tapes, ropes, ropes. However, birds love natural insulation materials, so additional treatment with special means is required. In addition, working with these materials requires certain experience and skills.
Polytherm is a special synthetic insulation made from polyester fibers. The threads are fastened by soldering without the use of glue. The material is produced in the form of tapes, completely ready for use.
We check the tightness of the installation of windows and doors
Large heat losses can come from windows and doors. If there are old wooden windows on your veranda, but you do not want to replace them with double-glazed windows, then you need to thoroughly check their tightness:
- First of all, we pay attention to the quality of the glazing of the veranda: to do this, we pull each glazing bead.
- If they are cracked or loose, it is better to remove all the glass, clean the grooves and coat them with silicone sealant.
- Then we insert the glass back and apply sealant along the edge.
- We press with glazing beads (new!).
Go over the joints of the frame and the window opening with a regular metal ruler. If in some places it passes freely, then these cracks must be sealed with polyurethane foam. Check the front door in the same way. If you bought an uninsulated version, you will have to insulate the fabric yourself from the inside and upholster it with leatherette.
Insulation technology
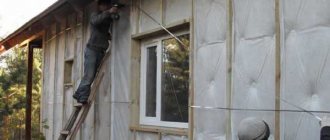
Since it is easier to insulate an extension to a house from the inside - you can work in any weather - this method, despite all its shortcomings, is used quite often. Another reason for this choice is often related to the fact that the external walls are already finished with the same facade material as the entire house, and you do not want to spoil the exterior.
There is no big difference in how to attach the insulation - from the inside or outside. There are serious differences only in the thermal insulation technologies of different structural elements.
Walls
The method of installing insulation is selected taking into account its type and subsequent finishing:
If you plan to plaster internal or external walls, then this can only be done using expanded polystyrene and mineral wool with a density of at least 130 kg/m3. They are glued to the surface or mounted end-to-end using umbrella dowels with a large head.
A reinforcing mesh is attached on top of the slabs and a layer of plaster is applied. Source promalp-nn.ru
The question of how to insulate a veranda for winter living with walls decorated with cladding panels is resolved in a completely different way. To attach them, it is necessary to mount the sheathing, and the distance between adjacent guides must correspond to the width of the roll or slab heat insulator. If it is a non-moisture-resistant material, then it is covered on both sides with a breathable film to insulate it from the penetration of wet steam from the room and precipitation from the street. A ventilation gap is left between the insulation and the cladding, for which additional slats are placed on the sheathing.
The final stage
A variety of options can be used as finishing. For example, fix the lathing on the walls, and on top of it are sheets of drywall. What to do next with the now warm, cold veranda - only your imagination will tell you.
It is difficult to imagine a country cottage or dacha without a veranda. Basically, such a building is used only in the warm season. But often, to increase the usable area and use the premises in winter, they insulate the veranda attached to the house. We will tell you how to implement this correctly and at minimal cost in this article.
Video description
You can see how thermal insulation is installed on the frame in this video:
Floors
If the height of the room allows or there is no other way, then the existing flooring is used as a subfloor. Most often these are boards laid on joists. A beam is attached to them in a similar way to a frame for walls. But it must have a sufficient cross-section to withstand the loads. Insulation is laid between the new joists, covered with waterproofing and a finishing floor is installed.
Floor insulation with mineral wool Source balkoncity.ru
If the base is concrete, one of the insulation options could be a screed with expanded clay or a heated floor poured into a regular concrete screed. This method is especially relevant when you need to decide how to insulate the veranda and make a bathroom or kitchen there by tiling the floors.
When the floor is accessible from below, the insulation can be secured under the existing flooring, creating the same thermal insulation pie, protected from moisture.
If the distance from the floor to the ground is very small, you can remove the flooring, fill the cavity with expanded clay and put it back in place.
To prevent the insulation from absorbing water from the ground, install a waterproofing barrier made of roofing felt or thick film. Source ekouteplenie.ru
Ceiling
The easiest way is to insulate the ceiling, which is accessible from the attic. If it is not there, then to maintain the height of the room, remove the roof and install thermal insulation.
When the ceiling height allows it to be reduced, the insulation is attached according to the already described scheme, as on the walls.
The ceiling along the frame is hemmed with plasterboard, clapboard or other finishing materialSource pechiexpert.ru
Windows and doors
The ideal way to eliminate heat loss through openings is to install double or triple glazed windows and an insulated entrance door. If there is no money left for this, there is another way to insulate a veranda in a private house cheaply with your own hands. During the cold period, the outside of the windows is covered with transparent film, the gaps between the frame and the wall are caulked and sealed with strips of paper or self-adhesive foam.
If there are many windows, some of them can be dismantled and sewn up when insulating the walls. Source avatars.mds.yandex.net
This is a completely acceptable temporary option for maintaining heat in a room. If you arrange a vestibule in front of the front door, installing an insulated frame partition, then the problem of cutting off the cold from it will be solved.
Knowing how to insulate a veranda in a wooden house with your own hands, you can turn it into an additional bedroom, kitchen or bathroom, expanding the living space of the house. To do this, you need to block the possibility of warm air leaving the room from all sides: through the floor, ceiling, walls, windows and doors. You can insulate both from the inside and outside, choosing the method that requires less cost or will be the most effective in your case.
Determining the scope of work
To decide how to insulate an extension to a house with your own hands, you need to evaluate its design, wall material, dimensions, ceiling height and other features:
- If the area of the room is small and you want to preserve it, you will have to insulate the walls from the outside. The same applies to the floor and ceiling, when when insulating from the inside, the distance between them decreases to unacceptable.
- It is not always possible to insulate floors from the outside without dismantling the existing coating. This happens when the flooring is located low above the ground and it is impossible to get to it from below.
- The same applies to the ceiling: if the veranda and the house have a common roof, there are no problems with insulation from the attic. If the extension is closed by one slope with a slight slope, you will have to either dismantle the roofing material or install insulation from the inside.
- Most of the heat escapes through doors and windows, the insulation of which is not given due attention in a room originally intended for seasonal use. Most often these are single-pane windows and lightweight doors. You need to decide whether to replace them or insulate them.
Even such high-quality and new windows will not retain heat in winter Source ankorokna.ru
- The entrance directly from the street is an open gate for frosty air, which manages to cool the room in a matter of seconds. Therefore, it is necessary to think about installing a vestibule, which can be done by fencing off part of the veranda with a warm partition or by attaching an entrance group to it.
- You should also think about the heating method before starting thermal insulation work. If heating is chosen using a “warm floor” system, the floor insulation technology must take into account the installation features of such a system.
Advice! If you do not live in the house permanently, then you should not install a water heating system - it may freeze and fail in your absence. It is better to prefer electric heated floors.
- The material of the walls is also of great importance. It is undesirable to insulate vapor-permeable materials, such as wood or foam concrete, with non-breathable insulation materials, otherwise moisture will accumulate between them, gradually destroying the load-bearing structures and leading to serious disturbances of the indoor microclimate, including the occurrence of mold and mildew.
The result of improper insulation Source e-brus.ru
As for how to insulate a terrace in a wooden house with your own hands, here we are talking more about a complete reconstruction or completion. Especially if it is an open extension without a canopy and a floor raised above ground level. Sometimes this task is even easier to solve, since there is no need to dismantle existing ceilings, old windows, etc.
In general, to transform the veranda into a living space, comprehensive insulation of all structures except the wall common with the house will be required.
We insulate the floor in the veranda
The floor is another source of heat loss in verandas and terraces. Most often, the floors in the veranda are made of concrete screed. Sometimes wood is used (by the way, it is warmer). If you are planning to install a heated floor in your veranda, we recommend that you opt for an electric heating system in order to turn on the system as needed. As for water insulation, it is better to avoid it on the veranda. During frosty weather, pipes may freeze and become deformed. Then the system will need to be replaced completely. How to make a warm floor on the veranda is shown in this video.
But what if you don’t want to use heated floor technology? You can insulate the floor on the veranda in a simple way “along the logs”. Here's what you'll need for this:
- Make a subfloor from planks.
- Install logs on the boards. The height is selected taking into account the thickness of the future insulation.
- The logs and the space in them are covered with a waterproofing film, extending onto the walls.
- Now you can install insulation between the joists. It is best to use mineral wool. It needs to be placed tightly in the free space so that there are no large gaps.
- The insulation layer is covered with a vapor barrier film, overlapping the walls.
- The finished floor is installed on top. You can use OSB boards, plywood or boards. You can lay laminate or other flooring on top.
Bulk heat insulators
This option can be used when insulating a room in which the ceiling has beams. The surface to be backfilled is covered with a special film, which acts as a vapor barrier and prevents the insulation material from spilling onto the heads of those in the lower room.
Then everything is simple - expanded clay, sawdust, straw, or sand are poured and covered with a film of insulating material on top. It will prevent moisture from entering the insulating layer. The thickness of the backfill depends on the region and is usually about 20 centimeters. If necessary, a hard floor or floor is built on top on which you can walk.
Which side to insulate the veranda from inside or outside?
After the floors are insulated, the verandas move to the walls. The same mineral wool or polystyrene foam is used as insulation.
It should be noted right away that only walls in contact with the street from the outside are subject to insulation. There is no need to insulate the internal partitions of the house. The photo shows a diagram of a wall with insulation. On it you can see the order of all layers.
Adhering to this scheme, we begin to insulate the walls internally. First, the entire surface is covered with waterproofing. The material at the joints is securely glued with tape to avoid the formation of gaps. The sheathing is knocked down to fit the size of the insulation from the bars. Thermal insulation is tightly laid inside each cell, the whole thing is covered with a vapor barrier film, after which the entire pie is sheathed with clapboard or plywood.
With a sound assessment of the total scope of work and the required costs. In terms of planning your own time and effort, unfinished repairs are worse than the premises in their original, “pre-repair” state. After measuring the surface of the floor, walls and ceiling, you need to choose your insulation option (foam plastic, thermal insulation rolls, mineral wool, a combination of these materials) and immediately buy them in the required quantity.
In addition, you will need consumables - bars and slats of various sections, nails, moisture-resistant film, glue, polyurethane foam, etc. Purchasing everything you need in advance will help you plan your expenses wisely and not be distracted by trips to hardware stores instead of work.
Insulation of a cold veranda begins with the choice of insulation and its installation location. As a rule, the veranda has a beautiful external and internal decoration. And deciding which side to hide under the insulation is not easy.
Insulation of a cold veranda begins with the choice of insulation and its installation location. As a rule, the veranda has a beautiful external and internal decoration. And deciding which side to hide under the insulation is not easy.
To make a final and informed choice, we offer arguments in favor of one or another type of insulation.
It’s worth mentioning right away that since the construction of a veranda is, as a rule, a budget project, as a result of which it is built from inexpensive materials - wood, cinder blocks, or gas silicate blocks, the veranda will have to be insulated comprehensively.
You can, of course, insulate only the walls and even insulate the house from aerated concrete on the outside or the ceiling, but you will not get the desired effect from such thermal insulation.
Let's decide how to properly insulate the veranda to the house with our own hands. Projects and photos will allow you to turn it into a full-fledged living space for the winter. You can use it absolutely at any time of the year. Before starting work, you need to think through absolutely all the nuances: insulation option, material for thermal insulation, places for installing insulation. In this case, it is possible to lay insulation from the inside and outside.
Insulating a veranda in a wooden house is possible subject to the following conditions:
- Installation is only possible if there is good ventilation.
- In cool weather, the heating should always be on in the veranda.
- Additional wall insulation cannot exceed a thickness of 55 mm.
Modern design of a veranda at the dacha - interior photo
- work is carried out outside the home, all garbage remains outside;
- repair measures do not make serious changes to the lifestyle of the inhabitants of the house;
- the area of the terrace is not reduced;
- walls finished with special materials accumulate heat well and do not become damp, which increases the service life of the veranda.
Internal insulation can be carried out in any weather outside
In one approach, it is quite possible to protect all surfaces of the veranda (floor, ceiling, wall) from heat loss. At the same time, the home craftsman has free access to these bases at any height. But when performing interior work, you need to immediately prepare for changes in everyday life (especially when insulation is delayed for a long time) and the existing interior.
Features of finishing a cold corridor
Several finishing features:
- Choose practical, durable and reliable materials that are resistant to temperature changes and high humidity (all this is quite possible in a vestibule). If you want to make the cold corridor in the house lighter, then for decoration use colors such as white, light yellow, peach, soft blue, milky, beige, pale green, light pistachio and others. Colors can also be used to make a room warmer. This is achieved due to the predominance of a warm palette, which includes shades such as peach, light yellow, terracotta, light orange. Try using finishing materials to highlight one of the zones. It is best to focus on the main entrance to the house to define it. Experimenting with textures and colors will help you pay attention to this area. So, if you have chosen plaster for finishing, then decorate the entrance using decorative coarse-grained plaster, making patterns on the treated surface. If you use other materials, then let the wall in which the entrance is located be brighter or darker, while the rest are calmer, lighter and neutral.
Actually putting it all together
Since the roof of the veranda will have to be insulated either with polystyrene slabs with foam plastic or with mineral wool, you need to create a base for them if there is no space in the rafter system or there are no rafters at all and the roof is laid on slats. Without lathing, there will be nowhere to lay sheets of expanded polystyrene, and there will simply be nothing to attach cotton insulation materials to. Need a frame. This structure is easy to assemble: slats or bars are placed on supporting structures in increments equal to or slightly smaller than the size of the mineral wool slabs. If polystyrene foam is used, the dimension must correspond to the dimensions of the insulation boards. The cotton wool must also be secured from below, using stretched cords or slats of wood. The frame can also be assembled from metal parts used in structures with plasterboard. Materials like penofol are attached directly to the ceiling using a construction stapler.
When the insulation is in place, it is lined with a vapor barrier from below - for mineral wool, or simply assembled decorative sheathing, as is the case with expanded polystyrene. At this point, all work is completed and you can enjoy the result.
Pie diagram isolated
When figuring out how to insulate the roof of a veranda, it is necessary to study the relative location of the layers inside the assembled structure. If we look at everything layer by layer, the components will be arranged like this:
- The outer part of the pie. This can be either the roof or the floor of the floor above.
- If there are no superstructures above the extension, then the next layer will be a waterproofing film. If there is a room above it, it is better to lay a layer of vapor barrier.
- Next will be the insulating layer.
- The insulation is covered from the inside with a vapor barrier membrane.
- From the inside - from the side of the room, everything is hemmed with a decorative covering.
When insulating the veranda roof, you should arrange the components of the structure in exactly this order, without replacing the steam and waterproofing films with one another. They create the possibility of normal release of moisture from mineral wool. If polystyrene foam was used, then you should definitely think about good ventilation - all insulation of this type creates a completely air-tight barrier.
We insulate the walls of the veranda
A lot of heat escapes through the walls
This is why insulating the veranda walls is so important. You can insulate walls from the inside with polystyrene foam, polyurethane foam or mineral wool
You decide. However, the insulation technology is almost identical. Your task is to create a sheathing so that this or that material can be laid in it. In fact, the work is reminiscent of floor insulation, only in a vertical plane.
When the veranda is made of wood, insulation occurs as follows:
- The first step is to get rid of all the cracks.
- Next, you must make a sheathing or frame from wooden blocks. The fastening pitch is selected according to the width of the insulation, and the height depends on the thickness of the insulation.
- When the vertical sheathing is ready, insulation begins to be laid in the free space.
- Using a construction stapler, the insulation is sewn with a vapor barrier film. The film is fixed with an overlap of 10–15 cm.
- Finally, you need to do the finishing. This can be covered with clapboard, plastic panels, plasterboard with wallpaper, painting or putty. It all depends on your desire.
Note! External insulation is performed in the same way. Only the finishing material should not be afraid of moisture and external influences
This could be facade paint or plaster, bark beetle, siding.
If the veranda has concrete walls, then you can insulate it with polystyrene foam. Everything is a little simpler here. You need to glue the foam boards to the wall using special glue, and then strengthen the fixation with dowels with an umbrella. Next, the surface of the slabs is coated with an adhesive solution into which the reinforcing mesh is embedded. After drying, you can do decorative plaster (bark beetle, fur coat, etc.).
We install thermal protection for the walls
The walls have a large area of contact with the street, so let’s look at how to insulate a veranda with your own hands from the outside and inside. External insulation is carried out if the wall material looks unpresentable. Those. it could be blocks, old wood, etc.
a) For wooden walls:
- We seal all the cracks in the building.
- We place a vertical sheathing of beams on the tree in increments of up to half a meter. It is better to measure the width of the insulation and fill it exactly to its size. Then all the slabs will fit tightly to the sheathing.
- We insert mineral wool between the beams, securing them with dowel umbrellas.
- We fix the waterproofing film on top with a stapler.
- We finish with clapboard or siding.
After laying the mineral wool, you need to staple the waterproofing film to the sheathing
b) For block walls:
- We glue polystyrene foam boards to the walls with a special adhesive composition, additionally strengthening them with umbrella dowels.
- We smear the same glue on the top of the slabs and attach the reinforcing mesh to them.
- After drying, cover the walls with decorative plaster.
- Let's paint.
Select an adhesive composition specifically for laying polystyrene foam boards
All layers of the insulation cake are hidden under decorative plaster
If the veranda looks aesthetically pleasing from the outside, and you do not want to change its appearance, then you can carry out internal insulation. But, before you insulate the veranda from the inside, you need to carefully caulk all the cracks (in a wooden building).
Work progress:
- They stuff the sheathing.
- Fix the waterproofing film with a stapler, which will prevent moisture from the street from entering the insulation.
- A metal frame is mounted from profiles, onto which drywall is then attached.
- Fill the frame with mineral wool.
- Cover the insulation with a vapor barrier film.
- Installing drywall.
- Apply the finishing coat (putty, paint).
The distance between the metal profiles must match the width of the insulation sheets
Vapor barrier
If there is a need to install a vapor barrier, it is better to use a special film with a membrane.
It will allow the walls to pass air normally, and after installation, condensation will not accumulate inside the “pie”. To install a vapor barrier, film or polyethylene is applied to the insulation. An allowance is made along the edges.
Film with membranes for vapor barrier Source kedrovdom.ru