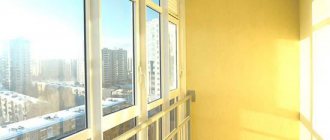
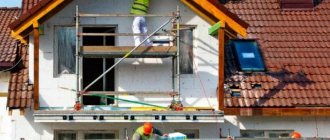
Insulating a balcony or loggia allows you to increase the area of your home and get additional space for work or leisure. But in order to feel comfortable on the balcony all year round, it is necessary to insulate it well. One of the important stages is the insulation of the balcony ceiling, since warm air moves from bottom to top. When planning insulation, special attention should be paid to the choice of insulation and compliance with the technology for performing the work.
Insulating a balcony or loggia allows you to increase the area of your home and get additional space for work or leisure. But in order to feel comfortable on the balcony all year round, it is necessary to insulate it well. One of the important stages is the insulation of the balcony ceiling, since warm air moves from bottom to top. When planning insulation, special attention should be paid to the choice of insulation and compliance with the technology for performing the work.
You should also check to see if the ceiling or roof is leaking. After all, if moisture accumulates between the ceiling and the insulation layer, dampness, mold and a musty smell will form in the room.
What types of insulation are there?
- The most common and economical way to insulate a balcony is from the inside.
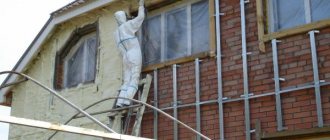
All installation of thermal insulation is carried out indoors, which allows you to carry out most of the work yourself with minimal construction skills. - External insulation - the insulation is attached to the outside, covered with reinforcing mesh and plaster.
This is quite an expensive method, as it requires the involvement of specialists. It justifies itself in the case when high-quality repairs have already been made inside the balcony without insulation.
Bottom line
Having resolved the issue with insulation, you can move on to the final phase - heating the balcony space to make it truly suitable for living and relaxing. To thermally insulate a balcony ceiling, you need to: choose the right good thermal insulator, carry out preparatory measures, assemble the frame and fix the insulation. Using the technology described, this will be quite simple. For a better understanding of the process, check out the video, which clearly shows the stages of thermal insulation work.
Video on the topic:
Preparing for insulation
If you decide to refurbish and insulate your balcony, you must:
- Glazing the balcony or replacing single-glazed windows with modern double-glazed windows with low thermal conductivity;
- Select materials that will be used for insulation and finishing;
- Calculate the amount of required materials (insulation, waterproofing), antiseptic, fasteners, glue, polyurethane foam, etc.
- Decide how the balcony will be heated (heater, infrared heater, or “warm floor” will be used);
Quartz heater Tepleya
Finishing
If the balcony ceiling was insulated using frame technology, then moisture-resistant plasterboard can be used as the final finishing of the room. After installation, the plasterboard surface is covered with wallpaper, painted, plastered or tiled. PVC panels and wooden lining are also suitable for finishing ceilings insulated using the frame method.
The ceiling, insulated with foam plastic using frameless technology, is finished after the polyurethane foam has dried. The protruding foam is cut off with a stationery knife so that the ceiling becomes even. Then the surface is plastered with cement-sand mortar, puttied, sanded, primed and painted.
Balcony glazing
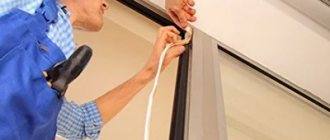
The thermal conductivity of glass is much higher than that of concrete or brick walls, so the choice of glazing design and the material from which the frames are made is very important for heat conservation.
The advantage of warm plastic glazing over aluminum is obvious!
Installing new frames is a rather complex and painstaking process, so you should not do such work yourself.
In this case, it is safer to hire professionals for installation, although this is not cheap.
Installation of sheathing
When you do the insulation of the ceiling on the balcony with your own hands, after applying the markings, they begin to build the sheathing from timber or profile:
- Along the length of the ceiling plane, focusing on the line drawn along the perimeter, slats or beams are fixed. To do this, holes are made with a hammer drill at intervals of 60 centimeters and nylon dowels with a diameter of 8 millimeters are driven into them with a hammer.
- Next, use a screwdriver to screw the screws through the beam in accordance with the diameter of the dowels. If, due to the unevenness of the floor slabs, the beam begins to deviate from the horizontal markings, then at the fastening point, place a chip under it and fix it with a nail so that it does not jump out. Similarly, it is displayed against the wall.
- First of all, the beams are mounted near the window and on the side opposite to it, and the middle elements are aligned with them. To control the placement of the timber in one horizontal line, a spirit level is used, which allows for a level ceiling plane.
If it is planned to cover the balcony with plasterboard, then CD and UD metal profiles are used to assemble the sheathing. Along a line running along the perimeter of the loggia, a UD profile is nailed to walls made of brick or concrete using a hammer drill, and self-tapping screws are used to fix it to the plastic frame. You can use fleas - fasteners 9.5 millimeters long.
Along the width of the room, the CD profile is placed at intervals of 40 centimeters. In order to give rigidity to the frame, the CD profile is secured with U-shaped hangers, fixing it to the ceiling with 6x40 dowels. To screw the profile with fleas, use a screwdriver. The spirit level helps control the placement of CD profiles with UD in a single plane.
Insulation materials
The market offers a very large selection of materials for insulation, having different properties of thermal conductivity and strength.
The most commonly used are the following:
- Penoplex (extruded polystyrene foam) is a durable and lightweight material that does not allow moisture to pass through and has low thermal conductivity. For insulation, slabs with a thickness of 40 - 60 mm are sufficient.
- Polystyrene foam (expanded polystyrene) is a very light material with similar properties, but does not have high strength. Therefore, when using it as insulation, a strong finishing coating is required.
- Penofol is a very effective insulation a few millimeters thick applied to aluminum foil, which performs the functions of vapor barrier and heat reflection.
Thermal insulation characteristics are equal to a 10 cm layer of mineral wool. Sometimes it is used in conjunction with other insulation, such as expanded polystyrene or mineral wool.
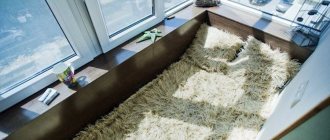
Vapor barrier of the loggia with penofol - Mineral wool is the general name for a group of fibrous thermal insulation materials that have good thermal insulation and low cost; a thickness of 50 mm of such insulation is quite enough to create good protection from the cold.
Mineral wool is produced in the form of a soft material, rolled into a roll, or in the form of semi-rigid slabs.
A common disadvantage of mineral wool is the need to protect exposed parts of the body and respiratory organs from small particles emitted by this material during installation.
Also, when using it as insulation, special attention should be paid to the meticulous installation of waterproofing, since mineral wool adsorbs and accumulates moisture, which can subsequently negatively affect the entire insulation structure.
Current prices for your city:
Performing markup
It is necessary to mark the level of the ceiling surface in order to know where its plane needs to be completed, since after installation is completed, the ceiling should not interfere with the opening of the windows. This means that the distance from the structure to the window sash when open cannot be less than 2 centimeters.
If preference is given to wooden lining with a thickness of 1.5 centimeters as the material for cladding, the sheathing should be placed at a distance of 3.5 centimeters from the window sash.
Since balcony frames are usually placed level, focusing on their elements, an even horizontal line can be obtained along the window. Then it is transferred to the opposite side using a spirit level. The line from the window drawn on the adjacent wall is also moved to the opposite side. Marks are made in the four corners with a pencil and connected with a tracer, which requires the participation of a partner.
Attaching the insulation
The insulation material can be attached directly to the walls and ceiling with or without lathing.
With frameless fastening, the insulation is glued with special glue and additionally attached at the corners and in the middle with plastic dowels (fungi). The use of lathing slightly increases the cost of the structure, but makes it more stable and reliable. For insulation with soft mineral wool, lathing is a mandatory element, but when insulation is done with hard slab material, it is usually also installed for the convenience of finishing work.
After laying the insulation, clapboard, plastic or plasterboard sheets are attached to the sheathing for subsequent wallpapering, painting or laying ceramic tiles.
The lathing can be made of a special metal profile or wooden beams. The finished sheathing is a cellular structure with cell dimensions of 40 x 60 cm.
Recommendations from experts
The main aggressor for finishing materials on the balcony is water. Therefore, the installation of a hydraulic barrier cannot be neglected. Loggia owners often opt for universal protective equipment from the budget group. This is a wrong decision.
Durability can only be ensured by a product designed for use on concrete structures located outside the building. That is, the hydrobarrier must have a layer of more than 4 mm for external use. The service life should be at least 10-15 years.
As a rule, not only the ceiling is insulated. Therefore, a waterproofing coating must be additionally applied to the adjacent corners. It is better to leave a vapor-proof fabric or isolon with a small allowance in order to later avoid unnecessary hassle with organizing hermetic protection of insulation.
Balcony waterproofing
If the windows have not yet been installed, then it is worth calculating in advance the minimum height of the upper profile of the frame. To do this, sum up the thickness of the insulation, leveling solutions, ventilation gaps and decorative materials with or without lathing. Based on this, a beam will be installed to increase the mounting support for the glazing.
Wooden elements of frames, frames or sheathing must first be treated with an antiseptic composition and dried. Metal profile, fasteners are used with a galvanized coating or painted independently with anti-corrosion paints.
It is not worth taking products for working with drywall, since they are intended for work with small differences in temperature and humidity, that is, inside the building.
What to insulate
When calculating the required amount of materials, the question will arise: is it necessary to insulate the wall of the room adjacent to the balcony? After all, it is adjacent to the room and therefore should be warm! Actually this is not true.
The outer walls of houses contain a layer of insulation inside them, which will not allow heat to pass out through the wall. But after insulation, this wall inside the balcony will warm up a little due to the air passing through the doorway from the adjacent room, but the corners around the perimeter of the balcony will remain cold because they are in direct contact with the frosty air of the street.
Condensation or even frost may appear in these places. The same applies to the ceiling slab. Even if the upper and lower neighbors have insulated their balconies, the ceiling and floor should still be carefully waterproofed and insulated. Only with such measures can, in addition to eliminating heat loss, also ensure good sealing of the room and avoid the appearance of condensation or even mold.
Thermal insulation on the top floor
If the floor is the last, then you should carefully consider eliminating places of possible moisture penetration. Foamed polyethylene, which was laid as the first layer of insulation, is also an excellent waterproofing agent. That is why you should not skimp on its use.
If the apartment is not on the top floor and the upper balcony is insulated, then a layer of foil polyethylene will serve as a moisture barrier in case of leaks from above. If the apartment is located on the top floor, then a layer of polymer insulation will prevent the formation of condensation and keep all structural elements dry.
Polyethylene foam is an excellent waterproofing material
In the latter case, after laying and fixing the heat insulator, a vapor barrier must be stretched over the entire ceiling area. A slab insulated in this way should be sheathed with finishing material. The choice here is huge: decorative PVC panels, plastic or wooden lining, drywall, etc.
Balcony heating
It will not be possible to heat the balcony to a comfortable temperature with air from the room escaping through the doorway.
It is not practical to take up free space, which is already limited, with an oil or infrared heater, and installing water heating is simply prohibited. The solution to heating a balcony is to install a heated floor. Now this technology has already been well mastered, is quite affordable in cost, and besides, you have the opportunity to choose the most suitable option for yourself from the available varieties. This design allows you to regulate the floor temperature and is quite economical to operate.
- The most common method is floor heating using electric heating cable, laid in a layer of concrete screed in the form of a snake in increments of 3 to 10 cm. This method is durable, reliable and safe, because the cable is protected by its own insulation, covered with a layer of screed and a finishing floor covering.
Electric underfloor heating cable system - The second method differs in that the electrical cables are attached to a metal mesh to ensure uniform heating. These so-called electric mats, are attached to the base using tile adhesive.
- Third option - film infrared heater. The heaters are strips of carbon paste between two layers of electrically insulating plastic.
An infrared film heated floor has been installed.
The principle of operation of film heaters is based on radiation in the infrared (thermal) range, when not only the entire surface is heated, but also the surrounding objects, which in turn heat the surrounding space. In addition, a reflector is placed under the film heaters and thermal radiation spreads only in one direction, which makes such a system more efficient and economical. The film heater can be mounted not only on the floor, but also on the ceiling or walls.
Preparatory work
Before you begin insulating the ceiling surface on the balcony, you will need to do a large amount of preliminary work. They are performed in a certain sequence.
First of all, before you insulate the ceiling on the loggia, you should glaze it. This is one of the main preparatory activities. As for balconies, in houses built during the Soviet period they were not glazed and window frames were not installed on them. True, even today some developers commission buildings with unglazed loggias.
The fact is that without securely installed frames with glass there will be no point in thermal insulation of loggias and balconies. Many companies and firms are currently engaged in this type of activity such as glazing. The main thing is not to install cheap plastic frames, but to give preference to reliable and high-quality products, not necessarily expensive.
Then proceed to the next stage - arranging waterproofing. It is necessary to eliminate all cracks, gaps and cracks through which heat can leak. Cold air also penetrates through them and moisture from the street enters, which provoke the spread of fungus and mold, which are very harmful to human health.
If there are large gaps in the corners of the balcony, they can be eliminated by blowing in foam. When it dries, the excess part is cut off and the corner is covered with a cement-sand mixture or facade putty, or special sealing compounds - such as “Trowel” or “Carbolate”.
It is also possible to use bitumen-rubber or rubber sealant if the gaps, seams or cracks are small. In any case, before you insulate the ceiling on the balcony with your own hands, you must do everything to ensure that the floor slab on the inside of the room does not allow moisture from the outside to pass through. For this, you can use special building mixtures, for example, “Penetron” or “Penecrete”.
Finishing work
Finishing begins when the thermal insulation of the floor, ceiling and walls is completed. There will be no problems with cladding with wooden lining. If you plan to use plastic products for finishing, then you can install both them and putty compounds on the remaining walls. This work must be done before covering the ceiling surface.
When the balcony is covered with sheets of plasterboard, preparation for finishing involves cleaning the ceiling and walls from dust with a damp sponge in order to create good adhesion of the putty mixture to the surfaces.
Thus, following the step-by-step instructions, it will not be difficult to insulate the ceiling on the balcony with high-quality materials.