The need for wall insulation (if insulation is not part of the construction process) is caused by the insufficient thickness of the building material.
The main reasons for this are: design errors and the desire to save money on the purchase of building materials with the expectation of insulation.
One way or another, insulation is a fairly simple process that can be accomplished with independent efforts; the main thing is to understand the meaning of the actions and take all measures to achieve the most effective result.
The list of popular insulation materials is quite large and is constantly being updated with new materials, but the cheapest, easiest to use and preferred is polystyrene foam.
Criteria for choosing expanded polystyrene
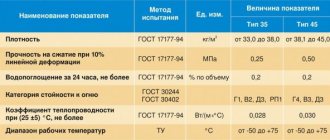
The main characteristic when choosing insulating building materials for the facade of a house and roof is the density of polystyrene foam, its numerical expression is indicated in the brand. PSB-15 has the minimum indicator, and PSB-S-15, PSB-S-25, PSB-S-35 are recommended for outdoor work.
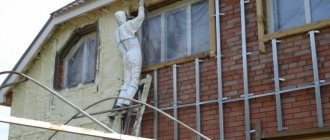
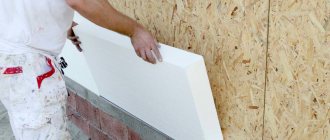
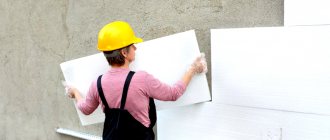
Figure 1. Facade insulation with polystyrene foam
The choice of thickness of expanded polystyrene slabs is focused on the climatic features of the region where the building is located. It should be noted that a 3 cm sheet of PSB-15 in terms of thermal conductivity is similar to 40 cm of brickwork, 25 cm of gas or foam concrete or 10 cm of wood. In addition, the foam plastic is necessarily covered with a layer of plaster, which also acts as insulation for the facade walls.
Decorative layer
The finishing, in addition to decorative functions, protects the insulation from destruction under the influence of external factors. You can begin applying decorative plaster 3 days after laying the reinforcing mesh and drying the protective layer. Finishing is carried out in several stages:
- Primer is applied. Drying time for primer paint is approximately 4 hours. If you plan to use plasters of intense shades, it is recommended to use primers with a shade close to the color of the plaster.
- Preparation of plaster mortar. The dry mixture is diluted with cold water in the amount specified in the instructions. The finished mixture is thoroughly mixed with a construction mixer.
- Using a steel float positioned at an angle to the wall, a thin layer of plaster is applied to the thickness of the grain. The surface is leveled and smoothed with a grater, excess material is removed.
- When the solution stops sticking to the instrument, the decorative layer is given texture. To do this, use a plastic grater or sponge to make horizontal, vertical or circular lines. The choice of direction depends on the imagination of the performer.
Preparatory work
Before insulation of the external walls of the house begins, it is necessary to prepare the working surface.
Preparation of external walls
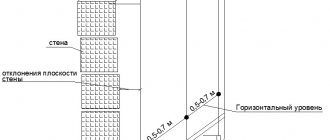
The surface to which the insulation will be attached must be smooth and clean. All differences when preparing the walls of the house must be removed, because this can cause fractures of the polystyrene foam during its installation. Fluctuations in uniformity should not exceed 1-2 cm, and large tubercles can be knocked down with a hammer, after which all peelings can be carefully removed. Also, if paint or whitewash was previously applied, it must be removed and dust and dirt removed.
Figure 2. Wall preparation process
To prime or not
After leveling, the surface of the wall should be treated with a soil mixture, because in this way small particles are removed and maximum adhesion and protection against the spread of microorganisms and fungi is ensured.
You can avoid priming the walls; running your palm over them does not leave any dirt behind. The choice is yours, but this inexpensive process improves the quality of facade insulation with polystyrene foam.
Any priming mixture can be used for exterior use according to the instructions on the package. Apply by brush, roller or spray.
Preparation of EPPS
In fact, foam boards are already ready to go, but if you have chosen extruded polystyrene foam, then you should pay special attention to it. A very smooth surface does not adhere well to glue, so it is necessary to make it looser before installing the slabs. This procedure is carried out with a needle roller for working with drywall; if such a tool is not in your arsenal, then it can be done using a mounting knife, which you need to make grooves. If you plan to apply the insulation in two layers, then treat both sides.
Finishing window sills and slopes
The structures of window sills, slopes and “drip” should be installed before the walls are insulated. Particular attention should be paid to the following points:
- The window sill should have a protrusion of 30-40 mm from the finish, so 10-11 cm must be added to the width, because the width of the polystyrene foam, as well as the finish, is taken into account.
- When finishing slopes, insulation with a smaller thickness is used - 2-3 cm is enough to prevent the wall from moving onto the glass. When performing installation, the foam board should protrude 10 mm beyond the facade wall for easy joining.
- Between the base and the insulation, it is necessary to install a so-called “drip line” made of galvanized steel, so that natural precipitation does not accumulate on the walls, but flows off.
Figure 3. Finishing near the windows
Thus, you see that the preparatory work stage requires special attention and a lot of time and effort, however, the service life and effectiveness of polystyrene insulation will depend on the quality of their implementation, so you should not neglect this.
Characteristics of expanded polystyrene
Expanded polystyrene will protect the facade of the house from moisture and temperature. Thermal conductivity of 0.038 W/mK allows for insulation using only one layer of polystyrene foam. The material has a high hydrophobicity index. Expanded polystyrene practically does not absorb water. Polystyrene foam will completely rid the walls of moisture. Refers to slightly flammable materials. But installation must be carried out following fire safety instructions.
Characteristics of expanded polystyrene in comparison with other materials
Fire hazard
There are many misconceptions about the quality and characteristics of insulation. The material is considered to be highly flammable. But if the installation is carried out, taking into account the characteristics and properties of polystyrene foam, then ignition will be excluded. For this purpose, protective coatings from other building materials are used. The combustion temperature of polystyrene foam boards becomes 491 degrees. The indicator is 2 times higher than that of paper and wood.
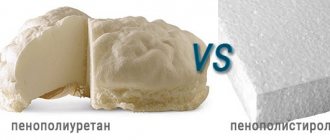
The flammability of expanded polystyrene is lower than that of polystyrene foam
Durability
Many people are also concerned about the durability of the insulation. But under finishing, without external mechanical damage, the material does not deteriorate at all.
Environmental friendliness
Synthetic materials can be harmful to health. But polystyrene foam is absolutely safe. There are no toxic substances in it. Remaining or replaced material must be disposed of for further processing. Throwing it into ordinary trash cans is strictly prohibited.
Peculiarities
Expanded polystyrene is a universal heat insulator endowed with unique properties.
Advantages
The positive qualities of the material include the following:
- durability and strength (with high-quality installation it will last at least 50 years, does not crumble, does not rot, does not decompose);
- low thermal conductivity;
- high thermal insulation (a 10 cm thick slab has the same thermal insulation properties as one and a half meter brickwork);
- moisture resistance (the material absorbs no more than 6% of moisture and retains more than 90% of its properties);
- resistance to temperature changes, ultraviolet radiation, chemical and biological influences (mold and mildew do not form on it);
- frost resistance (withstands up to 50 freezing/thawing cycles and does not lose its physical and chemical characteristics);
- environmental friendliness (it is even used for food storage);
- fire safety (modern types of polystyrene do not support the combustion process, as they have been treated with fire retardants);
- simple installation technology (no need to purchase expensive tools, the material is lightweight and easy to cut);
- low cost.
Due to its high moisture resistance, expanded polystyrene does not require additional hydro- and vapor barrier. Unlike its main rival in the field of mineral wool insulation, polystyrene foam does not generate dust during installation, so no protective equipment (respirator, gloves, special clothing) is required to work with it.
Flaws
Expanded polystyrene is spoiled by rodents, they make moves in it. To protect the house from them, even at the cladding stage, poison in the form of grains or special capsules can be laid around the perimeter of the building, between the insulation layer and the cladding material.
This will be enough for a while. And, of course, you definitely need to install a base profile.
The material has low vapor permeability, so it is important to provide ventilation when insulating.
How to insulate a house with polystyrene foam?
To do everything correctly and efficiently, you should adhere to a certain technology for installing and decorating insulation. It may be difficult for a beginner to cope with a large number of stages and processes, but if you wish, you can do everything yourself.
If you don’t have the energy and time, hire a professional team of workers. This will entail additional costs, but you will definitely save your time.
Materials and tools required for work
You don’t have to buy expensive equipment to process and install EPP boards. It is enough to use the tools that you already have on the farm or you can borrow from people you know. An approximate list of what you will need:
- EPP plates of the required thickness;
- tape measure and pencil for marking;
- building level;
- stationery knife;
- drill or hammer drill for making holes for dowels;
- umbrella dowels;
- specialized adhesive solution;
- facing material.
Installation under siding
In order to perform insulation with polystyrene foam followed by finishing with siding, the installation of a sub-cladding system is required. It is constructed from a metal profile or wooden beam located vertically, with a pitch of no more than 40-60 cm. To fix the galvanized guides, brackets (suspensions) are used, which are attached to the wall with anchor elements or self-tapping screws.
The entire sheathing is leveled using a level, level, plumb line and fishing line. The type of material is selected depending on the panels used. Steel sheathing is ideal for metal siding. Its service life will be longer than wood.
It is important to know
Wooden beams must be treated with an antiseptic, and the use of a metal profile is allowed only if it is coated with zinc. To increase the service life, the profile can be painted using powder coating.
After the installation of the sheathing on the outside of the building is completed, insulation is carried out with polystyrene foam. If your choice fell on a wooden sheathing, then the slabs are installed between the guides, then fixed with the help of umbrella mushrooms. When using metal sheathing, the slabs are strung on brackets. Having completed fixing the panels to the walls, you can begin cladding with siding.
Installation followed by plastering (wet facade)
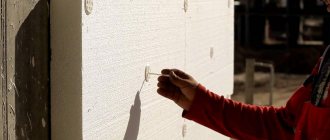
This method of thermal insulation of a wall outside a room is the simplest and most “low-cost” in financial terms. Insulation is carried out with expanded polystyrene, fixation in the same way as when facing with siding - fungi - umbrellas. The difference is that in this case the installation of a sub-cladding system is not required, and the insulation is additionally fixed with an adhesive mixture. This allows you to firmly fix it to the surface.
Having secured the thermal insulation over the entire required area and reinforced it with mesh, you can begin cladding the facade. This is done in three ways:
- Decorative facade plaster;
- Painting with water dispersion paint;
- Decorative plaster followed by painting the facade.
Plastering technology of the selected insulation
The plastering process begins after waiting for the reinforced layer to completely dry. As in the case of preparing walls for plaster, the surface is primed in two passes. The plaster layer is applied with a trowel or spatula, following the technique used to create a decorative coating with the selected effect, for example, for bark beetles, “rolling” filler grains is done.
If you plan to paint the house, then the plaster is leveled and smoothed, or puttied.
You can insulate a house not only by using warm plaster, but also by installing a “wet facade”. Having become familiar with the types of insulation suitable for this scheme, having correctly chosen the desired material, also pay attention to all the work involved in the complex, in its own way, process of insulation. Only in this case will the heat of your hearth be effectively conserved, and the walls will be protected.
Important nuances
Since creating high-quality and beautiful facades requires a flat surface, the walls must be leveled before attaching the insulation. Protruding parts are removed; in some cases, additional plastering of the building outside may be required in order to achieve the desired result. Differences of 1-2 cm are allowed. This difference can be compensated for by the adhesive composition.
In addition, the following points should be taken into account:
- Fixing with disc dowels can only be done after the glue has completely dried. If they are installed early, there is a possibility that the thermal insulation slab may move to the side or be pressed inward. This will lead to increased consumption of decorative plaster;
- Before attaching the reinforcing mesh, the plastic caps of fungi - umbrellas need to be puttied;
- If there is a need to insulate a house in two or three layers, the sheets are arranged strictly in a checkerboard pattern. Stitches stacked on top of each other are not allowed. Fixation is performed only to the main surface of the load-bearing walls;
- The panels are joined only with cut sides. So, the gap between them will be minimal. The resulting seam is sealed with liquid foam. The use of polyurethane foam is strictly prohibited; its use may lead to peeling of sheets from the surface of the walls and, accordingly, damage to the thermal insulation layer.
Installation of the reinforcing mesh and puttying is carried out only on the last layer, on the one located outside the structure. There is no need to process internal ones.
We insulate slopes
Windows and doorways are the main areas of the area where significant heat loss occurs. Therefore, it is necessary to organize thermal insulation of slopes. This process consists of several steps:
- cleaning the surface from contamination;
- primer of slopes in two layers to improve adhesion;
- leveling by grouting;
- cutting insulation;
- applying a layer of glue;
- installation of slabs;
- foaming the resulting cracks;
- plastering.
Finishing can be done later when finishing the walls.
Pasting the cornice
Before insulation, the cornice should be treated. It is important to follow several rules:
- choose a material of minimal thickness so that it can adhere to the adhesive layer;
- you need to start gluing the insulation strips from the wall;
- First, the vertical elements are fixed, and then the horizontal ones.
When the cornice is covered, they move on to organizing vapor and waterproofing.
Preparing walls for laying thermal insulation
Before installing insulation, the following steps are required:
- Sealing irregularities, gaps or cracks, depressions in the wall plane. Differences of more than 1 cm per 1 m of length must be leveled.
- The plane of the wall is covered with a contact primer (especially necessary for severe shedding).
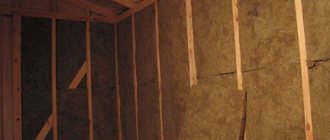
- Installation of sheathing. This is done for subsequent installation of the casing (if planned).
The sheathing is made from wooden blocks or from drywall guides and forms a flat plane. The thickness of the planks corresponds to the thickness of the insulation (no less!) , the pitch of the planks is recommended to be about 40-50 cm from each other (in practice, a step is chosen that is a multiple of the width of the PPS sheet for greater efficiency).
Common mistakes
When installing extruded polystyrene foam with your own hands, frequent mistakes are made. Knowing about them, you can avoid repetition of ridiculous situations. Below are the most common:
- The surface of the walls is not completely leveled. Therefore, the slab lies unevenly;
- The glue is applied to the center of the slab, the corners will bend outward over time;
- Plaster without a reinforcing mesh will lead to cracking of the surface;
- Poor insulation of the seams between the plates will lead to the formation of cold bridges;
- There is an opinion that the thermal insulation of a house made of aerated concrete will lead to the disruption of the vapor barrier of the premises and the possible formation of mold.
Only correct and competent installation of insulation in compliance with many conventions can benefit both the person and the entire building. This should be remembered!
Plaster systems
When the insulation for the facade under plaster is selected, it is necessary to purchase the appropriate plaster system. Different manufacturers offer their own unique sets of materials, which include: glue, primer, coat, facade paint, fasteners. The composition of the materials included in a specific kit is assembled by manufacturing companies in such a way as to ensure the best compatibility of parameters, strength, and durability of the plaster on the insulation. Therefore, it is always recommended to use all elements of the plaster system of the same brand. It is desirable that it be from a reputable manufacturer. Collecting different materials from different brands can be cheaper, but very risky.
From the instructions that come with a specific plastering system, you should clarify the requirements for the characteristics of thermal insulation boards that can be used with this kit. Before gluing the walls on the outside, the mineral wool surface is primed.
Briefly, the technology for insulating a facade with mineral wool under plaster or with expanded polystyrene looks like this: insulation boards are mounted with special glue, then they must be additionally secured with disc-shaped dowels. When installing heat-insulating material to hollow walls (frame and others), dowels with a screw-in core are used. Depending on the type of material from which the house is built, fasteners of different sizes and designs are purchased. If the building has solid load-bearing walls, then driven dowels are used. Before the plaster composition is applied to the insulation, the surface is reinforced. A reinforcing mesh is glued onto the heat-insulating material (fiberglass is selected with cells whose size is 3-6 mm). First, the insulation boards are covered with a uniform layer of glue, into which it is pressed. The same glue is applied to the mesh to level the surface.
Plaster systems from individual manufacturers require priming of the reinforcing layer with a special composition before a fur coat or bark beetle is applied to it. In addition to the materials listed above, always, starting (located at the bottom of the wall), finishing (located at the top, under the eaves) and corner strips (special for securing all corners) are used.
Issues of vapor barrier and waterproofing
An important requirement during the construction and improvement of a house is the correct implementation of all work to ensure ventilation and waterproofing, since it is the incorrect installation of these components that significantly reduces the performance of the structure.
When insulating walls with polystyrene, waterproofing is not needed . It should be taken into account that if there is a high passage of groundwater under the building, it is necessary to waterproof the basement and foundation.
Since polystyrene foam does not allow air and water to pass through, there is no need to lay a vapor barrier layer when insulating walls from the outside.
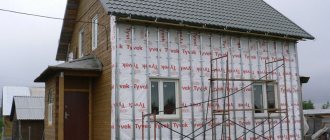
Wall insulation cake under siding
Cost of façade insulation with polystyrene foam (expanded polystyrene)
The cost estimate for façade insulation with polystyrene foam includes all necessary materials and work. If you want to save money, you can study the technologies and recommendations for insulating facades with expanded polystyrene and polystyrene foam and carry out the installation yourself. However, if your house has several floors, then it is better to trust the professionals.
To calculate the cost of work, you can take into account the following prices:
- installation and dismantling of scaffolding per m2 - 100-140 rubles;
- insulation per m2 - 300-360 rubles;
- reinforcement per m2 - 300-350 rubles;
- decoration per m2 - 300-350 rubles.
Thus, the final estimate will depend on the cost of materials and services, as well as the complexity of the object and deadlines.
Installing expanded polystyrene on the facade of a house is not a difficult task; the main thing is to know the basic rules of this process and choose the right consumables and tools.
Useful advice from professionals
For high-quality insulation, it is recommended to listen to the advice of builders. The main ones:
- Insulation from the inside is carried out along the entire perimeter of the housing, and not just those walls that border the street.
- To prevent the formation of condensation and further problems with the insulation, care should be taken to ensure reliable ventilation. Air ducts are installed in the walls during the construction of a building or in the ceiling structure.
- To secure polystyrene foam boards, it is recommended to use mushroom dowels with plastic rods.
- According to reviews from builders, double-layer insulation with thin slabs of polyurethane foam on the outside is preferable to single thick insulation.
Simple tips will help you avoid making mistakes when insulating your home.
It is up to the owner to decide which polystyrene foam is best for insulating a house made of timber or brick. Each type has a number of advantages, for which professionals value it. The material is durable, lightweight, provides high-quality insulation and is affordable. With proper installation, the results will last for decades.
Classes and grades of foam plastic
Foam plastic as a material for finishing and insulating facades can have different brands and corresponding classes - each of them has its own purpose, composition and characteristics.
Foam classes
There are two classes of finishing materials on the modern construction market:
- Pressed – it is made by pressing equipment.
- Non-pressed - materials are sintered at high temperatures.
Which particular class a particular finishing material belongs to can be determined, so to speak, by eye, visually. Thus, unpressed sheets of material are round or oval-shaped granules firmly glued together with a special composition, while the structure of the sheet itself is porous. The overwrought sheets are smooth, but the density can be different, depending on the brand of the product itself.
Foam brands
Figure 3. Storage of façade foam.
Unpressed foam is abbreviated as PSB, but pressed foam is called PS. Although the material itself has different letter designations.
- A – the canvas is made in the correct geometric shape, namely in a parallelepiped format, with a smooth edge;
- B - the edge of the sheet itself has a cut in the shape of the letter L;
- R - cutting of blades is carried out using a hot jet;
- F – façade type or can be used using decorative finishing elements;
- C – self-extinguishing type of finishing material;
- N – the material is suitable for exterior finishing.
So the numbers in the name of the PPP will coincide with the density indicators.
Brands of unpressed foam
picture 3 – BPP brands
- PSB-15 is the most expensive material with high brittleness. It is used as a thermal insulation and packaging material, characterized by low hygroscopicity. Used for finishing and insulating balconies, cottages, and outbuildings.
- PSB - 25, often supplemented with the letter F in the marking and is applicable for façade insulation. Due to its density, it is also suitable for the manufacture of decorative elements.
- PSB-35 is a material widely used in construction and finishing. For example, for insulation of heat and gas-carrying lines, it is used in the process of manufacturing multi-layer panels as a heat-insulating gasket.
- PSB-50 has the highest density, perfectly insulates heat and sound, therefore it is used in all objects, regardless of purpose.
Pressed foam brands
The presented finishing material is durable and rigid, looks like plastic with closed cells, and is widely used in the field of finishing and insulation of a wide variety of buildings. Thus, brands PS-1, PS-2, PS-3, PS-4 are foam plastic with a closed porous structure and are resistant to external negative influences.
Foam plastic with increased hardness characteristics is labeled as PS - 1-35O and PS-1 - 150 - applicable in the field of radio electronics, due to its resistance to electric current breakdown. It is often used when insulating facades; the main thing is to choose high-quality material.
Rules for choosing polystyrene foam for facade insulation
The task posed in the field of finishing and insulating the facade is perfectly handled by PSB - S - 25 and there are several reasons for this.
- the material itself is dense and does not crumble during installation due to its strength;
- has low thermal conductivity in its characteristics and at the same time does not allow heat to escape outside during the installation process;
- It is light in weight and easy to transport;
- has a low price and is durable, self-extinguishing.
But its main quality is the density achieved by pressing the granules and the stronger the pressing, the stronger the final result.
PPS or EPPS
The starting raw material for the materials is polystyrene. The final product can vary greatly in density, hardness and structure. This is explained by the plate production technology:
- Foaming . Expanded polystyrene is characterized by lower weight due to the high air content in the pores and granules. The advantage is the low price, the disadvantage is that it retains heat worse with the same thickness of the slab.
- Extrusion . EPPS has less moisture-absorbing ability and higher density, strength and hardness. With identical sheet thickness, the thermal conductivity is lower. Against the background of the advantages, only one disadvantage stands out in the group of materials - high cost.
Craftsmen also note the low adhesion of extruded insulation due to the dense and smooth surface. To improve the situation, the boards are passed with a float or a needle roller (with metal spikes) to bend the drywall. Also, such products are characterized by a stepped shape of the mounting edges. This is a practical approach from manufacturers, thanks to which there are no cold bridges and the joints between individual sheets are strengthened.
Production line for extruded polystyrene foam Source ros-tenders.ru
