Various heating systems, installed mainly in the floor, are used as a source of thermal energy for the loggia. They allow you to maintain optimal temperature conditions and create the most favorable conditions.
There are several options for arranging underfloor heating. To make the right choice, you need to compare the pros and cons of each decision.
We will tell you which heated floor on the balcony is preferable in a given situation, and also provide step-by-step instructions for installing the heating system.
Heating mats and their types
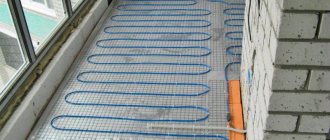
One of the most popular and budget systems are heating mats. They represent a single heating cable, attached in a wave-like manner to a special mesh made of durable fiberglass. The devices belong to the class of systems with cable heating; they are installed exclusively on the floor.
Heating mats can have a length from 50 cm to 3 meters, the width of the reinforcing mesh holding the cable is usually 50 cm
A single- or double-core cable acts as a heat source. Its diameter varies in the range of 2.5-4.5 mm. To operate the mats, a power source of 220-230 W is required.
The cable is protected by a special plastic shield. The length of the cold wire usually exceeds 2 m.
Industrially produced heating mats are divided into two groups.
They are divided by cable type into:
- single-core;
- two-core;
Single-core systems . Their peculiarity is that they must be laid so that the two ends are connected to the thermostat. This significantly complicates installation, since cutting of mats is required.
Also, a mat with a single-core cable emits an electromagnetic field, so it is not installed in rooms where people are constantly present.
The main advantage of single-core heating equipment is its low price, the possibility of implementation in the bathroom, toilet, kitchen area
The double-core mat is an improved modification of the single-core mat. Here, in addition to the heating core, there is an electrical cable. Its implementation in the design allows one end to be connected to the thermostat, and the other to be hidden in the coupling, which makes it possible to complete installation anywhere.
The two-wire type mat practically does not emit an electromagnetic field, therefore it is completely safe for humans. It can be installed not only in the balcony floor, but also in any other room as a source of additional heat.
Heating mats also differ in power and can generate from 60 to 2300 W of energy. You can read below about how to calculate the required power of the mat.
Both single-core and double-core mats are reliable and can serve flawlessly for many years. Typically, single-core modifications are thinner than double-core ones, have more power, and therefore are able to warm up the floor surface faster.
Pros and cons of heating mats
Let's consider the features, advantages and disadvantages of heating mats.
- When using mats, the height of the room is reduced by only a couple of centimeters, taking into account the height of the tiles and the adhesive layer.
- The system is economical and uses electricity efficiently. If there is furniture on the balcony, then mats cannot be placed under it.
- Heating mats are easy to install. The only point that may cause difficulty is connecting the system to the thermostat.
- Heating mats are used for short periods of time. They are not designed for constant 24/7 operation.
You can apply tile adhesive on top of the mats and lay the tiles themselves. The choice of device takes into account the area of the heating surface and the heat loss of the loggia. For installation on a balcony, it is not advisable to take a long mat, since the device cannot be shortened.
You can only reduce the cold ends, so for the balcony you need to select a device that best matches the floor area.
Image gallery
Photo from
Components of a heated floor on a loggia
System fully prepared for installation
Laying floor tiles on heating mats
Electromats in non-standard shaped rooms
Installation of heating mats
Installation of heating mats must be carried out with care. It is important to protect the cable from mechanical damage. It is unacceptable to use cutting or sharp objects during installation or leave them unattended.
It is also important to try not to step on the cable. To eliminate the possibility of this incident, it is advisable to carry out installation in shoes with soft soles or without shoes, and before installation, the floor surface is completely cleaned of dirt.
Care should be taken when fixing the tiles, applying adhesive and cleaning the seams. While performing this work, you may accidentally damage the cable.
The installation of an underfloor heating system using heating mats includes a number of traditional stages:
Image gallery
Photo from
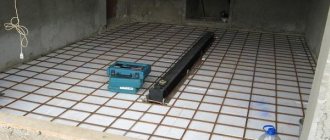
Stage 1: Laying heating mats on a leveled base
Stage 2: Cutting the underfloor heating system
Stage 3: Applying tile adhesive to the heated floor
Step 4: Laying floor tiles over the heated floor
Let's consider options for laying mats on different types of surfaces.
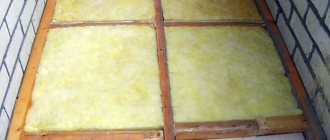
First, heat-insulating material is installed on the concrete floor of the loggia, then the floor is leveled, and a shock absorber is installed that will prevent deformation when heated. Then a mat is placed on the shock absorber, after which it is covered with tile adhesive, on which the tiles are laid.
At the last stage, the protective tube for the temperature sensor, thermostat is installed, and the cold wires are connected.
Before laying the mat, to ensure its maximum effectiveness, you can lay a layer of thermal insulation on the floor (+)
If the floor on the balcony is made of wood, then the surface is first leveled with a concrete layer of 7-9 mm, then heating mats are laid, hard foam is laid, and then the floor is covered with wood.
If the installation is carried out on an old tile covering, then make a concrete screed, install a heating element, cover it with tile adhesive, and then create a new tile covering. If the floor tiles were in good condition, then leveling screed may not be necessary.
Heating mats can be easily installed on the old tiled surface of the loggia without dismantling it (+)
Let's take a closer look at the installation features.
Before introducing mats into the floor surface, it is necessary to draw up a schematic installation plan.
The project should display:
- heated surface contour;
- laying diagram;
- location of the temperature sensor, thermostat, taking into account the location of the power supply wiring.
Before starting work, it is important to prepare the surface for laying mats. To do this, eliminate cracks on the floor with putty. After it dries, the floor is cleaned of dust and dirt. If the surface is wooden, you need to make sure that it is securely fixed.
Before installation, you need to install a groove for the tube that comes with the temperature sensor. It is important that it is located at the level of the top edge of the product at the same distance from the heating cables.
During work, you need to seal the tube on one side with electrical tape so that tile adhesive does not get into it. The second end is connected to the thermostat itself, which is located in the junction box.
Installation can be done in two ways - cable up or cable down. The first method is the simplest and is used most often in practice.
The method in which laying is done with the cable up is that the mats are laid with the mesh down. Next, using glue, the device is point-fixed to the floor surface.
Afterwards, tile adhesive of the required thickness (usually 3-5 mm) is applied to the surface of the mat, after which they begin laying the tiles.
It is important to distribute the glue evenly over the surface of the mat to avoid the formation of air voids, since during operation they can lead to overheating of the cable and its breakage
The cable must be completely immersed in a heat-conducting medium (tile adhesive, etc.).
The method in which the cable is laid with the cable down (i.e., with the mesh up), is more difficult to implement. Before laying the tiles, a mat pattern is made. To do this, it is spread out so that it completely covers the heated surface.
Next, the mat mesh is cut and then rolled up. A 2-3 mm layer of glue is applied to the floor, after which the mat is unrolled with the cable facing down and pressed lightly.
During installation, it is important to ensure that the distance between the cables is not less than 5 cm. A second layer of 5-6 mm adhesive is applied with a notched spatula directly onto the heating mat, after which the tiles are laid.
How to make a warm floor on the balcony?
To heat a balcony, either an electric or film heated floor is suitable. The water one is too heavy for the balcony structure. Before installation, it is necessary to purchase materials taking into account the size of the balcony. Installation should be entrusted to a professional, or installation done yourself. In the second case, you can save a lot of money. If you decide to install an electric floor, try to follow the recommendations of specialists.
Electric floor heating system
- Select the location where the thermostat will be located. Prepare it, create a power line.
- Tackle the base. Remove the old covering and thoroughly clean the floor of debris. If the surface is uneven, make a rough screed.
- Lay a thermal insulation and waterproofing layer.
- Lay out and attach the snake-shaped heating element.
- Check the network for integrity. This can be done by simply measuring the resistance using a multimeter.
- Connect the structure network to the sensor.
- Fill the screed.
- The last stage is laying the finishing layer.
- The floor can be used for its intended purpose after the screed has completely dried.
Temperature sensor installation
To ensure the necessary microclimate in the room, thermostats equipped with a temperature sensor are used. They interact effectively with cable systems and IR film.
The functions of the thermostat include maintaining the set temperature, adjusting it, and optimizing energy consumption. Depending on the modification, the functions of the device may vary.
The principle of connecting the thermostat is the same for any system. We will consider the features of installing a temperature sensor for heating mats.
One thermostat is able to regulate the temperature of several heating mats at the same time. Cable systems are connected in parallel, the maximum current should not exceed 16 A, which corresponds to 3600 W at 230 V
If the total power of the mats is greater, then installation of the thermostat requires additional equipment in the form of an input circuit breaker, an RCD, a power relay, a directional circuit breaker, and a special thermostat.
To install the regulator, you must perform the work in the following order:
- create a special hole in the wall for mounting the box;
- make a recess in the wall to install the power wire and create a hole for laying the connecting channel;
- perform installation and configuration according to the instructions;
- place the sensors in a corrugated plastic tube with a diameter of 16-20 mm.
The tube must be hermetically sealed at one end to protect the wires from solutions and water getting inside. From the opposite end, the tube is placed in the installed box.
It is recommended to place the regulator close to the wiring in order to save on supply wiring; it is advisable to install it on the wall in a living room in the most convenient place
The permissible bending radius of the wiring is at least 5 cm. The tube with sensors is attached to the floor. It must fit between the loops at a distance of at least 20 cm.
It is important to remember that during installation you cannot shorten the heating cable, replace supply wires, make adjustments to the design of the thermostat, or carry out repair and installation work with the supply voltage turned on.
What should be the insulation?
A balcony is a structure that protrudes beyond the load-bearing walls and has no support underneath. All enclosing surfaces are thin and freeze in winter. GOST allows a maximum operating load of only 200 kg/m2.
What to consider when installing balcony insulation:
- moisture resistance of thermal insulation in the area of contact with atmospheric moisture;
- a lot of construction and finishing materials.
The construction market has all the necessary goods to install balcony insulation with your own hands. The floor is the coldest contact surface, so you should pay special attention to it.
Important! The warm floor is installed after glazing and insulation of the perimeter of the walls and ceiling, but before finishing.
Principle of calculation of floor systems
Before choosing any floor system, it is important to calculate the power of the heater and determine its required length.
To do this, you need to calculate the heat loss of the loggia. A lot of thermal energy comes out through window openings, so ensuring a temperature of +20-+23°C is quite problematic, especially in the winter season. Therefore, it is recommended to install heating equipment in heating mode.
You can calculate the heat loss of a balcony using an online calculator.
Before installing a heated floor system on a loggia, it is important to first insulate the room
The recommended temperature of heating mats, cable or IR film is +26°C. This mode is suitable for heat-insulating parquet floors. If tile, marble or other heat-conducting coating is used as a coating, then the recommended cable temperature is +28-+31°C.
Typically, loggias require 160-180 W per m2 for heating and 200-220 W per m2 for heating mode. Taking these recommendations into account, you can calculate the required cable length, laying pitch, and system power.
For example, a loggia has an area of 2 m2. The flooring is tiles, no screed is planned. Let's take the heating mode, which requires 200 W per m2. Next, we determine the heating area.
It is calculated using the formula:
Sgr=Stot-Spr, where
- Spr - the area occupied by cabinets and other furniture;
- Stotal - total area of the room.
Let's say the area occupied by furniture is 0.5 m2. Then Sgr=2-0.5=1.5. The heating mode is selected for the loggia, so the required cable power is 200 W per m2.
Then the recommended system power is 1.5 * 200 = 300 W per m2.
If a screed is not planned, choose a thin cable system that can be completely embedded in a layer of tile adhesive.
You can select a system with the required characteristics using tables describing the characteristics of the equipment.
Using the technical characteristics of the mats, you can determine the optimal model based on individual requirements (+)
Based on the table, we determine the thickness of the mat, its dimensions and length based on its area. In our example, the power of the mat is 0.25 kW, and the length is 17 m.
Next we look for the installation step. We calculate it using the formula:
h=(Sgr*100)/Lcab , where
- h —laying step;
- Lcable - cable length in meters.
We substitute the values into the formula and get: h=1.5*100\17=8.8 cm.
When laying mats or cables, remember that the distance from the walls should be 10 cm.
Electric models: varieties
There are several options for electrical models of heating systems:
- Cable. The heating element of cable models is a heating cable, which is a heat source, which allows it to transfer heat more efficiently. Comparing a heat cable with water pipes, it can be noted that the cable warms up along its entire length, and the coolant in the pipe cools as it moves away from the heating source. But just like with water pipes, the cable requires pouring a concrete screed and finishing, for which it is better to use laminate.
- Thermal mats. This option is essentially the same heating cable. A distinctive feature of thermal mats is that the user does not have to lay the reinforcing mesh, and then the cable, fixing it to the mesh. Thermal mat is a reinforcing mesh on which the heating cable is already attached. This option, like the previous one, is placed in a concrete screed.
- Infrared. If it is not possible to pour a concrete screed, or there is no desire to wait for it to dry, you can lay the infrared version on the loggia. In this case, the functions of the heater are performed by a film placed on the finished screed, directly under the laminate or tile.
Preparatory work
Installation should be carried out on a well-insulated balcony. Otherwise, you will heat the street and not your room. Therefore, before installing a heating system, you should insulate the walls, ceiling and floor.
It is also necessary to check the balcony slab. Will it be able to withstand the additional load when laying pipes? The slab must be level; if there are differences of more than 10 mm, they must be eliminated.
Let's consider 2 options for laying pipes when insulating a balcony or loggia:
- Snake. This heating scheme is preferable for small rooms. The shape is not considered effective for heating large spaces. The maximum possible water temperature is at the beginning of the system, so installation begins from the coldest parts of the room.
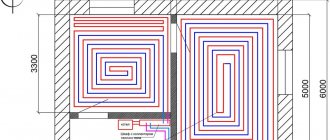
- Snail. The pipes are laid along the walls, moving to the center of the balcony floor. This form is suitable for large balconies and loggias. Allows you to avoid unheated areas by alternating cold and hot flows. In this scheme, the pipe bend reaches 90 degrees. Heating occurs evenly.
Infrared films
A very popular option for additional heating. Exactly additional, since the power of the entire system rarely reaches levels that allow one to hope that it will be able to create enough heat for comfort. However, when connecting the balcony to the room and demolishing the wall, some of the heat from the living space gets there, so it’s still worth considering this option. In addition, it also has advantages over other types of heating:
- A thin film will not take up space and the floor level will not rise.
- There is no need to fill the screed. All “dirty” processes can be avoided.
- Anyone can install the system - you just need to strictly follow the instructions.
- Electricity bills will not increase as much as in previous cases.
- The cost of the solution can be very different and you choose how much it will be. You can lay the film not over the entire area of the room, but only in some areas, significantly reducing the price of the purchased kit.
The disadvantages include several points. For installation, a perfectly flat surface is required - all unevenness and other similar defects in the base can damage the thin film. It is not recommended to place furniture in areas under which the film is located. Well, the heating power will be insufficient if you live in a cold region.
Other styling options
If the balcony structure is not able to withstand the heavy weight of the cement screed, then you can resort to the following methods of installing a heating water system:
- wooden modular;
- wooden on logs (slats);
- polystyrene foam method.
In the first option, chipboard sheets are used, which have special channels for laying pipes. The sheets are laid with a gap of 5 cm on a pre-leveled wooden base, to which they are fixed using self-tapping screws. Next, an aluminum profile is placed into the grooves of which the pipes are laid. These structures are completed with another layer of chipboard.
The second option involves placing wooden slats with a thermal insulation layer. Using a building level, they are leveled strictly horizontally. An aluminum profile is placed between the slats, in which the water floor pipes are laid. The space between the profile and the slats is filled with heat-insulating material. A subfloor and finishing coating are installed on this entire pie.
Installation of water heated floors using the slatted method
In the third option, polystyrene foam boards are used, which have ready-made grooves for laying pipes and serve as a heat-insulating material. The slabs are laid from the corner of the balcony, special aluminum plates are placed on them, and then pipes are laid in them. After checking the operation of the heating system, gypsum fiber board sheets and the finishing floor are installed on the structure.
Laying a warm water floor using the polystyrene method
What to choose from
If we were talking about private houses, then in almost all respects water circuits would be an ideal solution. However, in apartments with a common heating riser it is almost impossible to connect. At least with obtaining all the necessary permits for this. Therefore, it makes no sense to consider water heating systems in this case. The remaining options will be:
- Electric heating cables.
- Heating mats.
- Infrared films.
Each option has its own pros and cons. Therefore, you can decide what type of heating device to install on the balcony under the laminate only after familiarizing yourself with all the characteristics of the solutions.
Description of fabric
Felt is a super dense and durable fabric. It is obtained by felting the fluff of hares, goats, and rabbits. Fur waste is often used for this.
Sometimes felt is made together with chemical soft fibers. This fabric can be either smooth or pile.
