Brick is a classic building material designed to last for decades. The thermal conductivity of brick walls depends on their thickness - the number of rows of masonry.
If a brick wall freezes in the first winter after building a brick house, this means that the construction technology was violated or the thickness of the house wall is insufficient. In this case, it is necessary to solve the problem of thermal insulation of brick walls from the inside.
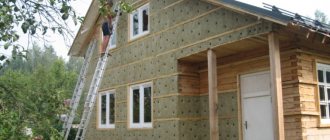
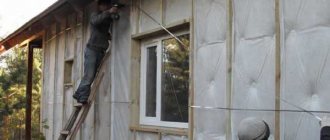
External thermal insulation should be a priority, but its installation is not always possible. Let's look at how to insulate a brick house from the inside with mineral wool, which one is better to use, and how to properly carry out the installation of thermal insulation.
Main types of mineral wool
There are three such types.
Glass wool
This product is produced by melting broken glass and quartz (sand). When a molten mass is obtained, glass fibers are pulled out of it, the length of which is 15-50 mm, thickness - 5-15 microns.
Considering what this mineral wool consists of, it can be argued that this material:
- chemically absolutely inert;
- cannot become a medium for the development of any forms of biological life (neither microflora, nor rodents, nor insects will grow in glass wool);
- not subject to rotting.
The disadvantage is the causticity and fragility of the elements that make up glass wool. When styling it, you need to work using special protective equipment, otherwise the skin will be completely irritated. Also, glass wool particles should not be allowed to get into the respiratory system or eyes.
So it is not advisable to use glass wool when arranging thermal insulation in residential premises. After all, microparticles will still be released from the laid mats and spread throughout the room. Residents will begin to inhale them along with dust particles and suffer from allergic reactions.
Slag
This mineral wool is also not suitable for thermal insulation of housing. There are many reasons that can be cited, including:
- causticity and fragility of particles;
- high hygroscopicity (ability to accumulate moisture);
- significant shrinkage (as a result, the insulating properties of the insulator layer are lost).
And the designated material cannot be classified as absolutely environmentally friendly. It is produced from blast furnace slag. Their composition is heterogeneous; they can even show increased background radiation. In addition, steam may be highly acidic, and moisture absorption contributes to the formation of an aggressive environment. Metal elements deteriorate first.
Basalt (stone) wool
This insulation is excellent for furnishing residential premises, that is, for internal insulation of houses. This material, when compared with all others, is considered the most elastic and durable. The fibers are less brittle and therefore do not cause irritation to the mucous membranes and skin. At the same time, reducing negative qualities does not in any way reduce the insulating properties. Basalt wool has a thermal conductivity coefficient almost the same as glass wool.
A negative property of stone wool can be considered its ability to absorb moisture. However, its hygroscopicity index remains the lowest when compared with other similar compositions. Complete polymerization of the binder occurs when such a mass is produced. So this mineral wool does not pose a significant danger to human health. You just need to purchase certified products supplied by reputable manufacturers. Laying basalt wool is easy. Such mats (cords):
- hold their shape well;
- easily cut;
- If necessary, they are fixed to the wall with glue.
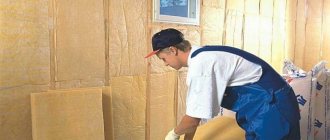
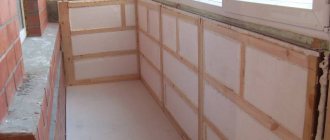
The process of proper insulation with your own hands
- First you need to clean the wall surface from any remaining finishing material. A good example is the insulation of a brick wall with mineral wool on the side of the home. At the end of the cleaning process, the wall should be completely bare. If there are traces of mold, they must be removed with a spatula.
- At the next stage, the existing cracks and cracks are thoroughly sealed. To seal large and small flaws, you can use polyurethane foam or building mixtures.
- Upon completion of installation, it is necessary to remove dust from the room with special care. Good cleaning results can be achieved using a vacuum cleaner. This is necessary so that the anti-fungus and mold agents cover the surface being treated well, destroying harmful organisms where they are not visible to the eye. It is also recommended to use antiseptics for treating walls for preventive purposes.
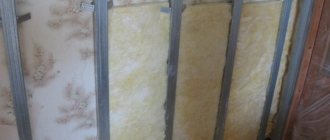
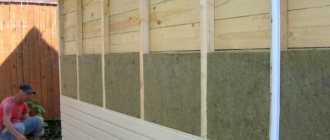
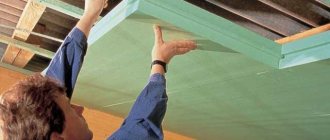
Installing mineral wool in the frame yourself
It is worth mentioning safety precautions when working with mineral wool. Regardless of the type, the material can be volatile, which means you will have to wear a mask and gloves when working. It is also recommended to wear long sleeves and not to work in shorts. It is prohibited to store food and drinking water in the work area.
The first stage will be the actual production of the frame. It is assembled from bars made of wood or metal profiles. The first option is suitable for finishing with chipboard sheets, the second - for drywall. The required width of the bars is from 40 to 50 millimeters, the depth should be at the same level as the thickness of the insulation sheet. The vertical gaps between the frame lines should be in the range of 50 to 60 centimeters. The corners must be decorated with frame elements.
The next level is insulation with mineral wool from the inside. Take note - mineral wool is very elastic. Unwinding a roll or unpacking a bale, as well as measuring the required length, must be done taking into account a margin of approximately 10 centimeters. This will avoid bottlenecks when applying material. Fastenings can be staples, which are usually used to connect sheets of drywall, only in this case they will press the material.
Some features should be taken into account. If sheet insulation is used for internal insulation of the house, you need to install horizontal strips. This will help avoid pressure from the upper fragments on those located at the bottom of the structure.
When choosing insulation, you should take into account both its width and the width of the structure as a whole. It will be nice if the size of the material fragments exceeds the width of the cells by several centimeters (from 3 to 5 is enough).
After laying the material on the insulated surface, they proceed to installing the vapor barrier. Materials for it are produced in the form of rolls. If the insulation contains foil, then there is no need for a partition between the layer of mineral wool and the sheathing. If a vapor barrier is necessary, then it is laid on the wall, to which it is attached with construction tape or an adhesive base. Laying is carried out with the obligatory creation of an overlap.
If the house has a low level of sound insulation, installing mineral wool as internal insulation will help cope with this problem without additional costs, since the material perfectly muffles sounds entering the house from the outside.
Upon completion of this stage, the thermal insulation can be considered complete, after which you can begin sheathing and finishing the surface of the walls.
Common materials for internal insulation
Not all materials are suitable for internal insulation. Insulation for walls and partitions made of plasterboard should have a fairly dense texture, not crumble, or cake.
The most popular:
- Styrofoam . The cheapest and most successful option. Foam insulation is the most common type. Almost complete vapor tightness, rigidity, ease of processing and installation, excellent heat-saving properties of the material make it a leader among its peers.
- Extruded polystyrene foam (EPS), penoplex. This is the same foam, but made in a different way. The structure of these materials is a frozen foam. Complete vapor barrier and excellent heat conservation of the material would make it the best option, but the high price limits its use. Insulating walls from the inside with penoplex is very effective and allows the use of thin material.
- Minvata. It is mostly suitable for external insulation, but can also be used for internal insulation. The main problem with mineral wool is its soft structure, which requires the installation of sheathing. In addition, mineral wool is a hygroscopic material that requires high-quality vapor protection.
Insulation of the ceiling surface
Mineral wool is quite often used for ceiling insulation, and it is perfect for both ceilings made of plasterboard and suspended ceilings made of plastic panels. The whole question is how to technically correctly fix mineral wool on the ceiling, because the insulation must not adhere securely to the ceiling surface.
As long-term experience shows, it is best to place wooden slats on top of the working frame mounted on the ceiling surface, which will precisely hold the insulation. Mineral wool for the ceiling should be used with a foil layer.
About mineral wool
Internal wall insulation is less effective than external insulation, but if the latter is impossible due to some circumstances, it is a good alternative.
Insulating walls from the inside with mineral wool plus plasterboard has its advantages and disadvantages, which must be known and taken into account when performing this type of work.
Advantages of mineral wool insulation:
- Material price
- Resistance to temperature changes and various temperature conditions
- High fire safety
- Ease of installation
- Good sound insulation
- Resistance to mechanical and chemical stress
- The material has low thermal conductivity
Insulation with mineral wool can be done with your own hands, at any time of the year, regardless of the weather outside the windows.
The disadvantages of this method of insulation are:
- Mineral wool absorbs moisture, which over time destroys it and leads to rotting
- Along with insulation, it is necessary to carry out a vapor barrier to avoid condensation and the appearance of fungus and mold.
- After some time, mineral wool shrinks
Important: If every centimeter of space in the house is valuable to you, then it is better to insulate the facade, since internal insulation can take up to a whole square meter from the area of the room. Mineral wool has been used in construction for a long time; it is made from natural fibers, is an environmentally friendly material and perfectly retains heat in buildings.
Mineral wool has been used in construction for a long time; it is made from natural fibers, is an environmentally friendly material and perfectly retains heat in buildings.
There are three types of mineral wool depending on the purpose of its use:
Easy
It is used for insulation of frame buildings, has a density of 10-90 kg per cubic meter.
It is used to insulate building facades; its density is 90 kg per cubic meter.
They mainly insulate technical buildings and industrial equipment where the air temperature is high or low.
If you classify mineral wool by composition, it is as follows:
Very common and economically priced. It is made by melting sand or broken glass into a thin fiber, to which binders are added, turning the material yellow.
Glass wool
It is based on the raw materials that are used to make glass; even cullet and glass production waste are used. Dimensions of insulation fibers: length – 14-50 mm, thickness – 4-15 microns. Thermal conductivity – 0.028-0.052 W/m K. Operating temperature from -60 °C to +500 °C.
Slag
The raw material is blast furnace slag. Fiber sizes: length – 15-16 mm, thickness – 4-13 microns. Thermal conductivity – 0.45-0.48 W/m K. Maximum heating temperature up to +300 °C. This species is very hygroscopic.
Experts warn that slag wool should not be used on metal surfaces. The thing is that residual acidity is always present in slags. When interacting with moisture, the acid begins to corrode the metal.
Stone wool
This is the most common type in this category. And when it comes to mineral wool, it means stone wool. Therefore, in what follows we will not distinguish between these two concepts.
So, let's start with the fact that mineral wool is made from different types of stone. Therefore, it has different characteristics in terms of density and thermal conductivity. If the insulation is made of limestone, dolomite, and so on, that is, non-solid rocks, then the thermal conductivity can vary from 0.077 to 0.12 W/m K. If the insulation is made of basalt (diabase or gabbro), then the thermal conductivity of such a material is 0.03 -0.05 W/m K.
At the same time, soft rocks contain many impurities in their structure, which means that the fibers are weakly connected to each other. Therefore, more formaldehyde is added to them during the production process. Such materials can withstand temperatures up to +600 °C. Basalt mineral wool up to +1000 °C. Stone wool today is sold in mats (blocks), in rolls and in loose form.
How to choose stone wool?
Before purchasing stone wool, you need to find out the amount of material needed and calculate the load that will be placed on the insulation.
We have already said that the prices are high, but you can still save money. The cost will be influenced by the following factors:
- Density of wool;
- Manufacturer;
- Binder and rock category;
- The presence of another layer of coating;
- Quantity purchased.
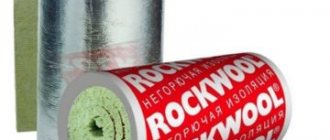
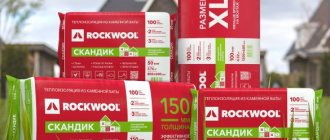
When purchasing, be sure to look at the instructions; they usually indicate the scope of use of stone wool and its technical characteristics. The most proven ones are TechnoNIKOL and Rockwool. The last company is located in Denmark; insulation materials from this country are of the highest quality, since strict certification bodies operate there.
When choosing, check with the seller how the fibers are arranged: horizontally, vertically or in a chaotic order. The first two types prevent the material from deforming, and the latter provides good heat and sound insulation.
Depending on the density, stone wool is usually divided into categories. Stone wool: wall slabs:
- Brand P-75. Suitable for horizontal internal surfaces that are not exposed to load, for insulating pipelines.
- Insulation for walls is wool grade P-125. Suitable for both horizontal and vertical surfaces. It is ideal for insulating ceilings, floors and the inside of walls.
- PZh-175. Stone insulation for walls made of metal profiled sheets or reinforced concrete.
- Insulation wool PPZh-200. The hardest stone wool. This type is used in engineering buildings, protecting them from fire.
Which mineral wool is best for wall insulation?
Insulating a house with stone wool begins with choosing a manufacturer.
Rockwool “ROCKWOOL” is popular both in the domestic and foreign markets. It has the following distinctive characteristics:
- Good level of strength;
- Mineral wool for wall insulation lasts from 15 years;
- The fibers are arranged in a chaotic manner;
- Helps save electricity, as the manufacturer claims;
- An additional layer that increases moisture resistance.
Stone wool "TechnoNIKOL".
- Produced only on the basis of basalt rocks;
- Additional layer for noise reduction;
- Light weight, making work easier.
Insulation for walls stone wool "URSA":
- Special packaging will make it easy to transport and work with the material;
- Does not contain formaldehyde resins, therefore it is recommended for schools, hospitals, etc.
Tips for choosing
Buying a truly high-quality product can sometimes be difficult. Therefore, you need to know some important points.
Pay attention to where and how the cotton wool is stored. Most often, it is stored in its original packaging and wrapped in shrink film.
Make sure there are no holes or cuts on the packaging. The cotton wool should not be in the open air, but under a canopy. If stone wool is packaged in cardboard boxes (they usually contain expensive insulation materials), then its storage location must be protected from moisture. Even after getting a little wet it will be unusable. Purchase goods only from trusted sellers. Give preference to those stores that are located closer to you - this will reduce the cost of delivery.
Installation of insulation under drywall
Since the insulation for plasterboard partitions will have to be covered with sheets, for this it is necessary to first create a frame base. It must be made from aluminum profile CD60 or UD28. You must first apply markings to the base. Vertical lines mark the location of the racks. The distance between them should correspond to the width of the drywall sheet. It is also worth immediately determining the joining location of the plasterboard profiles.
After this, you can begin the most important stage - laying the insulation. Before such work, you should prepare glue for cotton wool. It must be diluted in accordance with the instructions on the package. The mixture should have a uniform consistency.
Next, the glue is applied to the slab using a spatula, and mineral wool is applied to the wall between the frame posts. If the mixture is squeezed out from under the cotton wool, it should be removed immediately. It is necessary to ensure that there are no gaps between the plates.
The cotton wool must be tied together, just like a brick. After installation is completed, the surface must be checked. If there are places left unfilled with cotton wool, then they are caulked.
After such work, you need to give time for the glue to dry and set. This may take 15-20 hours. Then you can begin installing drywall. Difficulties usually do not arise at this stage, since everything is prepared for work in advance.
What is a vapor barrier and how to install it
The process of internal insulation of brick walls has one important stage - installation of a vapor barrier. Economic activities in the house lead to the constant release of moisture (steam).
Mineral wool, in turn, absorbs this steam and because of this, dampness and mold occur. Therefore, it is very important to isolate the insulation from moisture and steam with a special membrane. It is installed on top of a frame with insulation. A vapor barrier can be created using a membrane film.
It is vapor permeable, which has a positive effect on the quality of insulation. The membrane film “works” only in one direction. This must be kept in mind when installing it. The entire partition is covered with film. The membrane film must be laid overlapping, and the joints must be glued with mounting tape.
Technology of thermal insulation of walls with plasterboard from the inside
The technology of insulating the walls of a room with plasterboard from the inside does not require special training of workers or expensive equipment. General construction skills and a universal tool are enough.
Tools and materials
During the work you will need:
- guides (metal profiles or wooden bars);
- gypsum boards;
- insulation in slabs or rolls;
- double sided tape;
- vapor barrier membrane;
- screws, dowels and other fasteners;
- anti-mold agents;
- putty;
- drill;
- screwdriver;
- hand tool.
The floor in the room must be cleared of debris and foreign objects.
Design
At this stage, the type of insulation, gypsum board and guides is selected.
If you are insulating a kitchen or bathroom, you should choose moisture-resistant plasterboard. For the boiler room, it is recommended to use fire-resistant.
Wooden guides are cheaper, but they are at risk of drying out and deforming in the event of temperature changes. The metal profile does not have such disadvantages. The number of guides is calculated based on a standard step of 60 cm.
When calculating the volume of materials purchased, a 5% reserve should be made in case of damage to gypsum boards and for cutting complex elements of walls and ceilings.
Stages of work execution
At the first stage, it is necessary to perform a number of preparatory work:
- clean the walls from dirt and mortar drips;
- dismantle all protruding objects: fasteners, remnants of fittings, sockets, lamps, etc.;
- fill all cracks and irregularities;
- treat with a composition against fungus and mold;
- dry the surface.
Next, marking work begins. Use a plumb line or a laser rangefinder and a chop cord
special attention should be paid to:
- parallelism of the marking of the mounting points of the guides;
- marking in corners and junctions of building structures: arches, window and door openings, columns, bay windows, ceiling beams.
After marking, they proceed to the installation of frame guides.
- The starting profile is glued to the floor using double-sided tape; the adhesive tape will improve sound insulation and protect against drafts;
- vertical profiles are attached to the starting strip with metal screws, and to the wall with screws on dowels.
The process of insulating walls with plasterboard.
A very important stage is laying insulation into the guides. The quality of insulation will directly depend on the accuracy of the work:
- insulation sheets are placed in the guides from bottom to top;
- they should fit between the profiles without gaps, with some effort;
- the sheets are additionally attached to the wall with adhesive or disc-shaped dowels;
- All cracks and gaps must be tightly filled with scraps of material or sealed with foam.
Now it's time to install a vapor barrier:
- penofol is mounted with foil inside the room;
- The vapor barrier membrane is attached with the rough side inward; double-sided tape is used for installation.
And the final stage is the installation of drywall sheets. They are mounted horizontally, from bottom to top. Before screwing the sheet to the guides, you need to use markings and a level to make sure that it is positioned strictly horizontally. After the first layer is secured along all the guides, the next one is installed on top of it. Here you also need to ensure that the position is horizontal and that the gaps between the sheets are minimal.
As a rule, the size of the room does not allow installing only whole sheets of drywall. Pieces have to be mounted in corners and under the ceiling. Drywall should be cut on the floor, in a horizontal position, on a flat surface. It is enough to cut through the top layer of paper with a mounting knife. Now the cut piece can be broken off along the cut line.
Upon completion of installation, all joints between the sheets should be thoroughly puttied. After the composition has dried, it is leveled with fine sandpaper, achieving a completely flat surface of the wall or ceiling.
Now the surface of the insulated wall is ready for final finishing. Two main types are used:
- wallpaper;
- water-based paint.
When insulating rooms with high humidity with plasterboard, moisture-resistant types of plasterboard with special hydrophobic and antifungal impregnations are used. These panels are easy to distinguish: they are painted green. In wet rooms it is also necessary to arrange supply and exhaust ventilation to prevent air stagnation and mold formation.
Instructions for installing lathing on the facade
Installation of lathing on the facade during its insulation is carried out only when using various panels, porcelain tiles or natural stone as finishing. For decorative plaster and painting, thermal insulation is installed without lathing.
To install a frame for siding, block house, imitation timber or tiles you will need:
- dry, straight, smooth-surfaced wooden slats 40x40 or 50x50 mm.
- metal hangers or bars for attaching the sheathing to the wall.
Metal hangers.
The technological process can be divided into several independent stages.
- Step 1. Determine the thickness of the pads under the sheathing posts or the distance from the wall at which the posts will be plumb. To do this, the width of the racks is subtracted from the thickness of the insulating layer.
- Step 2. On the surface of the wall, mark the places where the strapping is attached, and then the lines of passage of the internal horizontal and vertical slats. The horizontal distance is 590 mm, the vertical distance is 390 mm (for laying sideways). It is impossible to maintain the same step along the entire wall. Therefore, compensation, i.e. a smaller distance between the posts must be done either on the window or on the doorway. To do this, the marking must first be carried out from one side of the strapping to the opening in the wall, and then from the other.
- Step 3. The linings are cut to the obtained dimensions.
- Step 4. Along the line of the rack, the places for attaching the linings are marked: at the ends of the racks, and inside in increments of 40-60 cm.
- Step 5. Use a hammer drill (electric drill) to drill holes in the wall for self-tapping screws.
- Step 6. Dowels are driven into the drilled holes.
- Step 7. The lining is attached.
- Step 8. The racks and horizontal slats are filled. Door and window openings are also upholstered.
This technology allows you to quickly and easily install the sheathing. Difficulties arise when laying insulation: bars protruding beyond the dimensions of the racks interfere. You have to cut out the wool in the insulation boards to fit them, but this is difficult. Therefore, professional builders use metal hangers.
Horizontal slats are often not used under siding. The racks perfectly hold the finishing material, and horizontal packing is not needed for basalt slabs.
Selection of internal insulation
Let's talk about insulation under plasterboard sheets. There are mainly three types of insulating materials that are well suited for this purpose. This includes:
- basalt wool;
- glass wool;
- Styrofoam.
Related article: Welded mesh fence
Due to constant debate among experts about the health hazards of polystyrene foam and expanded polystyrene, their use is now not as widespread as it once was.
The external similarity between basalt and glass wool is undeniable, but at the same time they have many differences that need to be paid attention to. The first is, of course, the composition
The basis of glass wool is glass fibers, the basis of basalt wool is rock of igneous origin. Second: thermal conductivity coefficient. For basalt wool, this indicator is lower than that of the “opponent”, so it manages to retain heat much better.
A significant difference between these two materials is also visible in the fire resistance indicator. When exposed to fire and high temperature, glass wool simply sinteres into a single mass, while basalt wool remains virtually unchanged.
In work, again, basalt wool is more convenient than glass wool. Very fine fibers of glass wool can cause unpleasant itching, so good care should be taken with protective clothing, goggles, gloves and a respirator. When working with basalt wool, it is enough to wear only gloves.
If we talk about savings, then the balance certainly tips in favor of glass wool, which is on average three times cheaper than basalt. But don’t forget that glass wool needs to be laid in two or even three layers.
Manufacturers offer to buy insulation both in slabs and in rolls. Plates are much more convenient because they do not need to be cut during the insulation process. Usually their width does not exceed 60 cm, which makes it possible to attach them between the posts of the so-called skeleton without any problems.
If you still have doubts, it would be a good idea to watch a couple of videos that will help you imagine what and how.
Mistakes made when insulating
In order for the insulation of the walls of the house, from the inside, done with your own hands with mineral wool, which will be covered with plasterboard on top, to last as long as possible, it is important to avoid common mistakes:
- an attempt to save money when purchasing thermal insulation material from little-known manufacturers;
- non-compliance with the sequence of thermal insulation work;
- laying mineral wool with various types of defects;
- there are gaps between adjacent sheets of material;
- improperly equipped vapor barrier or its complete absence.
It often happens that while doing the work with his own hands, the homeowner forgets to install sockets or a switch in the drywall . If you carry out installation work on installing electrical products after fixing the drywall, you can significantly damage the insulation. Therefore, this procedure must be performed in advance.
As you can see, insulating mineral wool under drywall is not the most difficult process; the main thing is not to forget about high-quality vapor barrier and distribute the mineral wool in an even layer from the inside over the entire surface of the walls. This procedure will keep the house warm and prevent the formation of drafts and other troubles.
Insulation of walls with mineral wool from the inside under plasterboard
Mineral wool in any form - in rolls or slabs - needs a coating on top. It has high vapor permeability, so it is recommended to leave a ventilated gap between the ceiling and the insulation to remove moisture.
The most common material for covering mineral wool insulation indoors has become plasterboard.
Drywall is sheets of special gypsum dough sandwiched between layers of paper or cardboard. This material is environmentally safe, non-flammable and non-toxic.
Different types of drywall are suitable for any room. With its help, you can create perfectly smooth surfaces, organize sound and heat insulation, hide electrical wiring or other communications. How to cover walls with plasterboard, making the most of its advantages, can be read here.
If you choose to insulate the walls from the inside with mineral wool plus plasterboard, then you need to know the following. It is necessary to choose the right not only insulation, but also drywall. If ordinary drywall is suitable for residential premises, then when insulating a kitchen or bathroom it is moisture resistant. For wall cladding, plasterboard with a thickness of at least 12.5 mm is used.
At the same time, it is important to provide high-quality protection for the wall from steam penetration from the inside. For this, a vapor barrier film is used, which is laid on top of the insulation layer.
In this case, it is very important to achieve the tightness of the vapor barrier: the film is laid overlapping, the joints are taped.
The fastening points are covered with tape or coated with putty. Then steam from the room will not penetrate the insulation, which, when wet, loses its heat-insulating properties. As a vapor barrier film, you can use ordinary polyethylene or foil film.
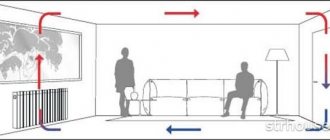
When insulating with mineral wool under drywall, the ventilated facade method is used.
It consists in the fact that a gap of 2-5 cm is left between the insulation, covered with a vapor-proof film, and the drywall. Air moves freely through it, which leads to the evaporation of settled moisture and ensures the dryness of the wall.
After preparing the wall for insulation, a frame of wooden slats or metal profiles is installed on it. Mineral wool slabs are laid between them, which should be slightly larger than the cell size for more dense installation.
After the entire wall is covered with insulation, a vapor barrier film is laid on top. The gap between the insulation and the drywall is achieved by means of counter-battens, which are placed on top of the frame. After the drywall has been attached, carefully seal the joints. And the surface is ready for finishing.
Where to place thermal insulation?
Insulation of buildings should be carried out correctly from the outside, otherwise condensation cannot be avoided upon contact with a cold front (dew point). Let's consider three types of brick walls:
- There is no thermal insulation . The dew point is located in the thickness of the brick wall, so it accumulates moisture during the winter months, dries out and eventually collapses.
- Thermal insulation is located on the room side . As the brick wall freezes, the dew point moves towards the room, towards the inner surface of the enclosing structure. As a result, moisture condenses between the heat insulator and the brick wall. To avoid the appearance of moisture in the wall, it is necessary to ensure effective ventilation of the room .
- The insulation layer is laid on the street side . The wall does not freeze, so it remains dry and freely allows water vapor to pass through. It is important that there is a ventilation gap between the insulation layer and the brickwork to remove moisture from the room.
Lathing under mineral wool and drywall - features and installation
Traditionally, you can create a partition sheathing for attaching drywall from two materials:
- wooden slats;
- galvanized profile.
The wooden frame is distinguished by its massive, bulky design. Before installation, wooden slats are treated with an antiseptic to prevent the possibility of rotting.
When installing drywall, it is more advisable to use special galvanized profiles.
They are designed to be attached to each other, in addition, they are provided with mechanisms for attaching to walls - brackets, with which you can adjust the thickness of the partition.
A brief diagram of the installation of lathing for gypsum boards can be presented as follows:
- The thickness of the partition is determined depending on the selected thickness of the insulation;
- a guide profile is attached to the sides of the vertical adjacent walls, along the floor and ceiling;
- the edge from which the plasterboard sheets will be installed is determined;
- Considering the width of the sheets is 120 cm, markings are made every 40 (or 60) centimeters;
- U-shaped brackets are attached along the markings at intervals of 50 cm;
- the supporting posts are inserted into the guide profile in accordance with the markings;
- using a stretched string, level the supporting posts and secure them with brackets;
- Transverse posts are attached to the load-bearing posts to ensure structural rigidity;
Mineral wool lathing
Insulation is laid under the resulting plane.
Construction of an insulating “pie” from the inside
In construction terminology, the unity of various structural elements is called a pie. If we apply this term to walls that are insulated from inside the building, the list of layers will look like this:
- load-bearing external wall;
- waterproofing layer;
- insulation layer made of mineral wool;
- vapor barrier layer;;
- frame for fastening drywall;
- drywall directly;
- finishing material.
Useful tips and nuances of internal insulation
If possible, it is advisable to carry out insulation from the outside, as this is most effective. In addition, this allows you to neutralize the harmful effects of cold on the walls. Naturally, this does not apply to wooden buildings, where it is necessary to lay a thermal insulation layer both inside and outside the room.
Experts recommend that before installation work, a calculation of the thermal characteristics of the building is carried out, thanks to which it is possible to correctly select the thickness and characteristics of the insulation. Even when individual sections of the walls freeze, they provide thermal insulation around the perimeter of the entire room. If the building has high humidity, then foil insulation is used.
When doing all the work with your own hands in a brick or wooden building, it is important to ensure that the markings are applied correctly. The rolled insulation must be opened in advance so that the mineral wool takes on its original dimensions.
If glass wool is used as insulation, then all work on its installation is carried out only with the use of protective equipment. You cannot proceed to the main work until the fungus and mold, as well as other damage to the walls, have been eliminated in the room.
Many experts also recommend laying insulation under the metal profile or using polyurethane foam. Mineral wool must be properly leveled so that it acquires its natural position without dents, deflections or waves. In the case of multi-layer laying of thermal insulation, the seams should not be allowed to coincide.
Features of calculating the dew point in the house
To further secure the thermal insulation design and be completely sure that it will last as long as possible, you need to correctly calculate the dew point in the room. In most cases, humidity levels inside the room are an order of magnitude higher than outside, so streams of steam tend to escape outside. As steam travels this path, it passes the dew point, that is, the temperature zone at which condensation forms. If the dew point is as close as possible to the inner wall surface, then this does not threaten the mineral wool. If the point of condensation formation shifts inside the walls, then they freeze and humidity rushes into the room, damaging the thermal insulation material along the way. In such a situation, high-quality vapor barrier is vital.
Wall thermal insulation technology
Insulating walls with plasterboard is very widespread, so the technology is well established. Carrying out work with drywall on your own is quite problematic; you will need a second person, as well as certain skills and, of course, special tools. But if you wish, if you prepare everything correctly and call an assistant, you can do the work yourself.
1. Procurement of tools and materials
Need to purchase:
- the drywall itself;
- materials for the frame (metal or wooden slats);
- insulation;
- self-adhesive tape;
- fasteners (screws and dowels);
- vapor barrier film;
- putty;
- antifungal liquid
2. Preparing the walls
The process includes:
- surface cleaning;
- putty of cracks;
- drying with a hair dryer or heater;
- removing traces of mold and mildew;
- It may be necessary to treat the walls with a special waterproofing putty to prevent possible dampness. In this case, the first layer is applied vertically, the second horizontally.
3. Marking walls for frame assembly
This is done using a level and plumb line.
4. Frame installation
Still, a metal frame is more technologically advanced than a wooden one. Self-adhesive tape is glued to the profile attached to the floor, which improves sound insulation.
5. Fastening the insulation
The thermal insulation layer is attached tightly, without gaps. You can glue it to the wall with special glue or use the “umbrellas” used to attach foam plastic.
6. Vapor barrier device
If penofol is used, you need to make sure that the foil side of the material is facing inside the room.
If the insulation of walls under plasterboard is provided with a vapor barrier material with a rough surface, then the uneven side should face inward. It serves to trap moisture with its further retention on the fleecy surface. By ventilating the structure, excess liquid is removed.
7. Installing drywall
8. Processing of joints
Putty is applied to the joints of plasterboard sheets, reinforced with a special plaster mesh - “serpyanka”. If several layers are applied, you need to wait until the previous layer dries.
9. Decorative finishing. Painting or wallpapering
Vapor barrier in different rooms
There are different levels of moisture evaporation in the bathroom, bedroom or kitchen. Therefore, you should consider how to install the vapor barrier material on the frame.
Step-by-step process of waterproofing a bathroom
In the bathroom
Watch the video: waterproofing in the bathroom.
When working in the bathroom, the sequence of actions is as follows:
- First, the frame of the selected type is installed.
- Then a heat-insulating layer of material is mounted into the frame (if provided).
- After this comes the moment of fixing the vapor barrier layer into the frame structure.
- Depending on the selected material (vapor barrier film or membrane film), the sheets are secured either with a profile or immediately fixed with a sheet of plasterboard. When installing vapor barrier material on the surface, you should be extremely careful. It is necessary to check that there are no cracks or gaps between the sheets.
The installation of vapor barrier material in other rooms is carried out in the same way.
It is preferable to opt for waterproofing the bathroom using mastic.
Necessary places for waterproofing in the bathroom
In wooden houses
There are some differences in the process when installing a vapor barrier layer in a wooden house. Plasterboard coverings are popular in wooden houses. The main thing is to adhere to the process technology in order to do everything correctly.
Vapor barrier in a wooden house under a wooden frame
The wooden facade of the house is prone to corrosion and fungi. Therefore, it is best to install a vapor barrier coating on both sides of the insulation so that moisture and dampness coming from the wood do not reach the surface of the plasterboard sheets. To do this, you can first fix the vapor barrier sheets on both sides before installing the insulation into the frame. This will remove excess moisture from the surface of the drywall and wood.
Vapor barrier in a wooden house under a metal frame
It is not difficult to install vapor barrier material under plasterboard floors. The main thing is to weigh the important nuances and decide what materials you need to buy and which installation option is most relevant.
The main thing is to decide what goals are set, and you also need to pay attention to the cost of the material. A narrow selection of vapor barrier materials prevents you from getting lost in a multitude of ideas
Watch the video: attaching a vapor barrier in the attic under a metal profile and to aerated concrete walls.
Varieties of mineral wool
Mineral wool is the general name for a thermal insulator, indicating its origin. But, there are several types of products that differ from each other. They are:
Glass wool. It has been used for a long time, but with the advent of new analogues, it is losing relevance
When working, it is important to protect the respiratory tract, mucous membranes and skin, since the insulation releases small particles of glass. Slag
Made from blast furnace slag. Rarely used in private housing construction. Suitable for non-residential premises, warehouses or temporary structures. Capable of oxidizing metal and strongly absorbing moisture. Stone wool. It is made by melting rocks (gabbro-basalt). Suitable for both insulation of facades and thermal insulation inside. Basalt wool. They prefer to insulate a house with mineral wool using this particular heat insulator. In all respects, basalt materials are better and of higher quality, they have a longer service life, and are easy to work with.
If you need to insulate a frame house using mineral wool, then the scheme involves the use of basalt wool
It is dense, does not shrink and does not burn, which is important for safety reasons.
Required materials and tools
To insulate walls, you need to purchase basic and auxiliary (consumable) materials, collect (borrow from friends and acquaintances or rent from specialized companies) a set of tools and devices.
Materials you need to buy:
- basalt wool - must be purchased with a margin of 10-15%;
- vapor barrier film (type B or C);
- windproof membrane (type A or AM);
- wooden beam 50x50 mm or 50x100 mm - the width depends on the thickness of the mat;
- rail (distance strip) 20 x 50 mm for installing a counter-lattice for exterior finishing (siding, block house, imitation timber, etc.);
- metal cornices for slabs;
- primer;
- special fasteners for cotton wool (dowels with a large plastic roundel washer);
- glue “CERESIT CT190” or plaster-adhesive mixture “EK THERMEX - EK Chemical” for attaching mats to the wall and gluing reinforcing mesh;
Attention: “CERESIT CT180” is not intended for basalt wool. You can glue basalt insulation with it only at your own peril and risk.
- reinforcing fiberglass mesh;
- wood screws for mounting the counter-lattice.
In the process of work, you cannot do without the following devices and tools:
- scaffolding (rent required) or construction trestles (made independently from scrap materials). Working on stepladders or ladders is prohibited for safety reasons and is inconvenient;
- hammer drill or electric drill;
- screwdriver;
- mixer attachments for stirring glue;
- hacksaws for wood;
- hacksaws for metal or metal scissors (perfectly replaces the “grinder”);
- knife with removable blades;
- containers for preparing glue;
- notched trowel;
- hydraulic level or laser level;
- level;
- plumb line;
- beating cord;
- construction square;
- roulette;
- hammer.
Step-by-step work on insulating walls with mineral wool from the inside
Let's say the owner of the house decided to install mineral wool thermal insulation inside the rooms and cover this structure with plasterboard. Then he should not violate the technology, but perform the work in the order indicated below.
Stage one. All previous decorative coverings are removed from the wall. It can be:
- wallpaper;
- dye;
- decorative plaster.
You will need to get either to a reliable plaster coating or to the wall base. You can clean the wall in different ways. It is best to soak decorative plaster and wallpaper at first, so that these coatings can then be removed without difficulty. But you will have to tinker with the paint. First, it is heated with a hair dryer, after which it is removed with a spatula. You can wash off the dye using a solvent. Sometimes it is advisable to do mechanical cleaning if you have an electric hand-held machine.
Stage two. When the wall is cleaned, and dust and all kinds of small particles of construction debris are removed, all surface flaws will be revealed. It will be necessary to “treat” her. You may find:
- mold colonies;
- cracks;
- deep recesses.
To treat such a surface, deep penetration soil with antiseptic additives is used.
Stage three. Need to do some marking. Vertical lines are marked on the insulated wall. Guides are installed along them to further mount the frame for drywall. Between these lines there should be a distance of 40 cm or 60 cm, because it will be easier to attach gypsum board sheets, the width of which is 120 cm. The lines are planned to be positioned in such a way that adjacent sheets of drywall are joined along them.
Stage four. Lines are broken:
- on the ceiling;
- on the floor;
- on adjacent walls.
Marking the ceiling for the starting profile
Along these lines, the frame under the drywall will subsequently be installed. How accurately the lines on the floor and ceiling are drawn will need to be checked using a plumb line. On the side walls, vertical lines should connect them.
Along these lines, guide profiles (PN 28/27) can be mounted at the same time. Next, you will need to install vertical racks in it.
Fastening the guide profile
Stage five. You need to attach straight hangers to the wall. Their location should correspond to the axis of the broken vertical lines. These hangers are installed at a distance of 40-50 cm from each other. And the perforated side strips will need to be bent perpendicular to the wall.
Profile hangers for plasterboard
Stage six. Basalt mineral wool slabs are laid. It is best, as already mentioned, to attach the slabs with special glue. The adhesive mass is diluted with water and brought to the desired consistency, as indicated in the instructions.
Stage seven. It is necessary to first try on each slab to the place where it will be installed. Where necessary, you will have to make cuts so that perpendicularly bent perforated strips of direct hangers can then pass along them.
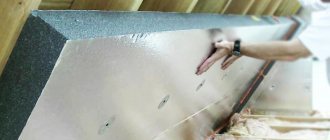
Stage eight. Glue is applied around the perimeter of each slab, and in the center you can apply it in slides. However, if the wall is pre-leveled very well, then it is easier to apply the glue with a notched trowel. Ridges 1 cm high spread out, evenly covering the entire area of the slab.
Applying an adhesive composition to a mineral wool slab
Stage nine. The adhesive composition has been applied. Now you can “prick” the slab onto the hangers, passing it through the cut slots. Next, you will need to press it tightly against the wall, with its entire surface. And those excess glue that protrudes on the sides are immediately removed.
The slabs should be laid without gaps, that is, they should fit one another quite tightly.
Stage ten. The frame is mounted. Vertical posts are cut to the required sizes. Their ends are placed in control profiles. After this, using fasteners (preferably self-tapping screws), they are attached to the profiles and to the perforated strips of direct hangers that protrude through the mineral wool. When the racks are fixed, the planks will need to be bent to the sides and pressed into the mineral wool.
The wall is covered with insulation
Stage eleven. A vapor barrier is formed. The membrane is attached to the frame controls. It is enough to use double-sided tape. If the frame is wooden, fastening is done with staplers.
The final stage. After installing the vapor barrier layer, you can begin installing drywall. Next comes decorative finishing.
Prices for mineral wool
Video: How to properly insulate walls with mineral wool and plasterboard:
Instructions for installing sheathing
The lathing technology for all types of walls is standard and consists of the following operations:
- the passage of vertical and horizontal slats is marked. The dimensions of the cells in height and width should be 2-5 cm smaller so that the mats stand upright and stay inside the structure only due to the elasticity of the insulation;
- a vertical frame is attached to the wall. A beam measuring 50x100 mm must be equal to the height of the room;
- horizontal strapping slats are installed. The size of the block is 50x50 mm, the length is equal to the distance between the vertical strapping slats. Attached to a vertical stand using a metal angle. Can be attached directly to the wall;
- Vertical internal racks are installed. The pitch is equal to the width of the insulation minus 2-5 cm. The fastening is carried out either with corners to the horizontal trim, which is easier, or to the wall;
- Horizontal bars are attached between the posts. Do not forget that the distance between them should be slightly less than the size of the insulation boards.
Attention: under decorative plaster, as well as in lathing with a step between vertical posts of 40-50 cm, the internal horizontal slats are not stuffed.
A schematic diagram of the sheathing device is shown below.
Sheathing diagram.
- 1 - sheathing strapping bars;
- 2 - vertical bars;
- 3 - horizontal bars;
- 4 - metal corners on screws or nails;
- 5 - fasteners fixing the harness to the wall.
The process of installing the sheathing is completed by tying the windows and doors.
Preparing the walls from the inside in the apartment
The use of basalt wool for wall insulation minimizes the amount of preparatory work, since there is no need to install lathing for decorative plaster, painting and wallpapering. It is enough to attach a fiberglass reinforcing mesh to the surface of the insulation, and then apply a layer of putty over the dried glue, with the help of which a flat surface will be obtained.
Lathing is only needed for ceramic tiles and PVC panels. You can see how to arrange it correctly using the example of wooden walls. We should not forget that the walls themselves still need to be prepared. In this case, technological operations are performed in the following sequence:
- switches, sockets, lamps, various fasteners, etc. are removed from the walls;
- the old finish is removed, and, if necessary (it’s leaking in many places), the plaster is removed;
- the wall is cleaned of dust and dirt, including smoked areas and oil stains;
- small and large cracks are sealed.
There is no need to carefully level the surface - the cotton wool will hide everything.
Facade preparation
Insulating the outside of a house with basalt wool begins with preparing the facade for thermal insulation work. They are performed according to the following scheme:
- Rainwater drainage systems, doorway and window frames, lanterns, etc. are removed from the walls. As a result, the wall should be completely bare;
- the surface of the walls is cleaned of dirt and dust, deposits of masonry mortar;
- The verticality of the wall is checked. If the slope is more than 1.5 cm for every 3 m, work is carried out to level it (a layer of leveling plaster is applied);
- existing gaps, cracks and holes are sealed with repair mortar. How to properly repair cracks formed due to shrinkage of the building can be found in the work “How to prepare walls for wallpapering”;
- wooden walls are impregnated with fire retardants and antiseptics;
- facade made of brick, concrete, aerated concrete, foam blocks, etc. treated with deep penetration primer in 2 layers;
- Under the sheathing, a vapor barrier membrane (type A) is attached to the walls with the smooth side facing the insulation. For fixation, you can use the staples of a construction stapler. In order for the vapor barrier to be of high quality, the membranes must overlap each other by 15-20 cm (overlapping), the seams are taped with regular tape. Many specialists ignore this operation. But this is the case when “you can’t spoil the porridge with butter”;
Attention: vapor barrier is not carried out when gluing mats to the wall.
- at the level of the joint between the wall and the foundation, a special cornice made of galvanized metal (professionals say “profile”) is installed to support the mats (they will not slide). Fastening is done with dowel screws. The joints at the outer corners are cut at an angle of 45o, after which they are fastened together with metal plates.
Cornice under basalt wool.
Cornice connection at outer corner.
With a wide foundation, you can do without a cornice. Basalt mats are installed directly on the foundation base, previously covered with roofing felt, to prevent moisture from entering the insulation from below.
The sheathing is placed on the fixed membrane.
Mineral wool, what is it?
Mineral wool is a fibrous or layered material based on mineral raw materials. Hence the name. There are three types in this category:
- glass wool;
- slag;
- stone wool.
Glass wool
It is based on the raw materials that are used to make glass; even cullet and glass production waste are used. Dimensions of insulation fibers: length – 14-50 mm, thickness – 4-15 microns. Thermal conductivity – 0.028-0.052 W/m K. Operating temperature from -60 °C to +500 °C.
Slag
The raw material is blast furnace slag. Fiber sizes: length – 15-16 mm, thickness – 4-13 microns. Thermal conductivity – 0.45-0.48 W/m K. Maximum heating temperature up to +300 °C. This species is very hygroscopic.
Experts warn that slag wool should not be used on metal surfaces. The thing is that residual acidity is always present in slags. When interacting with moisture, the acid begins to corrode the metal.
Stone wool
This is the most common type in this category. And when it comes to mineral wool, it means stone wool. Therefore, in what follows we will not distinguish between these two concepts.
So, let's start with the fact that mineral wool is made from different types of stone. Therefore, it has different characteristics in terms of density and thermal conductivity. If the insulation is made of limestone, dolomite, and so on, that is, non-solid rocks, then the thermal conductivity can vary from 0.077 to 0.12 W/m K. If the insulation is made of basalt (diabase or gabbro), then the thermal conductivity of such a material is 0.03 -0.05 W/m K.
At the same time, soft rocks contain many impurities in their structure, which means that the fibers are weakly connected to each other. Therefore, more formaldehyde is added to them during the production process. Such materials can withstand temperatures up to +600 °C. Basalt mineral wool up to +1000 °C. Stone wool today is sold in mats (blocks), in rolls and in loose form.
Calculate the insulation of your home
The required amount of mineral wool is not selected at random, but taking into account the weather conditions of a particular region.
In the Moscow and Leningrad regions, for example, the climate is temperate and continental. Here it is recommended to insulate the house with mineral wool slabs with a thickness of 8 to 10 cm. The further north you are from these places, the greater this figure will be. In the Murmansk region, the optimal thickness of wool for wall insulation will be about 15 cm.
A material whose density is less than 40 kg/cubic meter is used exclusively on horizontal surfaces that are not subject to load (this is the kind of mineral wool that is usually produced in the form of rolls).
For insulation of external walls, the density is in the range of 50–75, and for creating a ventilated facade - all 110, and even more if the surface is still covered with plaster.
Costs of raw materials and services
Material costs are determined by the insulation area and depend on the size and cost of the slabs. With a total insulation area of 109.9 m2, a thickness of the slab layer of 0.1 m, the volume of the heat insulator will be 11 m3.
Since most insulation is sold in m3, knowing its cost, you can determine the total cost of purchasing slabs:
- Basalt wool, 1500 rub/m3, total 16500 rub.
- Mineral wool, 1070 rubles/m3, total 11770 rubles.
- TechnoNIKOL basalt wool, 2270 rub./m3, total 24970 rub.
- Glass wool Isover Warm House, 1250 RUR/m3, total 13740 RUR.
- Stone wool Mat Teploroll, 1280 RUR/m3, total 14080 RUR.
- Slag wool, 860 rub./m3, total 9640 rub.
- Ursa GEO Facade, 975 rub./m3, total 10,725 rub.
Average prices by region of Russia for thermal insulation of brick walls:
- thermal insulation with mineral wool on glue, 360 RUR/m2;
- fiberglass reinforcement and glue treatment, 410 RUR/m2;
- primer work, 60 rub./m2;
- performing decorative plaster, 380 RUR/m2;
- thermal insulation with mineral wool on a wooden frame, 870 rub./m2.
If you are interested in how and with what you can insulate brick walls from the inside and outside, take a look at this section.
The need for floor insulation
Mineral wool will effectively insulate floors.
A little heat leaves the room through the floors, compared to windows and entrance doors. However, if heat loss occurs through the floor in a living space, then it is impossible to call such a home comfortable.
Cold floors bring much more discomfort than cold walls or ceilings. The fact is that a significant part of the time that a person spends in a room, he is in direct contact with the floors, so the cold coming from the floors is felt much stronger than the cold coming from other structural elements of the room.
This is especially true for rooms located above unheated rooms - basements, cold basement floors, etc.
Insulation of attic floors is necessary for the same reason: the thermal insulation layer in this case does not allow heat to escape through the ceiling of the room below.
Possible difficulties and errors during the installation process
In fact, modern thermal insulation boards are produced in such a way that even novice craftsmen can install them on their own .
The problem arises in obtaining a real result in conserving thermal energy in the house during the winter period and ensuring normal thermal conditions during the hot period. To do this, you need to choose the right thermal protection system.
Since it is an expensive undertaking, it is better to invite specialists before installation, who, using instruments, will be able to establish the real heat loss in the cottage, and select a protection system: the type of slabs and its thickness, installation and finishing technology.
If this is not done, then installing thermal protection may not bring the desired result, and sometimes even cause harm if the dew point is shifted and moisture begins to destroy the structure of the walls and foundation of the house.
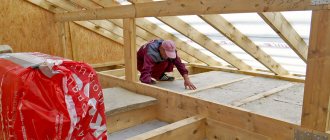
Thermal insulation of the ceiling of frame houses
One of the key aspects of residential thermal insulation is ceiling insulation. As a rule, this stage is carried out while the roof is not yet assembled, since nothing should interfere with laying mineral wool on top of the ceiling.
The vapor barrier film is attached to the ceiling beams. Then a board, plywood or OSB board, the thickness of which is 2.5 cm, is nailed onto the film. The insulation is fastened to the plywood, according to the same principle as when insulating other structures. Mineral wool must be laid across the entire width of the ceiling, taking into account the overlap of the width of the walls.
If the attic is not used for living, there is no need to install membrane film. For cladding, you can use plywood or a regular board. If it is not possible to insulate the ceiling from above, then internal insulation should be performed by tying insulation boards to the ceiling. Then the ceiling is covered with vapor barrier film and plywood sheets.
Pie wall of brick house
The standard scheme for installing a wall pie looks like this:
- lime mortar or plaster;
- main wall masonry;
- one type of insulation;
- facing materials, which can be made of plaster, special facade panels or bricks;
- a special galvanized mesh designed to hold all layers of the cake.
This is just one version of the pie, but the composition of the fillings can be changed taking into account natural conditions and the individual wishes of the owner.
wall pie
The wall is responsible not only for the strength of the structure, but also for the level of comfortable living in the house.
Only the correct calculation of the cake can provide the future structure with a sufficient level of thermal insulation, the ability to transmit steam and the degree of protection against fire.
When choosing the composition of a pie for a brick wall, the owner of the house must make a decision together with a specialist who will give advice and suggest the right material for the work.
Insulation of wooden floors along logs
This is the most common method of insulating a wooden floor. It is simple and yet quite effective, eliminating significant heat loss. This method is especially relevant for floors that are located close to the ground (first floors, plinths).
The technology of floor insulation using joists is implemented in this way. The first step is to install wooden logs with a T-shaped cut into the log house or onto the foundation in increments of 0.6-1 m. After this, boards or panels are fixed on which the insulation will be laid. Shields (boards) must be hemmed from below or secured to special cranial bars. Next, insulation is placed on the flooring.
The next stage is the installation of a vapor and waterproofing layer. This layer is only needed when a certain type of insulation is used. For example, protection from moisture and vapor is required when using ecowool or mineral wool. Vapor barrier sheets must be overlapped by 100-150 mm, and its edges in height must be bent up to 100 mm. As a vapor barrier, ordinary polyethylene film and other special materials are used.
The final stage is installing the floorboards on the floor and finishing the floor covering.
Thermal insulation of the floor on the first floors can also be carried out using joists installed on brick columns. That is, the logs are mounted on a brick column on a wooden spacer. Insulation boards (foam plastic, fiberglass, mineral wool, etc.) are installed between them, which are protected by a layer of vapor barrier.
The main advantage of thermal insulation of a wooden floor along joists is the ease of work, which any home craftsman can handle. And at the same time, the effectiveness of this method is quite high. In addition, this method assumes that there is no mechanical load on the insulation, so any heat-insulating material can be used.
The construction of a wooden floor on joists can be viewed in the video below.
https://youtube.com/watch?v=pvlhnnChkUg