Lining is a type of lumber that is similar to edged wood. The only difference is the presence of longitudinal grooves, which ensure adhesion of the elements without the formation of gaps. Finishing from lining creates a microclimate in the room suitable for relaxation, while its arrangement does not require experience in finishing, as when working with wood. To obtain the expected result, it is enough to follow the step-by-step instructions and select materials in accordance with accepted rules.
Subtleties of finishing inside the bath
- Do not mount the lining horizontally in the washing room and steam room. Splashes of water will enter the lock, and the lining will quickly darken. But if the design requires horizontal fastening, then the tenon should point upward.
- All fasteners must be taken with a zinc coating, since iron will quickly rust if exposed to moisture.
- All fastening corners and strips at the top need to be slightly sharpened at the bottom, so the water droplets will go down faster.
- The planks are attached 4-5 cm from the base, so as not to block the ventilated gap.
- Consider a ventilation system in the bathhouse, so the moisture will evaporate faster and the lining will last longer.
- If the lining turns black, it must be immediately treated with bleaching compounds, for example, Senezh Sauna
We looked at how to do the interior decoration of a bathhouse with clapboards with your own hands. By following all the techniques and watching the thematic video in this article, even a beginner will be able to do the job with his own hands.
Tile installation technology
If we are talking about laying tiles on the floor, then the floor area is first filled with cement mortar at a slight slope towards the drainage system. The perimeter of the sauna is framed with construction twine. The tilting technology depends on the first tile from which the further floor angle is measured.
When laying, you can use a special tile adhesive, but a prerequisite for ensuring no subsidence is the addition of sand granules
If the tile is laid on a cement-sand mortar, then before laying it is immersed in water for 10 hours.
When installing ceramics on the screen around the furnace, heat-resistant thick glue is used. If the mastic is runny, it is better to make it thicker by adding sand. Wall tiles are laid in rows from bottom to top level.
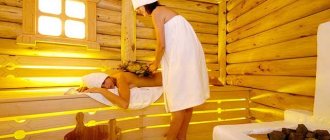
Regardless of the purpose for which the bathhouse is being built - personal use or business, the task of properly equipping the steam room is considered the main one on the to-do list. Compliance with the necessary standards will guarantee a long, safe, pleasant use of the Russian bath.
How to sheathe the ceiling correctly?
You need to start finishing the steam room from the ceiling. It is in this part that there is the greatest likelihood of the formation of thermal gaps that exceed the norm, which is unacceptable when constructing steam rooms. The wall panels must be in close contact with the ceiling.
Attaching a wooden board to the ceiling should begin from the entrance side. For installation, nails or a clamp are used. The finishing fastener must support the total weight of the ceiling.
It is quite difficult to secure boards with a metal clamp or an ordinary nail. For this, a special hidden fastening element is used. The head of the nail is cut off and the end board is attached to it.
To protect the front surface of the lining, the nail should be finished off using a hammer. Clean the location of the fastener with sandpaper to prevent the formation of roughness.
The boards must be laid in strict sequence. The distance between the wall of the bathhouse and the ends of the lining should be no more than 40–50 mm. A gap is left to ensure air circulation.
Rules for visual inspection of boards and assessment of their condition
The following must be taken into account:
Pay attention to the quality of the chips. The boards must have a flat and smooth surface. This directly affects the economic benefits of finishing work. If the front side of the lining is rough, finishing will be complicated by the increased consumption of antiseptic and paint materials. The moisture content of the boards should not exceed 12-16% (GOST requirement). It is visually impossible to determine whether the material offered by the manufacturer meets this criterion. Therefore, it is necessary to request documents confirming compliance with GOST. If the wood is not dry enough, there is a high risk that it will suffer during the first years of operation of the finished premises. Pay attention to the depth and evenness of the groove. These indicators determine the quality of installation
And it doesn’t matter how it will be done: using clamps, nails or staples. If the groove is shallow, there will be nothing for the fasteners to grab onto.
An important characteristic of boards is width. Often there are lamellas on sale that are wider than standard ones (more than 88 mm) and managers assure that it is more profitable to buy such lining. This is not true, since such a finish will be less durable and there is a high risk of wide boards bending when exposed to moisture.
Types of lining and classification
Wood paneling
coniferous species
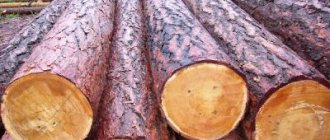
- Pine. The most common wood for lining. It has a beautiful appearance and low cost. Over time, a pine product begins to darken.
- Spruce. Northern spruce is used to make the lining. It is more durable and has a beautiful appearance. Just like pine darkens over time.
- Canadian cedar is used to finish the bathhouse. It is not cheap, but has excellent technical characteristics and a beautiful appearance.
Wood paneling
hardwood
- Oak. Beautiful and durable material, easy to process, expensive.
- Aspen. Beautiful light color. Has thermal insulation properties. Well suited for a bath.
- Linden. It is very suitable for finishing a bath, because the material does not heat up much and emits a pleasant aroma.
- Alder. In a room with high temperatures, the material does not heat up. It also hardly dries out or warps.
- Abash. African oak has high strength and softness. Such wood does not shrink, warp or heat up. Has a beautiful appearance. The cost of abasha is quite high.
Most often, the interior lining of a bathhouse with clapboard is made of hardwood. The temperature in the bathhouse is high and under its influence, coniferous wood releases resins. Hardwoods have virtually no resin compounds, so no resin is released.
The type of wood from which the lining is made is also of great importance. There are 4 main varieties:
- “Extra” is a product made from the highest grade wood without a core or flaw.
- “A” - one live knot, two resin pockets and two blind cracks are allowed per one and a half meters of the length of the product.
- “B” - the presence of four knots (up to 2 cm) is not prohibited, two of which must be captive. Two resin pockets are also possible, one and a half meters long for the product.
- “C” - lining classified in this class allows two captive knots with a diameter of 2.5 cm, non-through cracks of no more than 5% of the length, two resin pockets up to 5 cm long and up to 5 mm wide, mechanical damage up to 6% in diameter, a contrasting spot with a diameter up to 15 cm, as well as other spots and stripes totaling up to 5% of the entire surface of the product.
Also, the lining is divided by type of profile:
- Eurolining.
- Soft-line.
- Calm.
- Imitation of timber.
- Block house (imitation logs).
- Landhaus.
- American.
What kind of foil is there?
If you decide to cover your steam room with foil, you need to learn about the types of foil and the features of such a coating.
Most often, log baths are sheathed with aluminum foil.
Its type is determined by the presence of additives.
Foil can be simple, fabric or foil paper. The best foil for a steam room is simple, which can withstand very high temperatures. A sheet of such foil has a thickness of 0.03 to 0.3 mm. This is quite enough for such cladding to bear all the necessary loads. Of course, it is better to purchase thicker foil. The foil must contain at least 99 and a half percent aluminum. Ten square meters of such material cost less than 500 rubles, which is very profitable. Each roll of foil is marked "T" or "M". The letter "T" means "hard" and the letter "M" means "soft."
Fabric foil is slightly more expensive. This form of foil has several varieties - based on fiberglass or foil insulation. The densest type of fabric foil is called canvas foil. For steam rooms, it is not used as often as simple foil, because it allows steam to pass through, although it retains heat very well.
Foil paper is made from cellulose, which is coated with a thin layer of aluminum. This material cannot withstand temperatures above +120 degrees Celsius, so it is better not to use it for a steam room. But this foil can be used to cover the dressing room and other adjacent rooms. This foil is perfect for nooks and crannies between pipes, as it is very flexible. This material is very cheap - 10 meters can be purchased for less than 300 rubles.
Covering the baths with clapboard
Covering a sauna with clapboard is not something long and requires a lot of experience.
It is recommended to break down all work into stages, which allows you to distribute working time as efficiently as possible and control the timely completion of all previously assigned tasks.
- The first stage, of course, will be preparatory work;
- The second is the creation of a wooden frame for subsequent fastening of the lining strips;
- The third stage is the installation of insulating materials and the installation of the lining itself.
- The fourth and final step can be considered finishing the lining itself, applying a protective layer.
Antiseptic coating for wood - a real opportunity to extend the life of wood finishes
Preparatory work
Before immediately starting work on decorating the walls of the bathhouse with your own hands, it is recommended to carry out preparatory work, which most often includes preparing the walls and ceiling of the bathhouse for further work.
If there are sufficiently deep differences on the walls, at the rate of no more than 2 mm per 1 meter, then work should be done to level the surface. In this case, you can use plaster or putty - the most optimal and inexpensive option.
To increase the level of resistance and durability of the building, as well as to eliminate the possibility of fungus and mold appearing on the walls, most experts recommend applying special protective agents to the walls.
Afterwards, work begins on installing communications, which can include:
- Electricity supply;
- Water supply;
- Everything that can be easily and quickly hidden using wooden panels.
As the last work at this stage, we can note the purchase of direct lining strips and other fastening materials, in particular we are talking about wooden blocks, hangers, and various heat-insulating materials.
The photo shows high-quality installed wiring in the bathhouse
Installation of sheathing
The instructions below will help you understand how to choose the right lathing and how to subsequently lay thermal insulation material between the beams.
To create a frame for the subsequent installation of the lining, you should use only a wooden block, the optimal size is 20x50 mm. When cutting, you can use sizes of 1000 mm in length and 500 mm; also, at your discretion, depending on the type of bath structure itself, you can choose a different ratio of sizes.
Installation of metal hangers on the wall
Afterwards, we install metal hangers; they should be placed at a distance of 30-40 centimeters, while the distance between the rows with beams will be about 40-50 centimeters. We attach the hangers to the wall using dowels. We attach bars for the frame to the pendants.
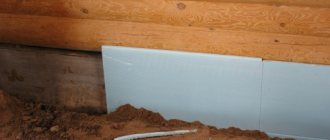
Laying insulation
Before installing the lining strips on the wall, work is carried out to insulate the bathhouse. Most often, in the process of performing these works, mineral wool is used - as an inexpensive material, but at the same time high-quality and effective, fully meeting modern requirements for creating bath complexes and saunas.
Installation of mineral wool, on top of it a vapor barrier film
On top of mineral wool, it is recommended to install a vapor barrier layer in the form of a vapor barrier film; a wide selection on the market is presented by the ISOSPAN company; these materials help to achieve a comprehensive solution to issues related to the implementation of high-quality heat and vapor barrier of a single room or bathhouse as a whole.
Installation of lining
The process of installing and covering the walls of a bathhouse with clapboard inside can be divided into several main components.
In particular, we are talking about:
- Fastening the lining with galvanized tenon screws. It is recommended to drill holes for self-tapping screws to prevent chipping.
- Start the sheathing process from the most inaccessible place, but remember that the very last board will have to be adjusted both in length and width.
Cladding with clapboard should start from the most inaccessible places
The corners of the rooms are finished with a special wooden plinth, which is secured with stainless nails. Some experts recommend the use of glue when attaching such elements, which is considered by most to be a waste of material and money, since glue is simply ineffective in rooms with high temperatures and constant fluctuations.
How to properly line a bathhouse with clapboard using nails as fastening material
Step by step guide
To do the work correctly, it is important to observe some nuances. Before proceeding directly to the sheathing, wooden planks are fixed along the vertical surface
Subsequently, they will play the role of a frame for attaching the material. A layer of insulation is placed between them. Thermal insulation is laid, aluminum tape must be glued at the joints
Before proceeding directly to the sheathing, wooden planks are fixed along the vertical surface. Subsequently, they will play the role of a frame for attaching the material. A layer of insulation is placed between them. Thermal insulation is laid; aluminum tape must be placed at the joints.
You can attach the lining to the foil with a fifteen-centimeter air gap. This step is necessary for efficient heat transfer.
Thanks to the air gap, the thermal conductivity of aluminum decreases; infrared rays hitting the foil sheet will reflect heat into the steam room.
You can also consider more detailed instructions for covering.
Log steam room
If the walls are built from logs, covering with foil is pointless. In this case, the quality of caulking is much more important. The thermal insulation layer on the log house will not play a role. In a log steam room, foil may only be used to cover the ceiling surface. In addition, aluminum foil is used to decorate the walls around the heating device. This way the heat will be reflected into the room rather than heating up the back wall.
When working with the ceiling, the foil is attached with the reflective layer down, overlapping, extending up to 5 centimeters onto the walls
It is important to seal the joints with special tape. The work should be done efficiently, without creating loopholes for steam
If desired, cover the top of the foil with clapboard, but you can leave it like that.
Brick steam room
When using frame technology or brick, it is important to follow a step-by-step guide, which includes covering the entire area of the ceiling and walls with material. Creates a thermos effect
- The master marks the wall onto which the sheathing bars are attached, the thickness of which must correspond to the thickness of the insulating layer, since it will be laid between the beams. If the lining is subsequently attached in a vertical position, the planks are secured in the same way.
- The width between the beams should be equal to the width of the insulation product. If there is ventilation or windows on the surface, bars are attached around them, onto which the foil will subsequently be attached.
- The insulation material is placed.
- It is covered with foil and secured to the sheathing with a construction stapler. Material with a small thickness should be laid with an overlap, but if it is thick, the material is attached end-to-end. Around windows and ventilation, the work is done more carefully.
- The joints are covered with metallized tape. They must be hermetically sealed.
- Slats with a thickness of about 25 mm and a width of 4 cm are attached to the sheathing. They will act as a retainer for the foil with insulation, create a gap and become a support for further installation of the lining.
- At the final stage, the lining is attached to the sheathing. When attaching the planks horizontally, you need to start from the bottom; they are placed with the grooves down. For vertical fastening, installation is performed from the corner, leveling the first element.
Work with the ceiling is done in the same way. You need to fill the baseboard around the perimeter.
Covering saunas and baths: what's the difference?
Bathhouses and saunas differ in humidity and temperature.
In the sauna, the air is dry with humidity up to 8% with a permissible temperature range of 80–140 degrees.
In the Russian steam room, high humidity is always maintained with an indicator of up to 70%. In this case, the maximum permissible temperature is up to 100 degrees.
There are no restrictions on the choice of tree species for sauna cladding, with the exception of pine. Raw materials are less susceptible to moisture and therefore last longer. Installation method: vertical, horizontal.
For lining a Russian bathhouse, it is better to take lining made of alder, linden, abasha, and larch. The combination of several breeds at the same time looks beautiful. The installation method is predominantly horizontal.
What materials to choose for insulating the walls of a bathhouse from the inside?
Bath insulation on walls with foil
Well suited for baths, because... performs several functions at once (hydro- and vapor protection, heat-insulating properties). There are several types depending on the foil material:
- with a layer of foil;
- with aluminum coating;
- with a layer of aluminum foil.
Regular foil can be subject to corrosion, and aluminum must be protected from excessive overheating, otherwise it can damage the finishing materials.
Classic mineral wool
We recommend not using this type of insulation, or limiting the scope of application by excluding the steam room.
When heated (and this process is always typical for a bath), this material begins to release phenol-formaldehyde resins, which act as a binder in mineral wool. The negative impact of these resins on human health has been proven.
Basalt wool
It is low cost, fireproof, and easy to install. It can be classified as an environmentally friendly material; in addition, basalt wool has good sound insulation. The disadvantages include the tendency to shrink (over time the layer will become thinner) and the fact that it becomes dusty during installation.
Foam glass
Foam glass would be an ideal option, if not for its high cost and heavy weight. It is absolutely harmless and safe, not susceptible to shrinkage, insects and rodents. It is a fireproof material. It must be installed together with a vapor barrier, otherwise the walls will be damaged by fungus, mold, etc. The difficulty of installation lies in the fact that if the installation technology is violated, there is a high chance of destruction of the material.
Useful video
Watch a video about the advantages of this modern material:
Peat blocks
They are crushed peat, which is formed into blocks of various sizes and shapes. Combines heat and sound insulating properties. It has bacteriological properties and is not subject to burning or rotting. It is considered an environmentally friendly and breathable material.
A small disadvantage is that this option is not very common and at the moment there are quite a few companies producing it.
Ecowool
Thanks to the flame retardants included in the composition, it is classified as a fireproof material. And cellulose gives the right to classify it as an environmentally friendly material. The difficulty is that the most effective method of application is “wet”, and it requires certain skills and specialized equipment. In addition, ecowool is very hygroscopic and is not suitable for use in a bathhouse.
Foil polyurethane foam
Another insulation for a bath on the walls with foil. It is one of the most modern materials, has an aluminum coating on one or both sides, and performs shielding and waterproofing functions.
A slight difficulty seems to be that specialized glue is not always able to hold the sheets on the walls, and breaking through the material is contraindicated. Otherwise, the heat-insulating layer will be destroyed.
CAREFULLY! You may decide not to use it due to doubts about its environmental friendliness and the release of gases when heated. Like the following materials
Polystyrene foam and polystyrene foam
We strongly recommend excluding these materials from the list of suitable insulation materials, because when heated (more than 60 degrees) it begins to release harmful substances. And then the healing procedure takes on the opposite character.
So, we have comprehensively examined the topic of insulation for bathhouses on the walls from the inside. The choice of insulation materials is huge and many of them are suitable for use in bathhouses and steam rooms without danger of harm to human health. In addition to industrially produced materials, do not forget about natural insulation materials, for example, mixtures with clay.
The most important thing is to correctly install all the elements of the “pie”, not forgetting about ventilation gaps and the use of steam and water protection. And it’s worth completing the work on the internal insulation of the bathhouse with finishing materials that can be coated with special compounds or oils to maintain a beautiful appearance. In this case, you will get an excellent bathhouse in which it will always be pleasant to take a steam bath.
In this case, you will get an excellent bathhouse in which it will always be pleasant to steam.
To learn more:
- We do the insulation of a bathhouse from the inside with our own hands: what and how, different bathhouses need to be insulated differently
- How to insulate a bathhouse from the inside if the walls are made of brick, blocks or wood, so as not to freeze in the steam room?
- How to make insulation in a bathhouse with a cold roof or attic? What is the difference?
- In what cases is it necessary to insulate the roof, and when not?
Criterias of choice
When choosing insulation, you need to consider a number of factors:
- To secure it to a wooden frame, it is better to choose foil with a backing. You can make it yourself from mineral wool, foamed polyethylene, or kraft paper.
- The material must withstand heating up to at least 100°C.
- On the packaging you can read what thermal radiation the foil insulation will reflect. The indicator must be at least 95%.
- The material must be durable.
- The foil and substrate should not emit harmful substances when heated strongly.
Advantages and disadvantages
Advantages:
- environmental cleanliness;
- high reflectivity;
- ease of installation;
- resistance to fungi and mold.
The main disadvantage is low mechanical strength. You need to work with it carefully so as not to damage it.
Methods for attaching lining to the wall
Listed below are the 5 main ways to attach lining to a wall.
The simplest and most convenient way that does not require specialization. Installation in progress
using small nails and clamps
. In this way, it is permissible to fasten only light lining, because the grips are not capable of holding a lot of weight.
A clamp is inserted into the lining, which is attached to the guide rail using a nail, screw or self-tapping screw. A rail is inserted into the groove and each subsequent rail is fastened in the same way. They must be fastened tightly enough so that there are no gaps. If the last row of lining does not fit entirely, and a large gap remains, then the top row must be cut to size and secured along the guides.
Using nails
. It may seem that this method is simpler than the previous one, but in practice chips, bruises and other damage to the material often occur. In addition, the process of performing the work is not very convenient and labor-intensive. Nails are driven in every 25 - 30 cm. To install a two-meter long slats, 7 or 8 nails are needed.
First, the panel is marked in the places where the nails will be driven in. Then, at an angle of 45 degrees, the nails are nailed into the edge with the groove. The panel is applied to the wall and then you can drive in nails. After installation, the caps are recessed so that the next panel of the lining easily fits into the groove. After this, the next panel is installed using a similar method.
This installation method cannot be used for thin lining, as it will break off.
This mounting option is used
for old-style lining
. Cladding with eurolining is somewhat different from installing older lining. The design of the product consists of fastening with screws. To avoid splitting the wood, a hole is drilled in the places where the screw is screwed in. The drill should be smaller in diameter than the screw. The hole location is countersunk to recess the screw head. The fasteners are screwed in as far as possible using a screwdriver. The caps will not be visible because they are covered by the next row of panels.
Installation of lining
using a stapler and construction staples
. The bracket is driven into the groove at an angle of 45 degrees. You need to have a stapler that can push the staple tightly in until it stops. In this case, the fasteners will in no way interfere with the installation of the next row of panels.
The fifth method of fastening is most often used
for finishing a sauna or bathhouse
. Screws act as fasteners. A hole is drilled at the installation sites and the fasteners are screwed in using a screwdriver. The screws are tightened to the point where the head is significantly recessed. To hide the heads of the screws, a plug is driven into the hole where it is screwed in.
Over time, under the influence of high temperatures, the wood may dry out a little, and the locations of the plugs will appear. To prevent this problem, special compounds must be applied over the plugs.
Thickness
Aluminum allows the production of any sheets. From a few micrometers to centimeters. In construction, options of 30-300 microns are used. Foil for a bathhouse 100 microns is the most durable, and the cost differs slightly from thinner options. It is easier to work with a durable option, but installation still needs to be carried out very carefully.
The thickness of the foil layer is always indicated in the characteristics of the material. If you have a limited budget, you can choose the minimum thickness. The smaller the thickness, the more careful the installation needs to be. The thickness of the foil does not have a significant effect on the efficiency of heat reflection.
Information. Foil without an insulating layer on mesh or kraft paper is sold in rolls, with a thick layer of insulation - in sheets. In terms of price, it is beneficial to immediately purchase several rolls to insulate the entire bath.
Do not think that thickness is the decisive factor in which foil is best to use for a bath. On the contrary, it only affects strength, and not the thermal insulation characteristics. Despite the inertness of aluminum, it is still oxidized to some extent by water.
For some manufacturers, especially in those materials where thin foil is used, it is protected by a polymer film or spraying.
Such insulation is usually more expensive.
Their benefits are noticeable only after many years of use.
Their use is justified only for paired separation.
Subtleties of finishing inside the bath
- Do not mount the lining horizontally in the washing room and steam room. Splashes of water will enter the lock, and the lining will quickly darken. But if the design requires a horizontal fastening, then the tenon should point upward. All fasteners must be taken with a zinc coating, since the iron will quickly rust with moisture. All fastening corners and strips at the top need to be slightly sharpened at the bottom, so water droplets will go down faster .The planks are attached 4-5 cm from the base, so as not to block the ventilated gap. Consider a ventilation system in the bathhouse, so the moisture will evaporate faster and the lining will last longer. If the lining turns black, it must be immediately treated with bleaching compounds, for example, Senezh Sauna
We looked at how to do the interior decoration of a bathhouse with clapboards with your own hands. By following all the techniques and watching the thematic video in this article, even a beginner will be able to do the job with his own hands.
Wooden cladding of walls and ceilings in a bathhouse is a traditional finishing option that allows you to accumulate heat in the premises and create an optimal microclimate for bathing procedures and relaxation.
Principles of insulation depending on the type of building
The choice of insulation depends on the material from which the bathhouse is built. We need to talk about each type of building in more detail.
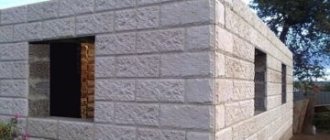
Made of brick
Sheathing with foil and clapboard is usually done in brick baths. Carrying out work:
- Without additional insulation of walls, ceilings, and in brick baths, it is impossible to achieve an optimal level of comfort.
- All brick surfaces are covered with foil. The individual sheets are glued together with metal tape.
- The sheathing needs to be secured over the reflective sheets. It must be independent so that there is good ventilation between the wooden frame and the foil layer.
If there is no ventilation, condensation will accumulate inside, which will cause the wooden frame to rot.
Made from concrete
To insulate concrete surfaces, ordinary foil will not work. You need to choose a material that has a backing. It is fixed on top of the waterproofing layer.
Made of wood
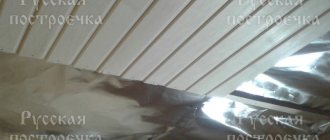
It is not necessary to cover wooden beams with foil. To achieve an optimal level of comfort, it is enough to correctly caulk the seams between the logs. You can cover the ceiling in the steam room with foil. It needs to be secured with the reflective layer down, the sheets overlapped, and glued with aluminum tape.
Classification of lining
Depending on the material used, lining can be divided into several types.
Plastic
The plastic type of the material makes it possible to save money, and we are also pleased with the simplicity of how the lining is attached to the wall. This lining is suitable for both ceilings and walls; moreover, it looks aesthetically pleasing and fits almost seamlessly. One of the disadvantages of the material is its short service life, since it fades in the sun and cracks in frost.
Metal
Such panels are usually made of steel and aluminum, which have an additional layer of protective coating. The texture and color scheme can satisfy the needs of even the most demanding buyer. Aluminum products are made to last and are ideal for outdoor work. As for steel, if the integrity of the protective coating is damaged, corrosion processes may begin and the metal will begin to rot.
What is the difference between regular and eurolining
Both options are suitable for high-quality surface finishing, but eurolining has additional advantages:
- Euromaterial is made from other types of wood and using other processes in manufacturing technology.
- It has an elongated groove for fastening.
- Other geometric parameters are inherent.
- The products go through excellent drying and special processing.
- Eurolining is characterized by an additional ventilation function.
- There are systems for removing accumulated moisture, and this helps protect the wood from destructive processes (special grooves are made on the back side of the panel so that the aesthetics of the wood are not compromised).
- It differs in cost (it is higher than that of standard lining).
Where is it used?
It should be noted that the heat-insulating effect of foil is not based on the same property as that of other heat-insulating materials. Aluminum foil for a bath, on the contrary, conducts heat very well, but its effectiveness is based on the reflection of heat rays.
Any household infrared heater, electric fireplace, air heater uses an aluminum heat reflector. To eliminate the disadvantage of aluminum’s high thermal conductivity and low strength of foil, manufacturers produce composite materials.
They have a layer of foil (reflective layer) and a layer of thermal insulation, such as polyethylene foam. There are also many options where the foam layer is replaced with plastic film and (or) kraft paper.
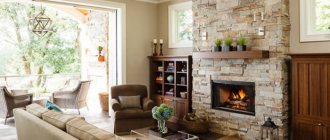
Decorating the rest room
The bathhouse is always perceived as a place of relaxation from everyday worries. Each room in it is intended for its own purposes. The name of the relaxation room speaks for itself: this is where you relax after water treatments
Therefore, it is important to create a cozy and relaxing environment in it.
Proper finishing of a relaxation room in a bathhouse is not an easy task, the implementation of which can be entrusted to specialists: designers and artists.
A cozy environment is created through the correct choice of facing materials, furniture, accessories, organization of lighting and illumination of various zones and architectural elements of the room.
Which lining to choose for a bathhouse
There are 4 types of lining, differing in the profile of the boards:
- Eurolining.
- Standard (otherwise called “peasant”).
- Block house (imitation logs).
- American (imitation timber).
Popular brands that have proven themselves to be of high quality:
- "Calm";
- "Soft Line";
- "Classical".
All of them belong to the eurolining category and differ in size and profile. Boards, regardless of their type and brand, are often called lamellas.
Finishing a bathhouse with clapboard is a traditional, frequently used solution. It has gained so much popularity for many reasons. Lining is a natural and therefore environmentally friendly material that is beneficial to human and animal health.
When choosing, it is extremely important to consider several points:
- type of wood;
- grade of material;
- resistance to moisture;
- coefficient of thermal conductivity.
Algorithm for interior finishing
Walls
Finishing work begins with the walls. It is necessary to take into account that their list and sequence, as well as the materials used, will differ for the main premises for various purposes (steam room, washing department and dressing room).
It is better to finish the walls in the steam room with wooden paneling. The optimal choice is linden or aspen. As a last resort, birch trees.
In the washing department it is possible to use lining with a moisture-resistant coating, plastic panels or tiles. For a log bathhouse, the optimal solution is to use wood.
The walls of the dressing room (rest room) can be finished with any materials.
The sequence of work is as follows:
- The lining is left inside the bathhouse for a day to adapt the material to temperature and humidity. this reduces the likelihood of deformation;
- lay electrical wiring;
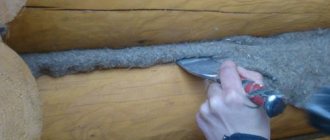
- perform caulking of all inter-crown seams (moss, tow, special hemp or jute edging, flax-jute insulation);
- steam and waterproofing is performed;
- the sheathing for the lining is installed;
- insulation is installed (the optimal solution is basalt wool);
- the lining is sewn on (an air gap is left).
In the washing department and dressing room, it is additionally treated with antiseptics and fire retardants.
Floors
Work begins with cutting off the subfloor and organizing ventilation of the foundation. This will minimize condensation on subfloors. The floors in the steam room and washing area are made with a slight slope towards the sewer holes so that the water flows there by gravity.
The steam room has wooden floors. The optimal solution is a tongue and groove board. This allows water, even when they are tightly packed, to go into the sewer. And ensures high-quality drying.
If financial possibilities allow, then you can install a cork covering on top of them (the feet do not slip and it looks amazing).
The floor surface in the steam room should be raised above the ground higher than in the rest room and washing area.
In the washing room it is recommended to place porcelain tiles, on top of which there is a wooden slotted panel. This will not interfere with the drainage of water and will prevent slipping.
Useful tips
The cheapest pine wood can be used to build a dressing room, a relaxation room, but not a steam room. Finishing with wooden clapboard is expensive; to reduce costs, experts give some advice:
Use slats of short length (up to 1.5 m), which are cheaper, connecting them on a joining strip. Hardwood boards should be installed only in the steam room; the remaining rooms should be sheathed with budget-priced softwood lumber. Combine types of lining in a steam room, where the quality of the material is important, install extra-class slats, and use class B in other rooms. Perform hidden fastening of the lining by driving a nail at an angle of 45° into a groove or tenon. This will prevent metal contact with water and slow down corrosion processes. Insulation during the construction phase seems like an extra expense, but it will quickly pay for itself thanks to fuel savings. A step-by-step plan will allow you to complete all the work yourself
A step-by-step plan will allow you to complete all the work yourself.