An integral part of arranging an autonomous heating system for a private home is the installation of batteries. However, in order for their operation to be durable, trouble-free and provide comfortable living, it is necessary to take into account several important nuances. Let's look at what SNiP requirements the installation of heating radiators must comply with, what are the main criteria for choosing devices, how to correctly determine the location for their installation and the method of connection, what are their main varieties and what are their features, as well as what stages the installation procedure consists of.
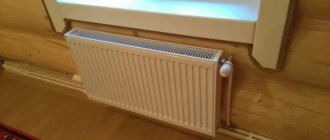
Heating radiator under the window Source srubdacha.ru
Installation of heating radiators - SNiP requirements
In order for the heating device to produce the properties specified by the manufacturer during operation and successfully cope with its function, a number of SNiP requirements must be taken into account when installing it:
- Installation of heating radiators must be carried out with a gap to surrounding objects and structures - at least 3-5 cm to the wall, at least 5 cm to the window sill strip, and from 7 to 15 cm to the floor surface.
- The length of the device body should be from 50 to 75% of the width of the window opening under which it is located.
- To ensure better circulation of heated air, the radiator is installed next to the doors or window.
- The optimal placement of the device relative to the window is in the center. A deviation of 2-3 cm is allowed.
Advice! Shielding the area of insufficient wall thickness next to which the radiator is installed with foil-coated thermal insulation material can reduce the heat loss of the device by 10-15%. However, such protection should not be installed in all cases. For example, heating the wall under the window sill allows you to avoid the accumulation of dampness near the window.
Installing a radiator in a niche Source santex-tomsk.ru
Algorithm of actions when replacing pipes (instructions)
To ensure normal operation of the heating system, it is better to resort to a radical change of pipes for all neighbors above and below. However, it is not always possible to persuade the residents of the entrance to hold such an event, so the riser will have to be cut only within the confines of their apartment.
You should also keep in mind the fact that the riser is community property. Therefore, you do not have the right to make sole decisions regarding his fate. You can experiment with a pipe only within your own home.
Criteria for choosing a radiator - technical parameters, types
Despite the fact that the main selection criteria are appearance, compliance with the interior and cost, without taking into account technical parameters, correct, trouble-free and durable operation of devices is almost impossible. Therefore, in addition to the type of material and design features, it is important to take into account the technical characteristics of the device.
Options
In order to correctly assemble and install heating radiators, you must first understand their basic technical characteristics:
- System pressure. The materials and design of the device must be designed not only for the operating pressure, but also for possible water hammer. For autonomous systems, its value, as a rule, does not exceed 2-4 atm.
- Heating level. The temperature of the coolant leaving the boiler circuit should not exceed the permissible heating level of the battery. Otherwise, this will lead to deformation of the seals and distortion of the housing itself, which can lead to depressurization and leakage. For private systems, its value usually does not exceed 900C.
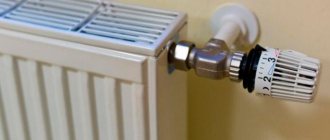
The use of thermal heads allows you to control the heating level of the battery Source otoplenieblog.ru
- Coolant purity level. Various suspensions and dissolved substances present in the coolant, when heated/cooled, can settle on the walls of radiators, narrowing their clearance and reducing heat transfer. Over time, this will lead to excessive consumption of coolant, overloading the pump and the need to replace devices.
Important! Often, when designing a house, special niches are placed in the walls into which heating radiators can be hung, but such a design must be created correctly from the beginning. This is not only the dimensions and depth of the excavation, but also the sufficient thickness of the partition, facing the other side onto the street, in order to avoid significant heat loss and excessive consumption of energy resources.
Varieties
When choosing radiators, the material of its body and design features are also taken into account. Based on this feature, they are divided into 6 main varieties:
- Aluminum sectional. Made from an alloy of aluminum and silicon. They are distinguished by their light weight, aesthetics, maximum heat transfer and heat resistance. However, they are sensitive to water hammer and the composition of the coolant.
Aluminum sectional radiators of different heights Source googleapis.com
See also: https://m-strana.ru/services/inzhenernye-sistemy-otoplenie-vodosnabzhenie-kanalizatsiya/
- Bimetallic with a silumin body and a steel base - sectional and monolithic. Heat transfer is close to aluminum analogues. Quite expensive products.
- Steel panel and tubular. They are universal in use, but are not as durable as their cast iron counterparts; in addition, they are characterized by insufficient heat transfer.
- Cast iron sectional. They are characterized by low cost, durability, strength, durability and inertia. Disadvantages: heavy weight, cumbersome.
- Copper. Suitable for installation and operation in any conditions. The downside is the very high cost.
- Plastic. Applicable for systems with low pressure and stable operation when heated to no higher than 800C.
The most popular are aluminum radiators; they are lightweight, quickly transfer heat and are durable - they are assembled from silumin sectors - however, installation in an autonomous heating system requires strict control of parameters. This is primarily the operating pressure, pH level and degree of purity of the coolant. Otherwise, the device body quickly corrodes, deforms, cracks and fails.
Aluminum radiators will easily fit into any interior of a modern home Source teplosfera31.ru
What time of year is best to change batteries?
Replacing the battery can take from 10 minutes to 3-4 hours.
In a private house, if everything is prepared and the material has been purchased, the time of year can be ignored. Turning off the heating for 1-2 hours, even in severe frost, will not greatly affect comfort.
In an apartment building, late spring or early autumn is chosen to replace a radiator without shut-off valves. During the heating season, the entire riser is turned off. Management companies are reluctant to do this, since even a short shutdown will result in a complaint from the residents of the entrance, and those who are particularly important may demand a recalculation.
In addition, after resuming the heat supply (filling the system), there is a possibility of water hammer, which can lead to an accident in any apartment and flooding of neighbors, for which the management company will also be responsible. During working hours, some apartments are left unattended, which can lead to unpleasant consequences, since it is impossible to find out about a leak in a timely manner.
In the summer, utility services carry out preventive work, including pressure testing the system, which can complicate the replacement process, since the supply of coolant can be carried out unexpectedly and at a time when residents are absent. Summer is a holiday period and the price for replacing batteries at this time may be higher.
Conclusion: in a private house, work is carried out as needed, in an apartment building - in May–June or August–September. Shut-off valves allow you to work at any time.
Installation locations and connection methods
Due to the fact that the main purpose of heating devices is to minimize the influence of weather conditions on the microclimate of the room, they are installed in the following places where heat is most likely to leak:
- In the window sill area.
- The space between window openings.
- Walls of corner rooms.
- Hallways, corridors.
- Solid walls inside bathrooms, showers, storage rooms and utility rooms.
The rules for wiring a radiator during installation in a heating system are determined by the type of its assembly - there are the following three options:
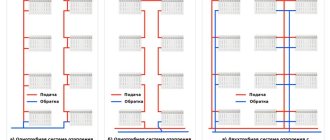
- Single-pipe. The coolant passes through the system using one pipe - sequentially passing through all the devices and returning back to the heating circuit. The advantage is a simple device, the disadvantage is that subsequent batteries receive less heat than the previous ones.
- Two-pipe. There are two parallel highways - forward and reverse. Radiators are connected to both of them and receive the same amount of heat regardless of the distance in the circuit.
- Collector. The system involves connecting separate lines to each device.
Diagonal method of connecting a radiator Source sjthemes.com
Modern heating batteries, depending on operating conditions, can be connected in the following different ways:
- Lateral or one-sided. The supply line is connected to the top input, the return line is connected to the bottom of the same side. The method is characterized by a high degree of heat transfer. The scheme is applicable when the devices are at a short distance from the boiler, as well as in powerful systems. On the contrary, with a large distance and low pressure, the coolant will not warm up most of the radiator sections.
- Diagonal. The direct supply pipe is connected to the top of the radiator on one side, the return pipe to the lower outlet on the other. The method is applicable to devices with a long body and is one of the most effective. It is also used to connect batteries in weak systems.
- The bottom is double sided. Both lines - inlet and outlet - are connected to the lower pipes, but on opposite sides. This option is convenient when the coolant pipeline is installed in the floor. However, the efficiency of this method is minimal and heat loss is the greatest - up to 15%.
Some interesting tips
If you decide to replace old batteries, it won’t hurt to think about installing a faucet, either regular or with a thermal head. In the first case, you can manually regulate the coolant flow, in the second, this will be done automatically. But if a thermostat is installed on the radiator, it does not need to be covered with a decorative screen.
The thermal head on the shut-off valve makes it possible to change the amount of coolant so that the temperature in the room is always high enough
This will lead to data distortion when measuring temperature. It is worth noting that thermostats can only be installed in single-pipe systems. In any case, at least shut-off valves must be installed at the inlet and outlet of the radiator, if they are missing.
This will allow you to disconnect the radiator from the system to clean or replace it, regardless of the season. The thermal power reflected in the battery data sheet does not always correspond to the declared one. If you increase the number of sections by 10%, you can improve the situation.
Installation stages
The installation of the radiator is specified by the requirements of SNiP and corresponds to the following algorithm:
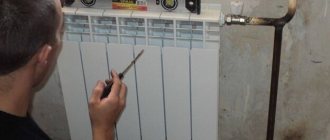
- The installation location, type and number of fastening elements are determined, depending on the type, weight and dimensions of the device.
- Fastening brackets and hooks.
- The necessary adapters, fittings, and plugs are mounted on the radiator.
- The radiator is installed on fastening elements.
- The supply and discharge lines are connected to the device.
- An air venting mechanism is connected, for example, a Mayevsky tap.
- The system is being tested.
Some types of modern aluminum and bimetallic radiators have a protective film on the body - it is better to remove it after installation is completed. This will avoid accidental damage to their surface and deterioration of aesthetic parameters.
Dismantling risers
In residential buildings with a bottom spill, risers are discharged in pairs. Which of the risers is connected to the riser that needs replacement is found out from the residents living on the top floor. Most often, the jumper is located in their apartment.
When examining the basement to look for risers, you need to navigate the entrances. When the required entrance has been found, you need to understand how the apartment is located relative to the flight of stairs in order to determine the necessary pipes. Then both risers are blocked by unscrewing the plugs or opening the vents.
In order not to take risks and not waste time searching, you can, for an additional fee, invite plumbers from a service organization who will discharge water from the riser under their own responsibility, quickly and efficiently.
Briefly about the main thing
The battery installation must be carried out in accordance with the requirements of SNiP. The choice of model for specific application conditions should take into account the operating parameters of the system:
- Pressure.
- Temperatures.
- Coolant composition.
Based on the type of material and design, radiators are divided into aluminum, bimetallic, steel, cast iron, copper and plastic. They can be connected to the system in lateral, diagonal and bottom ways. Radiators are installed in places where cold is most likely to penetrate into the room in accordance with the instructions and technology.
Pipe replacement
Dilapidated pipes are a source of constant heating problems, which is why old pipes must be removed without fail. First of all, we decide on the material of the new pipes. Older homes usually have cast iron pipes that are susceptible to corrosion.
Experts recommend paying attention to reinforced polypropylene pipes, which ensure normal operation of the system for half a century.
This product includes a layer of foil that increases the strength of the pipe and also prevents temperature deformation.
- When exposed to high temperatures, reinforced polypropylene pipes do not collapse and meet all environmental requirements.
- In addition, pipes of this type are much cheaper, which determines the minimum cost of replacing a heating system.
- A galvanized pipe should be considered a more reliable option. And although the cost of installation will increase slightly, in regions with very cold winters, the use of galvanized pipes is the only solution, since the temperature of the coolant can significantly exceed the permissible values for polypropylene.
An excellent solution is also a corrugated stainless pipe, which is not inferior to a galvanized pipe in terms of strength, while providing much simpler installation that does not require precise adjustment.
This pipe bends at all angles; simple fittings consisting of a nut and a seal are used for its installation. The only tools you will need are a couple of keys.
Useful tips
Regarding rental housing, the picture is unclear. Thus, according to Government Decree No. 491 of August 13, 2006, heated elements are included in the common property of the house. A Art. 65 of the Housing Code of the Russian Federation states: the landlord is obliged to monitor the proper condition of common property and repair it as necessary. In fact, management companies and housing offices carefully hide this information, encouraging residents to replace heating devices at their own expense. Those who wish to assert their rights can apply to the court. But there is certainty regarding privatized apartments. There, the repair of utility networks is the responsibility of the owners.
If the radiator bursts, you must immediately call the operating organization (UK or Housing Office). In some entrances you can find a telephone number on the wall to call an emergency team. The second thing you need to do before the repairmen arrive is to localize the leak (throw a blanket over the battery) and try to collect the water in a placed container (basin). The third step is to turn off the water. If there is no shut-off valve in the apartment, you will have to turn off the entire riser in the basement, the key to which is usually kept by the plumber on duty. Read about the cast iron heating and cooking stove on our website.
Calculation by area
The previous calculation method is an excellent solution for rooms with a height of more than 2.7 m. In rooms with lower ceilings (up to 2.6 m), you can use another method, taking the area as a basis.
In this case, calculating the total amount of thermal energy, the need per square meter. m is taken equal to 100 W. There is no need to make any adjustments to it for now.
Formulas for calculating the number of sections by room area, with an example
- At the first stage, the total area of the room is determined: [length]* [width]
(5x4=20 sq. m.) - The next step is to determine the heat required to heat the entire room: [area]* [requirement per sq. m.]
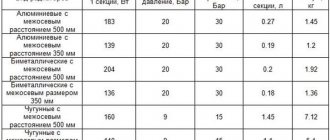
(100x20=2000 W) - In the passport attached to the heating radiator, you need to find out the power of one section - the average for modern models is 170 W
- To determine the required number of sections, use the formula: [total heat demand]/[power of one section]
(2000/170=11.7) - We introduce correction factors (discussed below)
- It is recommended to round up – we get 12 sections
Preliminary work
Before we begin describing the rules for installing heating radiators, let us dwell in more detail on some preliminary measures:
- We prepare a set of tools that we will need during the work process;
- We measure the area of the room and calculate the number of radiator sections;
- We consider additional mechanisms that may be needed for repairs in the future;
- we study the installation diagram of heating radiators (one-sided, diagonal or other options), and also study the basic rules, in particular, at what height to install heating radiators, what gaps and indentations to observe, etc.;
- We prepare ourselves mentally for the fact that the process of dismantling and replacing batteries will take a lot of time and effort.
Thread cutting
The die holder is placed on the pipe, with the long side - it will ensure that the die is strictly perpendicular to the axis of the riser. Before cutting the thread, you need to clean off the paint and ensure that the die fits well by chamfering it with a grinder, a file, or by crimping the edge of the pipe with a gas wrench.
To make the die go easier and not leave burrs, the pipe prepared for threading should be lubricated with any oil. To insert the die, it is pressed against the end of the riser, applying maximum effort, and then the holder is rotated. After cutting the beginning of the first thread, the riser is fixed with a gas wrench so as to compensate for the torque from the die. Otherwise, you can damage the connection between the water supply and the radiator in the apartments below and above. It is enough to make a thread of a maximum of 5 threads, since it is only needed for mounting the adapter fitting on a corrugated pipe.
