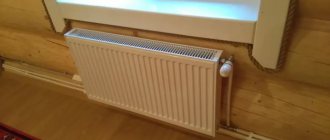
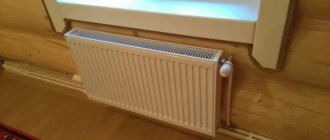
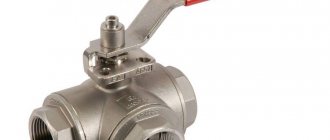
If you live in an apartment that still has old cast-iron radiators installed, heated by coolant from the central system, then you are probably familiar with the situation when in the spring the temperature outside is already above zero, and the radiators heat up like in winter. Something similar happens in the fall, but in reverse. In general, there is little comfort from such heating, but there is a way to cope with the problem, and it is applicable not only for apartments, but also for private houses. So, why do you need a thermostat for a heating battery, how does it work, how to use it and how to install it yourself - we will talk about all this in today’s article.
Thermostat for radiator
Installation goals and benefits
Installing thermostats on radiators allows you to set the desired temperature in the rooms. The device changes the volume of coolant supply, which accordingly reduces the air temperature.
The thermostat is an excellent alternative to the ball valves that are familiar to many. Their use is not always convenient or advisable. The tap must be constantly opened and closed, which leads not only to temperature fluctuations in the room, but also to the failure of the part itself.
By installing a thermostat, these problems can be avoided. In this case, there is no need to periodically open and close the tap.
Pros of a thermostat:
- processes for adjusting the coolant supply are performed automatically;
- there is the possibility of zonal change of parameters;
- reducing the volume of coolant entering the battery allows you to reduce heating costs;
- no maintenance required.
In boiler rooms, a thermostat is used to protect against overheating and excessive loads. The device will prevent accidents by controlling the increase in temperature and water pressure.
For your information
In some models, the head is attached to the valve body using a threaded connection, while in others it simply snaps into place. When threading, it is tightened by hand and slightly tightened with a wrench. In a device with latches, you need to set the handle to the “MAX” position, insert the head into the corresponding groove and press until you hear a click. If the device is assembled correctly, the thermal head will rotate easily and smoothly.
Some people think that in order to connect an infrared heater to a thermostat, you need to proceed in much the same way as with a liquid heating system. But this is not true, because connecting a thermostat to an infrared heater is a completely different process. First of all, due to fundamental differences in the principles of operation of regulators. The temperature of the radiators is regulated by shutting off the coolant flowing through the thermostat. In an infrared heater, liquid does not flow, and its temperature is regulated by disconnecting from the network when the required air temperature is reached.
Another fundamental difference in connecting a thermostat to an infrared heater is that the thermostat must be connected to the electrical network that powers the heating device in order to be able to turn it off. In heating system radiators, such a need exists only for digital thermostats. And only in order to be able to program the microcircuit and track the result on the display.
Types of thermostats
Based on their operating principle, thermostats are divided into mechanical, electronic and semi-electronic. Each type differs in design, operating principle, and has certain advantages and disadvantages.
Mechanical
Manually configured device. The device consists of a thermal valve and a highly sensitive head.
The mechanism operates stably and efficiently without external energy according to the following principle:
- Under the influence of temperature, the volume of coolant in the system changes.
- The bellows senses the changes and moves the control valve.
- The sensing element moves the rod, which regulates and controls the flow of coolant into the radiator.
The main advantages of mechanical thermostats:
- low cost;
- ease of installation.
But mechanical devices have more disadvantages:
- less efficiency;
- the need for constant adjustment;
- rapid failure of the protective cap.
Electronic
Electronic thermostat
A microprocessor is installed inside this device, which is responsible for heating the radiator. The device is equipped with a sensor that measures the heating of the coolant or air in the room. The received data is used for configuration. This type of thermostat can be adjusted by degrees.
To adjust the electronic device, use a keypad. The indicators are reflected on the display. The electronic device has a mechanical part in its design that is similar to the device described above. The bellows in the device are cylindrical, the walls are made in the form of corrugations.
Expert opinion
Grebnev Vadim Savelievich
Heating system installer
Inside there is a substance that reacts to the surrounding temperature. When heated, it expands and increases the pressure inside. The position of the rod changes, thus regulating the volume of coolant. When the temperature decreases, the reverse process occurs. The service life of the electronic thermostat is at least 10 years.
Manufacturers offer users 2 types of electronic devices:
- closed - with auto-tuning;
- open - all settings must be entered independently.
Semi-electronic
The principle of their operation is similar to mechanical, but there are some differences. The bellows head is oriented to the room temperature. The sensor of the devices is remote. It is connected to the working part by a capillary tube.
The principle of operation of the thermal head
The most common mechanical thermostatic head is capable of responding to temperature, since inside it there is a container filled with a substance that changes its volume depending on the degree of heating. It can be either liquid or gas. When heated, the substance expands and presses on the pressure rod. A container with gas or liquid is called a “bellows”. In another type of thermostat - manual - the valve opening value is adjusted using a digital rotating handle, which is located on the thermostatic head.
Device selection criteria
When selecting a thermostat, they are guided by the type of heating system installed in the house and the following characteristics:
- Material . The body is made of bronze, brass, nickel-plated or stainless steel. The optimal choice is stainless steel. The material is chemically neutral, does not rust and does not react with other metals. But the cost of such models is quite high. Bronze and brass appliances have the same service life. In this case, the quality of the alloy is important. It is carefully monitored by well-known manufacturers, so preference should be given to them.
- Method of execution . Radiators in houses are installed in different ways; accordingly, the valves are made straight (through) and angular (vertical and horizontal). There are models whose pipes and heads are located in 3 perpendicular planes.
- Compliance with the heating system . For single-pipe systems, large hydraulic resistance values on the control valves are not suitable. Therefore, models for them need to be selected with a wider cross-section. In the accepted classification, it is marked with the letter index G (for example, RTR - G). They are also suitable for two-pipe natural circulation systems. For two pipes with forced circulation, where the pressure reaches significant values, other models are used: marked N or D.
- Sensor type . Gas and liquid thermostats come with a remote or built-in sensor. It is better to use remote ones when the battery is behind thick curtains, the thermostat is installed vertically, the radiator depth is more than 16 cm or it is located in a niche. Devices with a built-in sensor require air circulation around them, so they are installed horizontally.
Do not try to install thermostats on all batteries. To ensure normal regulation in each room, it is worth equipping no more than 50% of heating devices with devices: 1 out of 2, 2 out of 3, and so on.
Difference between gas and liquid appliances
An important criterion for choosing a device is the type of internal filler.
When purchasing, you should pay attention to the following points:
Gas models have a long service life, about 20 years . The gas reacts smoothly to temperature changes, and this does not cause excessive or sudden stress on the equipment.- Liquid thermostats operate quickly . This affects the wear of working parts, but allows you to quickly respond to a drop or rise in temperature.
- In liquid thermostats, the sensor can be remote or built-in . If it is built-in, the device is placed in a horizontal position. It is advisable to install remote sensors when the device is covered with curtains, the thermostat is located vertically, the radiator is installed in a niche or at a distance of less than 10 cm from the window sill.
Summarizing
You can regulate heating radiators using several types of devices, but experts believe that the best solution is to use special control valves. Such products are manual taps and automated products - thermostats, and only in some cases can a three-way valve with a thermal head be used.
In high-rise apartments with centralized heating, it is better to give preference to control taps or a three-way valve. As for individual heating systems, the problem of how to reduce the temperature of the coolant in a heating radiator is solved using thermostats.
If the apartment owner still prefers automatic adjustment of radiators, then a filter should be installed before the thermostat - it will trap most of the various impurities.
The best manufacturers of thermostats
The global market for heating appliances offers consumers many models of thermostats of various modifications.
Taking into account the assessments of experts and consumers, we can name the leading companies in this field, whose devices have demonstrated reliability and efficient operation:
- Mondial Electronics Co is a Chinese manufacturer that has proven itself in the production of consumer electronics and equipment for light industry. The company's products combine quality and low price.
- Devi is a Danish company that has been producing thermostats since 1942. Initially, production was aimed at producing heating elements for industry. Today the company is one of the world market leaders in the field of electric heating.
- RTC Electronics is a company from South Korea. Engaged in the development of electronic devices for home and industrial purposes. The products are well adapted to the needs of the domestic market.
- Techem is a manufacturer from Sweden, specializing in the manufacture of instruments and devices for automated metering of gas, water, electricity, and heat consumption.
- Valtec is a joint production of Russia and Italy. The main activity is the creation of engineering plumbing adapted to Russian water and heat supply systems.
- Terneo is a Ukrainian brand owned by DS Electronics. Since 2003, it has been developing and producing thermostats and voltage relays. Taking into account new technologies, improved devices are constantly being produced.
- Ranco is an Italian company that develops high-tech components for dies and molds. In Europe and the states, this name is considered synonymous with reliability.
How to install correctly
They install a thermostat for a heating radiator at the inlet or outlet of the heating device - there is no difference, they work with equal success in both positions. How to choose a place to install?
According to the recommended installation height. There is such a clause in the technical specifications. Each device is configured at the factory - they are calibrated to control the temperature at a certain height and usually this is the upper radiator manifold. In this case, the heat regulator is installed at a height of 60-80 cm; it is convenient to adjust it manually if necessary.
Installation diagrams for heat regulators for radiators
If you have a bottom saddle connection (pipes fit only from the bottom), there are three options - look for a device that can be installed at the bottom, install a model with a remote sensor, or reconfigure the thermal head. The procedure is simple; the description must be in the passport. All you need is to have a thermometer and at certain moments turn the head in one direction, then in the other direction.
Installation is standard - on fum tape or linen winding with packaging paste
The installation process itself is standard. The valve has a thread. The appropriate fittings are selected for it or a matching thread is cut on the metal pipe.
One important point that those who want to install a thermostat for a heating radiator in apartment buildings should remember. If you have a single-pipe installation, they can only be installed if there is a bypass - a section of pipe that stands in front of the battery and connects the two pipes to each other.
If you have a similar wiring (there may not be a pipe on the right), a bypass is required. The thermostat should be installed immediately behind the radiator
Otherwise, you will regulate the entire riser, which your neighbors will definitely not like. For such a violation, a very substantial fine can be issued. Therefore, it is better to install a bypass (if not).
Review of recommended models
It is necessary to select a thermostat for a specific heating system, taking into account the conditions of its operation. But there are brands and models that are recommended by experts and many users.
Techem HKR
Techem HKR
Like all Techem brand products, the device is of unsurpassed quality. Experts emphasize the reliability of the design and long service life. This model is a serious, multifunctional unit with many modes and a bright display.
Powered by 2 Mignon batteries. Quick temperature adjustment saves energy costs. The operating mode can be programmed to suit your own needs. Apart from the high price, no disadvantages were found with the thermostat.
Valtec corner 1⁄2
Valtec corner 1⁄2
In this model, the thermostat is an angle valve, which allows you to automatically control the coolant flow with an accuracy of 1 degree. The requirement from the manufacturer is installation in a system with a maximum temperature of 110 degrees and a pressure of up to 10 atmospheres. Polusgon facilitates installation without interfering with the pipeline.
Advantages:
- compactness;
- easy installation;
- maintainability;
- Service life up to 30 years;
- low price.
Flaws:
- if the water pressure is above 10 bar, it can leak and flood the room;
- There are defective devices.
Danfoss Eco
The Danfoss EcoTM electronic programmable thermostatic element is used with thermostat valves with clip and threaded connections. The device has two sensors, which ensures the most accurate temperature control. The thermoelement reaction is only 3 minutes.
Advantages:
possibility of programming and control via Danfoss EcoTM App on a smartphone via Bluetooth;- the presence of adapters, making the thermocouple suitable for almost all existing valves;
- the presence of a function to turn off the device when there is a sharp drop in room temperature, which allows you to save energy when ventilating;
- the presence of an adaptive learning function, thanks to which the thermostat determines when to start heating the rooms in order to achieve the required temperature by a certain time;
- the presence of a valve testing function, thanks to which the thermostat fully opens the valve weekly and then returns it to its previous position to prevent the stem from sticking.
Oras Stabila
Oras Stabila
Finnish-made thermostatic valve with pre-adjustment. Designed for two-pipe systems with forced circulation. Consists of a control valve and a thermostatic head. The valve fits into the line in front of the radiator, and the head is installed on it.
Danfoss products
Danfoss is particularly popular among manufacturers.
The most popular Danfoss models
It is worth noting that some RA series and RTD series devices have been converted to RTR series.
Thermocouple correspondence table
Valve correspondence table
It is worth remembering: in order for the thermostat to last for a long period of time, it is recommended to clean the equipment and remove the thermal head after each heating season.
Installation Features
The thermostat will work effectively if installed correctly. First of all, you need to determine the location of its installation. Installation height – at least 80 cm.
Expert opinion
Grebnev Vadim Savelievich
Heating system installer
It should be noted that the operation of thermostats is negatively affected by drafts, direct sunlight, and devices that emit heat. If these conditions exist, use an external sensor, installing it at a distance of 2 to 8 m from the battery.
In private houses, installation of devices begins from the upper floors, in apartments - from rooms with significant temperature fluctuations: living room, kitchen.
Sequence of work:
- Close the riser and drain the water.
- At a short distance from the radiator, cut off the horizontal pipe connections and disconnect them and the taps from the radiator.
- When installing the device in a single-pipe heating system, a jumper is additionally welded between the coolant supply and discharge pipes.
- From the thermostat valve and stopcock, remove the shanks with nuts and screw them into the radiator plugs.
- Assemble and install piping. Connect it with horizontal eyeliners.
Installation Features
Device setup
In electronic models, it is enough to set the desired temperature on the scale or display. If possibilities allow, select the temperature regime for the time of day and days of the week. This mode is optimal for dachas where the owners appear intermittently.
Mechanical models require longer setup:
- Close windows, doors, vents, turn off the hood to limit heat leakage
- Place a thermometer in the room.
Turn the thermostat head to the left until it stops so that the valve opens. In this position, maximum heat transfer from the battery is achieved.- After warming up the room by 5-6 degrees, shut off the flow of coolant by turning the device valve to the right.
- The temperature will begin to drop. Once it reaches the levels you want, begin to slowly open the valve until you hear the sound of water. The head should become warmer.
- Leave the valve in the selected position. In the future, it will work at the temperature you set.
Tips before installation
In addition, we would like to give you some useful tips before installing the equipment:
- Be sure to read the instructions from the manufacturer, since the installation and configuration of each device may have its own characteristics, without knowing which you can damage the equipment.
- Seal all connections well, do not overtighten the nuts to avoid damaging the parts.
- Look in which direction the arrows on the thermostat body point - they will correspond to the direction of coolant flow in the system.
- If the installation will take place with a single-pipe heating system, we must provide bypasses, otherwise your thermostat will disrupt all its operation.
- Choose a place to install the thermostat so that it is not exposed to direct sunlight and there are no other heat sources nearby, such as household appliances. This will allow the devices to work more accurately. Drafts are also contraindicated for them.
- In the coldest rooms, give preference to electronic devices, as they are more sensitive.
The valve is installed on a tee.
The rules are quite simple, but despite this, they are very effective and will help you save on heating, reducing not only the cost of the regulators themselves, but also making them a plus over time.
FAQ
What happens if you install regulators of reduced resistance on the 2nd tube? What could this mean other than overspending?
You want to put an expensive model where you can get it cheaper. This is not advisable. In general, nothing will explode and nothing will fall off. This may result in incorrect operation of the regulator.
Is it possible to regulate the heating of the battery with a ball valve to shut them off?
The ball valve has only 2 positions: open and closed. It is impossible to regulate the heating by setting it to half position. The faucet will quickly fail due to the accumulation of salt and pieces of rust and will stop turning.
From an economic point of view, installing thermostats is especially advisable in private houses with autonomous heating. In apartments with a centralized coolant supply, the use of these devices will help improve the microclimate, achieving a comfortable mode without radically blocking the radiators and systematic ventilation.
Child lock
The last thing I would like to note is the blocking from “moving children”. If you have configured the thermostat as needed, you can “lock” it, just press the “up” and “down” keys simultaneously for five seconds, a lock icon will appear (unlock in the same way).
Guys, that's all. These are the basic settings, sorry if it’s not very clear. For this, I also created a video version, I simply “chewed” the information there, so let’s take a look.
Safety precautions
Any work on the installation of electrical equipment must be carried out in compliance with basic safety regulations. Failure to comply with these can lead to disastrous consequences.
The basic rules include the following:
- Before carrying out work, make sure that the entire room, or a separate room in which the sensor is installed, is de-energized;
- Do not start a device that is in a disassembled state;
- operation of the regulator implies a temperature range from -5 to 40 °C;
- carry out timely cleaning of the thermostat from dust;
- The device must be cleaned with products that do not contain solvent or benzene;
- carry out repairs only if you are 100% confident in your abilities, and you will need to figure out how to remove the heated floor thermostat;
- Make sure that the system power does not exceed the permissible limits provided by the thermostat manufacturer.
Connection diagram for high power heated floors
When connecting, be sure to check the power that the thermostat can pass through. Usually it is designed for a load of no more than 16A (3.7 kW at a voltage of 230V).
This is exactly the maximum value. It is recommended to use the device under a constant load of no more than 70% of this power.
In this case, the device will last a long time and function properly. The switch that switches the contact quickly fails when overheated. And along with it you will have to change the entire device.
For loads greater than 3.7 kW, a modular contactor will be required.
The connection diagram in this case will change to the following.
Here, instead of the load, the wires from the regulator go to the contacts of the switching coil (A1-A2), and the heating cable itself is connected to the power terminals of the starter (1-2 or 3-4).
